
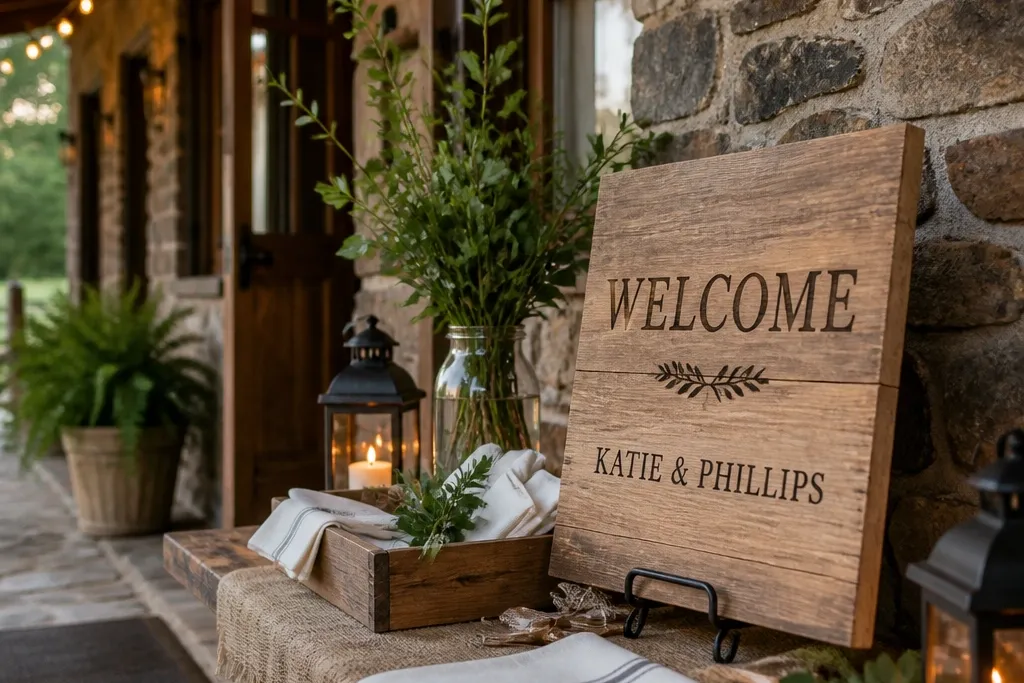
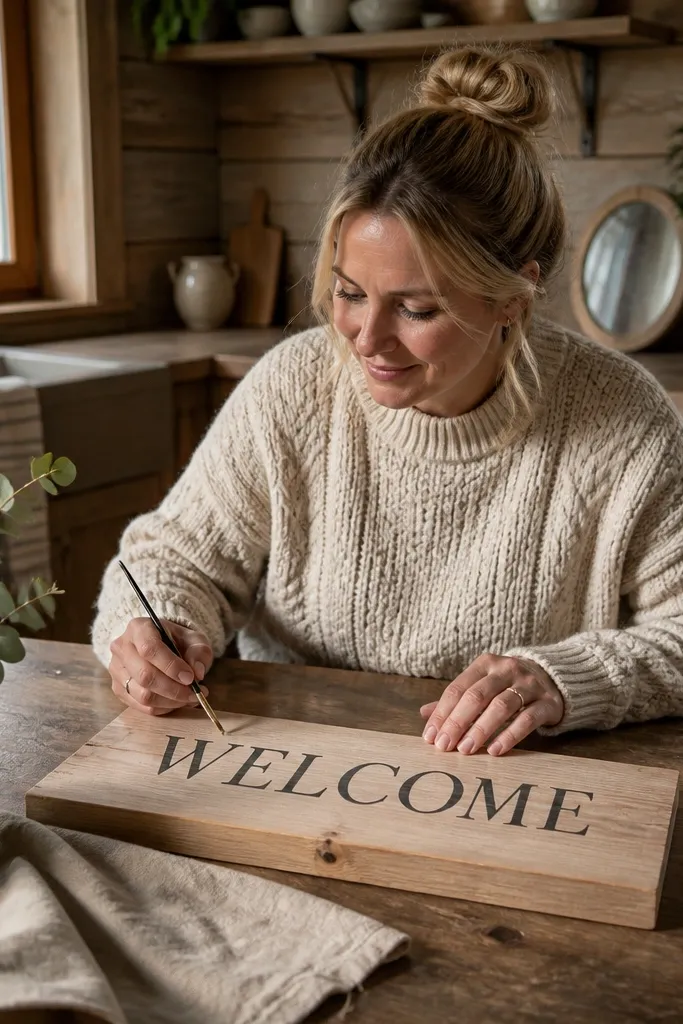
1. Natural oak board with dark walnut hand-lettering
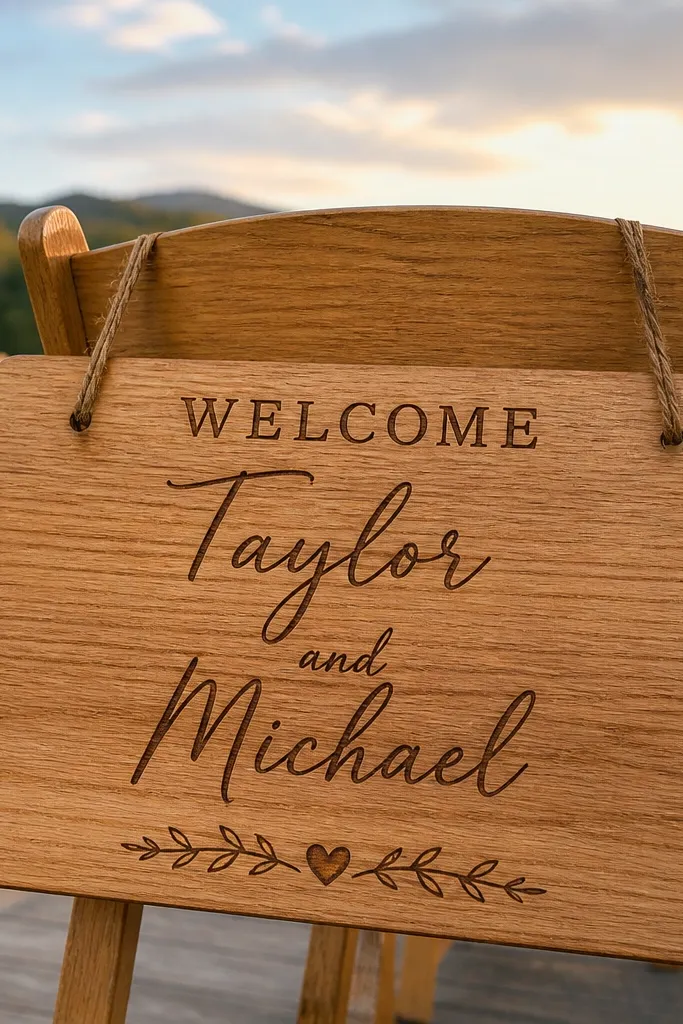
This look feels cozy because the wood tone is warm and the lettering stays readable without heavy decoration. Natural oak plus dark walnut ink gives you that “farmhouse but clean” vibe that photographs well in both golden hour and indoor window light. Keep the script bold enough that guests can read it while walking in. It works best for rustic venues, backyard ceremonies, and venues with wood walls where you want the sign to blend but still stand out.
Start with a natural oak or light-stain board about 10-12 in tall. Then use a walnut-colored paint marker or stencil with walnut paint for the words “WELCOME” and the couple’s last name. Finally, add a thin border line with the same walnut tone so the message feels framed, then seal with a matte clear coat.
Quick tipIf your lettering looks too thin, trace the letters with a second pass before sealing.
Skip thisSkip super-skinny script fonts — they disappear in photos and from a distance.
2. White painted welcome with a simple pine-branch frame
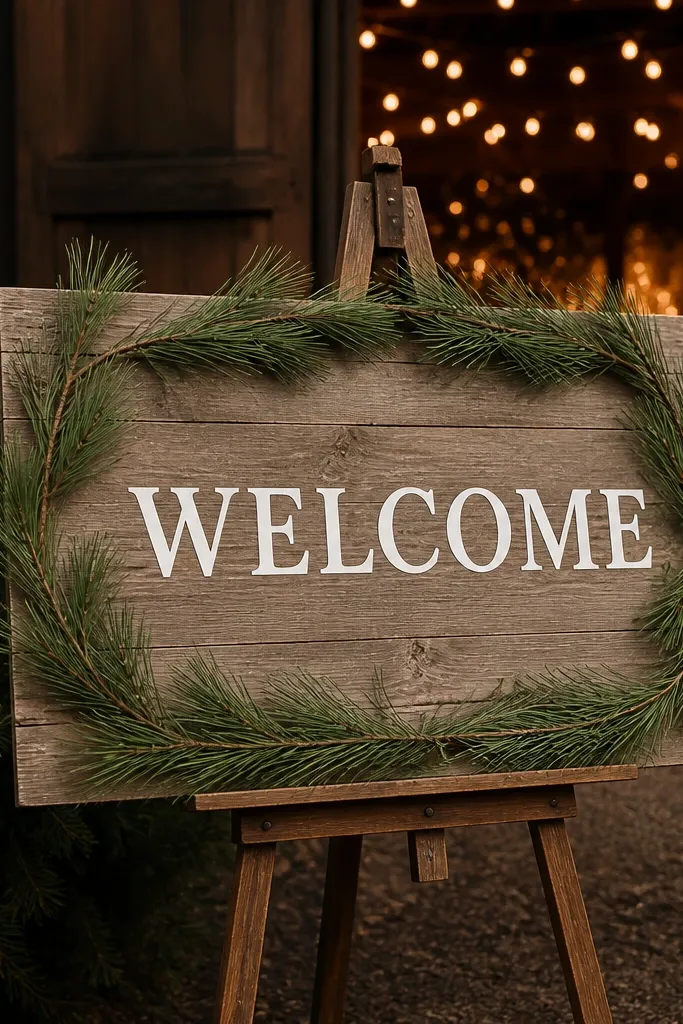
White paint on wood gives a crisp, bright welcome that still feels soft when you keep the florals minimal. A small pine-branch frame looks seasonal without turning the sign into a winter-only decor piece. This is a great choice when your venue lighting is dim because the white lettering stays visible. It suits fall and winter weddings, especially if your table settings include candles or greenery.
Paint the board with two thin coats of white craft paint, letting it dry fully between coats. Then apply “WELCOME” in a dark gray or black paint marker, centered and slightly larger than the last names. Finally, attach a short pine-branch garland or two sprigs on the left and right using hot glue, and finish with a matte topcoat to keep the wood from scuffing.
Quick tipUse hot glue only on the branches, not the lettering, so you don’t lift paint when you remove or reposition.
Skip thisDon’t cover the whole board in thick paint — it looks chalky and chips in the edges.
3. Dark stain rectangle with white vinyl lettering and a mini wreath
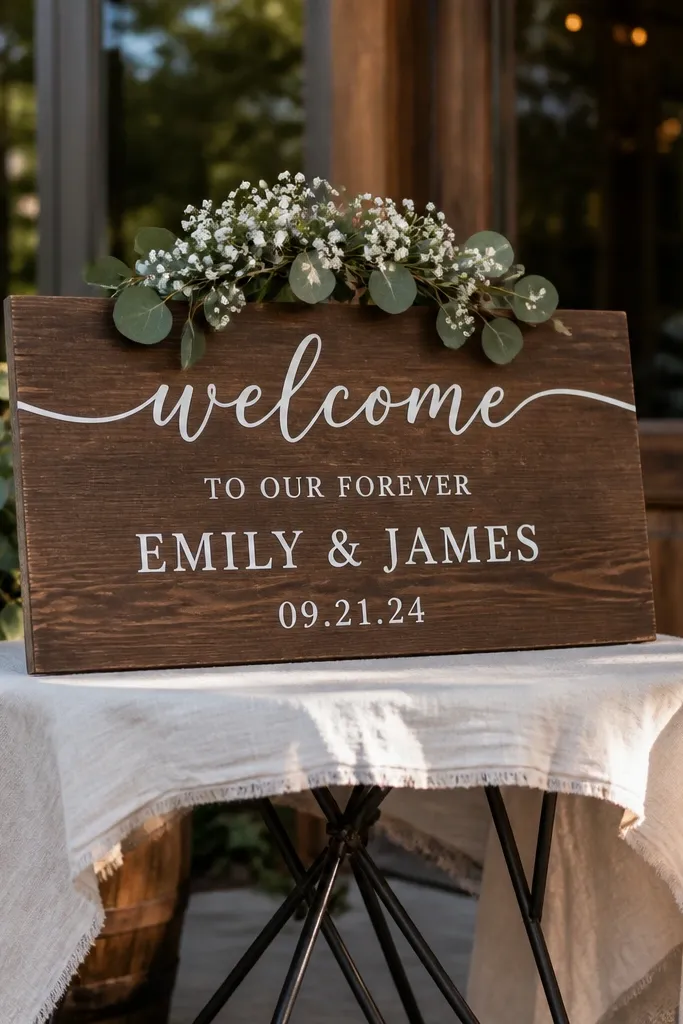
This is the cleanest “quick weekend” method because vinyl lettering is fast and stays sharp in photos. Dark stain makes the white vinyl pop, and the mini wreath adds warmth without clutter. You get a polished look even if you’re assembling the sign the day before. This works for modern rustic weddings, especially when your palette includes black, cream, taupe, or deep green.
Stain the board a deep walnut or espresso tone and let it dry overnight if possible. Then apply pre-cut white vinyl letters for “WELCOME” and “NAME + NAME” (keep font bold and centered). Finally, glue a small wreath (5-7 in diameter) at the top or bottom corner and seal with a matte spray that’s safe for vinyl.
Press vinyl down with a firm edge tool and go slow on curves so edges don’t lift.
Skip glossy sealers — they create glare that washes out white text in daylight.
4. Shiplap-style wood panels with stacked welcome lines
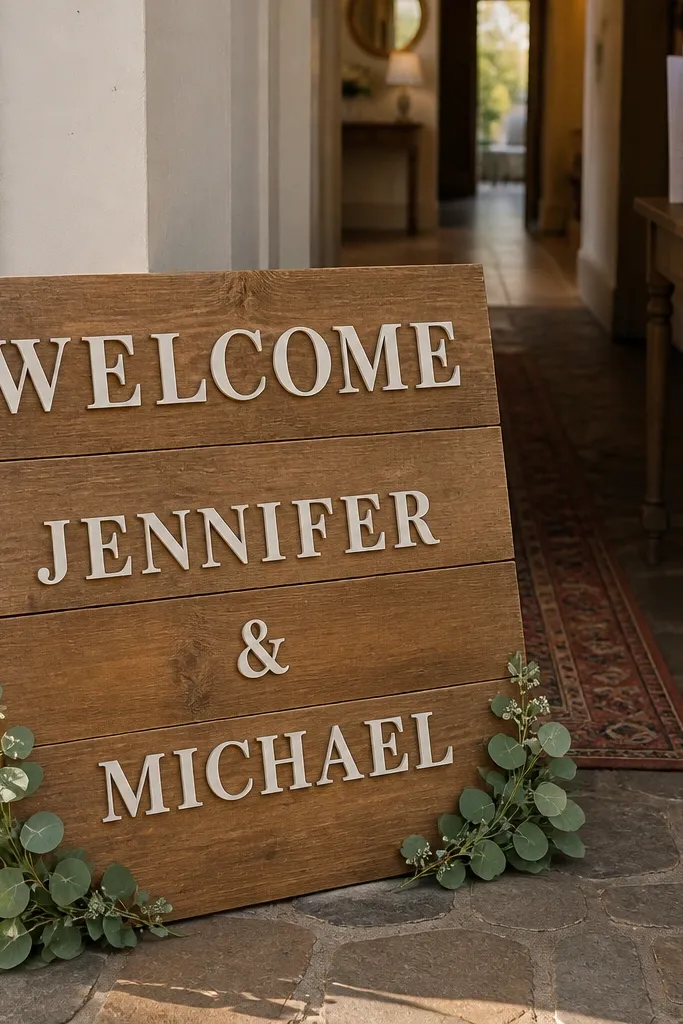
A multi-panel board gives texture that reads as “designed” even with minimal lettering. Stacking your welcome message in two lines makes it feel cozy and intentional, and it fits narrow entry spaces where a wide sign would be awkward. Add small greenery corners instead of a full garland so the sign doesn’t look heavy. This style fits coastal rustic, cottage weddings, and venues with textured walls.
Choose a pre-made shiplap-style wooden panel or boards with visible grooves, sized around 12x18 in. Then paint or stencil the words in a dark color, keeping each line centered and evenly spaced. Finally, attach two small sprigs at the top left and top right using zip ties through pre-drilled holes or discreet glue dots.
Quick tipIf you’re using greenery, keep it dry (no fresh leaves) so it doesn’t shed on guests' shoes.
Skip thisDon’t overcrowd the corners — two sprigs beat a full border for photo clarity.
5. Arched top wooden sign with scripted last name
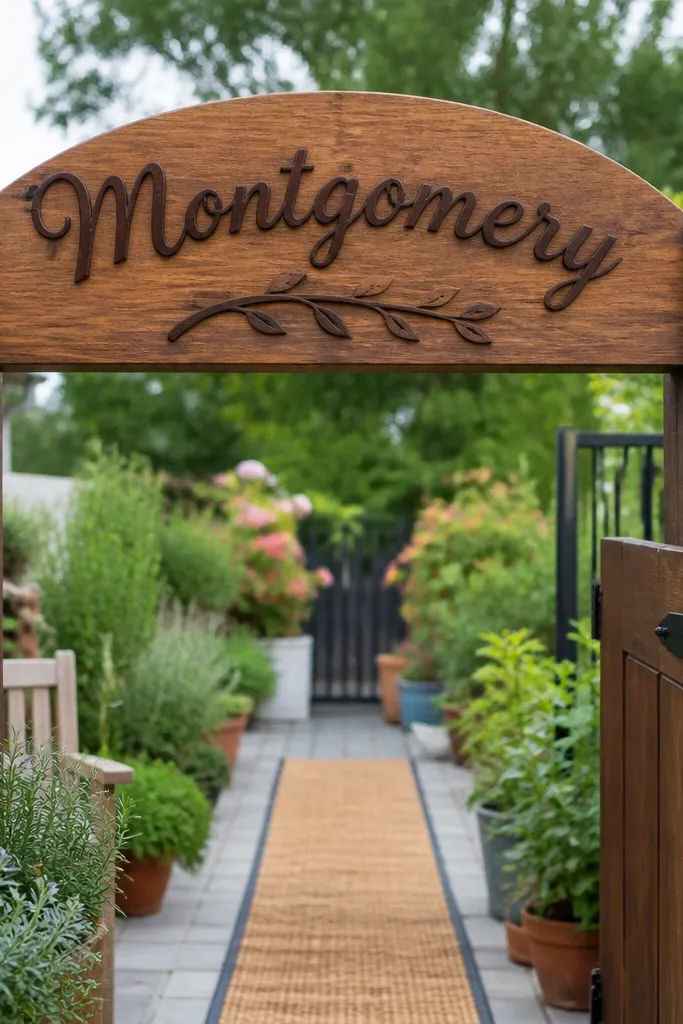
An arched top instantly reads as “welcome” because it frames the message like a doorway. The shape is photogenic from straight-on and from a slight angle, which matters when guests take pictures while walking. Pair an arched outline with scripted last names for that cozy, romantic feel without extra clutter. This works especially well for garden ceremonies, outdoor arches, and venues with natural stone or brick.
Get an arched-top board or cut a rounded template yourself and sand the edges smooth. Then stencil “WELCOME” in bold block letters and paint the last name in a script style below. Finally, add a thin arch line (same color as the script) and seal matte so the lettering stays crisp.
Quick tipTest your stencil alignment by taping it on and stepping back — arched shapes exaggerate spacing mistakes.
Skip thisSkip tiny lettering inside the arch — the arch already draws attention, so the words need to be large.
6. Burnt wood edges with cream lettering and dried lavender
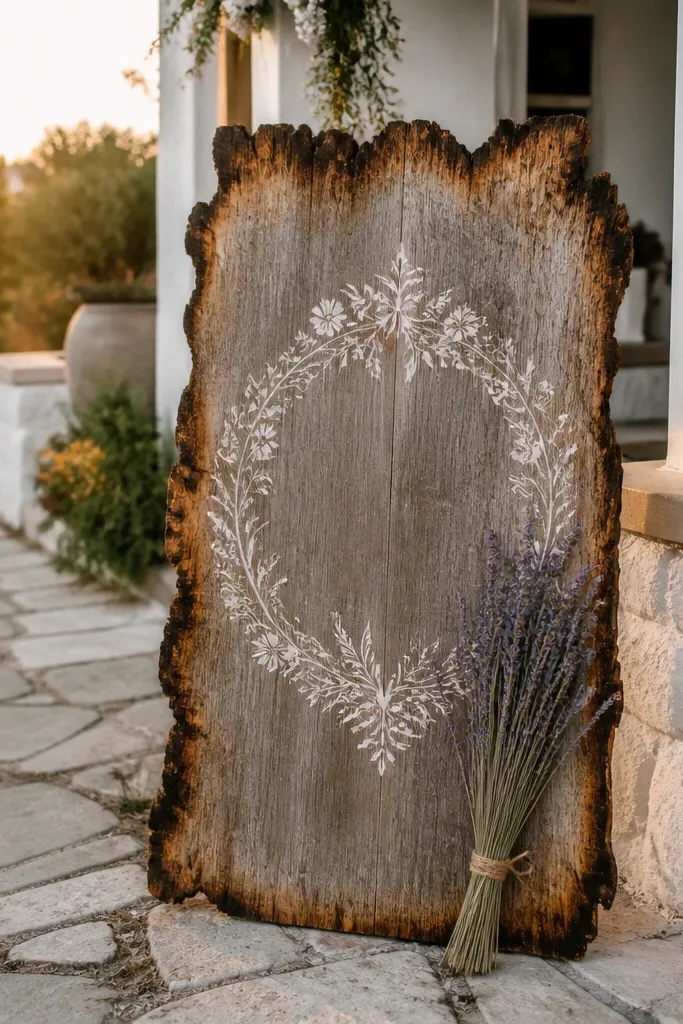
Burnt edges add a rustic halo around the sign, and cream lettering keeps the center soft and readable. Dried lavender gives a gentle color pop that looks great in warm sunlight and still feels calm for indoor shots. This is a strong fit for late summer and early fall weddings where you want a “cottage garden” mood without going full floral wall. It also photographs well against neutral linens and beige venues.
Use a wood-burning tool or controlled torching for a light edge burn, then sand lightly to smooth the char. Paint the text area with cream paint, keeping the letters bold and centered. Glue two small dried lavender sprigs near the bottom corners and seal with matte clear coat.
Burn lightly — heavy charring makes the sign look scorched, not styled.
Don’t add lavender everywhere — two sprigs give the color pop without hiding the text.
7. Monogrammed welcome with small "est." date plaque
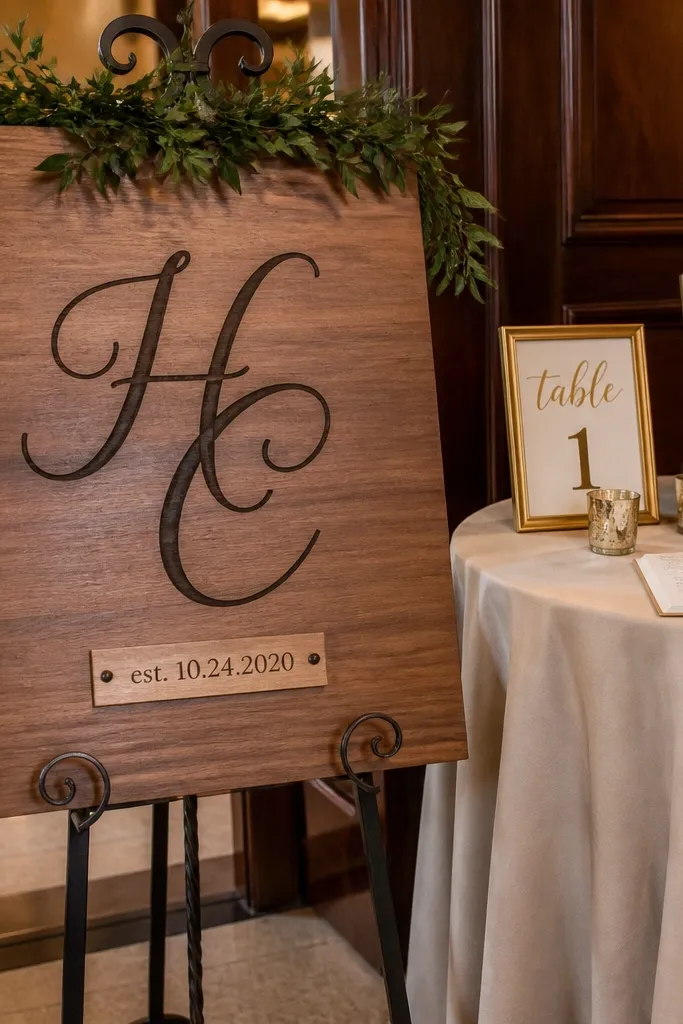
If you want cozy without being overly rustic, add one clean monogram and a small “est.” date plaque. Guests love seeing initials because it feels personal, but the date keeps it grounded in the wedding moment. This look is great for couples who want something minimal that still looks intentional in photos near the guest book. It fits modern farmhouse, boho neutrals, and venues with neutral walls.
Start with a rectangular board and lightly stain it so the wood grain shows. Paint or stencil “WELCOME” at the top, then add the couple’s initials in the center. Create a small separate wooden plaque (or painted rectangle) for “EST.” and the date, then attach with wood glue or small screws and seal matte.
Use a stencil for the initials — freehand monograms usually end up uneven.
Skip adding too many extra lines of text — welcome signs read best with one hero message.
8. Cedar board with engraved-look stencil and black ink
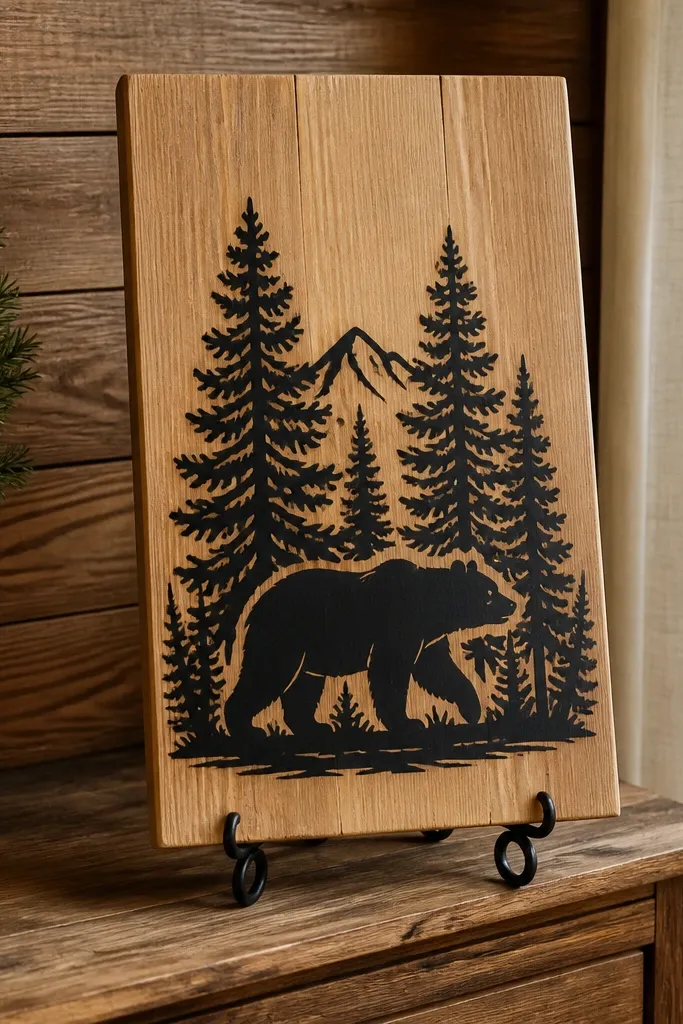
Cedar already has a warm tone and fine grain, so you don’t need heavy paint to make it look good. The engraved-look stencil effect makes the text look carved even when you’re working fast. Black ink on cedar is high contrast but not harsh, so it looks cozy rather than office-like. This is a strong option for indoor receptions where you want the sign to look rich without darkening the room.
Choose a cedar board around 10-14 in tall and sand it lightly so the stencil edges stick. Apply black paint through a stencil, then wipe the surface gently so the paint sits only inside the letter shapes. Seal with matte clear coat, then add a thin black line border to keep the composition tight.
Quick tipAfter stenciling, wait a full dry time before sealing or the matte coat can smear the edges.
Skip thisDon’t freehand the engraved look — stencil placement is what makes it look clean.
9. Two-tone bottom script with greenery garland on hinges
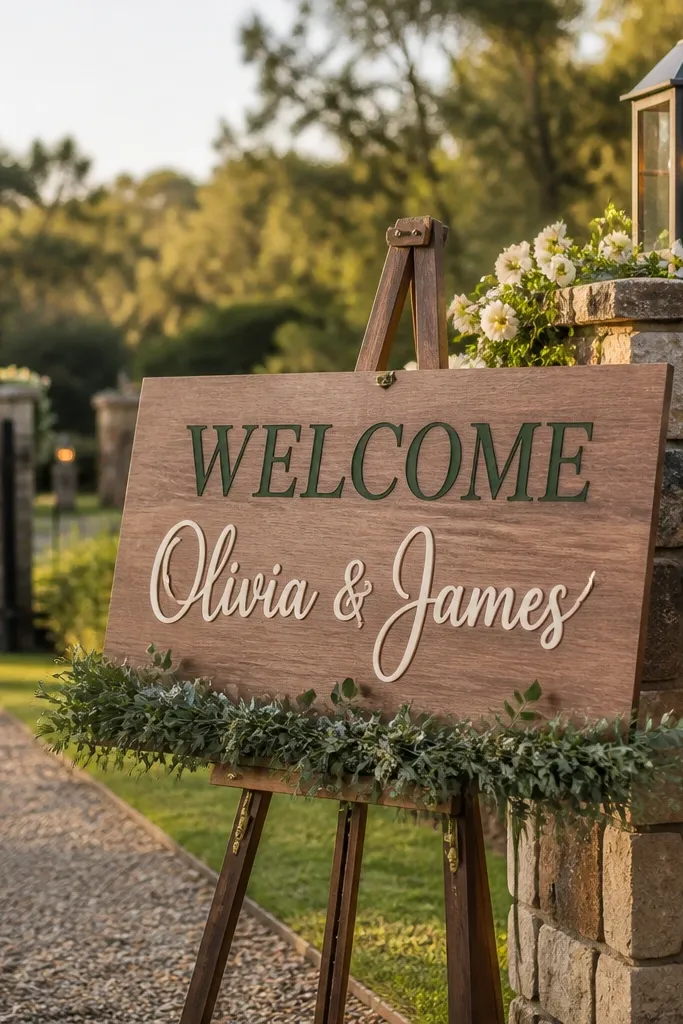
This style looks interactive and styled because the greenery garland has a separate element instead of being glued flat. The two-tone lettering (one color for WELCOME, another for names) reads clearly and adds depth. It’s also forgiving if you’re assembling quickly since you can swap the greenery piece without repainting the sign. Great for outdoor receptions and rustic venues with open entry paths.
Paint the top area for “WELCOME” in one color, then paint the bottom area for names in a second color that contrasts (cream + sage, or black + natural). Attach a small hinged greenery garland using two small hinges on the back so it sits upright in photos. Hang or prop the sign at the entry, then secure the garland with a small magnet or hook so it doesn’t flop.
Quick tipBring a spare greenery sprig — the hinged piece makes it easy to replace if one leaf drops.
Skip thisSkip heavy garlands on hinges — they swing and blur in photos.
10. Sunburst wood-burning rays behind the welcome text
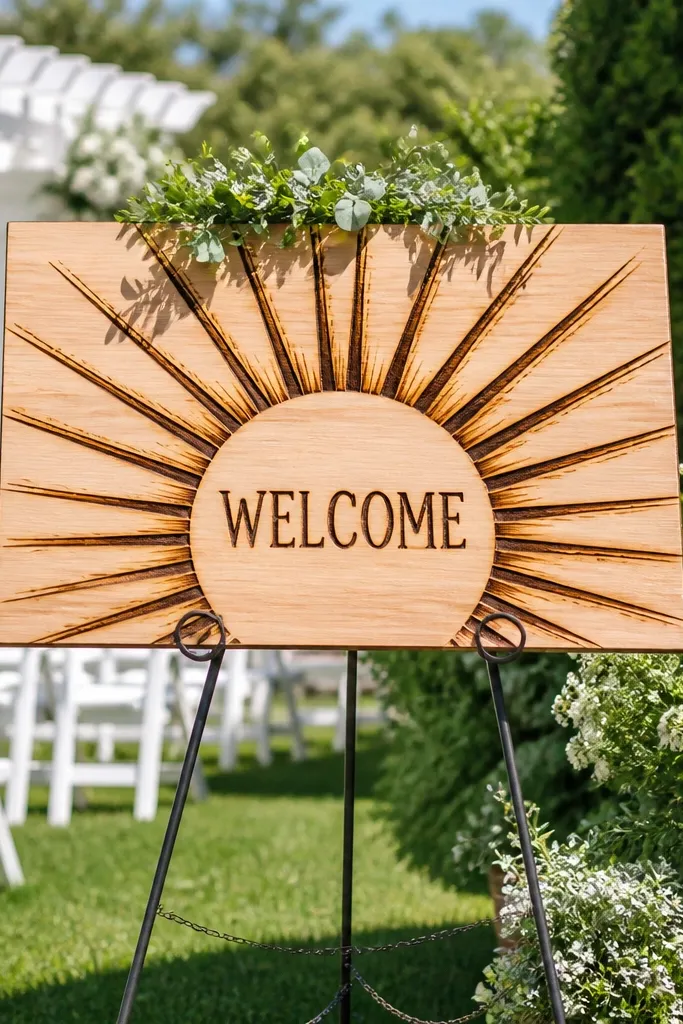
A sunburst behind the text adds instant photo energy without adding clutter. Wood-burning rays look warm and handmade, and they frame the lettering so the sign reads even when the background is busy. This works especially well for summer weddings, bright venues, and receptions with lots of natural textures. It also pairs nicely with simple dried flowers because the rays are the main visual.
Start with a light-stained board for contrast. Use a wood-burning tool to draw short rays from behind the “WELCOME” area, keeping them evenly spaced. Paint the letters in a dark color (charcoal or black), then seal matte to lock everything down.
Make the rays shorter than you think — long rays can overpower the text.
Don’t burn too dark — soot-heavy rays make the sign look messy instead of cozy.
11. Whitewashed board with dark green "WELCOME" and eucalyptus clips
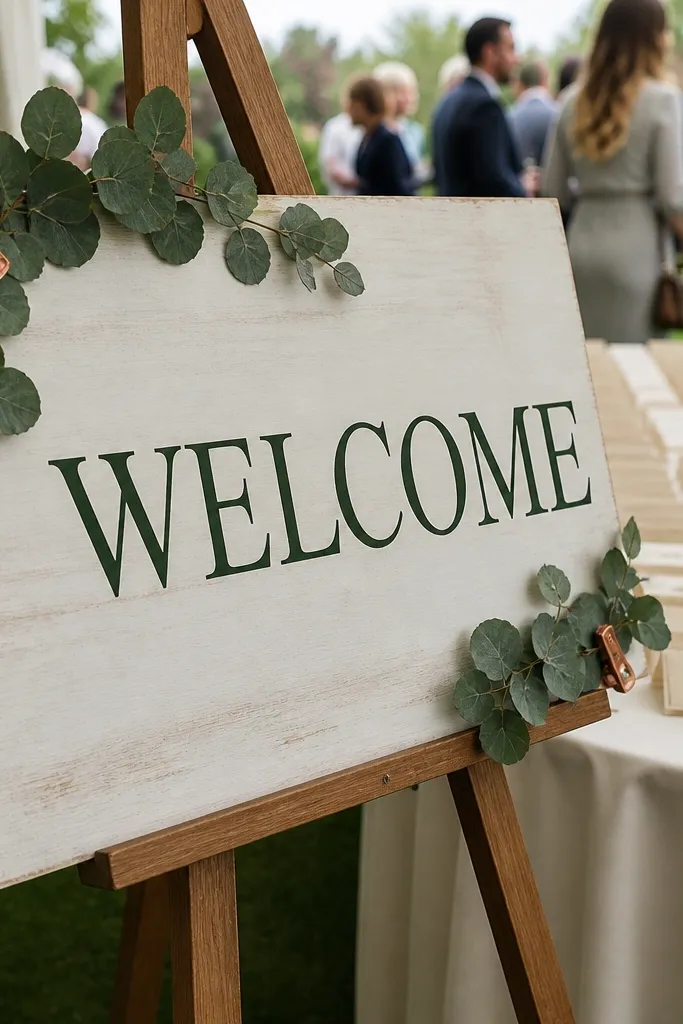
Whitewashing gives you that soft, airy background that makes dark green lettering look fresh and cozy. Using eucalyptus clips (instead of full glue-on greenery) keeps the sign clean and reduces mess if you need to adjust placement. This look is perfect for spring and summer weddings, especially if your table decor includes greenery and candles. It also photographs beautifully against light walls and linen draping.
Whitewash the board with a watered-down off-white paint, wiping back until you like the grain. Then stencil or paint “WELCOME” in dark green and add names in a smaller matching font. Clip two eucalyptus sprigs at the top corners using small binder clips or discreet clothespins, then seal the sign itself with matte clear.
Quick tipUse matte on the wood, not on the clips — shiny clips catch light and look distracting.
Skip thisDon’t skip wiping back the whitewash — heavy white can hide the wood grain and look flat.
12. Cursive welcome with gold paint dot border
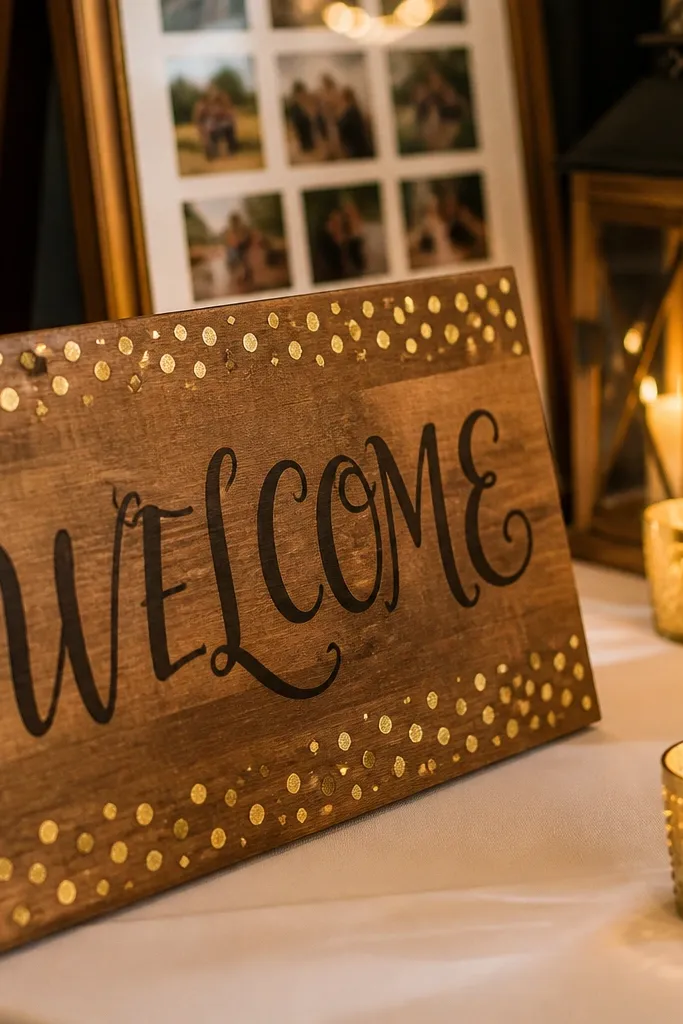
Gold dots around the border add a gentle sparkle that shows up in photos without looking flashy. The key is keeping the rest of the sign simple: one cursive “WELCOME” and one line for names. This style is great for indoor receptions, especially if you have gold candle holders or gold frames in the guest book area. It reads cozy because the base wood tone stays warm and the gold stays restrained.
Sand the board and leave it natural or lightly stain it. Paint or stencil “WELCOME” in gold paint, using a brush tip that makes smooth curves. Then dab small gold dots along the border at even spacing, and finish with matte clear coat to stop the gold from looking too reflective.
Quick tipPractice dot spacing on scrap wood; spacing that’s off by a lot shows up immediately in photos.
Skip thisAvoid using metallic spray paint — it can look patchy and streaky on wood grain.
13. Checkerboard corner blocks with welcome script
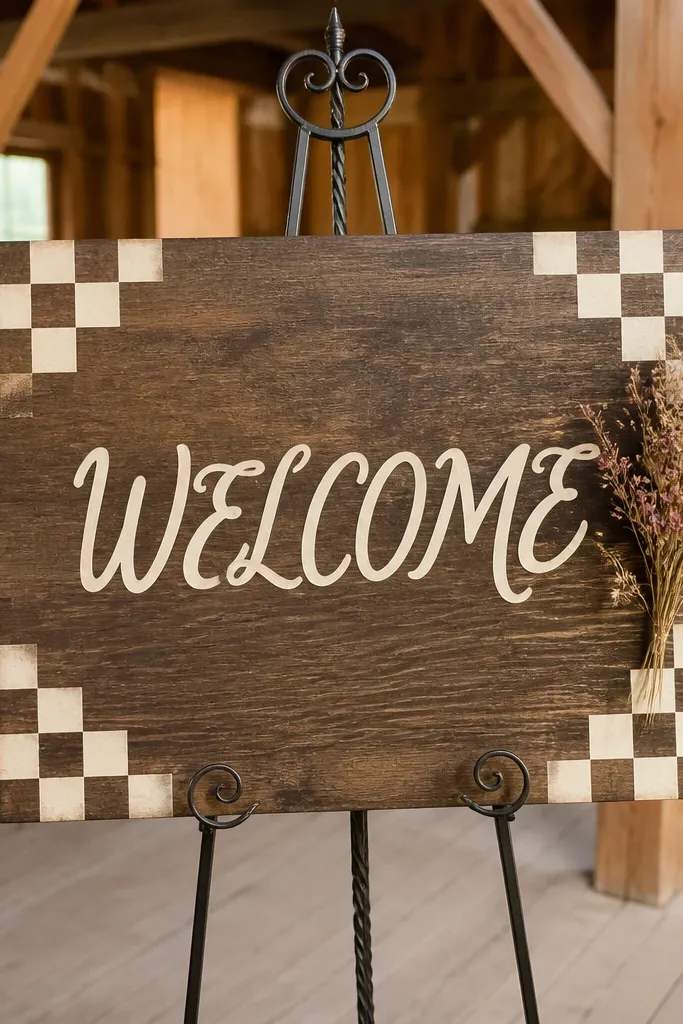
A checkerboard accent in the corners adds charm and makes the sign feel playful without going full theme. Keep the main message in script for coziness, then let the corners provide the visual punch. This is perfect for rustic barn weddings where you have plaid in the palette or your florals include wildflower colors. It also looks great in photos because corners catch light and guide the eye toward the center.
Paint or stain the board in a neutral base, then mark two small corner squares. Fill the squares with a simple two-color checker pattern, like black and cream, using painter’s tape for clean lines. Add “WELCOME” in script across the center, then seal matte and avoid any shiny topcoat over the checker pattern.
Quick tipTape the checker squares in tiny sections so edges stay crisp even on wood curves.
Skip thisDon’t make the checker too large — it competes with the names and makes the sign feel busy.
14. Natural wood slices as a border around the welcome text
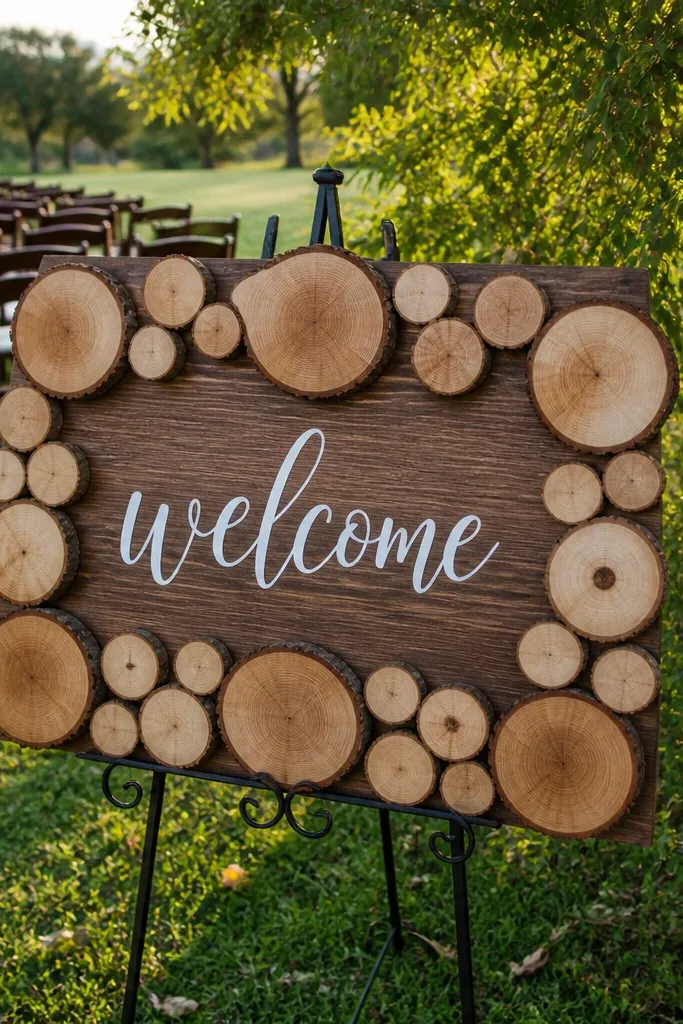
Wood slice borders look cozy because they add dimension and a handmade feel, not just flat decoration. The center message stays clear, and the slices create a frame that looks good from straight-on and angled shots. This style works well for outdoor ceremonies, especially if your seating has wood accents or your bouquet has dried textures. It also hides minor lettering imperfections because the border draws attention to the overall composition.
Cut or buy thin wood rounds and sand their edges so they don’t look rough. Attach them around the perimeter of a rectangular welcome board using wood glue, leaving the center clear for text. Paint or stencil the message in a dark color, then seal matte so the slices don’t soak up moisture and warp.
Pre-arrange the slices on the floor first; spacing differences are easier to spot before gluing.
Don’t leave gaps too wide — a border that’s patchy looks unfinished.
15. Rope-edged welcome sign with cream lettering
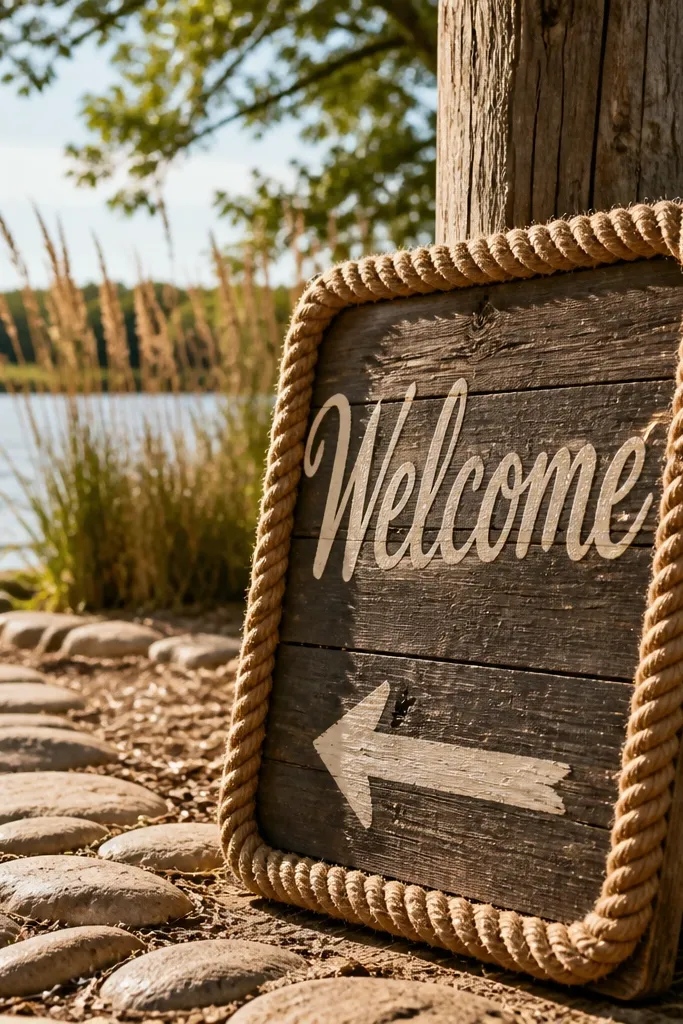
Rope edging makes the sign feel coastal-cottage cozy, even if you’re not doing beach wedding decor. Cream lettering stays soft and readable, and the rope adds texture that looks great in natural light. This is a strong fit for beach-adjacent venues, lakeside ceremonies, and warm-weather weekends. Pair it with simple white florals or dried grasses for a cohesive look.
Stain the board a light natural tone, then wrap a jute rope around the edges and glue it down with a hot glue gun. Paint “WELCOME” in cream and keep the lettering bold so it reads over the rope texture. Add names in a smaller font below, then seal the board with matte clear coat while keeping the rope from soaking up too much product.
Quick tipUse thicker jute rope so it doesn’t look stringy in close-up photos.
Skip thisDon’t use thin twine — it looks like leftover craft string on camera.
16. Olive wood stain with white block letters and a linen bow
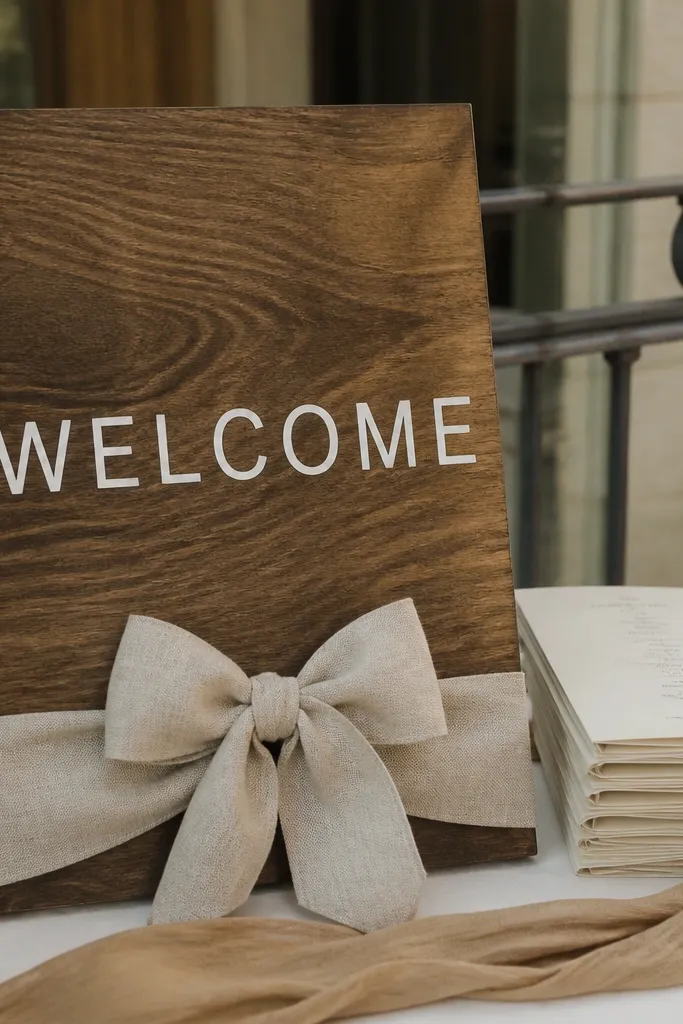
Olive stain gives you a muted, cozy base that pairs with warm neutrals. White block letters are easy to read and look modern against the wood, and a simple linen bow adds softness without turning it into a gift tag. This look is great when your wedding palette includes olive, cream, tan, or muted terracotta. It also works indoors where lighting can make lighter stains look washed out.
Stain the board olive and let it dry fully. Then paint “WELCOME” in white using a stencil for crisp edges, and add names in smaller white letters underneath. Tie a linen bow and attach it near the top center with a small wood-safe hook or glue dot, then seal matte so the wood doesn’t get sticky.
Keep the bow off the lettering — place it above the text so it frames the sign instead of covering it.
Skip glossy paint — it reflects overhead lights and kills readability.
17. Rusty red painted welcome with black hand-drawn border
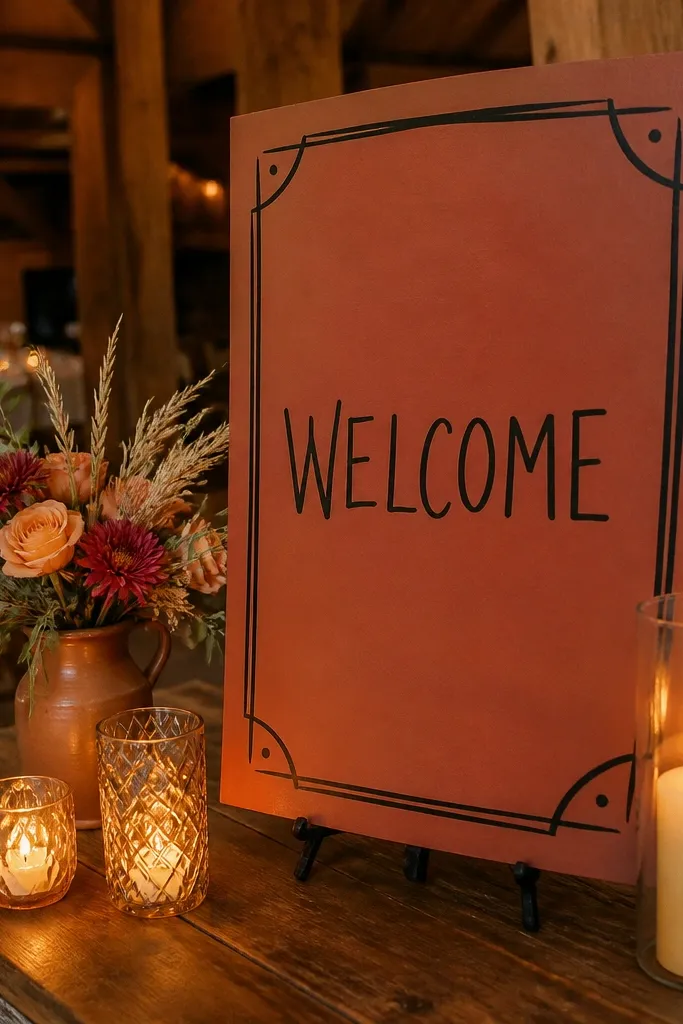
Rusty red is cozy because it looks like aged paint and ties in with fall florals, terracotta tables, and warm candlelight. A black hand-drawn border makes the sign feel handmade and frames the words without a lot of extra elements. This style is perfect for indoor barn receptions or outdoor ceremonies in cooler weather. It also looks great when your guest book table has black frames or dark wood pieces.
Paint a base area or full board in a rusty red tone, then let it dry. Use a thin black paint marker to draw a border line around the message and paint “WELCOME” in a slightly lighter or white tone for contrast. Add names below, then seal matte so the black border doesn’t smear.
If the black marker bleeds, let the base paint cure longer before outlining.
Don’t use bright cherry red — it looks modern and less cozy on wood.
18. Matte black stained board with cream typography and star cutouts
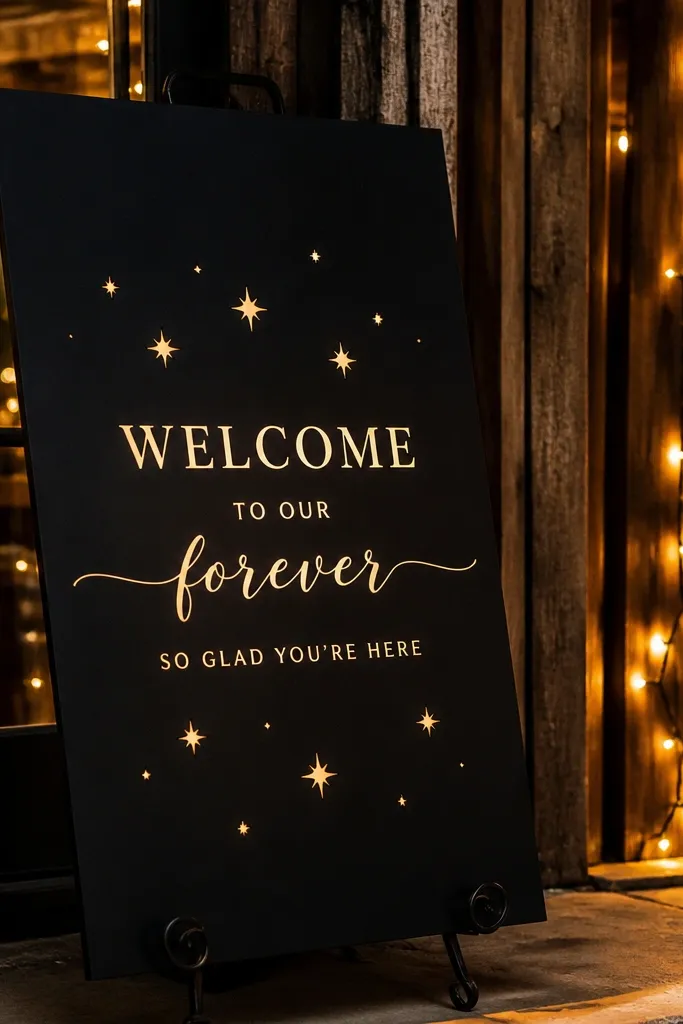
A matte black base makes the cream typography look classy and cozy at the same time, especially in evening receptions. Star cutouts add a whimsical touch without needing a full floral setup. This is a great choice for couples who want a slightly playful vibe but still want the sign to look sharp in photos. It also stands out in venues with lighter walls and neutral decor.
Use a matte black stain or paint and let it cure fully so it doesn’t smear. Apply cream lettering with stencil or vinyl, then add small star cutouts at the corners using pre-made wooden shapes glued on top. Finish with matte clear coat to keep everything uniform and reduce glare.
Quick tipKeep star sizes small (about 1.5-2 in) so the message remains the hero.
Skip thisSkip glossy black — it makes the sign shiny and harder to read in direct light.
19. Two-sided welcome sign with flip panel for ceremony vs reception
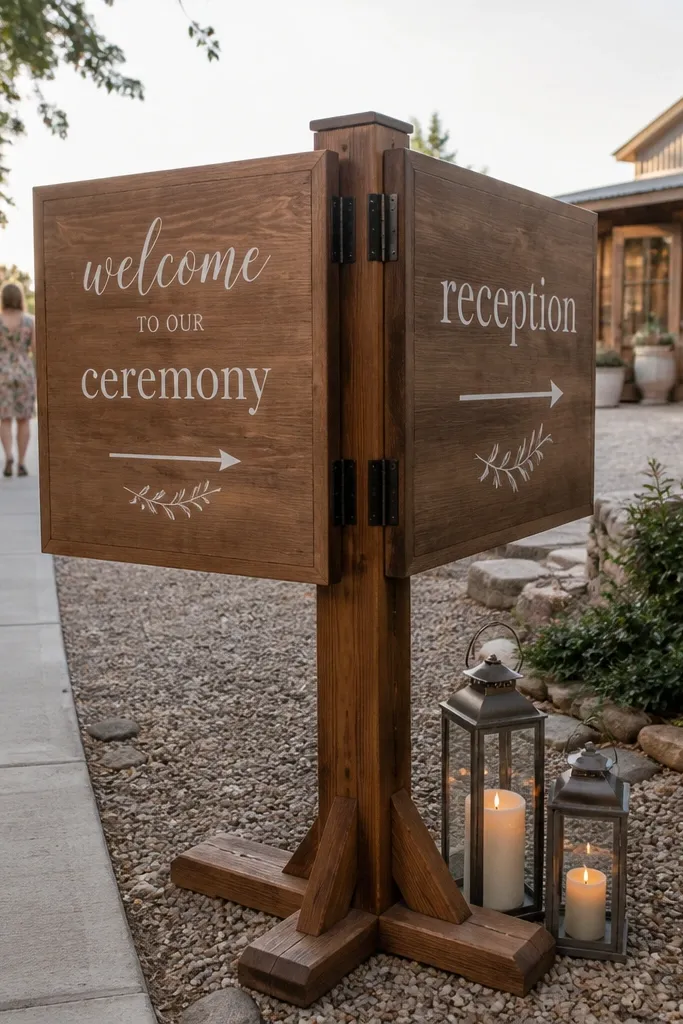
A two-sided sign is the most practical “weekend” upgrade because you don’t need to swap decor mid-day. Guests see the ceremony message when they arrive, then the reception direction when they move to the next space. It still looks cozy because the same wood finish and lettering style keeps it cohesive. This works best for venues with two locations or a ceremony-to-reception transition in the same grounds.
Build or buy a double-sided wooden sign with a shared frame and two panels. Paint or stencil the front with “WELCOME TO THE CEREMONY” and the back with “WELCOME TO THE RECEPTION,” keeping font sizes consistent. Seal both sides matte, then add small matching greenery accents on the top corners of each panel.
Quick tipPlace it on a stand with a stable base so it doesn’t wobble when people approach for photos.
Skip thisDon’t put tiny directional text on the flip side — guests should read it fast while walking.
20. Corner ribbon banner with painted welcome and names
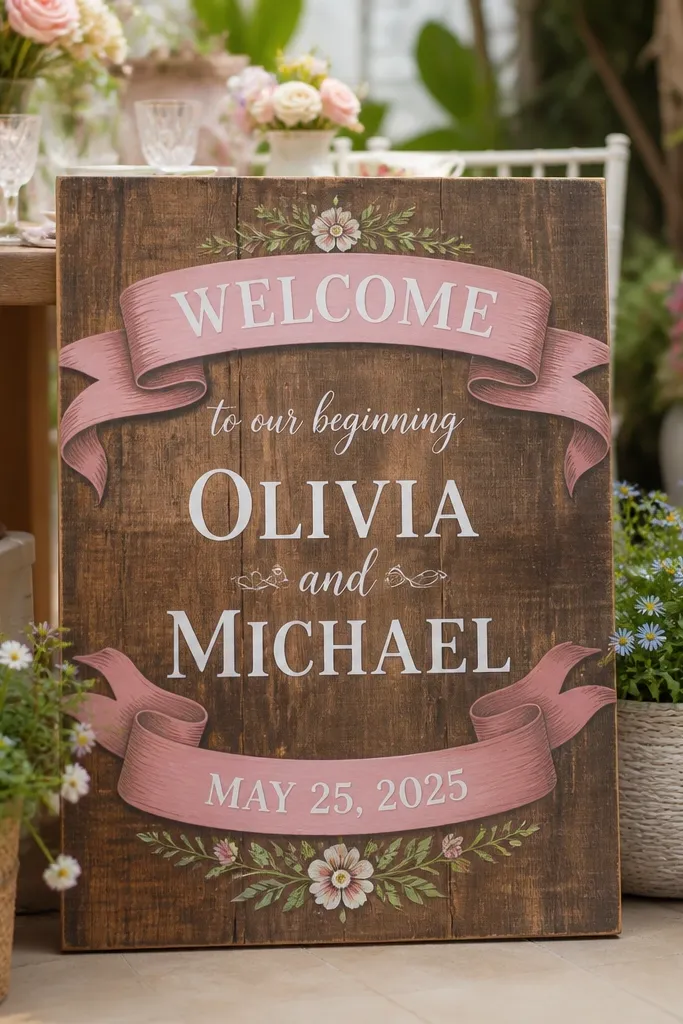
This look gives you a soft, celebratory feel without covering the whole sign in florals. Ribbon banners at the corners create movement in photos, and painted lettering stays crisp. It suits spring weddings, garden ceremonies, and venues with pastel table settings. Choose a ribbon color that matches your bridesmaid dresses or napkins so the sign looks coordinated, not random.
Sand and stain the board in a light natural tone. Paint “WELCOME” in a dark color and add names below, centered and bold. Tie ribbon pieces at the top corners, pinning or gluing them to the back so they hang slightly forward, then seal matte around the lettering area.
Use wired ribbon if you want the banner to hold a gentle curve in photos.
Avoid flimsy ribbon that droops straight down — it looks flat and sad in pictures.
21. White board with terracotta welcome and dried wheat stalks
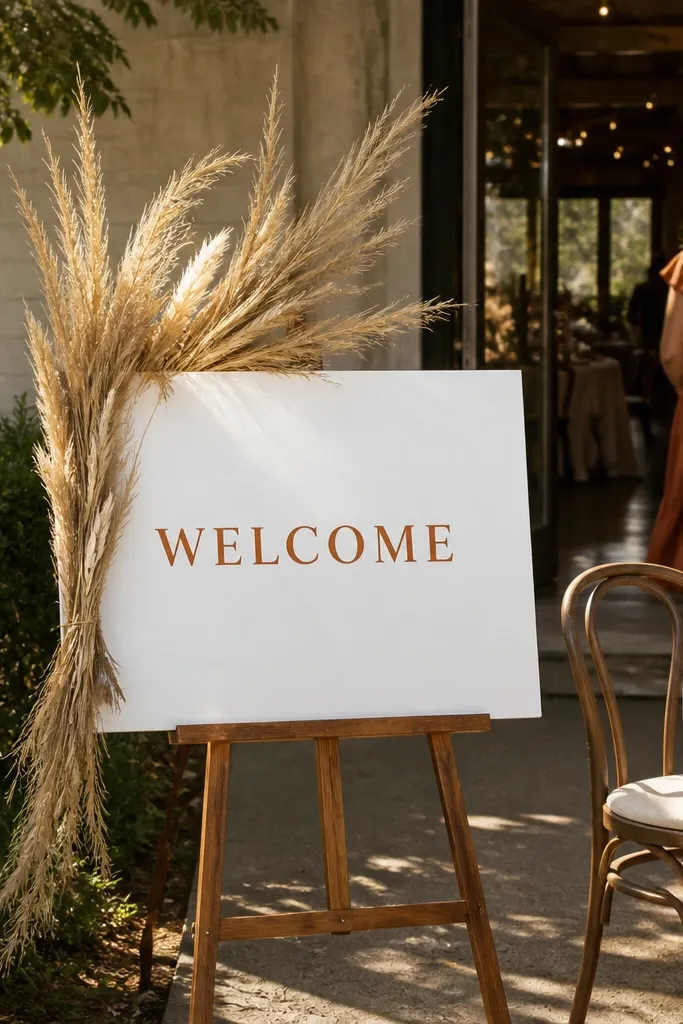
Terracotta on a whitewashed or painted board reads warm and cozy, especially in early fall. Dried wheat stalks add texture and height without stealing focus from the message. This is a great match for rustic candlelight receptions, neutral tables, and bouquets with tans and creams. It also photographs well because wheat creates natural lines that lead the eye toward the center.
Paint the board white or whitewash it until the grain shows. Stencil “WELCOME” in terracotta and add names below in a slightly smaller matching shade. Bundle 2-3 dried wheat stalks and place them at the bottom center using a small wooden clamp or glue dots, then seal the wood matte.
Quick tipDust dried wheat lightly before attaching so the sign doesn’t shed debris.
Skip thisDon’t use fresh greenery with wheat — it wilts and looks uneven by photo time.
22. Chalkboard-style wood with white welcome and linen tassels
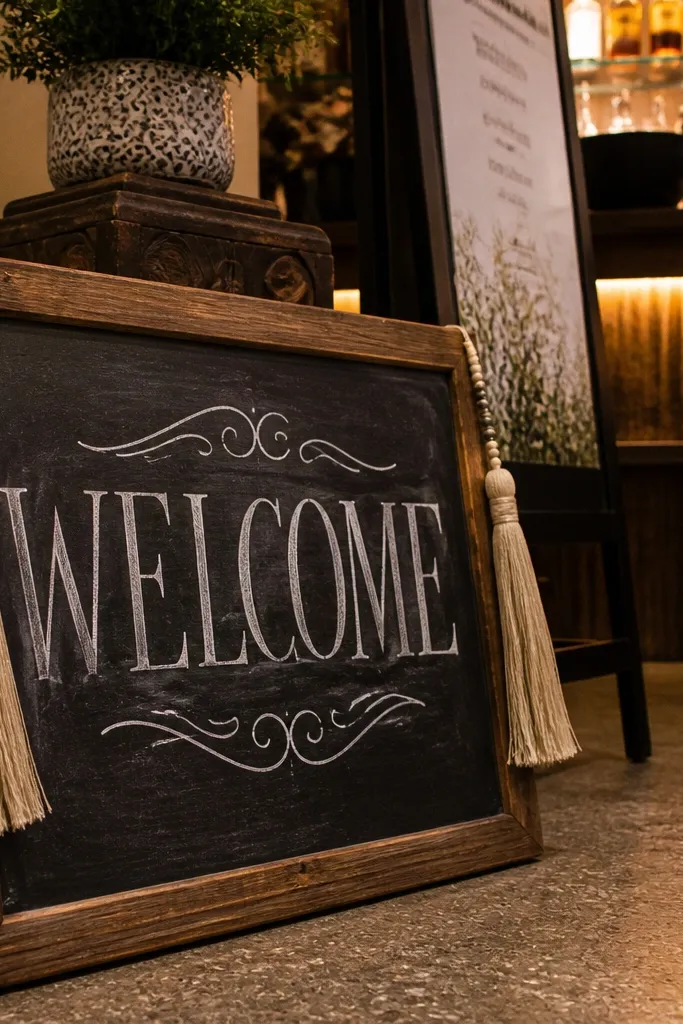
A chalkboard-style finish gives you that classic cozy vibe and makes the white lettering pop hard in photos. Linen tassels add warmth and movement, and they look good even if you keep the rest of the decor minimal. This works for indoor receptions, especially in evening light, and it pairs with black frames, dark wood, or neutral candles. It’s also forgiving if you need to tweak spelling — chalk-style surfaces can be wiped and redone.
Paint the board with chalkboard paint or chalkboard effect paint and let it cure. Use white chalk marker or white paint marker for “WELCOME” and names, keeping lettering thick. Attach 2-3 linen tassels at the bottom corners with glue dots, then seal only around the tassel attachment points if you want to preserve the chalk feel.
Write once, step back, then go back in — chalk markers show mistakes fast when you zoom in later.
Don’t make the background glossy — glare makes the “chalk” effect look cheap.
23. Natural wood board with laser-cut heart outline and cream text
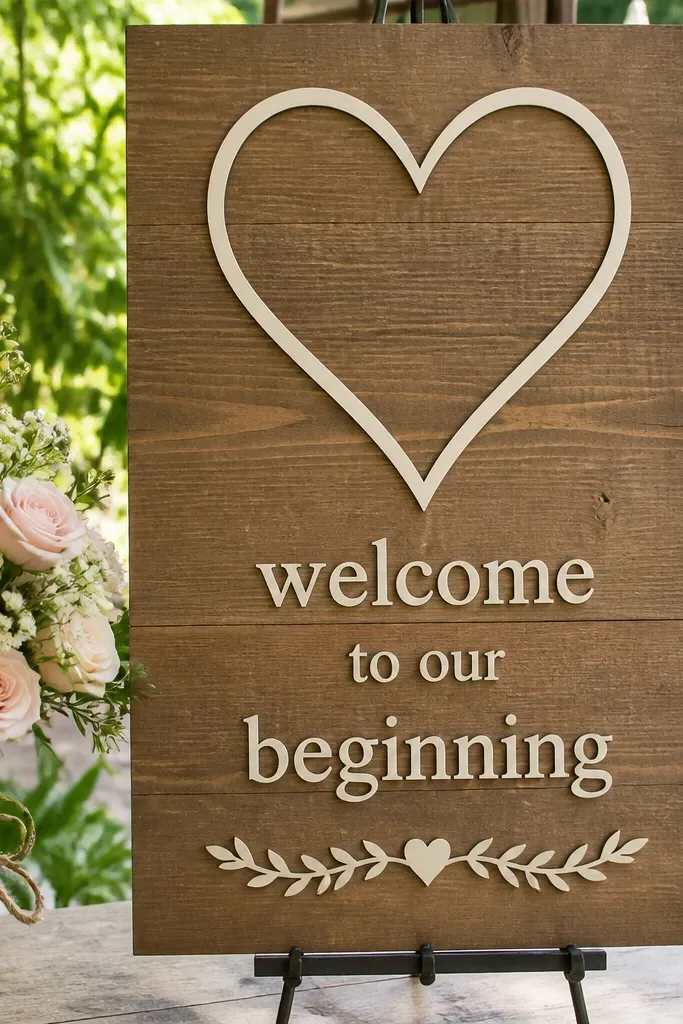
A heart outline is one of the most universally cozy shapes for a welcome sign, and it photographs cleanly when it’s crisp and centered. Keep the color palette tight: cream text on natural wood with the heart outline in the same color or a slightly darker stain. This look suits romantic garden weddings and venues where you want the sign to feel sweet without going full floral. It also works well if your ceremony has a heart-shaped arch or matching decor element.
Start with a natural wood board and lightly sand the surface. Add the heart outline by attaching a laser-cut wooden heart or using a heart-shaped stencil to paint it in cream or a darker tone. Paint “WELCOME” in cream above the heart and names below, then seal matte so the heart edges don’t lift.
Quick tipUse painter’s tape to mask the heart edges; it keeps the outline sharp even on wood grain.
Skip thisSkip layered hearts that stack too thick — they cast shadows that make the text harder to read.
24. Herringbone border with bold welcome and minimal florals
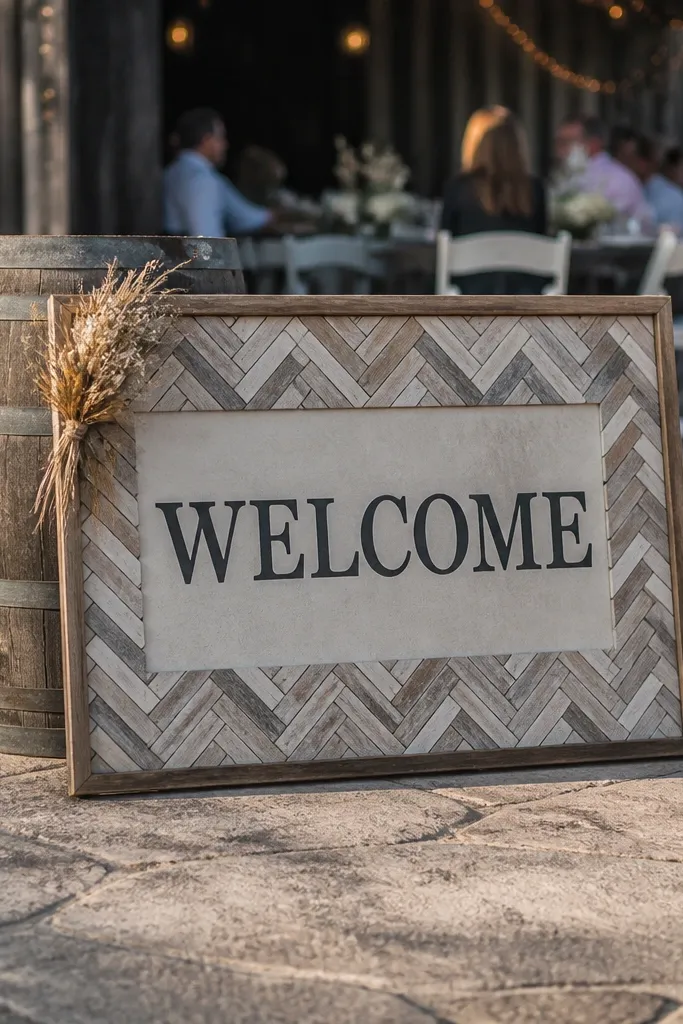
A herringbone border looks designed and cozy, even when the message is simple. It gives you a pattern that reads well from a distance, so the sign still looks good if your background is busy with chairs or tables. Keep the florals minimal — just one small dried bunch or a single sprig so the pattern stays the focus. This works for weddings with neutral palettes, tweed textures, or any decor that already has a pattern.
Paint or stain the board in a neutral base tone like natural or light oak. Mask a thin border area and paint a herringbone pattern using two colors (cream + dark gray, or black + natural). Add bold “WELCOME” and names in the center, then seal matte to protect the painted border.
Use a thin foam brush for the herringbone lines; it keeps corners cleaner than a wide brush.
Don’t make the border too thick — thick borders look heavy and crowd the message.
25. Farmhouse striped welcome with greenery tabs
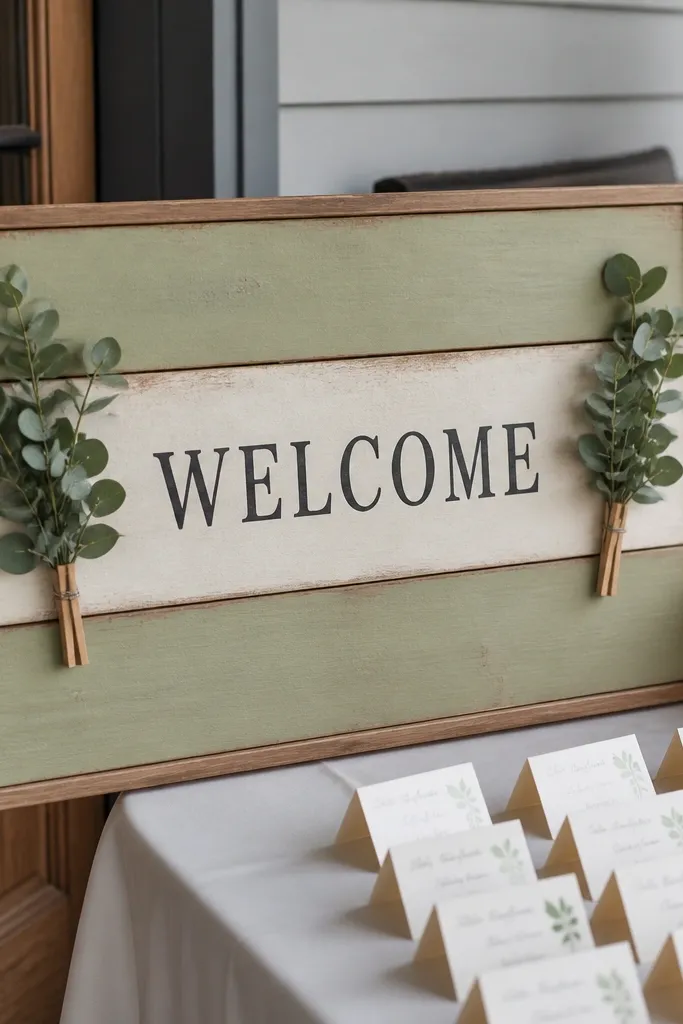
Stripes make a wooden sign look instantly styled, and greenery tabs on the sides keep it cozy without hiding the letters. This is a great option when you want a farmhouse look but still want the sign to feel clean and modern. The stripes also help frame the center message, so it stays readable even in cluttered entry areas. It suits barn venues, rustic outdoor ceremonies, and weddings with neutral checkered or striped linens.
Sand the board and apply a light stain or white base. Paint thin horizontal stripes across the top half, leaving a clean center panel for “WELCOME” and names. Attach two small greenery tabs on the left and right sides using clothespins or ribbon loops, then seal matte over the painted areas.
Keep stripe color count to two — more colors make the sign look busy fast.
Avoid stripes behind the lettering — it lowers contrast and makes the message harder to read.



