
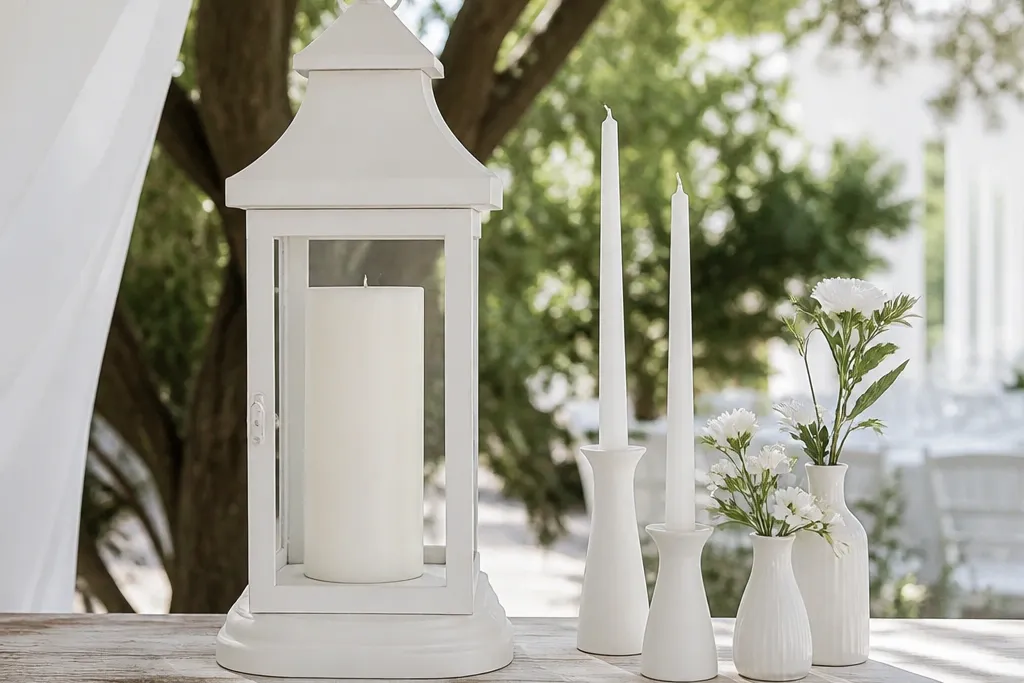
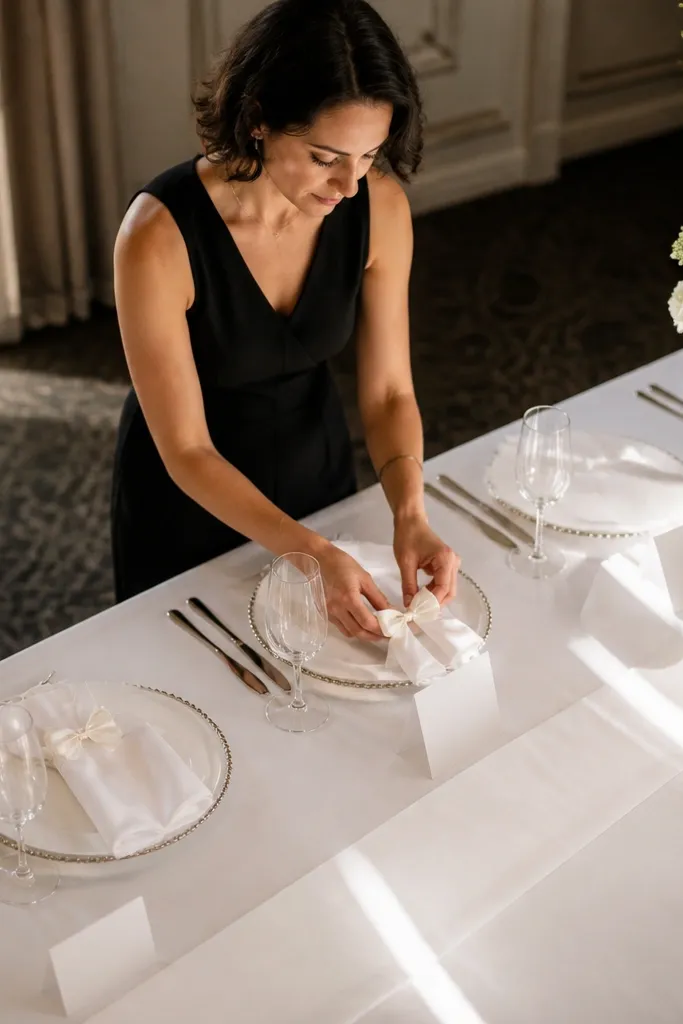
1. Tulle ribbon chair bow with a pre-tied loop
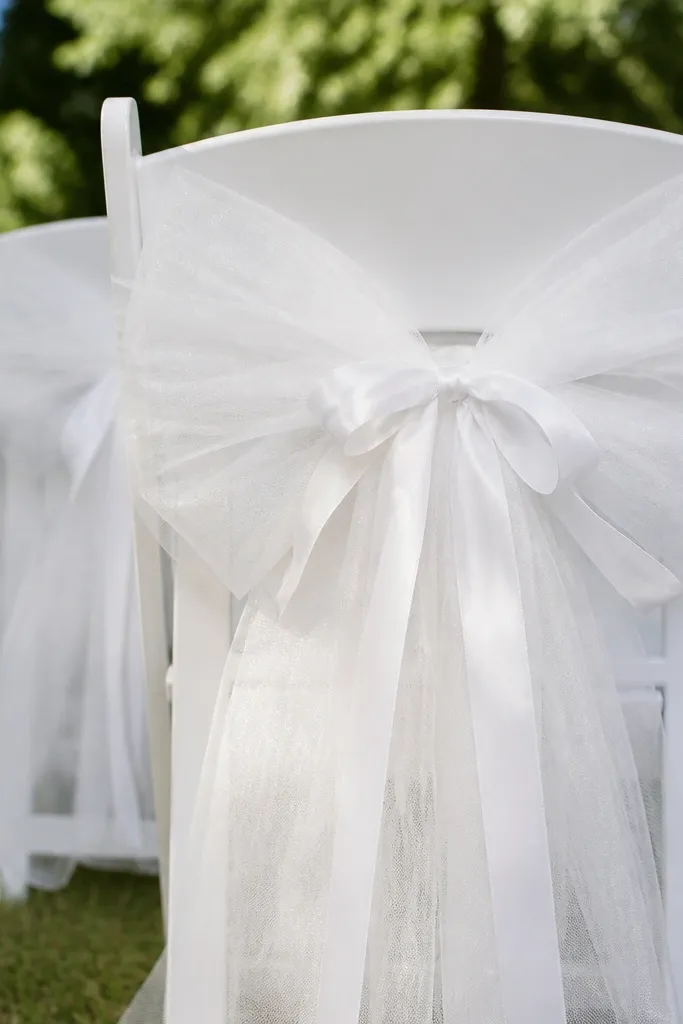
This is one of the fastest ways to make guest seating look styled instead of random. A full chair back bow frames the aisle and reads clearly in photos because it sits at face level. Tulle also looks airy even in bright daylight, and it doesn’t block sightlines like thick florals can. It suits ceremonies with a formal seat layout, and it works in winter or summer because tulle always looks light. Use it when you want a clean, soft white look that still feels festive.
Start with pre-made tulle ribbon or cut tulle strips into identical lengths, then fold them into a loop. Tie the loop around the chair back using a satin ribbon strip, then secure the ends behind with a tiny piece of tape or a zip tie hidden from view. Finally, fluff the loops so they fan outward, not flat — keep the bow centered and slightly above the chair seam.
Quick tipBring a small roll of clear tape and a few extra satin strips so you can fix one chair without losing your whole setup rhythm.
Skip thisDon’t tie one huge bow on every chair — the size jump shows up instantly in photos.
2. White bud vase row down the table edge
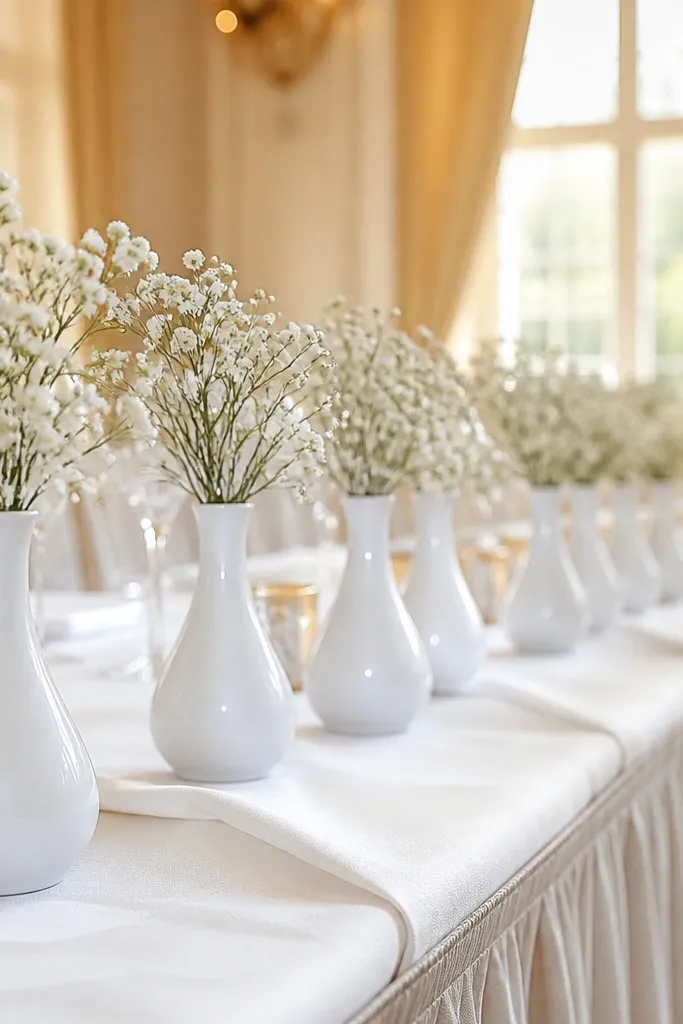
A tight row of small bud vases makes the table look curated in a single glance. It’s photogenic because the repetition creates a clean line that the camera naturally follows. This idea works best with single stems like baby’s breath, white spray roses, or eucalyptus, because you get airy texture without heavy arrangements. It suits dining tables, dessert tables, and cocktail tables where you need impact without spending time. White vases also keep the palette controlled when you’re mixing flowers.
Start by placing a white runner or plain white tablecloth first, then set three to five bud vases along the front edge at equal spacing. Add one stem per vase, trimming stems so the blooms sit at a consistent height. Then step back and adjust spacing — if one vase is off by more than a few centimeters, the row stops looking intentional.
If you’re using real flowers, pre-fill vases with water before you start placing them so stems don’t wilt while you arrange.
Skip mixed vase heights — variation looks messy fast when you’re aiming for quick and easy.
3. Mirror "snow" garland with faux pearls
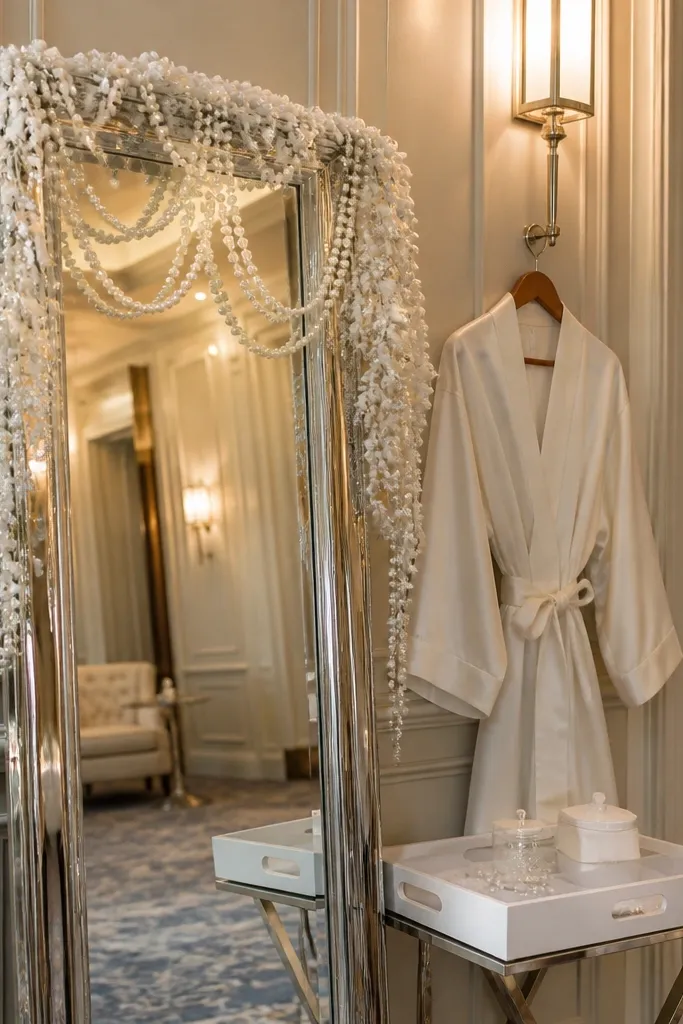
This turns a simple mirror into a bright photo prop with zero bulky setup. Faux pearls and bead garlands show up on camera as soft highlights, and the mirror doubles the sparkle for a bigger look. It’s perfect for getting-ready spaces, dessert backdrops, or entry tables where people take pictures. You get a clean white moment without needing floral foam or a full arrangement. It also holds up well in heat because you’re not relying on fresh stems.
Start by cleaning the mirror frame so tape sticks properly. Drape a pearl garland across the mirror in an S-shape, then secure ends with clear tape on the back edge so the front stays clean. Finally, add one small white cluster at the center (a mini bouquet or a satin bow) to anchor the composition.
Quick tipUse clear command hooks for the mirror if it’s freestanding — it’s faster than repositioning a heavy mirror on arrival.
Skip thisDon’t let the garland sag unevenly — the mirror reflection will exaggerate it.
4. White taper candle trio on a simple tray
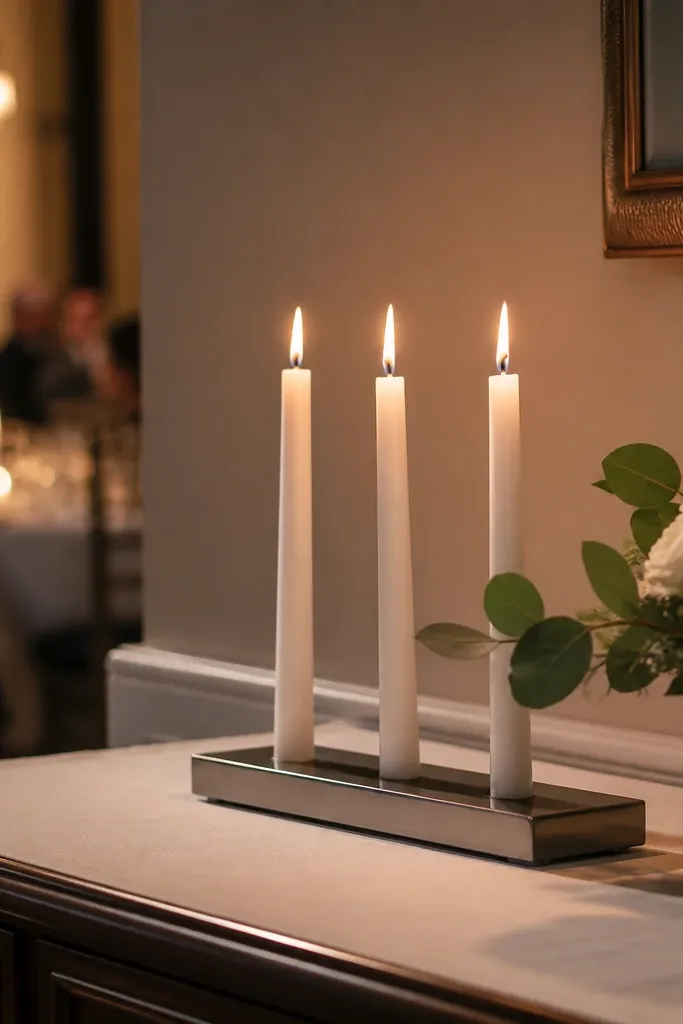
Three tapers on a tray give you height, light, and a polished look in minutes. White candles photograph as soft vertical shapes, which makes tables and sideboards look intentional even with minimal flowers. This is ideal for evening ceremonies or receptions where warm candlelight already exists, but it still works in daytime because the white wax is clean on camera. It suits modern, farmhouse, and classic styles because the materials stay neutral. Keep the styling sparse so the candles read as the main decor, not clutter.
Start with a long tray or shallow serving board, then place three taper holders spaced evenly. Add a thin strip of white fabric or a satin ribbon under the holders so gaps don’t show. Finally, light candles right before photos so the flames are steady and the wax looks fresh.
Quick tipBring sticker-based candle holders or foil drip protectors — they save you from wax mess on the tray.
Skip thisAvoid colored candle holders — they ruin the white-only photo palette.
5. Napkin ring with a folded white ribbon knot
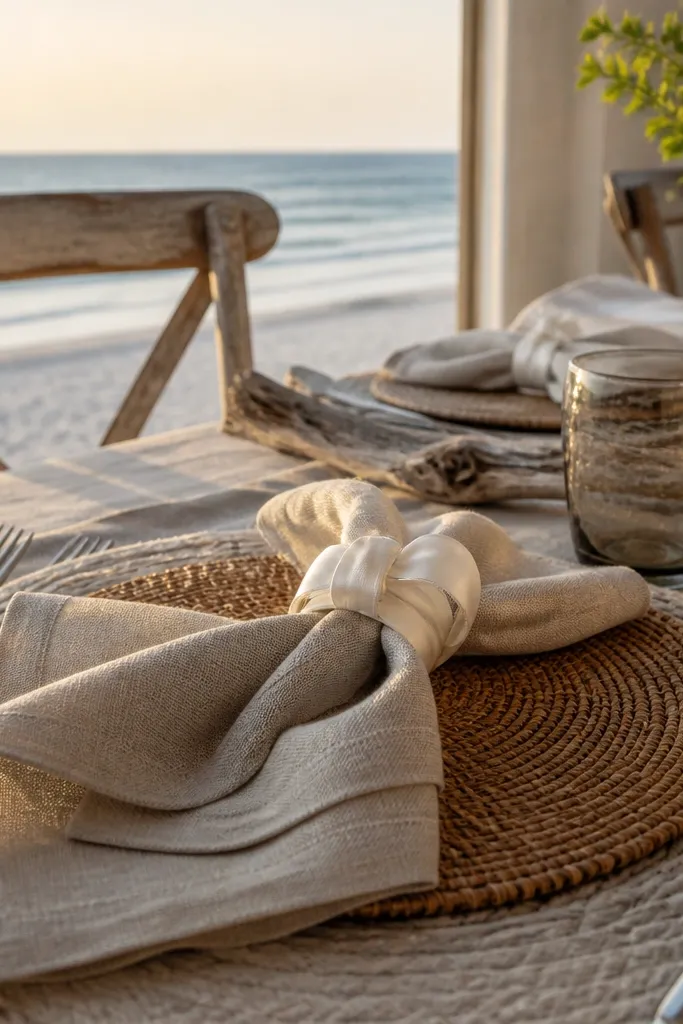
This is a small detail that reads big in close-up shots. A crisp folded ribbon knot gives structure to a napkin without bulky decor, and it stays consistent across every place setting. White ribbon also matches everything, which matters if you have mixed linens or chairs. It’s great for quick table styling when you don’t have time for full centerpieces. This idea works especially well when you’re photographing flat lays of menus, rings, or place cards.
Start by folding a 12- to 18-inch length of white satin or grosgrain into a narrow ribbon strip. Wrap it around the folded napkin and tie a tight knot at the center, then tuck loose ends behind the napkin edge. Finally, press the knot flat with your fingers so it looks sharp, not bumpy.
Use grosgrain for a more matte look; satin looks shinier and can glare under flash.
Don’t use wrinkled ribbon — creases show in every photo.
6. White balloon cluster with a single ribbon tail
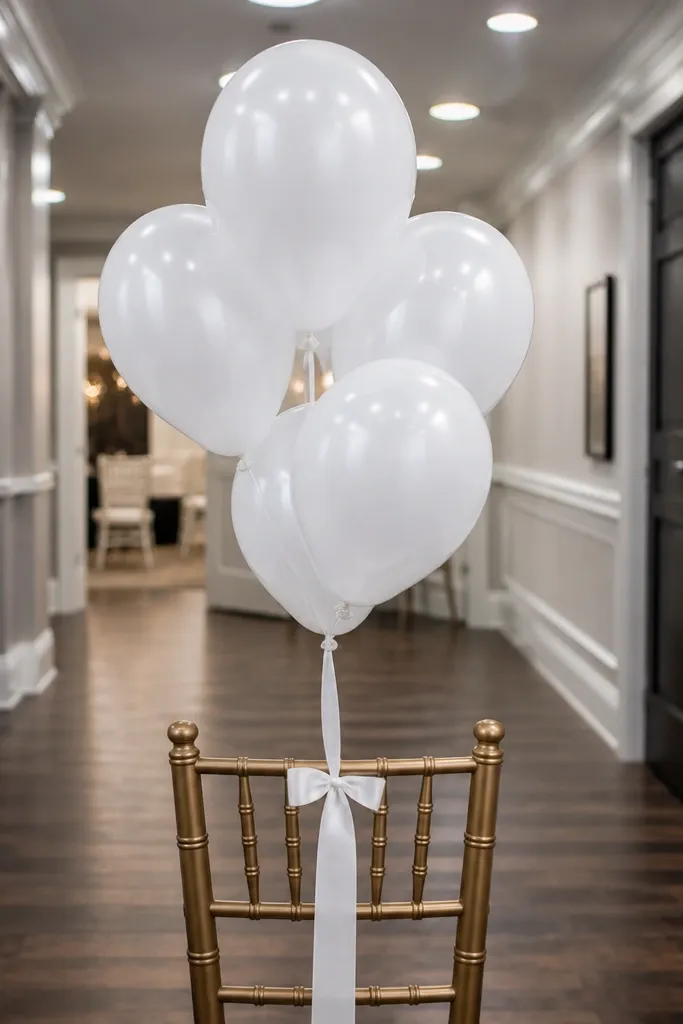
White balloons add instant “event energy” without building a full backdrop. In photos, balloon clusters create a soft, rounded shape that fills space behind people and makes group pictures look lively. This works best when you keep the cluster small and clean, with one ribbon tail for a sense of direction. It’s a good fit for receptions, dessert areas, and indoor venues where you want quick impact. Choose matte white balloons for fewer reflections under overhead lights.
Start by inflating three to five white balloons and tying them together at the stems. Add one long satin ribbon tail to the knot so the cluster looks intentional rather than floating. Finally, anchor the cluster to a chair back or a stand using clear fishing line or a weighted base you can hide behind the table.
Quick tipIf your venue has strong air vents, use a weighted base — balloons drift and ruin the framing fast.
Skip thisSkip mixed balloon finishes (matte and glossy together) in the same cluster.
7. Folded white paper fan backdrop strip
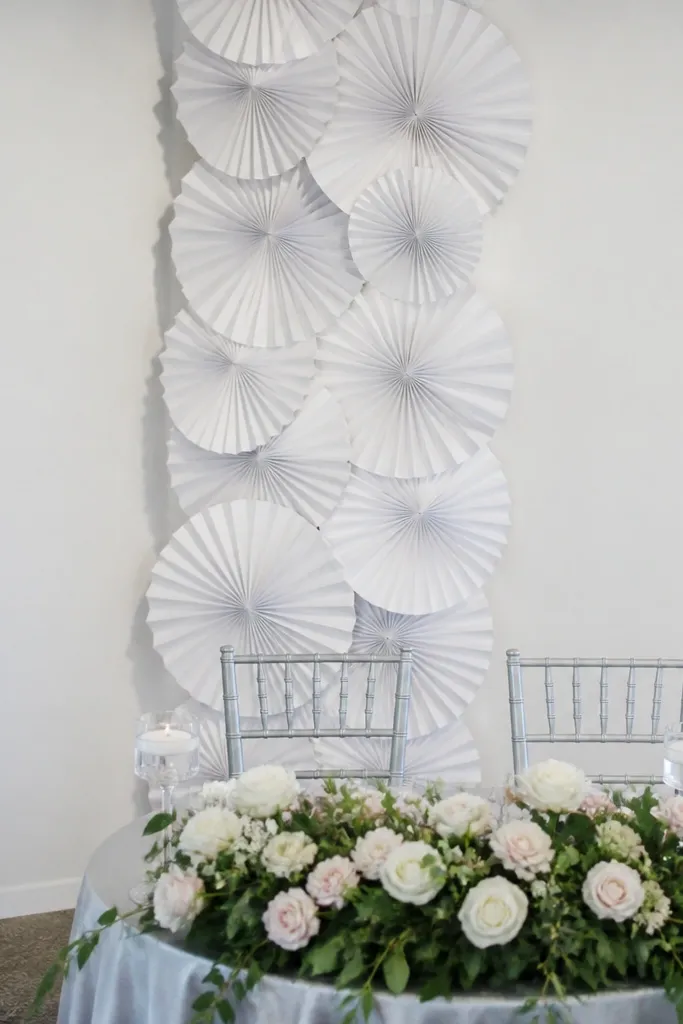
Paper fans are cheap, fast, and they photograph with crisp texture. A vertical strip of white fans behind a sweetheart table or photo area makes the space look designed even when you don’t have a wall setup. Keep the palette all white so the fans read as a graphic pattern, not a craft project. This suits receptions where you want a modern look, and it works year-round because paper stays stable. It’s also easy to remove at the end without damage.
Start by folding pre-cut fan sheets or accordion-folding cardstock into fans, then glue or tape the center crease. Arrange fans in a line on a white poster board or directly on a backdrop frame using double-sided tape. Finally, step back and adjust the spacing so each fan touches the next with no big gaps.
Quick tipUse a white foam board backing so tape grabs better and the fans don’t curl.
Skip thisDon’t leave the fans uneven — the pattern will look accidental in every camera angle.
8. White faux fur runner with candle shadows
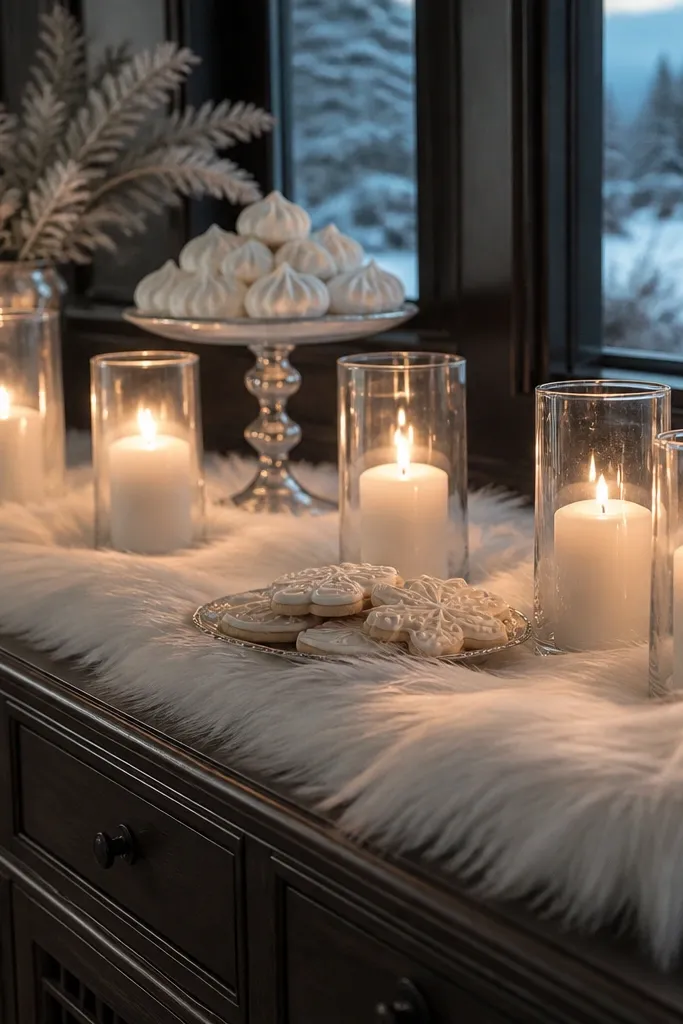
A white faux fur runner makes small tables look luxurious in a way that photographs instantly. The texture creates soft shadows from candles and vases, giving depth without extra items. This idea is best for dessert tables, welcome tables, and winter weddings where you want cozy visuals. It also hides minor table imperfections, which helps when you’re setting up fast. Keep the rest of the decor minimal so the fur remains the star.
Start by laying the runner centered on the table, smoothing from the middle outward. Place three candles or a small bud vase cluster on top, then add one flat white element like a menu stand to anchor the styling. Finally, adjust the fur so it doesn’t bunch under the items — you want even, fluffy texture in photos.
Quick tipBring lint roller sheets — white fur shows dust and ribbon fibers under bright lights.
Skip thisDon’t pair fur with bulky florals; it looks crowded quickly.
9. White fabric drape on a ladder or chair back
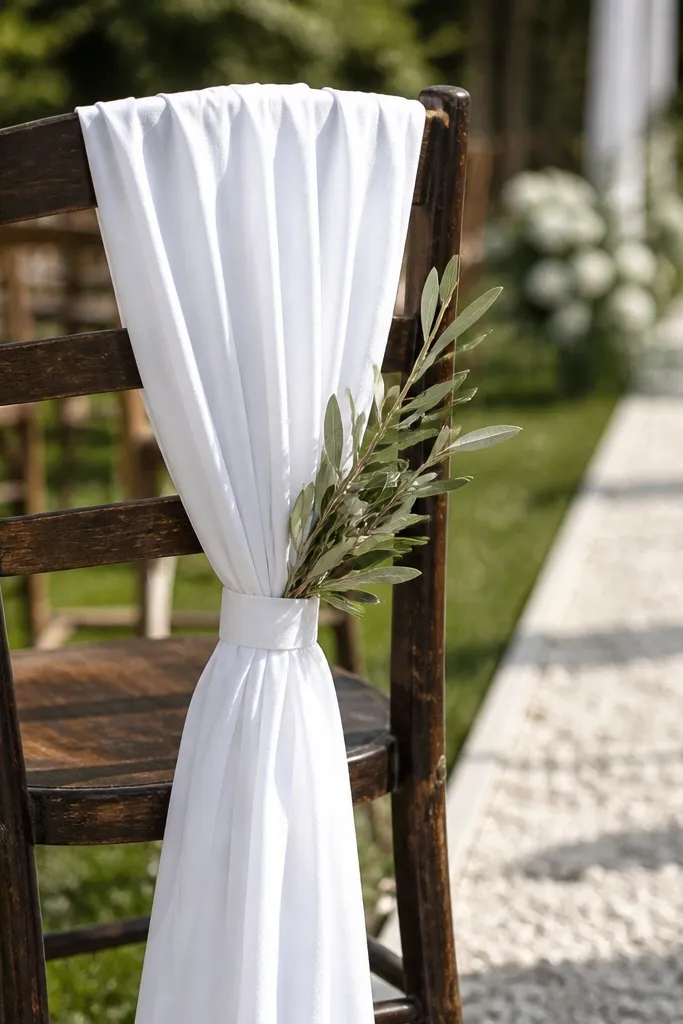
Fabric drapes create a clean, flowing backdrop without the work of building a floral wall. A white drape on a ladder, step stool, or chair back gives height and vertical movement that looks great behind a couple’s photo. It’s especially photogenic in side lighting because folds catch highlights. This works for ceremony entrances, photo areas, and dessert tables where you want a neutral background. Choose a fabric that hangs straight — it matters for the look.
Start with a single length of white fabric like chiffon or lightweight voile, long enough to cascade 12-18 inches down. Drape it over the top rung or chair back and let the ends fall naturally, then secure with clear tape or hidden zip ties. Finally, smooth the folds with your hands and pin just one spot so the drape doesn’t shift.
Quick tipIron or steam the fabric before arrival; wrinkles show more in white drapes than in any other color.
Skip thisSkip thick stretch fabric — it clings and looks wrinkled in photos.
10. White candle sleeves on glass jars
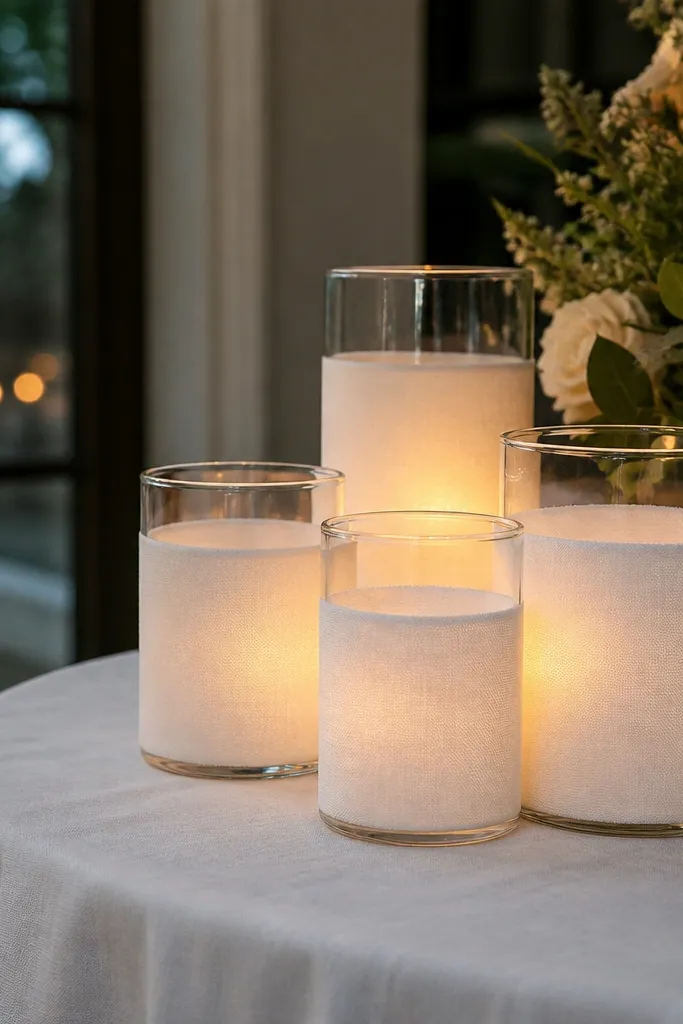
Glass jars with white sleeves look like styled candle lanterns without building a full centerpiece. The jar gives you height and a crisp silhouette, while the white sleeve keeps everything cohesive. This idea is great for receptions where you want low, soft lighting and a clean palette across multiple tables. It works in both indoor and covered outdoor spaces because the jar protects the flame. It also lets you reuse everyday jars, which keeps cost down.
Start by placing glass jars in a line or in a small cluster on a tray. Wrap each jar with a white battery candle sleeve or a strip of white fabric secured with a thin ribbon band. Finally, insert a LED candle or taper holder inside and test the height so the flame sits at a consistent level for photos.
Use LED candles if the venue has wind or strict fire rules — you’ll get steadier lighting for pictures.
Don’t use translucent white sleeves without testing — some look gray under indoor lighting.
11. White flower wall with single-step tape grid
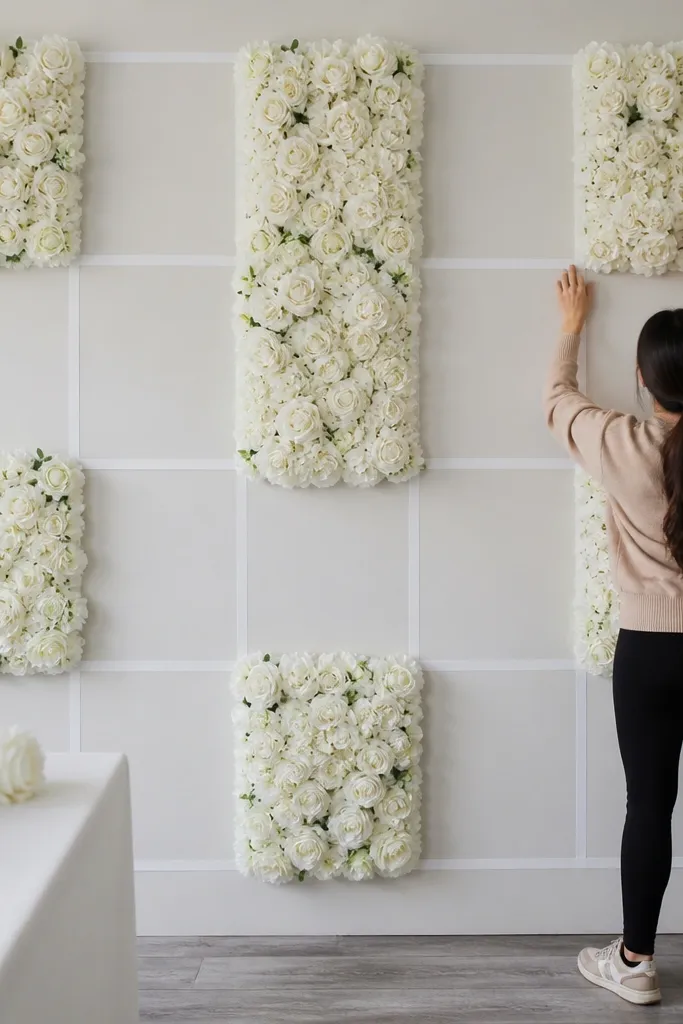
A simple white flower wall can look full and expensive when you control the placement with a tape grid. Instead of spacing flowers by eye for hours, you mark a grid and place pre-arranged faux clusters into the same spots. This keeps the wall symmetrical and camera-ready from multiple angles. It’s perfect for photo backdrops, sweetheart table backgrounds, and ceremony entrances. Use faux or dried for speed — fresh flowers slow you down.
Start with a white foam board or fabric backdrop panel, then tape a light grid using painter’s tape. Add pre-made faux white clusters and secure them into the tape points, pressing firmly so stems don’t pop off. Finally, stand back and adjust — fill only the center areas you’ll photograph, leaving edges lighter for a natural look.
Quick tipBring a small lint brush — white backdrops collect dust fast and it shows under flash.
Skip thisAvoid random single blooms spread everywhere; the wall looks sparse and uneven.
12. White ribbon aisle markers on chair backs
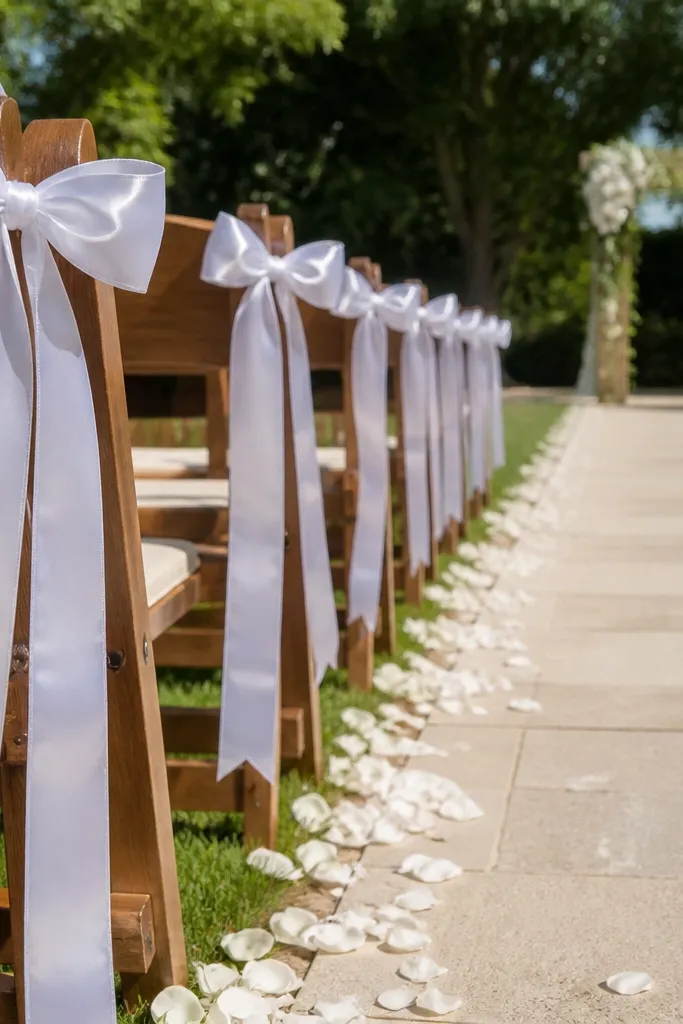
Aisle decor doesn’t need stakes and heavy installs. Tying white ribbons to chair backs creates a visual line that leads the camera down the aisle, which is what you want for ceremony photos. It works best when your venue uses rows of chairs, and you can keep the ribbon length consistent so it looks intentional. Choose a ribbon with body like satin or grosgrain so it holds shape. This gives you a clean, bright aisle moment with almost no setup time.
Start at the front and tie a ribbon loop around the top of the first and last chair in each row you’ll photograph. Then measure by eye and match the ribbon length across the aisle — keep tails the same length. Finally, step back and check alignment from the center aisle; adjust the first row only, since it sets the visual line.
Quick tipUse blackout tape on the back side of chair tops so the ribbon stays tight without marking the chair.
Skip thisDon’t tie ribbons at random heights — the aisle will look crooked in photos.
13. White floating taper candles in glass bowls
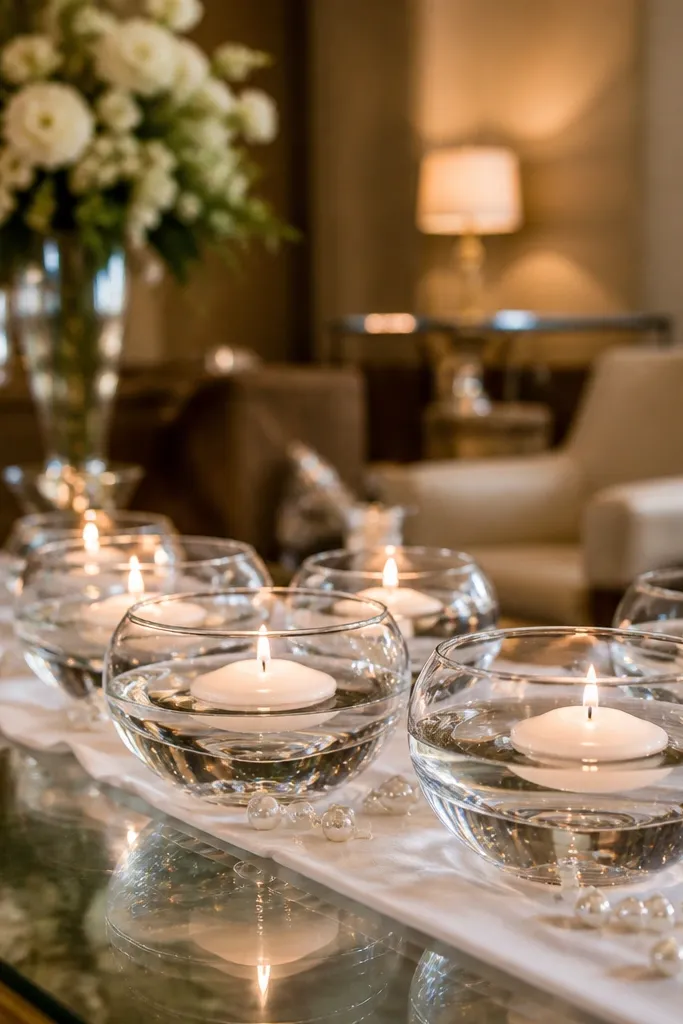
Floating candles give you a soft glow that looks elegant on camera, and they’re fast to set up when you already have the bowls. Clear glass shows reflections, while the white candle look keeps the palette clean. This is a great reception idea for centerpieces on low tables because it creates light without blocking conversation. It also works for outdoor patios under string lights. Keep the setup simple so the glow becomes the focal point.
Start with clear glass bowls or vases filled with water or pebbles, depending on your candle type. Place LED floating candles or taper-style holders designed for bowls, then add a few white petals or small pearls for texture. Finally, arrange bowls in a staggered line so the light catches different parts of the table in photos.
Quick tipIf you’re using real water, cover the table surface with a clear plastic liner to protect linens from spills.
Skip thisDon’t overcrowd the bowl with decor; it turns into visual clutter in wide shots.
14. White balloon arch strip on a single frame
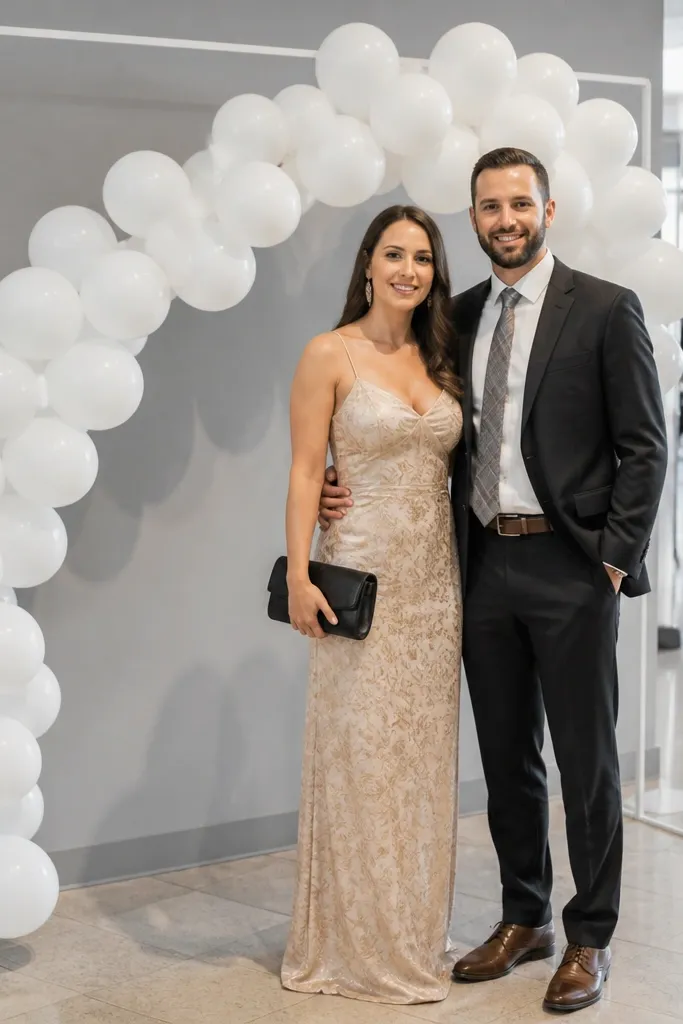
You don’t need a full balloon arch to get that big “wow” look. A white balloon arch strip on a simple frame gives you a curved backdrop that photographs well and stays manageable for quick setup. The curved shape helps group photos because it frames faces and creates a consistent background. This works for indoor venues, photo areas, and dessert stations where you want a clean event wall. Keep the color tight and let the shape do the work.
Start with a lightweight arch frame or even a bent stand made for balloons. Inflate and cluster white balloons in small groups, then attach them across the frame with balloon clips so you don’t need glue. Finally, add one ribbon streamer at the center and trim any uneven balloon tails so the curve stays smooth in photos.
Quick tipAssemble the frame and clusters near the photo area so you’re not carrying unstable balloons across the venue.
Skip thisDon’t mix in metallic colors with white if you want a pure white look.
15. White ribbon-wrapped glass bottles as mini vases
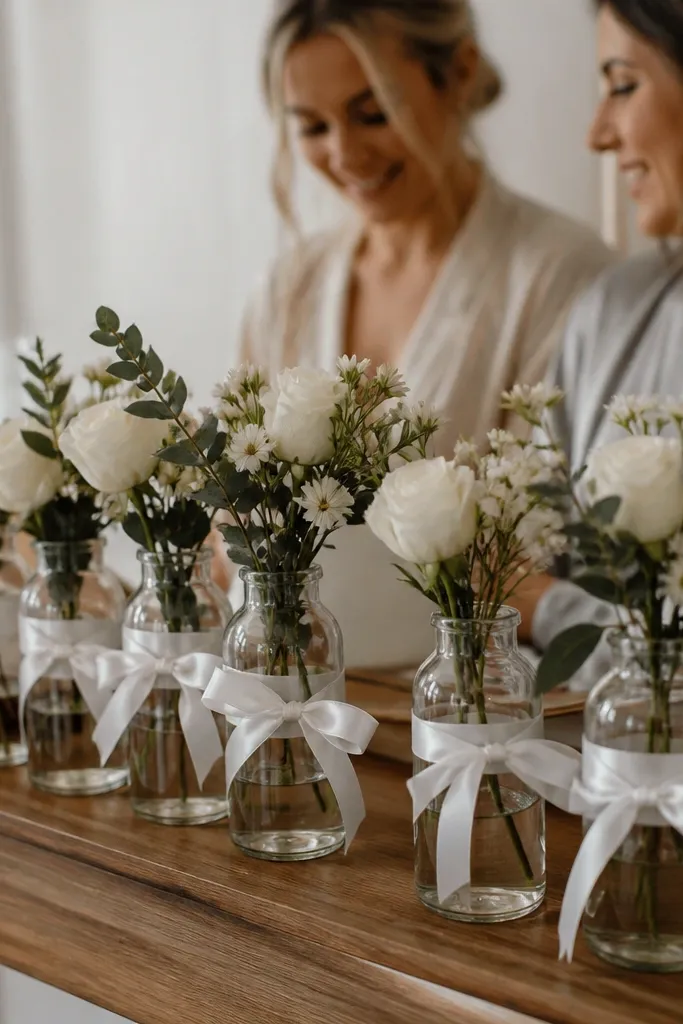
Wrapped bottles are a fast, inexpensive way to add height and texture along a table without a full bouquet. The ribbon creates a soft, matte surface that looks clean in close-ups and doesn’t overpower your flowers. This is perfect for getting-ready tables, welcome stations, and dessert tables where you need multiple small focal points. It also helps if you’re using mismatched bottle shapes because the ribbon hides it. White bottles make the whole display feel cohesive.
Start with clean glass bottles and wrap them in white satin ribbon, securing with double-sided tape or hot glue at the back seam. Add water and one or two stems per bottle so the flowers stay visible. Finally, place bottles in a cluster and rotate them so the ribbon seam lines up the same way across the group.
Quick tipUse narrow ribbon widths (1 to 2 inches) for a cleaner look; wide ribbons can look bulky fast.
Skip thisSkip ribbon fraying — trim ends cleanly so the white stays crisp.
16. White faux feather place card holders
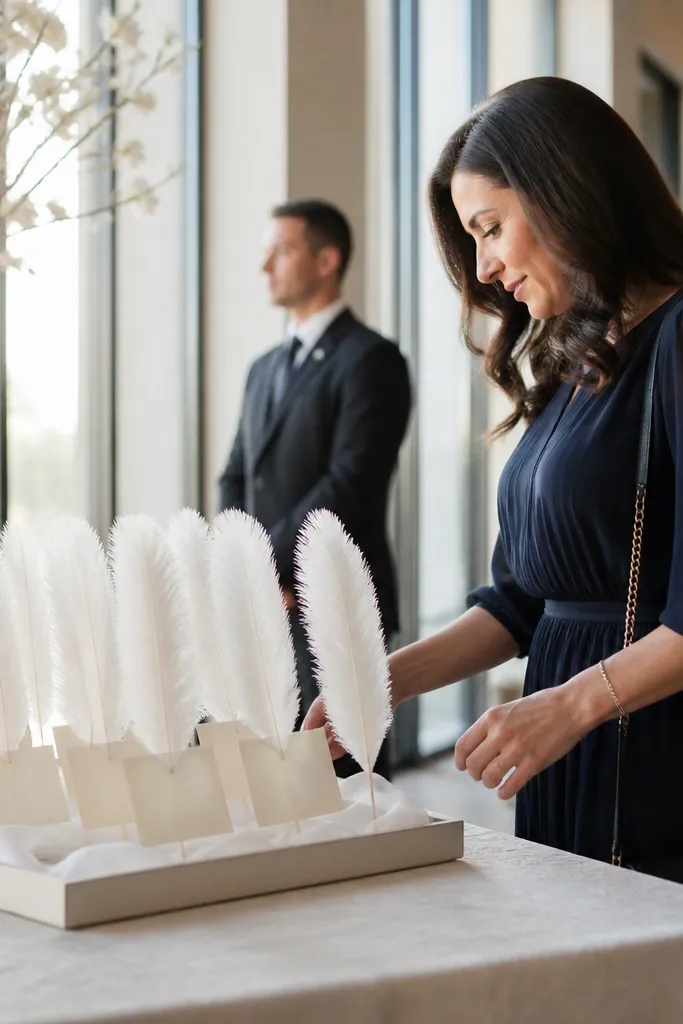
This makes place cards feel like decor instead of paperwork. A white feather holder gives a soft, airy silhouette that’s easy to photograph from the side and looks great in morning light. It suits weddings where you want a light, modern look without heavy florals. You can use it on a welcome table, escort cards, or a styled seating chart. It also keeps the table visually open, which helps if your venue is small.
Start by choosing feather holders or feather-shaped clips that already have a base. Place cards in the holder so the card edge faces outward toward the main aisle or camera. Then group holders with consistent spacing — keep the tallest feathers at the back so the cards stay readable.
Use the same card font color across the table; white holders look best with black or deep gray text.
Don’t mix feather shades like white and cream in the same row.
17. White doily underlay for cake stand
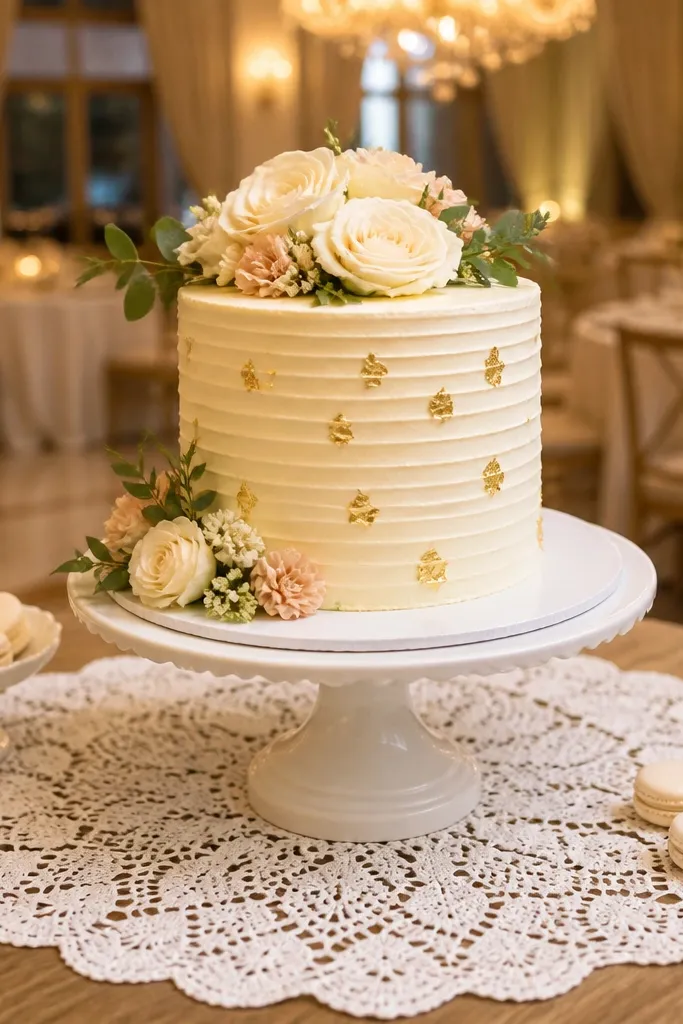
A simple white doily under your cake stand makes the base look intentional and softens the whole scene. In photos, it adds a lace-like texture without needing a full tablecloth change. This is ideal for dessert tables where you want the cake to look like the center of the design, not just a standalone item. It works across seasons because doilies read classic and airy. Pick a doily that’s large enough to show around the stand, not hidden.
Start by centering the doily on your table or on a cake stand base that can sit on top. Place the cake stand on the doily, then rotate slightly until the doily pattern frames the front. Finally, add one small white accent near the cake edge — a ribbon tie around a spoon rest or a tiny bud stem in a mini dish.
Choose a doily with a thick edge so it doesn’t collapse under the stand weight.
Don’t use a doily that’s too small — the pattern disappears and you lose the effect.
18. White ribbon-wrapped bouquet cups for centerpieces
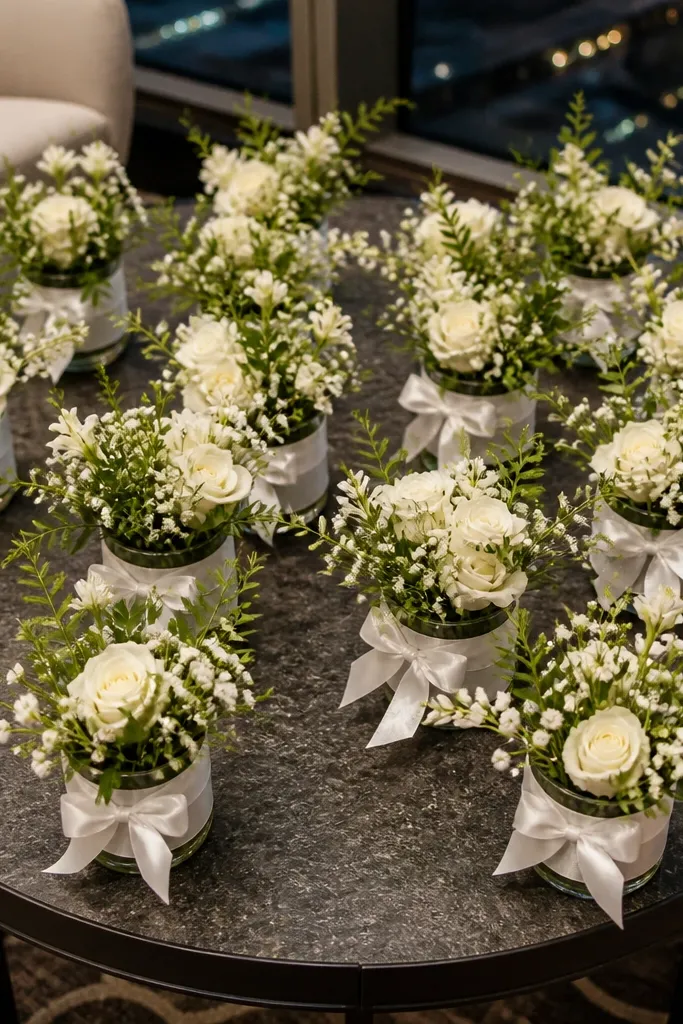
These ribbon-wrapped cups turn random containers into matching decor fast. The white ribbon gives you a uniform look across multiple cups, which is key when you’re trying to build a cohesive table in minutes. This idea works for low centerpieces because the cups are compact and keep the table open for conversation. It’s also great for receptions where you want lots of small moments rather than one big arrangement. White-on-white looks clean and looks intentional in group shots.
Start with clear cups or small jars and wrap each one with a strip of white ribbon, securing the ends at the back. Add water and one stem per cup, then place cups in clusters of three or five. Finally, press the ribbon seam to face the same direction across the table so the look reads consistent.
Quick tipUse ribbon with a slight stretch or a grip texture so it stays tight without slipping.
Skip thisDon’t leave the cups uncovered at the top — the rim shows immediately in photos.
19. White fabric napkin waterfall at the head table
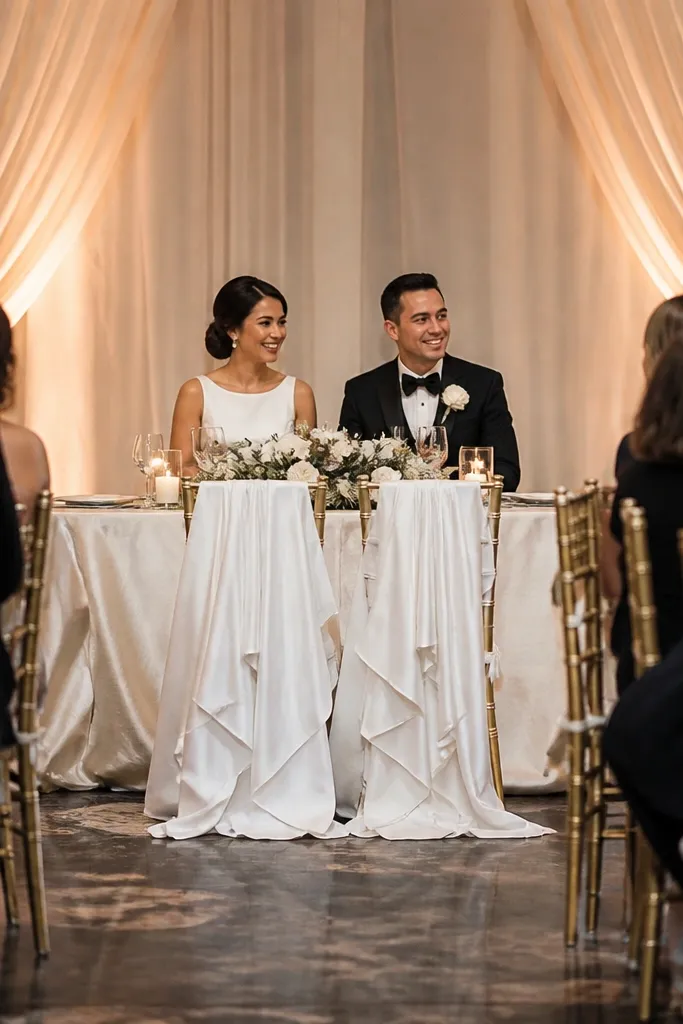
A fabric waterfall at the head table gives you a dramatic, photo-ready look without building a full backdrop. The drape creates motion and height, and it frames the couple’s seating area so everything reads as a unit. This is best when you have a standard banquet table and want quick impact for a sweetheart setup. White fabric also hides minor chair and table gaps. Choose a fabric that hangs well so it looks smooth, not tangled.
Start by measuring the front length of the head table so the drape falls 10-14 inches. Lay the fabric panels across the top edge, then secure with tape or clips underneath the table edge. Finally, adjust the folds so they fall in even waves, not one lumpy pile.
Use lightweight white chiffon if you want a softer look; use thicker voile if your venue has strong airflow.
Avoid slippery fabric that slides — it ruins the waterfall shape during setup.
20. White flowerless backdrop with sheer organza panels
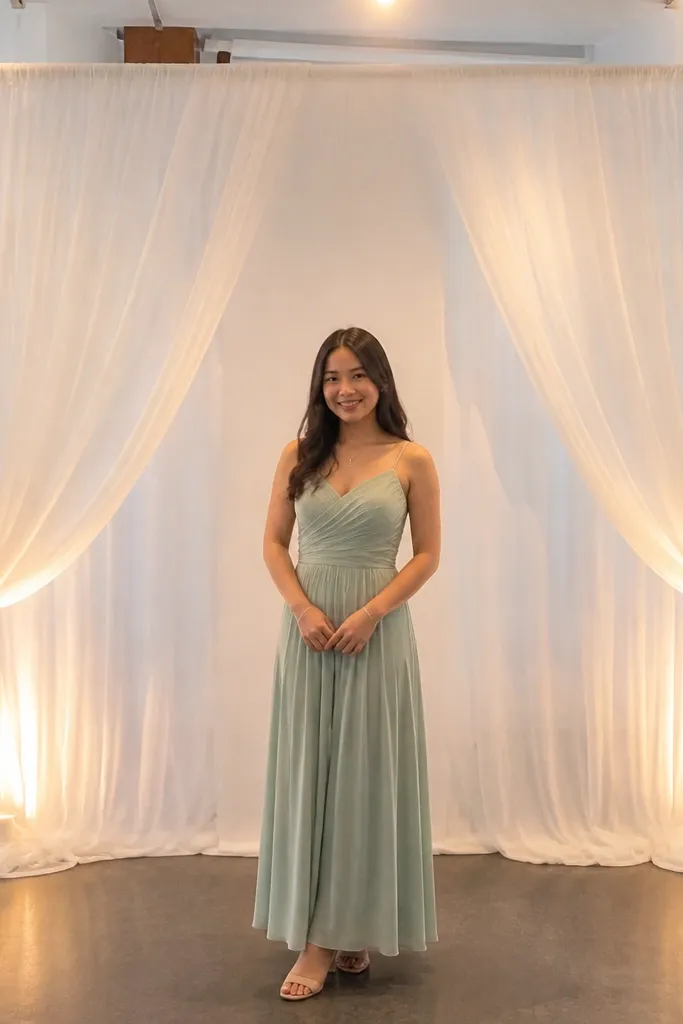
You can get a gorgeous white backdrop without using flowers at all. Sheer organza panels glow in backlight and create a soft, flattering background that makes skin tones look better in photos. This is ideal when you want quick and easy wedding decor in 5 minutes and you’re avoiding the mess of floral installs. It also works for outdoor ceremonies because fabric moves gently with air. Keep it simple and let the lighting do the magic.
Start by hanging two to four organza panels from a backdrop stand or tension rod using clips. Spread the panels so they cover the photo frame evenly, then secure the edges to stop flutter. Finally, place a white uplight or string lights behind the panels for a glow effect that reads on camera.
Quick tipUse clip rings or binder clips — they’re faster than tying knots in sheer fabric.
Skip thisDon’t use too-thin fabric without backlighting; it can look see-through and patchy.
21. White mini lanterns on a table with faux greenery
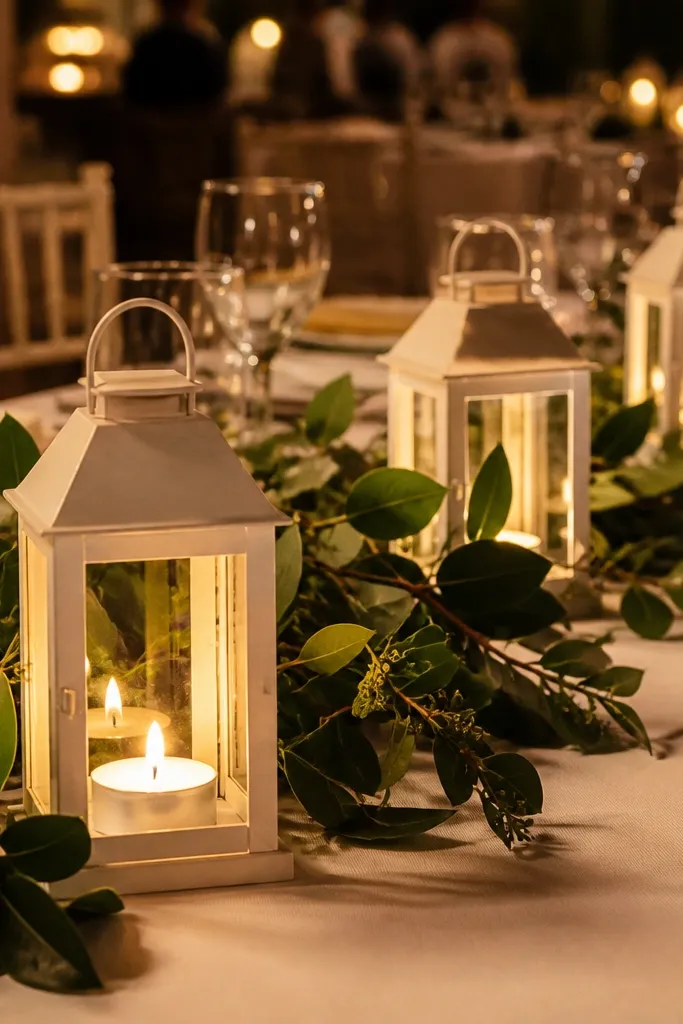
Mini lanterns add a styled, cozy look that still feels clean when you keep everything white. The lantern shape gives you a clear focal point, and the glass panels add sparkle when lights are on. Use this when you’re doing a smaller centerpiece and want more depth than a flat runner. It suits evening receptions and covered outdoor spaces. Add minimal greenery if you want texture, but keep it subtle so the palette stays white-forward.
Start by grouping three lanterns on a tray or runner, spacing so each one is visible. Place a small amount of white faux greenery or tiny white buds inside or next to the lanterns. Finally, add one warm LED candle inside each lantern and check the glow from the main guest side.
Quick tipChoose lanterns with frosted glass — they hide battery and wiring details.
Skip thisAvoid mixing lots of greenery colors; it competes with the white look.
22. White paper rosette garland on a dessert table edge
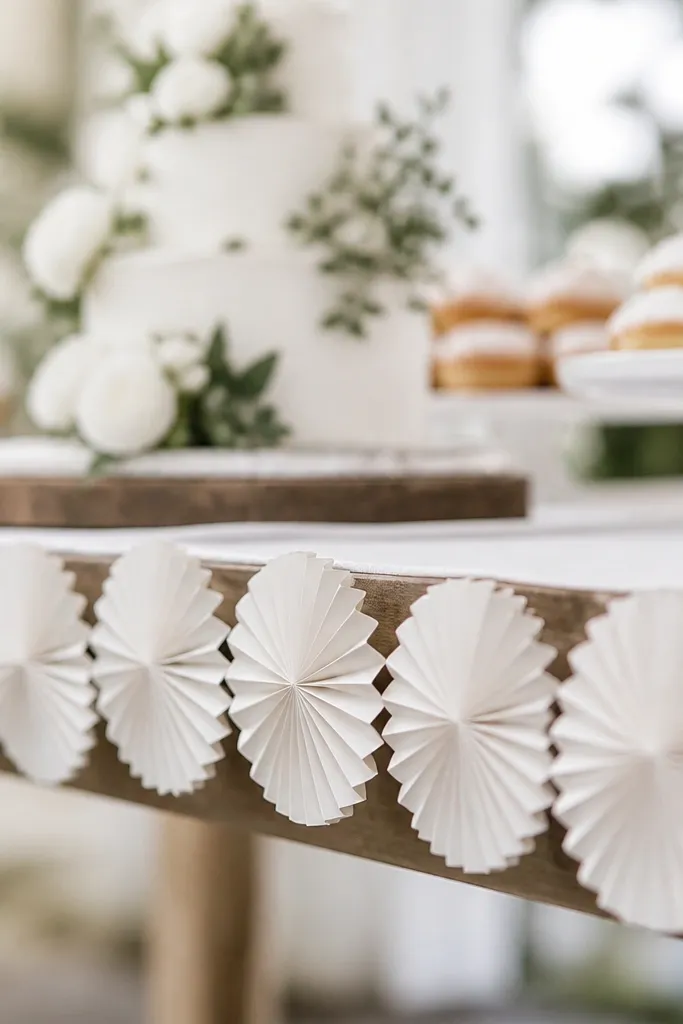
Paper rosettes are playful and photogenic, and they’re fast to hang when you already have a string. They create a “designed” border around your dessert table, which matters because dessert tables are always photographed from the side. Keep everything white so the rosettes look like a crisp pattern, not a cluttered craft. This works for spring and summer weddings, but it’s also fine in fall because the palette stays clean. It’s a good choice when you don’t want to build centerpieces at all.
Start by setting your dessert table items first so you know the garland height. Then hang the rosette garland along the front edge with tape or small hooks, keeping spacing consistent. Finally, press each rosette flat so it doesn’t twist — twisted rosettes look messy in close-ups.
Quick tipUse a clear measuring tape once and mark the attachment points so you don’t have to guess spacing.
Skip thisDon’t hang the garland too low — it blocks cake stands and ruins the shot.
23. White ribbon photo frame corners for a step-and-repeat
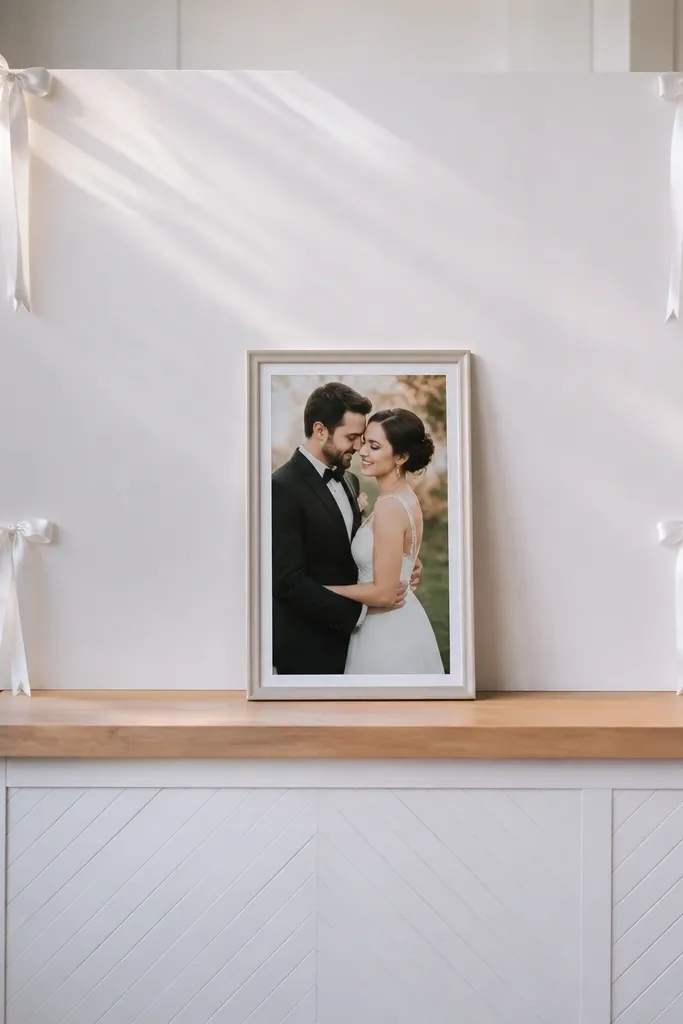
This gives you a clean photo frame look without buying a whole step-and-repeat system. Ribbon corners pull the eye toward the center and create a defined border for couple photos. It’s fast because you only need four placements, and it works even if your venue has a plain wall. White ribbon also keeps the vibe airy and consistent with the rest of your decor. Use it when you want your backdrop to look intentional from multiple angles.
Start with a plain white backdrop panel or a neutral wall section covered with white fabric. Attach ribbon strips at all four corners, making a square or rectangle frame outline with consistent lengths. Finally, adjust the angle so the frame sits at the same height people’s faces will be in photos.
Quick tipTake one test photo on your phone before you commit — it tells you if the frame height feels right.
Skip thisDon’t use different ribbon widths on the same frame — the border looks uneven.
24. White floral cloud bud cluster in a single vase
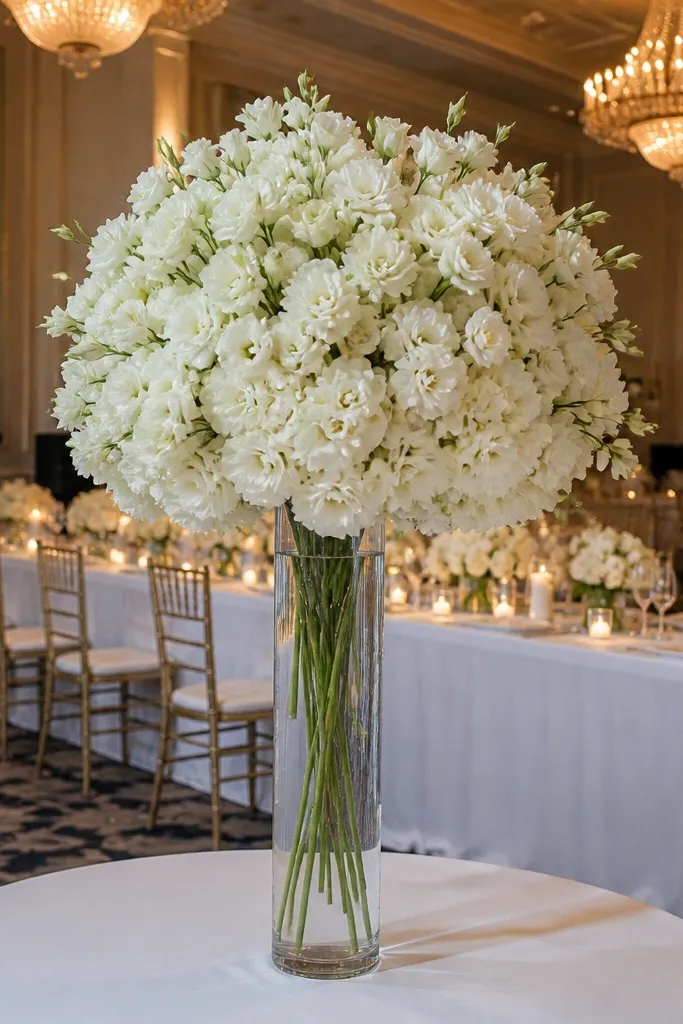
A single tall “cloud” cluster looks expensive because it creates one strong shape instead of many small pieces. In photos, it reads clearly as a background element behind head tables or side tables. Choose white buds with lots of small blooms or airy textures, like baby’s breath, spray chrysanthemums, or white lisianthus. This is ideal when you want the look of a full arrangement but you need speed and control. Keep the container white so the vase doesn’t steal attention.
Start with a tall white vase, then add water and a floral frog or a few crossing stems for structure. Build the cluster by placing stems from the outside inward so the shape rounds evenly. Finally, trim so the blooms sit 2-4 inches below the vase rim for a polished silhouette.
Quick tipIf your stems are too long, pre-trim them into a consistent height before you start arranging.
Skip thisSkip random stem lengths — the top will look uneven in photos.
25. White fabric-wrapped aisle vases on a folding table
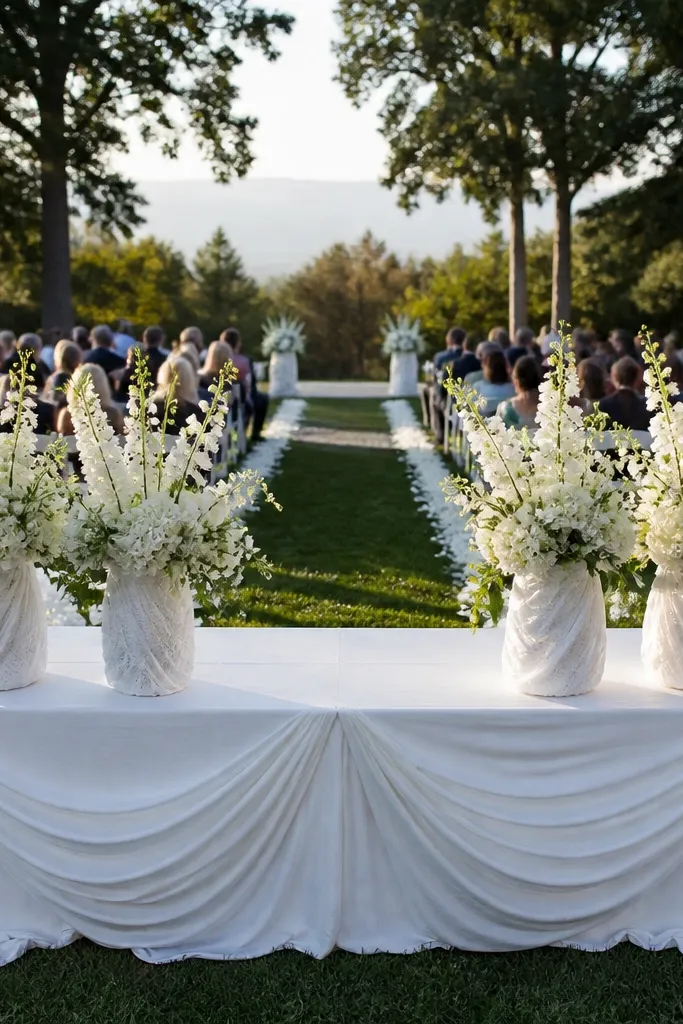
A folding table with fabric and two to four vases gives you a ceremony entrance moment that looks like a designed station. It’s photogenic because it creates a horizontal base plus vertical blooms, which balances the frame. This works when you don’t have a full aisle arch but still want a clean white setup for the couple’s walk-in. Keep flowers simple with single stems so you can set up quickly. White fabric hides the table surface and makes everything look cohesive.
Start by draping the folding table with a white cloth or fitted cover so it hangs cleanly. Place two larger vases in the center and smaller bud vases on the sides, all filled and ready. Then wrap the vase necks with white ribbon or add a white fabric strip so every container looks matching, not mixed.
Quick tipUse binder clips to secure fabric under the table edge — faster than tape and easy to remove.
Skip thisDon’t leave the table corners bare — camera angles catch that instantly.



