
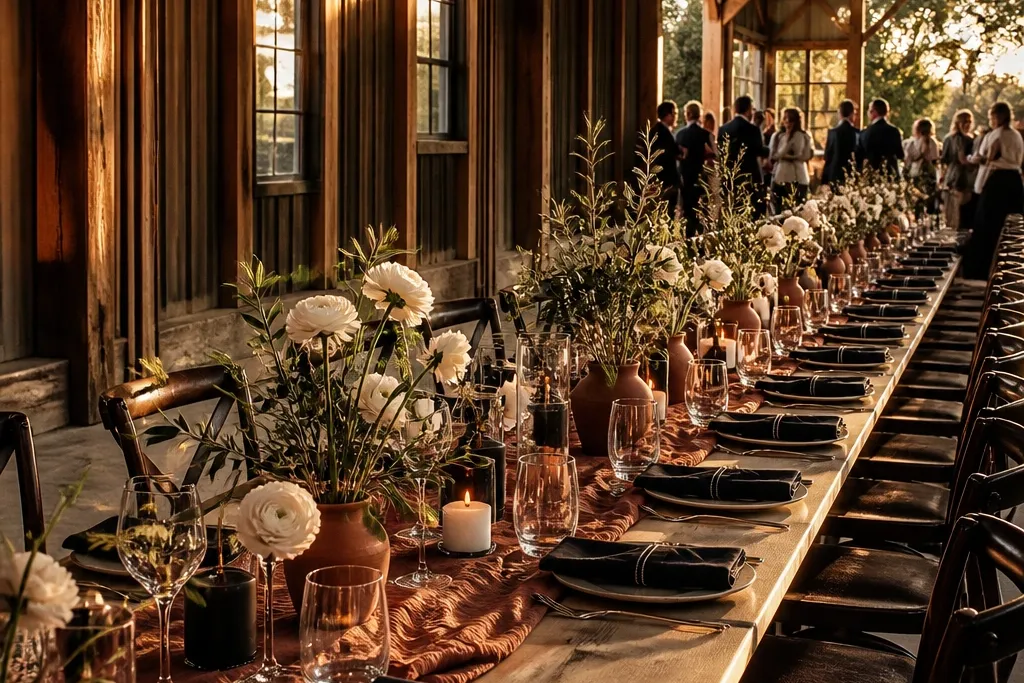
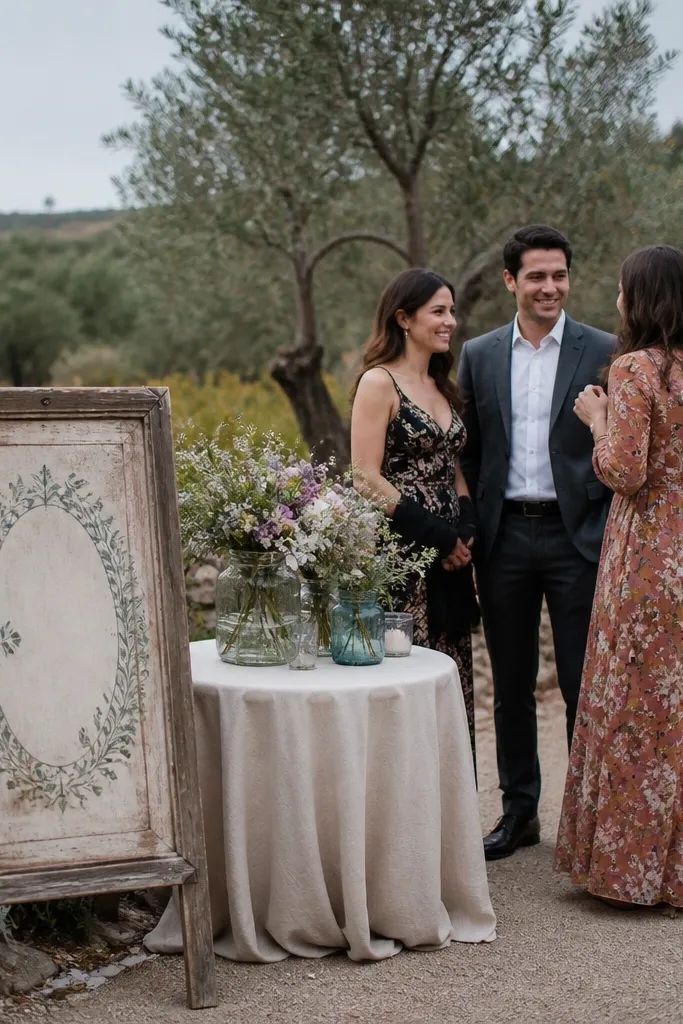
1. Terracotta and Oat Runner with Low Citrus Vases
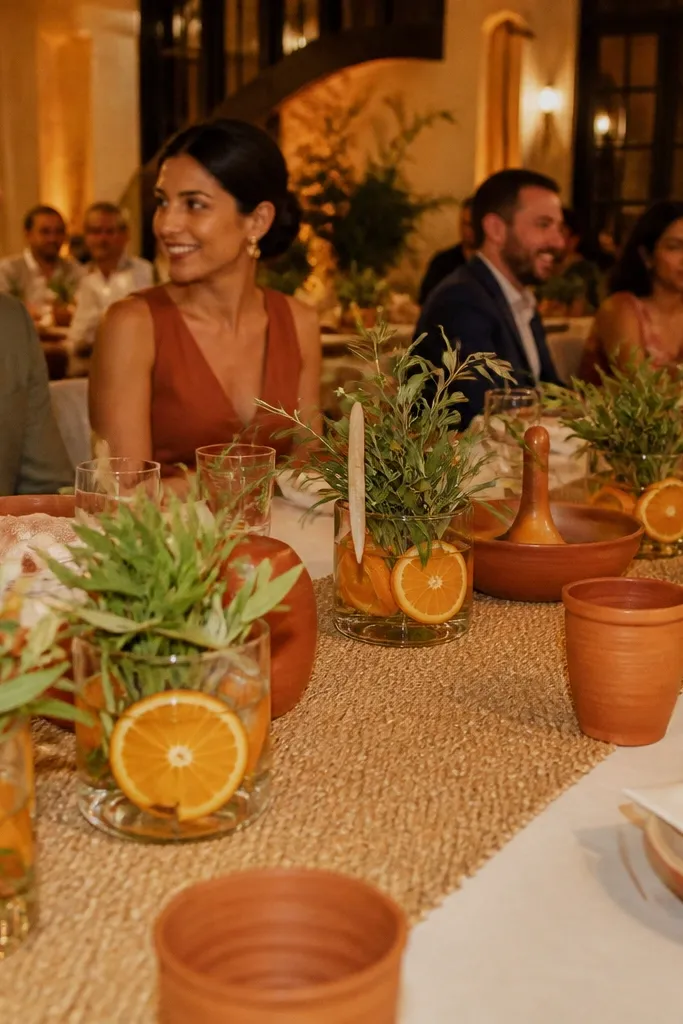
This is the kind of hidden gems wedding decor idea that looks styled without shouting. The oat runner gives you soft texture, while the terracotta pieces add warm contrast that reads beautifully under warm venue lighting. Instead of tall centerpieces, use low vases so guests can see each other — that also makes wide table photos look clean. Add citrus branches or sliced-lemon stems for a bright pop that still feels seasonal and organic. Best for spring and late-summer weddings where you want fresh color without full-on bright florals.
Start with an oat or cream runner that’s at least 18-24 inches wide and lengthwise centered on the table. Then choose 3-5 low ceramic vases in terracotta or matte clay and fill them with citrus branches or a small bundle of greenery. Finally, scatter a few terracotta tea-light holders around the runner edges so the table has “sparkle points” in photos. If you’re traveling, pack the runners flat and keep vases in bubble wrap with cardboard dividers; you can buy or rent the clay pieces locally to avoid breakage. Plan for 45-60 minutes per table for arranging and minor adjustments.
Quick tipBring a small lint roller. Runners collect fuzz fast and photos catch it.
Skip thisDon’t use tall centerpieces on guest tables if you want strong conversation-friendly photos.
2. Vintage Brass Candelabra Cluster on a Mirror Tray
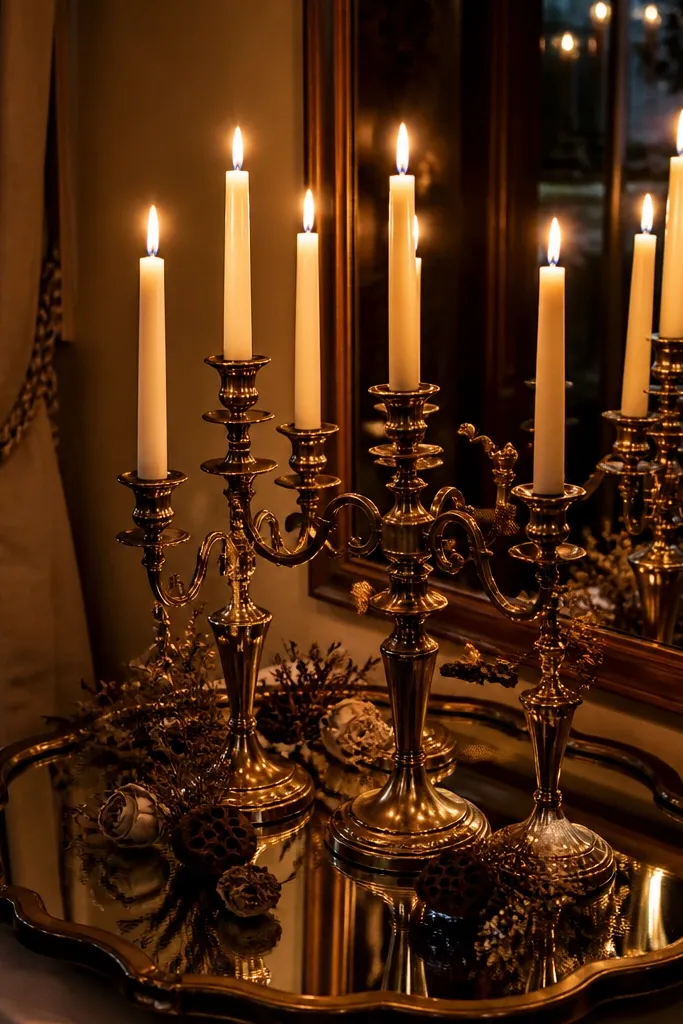
This setup makes candles look intentional instead of random. A mirror tray doubles the light from multiple tapers, so the scene looks fuller even when the room is dim. Brass adds that warm “old money” glow without needing expensive crystal everywhere. Put dried florals or a few seed pods around the base for texture that stays good in close-ups. It’s best for fall, winter, and evening receptions where candlelight is part of the vibe.
Start by finding one mirror tray big enough to hold the cluster — aim for 18-24 inches wide for a standard dessert or bar surface. Then place 2-3 brass candelabras (vary heights by 2-4 inches) and add tapers in cream or pale gold. Finally, tuck in a thin ring of dried florals around the tray edge so it looks finished from all angles. When you travel, choose tapers and dried stems over real candles that require heavy wax logistics. Allocate 30-40 minutes for placement and spacing; the mirror will show unevenness, so measure the spacing.
Quick tipUse battery candles for rehearsals and only swap to real tapers at the final setup window.
Skip thisSkip cheap, scratched mirrors — they create messy reflections that ruin the aesthetic.
3. Greenhouse Window Frame Backdrop with Hanging Glass Bulbs
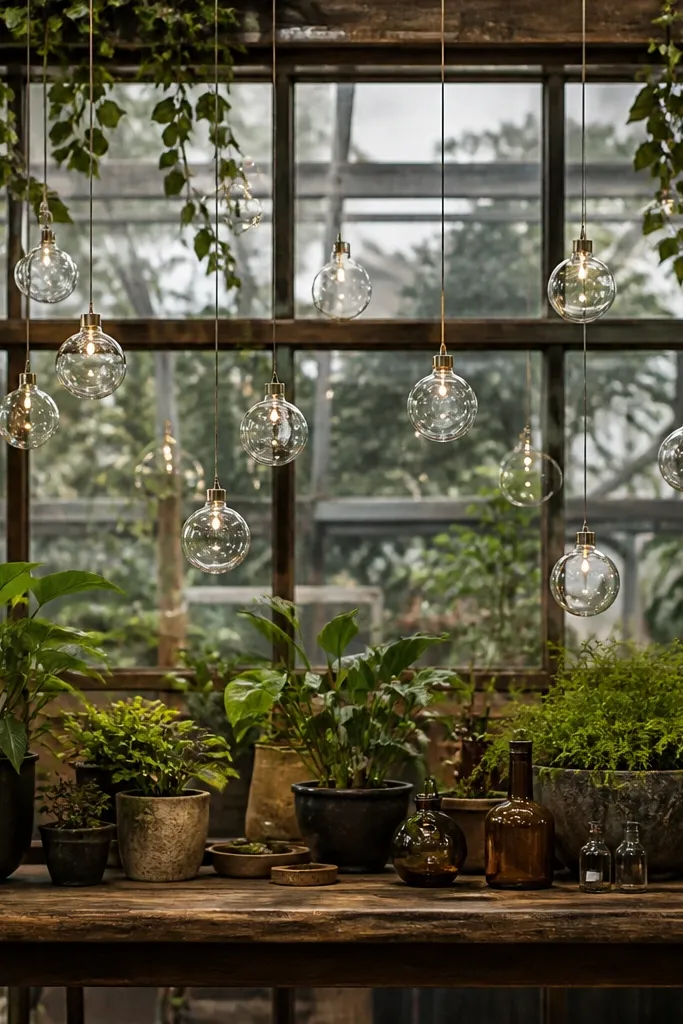
A window frame backdrop is a hidden gem because it gives “depth” without needing a huge floral installation. The frame creates natural lines for photos, and hanging glass bulbs catch highlights like little photo sparkle. Add trailing greenery from the top corners so it feels alive but still controlled. This looks incredible behind the couple’s head table or for a ceremony photo wall. It suits outdoor courtyards, industrial venues, and any place where you want a romantic frame without clutter.
Start by renting or sourcing an old window frame (or a faux one) with at least a 4-foot width so it fills the shot. Then attach 6-10 hanging glass bulbs using thin clear line or small hooks — space them evenly across the top half. Finally, run a few long greenery strands down the sides so the bulbs look like they’re growing from the frame. Travel tip: transport the frame flat with corner protection, and pack bulbs in separate boxes with individual wrap. Set aside 60-90 minutes on site for leveling, hanging, and adjusting greenery length.
Test the lighting angle before the ceremony. Glass reads best when there’s a light source near camera height.
Don’t hang bulbs too low. If they sit under 5 feet, they block faces in photos.
4. Black Linen Napkins with White Stitching and Clay-Colored Place Cards
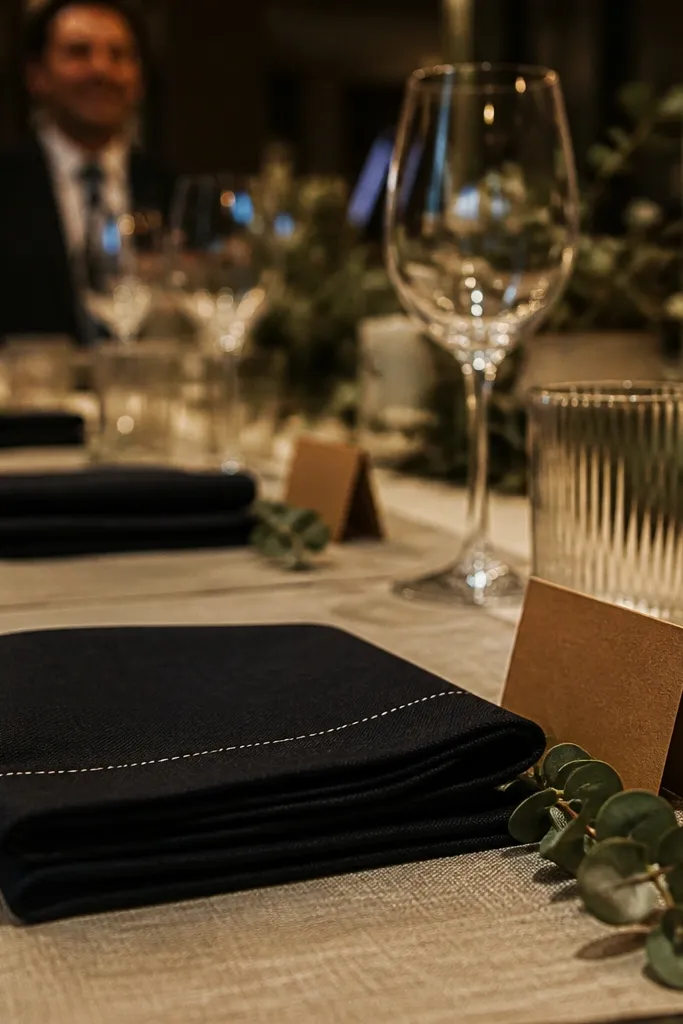
This is a clean, modern hidden gems wedding decor idea that looks sharp on camera. Black linen provides contrast, while white stitching adds a subtle graphic detail that stands out in close-ups. Clay-colored place cards keep the palette warm and stop the table from feeling too harsh. Add a small sprig of eucalyptus or dried olive on each card for texture that looks deliberate. It’s ideal for black-tie weddings, city venues, and winter receptions where you want mood and contrast.
Start by choosing black linen napkins with visible stitching, and keep folds consistent across the table. Then use place cards in terracotta or clay tones — cream envelopes are fine, but the card color needs to be warm. Finally, add one small sprig or dried leaf per setting and attach it with a tiny dot of hot glue or a tape-backed clip. If you’re traveling, pack napkins flat in protective sleeves and keep place cards in a rigid box. Budget 20-30 minutes per 10 guests for setting cards and attaching sprigs.
Use a matte black pen for names. Gloss ink reflects light and looks messy in photos.
Avoid mixing black linens with bright neon paper. It makes the table look accidental.
5. Ceramic Bud Vases in a Single Colorway, Grouped by Height
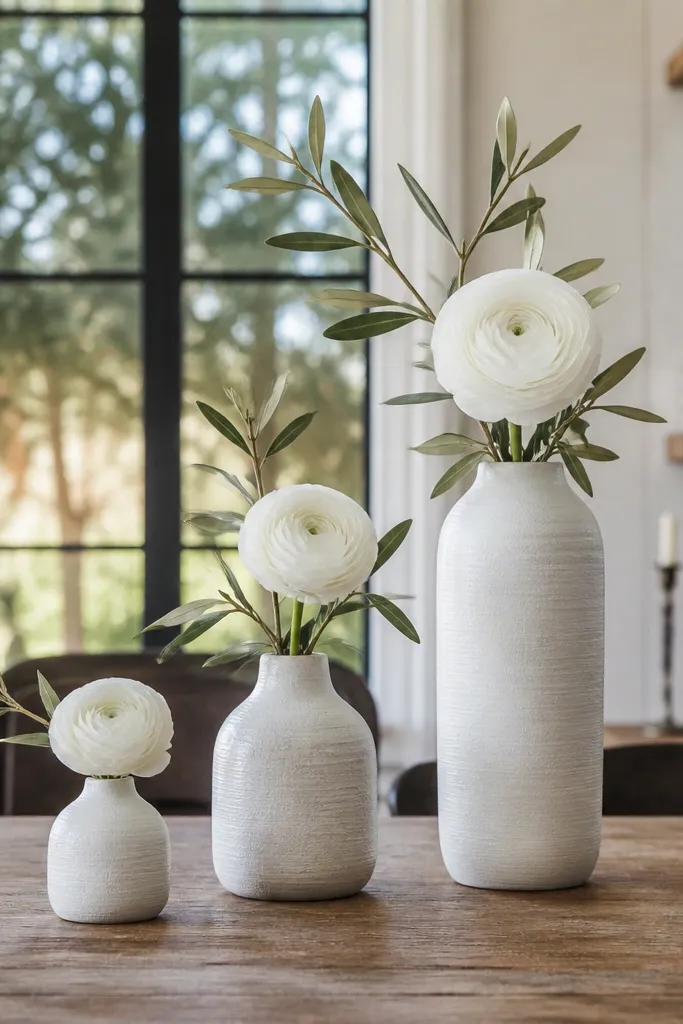
Bud vases are a hidden gem because they let you use fewer stems but still fill the frame. The trick is to keep the ceramic colorway consistent and vary height so the arrangement looks intentional, not like a scattered set. Use one flower type plus foliage — for example, white ranunculus with olive branches, or deep berry blooms with eucalyptus. This gives you a polished look across the room because the vessels match even if the flower mix changes. It works for beach, garden, and modern venues where you want softness without a huge centerpiece budget.
Start with 12-20 bud vases in one ceramic color (cream, smoke gray, or muted sage). Then group them in clusters of 3-5 on the table, arranging stems by height differences of 2-3 inches. Finally, keep the stems slightly irregular but the vase colors uniform; that balance reads natural in photos. For travel, buy or rent the vases locally if possible and only bring your stems and tape. Plan 40-60 minutes for one long table, depending on guest count and cluster size.
Cut stems 1 inch shorter than you think. Bud vases look taller on camera and you don’t want blooms bumping glasses.
Don’t mix too many vase colors. It kills the “aesthetic” look fast.
6. Linen-Covered Bar Cart with Dried Wheat and Blackberries
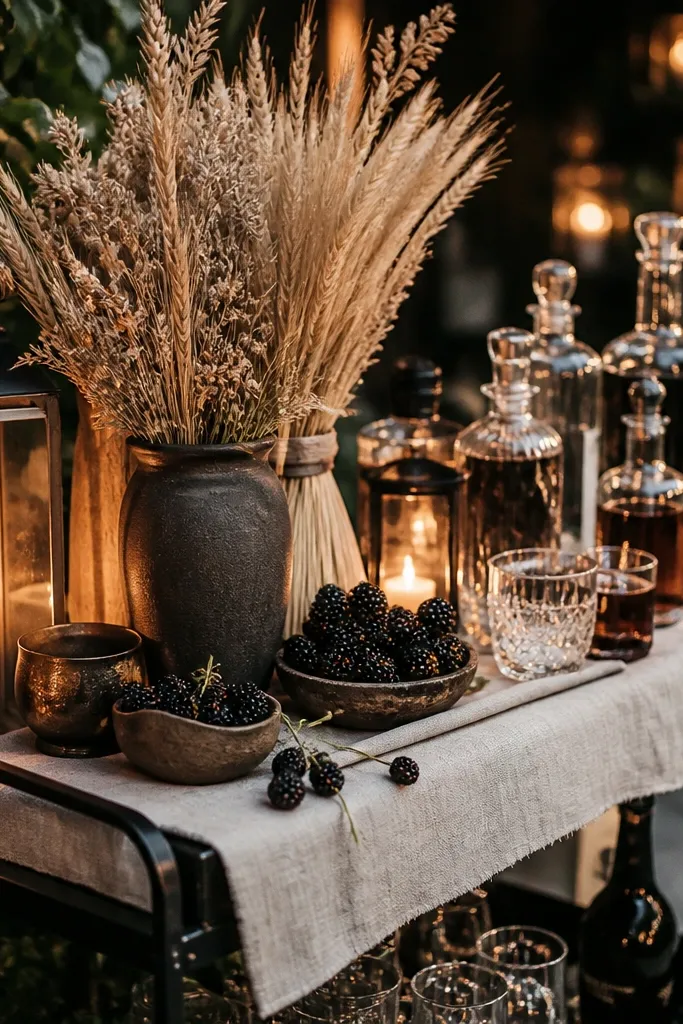
A bar cart is a photo magnet, and this decor idea makes it look styled instead of functional. Linen softens the hard metal look, and dried wheat adds height and movement. Add blackberries or blackberry stems in small bowls for a deep color accent that shows well in evening lighting. You get a clear “story” in the frame: warm harvest textures plus dark fruit. This works best for fall weddings, rustic venues, and any reception with an intimate bar area.
Start by covering the cart shelves with one piece of linen per level, pulled taut with clean corners. Then place dried wheat bundles upright in two or three spots so the cart has vertical rhythm. Finally, scatter small bowls of blackberries or arrange blackberry stems in one central ceramic vessel. When traveling, bring the linen in a garment bag and keep fruit in a cooler until the final setup window. Give yourself 45 minutes to dress the cart and adjust heights so it reads balanced from the guest angle.
Use a small handheld steamer on linen seams. Wrinkles show up instantly under bar lighting.
Skip plastic-looking fruit. It reads fake in every photo.
7. Floating Candle Line on the Water Feature Edge
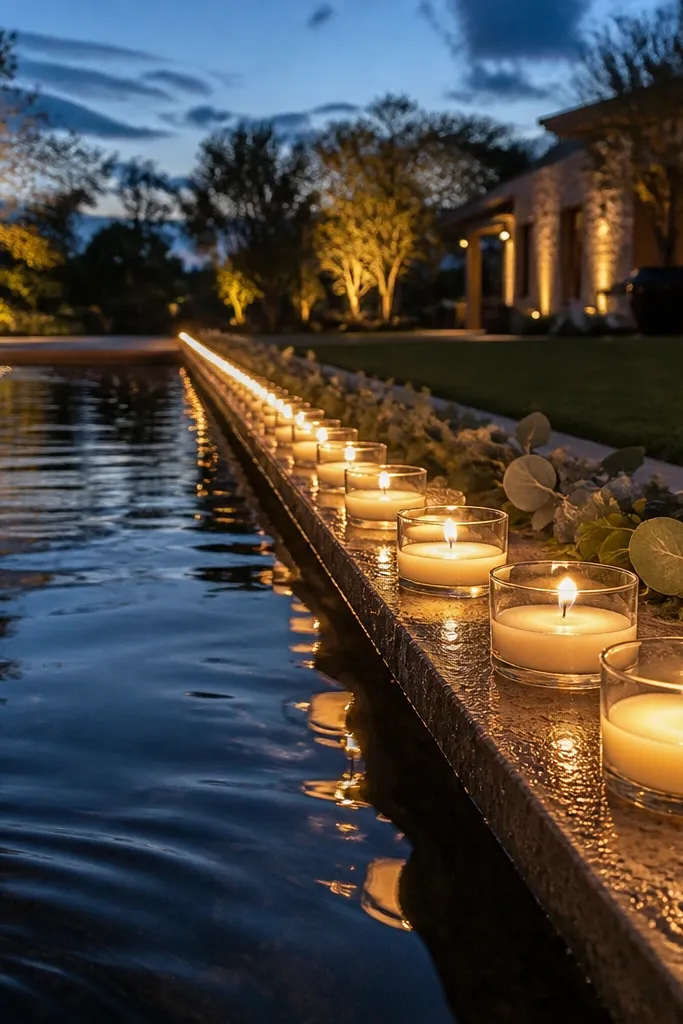
If your venue has a fountain, pond edge, or shallow reflecting pool, this hidden gems wedding decor idea turns it into a cinematic moment. A line of floating candles creates a clean horizon of light without needing to build a full installation. It looks expensive because it’s simple, symmetrical, and moves with the air. Pair it with a minimal floral landing — a few petals or one low garland — so the water stays the star. Perfect for evening ceremonies, waterfront venues, and outdoor receptions with a water feature.
Start by checking the water depth and surface stability. Use LED or float-safe candles that won’t tip, and aim for a line that runs 6-10 feet in length depending on the feature size. Then place the candles at dusk, not earlier, so they don’t look cluttered in daylight. Finally, add a single low accent at the ends — like a small ceramic planter with greenery — to frame the line. For travel, bring extra batteries and test the candles in a container before you go. Plan 20-30 minutes of placement and a quick cleanup routine for wax-free options.
Quick tipLight one end first and step back for spacing. Adjust before it’s fully lit.
Skip thisDon’t overcrowd the water. Too many candles look messy instead of intentional.
8. Paper Lanterns in One Shade, Tied to a Grid Backdrop
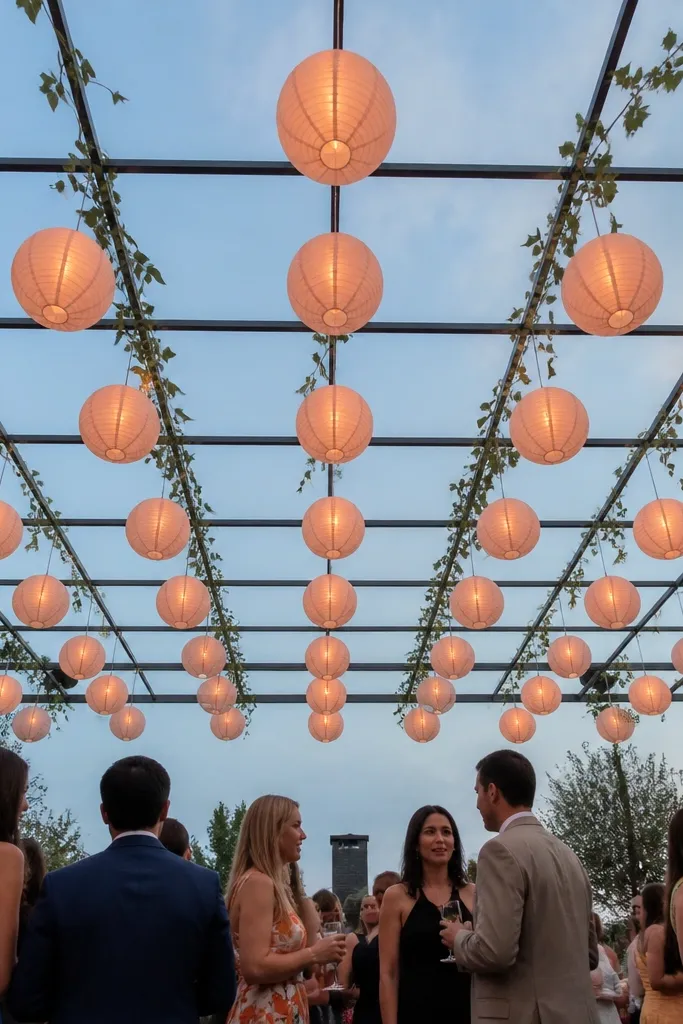
This is a hidden gem because it looks like an installation but stays budget-friendly. Keep lanterns in one shade — like warm blush, smoke gray, or deep plum — so the whole backdrop reads cohesive. A grid of lanterns gives you clean geometry, which translates into crisp photos even when guests move. Add a minimal greenery garland only at the top edge so the lanterns remain the focus. Best for indoor receptions, tent weddings, and any space that needs overhead wow.
Start by picking a grid size that matches your backdrop width, such as a 6x4 lantern grid for a 8-10 foot wall span. Then hang lanterns in rows with equal spacing so the pattern stays even in photos. Finally, tie a thin greenery strip across the top only, and keep the rest of the setup minimal. Travel tip: lanterns fold flat and stack easily, so they’re great to bring from home. Budget 60-120 minutes for hanging and spacing, depending on how many lanterns you use and ceiling height.
Quick tipUse the same string length for every lantern. Uneven heights look sloppy in wide shots.
Skip thisAvoid mixing lantern colors. Even pretty mixes can look chaotic on camera.
9. Monochrome Floral Table Runners with One Unexpected Texture
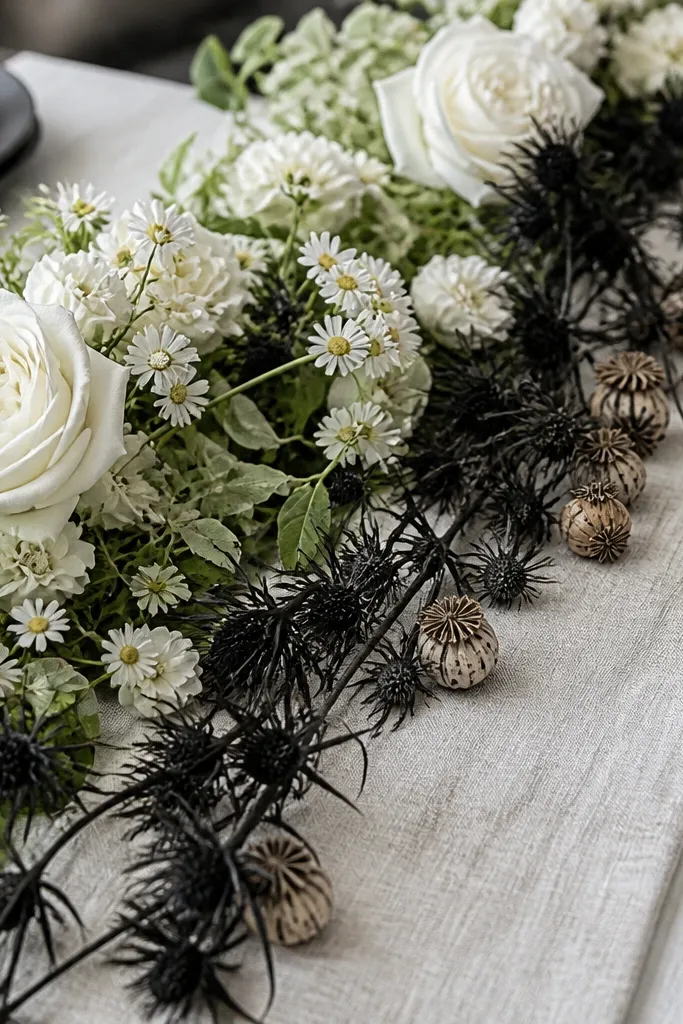
If you want hidden gems wedding decor ideas that look high-end, this is the formula: one monochrome floral palette plus one surprising texture. For example, use white blooms and pale greenery, then add a single strand of black thistle or a row of dried seed pods. That one “wrong” texture makes the arrangement feel designed and not generic. Keep the runner length consistent and let the flowers spill slightly off one edge for softness. This works for ceremony sweetheart tables, head tables, and dessert stations where close-ups matter.
Start with a monochrome base — choose 2-3 shades max like ivory, cream, and pale green. Then build a runner using a strip of floral foam or a runner tray with chicken wire, depending on your venue rules. Finally, add one unexpected texture in a narrow band across the center or near one end. Travel tip: bring pre-cut dried elements in a box and assemble flowers on-site to keep them fresh. Set aside 90 minutes for a long runner and take photos from the seating angle to check balance.
Quick tipShoot a quick phone test from 8-10 feet. If it looks flat, you need more texture contrast, not more flowers.
Skip thisDon’t add three unexpected textures. One contrast element is the sweet spot.
10. Tea Set Escort Cards with Tiny Bouquets in Teacups
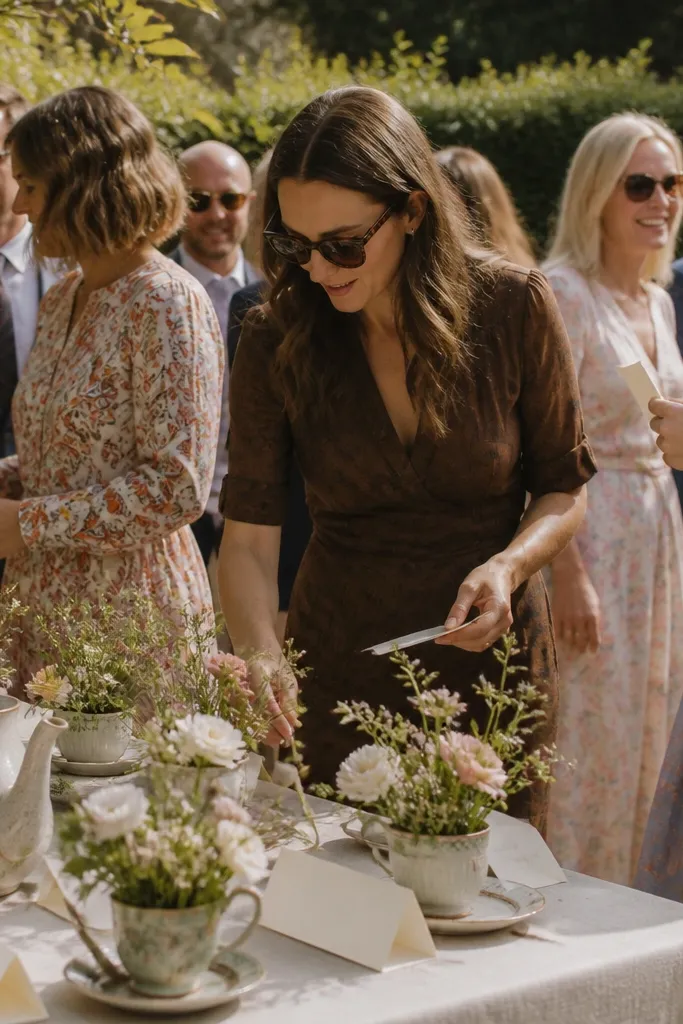
Escort cards are usually overlooked, but they’re a hidden gems wedding decor idea because they’re photographed while guests arrive. A mismatched vintage tea set looks charming, and teacups let you tuck tiny bouquets in a way that feels delicate and intentional. Write names on small cream cards and place them at the cup base or on a tiny saucer. The tiny floral scale keeps the table from looking heavy, and the tea set silhouette adds variety. This suits garden weddings, brunchy receptions, and any venue where guests mingle before dinner.
Start by sourcing a tea set mix with at least 20 cups total. Then place each cup on a matching saucer and add a tiny bouquet with one main bloom and one foliage type. Finally, position the name card so it’s readable from 3-4 feet away — avoid placing it inside the cup where it blocks the view. Travel tip: pack cups in socks or foam dividers and keep them in a rigid tote. Allow 2-3 hours for labeling and arranging so you’re not doing it under arrival pressure.
Use a consistent font size and leave enough margin. Small cards look illegible in photos with crowds.
Skip glass teacups if you’re worried about breakage. It’s a fast way to ruin the day.
11. Iced-Glass Votives in a Row with Real Ice Look
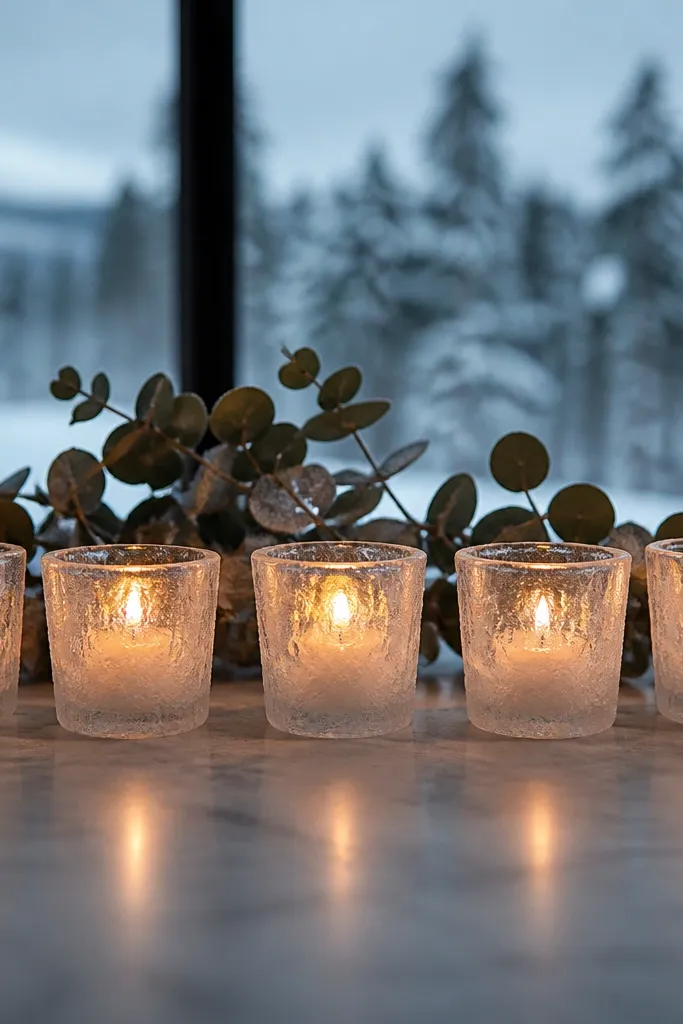
Frosted glass votives look like winter ice in photos, even when the wedding isn’t in snow season. The key is to use a consistent container shape and put them in a straight row so the light reads as a line. Choose pale candles in cream or light gray holders so the glow looks cool-toned. Add one thin garland of silver eucalyptus or dusty greenery along the row edge if you need a softer border. This works best for winter, city venues, and receptions with cool lighting.
Start by setting out votives on a tray first so you can check spacing and height. Then use a consistent candle height across the row — 2.5-3.5 inches is a nice range for tabletop photos. Finally, add a narrow border of cool-toned greenery or metallic ribbon at the ends only. Travel tip: pack votives with thick bubble wrap and keep them upright; frosted glass scratches easily. Plan 30-45 minutes to place the row and adjust for straightness.
Quick tipIf you can, wipe each votive with a microfiber cloth. Smudges show like fingerprints under candlelight.
Skip thisDon’t mix candle colors. Warm wax tones can clash with the cool glass look.
12. Dried Palm Fan Centerpieces for Tropical Texture
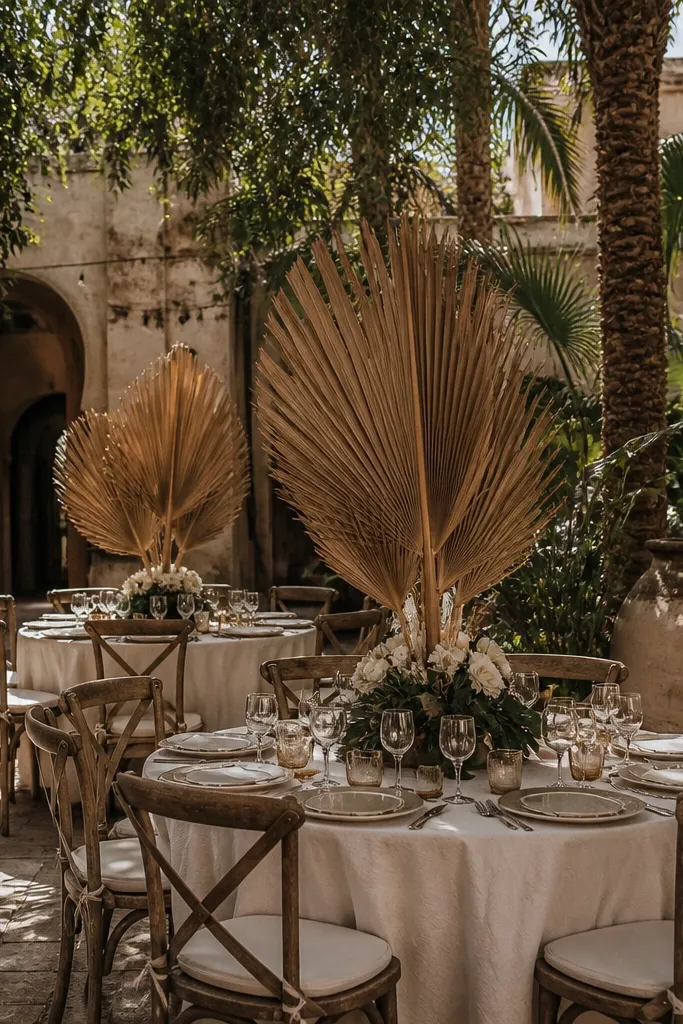
This is a hidden gems wedding decor idea for tropical and destination weddings that still photographs modern. Dried palm fans create a dramatic silhouette and texture that reads from the back of the room. Keep flowers minimal — a few white blooms or a small cluster of deep green foliage — so the fans stay the hero. This also helps with heat and humidity because dried elements hold up better than fragile fresh stems. It’s a great fit for beach patios, courtyard receptions, and any warm-weather venue where you want effortless style.
Start by securing dried palm fans in a consistent size range, ideally 18-24 inches wide. Then place 3-4 fans per table in a staggered pattern so they fan outward rather than standing straight. Finally, tuck a small cluster of flowers at the base or between two fans so the color reads without taking over. Travel tip: fans pack flat if you choose the right bundles; still, protect edges with cardboard. Budget 60-75 minutes per table cluster to get the fan angles right.
Quick tipAngle the fans slightly toward the camera side. It makes them look fuller in photos.
Skip thisAvoid adding lots of small loose petals everywhere. It looks messy fast in wind.
13. Hanging Macrame Plant Holders with Airy Greenery
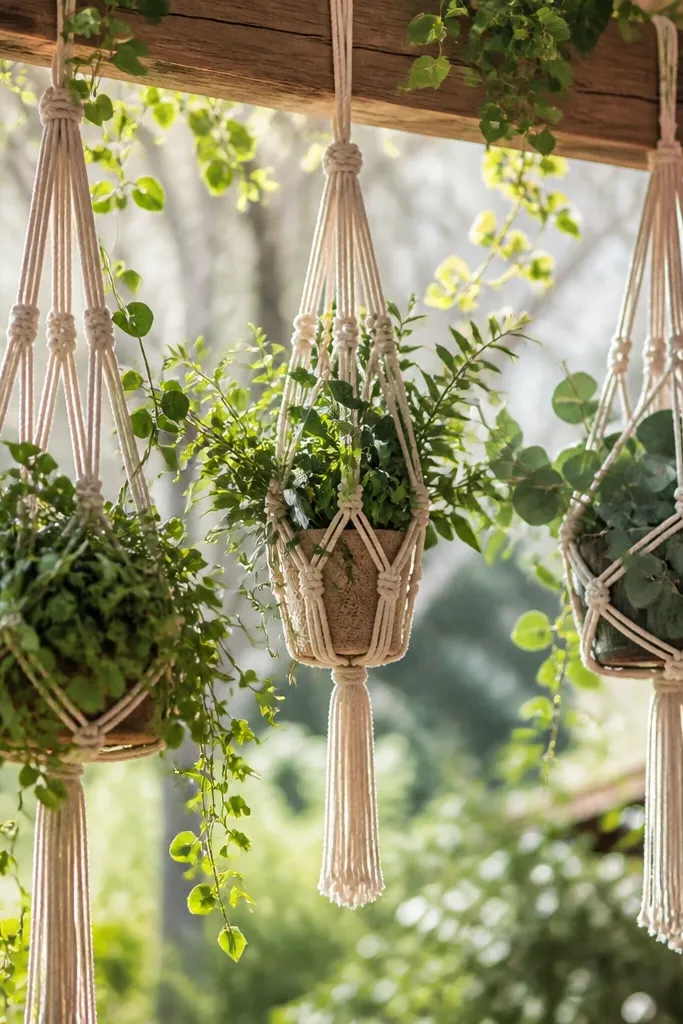
Hanging decor is a hidden gem because it uses vertical space and keeps the floor clean for guests. Macrame plant holders add a handmade texture that looks great in natural light and softens hard venue lines. Fill them with airy greenery like ruscus, eucalyptus, or trailing vines so the movement looks gentle instead of bushy. This setup is perfect for outdoor ceremonies, garden venues, and any aisle shot where you want depth. It also works in windy locations better than heavy floral installations.
Start by choosing macrame holders with a diameter large enough to hold 2-3 stems without gaps — aim for 10-14 inches wide. Then hang them in a consistent line along the aisle, spacing them 4-6 feet apart. Finally, use a simple wiring or floral tape to keep the greenery cluster tight at the top. Travel tip: macrame packs flat and light, so it’s easy to bring. Allow 45-90 minutes for hanging and adjusting height so the greenery sits around 6-7 feet for aisle photos.
Tie a small weight inside the planter if the greenery won’t hang naturally.
Skip thick, heavy arrangements. They swing and look messy in motion shots.
14. Monochrome Balloon Clusters with Paper Fan Backing
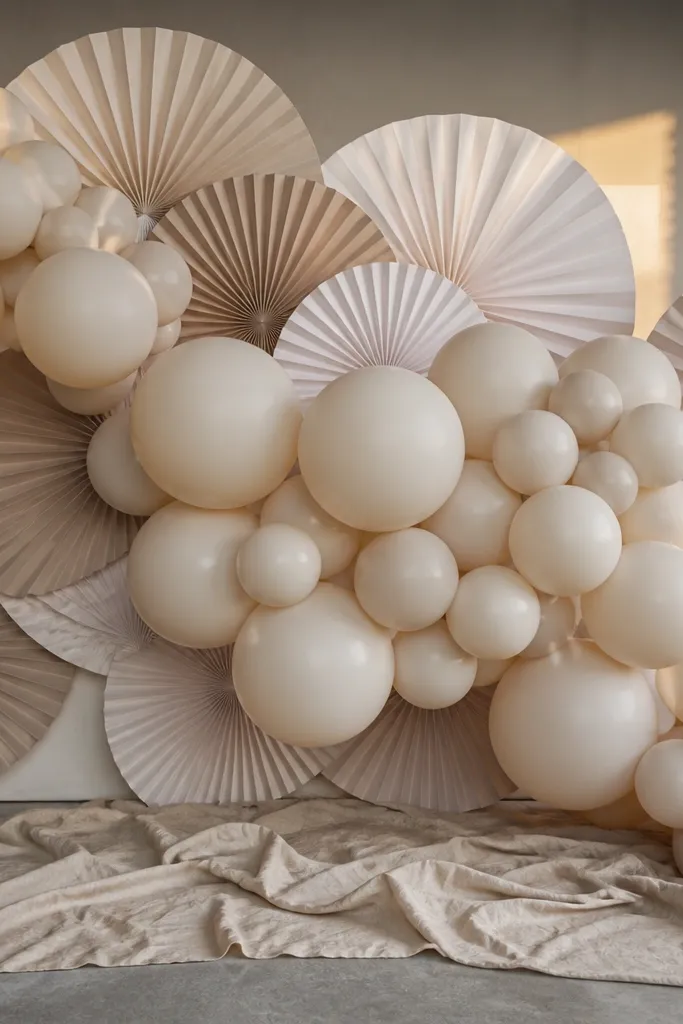
Balloon clusters can look dated, but this version reads modern because the balloons are monochrome and backed by paper fans. The paper fans create a graphic background that makes balloons look more intentional and less like party decor. Use balloons in one shade like matte champagne, soft sage, or charcoal — then repeat the same color in table accents. Add a thin ribbon tail only if it won’t tangle with guests. This setup is best for indoor receptions and indoor ceremonies where you want a strong photo corner.
Start by choosing balloon sizes that create depth: mix 12-inch and 18-inch balloons in equal amounts. Then arrange them into clusters of 3-5 attached to a backing board with paper fans — keep the fan color neutral so balloons pop. Finally, secure the backing to a stand or wall and add one small floral sprig at the bottom center for cohesion. Travel tip: transport balloons uninflated if possible or plan a local inflation partner at the destination. Budget 1-2 hours for setup and final balloon adjustment, depending on venue access.
Quick tipUse matte balloons, not shiny. Matte reads smoother on camera and hides imperfections.
Skip thisDon’t mix metallic and matte balloons. The reflections fight each other in photos.
15. Stoneware Milk Jug Bud Vases for Farmhouse Clean Lines
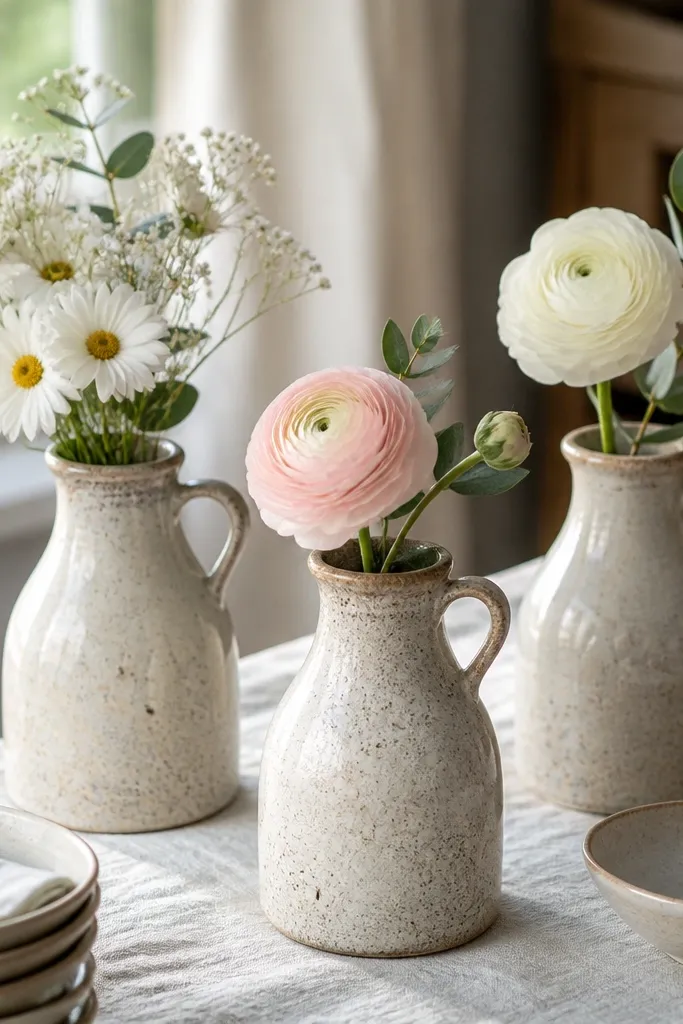
Milk jugs are a hidden gem because they look charming but still feel structured when you use them the right way. Stoneware jugs add weight and texture, and using one stem per jug keeps the look airy instead of crowded. Pair them with simple blooms like daisies, baby’s breath, or ranunculus — then add one foliage sprig for green. This works especially well for outdoor receptions and rustic venues where you want a “farm” feel without going full theme. Great for daytime weddings with bright natural light.
Start by choosing jugs around 6-8 inches tall and a consistent glaze finish. Then fill each jug with water and one stem bundle so the flower heads face outward in a matching direction. Finally, line them down the center of a table or group them at one end of a dessert station. Travel tip: stoneware is heavier, so limit the number you bring and rent extra jugs locally if you can. Plan 30-50 minutes for arrangement per table, depending on how many jugs you use.
Quick tipCut stems to the same height. Uneven heights look accidental in daylight photos.
Skip thisAvoid mixing jug sizes wildly. It makes the table look cluttered instead of styled.
16. Color-Block Tablecloths with One Center Statement Vase
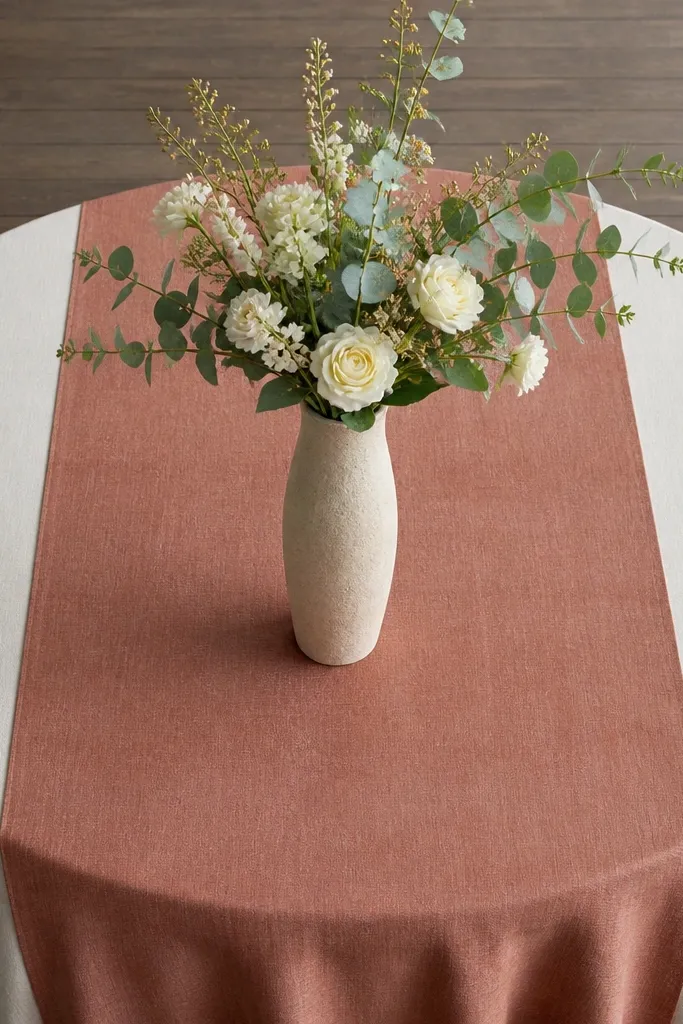
This is a hidden gems wedding decor idea for modern weddings that want bold color without busy centerpieces. Use two-tone tablecloths or overlays (like cream with a muted clay runner) and then pick one center statement vase — tall enough to read but not so tall it blocks. The color-block look gives you a strong graphic background, so photos look clean and intentional. Keep everything else minimal: one napkin fold, one candle cluster, and one floral moment. Best for city venues, art spaces, and receptions with strong architectural lines.
Start by layering two linens so the top cloth shows a clean edge — use a runner overlay that’s 14-18 inches wide. Then place one tall statement vase dead-center on the table and fill it with a tight arrangement — think 1-2 flower types and lots of foliage shape. Finally, keep the rest of the table styling low: a candle at each end and minimal place cards. Travel tip: bring linens in large garment bags and avoid folding creases in the same spot every time. Budget 45-75 minutes for one full table setup and photos from both sides.
Quick tipIron only the visible edges. You don’t need to perfect the whole cloth for photos.
Skip thisDon’t add multiple tall vases. The center statement disappears fast.
17. Low Hanging Ceremony Florals on Clear Fishing Line
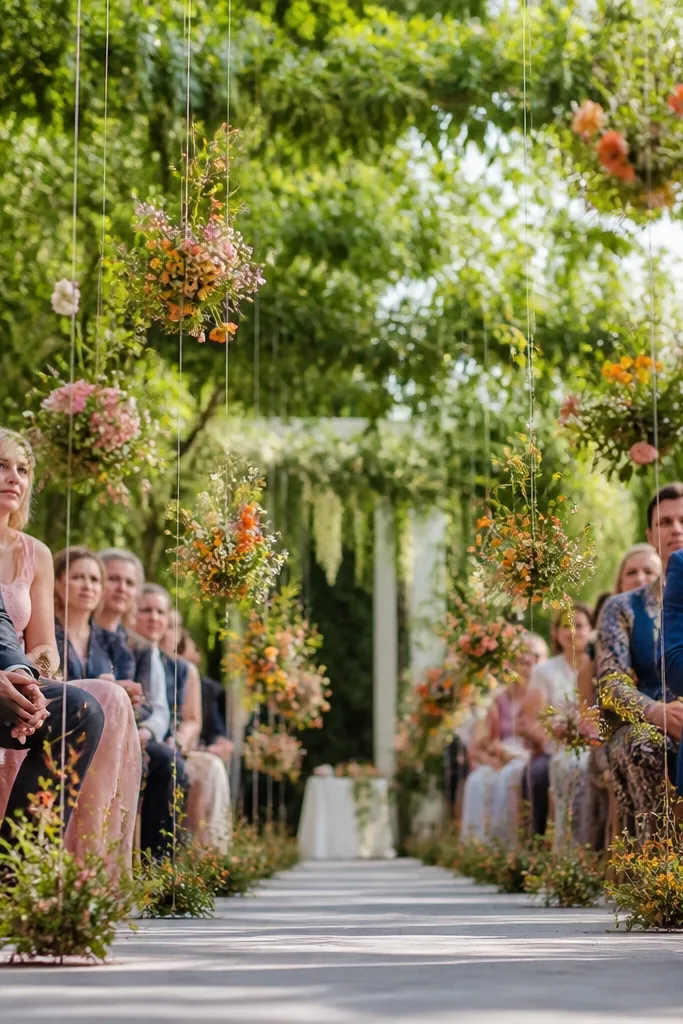
This is a hidden gems wedding decor idea that gives you “floating” florals without building a heavy arch. Clear fishing line makes the clusters feel airy, and you can position them low enough to frame faces in ceremony photos. Use small clusters with one flower type and greenery, and keep the scale consistent so it looks designed. This works especially well when the venue already has a nice backdrop and you want to add interest above guests. Best for outdoor ceremonies with open sky or indoor rooms with tall ceilings.
Start by buying or renting small pre-made floral bundles or building clusters with floral tape and mesh. Then attach each cluster to clear fishing line and anchor the line points to a ceiling beam, truss, or stand structure allowed by the venue. Finally, position clusters around 4-6 feet high so they frame heads in photos without touching guests. Travel tip: line and anchors are light, so you can bring most of the kit; assemble clusters on-site for freshness. Allow 60-90 minutes for hanging and final height adjustments.
Quick tipTest the sightline from the front row. If the cluster blocks eyes, raise it 6-12 inches.
Skip thisAvoid giant heavy blooms. They sag and look uneven after 30 minutes.
18. Aisle Petal Confetti in Two Sizes with Dried Herbs
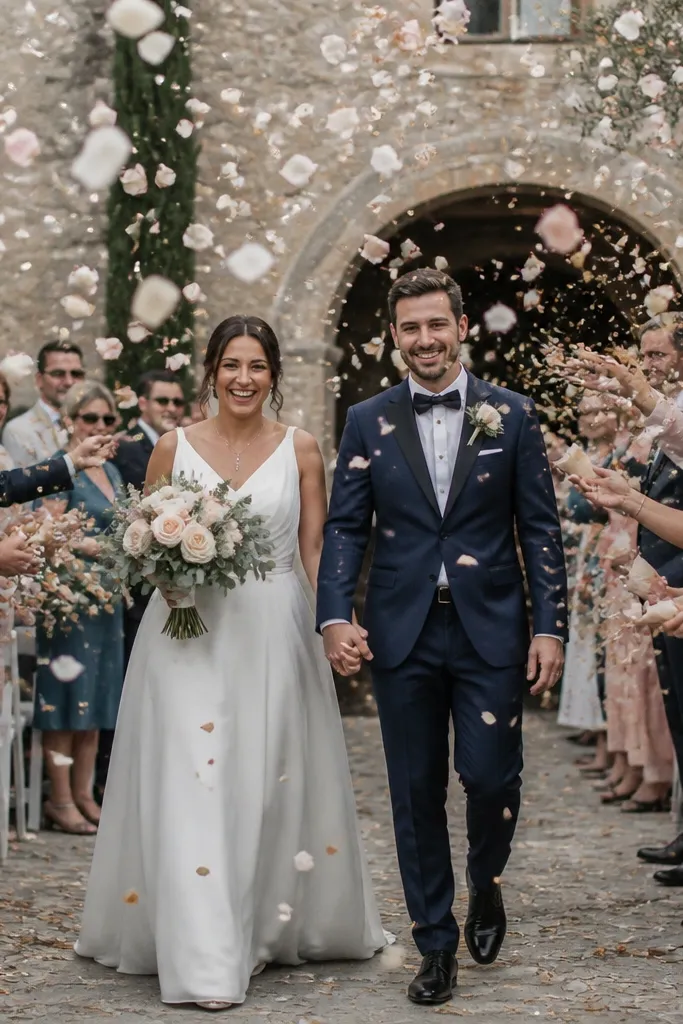
Petal confetti is common, but the hidden gem is using two sizes plus dried herbs for texture. The mix looks more natural than a single uniform petal, and the herb bits add subtle green that looks good even when the confetti is mid-air. Choose petals in one color family like cream + pale blush, then add dried herb sprigs in a matching green. This gives you a photo sequence that looks intentional, not like you just dumped petals. Best for outdoor ceremonies, especially where the aisle is visible from the side.
Start by mixing petals in two sizes: small petals for the “sparkle” and slightly larger petals for structure. Then add dried herb sprigs cut to 1-2 inch pieces so they show without clumping. Finally, bag the mix in small portions and assign a runner or two to distribute it evenly — don’t dump it all at once. Travel tip: use sealed bags and keep them dry; humidity makes petals stick together. Plan a quick test distribution on a small section before the ceremony to gauge how it falls.
Quick tipUse a dry, matte petal. Shiny petals reflect light and look odd in video.
Skip thisSkip overly bright colors. They yank attention away from the couple in photos.
19. Dessert Table Backdrop with Oversized Linen Bow and Dried Seed Pods
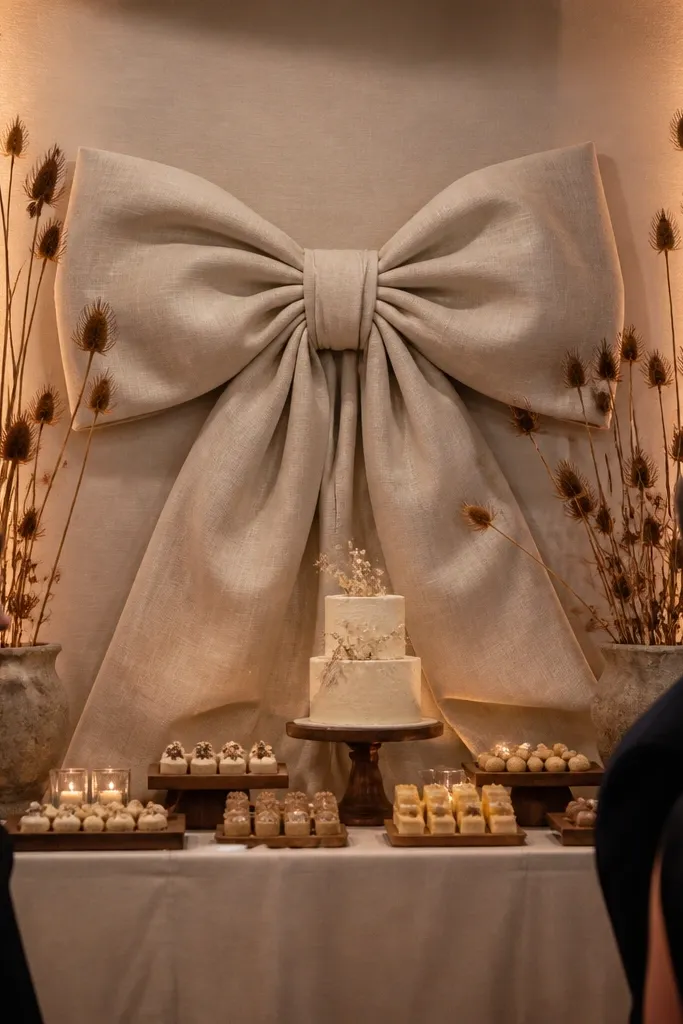
Dessert tables get photographed constantly, so this hidden gems wedding decor idea is about making the backdrop feel designed. An oversized linen bow gives a clear focal point, and dried seed pods add height and texture without making the table look like a craft project. Choose linen in a neutral tone that matches your palette, then add one accent color through the seed pods or a few dark blooms. The bow reads well from straight-on and from slightly off-center angles. Great for rustic-chic, garden, and modern weddings with a soft palette.
Start by building the bow on a frame or using a pre-made large linen bow rental. Then place it behind the dessert table so its center aligns with the cake or main dessert. Finally, tuck dried seed pods and a few greenery sprigs around the lower edges, keeping the top clean so the bow stays the hero. Travel tip: linen bows fold, but seed pods are fragile — pack them in a rigid box with padding. Give yourself 45-60 minutes for placement and a quick photo check from guest height.
Quick tipKeep the bow centered at least 2 feet above the cake. It prevents awkward overlap in photos.
Skip thisDon’t add extra hanging decor behind the bow. It competes and looks messy.
20. Terrarium-Like Centerpieces in Glass Cloche Domes
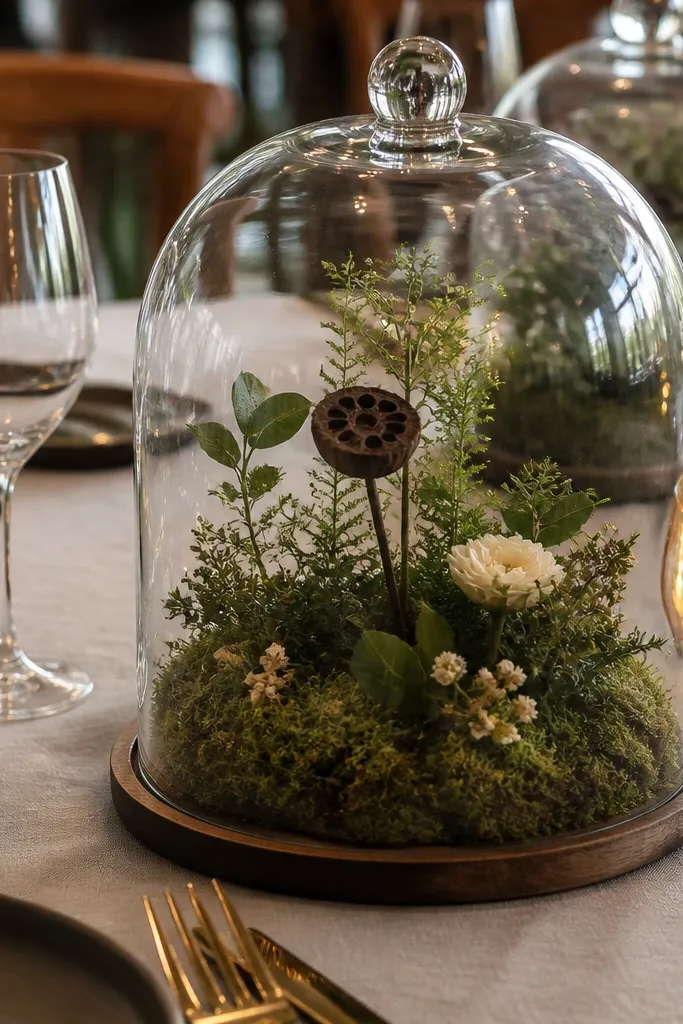
Glass cloche centerpieces feel like a hidden gem because they read magical without being bulky. The dome creates a contained scene, which makes close-up photos look curated and neat. Use moss or fine greenery base, then add a few small blooms and one vertical element like a dried seed pod. Keep the color palette tight so the dome doesn’t look like a mixed bag. This works beautifully for winter weddings, indoor receptions, and anyone who wants a clean, story-like centerpiece.
Start by choosing cloche domes that fit your table scale — typically 8-12 inches wide for dining tables. Then build a base with moss or greenery and insert one small bloom cluster plus a vertical accent. Finally, place a thin ring of decorative sand or small stones at the base to keep the scene crisp. Travel tip: pack domes with thick padding and keep them upright; assemble the greenery inside on-site to avoid crushing. Plan 60 minutes for one table if you’re building them from scratch.
Quick tipAdd a tiny battery votive inside the dome only if the venue allows. It creates a soft glow in photos.
Skip thisSkip wet moss. It wilts and stains the glass in a hurry.
21. Blackboard Menu Boards with Chalk Doodles and Dried Flower Corners
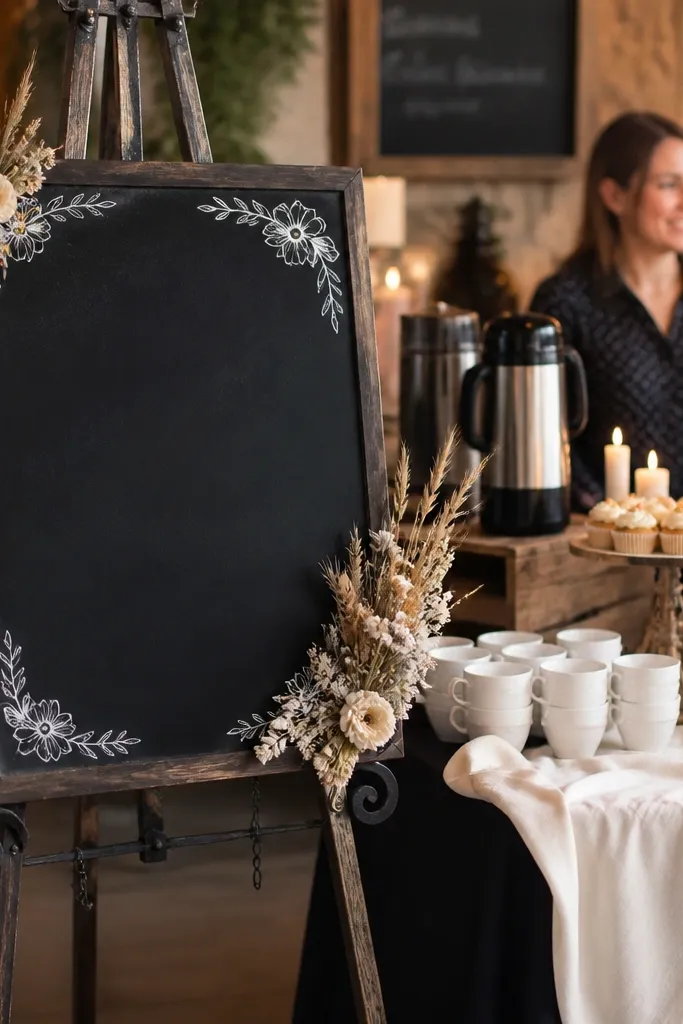
Menu boards are a practical decor piece, and the hidden gem is treating them like a design element, not a sign. A blackboard with clean chalk lettering looks photo-friendly because it’s matte and readable, and it gives you a strong dark anchor against lighter table linens. Add small chalk doodles in one style — simple leaves or tiny dots — then frame the corners with dried flowers. This makes the board look finished even from a slight angle. Best for casual-chic venues, outdoor receptions, and any wedding where guests mingle near the food.
Start by choosing a blackboard big enough to read from 6-8 feet — around 18x24 inches works well. Then plan your layout: menu categories on the left and prices or times on the right, with one headline line in larger chalk. Finally, attach small dried flower sprigs at the bottom corners using removable tape so you can adjust without damaging the board. Travel tip: pack chalk in a sealed pouch and bring a small eraser and cloth for smudges. Allow 20-30 minutes on-site to write and correct spelling before guests arrive.
Quick tipUse a ruler for lines. Straight chalk lines look far more polished in photos.
Skip thisDon’t use neon chalk colors. They look harsh and distract from the food.
22. Curtain-Style Backdrop Panels in Two Sheer Textures
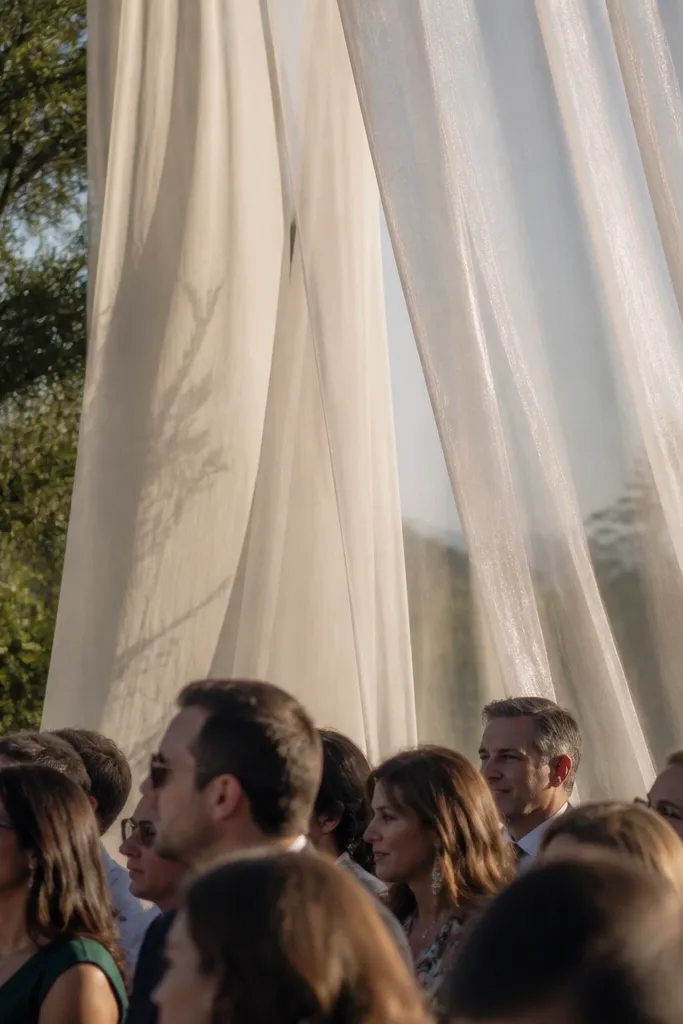
Sheer curtain backdrops are a hidden gem because they create softness and movement without heavy florals. Use two sheer textures in one color family — like matte ivory tulle and a slightly shimmery organza — so the backdrop catches light differently across the frame. When the wind hits or when people move, the layers separate and it looks alive. This setup makes a ceremony or photo area feel romantic without building an arch. Best for spring, fall, and indoor receptions where you want light and airy visuals.
Start by renting or sourcing 2-3 curtain panels per side, each long enough to reach at least 8-9 feet high. Then layer two sheer textures so one is behind the other, with slight overlap for depth. Finally, tie the top to a rod or stand and pull the bottom so it hangs in gentle folds, not flat sheets. Travel tip: sheer fabric packs bulky, so use compression bags and plan to steam on-site. Budget 60 minutes for hanging and smoothing before you set up any signage.
Steam both layers separately. Mixed wrinkles show up as darker patches in photos.
Avoid using only one sheer texture. It looks flat compared to layered sheers.
23. Ceremony Aisle Runner with Oversized Linen Pom-Pom Ends
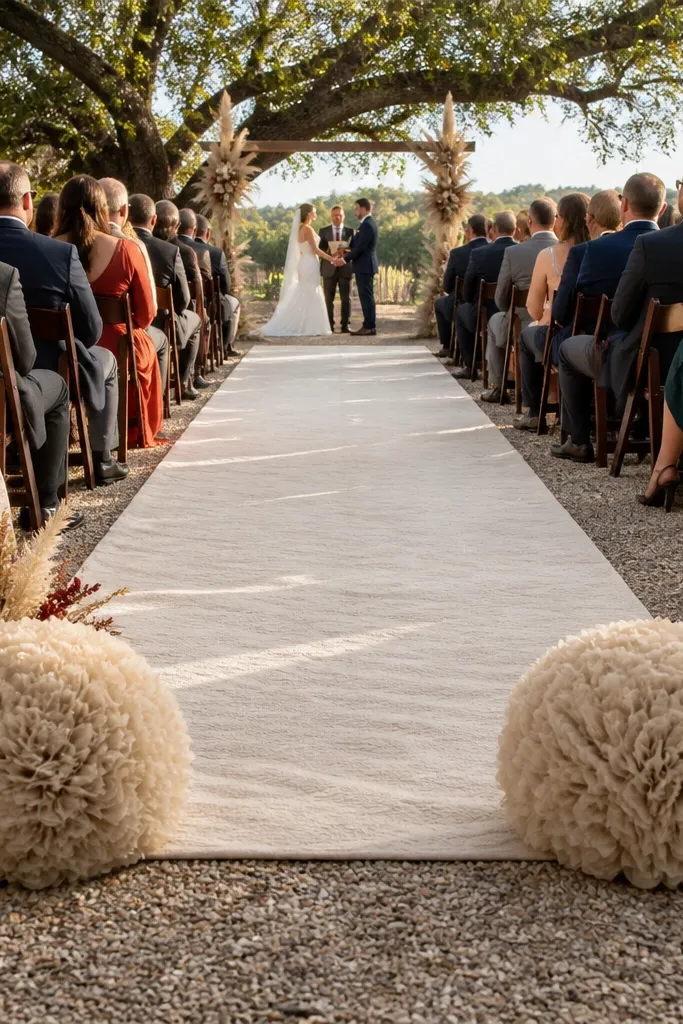
This is a clean, photogenic hidden gems wedding decor idea that frames the aisle without covering it in clutter. A runner gives you a defined line, and oversized linen pom-pom ends add a playful, soft finish that reads well from the back row. Choose pom-poms in the same color family as your runner, then add one accent color through small florals or a ribbon at the top. It’s great for ceremonies on grass or concrete where the ground isn’t pretty enough to be part of the aesthetic. Best for daytime ceremonies and venues that want a simple look.
Start by selecting a runner wide enough to hold the aisle line — 6-9 feet long and 3-4 feet wide for most ceremonies looks right. Then attach or place oversized linen pom-poms at the start and end so the aisle has a clear “frame.” Finally, anchor the runner with weights or stakes allowed by the venue and do a quick walk-through to ensure it’s not bunched. Travel tip: runners roll up better than folding; pom-poms pack in flat boxes. Give yourself 30-45 minutes to lay, anchor, and straighten.
Quick tipUse a level phone photo from the front. If the runner curves, guests will notice in photos and video.
Skip thisDon’t use a runner that’s too narrow. Thin runners look like last-minute tape in images.
24. Dried Flower Hoop Wreaths for Chair Back Accents
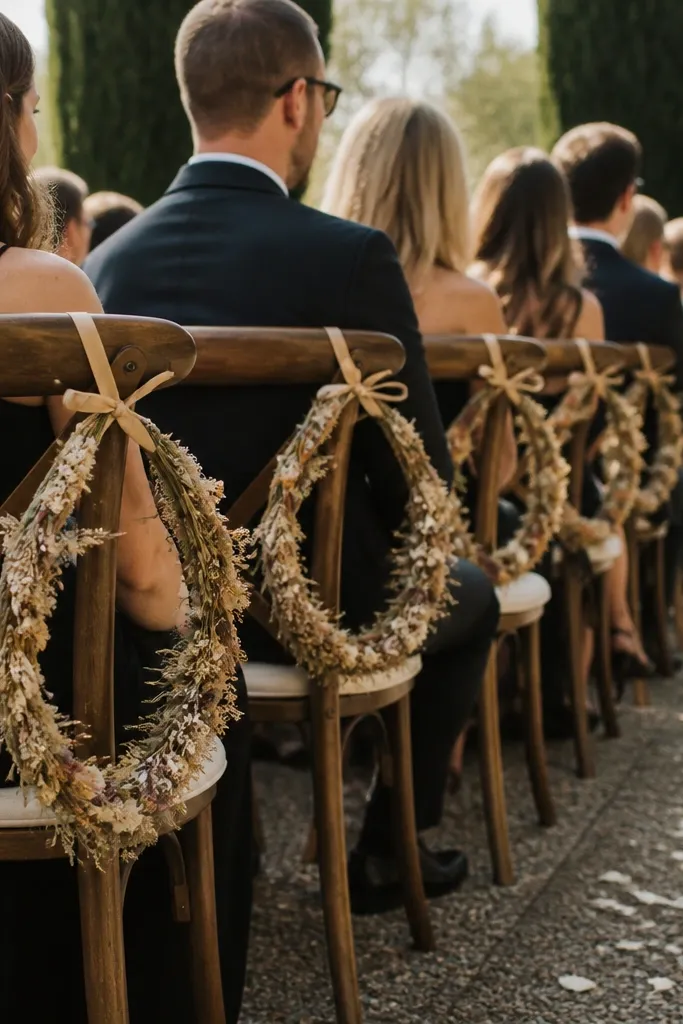
Chair back decor is a hidden gem because it adds detail without demanding a huge budget. Hoop wreaths made from dried flowers and greenery look textured in close-ups, and they’re lightweight compared to full chair sprays. Tie them with neutral ribbon so the chair frames stay consistent across the row. Choose one hoop size and keep the palette tight — cream, sage, and dried clay, for example. This is best for ceremony seating, especially when you have a clear view of rows in photos or video.
Start by making or renting hoop wreaths around 10-14 inches wide so they don’t overwhelm chairs. Then tie each hoop to the chair back using ribbon loops at two points to keep it centered. Finally, add a small dried bloom cluster at the top of the hoop so it catches light when guests sit. Travel tip: bring extra ribbon and a small scissor kit; ribbon is the part that gets messy. Plan 45-90 minutes to attach wreaths for a full section depending on chair count.
Quick tipKeep ribbon tails short. Long tails tangle in photos and with coats.
Skip thisAvoid wet fresh greenery on chairs. It wilts and stains fabric quickly.
25. Sunburst Candle Sconces on a Rustic Ladder Backdrop
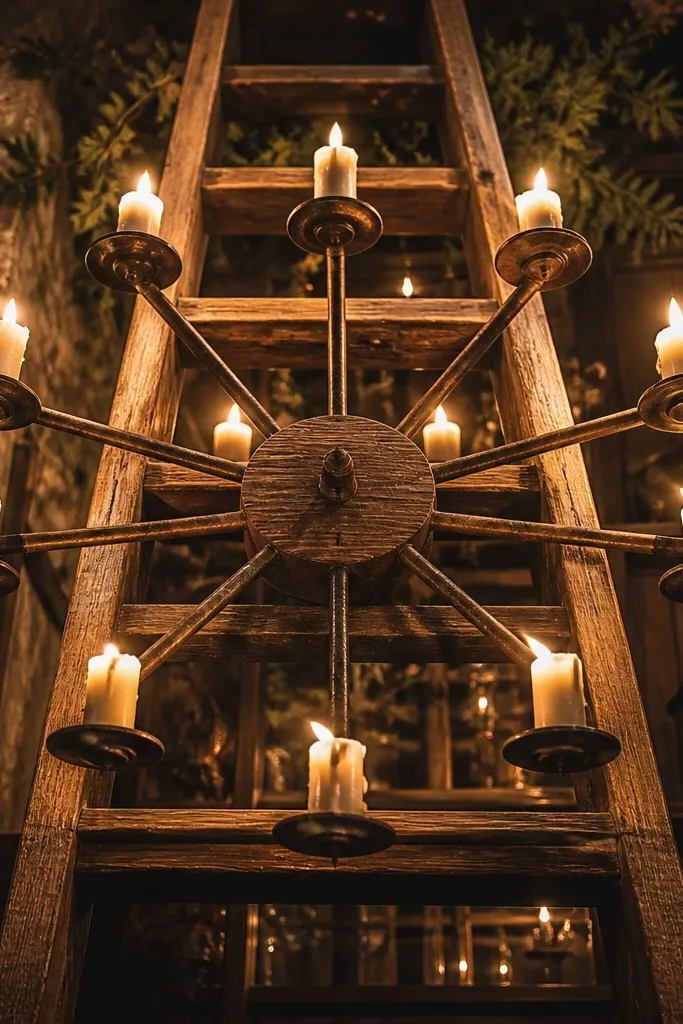
This decor idea looks like a warm little ceremony stage without the heavy build. A rustic ladder gives you height and texture, then a sunburst layout of candle sconces frames your sweetheart table, cake, or photo spot. It photographs well because the lines pull the eye to the center and the candles add flicker that makes every image feel alive. It suits outdoor evenings, venues with high ceilings, and couples who want cozy rather than formal. Book this when you know you’ll be lighting candles — late spring through fall evenings are the sweet spot, especially if you want that golden hour glow before the first flame. If your wedding palette is neutral, this still works because the ladder reads as the base color and the candles do the rest.
Step 1 — Source the setup: rent a tall wooden ladder (around 6 to 8 feet) and request candle sconces that can be attached with secure clips or a removable backing plate. Bring 8 to 14 battery candles or rent a small live-candle kit if the venue allows open flame; plan for one flame per sconce position so the sunburst stays even. Step 2 — Build the sunburst: mark the ladder center, then place sconces in alternating angles so they fan out like spokes; keep the top row slightly lower than you think so the camera framing stays clean. Step 3 — Placement and timing: set it 6 to 10 feet behind the focal table, then arrive 60 to 90 minutes before golden hour to level the ladder and test the candle spacing in the exact spot where photos will be taken. Step 4 — Cost and time: expect roughly $150 to $350 for the ladder rental plus $60 to $180 for sconces or candle rentals, and give yourself half a day if you’re DIYing any attachment hardware.
Quick tipMeasure the ladder height against your photographer’s viewpoint and place the center sconce at about eye level for guests seated at the table. If your venue has strict candle rules, use battery candles with flicker and warm white bulbs so the look stays the same in photos.
Skip thisAvoid using candles that are too tall — they’ll block faces and make the sunburst look like a messy wall instead of a clean frame.



