
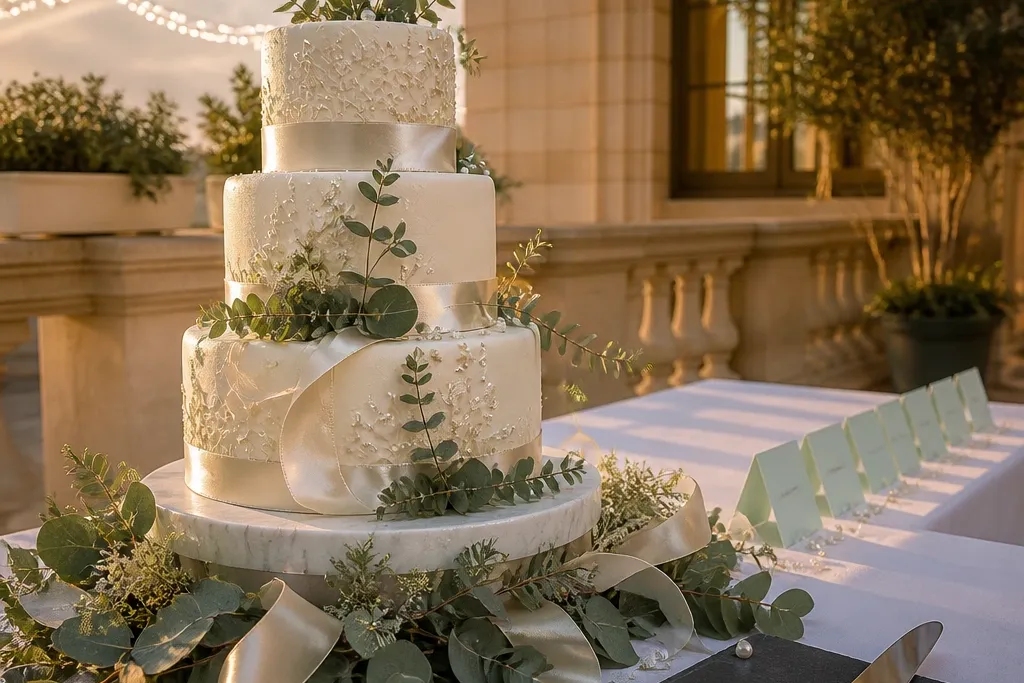
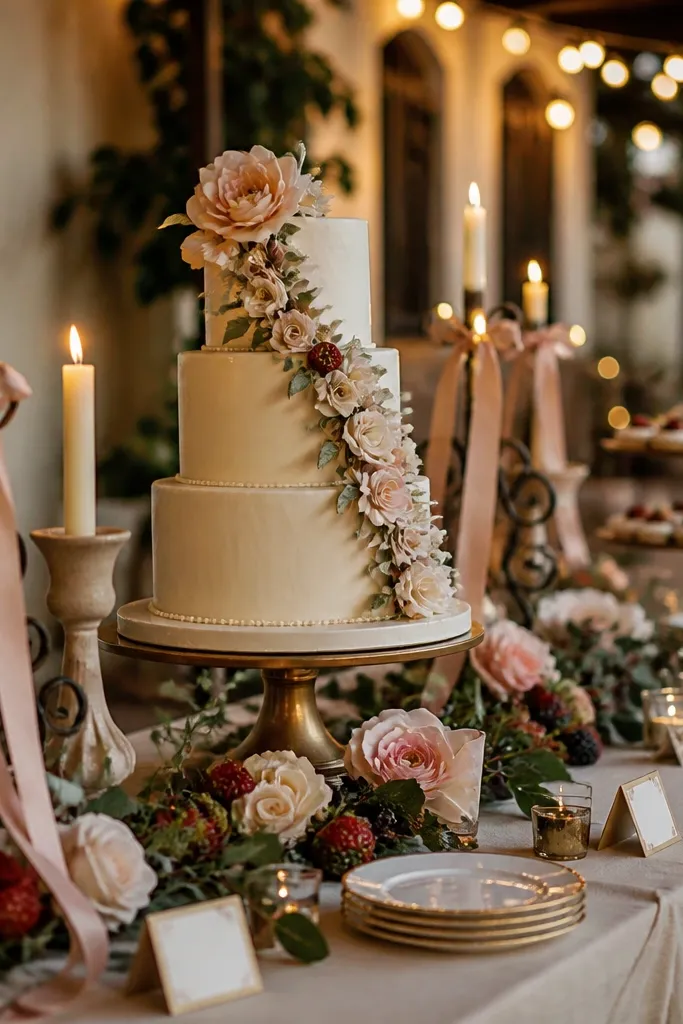
1. Ivory satin table runner with gold edge stitching
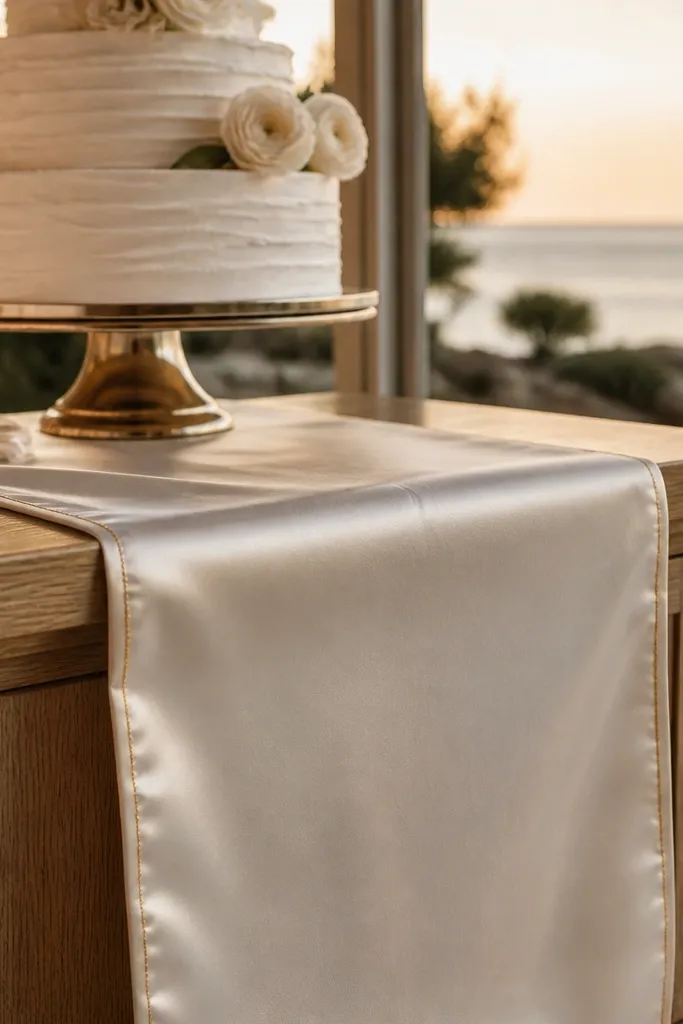
This is the cleanest way to make a cake table look styled without adding clutter. Ivory satin catches warm venue lighting and gives the cake a softer contrast than plain white cotton. The gold edge reads “intentional” in photos because it creates a crisp line under the cake stand. If you’re doing a food guide wedding reception layout with labels and serving utensils, the runner also gives you a consistent base for signage to sit on. It suits classic weddings, winter themes, and any palette that needs a polished, not busy, look.
Start by ironing the runner lightly and steaming the underside so it hangs flat on a banquet table. Then anchor both ends with small pieces of double-sided fabric tape so the satin doesn’t slide when guests lean in. Finally, place your cake stand centered on the runner and keep the signage on the runner’s same side for a one-direction serving flow. For budget, buy a runner that’s 12-18 inches wider than the table’s center area you actually want to show. Plan to lay it down right before setup so it doesn’t crease from travel.
Steam, don’t press hard — satin holds creases like crazy.
Skip a runner that’s too short; it leaves awkward gaps under the cake stand.
2. Champagne tulle overlay with a soft gathered front
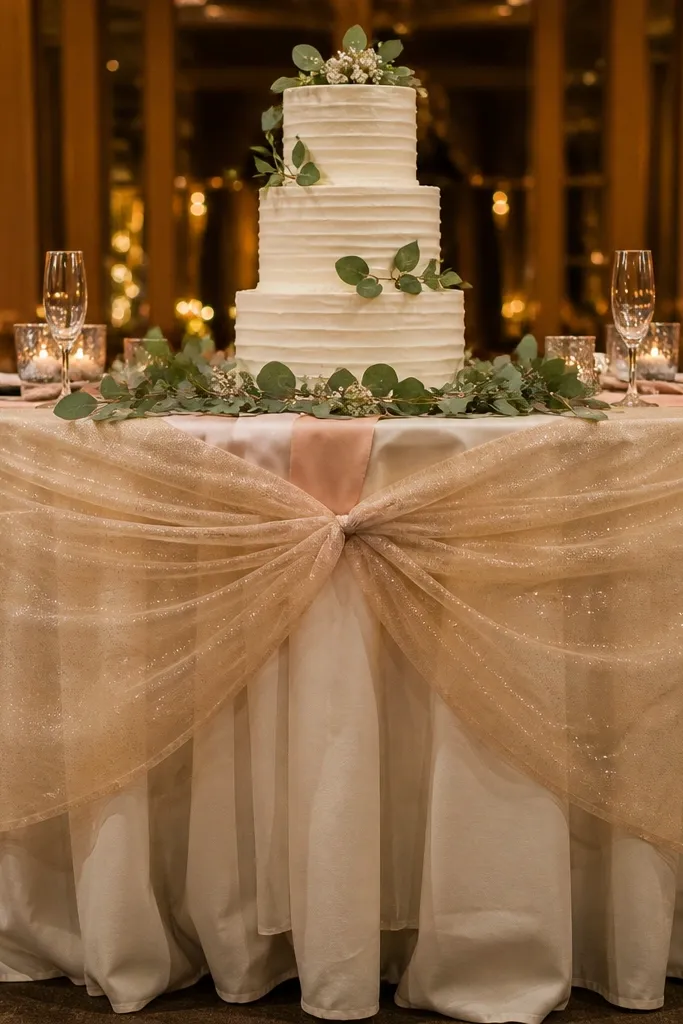
Start by laying a flat base cloth under the tulle (white or champagne). Then drape the tulle over the back edge and gather only the front 12-16 inches, securing it with discreet clips or tape under the runner. Finally, place a low garland or petal scatter in front so the gathered tulle doesn’t look like it ends abruptly. For cost control, buy 1-2 yards of tulle and focus on fullness at the front rather than covering the whole table. Set it up 30 minutes before guests arrive so it doesn’t sag while people are moving around.
Tulle adds texture that looks expensive even when the rest of the table is simple. Champagne is the sweet spot because it flatters warm indoor lighting and avoids the bluish cast that some cold whites get on camera. The trick is the gathered front — it frames the cake and makes the lower half of the table feel finished, not bare. This works especially well for a food guide wedding reception where guests linger near the cake while they check labels. It’s a good fit for romantic, garden, and pastel color palettes.
Skip thisAvoid super-sheer tulle that shows messy table edges through it.
Quick tipChoose tulle with a slightly heavier weight so it holds shape in warm rooms.
3. Acrylic tiered cake stand with clear beaded accents
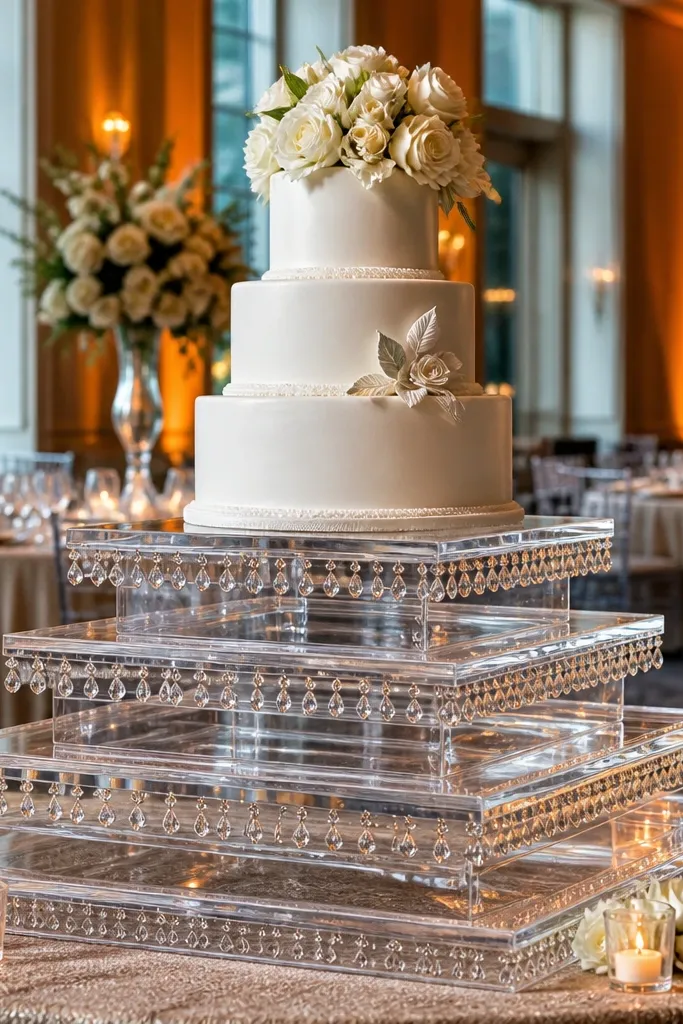
If you want a cake table that looks modern and photo-clean, acrylic is the move. Clear stands don’t block sightlines, so your cake stays the center of attention even in crowded venues. Beaded accents add sparkle without turning the setup into a disco. This works well for food guide wedding reception setups because labels, serving tools, and signage remain visible and readable. It suits glam, minimalist, and city venues where you want the table to look light and airy.
Start by choosing an acrylic stand with tiers that match your cake height — leave at least 6-8 inches of space above the top tier for topper visibility. Then use a non-slip mat or museum wax dots under the stand base so it doesn’t slide on satin or linen. Finally, add a small cluster of beaded candle holders or a single beaded garland behind the cake so the sparkle reads in photos. Budget tip: you can rent acrylic stands if you’re using them only for the reception. Plan to position the stand slightly forward so it doesn’t get swallowed by the table’s back edge.
Put the stand on a thin felt sheet to prevent clacking and to stop micro-slips.
Skip a stand with cloudy scratches — they show up in every flash photo.
4. Three tall candlesticks behind the cake with mirrored trays
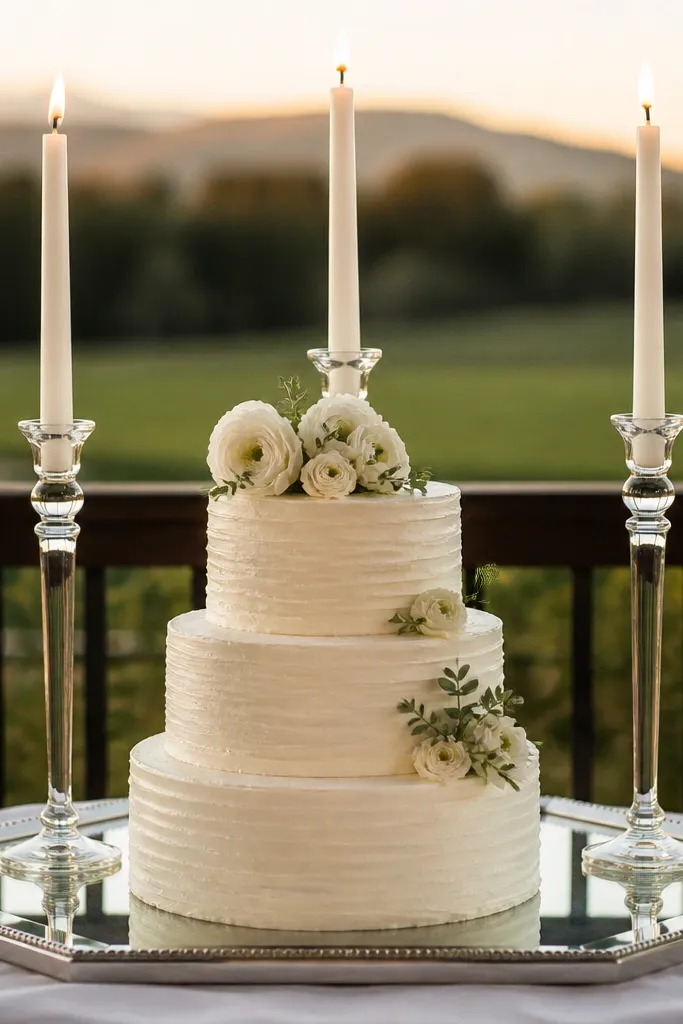
Start by placing a mirrored tray at the back center of the table, then set the cake stand in front of it so the mirror catches light behind the cake rather than directly under it. Next, cluster the three candlesticks on the mirrored tray — use flameless candles if your venue has any fire restrictions. Finally, add a small strip of greenery or a thin garland at the base so the mirror doesn’t look like it floats. For timing, assemble the candle cluster first, then add the cake so you don’t bump decorations during cake placement. Bring extra stickers or wax dots for stability.
Candlesticks create vertical height fast, and height is what makes cake tables look designed. Place three candlesticks behind the cake — tallest in the center, slightly shorter on the sides — and the arrangement frames the topper like a spotlight. A mirrored tray under the candles and/or cake base multiplies the light and makes the whole scene glow in reception lighting. This is great for a food guide wedding reception because it keeps the cake station feeling special even after dinner starts. It works best with white, ivory, or soft gold palettes.
Skip thisAvoid mixing candle heights randomly; it makes the cake look flat from the sides.
Quick tipUse warm white candles (2700K look) so they match typical reception lighting.
5. Greenery arch-style backdrop made from faux ivy strands
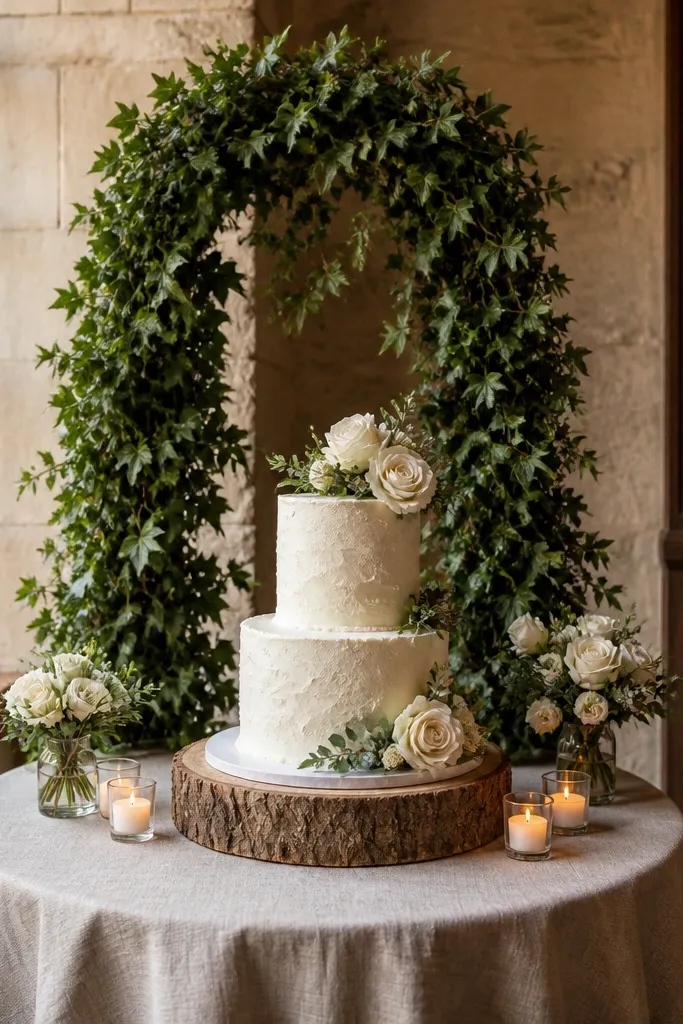
A greenery arch gives you structure without needing big bouquets. Faux ivy strands are forgiving, easy to shape, and they photograph well because the leaves create depth behind the cake. Keep the arch narrow enough that it doesn’t crowd the cake topper — aim for about the same width as the cake stand plus 6-10 inches each side. This backdrop is ideal for a food guide wedding reception because guests can see the cake station clearly from the room entrance. It suits garden weddings, outdoor-to-indoor transitions, and anyone who wants a fresh, natural look.
Start by forming two vertical supports with thin stakes or weighted bases at the table corners (or use a freestanding greenery frame). Then weave faux ivy across and slightly down toward the cake so it looks like it’s draping, not stuck on flat. Finally, add one small focal element behind the cake — a single floral cluster or a string of tiny lights — so the background doesn’t look uniform. Budget tip: buy fewer, thicker strands rather than lots of thin ones. Install the arch first, then place the cake stand so you can adjust the curve around it.
Spritz leaves with a light mist of water before setup to reduce that dry, plastic look in photos.
Skip a backdrop that’s wider than the cake stand; it pulls attention off the cake.
6. Blush and white rose clusters in low rectangular trays
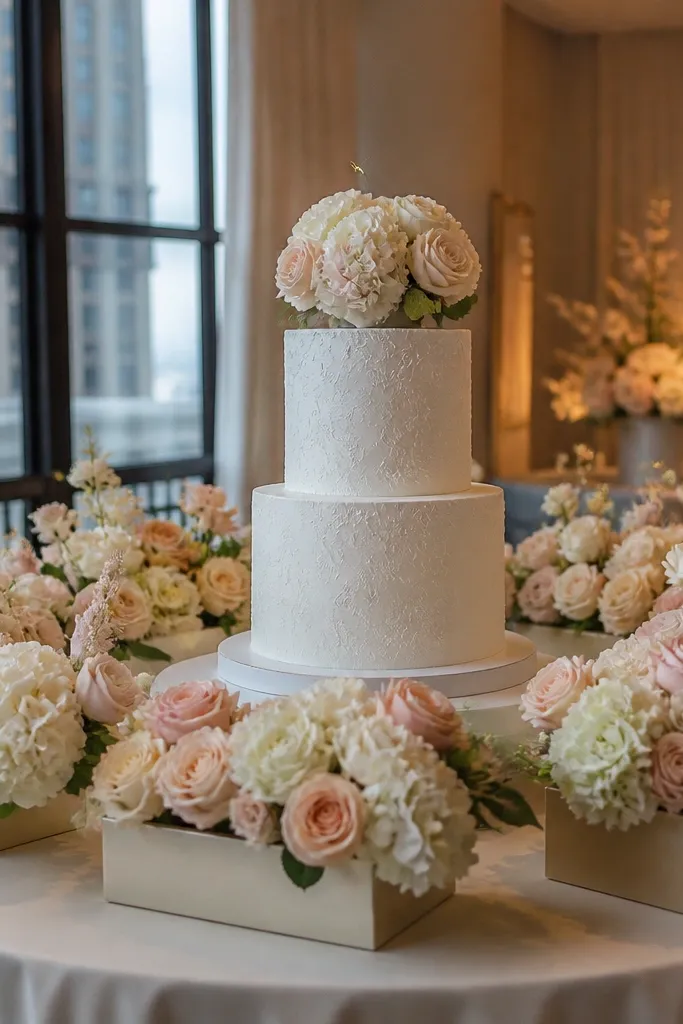
Low floral trays make the table look lush while keeping your cake unobstructed. Roses in blush and white give you soft color that reads clearly in both daylight and warm indoor lighting. Rectangular trays are practical because they define where the floral sits, so the setup stays neat even when guests crowd the station. This works for food guide wedding reception moments because labels and serving utensils stay visible in the center. It’s a strong choice for romantic themes, indoor receptions, and pastel color schemes.
Start by choosing two low rectangular trays sized to the table’s left and right thirds, not the full width. Then anchor rose clusters into floral foam-free blocks or use a grid so stems don’t wobble. Finally, keep flowers toward the outside edges and leave a clear “runway” in front of the cake for a knife set and signage. For cost, mix fresh-looking faux roses with a few real stems if you want scent without risking wilting. Place trays before the cake arrives so nothing gets bumped.
Use the same flower color ratios in both trays so the table looks balanced in photos.
Avoid tall center bouquets; they block the cake topper and turn the station into a wall of flowers.
7. Pearl beaded garland draped in a U shape
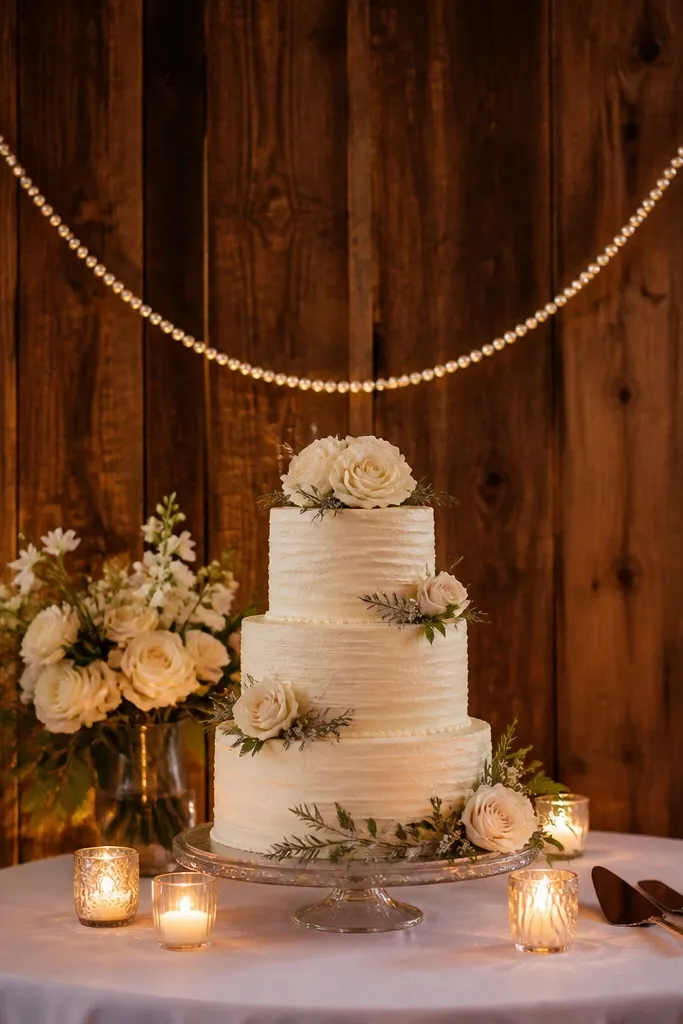
A pearl beaded garland adds shine without taking up space. Draping it in a U shape behind the cake creates a frame that guides the eye to the topper and tiers. Pearls also photograph well in low light because they reflect light in small points rather than big glare. For a food guide wedding reception, this kind of background makes signage and labels pop because the garland gives contrast. It fits classic, glam, and evening weddings.
Start by measuring the cake stand width and plan a U that’s about 2-4 inches wider on each side. Then secure garland ends to small stands or hooks at the table corners so it hangs consistently and doesn’t slide. Finally, place two tiny accent candles or a small floral cluster at the ends to keep the U from looking empty. Budget tip: use one garland strand and double it for thickness rather than buying multiple thin strands. Install the garland last before cake placement so you can adjust the curve.
If the garland tangles easily, coil it in a box overnight so it lays flat by morning.
Skip a straight garland across the back; it makes the cake look like it’s trapped in a line.
8. Mini terracotta pots with herbs along the front edge
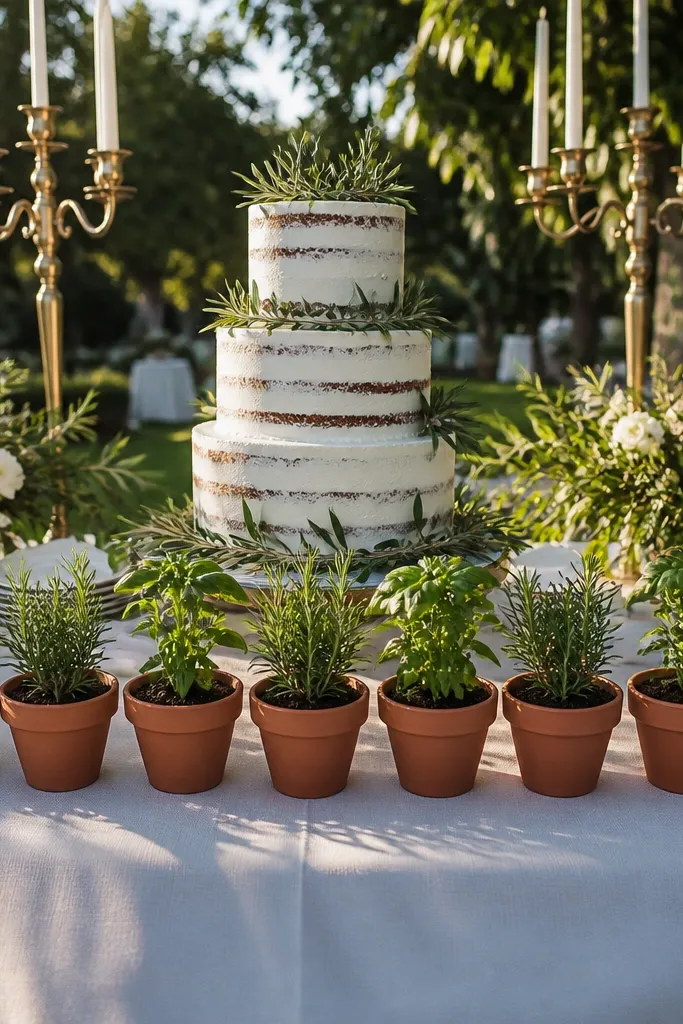
Start by choosing small pots that are all the same height or you’ll get a messy rhythm. Then line them along the front edge with consistent spacing — about 8-10 inches between pots. Finally, tuck a thin ribbon or twine between pots and tie it at intervals so the line looks intentional, not random. Keep herbs fresh by misting lightly right before setup and moving pots into shade until guests arrive. Bring saucers or tray liners so water doesn’t stain linen.
This is a food-forward decoration that still looks styled. Mini terracotta pots add earthy color, and herbs bring texture that reads fresh in photos. Place them along the front edge so guests see the “ingredient” vibe as they approach the cake station. For a food guide wedding reception, this is a clever way to connect the table to the meal without adding more signage. It suits rustic, Italian-inspired, and outdoor garden weddings.
Skip thisAvoid wet soil — it can stain table linens and look messy in close-up photos.
Quick tipUse rosemary or thyme because they hold shape better than softer herbs in warm rooms.
9. White lantern cluster with fairy lights behind the cake
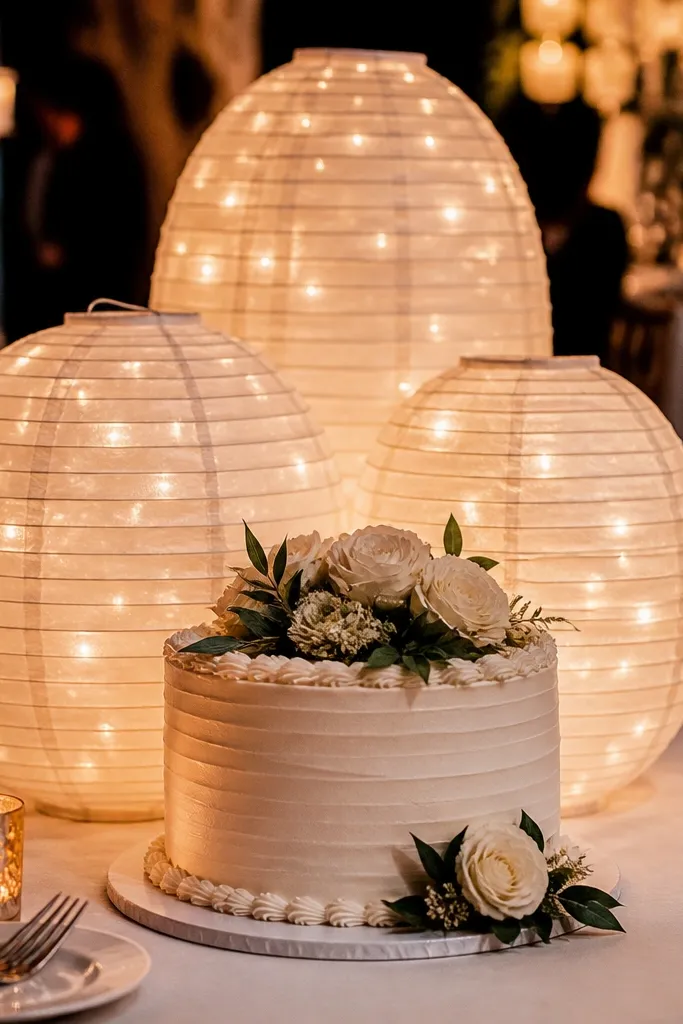
Start by placing a light source behind the cake area — a warm white battery fairy light string works without needing an outlet. Then set lanterns in a staggered arrangement: one tall, two medium, so the tallest matches the cake’s height. Finally, keep lantern glass clean and dry so the light isn’t diffused into a dim haze. For cost, use battery candles inside lanterns rather than adding extra candles on the table. Test the lighting angle from the front and side before the cake goes on.
Lanterns add a cozy glow and give your cake table a story, not just a pretty surface. The fairy lights behind the lanterns create depth so the cake looks dimensional even in dim reception lighting. Use a cluster of two or three lanterns so the height varies and the background doesn’t look flat. This works well for food guide wedding reception setups because lantern light helps labels and serving stations read clearly. It suits winter weddings, evening receptions, and venues with darker interiors.
Skip thisSkip lanterns that are too dark inside — they swallow the glow and make the table look gloomy.
Quick tipWarm white fairy lights look better than cool white under most reception bulbs.
10. Large-scale blush paper fans as a backdrop wall
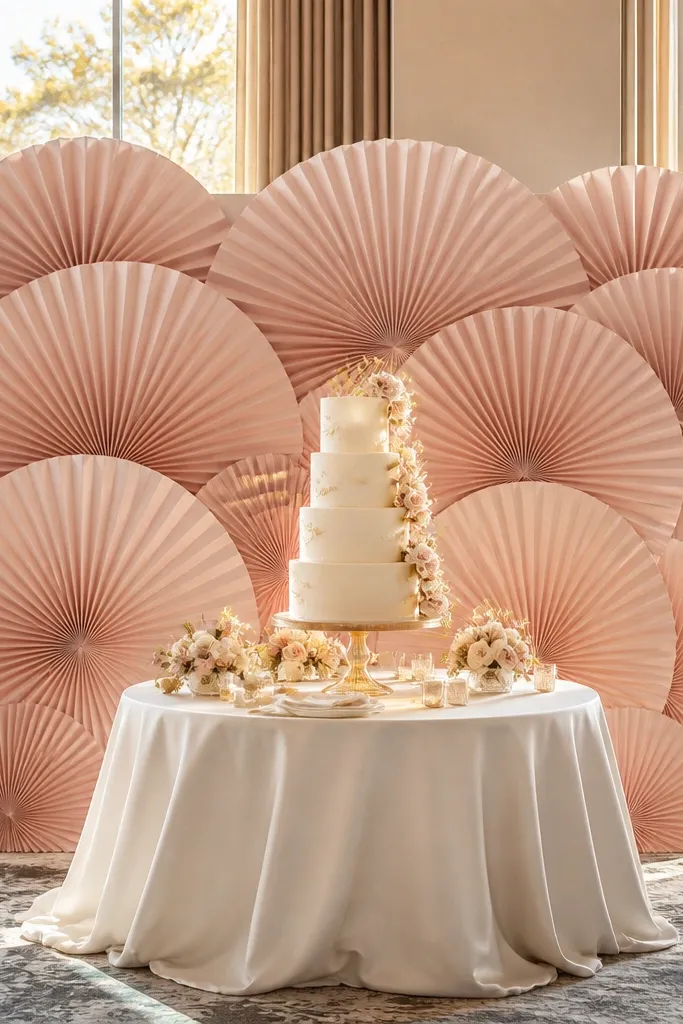
If you want maximum photo impact with minimal setup fuss, paper fans do the job. They create a graphic backdrop that makes the cake look intentional and centered, especially when your venue is plain or has busy walls. Blush tones keep it romantic, and the fan texture gives depth without adding bulk around the cake topper. For a food guide wedding reception, the backdrop also improves readability of signage because it creates a uniform, light background. It suits modern, blush-forward weddings and indoor receptions.
Start by securing fan panels to a freestanding frame or to a backdrop stand behind the table, not directly on the tablecloth. Then arrange fans in a staggered pattern so the peaks line up around the cake height. Finally, place the cake stand at the center and use two small side elements (like mini vases or candle holders) so the composition doesn’t feel empty below. Budget tip: use fewer large fans instead of many small ones for a cleaner look. Set up the backdrop first so you can adjust the cake placement.
Use matte fans; glossy paper reflects venue lights and creates glare.
Avoid a backdrop that’s too busy with multiple colors — it competes with the cake.
11. Sliced citrus and rosemary garland for a bright summer table
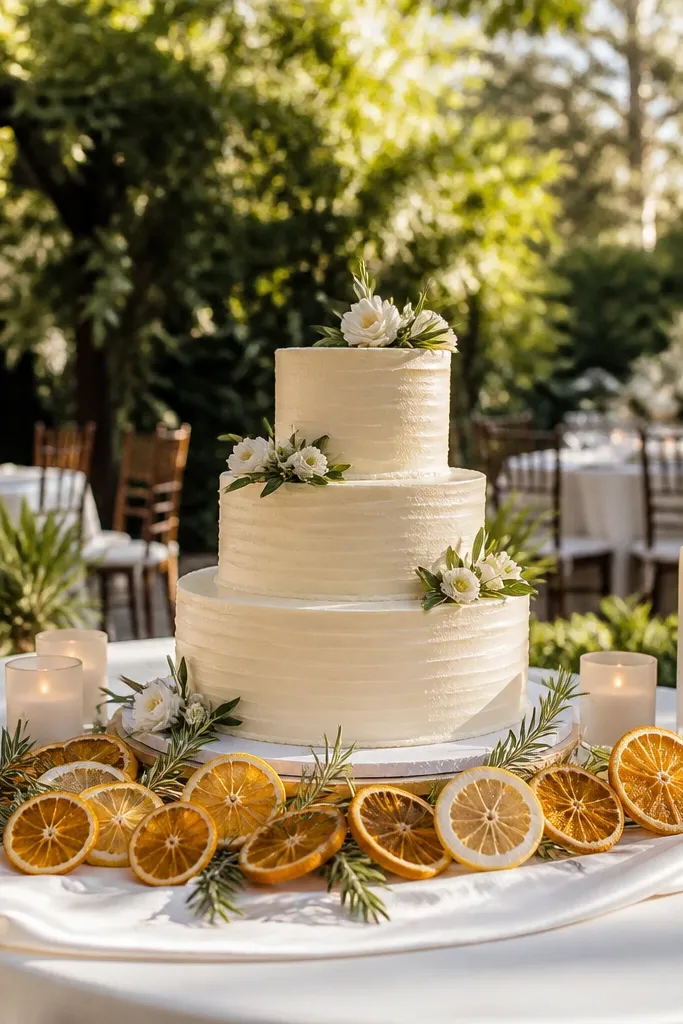
Start by choosing preserved citrus slices that are fully dried so they won’t leak. Then lay rosemary sprigs along the runner and intersperse citrus slices, securing with thin floral wire or tape on the underside. Finally, place a low candle group or small flower stems at the sides so the center garland isn’t the only visual. Keep the garland close to the front edge so it’s visible from guest eye level. Plan for humidity — if your venue is humid, use sealed citrus slices and keep it under shade when possible.
This is a food-guide wedding reception decoration that looks edible and smells good. Citrus slices — dried or preserved — plus rosemary create a bright, fragrant line that frames the cake without blocking it. It’s photogenic because the warm oranges and greens pop against white or cream linens. Guests also feel the “food moment” because the decor looks like it belongs in the meal. It’s ideal for outdoor summer receptions, brunch-style celebrations, and warm-weather venues.
Skip thisSkip fresh-cut citrus — it turns translucent, stains linen, and looks tired in photos.
Quick tipAdd a clear acrylic cake stand cover or keep a small distance between citrus and the cake to avoid scent mixing with frosting.
12. Monochrome black taper candles with gold candleholders
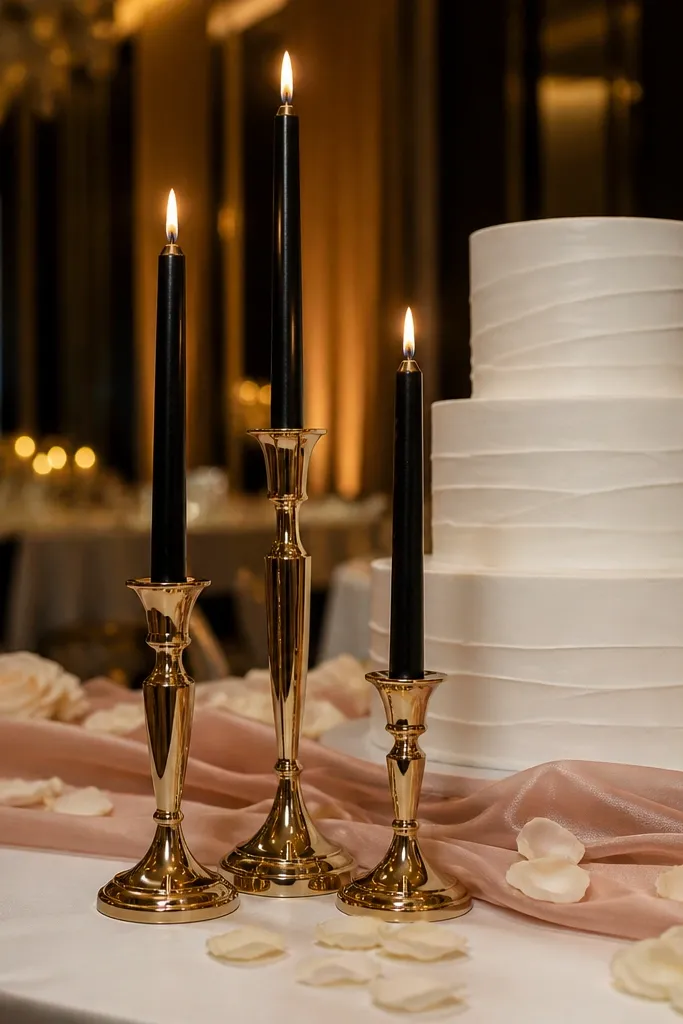
Start by selecting candleholders that match the cake stand material, usually gold or brushed brass. Then arrange 3-5 taper candles behind the cake in a staggered height pattern, keeping the tallest near the center. Finally, keep the front of the table clean and use small accents like a thin garland or a few scattered petals so the candles remain the visual anchor. For safety and ease, choose flameless tapers that still look like real tapers. Position candles first, then confirm the cake topper isn’t blocked from the front.
For modern weddings, black taper candles make the cake table look instantly styled. Gold candleholders add warmth and keep the palette from feeling too harsh. The contrast is what photographs well: black reads as solid shape, gold adds sparkle, and the cake becomes the bright centerpiece. This is a strong choice for evening receptions and for couples doing a dark accent color like black, deep green, or navy. It also works if your cake is tall or heavily decorated because the candles give structure behind it.
Skip thisAvoid mixing matte black with flat black tablecloths; it can absorb light and mute the cake.
Quick tipUse unscented candles or flameless — strong scents can clash with dessert aromas.
13. Floating floral stems in a row of clear vases
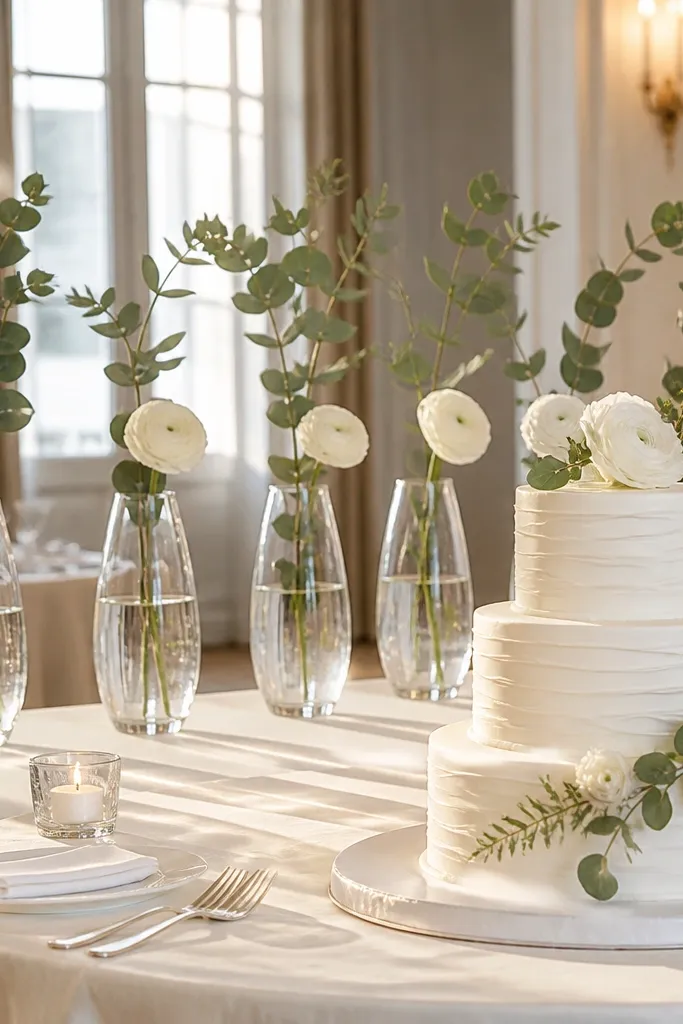
Start by choosing 5-7 clear vases and filling them with water plus floral preservative if you’re using real stems. Then place them at equal spacing — around 10-12 inches apart — and keep flower heads at a consistent height range. Finally, add one thicker element at the center, like a slightly taller stem, so the arrangement leads the eye to the cake. Use a runner or tray under the vases so water drips don’t hit the linen. Assemble close to serving time so stems don’t droop.
Single-stem vases look airy but still expensive because they’re controlled and intentional. When you place several clear vases in a row behind or beside the cake, you create a repeating rhythm that makes the table feel designed. Choose flowers with strong silhouette — stock, white ranunculus, or long-stem greenery — so each stem reads clearly. This is great for a food guide wedding reception because it keeps the label area uncluttered while giving the cake a polished frame. It suits minimalist weddings, modern florals, and any venue where you want the cake to stand out.
Skip thisSkip random stem heights; the row should feel even from the viewer’s angle.
Quick tipIf you use faux stems, pick ones with visible leaf veins — it reads more realistic on camera.
14. Rose-petal scatter in a shallow tray border
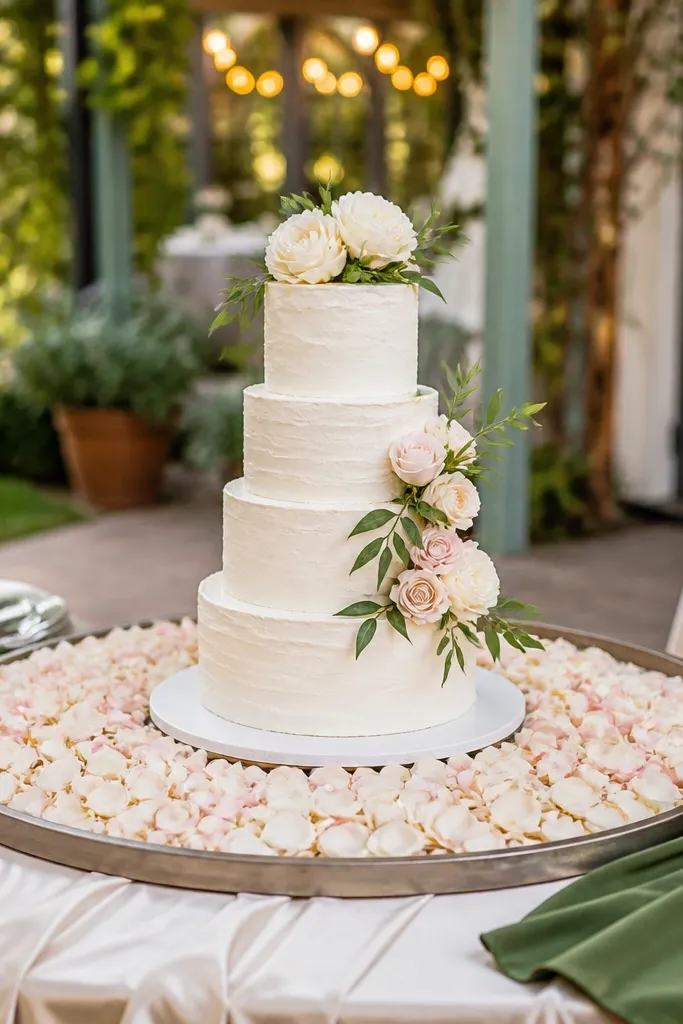
Start by placing a shallow, low tray (or two) in front of the cake stand along the table edge. Then sprinkle petals lightly in a gradient pattern — more at the center, less at the sides — so it looks designed. Finally, keep one “clean path” in front of the knife set and server so guests can serve without stepping into petals. If you’re using real petals, dry them fully and keep them in a cool room before setup. For faux petals, use ones with natural edges so they don’t look like confetti.
Petals are the fastest way to make a cake table feel romantic, but you need control or it looks messy. Using a shallow tray border keeps petals contained while still giving the “soft landing” look in photos. Choose petals in two tones — like pale blush and white — so the scatter has dimension instead of looking flat. For a food guide wedding reception, petals also help guide the eye toward the serving side, especially if you place them more heavily on the side where utensils and labels sit. It fits garden weddings, classic romance, and outdoor receptions.
Skip thisAvoid loose petals scattered across the entire tablecloth; they move and look uneven.
Quick tipUse petals sparingly near the cake — frosting stains show up fast under flash.
15. Woven basket set for cake server and napkins
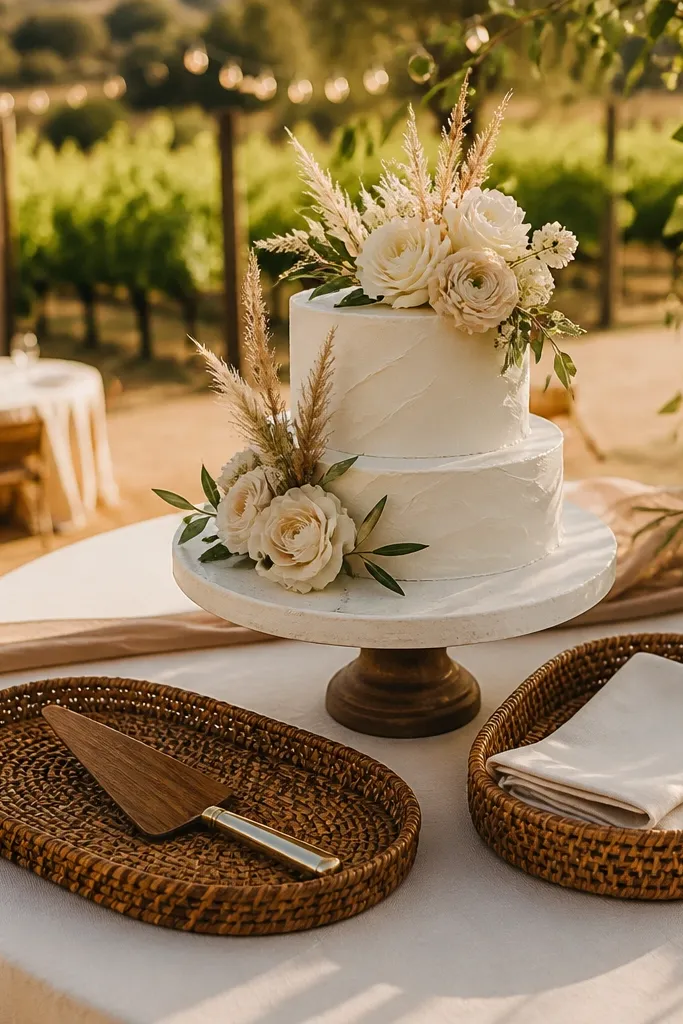
When guests approach the cake, they need a clear place for tools and napkins. Woven baskets look warm and handmade, and they photograph well because the texture adds depth under the cake. Use baskets that match your wedding’s material palette — rattan for boho, wicker for rustic, and darker weaves for modern country. This decoration improves the food guide wedding reception experience because it organizes the serving moment while still looking beautiful. It suits rustic weddings, beach ceremonies, and outdoor receptions.
Start by selecting two baskets: one for the cake server set and one for folded napkins. Then place the baskets on the same side of the cake station as your signage so the flow is one-directional. Finally, add a ribbon tie or small tag in your wedding color to make the baskets feel coordinated, not random. Budget tip: look for baskets with flat bases so they don’t tip when guests lean in. Position baskets 6-10 inches away from the cake stand edge for easy reach.
Line baskets with a thin cloth so crumbs or frosting don’t snag the weave.
Skip baskets that shed fibers — they stick to napkins and look messy.
16. Brushed brass tray with mini bud vases along one side
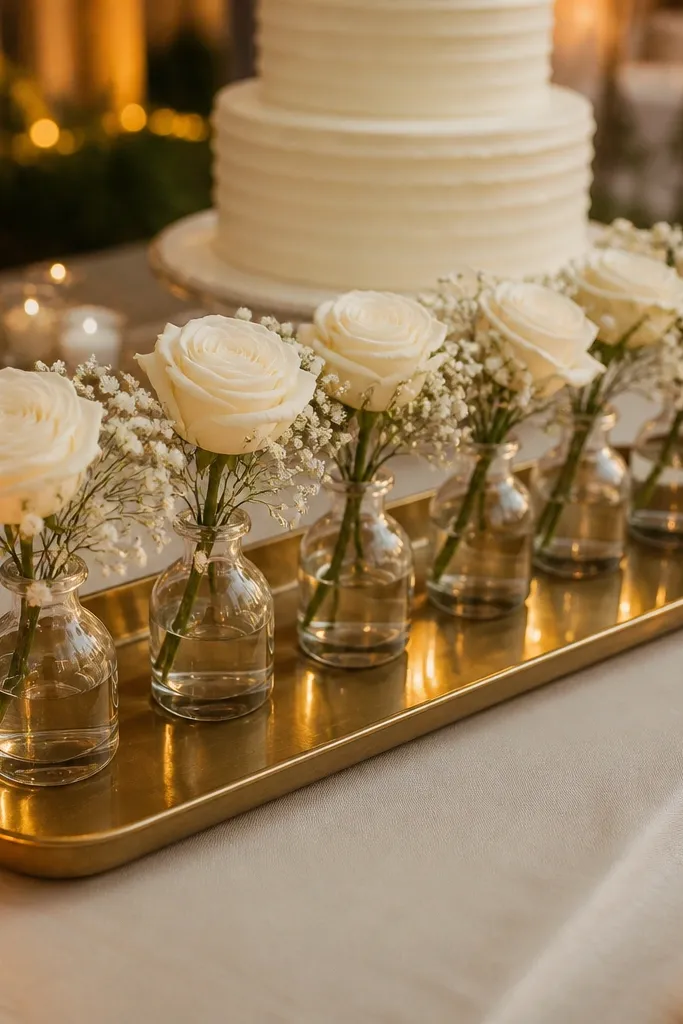
A brass tray instantly makes a cake table feel like a designed station, not just a place where the cake sits. Mini bud vases along one side create a clean, repeating detail that looks great in straight-on wedding photos. The brass adds warmth and pairs with most cake colors — white, buttercream, and even dark chocolate cakes. For a food guide wedding reception, it also organizes the side table area where guests look for labels and serving tools. This setup works for classic, glam, and modern weddings.
Start by choosing a brass tray that’s long enough to hold 5-7 mini vases without crowding. Then place the tray on the table’s side, not directly behind the cake, so it doesn’t fight with the backdrop. Finally, fill vases with short stems and keep the top of stems consistent height — around 6-8 inches. Add one small sign card on the tray edge so guests find the food station info quickly. Polish the brass right before setup to avoid dull patches in photos.
Use baby’s breath or waxflower for consistent volume if you want a fuller look with fewer stems.
Avoid tall bud vases; they block sightlines to the cake tiers.
17. White ceramic cake riser with scalloped edges
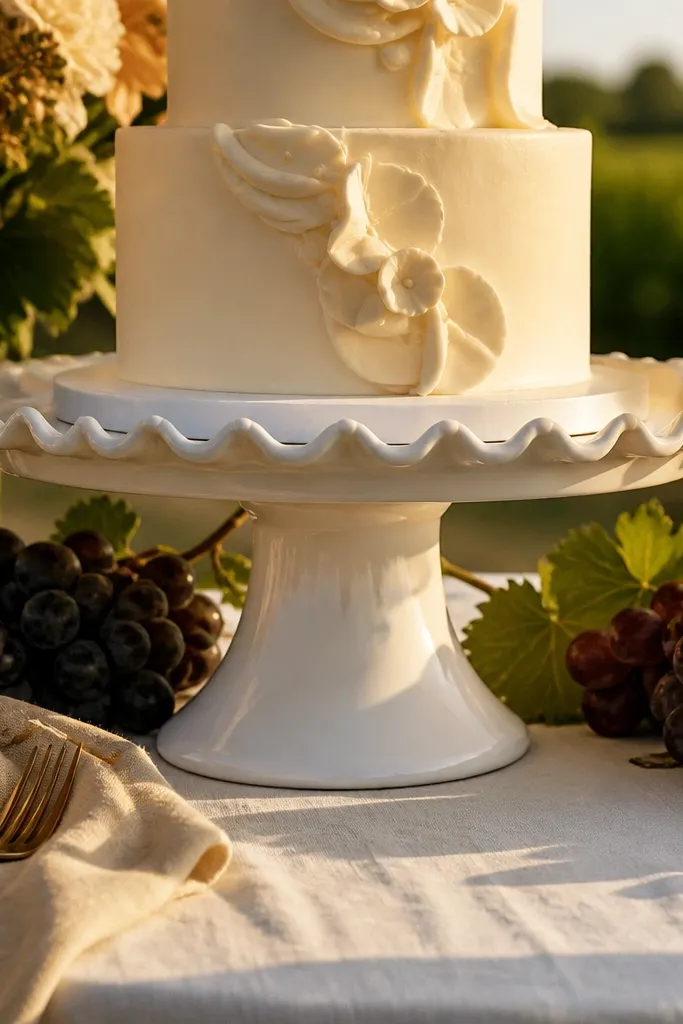
Start by matching riser size to cake footprint — leave at least 2 inches of rim showing around the cake base. Then place the riser centered and add a thin layer of non-slip liner under it. Finally, style the area around the riser with low elements like a garland or a small cluster of candles so it doesn’t look like the riser is sitting alone. For cost, you can reuse the riser for after-party desserts if it’s neutral. If you’re using a multi-tier cake, keep the riser stable and check it before frosting goes on.
A ceramic riser adds weight and permanence to the display. Scalloped edges look soft and decorative in photos, especially when your cake has smooth buttercream or fondant texture. Ceramic also hides minor table imperfections because it sits like a foundation. This is a smart move for food guide wedding reception setups where guests gather at the cake and you want the base to look clean even when they bump the table. It suits classic weddings, farmhouse touches, and neutral palettes.
Skip thisSkip risers with heavy decoration if your cake already has busy piping.
Quick tipUse warm white flowers around it, not icy silver — it keeps the photo tone flattering.
18. Gold wire frame with draped tulle ribbons
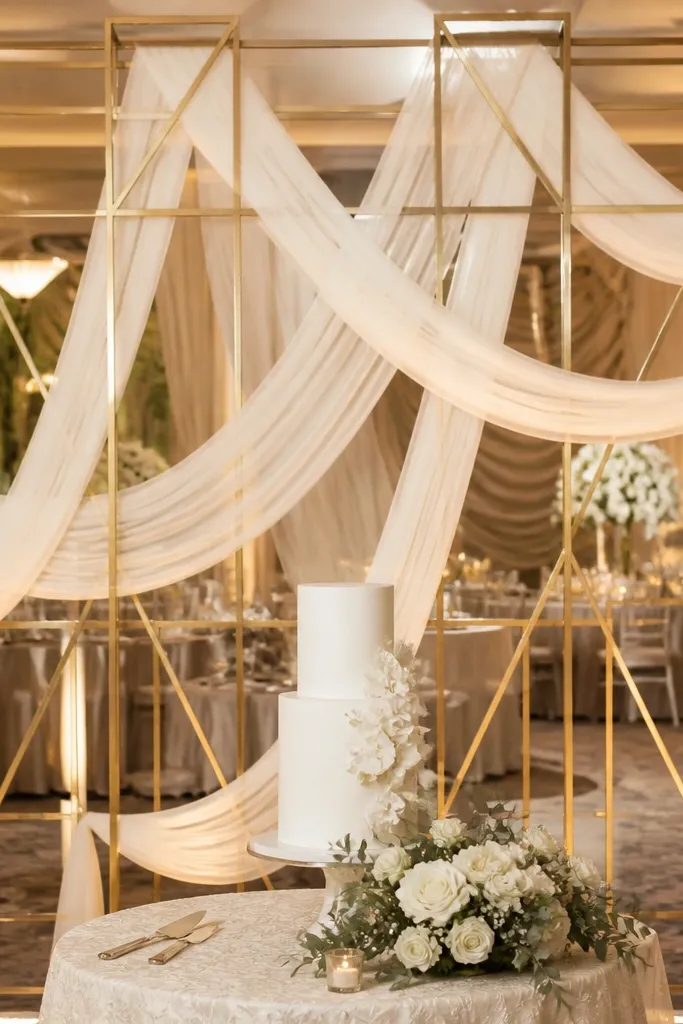
Start by choosing a frame width close to the cake stand width so the ribbons fall in a controlled way. Then drape tulle ribbons down from the frame at three points: center and both sides, keeping lengths around 24-30 inches. Finally, place the frame behind the cake and add small filler elements at the ribbon ends so they don’t look like they end mid-air. Secure ribbon ends with discreet ties so wind or movement doesn’t shift them. Install the frame first, then adjust ribbon lengths after you see the cake topper height.
A wire frame gives you a modern structure, and draped tulle ribbons soften the look. The result is a backdrop that looks airy but still has height, which is exactly what cake tables need for gorgeous photos. Gold wire pairs with champagne, ivory, and warm white cakes without turning the table too dark. For a food guide wedding reception, the frame also makes signage stand out because the background is light and textured. It’s a strong choice for indoor receptions and for couples who want glam without heavy floral walls.
Skip thisAvoid too many ribbon colors — two tones max looks cleaner in photos.
Quick tipUse tulle with a slight sheen; it lights up under reception lighting.
19. Pastel balloon garland anchored to the cake stand base
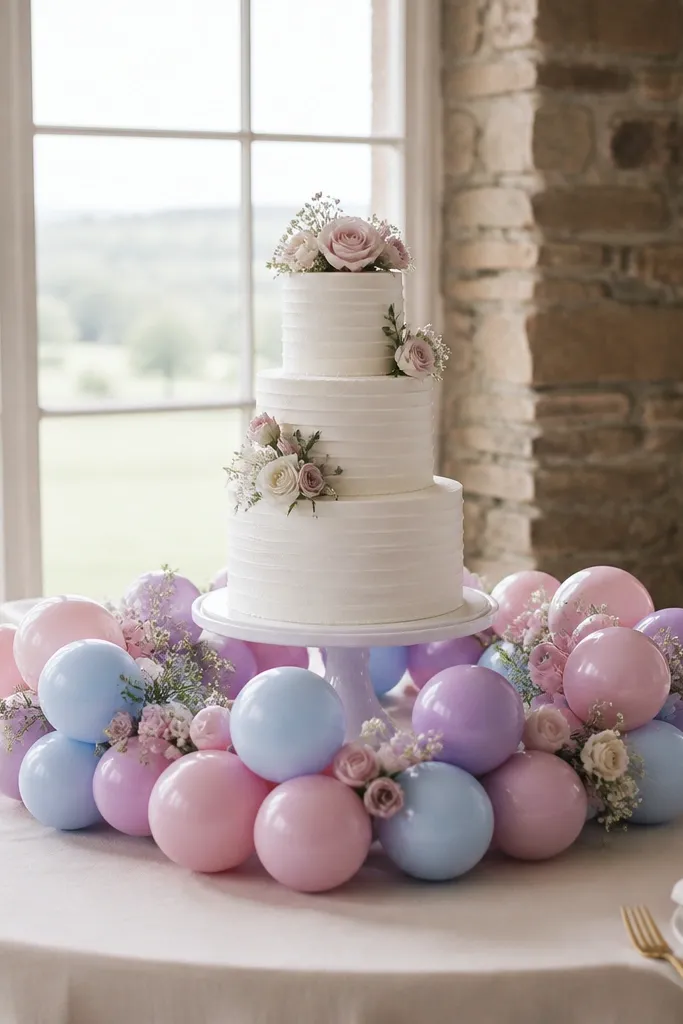
Balloon garlands can look surprisingly elegant when they’re controlled. The key is choosing pastel tones that match your linens and anchoring the garland at the base area so it doesn’t float into your cake topper. This gives the cake table a soft, playful frame that still reads as “event decor,” not party decor. It’s great for food guide wedding reception nights because balloons make the cake station easy to spot from a distance. It suits spring weddings, baby-blue or blush palettes, and venues with bright walls.
Start by picking 2-3 pastel colors and making the garland with clusters rather than a full wall. Then anchor the garland to a stand or weighted base behind the cake, keeping the top below the topper. Finally, add one small floral or greenery accent inside the garland so it looks integrated. For cost and timing, assemble the garland the day before and keep it shaded until setup. Inflate balloons to consistent sizes so the cluster looks even across the frame.
Use matte or satin balloons; glossy ones reflect harsh venue lights.
Skip giant balloons that crowd the cake — you want framing, not obstruction.
20. Frosted glass cloche with a single floral stem
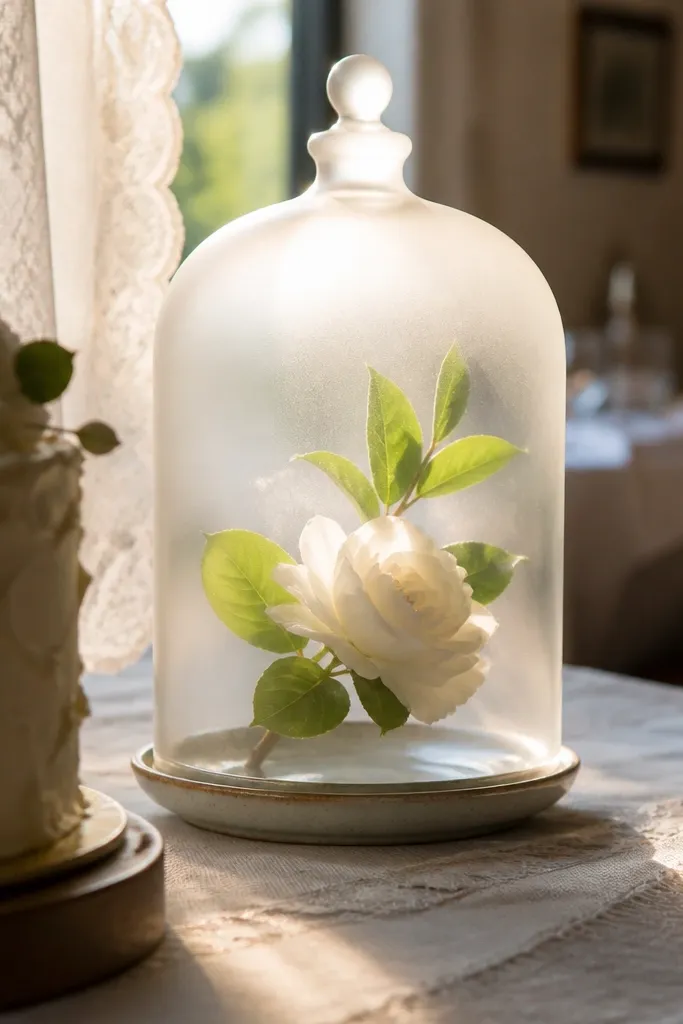
Start by choosing a cloche that fits on a small tray so it doesn’t wobble on linen. Then place a single stem in a tiny base inside the cloche — aim for 10-14 inches tall so it shows above the cake’s sightline. Finally, position the cloche on the side opposite your signage so it balances the station. Polish the cloche and wipe fingerprints right before guests arrive. If you’re using real stems, keep water inside a small inner container so the cloche doesn’t tip.
A cloche makes the cake table feel curated and a little fashion-editorial. The frosted glass softens the background and makes the single stem inside look intentional, not random. Keep the cloche placed slightly off-center to create a secondary focal point that still respects the cake as the main hero. For a food guide wedding reception, it’s a neat way to add texture and height without blocking signage or serving tools. It fits modern romance, winter weddings, and minimalist tables.
Skip thisAvoid clear glass cloches if your venue has harsh overhead lights; frosting looks cleaner.
Quick tipUse one stem only — two or three makes it look like a craft project.
21. Macaron color palette runner with matching napkins and labels
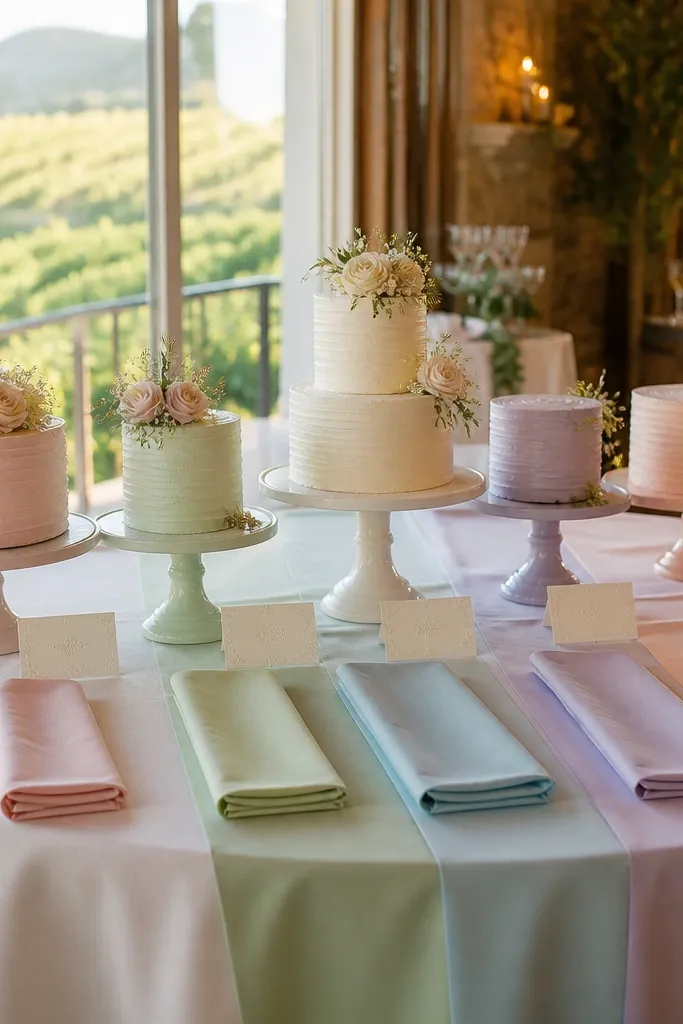
Start by selecting a runner that uses pastel blocks or stripes and measure the width so the cake sits centered on the lightest section. Then fold napkins in a consistent size and place them in a line or small stack on the runner’s same side as the labels. Finally, print label cards in one font and match their ink color to one runner shade. Budget tip: use the runner as your color palette anchor and keep flowers neutral or minimal. Set labels last so they don’t get covered by flower petals or steam from the tablecloth.
This is the “aesthetic cohesion” option. A macaron color palette runner sets the tone, and matching napkins plus labels make the food guide wedding reception feel coordinated, not piecemeal. Choose 4-5 colors max so it stays readable in photos. The runner also gives you a natural placement zone for labels and serving utensils, which makes the cake station easier for guests to use. It suits playful weddings, spring and summer events, and couples who want color without going loud.
Skip thisSkip too many font styles on labels; it makes the station look random.
Quick tipPick one ink color (like cocoa brown) for labels so the whole station looks intentional.
22. Monogram cake topper with matching acrylic signage
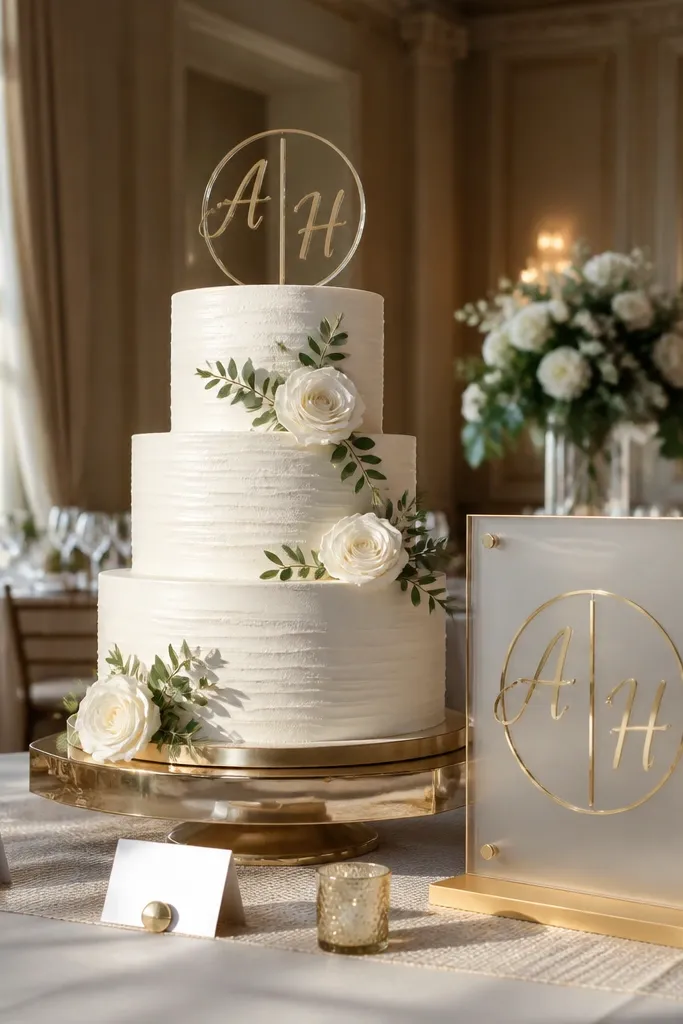
Start by choosing one monogram style and repeating it on signage so the table feels like one set. Then place the acrylic sign on the side where guests approach first, usually the right or left edge depending on your serving flow. Finally, position the topper so it doesn’t touch the backdrop — leave a small gap so it reads clearly in photos. Budget tip: you can order acrylic signage as a single sheet cut into cards and reuse frames. Put signage on the table after all florals are fixed so you don’t knock them.
A monogram topper gives the cake table a signature look, and matching acrylic signage keeps it crisp. The point isn’t the topper itself — it’s the visual system: same material, same color, same vibe. For the food guide wedding reception, signage matters because guests want the “what is this” moment without searching. Acrylic signs look clean and modern, and they photograph well when placed at a slight angle so they catch light. It suits weddings that lean modern, glam, or minimal.
Skip thisAvoid placing signs directly behind the cake tiers; they can disappear in the same light.
Quick tipWipe acrylic signs with a microfiber cloth — fingerprints ruin close-up photos.
23. Black-and-ivory marble effect tray and cake knife station
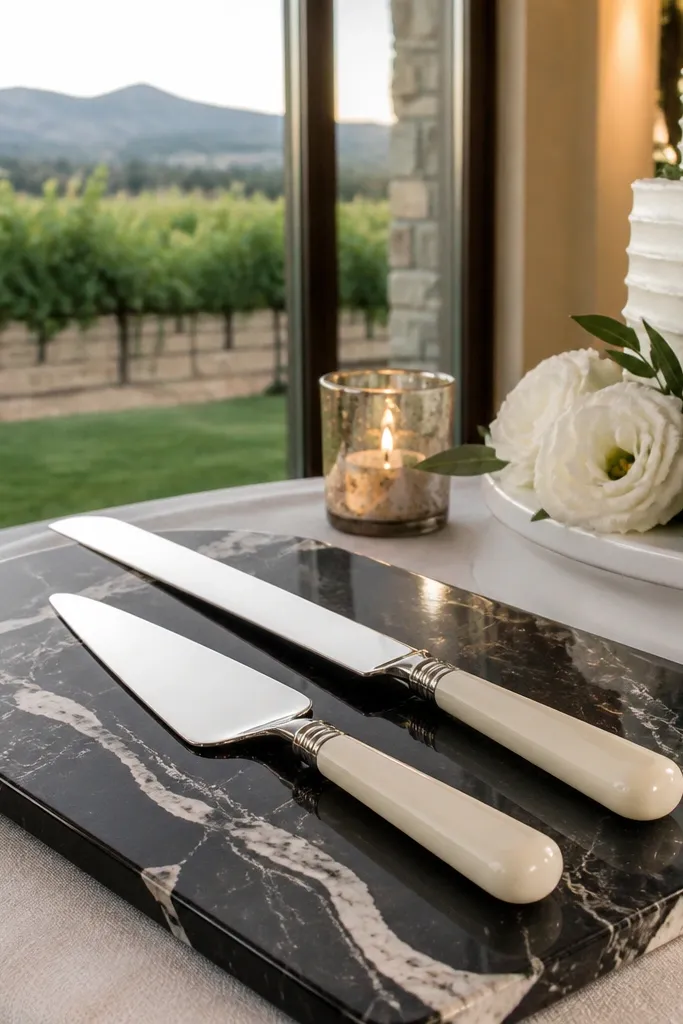
Start by choosing a tray that’s long enough for the knife set plus room for labels, without crowding. Then place the tray on a stable surface and add a small liner under it so it doesn’t slide on satin. Finally, stage the knife and server in the same orientation every time, with labels facing the room. If you’re using real flowers, keep them away from the tray so petals don’t stick to metal. Set the tray right before cake cutting so it looks freshly arranged.
A marble effect tray makes the serving area look premium, especially when the cake itself is simple. Black-and-ivory tones add a high-contrast frame that reads well in both daylight and evening. Put the tray on the side of the cake table where guests handle utensils, and use it to anchor the knife set, cake server, and small napkin stack. This is a direct win for a food guide wedding reception because it organizes the “how to serve” moment. It suits modern weddings, black-tie vibes, and venues with neutral decor.
Skip thisSkip placing a marble tray directly under the cake stand; it can look too busy.
Quick tipUse a small dish for rings of condensation if your venue is humid.
24. Single-color oversized pampas grass plume arrangement
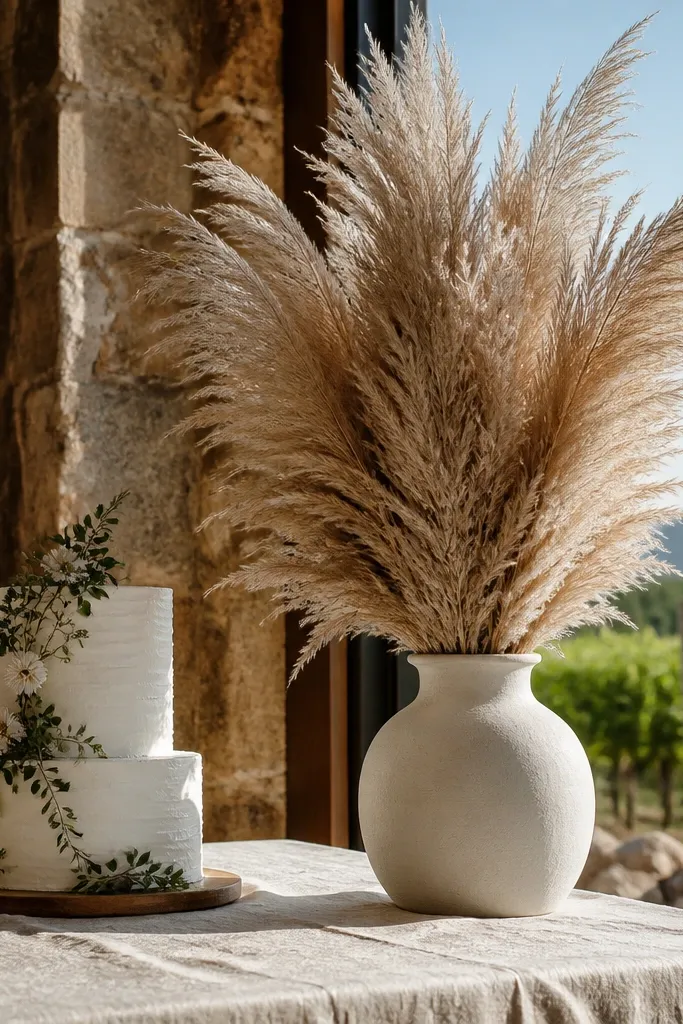
One big pampas plume creates instant height and texture without turning your table into a flower market. Neutral plumes like oat, cream, or sand look clean and read as intentional in photos. Place it slightly off to one side of the cake so it adds dimension while letting the cake remain the center. This works for food guide wedding reception events because it keeps the serving area uncluttered while still making the table feel designed. It suits boho-minimal weddings and venues with lots of natural light.
Start by choosing a plume height that reaches about the same level as the cake topper, then secure it in a weighted vase or stand. Then place it on the side opposite your signage so it balances the station. Finally, add a small secondary texture near the base — like dried palm or a thin ribbon — so it doesn’t look like a single object dropped on the table. Tie the plume with twine to keep it from shedding too much. Install it early so you have time to adjust angle without rushing.
Shake plumes gently before setup to reduce stray fibers on linen.
Avoid multiple large plumes; two or more makes the table look cluttered fast.
25. Mini fruit bowls for a dessert table style feeding vibe
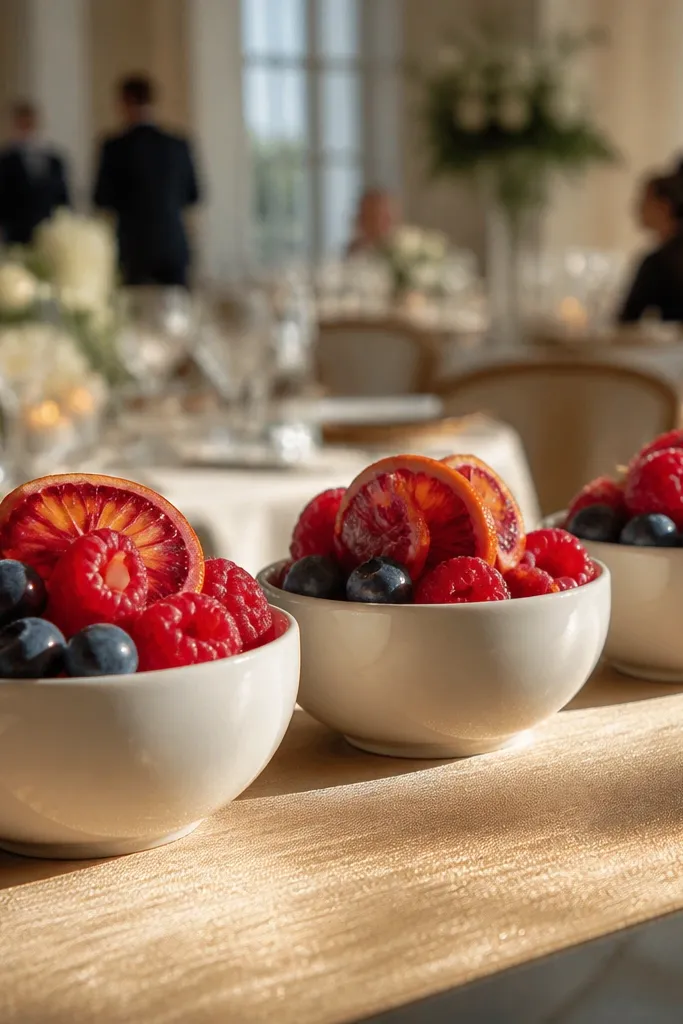
Start by choosing fruit that holds shape: strawberries, blueberries, and citrus segments. Then place fruit in mini bowls spaced evenly along the front or side of the cake table, leaving a clear center for cake cutting. Finally, add a small label card near the bowls so guests know what they’re looking at. Keep fruit chilled in a cooler until setup so it looks crisp. Assign someone to refresh bowls if they start to look watery.
Fruit bowls are a direct nod to the dessert and serving moment, and they look fresh in photos. Use mini bowls so the table stays elegant — large bowls can look like a buffet. Berries and citrus give you color variety without needing heavy floral. For a food guide wedding reception, these bowls also help guests feel like the cake station is part of a broader food experience. It suits summer weddings, daytime receptions, and any palette that can handle pops of red or berry tones.
Skip thisSkip watery fruit mixes; they stain linens and look dull in photos.
Quick tipUse clear bowl liners or keep fruit dry — water spots look messy under flash.



