
1. Drape the ceremony arch with ivory tulle and a single satin ribbon line
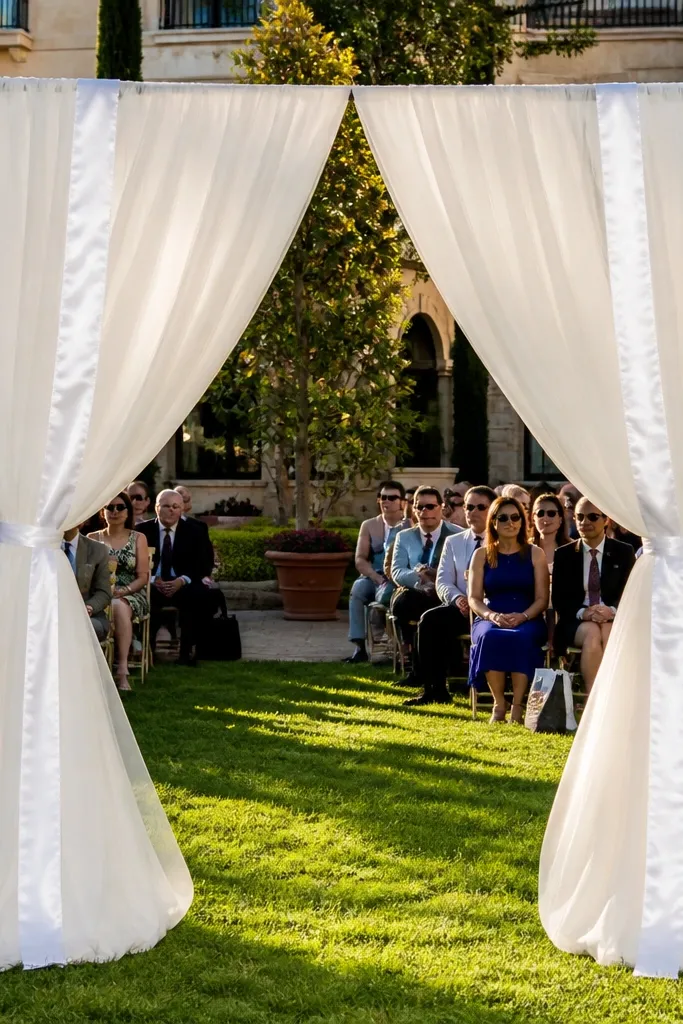
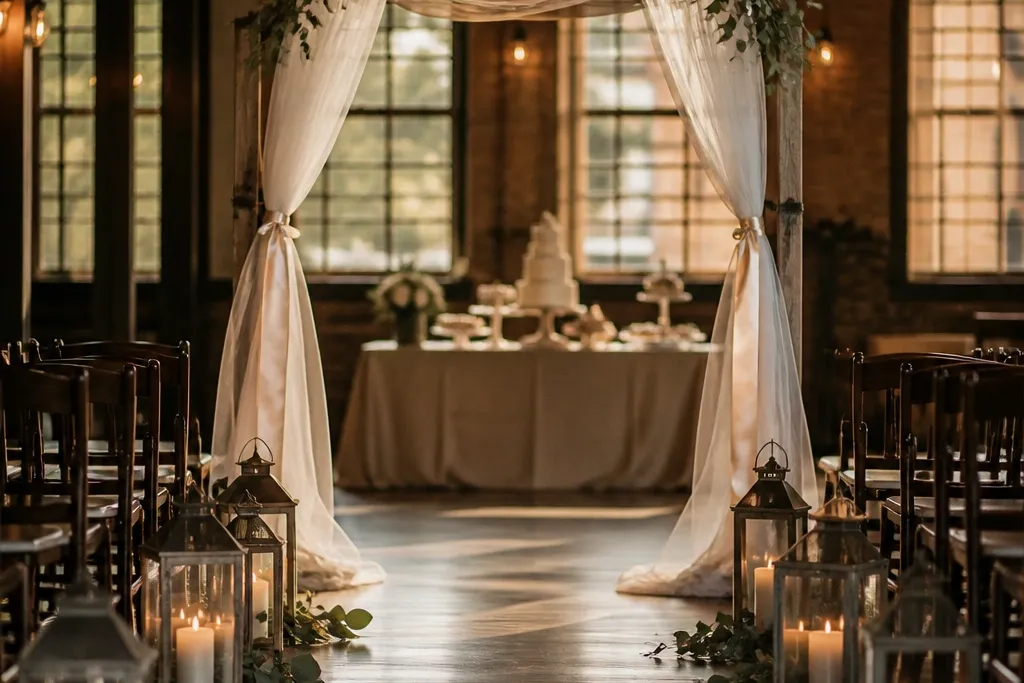
Start by renting or building a basic arch frame (metal or wood) and attach tulle in full-length panels, overlapping by about 4-6 inches. Then thread the satin ribbon through a few points so it stays taut and straight, not wavy. Finally, add two small clusters of greenery at the base corners only — you are framing the arch, not building a hedge. Budget tip: buy tulle by the roll and cut panels to length so you avoid waste.
This is one of the cleanest ways to get a luxury look without buying a full floral wall. Tulle reads soft and expensive in photos, and the satin ribbon stripe gives structure so the arch doesn’t look like fabric stuck on a frame. Keep the ribbon width around 1 to 1.5 inches and run it in a straight line through the center for a tailored effect. It suits outdoor ceremonies where you want movement but not chaos, and it also looks great indoors against blank walls. Best time is late afternoon or early evening when the fabric catches warm light.
Skip thisSkip multi-color ribbon and mixed fabric weights; it makes the arch look improvised in every photo.
Quick tipUse 2700K string lights behind the arch so the tulle glows instead of reflecting harsh overhead lighting.
2. Create a photo backdrop with layered organza circles and warm fairy lights
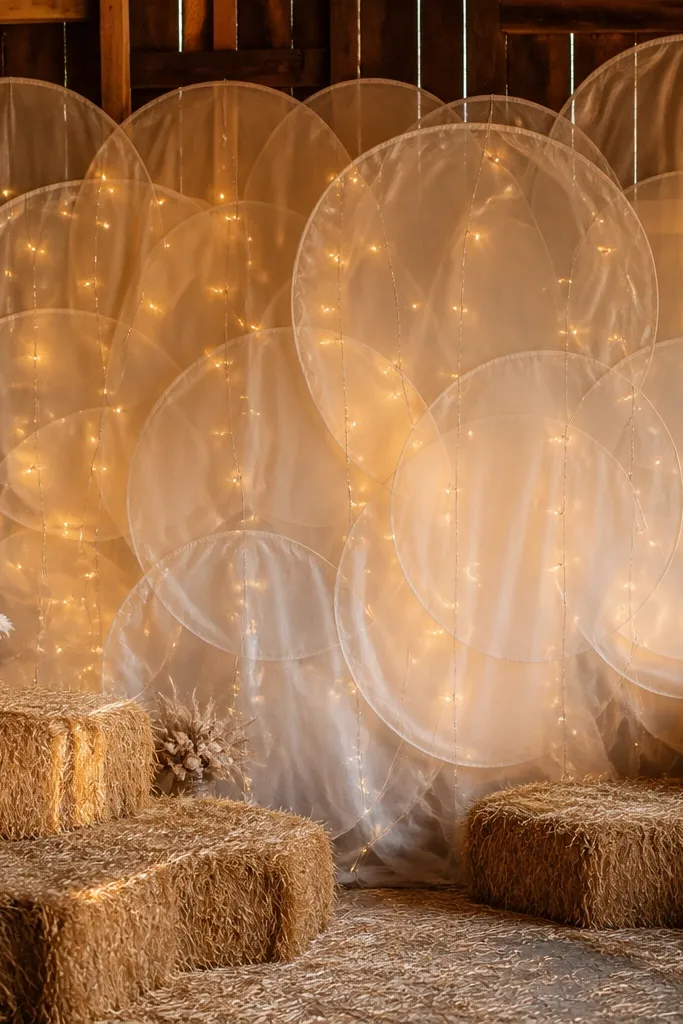
Start by cutting organza into circles using a template (for example, 10 inches, 14 inches, and 18 inches). Then layer them on a lightweight mesh or wire backing: place the largest circle at the top center and stagger sizes down the backdrop. Finally, weave warm fairy lights behind the layers so the light hits the fabric from the back. Keep the lighting on a battery pack if you’re outdoors to avoid extension cord clutter.
Organza circles give you dimension and a “soft canopy” effect that looks high-end without real floral volume. When you layer circles of different sizes, the backdrop fills the frame and looks expensive even with minimal flowers. Warm fairy lights add depth and make the fabric glow instead of looking flat. This works especially well for indoor receptions where walls feel bare and for outdoor receptions when you want a defined photo zone. It’s also forgiving — people stand in front of it and your photos still look full.
Skip thisAvoid thin, cold-white LEDs; they turn organza gray and kill the dreamy look.
Quick tipHang the backdrop 6-8 inches above head height so it reads as a ceiling, not a poster.
3. Float candle clusters in glass lanterns along the aisle
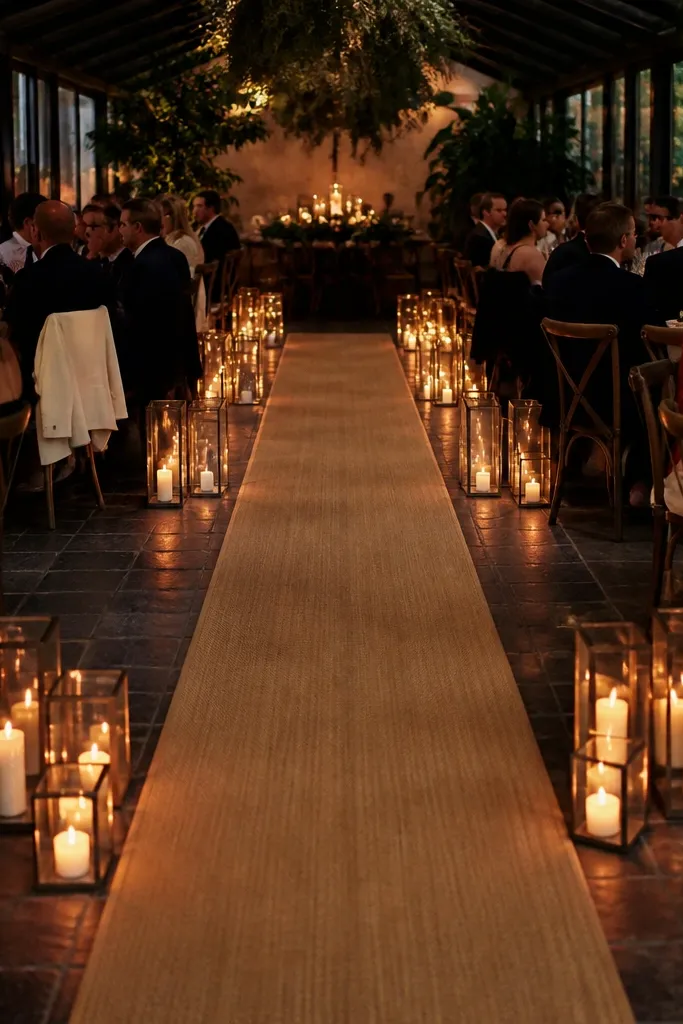
Start by grouping lanterns in sets of 3 or 5 with consistent spacing (about 3-4 feet apart depending on aisle width). Then use battery LED candles if wind or venue rules are an issue; otherwise use real candles with a stable base and drip protection. Finally, dress the lanterns with a thin ribbon band or a sprig of greenery tied at the handle. Budget move: buy plain lanterns and add your own greenery and ribbon so you control the look.
Lanterns make budget wedding decor ideas look luxurious because they create vertical sparkle and a consistent rhythm down the aisle. Candlelight softens faces in photos and adds that “evening wedding” mood even if your venue lighting is plain. Choose glass lanterns with a clear body so the flame glow shows through. This works for both ceremony aisles and reception entrances, and it looks especially good at night or in shaded garden venues. You get a high-end effect without needing hundreds of flowers.
Skip thisDon’t mix lantern heights randomly; keep them within a 2-3 inch range for a polished line.
Quick tipPlace lanterns slightly off the center line so they catch light from the side, which looks better in photos.
4. Line the head table with cascading greenery garland and taper candles
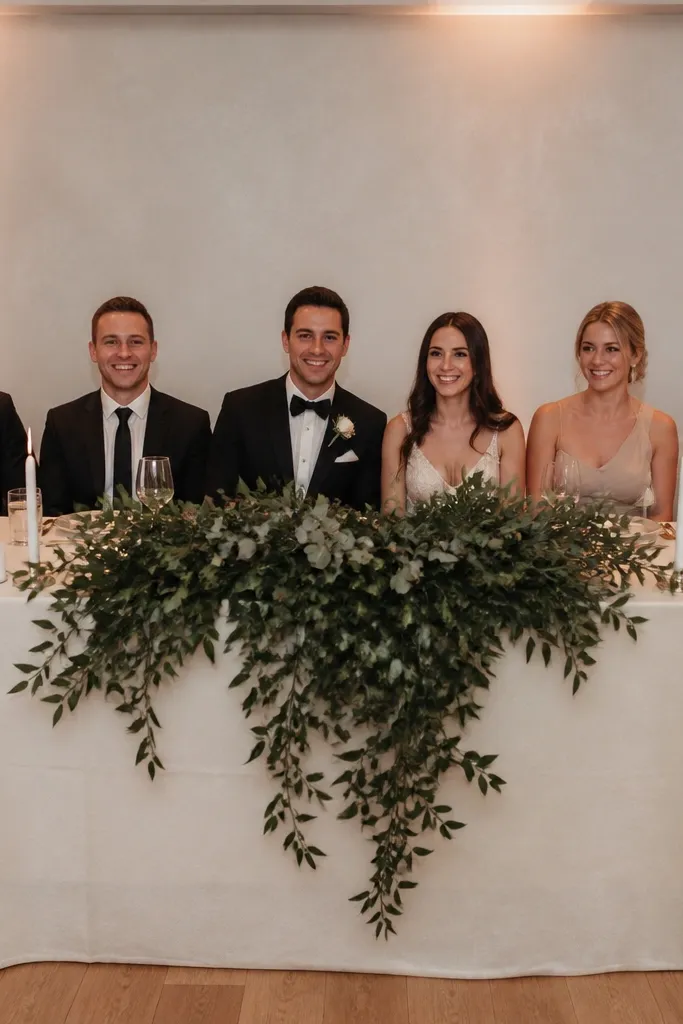
A head table is where most wedding photos focus, so it’s worth making it look styled even if the rest of the room is simple. Cascading greenery reads lush, and taper candles create a formal, expensive feel without a full floral wall. The trick is to keep greenery concentrated along the center and let it “spill” downward in a controlled way. This suits weddings with a sweetheart or long farm-table setup. Evening receptions look best because candle glow adds depth.
Start by laying a table runner in ivory or warm cream linen and placing a long base garland across the center. Then add smaller garland strands that hang down about 6-10 inches on each side of the centerpiece. Finally, cluster taper candles in two rows using holders for straight alignment. If you want extra height, add one tall vase behind the center but keep it narrow.
Press your table runner with a steamer and iron-like pressure; wrinkles read cheap fast in close-up photos.
Skip foam blocks and messy center piles; a clean cascade looks richer than tangled greenery.
5. Use oversized ribbon bows on chair backs for a clean, matching look
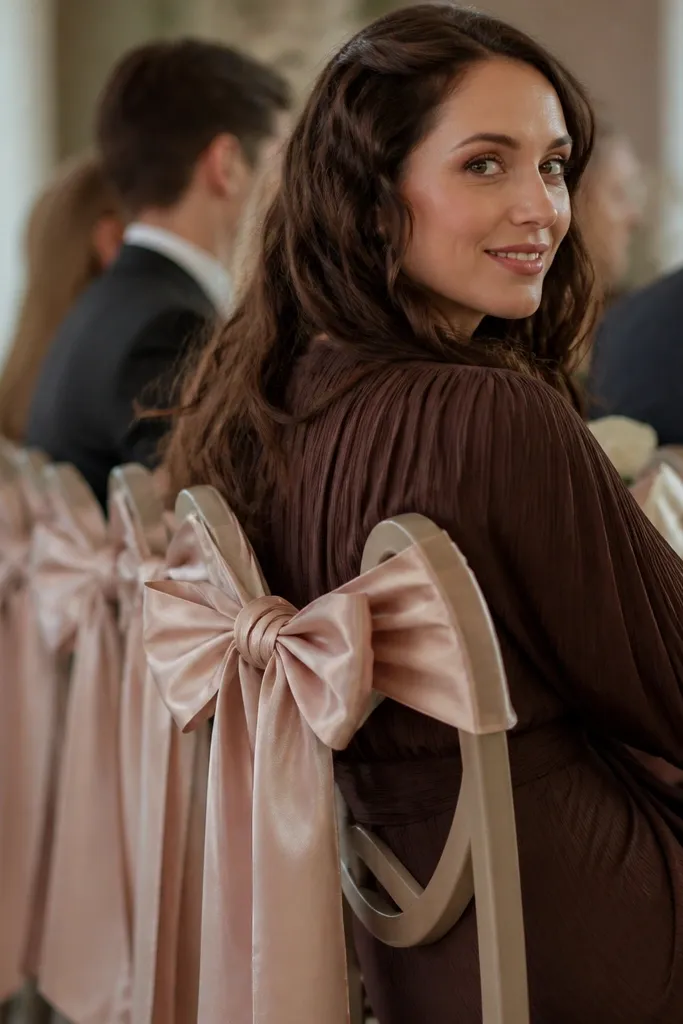
Start by choosing a ribbon width of 2.5 to 3 inches and cut lengths around 24-30 inches per chair depending on bow size. Then tie bows at the top back of each chair with the knot hidden behind the chair frame. Finally, place a small piece of greenery or a single faux eucalyptus sprig at the tail end for a finished look. Budget tip: buy ribbon in 100-yard rolls only if you’ll cover lots of chairs; otherwise buy by the spool and test one bow size.
Chair decor looks small in person but it shows up constantly in ceremony and reception photos. Oversized ribbon bows give a “designer” feel because they create shape and color contrast across the rows. Go for satin or satin-leaning grosgrain that holds form, not floppy organza bows. This is a smart fit for banquet halls and any venue where you can access chair backs easily. It also works for budget wedding decor ideas because one ribbon color can unify every chair.
Skip thisAvoid mixing ribbon finishes like matte and shiny; it makes the chair line look patchy.
Quick tipPre-tie bows on a cardboard template so every bow is the same size and your photos look consistent.
6. Turn your sweetheart table into a floating island with a white floral runner
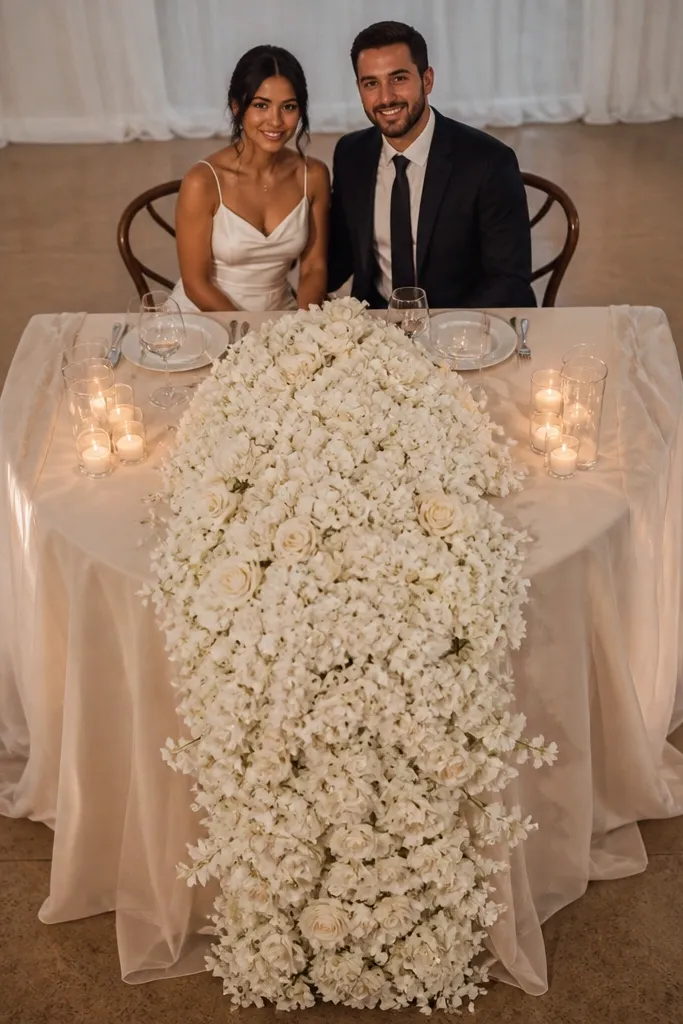
A sweetheart table looks expensive when the centerpiece has a continuous “runner” shape instead of scattered bits. Use a floral runner effect with faux flowers or greenery laid in a long strip down the center so the table reads cohesive from every angle. Add sheer fabric panels on the sides to create a soft edge and hide table legs. This works best for indoor receptions and for outdoor ceremonies where you want a clear focal point. It’s also ideal when you want a clean, modern luxury look rather than a heavy foam centerpiece.
Start by covering the table with a fitted white or ivory tablecloth and add a long runner strip in the center (greenery first, then flowers). Then drape sheer fabric from the runner edges down to just above the floor so it looks like a floating base. Finally, place two candle clusters at the runner ends so the table has balance. Budget move: choose one flower type for the runner and repeat it down the strip so it reads intentional.
If your venue has a patterned wall behind the table, keep the runner mostly white and greenery so it doesn’t compete.
Skip small, random center arrangements; they look underbuilt in wide shots.
7. Build a luxe dessert table with a tiered stand and a monochrome fruit topping
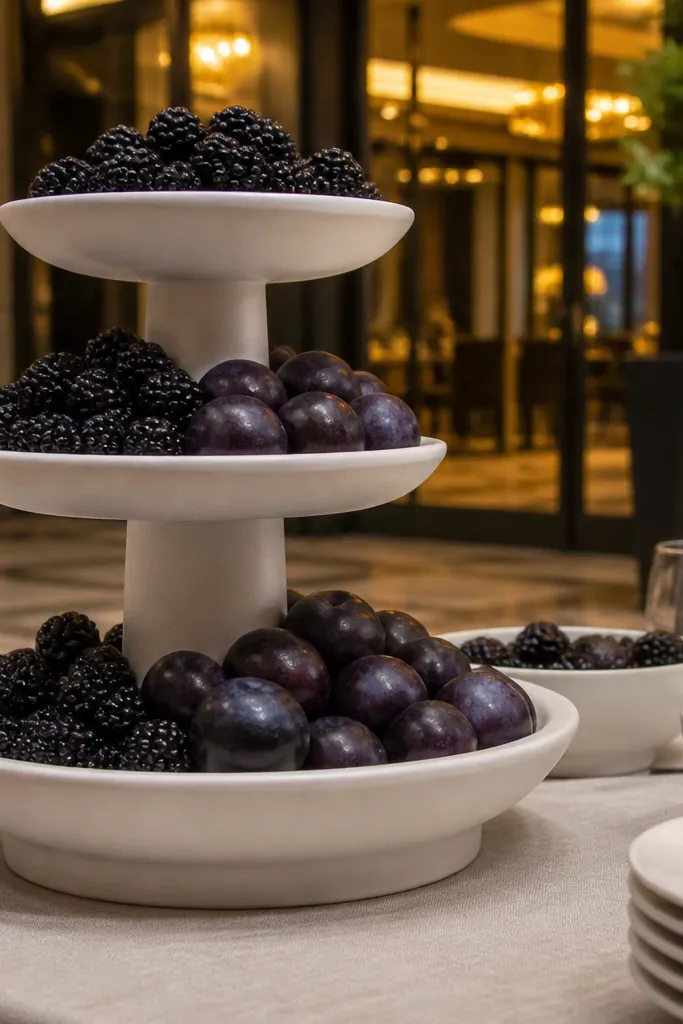
Start by buying or renting two to three tiered stands in matching tones (white ceramic and warm gold looks best in photos). Then pick one monochrome fruit mix and place it in shallow bowls at the base and on the top tier. Finally, add a simple runner under the stands and keep the background one color. Budget tip: use fruit and herbs sparingly — you want it to look styled, not like a grocery display.
Dessert tables are photo magnets, and you can make them look couture with height and a clean theme. Tiered stands give you that staged “magazine” look, while monochrome fruit adds color without the cost of lots of flowers. Stick to one fruit family like white berries and peaches, or deep berries like blackberries and cherries. Add warm string lights under the tiers so the fruit glows and the stands look more expensive. This idea suits almost every venue because it’s easy to set up and easy to photograph.
Skip thisDon’t scatter lots of small props; one tall stand plus a clean backdrop beats clutter.
Quick tipCover the tabletop with a smooth fabric runner so you don’t see plastic table covers in pictures.
8. Make a floating bar sign using acrylic letters and fairy lights behind it
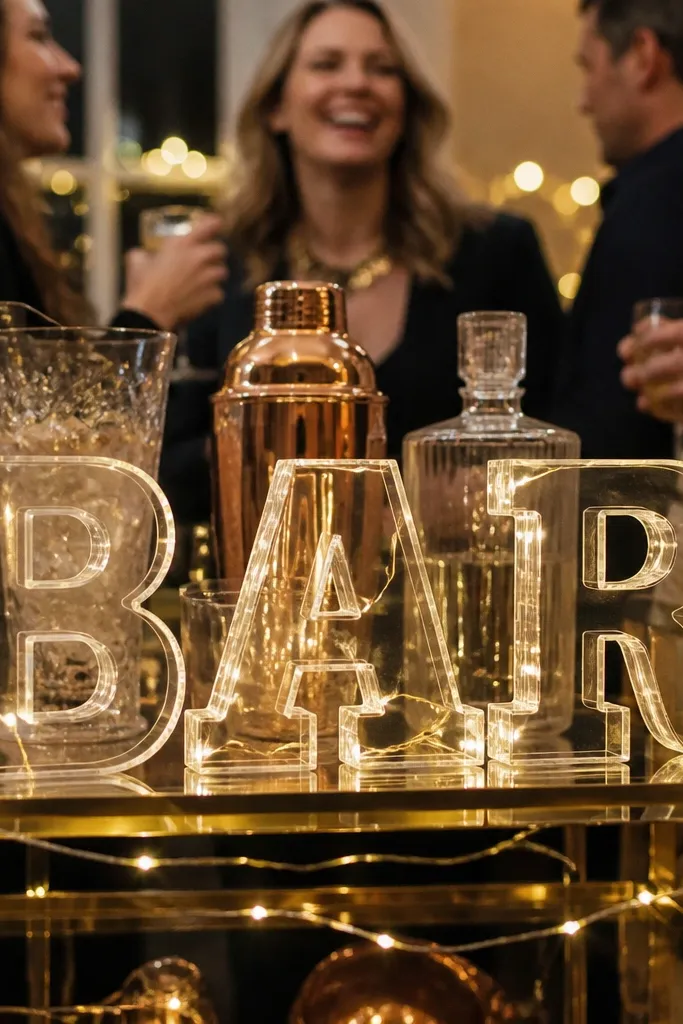
Start by placing a solid backing board behind the bar area in a neutral color like cream or charcoal. Then mount fairy lights behind the acrylic letters so the glow is visible around edges. Finally, secure the acrylic letters with standoffs or clear adhesive mounts at eye level. Budget move: choose thicker acrylic letters so they don’t look flimsy in close-ups.
A bar sign is one of the most photogenic details guests notice, and it looks expensive when it’s lit from behind. Acrylic letters catch light cleanly, and fairy lights add a soft halo effect that makes the setup look designed rather than temporary. Keep the message short, like “BAR” or the couple’s last initial, so it reads clearly in photos. This works for indoor receptions with a wall behind the bar and for outdoor receptions where you want a clear focal point. It’s a cheap way to add a luxury “moment” without building anything large.
Skip thisAvoid ultra-bright cool LEDs; they cause glare on acrylic and wash out your text.
Quick tipKeep the bar sign 5-6 feet from the camera angle you’ll use for group photos so it stays sharp and not blown out.
9. Create a statement aisle runner with a mirrored sequin mesh strip
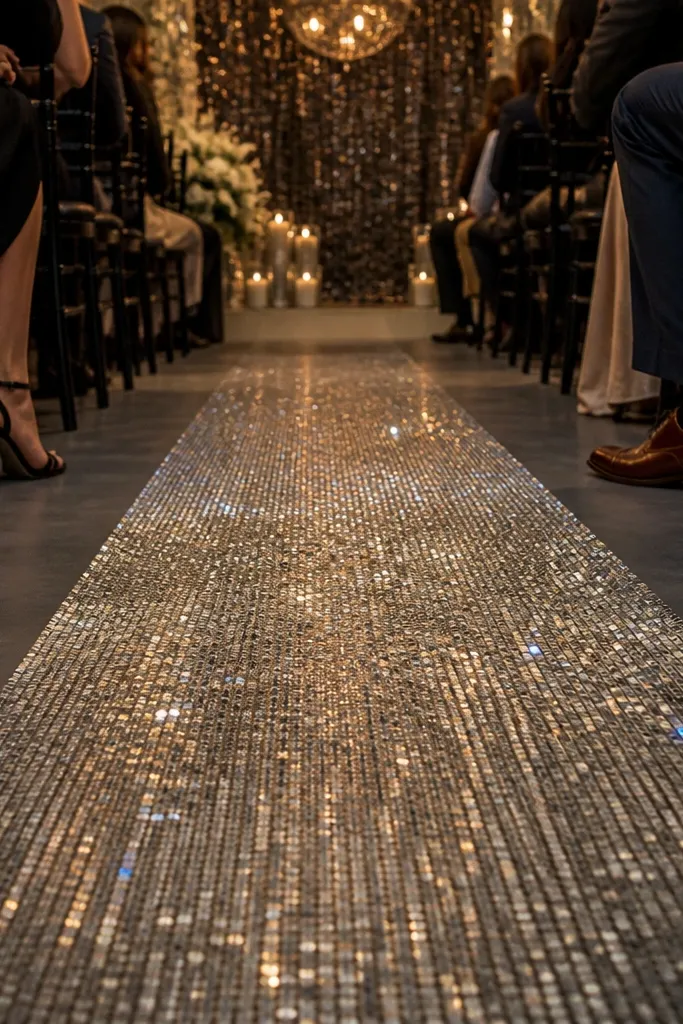
Start by measuring your aisle length and width and buying a single continuous sequin mesh panel if possible. Then secure it with fabric tape at the edges and use weighted clips or sandbags at corners. Finally, keep the aisle decor minimal: two candle lantern clusters at the entrance and maybe one matching floral basket at the exit. Budget tip: rent or borrow the runner if you’re only doing one ceremony location.
If you want luxury that reads instantly in photos, a sequin mesh runner does it. It catches movement as guests walk, and the sparkle looks “expensive” even when everything else is simple. Use it like an accent strip rather than covering the entire floor with different patterns. This works best in venues with solid flooring so the runner pattern stays clean. Night ceremonies and indoor ballrooms look especially good because the sparkle reflects warm venue lights.
Skip thisSkip mixing sequin with loud prints; the sparkle needs a quiet background to look luxe.
Quick tipTest the runner in the venue lighting before the ceremony; adjust LED brightness to avoid harsh hotspots.
10. Hang fabric clouds above the dance floor with draped tulle bands
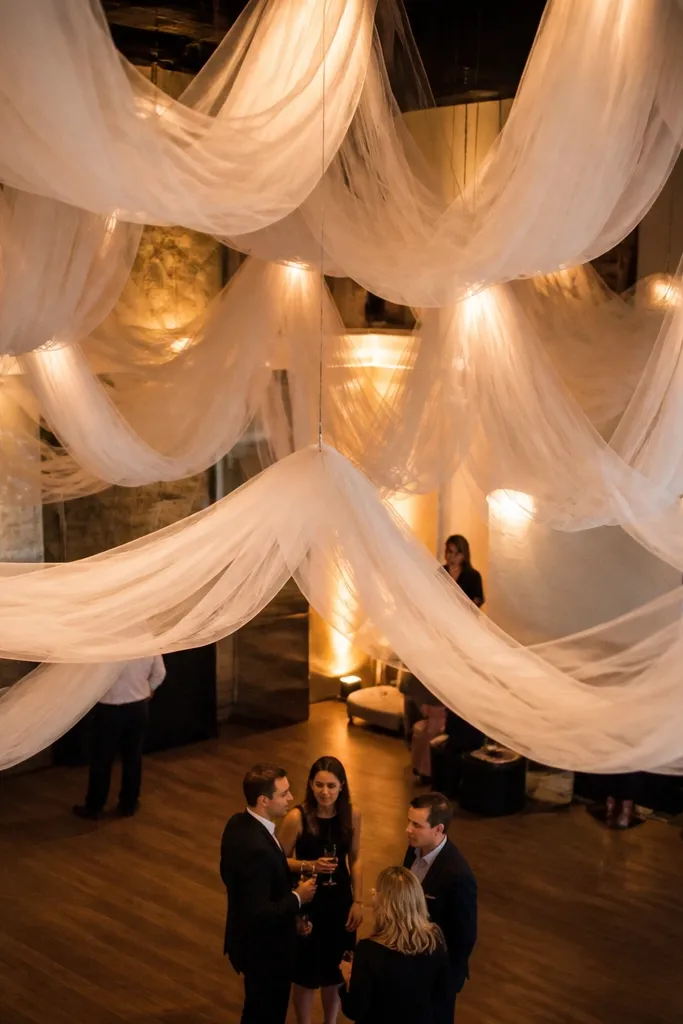
Ceiling decor is where budget wedding decor ideas surprise people, because guests look up in videos and photos. Tulle clouds create a soft canopy that makes the dance floor feel like a lounge, not a room. You do not need a huge amount of fabric if you hang it in bands and let it billow. This is best for venues with enough ceiling height or outdoor tents. It also photographs well when you have warm uplighting or string lights below the canopy.
Start by marking three anchor points across the dance floor ceiling line and attach lightweight monofilament or clear fishing line. Then drape tulle in long strips between anchors so each strip creates a billowy cloud shape. Finally, add a warm light source below (uplights or fairy lights) aimed upward so the tulle glows. Budget move: use one color of tulle and vary thickness by doubling some bands.
Keep cloud height consistent so your group photos don’t show uneven ceiling lines.
Avoid thin, transparent tulle in bright daylight; it can look see-through and flat.
11. Style the cocktail hour with bud vases on mirrored trays
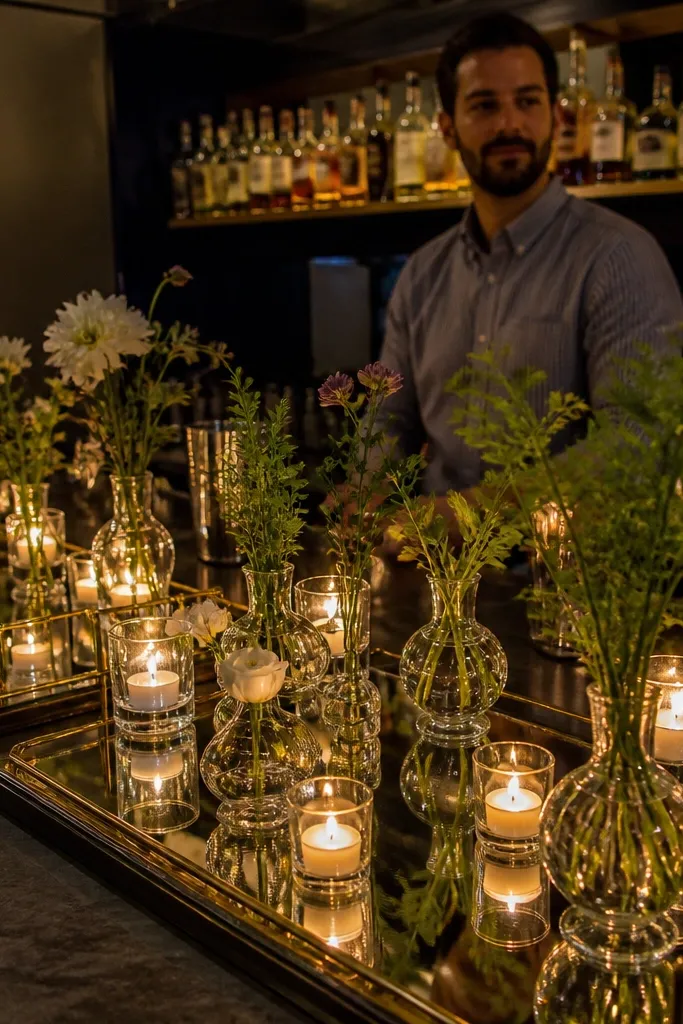
Start by buying two to four mirrored trays in a similar shape (round or rectangular) and set them on sturdy cocktail tables. Then fill each tray with 6-10 bud vases using the same stem height range (about 10-14 inches). Finally, add a thin layer of filler like baby’s breath or greenery between vases so the tray looks full. Budget move: use faux or silk greens for filler and real flowers only for the top stems.
Mirrored trays multiply light and make small flower bud vases look like a bigger installation. This is a smart budget wedding decor idea because you can use fewer stems while still getting a full, luxe look in photos. Place trays at eye level near the bar so guests see it and cameras catch it. For color, pick one flower color family and keep stems consistent in height. It’s a great fit for both indoor and outdoor cocktail hours because the sparkle of the mirror reads in any light.
Skip thisSkip random vase heights; mix only within a 2-3 inch band for a clean look.
Quick tipWipe mirrors with a microfiber cloth right before guests arrive; fingerprints show instantly in flash photos.
12. Make table numbers feel custom with framed botanical prints
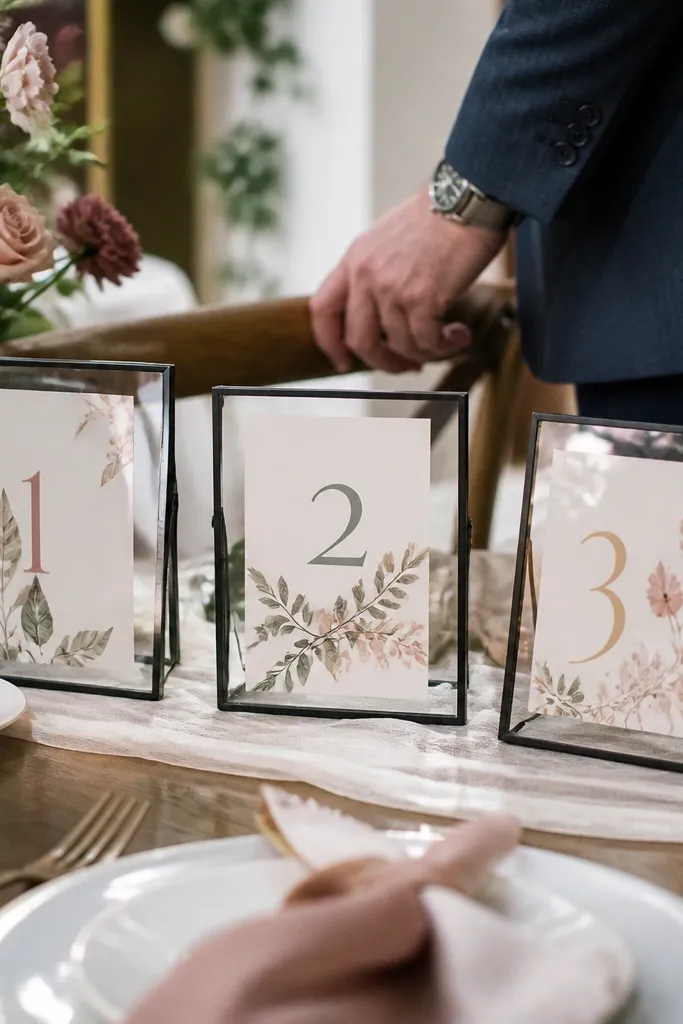
Start by choosing a print style that matches your palette: sage-green line art, ivory botanicals, or muted watercolor leaves. Then print table numbers in the same font style and insert them into frames that match your decor metals (gold, brass, or black). Finally, place frames on table stands or directly on top of a textured table runner. Budget move: buy frames from one size set so you do not waste time matching individually.
Framed table numbers look expensive because they read like art, not like a sign stuck on a board. Botanical prints in muted tones match lots of wedding palettes, and the frames create a consistent visual line across tables. This works especially well for vintage-modern weddings where you want calm, not loud. It also helps if your tablescapes are minimal, because table numbers become part of the design. You get a premium look without printing a huge banner or buying bulky signage.
Skip thisDon’t use tiny table numbers; make sure they’re readable from 6-8 feet away.
Quick tipPick one font weight across all numbers; mixed fonts look messy in a photo grid.
13. Swap expensive florals for a linen-and-pearl bud vase centerpiece
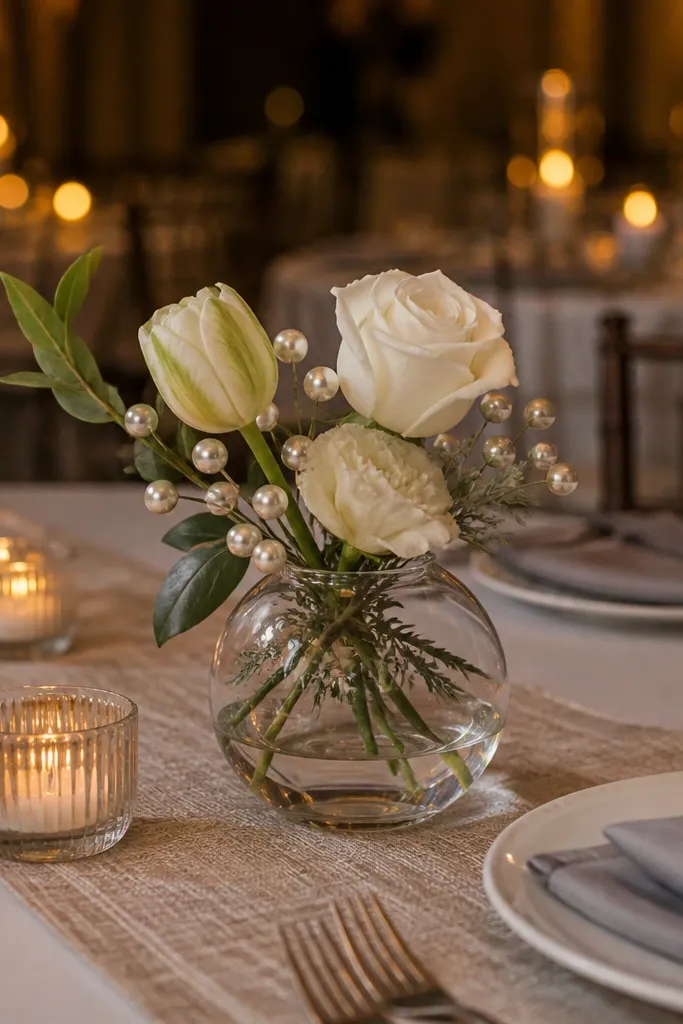
You can get luxury centerpieces without heavy floral spending by using fabric texture and a controlled sparkle. A linen runner plus pearl-like accents creates a soft, formal mood that looks high-end under warm lighting. Use bud vases with just a few stems so the centerpiece stays airy and photogenic. This is a great approach for budget wedding decor ideas when you want a clean, romantic look rather than a dense flower wall. It suits weddings with smaller guest counts too, because each centerpiece gets more attention in photos.
Start by laying a textured linen runner on each table and adding a thin strip of pearl garland or scattered pearl strands down the center. Then place 3-5 bud vases in a row with consistent stem heights and a single flower type. Finally, add one small candle or a tea light holder near the center so the pearls catch flicker. Budget move: use faux pearls or inexpensive pearl strand garlands and keep the floral portion minimal.
Choose matte napkins in ivory or blush so the pearl accents don’t look overly shiny.
Skip glossy tablecloths; reflections make pearls look cheap and can blow out in camera flash.
14. Build a floral-free balloon arch using matte balloons and one metallic balloon row
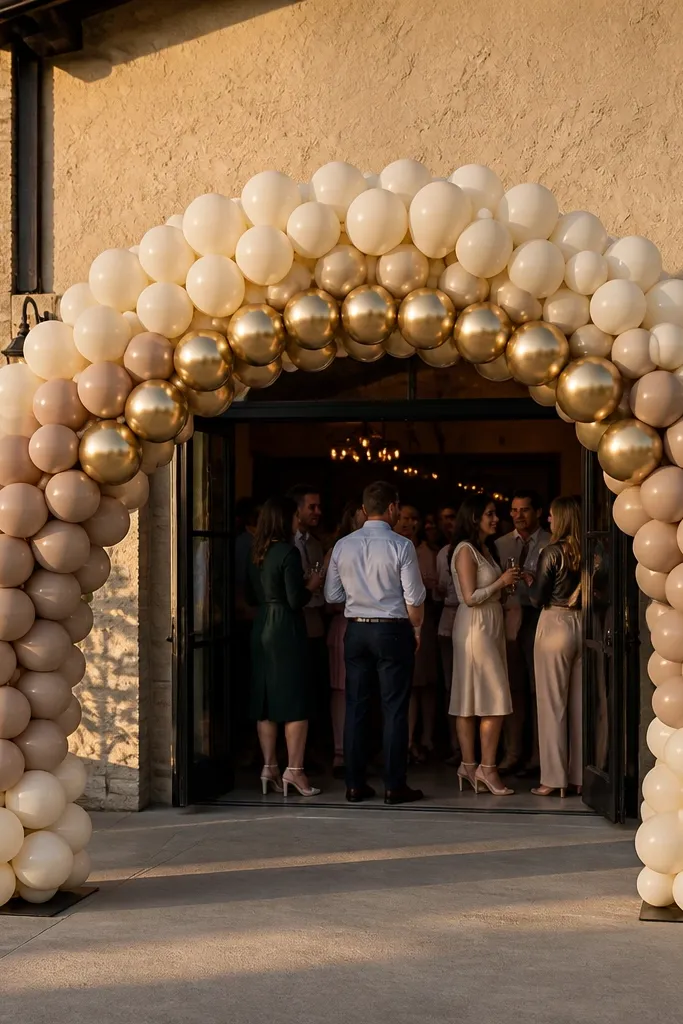
Start by choosing a tight palette: matte ivory, matte blush, and warm gold metallic. Then build the arch with a balloon frame base and cluster balloons in repeating color blocks (for example, 2 ivory, 1 blush, repeat). Finally, add one metallic balloon row around the middle for a clean accent line. Budget tip: rent the balloon tools or borrow an inflator so you do not waste money on extra supplies.
A balloon arch can look luxury when you control the finish and keep it minimal. Matte balloons look softer and more “boutique” than glossy ones, and a single metallic row adds that upscale sparkle without going overboard. Keep the color palette to two neutrals plus one metal tone so it reads cohesive in photos. This works for outdoor ceremonies, backyard weddings, and any venue where walls are too plain for a big backdrop. It also gives you instant height for group photos.
Skip thisAvoid rainbow mixes and multiple metallic shades; it reads like a party, not wedding decor.
Quick tipAnchor the arch well and keep it away from direct wind; balloon arches sag fast in gusts.
15. Style the cake table with a sheer curtain backdrop and a single tall vase
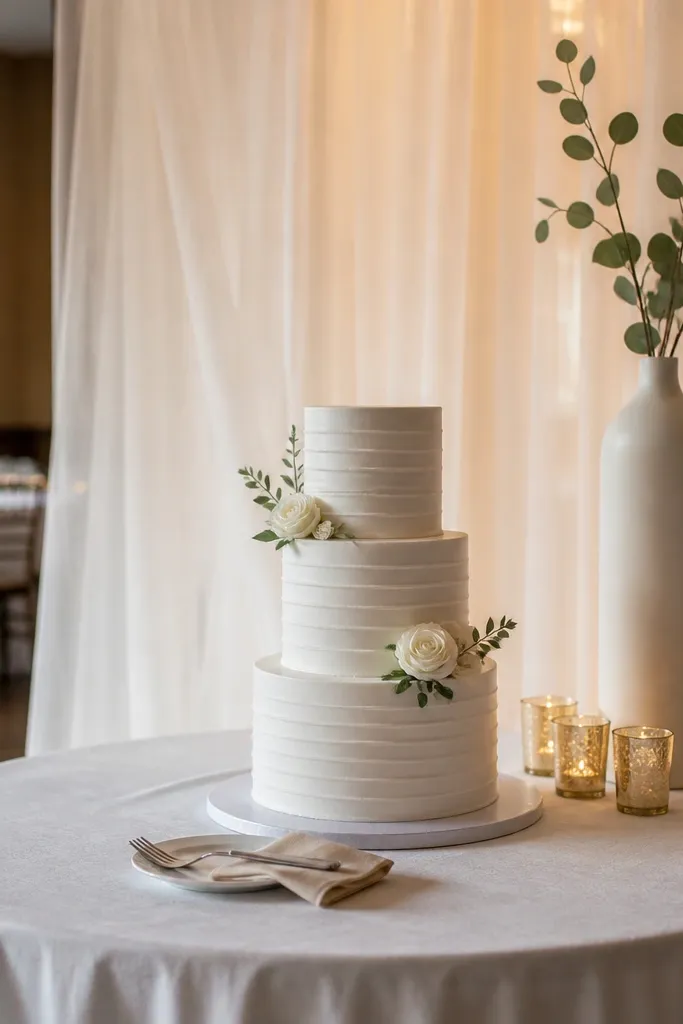
Start by hanging a sheer curtain behind the cake table, secured at the top with clips so it stays smooth. Then place one tall vase (or tall candle holder) in the center and use small side elements to frame the cake, not crowd it. Finally, add warm string lights or a small uplight behind the curtain for glow. Budget move: use a plain white curtain and add texture with the vase and a ribbon tie at the top.
Cake shots look instantly more expensive when the background is soft and the styling is minimal. A sheer curtain backdrop creates depth, hides messy table edges, and gives the cake a “floating” look in photos. Pair it with one tall vase or candle arrangement so the table has a vertical anchor. This works for indoor dessert tables and outdoor setups where you want a clean focal point. The best part is you spend money on fabric and lighting, not on a huge floral wall behind the cake.
Skip thisSkip busy props around the cake; the cake must stay the main subject.
Quick tipKeep the curtain length to the table height plus 12-18 inches so it looks intentional, not like a backdrop sheet.
16. Use mirrored charger plates for table styling that looks expensive in every photo
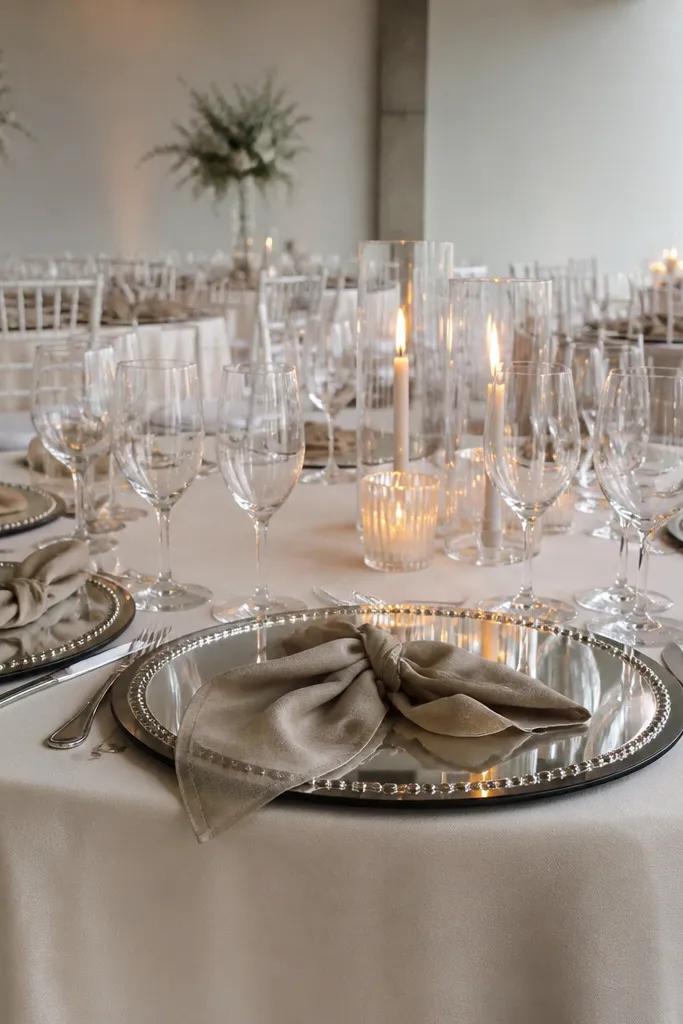
Charger plates are the fastest way to make a table look high-end without adding more flowers. Mirrored chargers throw light up into the linen and create a crisp, reflective layer that looks luxe in both daytime and evening photos. Pair them with matte napkins and simple glassware so the reflection doesn’t look chaotic. This idea fits nearly every venue layout because chargers work on round and long tables. You’ll also feel the difference during dinner because the table looks styled even before the centerpiece lands visually.
Start by renting a consistent set of mirrored chargers and choose a napkin color that matches your palette (ivory, champagne, or sage). Then set chargers slightly off-center under the plates to avoid perfectly aligned glare patterns in photos. Finally, keep centerpieces low and narrow so the chargers stay visible. Budget move: rent chargers instead of buying; they’re easy to transport and set up.
Wipe chargers right before guests sit; dust and smudges show as dull patches in flash.
Avoid highly patterned tablecloths under mirrored chargers; the reflection plus pattern turns messy.
17. Create a "garden wall" look with potted herbs and tall woven baskets
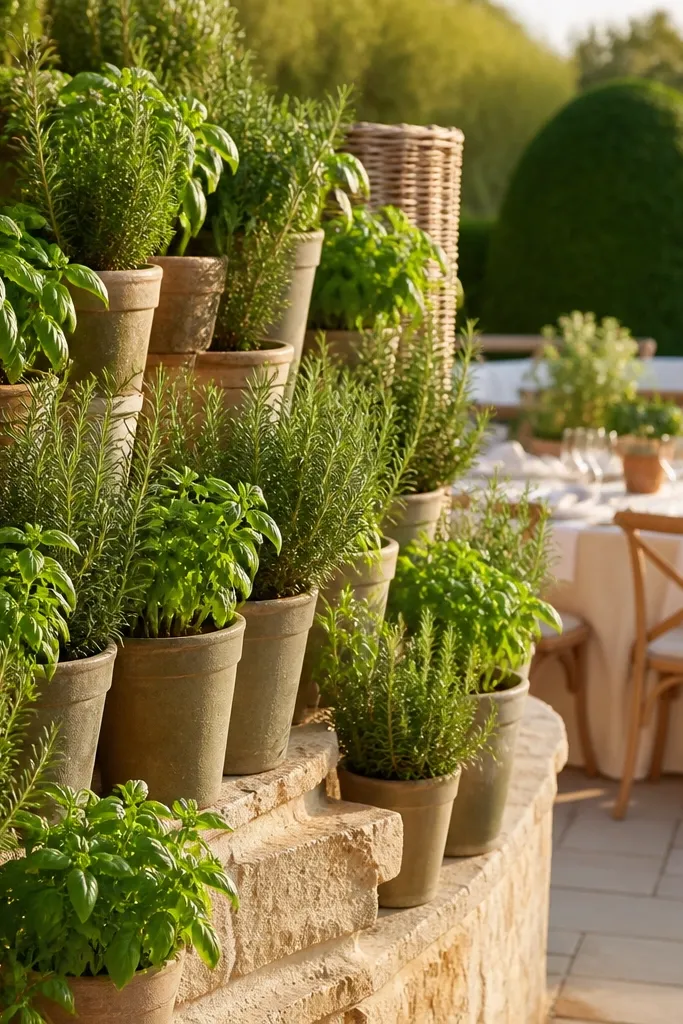
If you want budget wedding decor ideas that feel real and lush, potted herbs give you texture and height without floral bulk. Tall woven baskets add a warm, natural frame, and herbs look good in photos because they have movement and visible stems. This is a smart choice for outdoor weddings and venues that allow potted decor. It also works for ceremony backdrops and cocktail hour corners. The key is to keep the arrangement tall at the edges and slightly fuller in the middle so it reads like a wall.
Start by sourcing matching pots or using uniform containers and placing them in a grid-like pattern behind your ceremony seating. Then add tall woven baskets at the corners and one or two midpoints so the backdrop has structure. Finally, tie a thin ribbon band around basket handles or pot rims for color unity. Budget move: choose hardy herbs like rosemary or lavender that look good even if they lose a little volume.
Plan for watering and sun — herbs look wilted fast in late afternoon heat.
Skip random pot sizes; the backdrop looks messy when heights vary too much.
18. Frame the aisle entrance with two oversized urns and faux olive branches
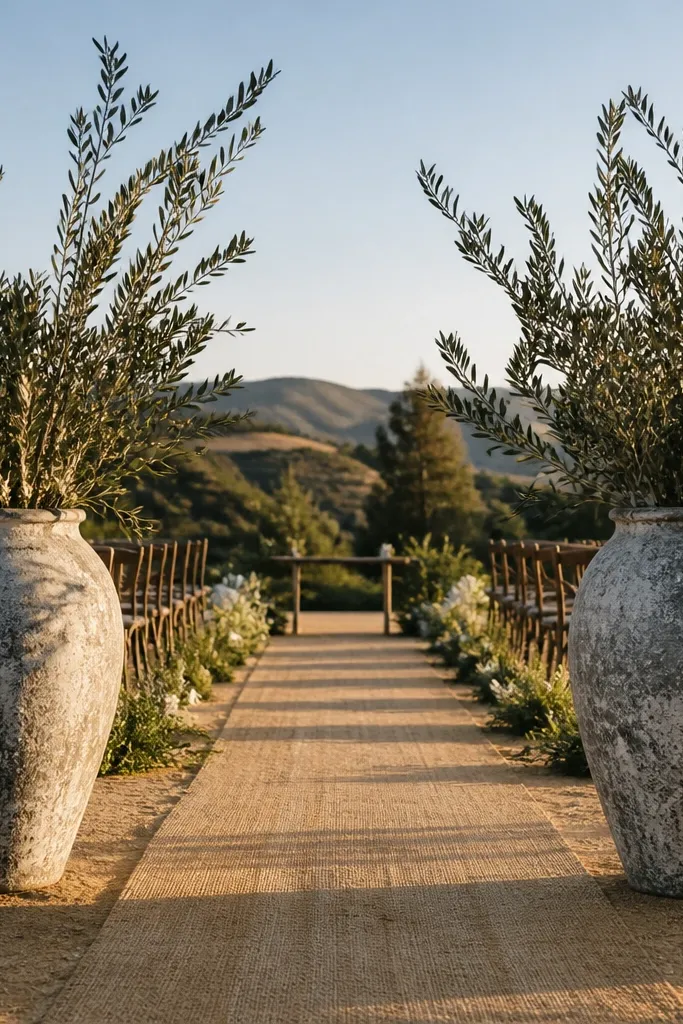
Start by placing two oversized urns (roughly 18-24 inches tall) on either side of the aisle opening. Then fill each urn with a tight base of greenery and add olive branches that extend outward and slightly upward. Finally, add a small ribbon wrap around each urn in your palette color. Budget move: reuse the same greenery bundle in both urns by trimming and rebalancing the shape.
Urns at the aisle entrance look like a venue upgrade because they create symmetry, height, and a finished threshold. Faux olive branches are a budget-friendly way to get that Mediterranean, luxe feel without spending on large floral arrangements. Symmetry reads beautifully in wedding photos, especially when the couple walks through the center. This works for both ceremonies and reception entrances, and it’s fantastic for outdoor weddings where you need something that stands up in light wind. It also stays photogenic from multiple angles because the urns anchor the frame.
Skip thisAvoid sparse branches; the urns must look full enough to read from 20 feet away.
Quick tipPlace urns on flat boards or weighted mats so they don’t sink into grass or shift on tile.
19. Make place settings look couture with textured napkins and a single gold stem
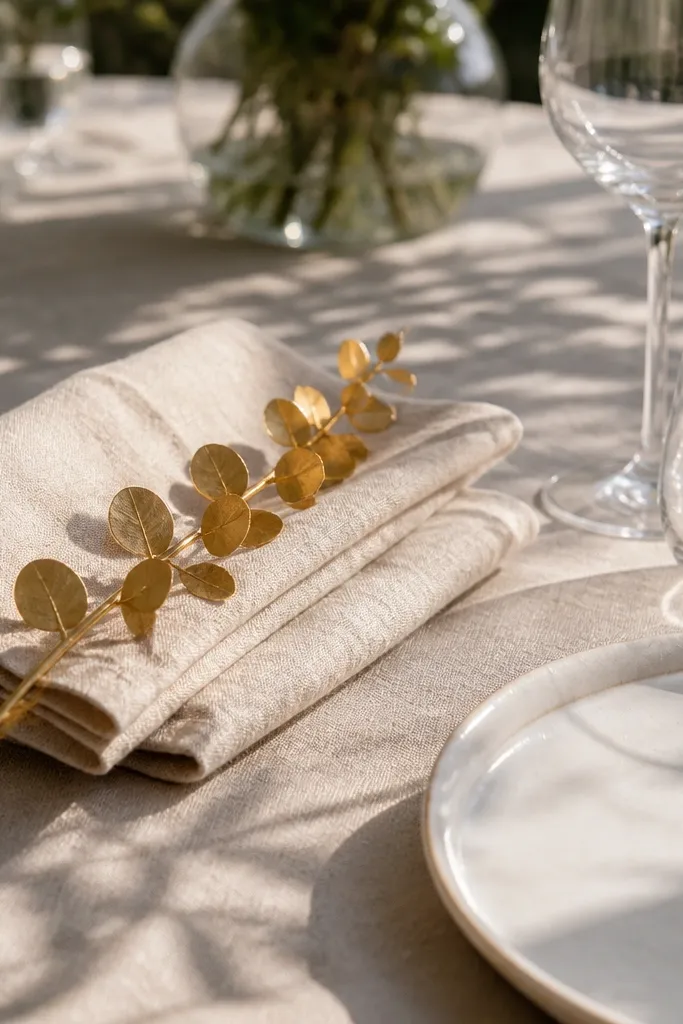
Start by selecting napkins with texture and weight, like linen blend or cotton sateen with a matte finish. Then fold each napkin into a simple rectangle fold and place it under or beside the dinner plate. Finally, add one small gold stem detail at the napkin fold or near the fork so every setting matches. Budget move: buy one bundle of gold stems and cut them into consistent lengths.
Luxury place settings are a quiet flex that shows in close-up photos and table spreads. Textured napkins in linen or linen-like fabric add depth immediately, and one consistent gold stem detail keeps it cohesive without spending on more florals. Choose a single element to repeat — like a small gold eucalyptus sprig or a mini metallic ribbon tie. This works for weddings where you want a clean, modern look and for venues where table linens matter because the room lighting is bright. It’s also a solid budget wedding decor idea because you control the look at every seat.
Skip thisSkip random mini flowers at each seat; the look becomes cluttered and uneven.
Quick tipKeep gold elements the same shade across the entire table layout so reflections look uniform.
20. Hang fabric banners behind the ceremony seating with a single repeat pattern
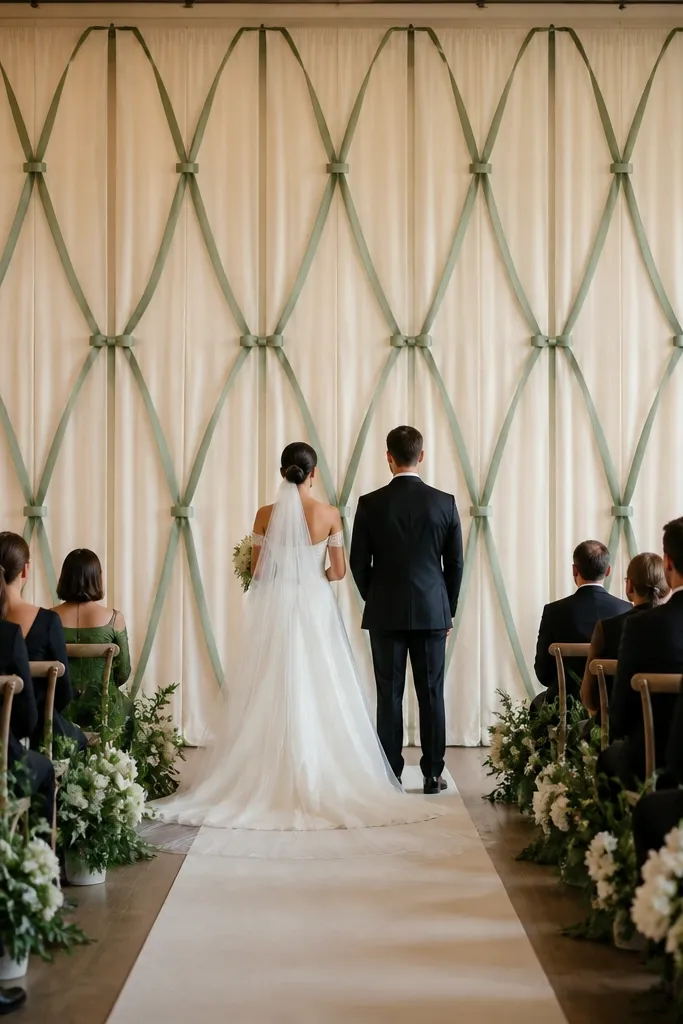
Start by measuring the width behind the seating and cutting fabric panels or ribbon strips to match. Then hang them in a vertical line grid using a tension rod or lightweight string line, keeping spacing consistent. Finally, add one or two matching decor elements at the bottom like lanterns or a low greenery line. Budget move: use fabric remnants in the same color family and trim them into equal sizes.
A banner wall gives you a big visual impact without installing a full structure. Choose fabric in one solid base color and add a simple repeat pattern through ribbon strips or printed fabric panels. The result looks intentional because the pattern repeats and aligns with your seating layout. This works best when you have a natural back wall behind the ceremony chairs. It’s also a good choice for daytime weddings because fabric hides harsh wall imperfections and reduces glare.
Skip thisAvoid mixing multiple patterns; one repeat pattern reads luxe, three patterns reads chaotic.
Quick tipHang banners so they sit 2-4 inches above head height; it keeps faces unobstructed in photos.
21. Drape a long table with a scalloped runner made from folded tulle
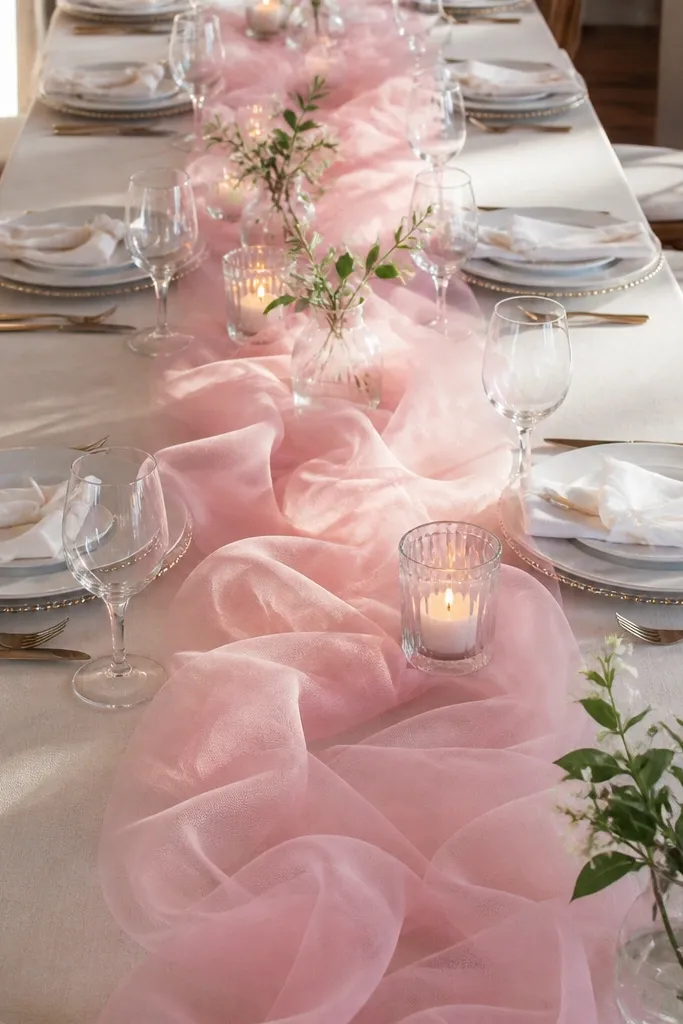
Start by measuring your table length and cutting tulle panels wide enough to fold into scallops along the center. Then fold the tulle repeatedly and attach it to a simple base runner using fabric clips or a thin stitch line. Finally, place a low centerpiece row so nothing blocks the scalloped edge from camera angles. Budget move: use one color of tulle and add texture through thickness variations by doubling some strips.
Scalloped tulle looks custom and romantic, and it’s a smart way to elevate a simple table without buying expensive centerpieces. Folded tulle creates soft waves that catch light and photograph well from above and at an angle. Pair it with a low floral arrangement or candles so the runner stays the star. This idea suits long banquet tables, sweetheart tables, and even dessert tables. It’s best for indoor receptions where you can control airflow and keep the tulle from shifting.
Skip thisSkip heavy centerpieces that cover the scallops; you lose the effect that makes it look luxe.
Quick tipSteam the tulle right before setup; wrinkles show as flat lines in overhead photos.
22. Create a luxe welcome area with a mirror-framed seating chart
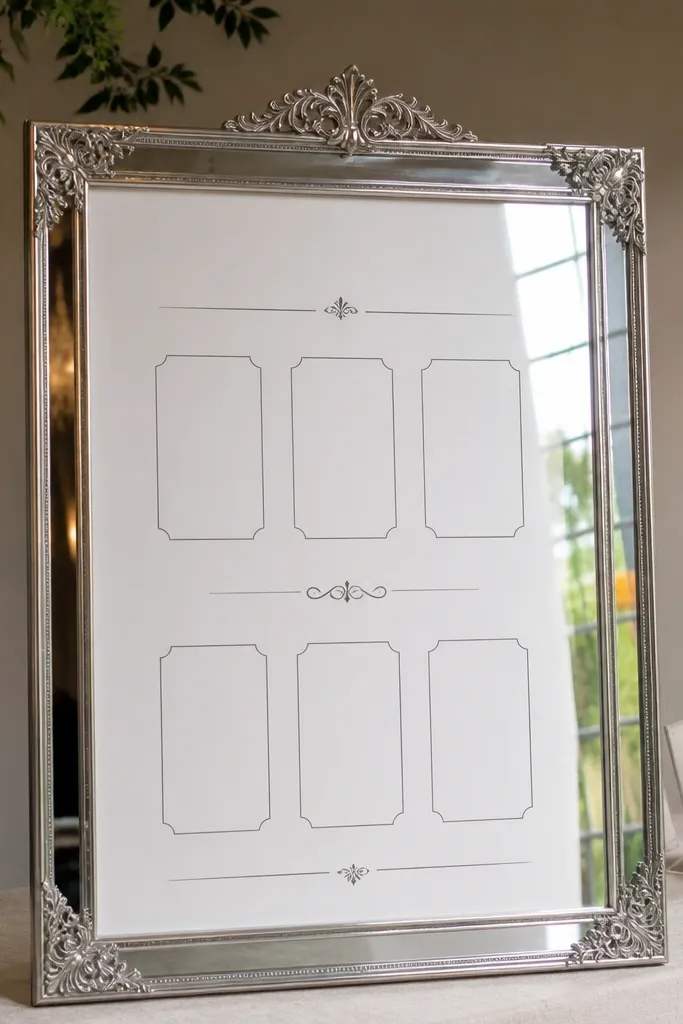
A mirror-framed seating chart makes the welcome area look styled even if you keep everything else simple. The mirror frame adds shine and depth, and the sign becomes a focal point for guest arrival photos. Choose a seating chart design with minimal ink and lots of white space so it reads cleanly. This works for indoor and outdoor welcome tables, especially where you want a “designed” look without building a large stand. It also helps guests find seats quickly, which matters when the room is busy.
Start by printing your seating chart on thick cardstock with a simple layout and large name text. Then place it inside a mirror frame or a frame with a reflective finish and hang it at eye level. Finally, build a small base arrangement using one greenery garland line and a candle or lantern beside it. Budget move: use a thrifted frame and repaint it to match your palette metal tone.
Position the sign so it doesn’t catch direct sun glare; angled light makes it look glossy, not washed out.
Avoid tiny text and overcrowded layouts; it looks messy in photos and is hard for guests to read.
23. Make cocktail napkin rings with tied ribbon and one pearl button
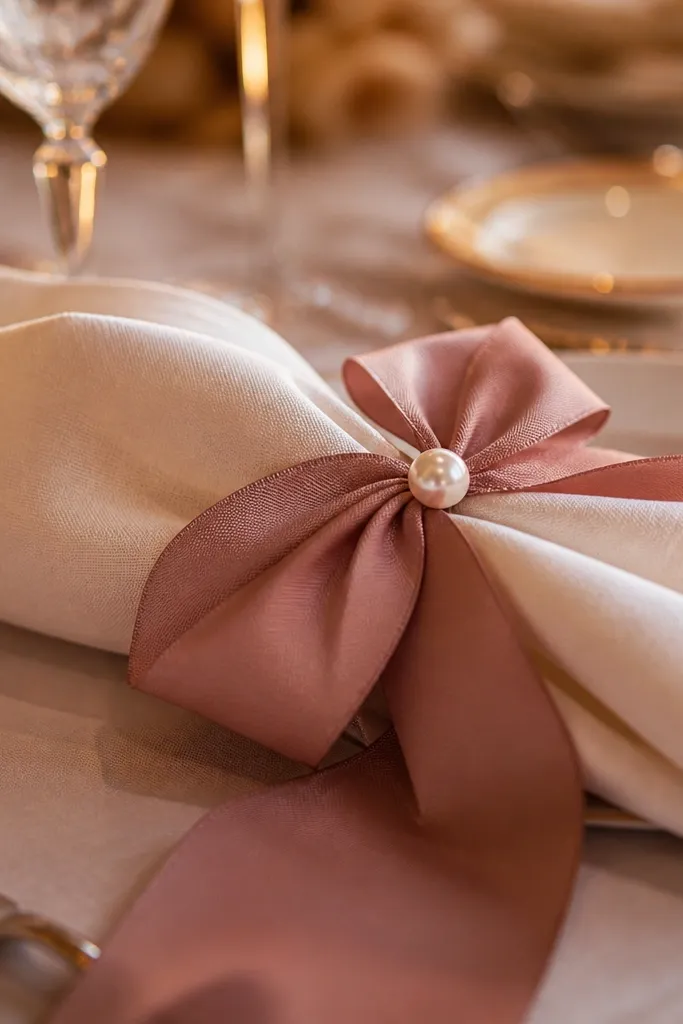
Napkin rings are small, but they photograph like details when the table is styled. Ribbon ties with one pearl-like button give a consistent, delicate look that feels bridal without floral costs. Keep the ring color matched to your palette and repeat the same button style across every table. This idea fits weddings with cocktail tables, modern receptions, and any setup where you want “finished” details even on the edges. It’s also a reliable budget wedding decor idea because you can make them in batches quickly.
Start by cutting ribbon strips into equal lengths and folding them into ring loops around the napkin thickness. Then tie each ring with a small knot and attach one pearl button or faux pearl charm at the knot point. Finally, place napkins on plates or trays with the ring facing outward so it shows in photos. Budget move: buy ribbon in one width and pearl charms in bulk to keep costs down.
Use a satin ribbon that holds shape; matte ribbon collapses and makes the rings look flat.
Avoid multiple charm shapes; one repeated charm looks intentional, mixed shapes look random.
24. Add uplights behind a plain floral wall using white hydrangea-style faux blooms
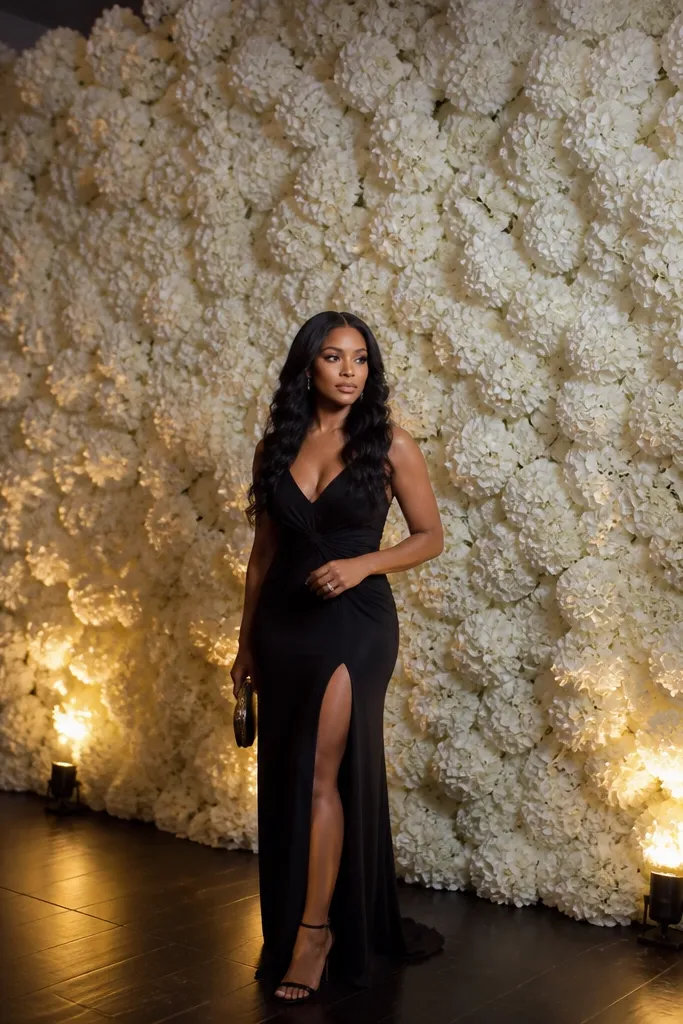
A plain floral wall can look expensive when you add uplighting and keep the bloom style consistent. White hydrangea-style faux blooms give a cloud effect, and uplights make them glow so the wall reads full in photos. You do not need a thick wall — you need a bright one. This works best indoors where you can control light direction and keep the wall in the background of your ceremony or sweetheart photos. It’s a strong option for people who want “classic luxury” without spending on fresh flower volume.
Start by assembling a simple backing panel or trellis and attaching faux blooms in a grid, leaving only minimal gaps. Then place two or more uplights at the base aimed upward so the glow hits the wall evenly. Finally, add a thin garland line at the top edge to hide attachment points. Budget move: buy faux blooms in one size and mix only two shades of white for depth.
Use a warm bulb color and avoid direct beam angles toward the camera to prevent blown-out highlights.
Skip mixed bloom types; the wall looks patchy when each flower has a different scale.
25. Design a luxe seating aisle with two-tone fabric fans on stands
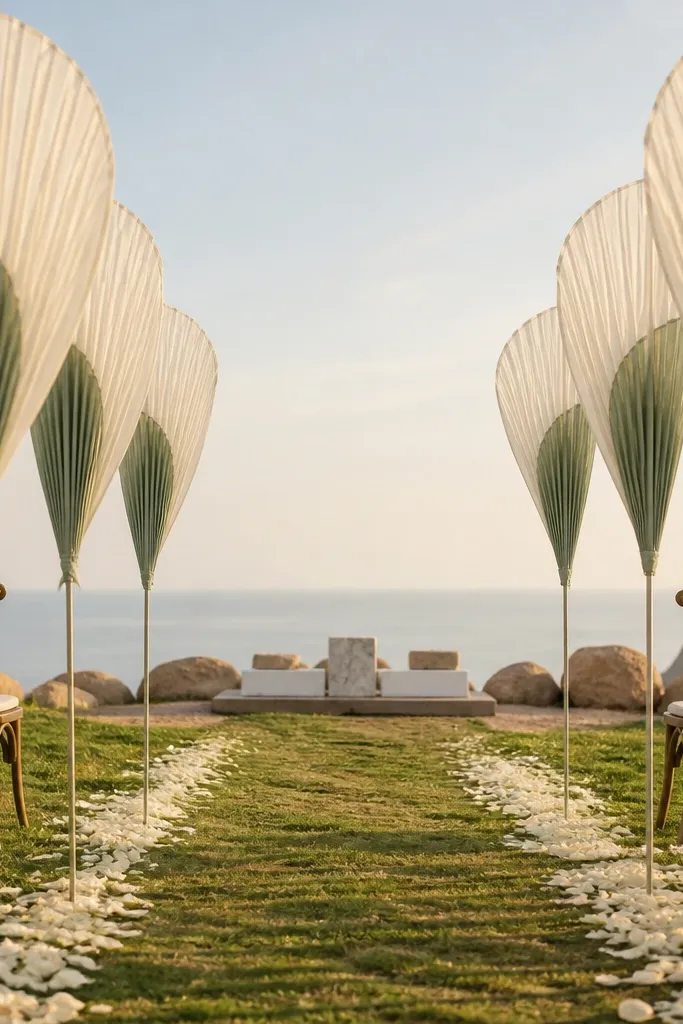
Start by choosing two fabric colors and making fan shapes using pre-made fan bases or foldable panels. Then mount fans on simple stands at consistent height across the aisle. Finally, place them in pairs so each stand faces slightly inward toward the aisle center. Budget move: use outdoor-safe fabric if it’s outside so wind doesn’t tangle the edges.
Fabric fans on stands give you height, movement, and a fashion-week look without floral spending. Two-tone fabric — like ivory outer layer with sage inner layer — adds depth and makes the fans pop in photos. This works great for ceremony aisles and for any venue where you need a defined path. It’s also photogenic from the side because the fans create layered shapes. If you’re doing a budget wedding decor ideas plan and want something different from arches and candles, this is the one.
Skip thisAvoid flimsy paper fans; they collapse and look cheap the second someone passes.
Quick tipKeep the fans at least 2 feet apart so guests don’t brush them and knock the stands.



