
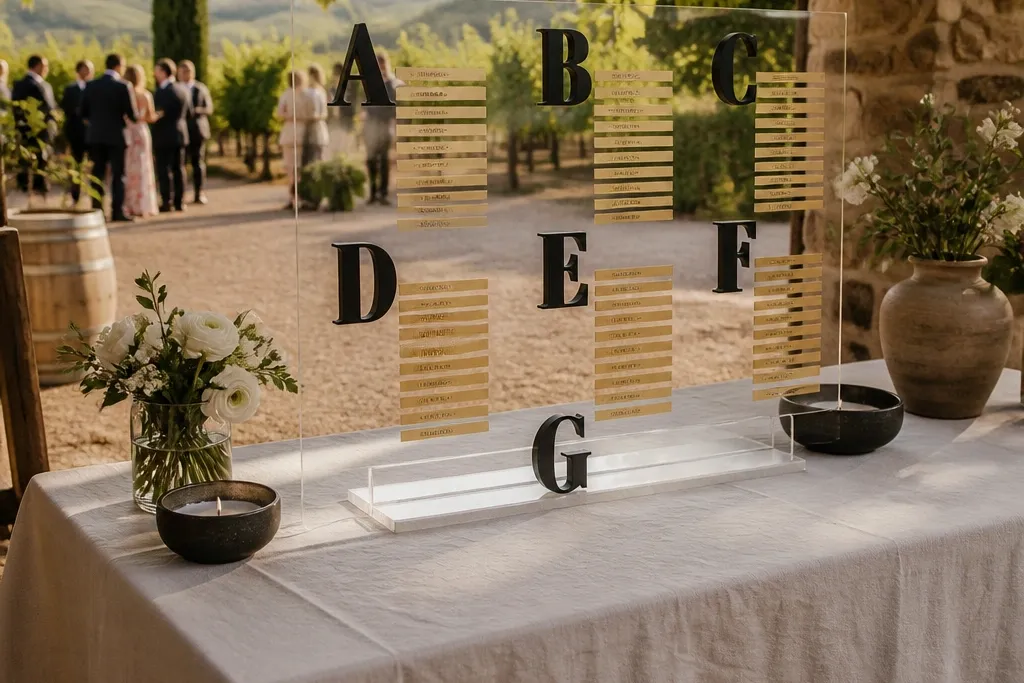
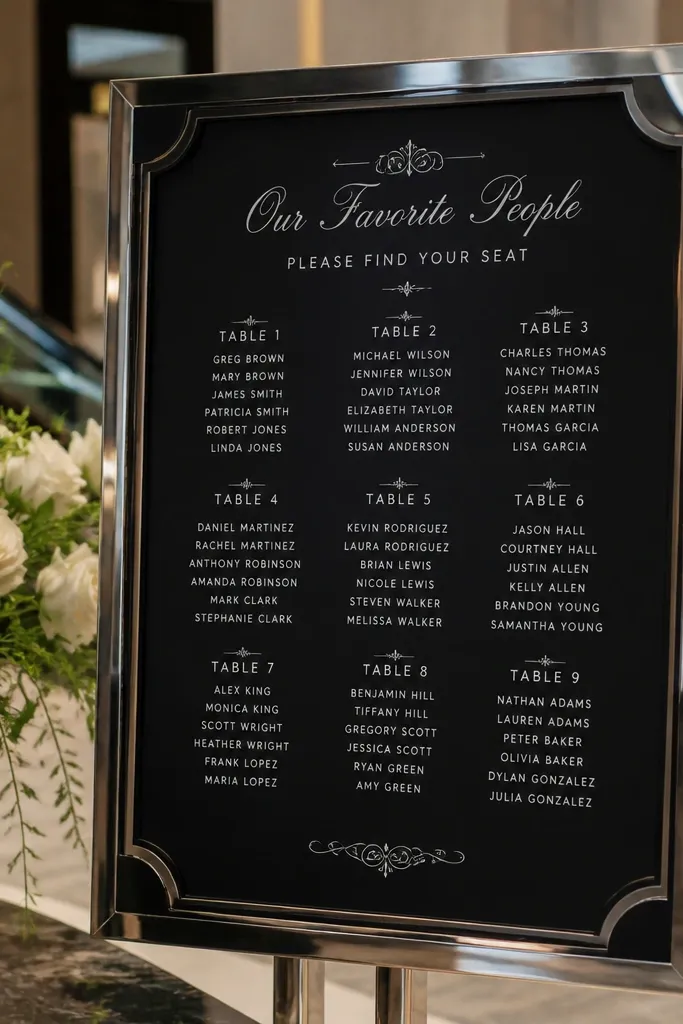
1. Acrylic Alphabet Grid with Table Letters in Gold Vinyl
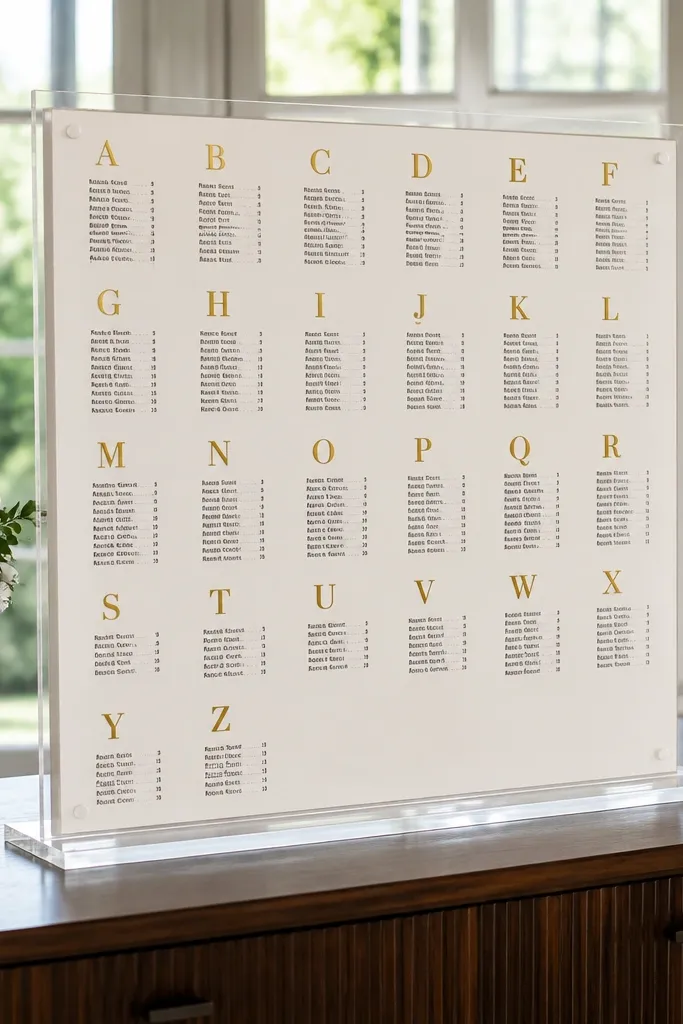
This is a clean, expensive-looking seating chart because the clear acrylic makes the design feel weighty and modern, even with a simple layout. Put the alphabet table letters in gold vinyl so they catch light without turning into glare. The guest names stay in crisp black text on a matte backing, which keeps readability high under warm venue lighting. It works best for reception halls and hotels where lighting is steady and guests stand 6-10 feet away.
Start by choosing your table letters A through Z based on your number of tables, and keep each letter in its own block. Then print the guest name grid on matte paper the same size as your acrylic panel, and mount it behind the acrylic for a clean edge. Finally, apply gold vinyl only to the table-letter headers, not the names, so the text stays sharp and easy to read. Tip the layout toward wide spacing between letters so it photographs well and reads fast in person.
Use matte backing paper behind acrylic — glossy paper creates glare that makes names hard to scan.
Don’t put gold vinyl on every line of text; it makes the names look fuzzy at distance.
2. Black Foam Board Seating Chart with White Vinyl Alphabet Headers
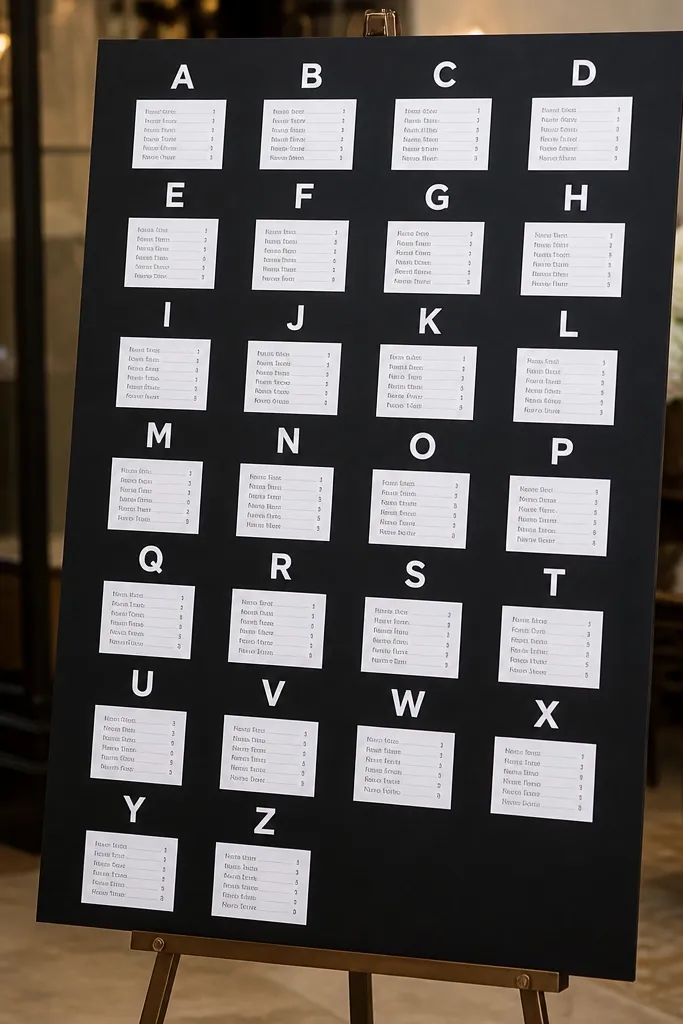
This setup looks luxe because black matte foam board feels substantial and the white vinyl headers look crisp and graphic in photos. The key is contrast: table letters pop immediately, while guest names remain readable in a lighter gray or black. It’s a great choice for weddings that want a modern look without spending on acrylic or framing. It also handles outdoor light better than glossy prints because the surface is non-reflective.
Start by cutting foam board to a wide rectangle size like 24x36 inches so each letter block has room. Then print guest names in a simple sans-serif font and place them under large white table-letter headers made with vinyl. Finally, add a thin border line to separate letters and prevent the grid from looking crowded. If you’re using multiple boards, keep the exact same font size for each letter across all boards.
If you’ll be outdoors, place the sign in shade and avoid direct sun — white vinyl can still reflect hard.
Skip thin fonts for names; they look great up close and fail the 8-10 foot readability test.
3. Framed Cotton Rag Print with Alphabet Tabs Along the Side
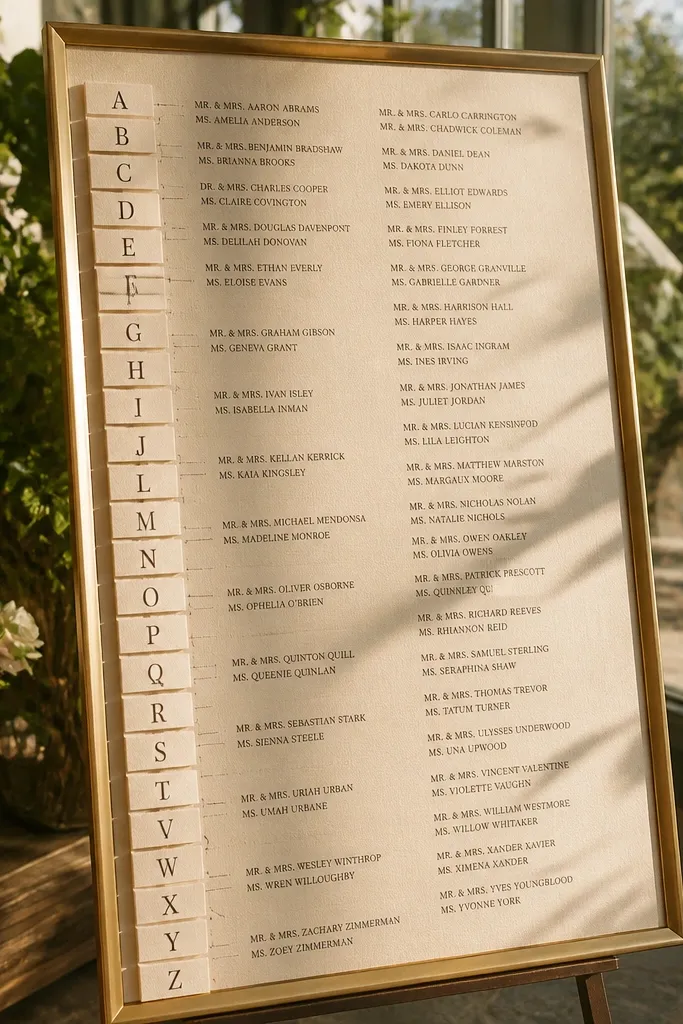
Cotton rag paper reads expensive because it has texture and absorbs light, so it looks good in daylight and warm indoor lighting. The alphabet tabs along the side are the secret for easy setup: guests can find their table letter quickly without scanning the entire sheet. This style is perfect if you want a soft, editorial look that still stays practical at a busy entrance. It suits couples who want a classic wedding vibe, but with a clean typography system.
Start with a cream cotton rag print sized around 18x24 inches, then lay out table letters A to Z in vertical blocks. Add alphabet tabs on the left margin by printing tab labels and cutting them into neat strips, then affixing them after the print is finished. Finally, frame the whole piece so the corners are protected and the paper stays flat during setup. Use one font family and one color for names so the tabs don’t compete with the text.
Quick tipBuy a frame with a matte or spacer — glass glare is the fastest way to ruin a paper-based seating chart in photos.
Skip thisDon’t use too many colors; the tabs need to be the only accent, or guests lose the visual hierarchy.
4. Monogrammed Wooden Easel Sign with Cutout Table Letters
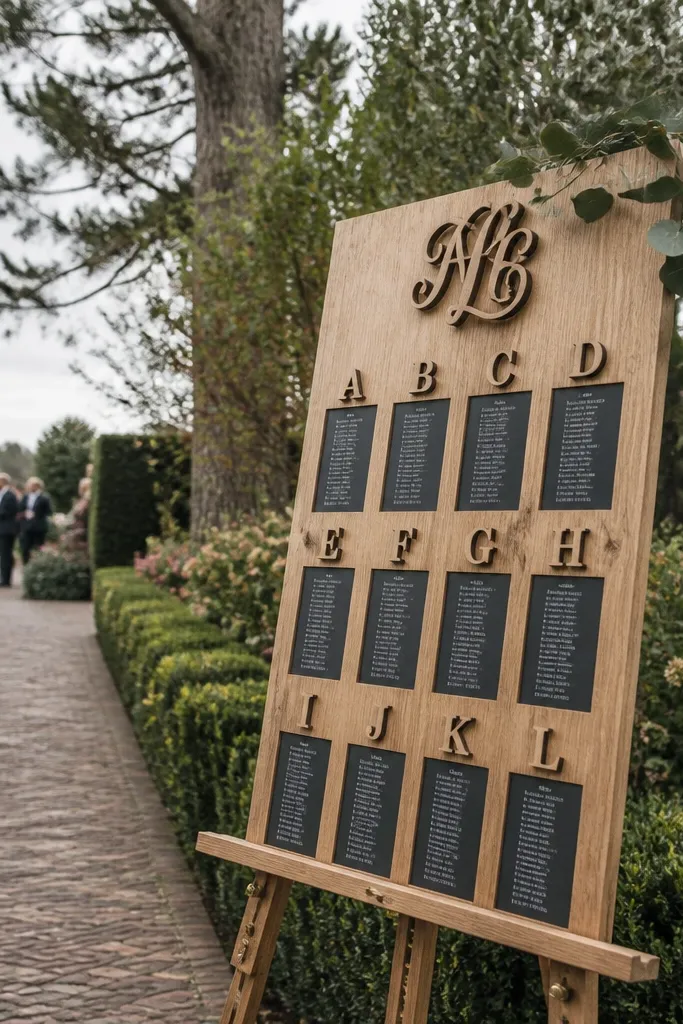
A wooden easel makes the seating chart feel like décor, not paperwork. The cutout table letters add tactile luxury and create natural shadows that look great in photos. Keep guest names in a dark, high-contrast print so they don’t get lost against the wood. This works best at venues where you can place the easel near the welcome area, not behind chairs.
Start by choosing an easel size like 24-30 inches tall so the table letters sit at eye level. Then design the chart with table letter headers that are large enough to cut out (think 4-6 inch letter height) and mount the printed name grid on a contrasting backing board. Finally, place the easel so it faces the flow of arriving guests and isn’t blocked by coat racks or bar lines. If you have more than 14 tables, split into two easels and keep the alphabet in order across both.
Use a backing board color like ivory or light gray so wood shadows don’t darken the names.
Don’t crowd the names into tiny lines; wood shadows make small text harder to read.
5. A-to-Z Seating Chart on Matte Acrylic with Raised Letter Stickers
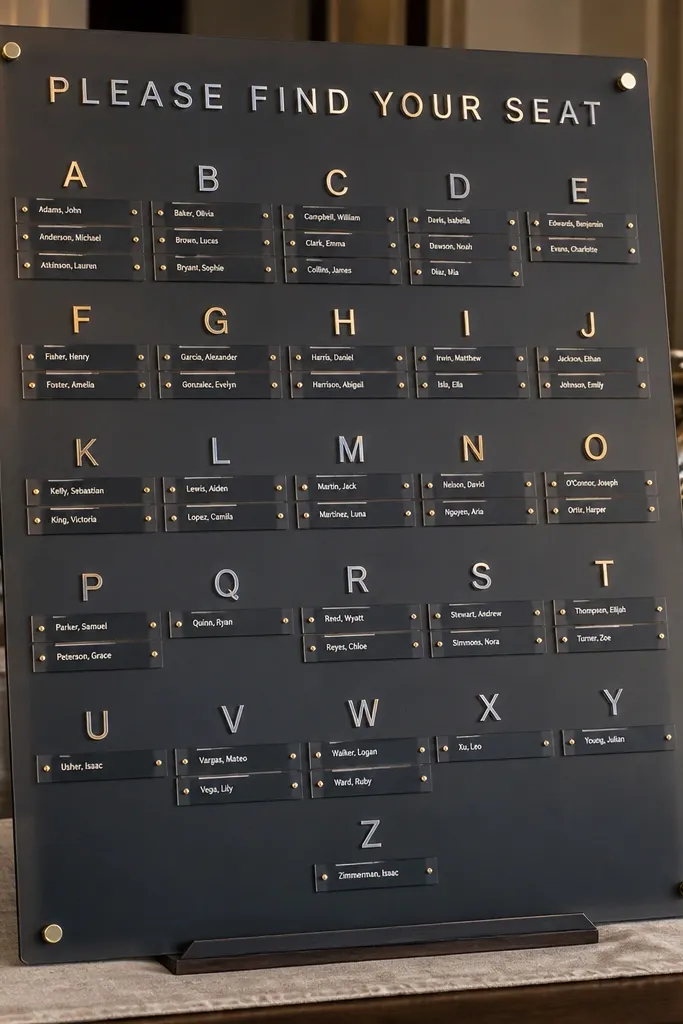
Matte acrylic looks high-end because it hides fingerprints and reduces glare, while raised letter stickers add that extra “designed” feel. The raised headers catch light subtly, and the name blocks stay flat and readable. This is ideal for venues with bright lighting overhead because matte surfaces stay clear in photos and in real life. It also works well for both indoor and covered outdoor receptions.
Start by ordering a matte acrylic panel and planning your letter blocks so each letter has consistent height (example: 2-2.5 inches per letter block row). Then print the guest name lists on matte paper and place them behind the acrylic, keeping names in one ink color. Finally, apply raised stickers only to the table-letter headers, not the names, and seal the panel edges if it’s going outdoors. Use a consistent line spacing so names don’t look uneven after cutting.
Do a quick test photo from standing height before the wedding day; matte still shows glare in some lighting angles.
Avoid glossy vinyl on matte acrylic — it creates hotspots that confuse the eye.
6. Black Marble-Style Background with Gold Alphabet Headers (Printable)
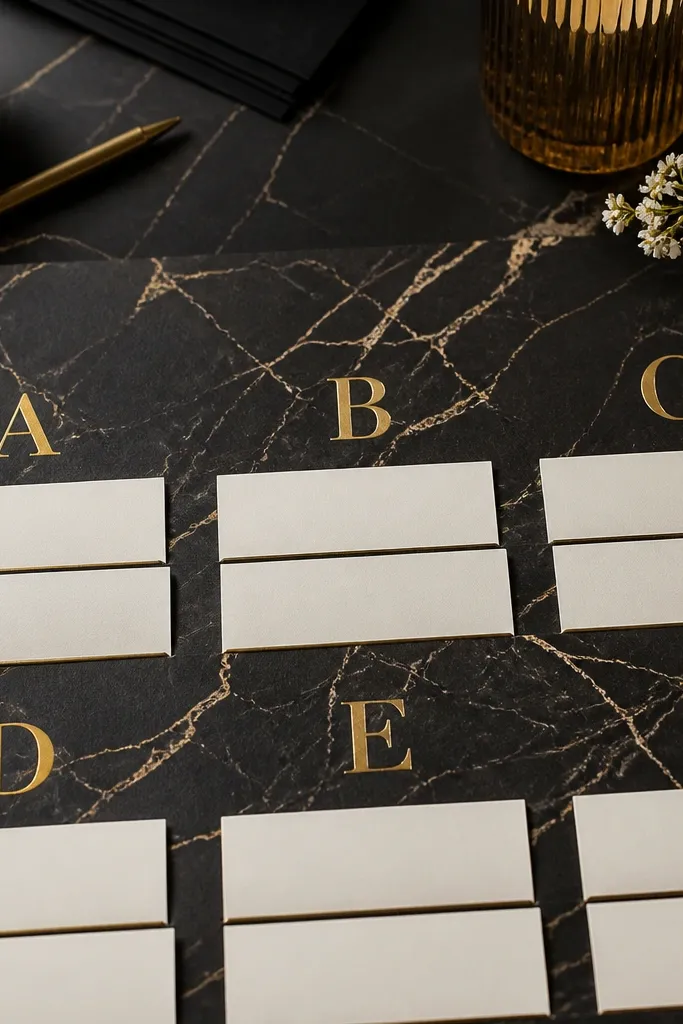
Marble-style backgrounds look luxury fast because they add depth without adding clutter. Keep it controlled: the marble pattern should sit behind white or light name blocks so guests don’t have to read over texture. Gold alphabet headers make the system feel dressed up while staying functional. This style is especially good for ballroom weddings with lots of cream, black, and gold accents.
Start by choosing a marble-style background that is subtle and doesn’t include busy swirls behind text areas. Then add light rectangles behind each table letter block and place gold table-letter headers on top. Finally, print names in black and keep the block width consistent for every letter. If you’re printing at home, test the background opacity on one page first — overly dark marble makes names harder to scan.
Use light rectangles behind each letter block; it keeps readability high even if the marble file prints darker than expected.
Don’t place names directly on the marble texture; guests will squint.
7. Whiteboard-Style Seating Chart with Brushstroke Alphabet Headers
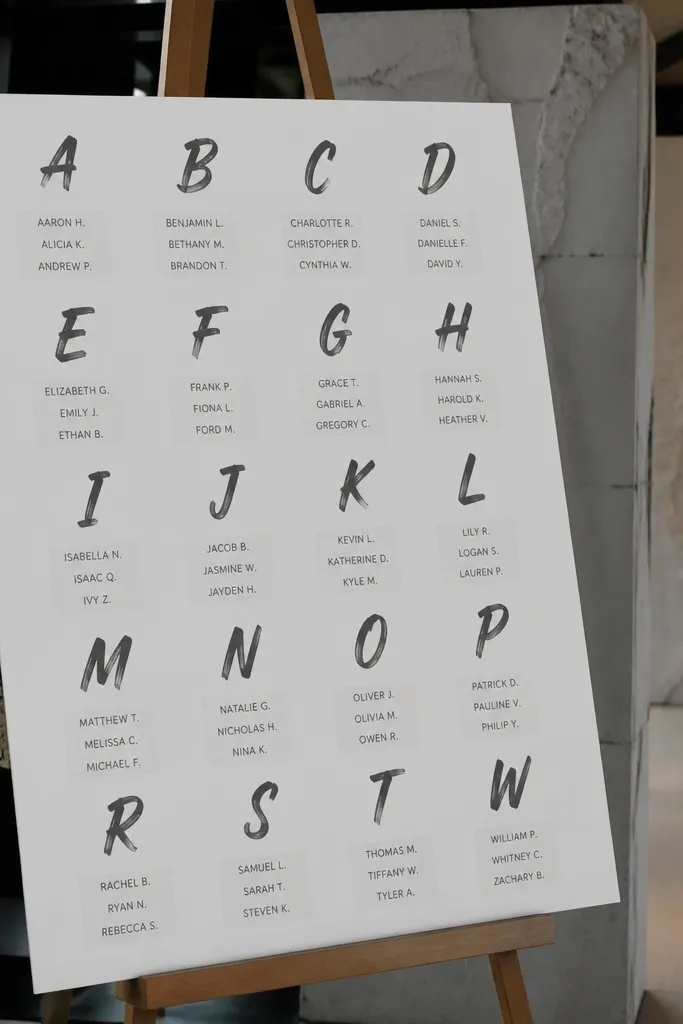
This look feels artsy and high-end because the brushstroke headers add movement while the guest names stay typed and perfectly legible. It works for couples who want a softer, romantic vibe without going full script font everywhere. The whiteboard-style background also helps with contrast, so names don’t disappear under warm lighting. It’s best for indoor receptions where guests aren’t moving in bright sun.
Start by setting table letter headers in one brushstroke font style, but keep the letters large (6-8 inches tall) so they read fast. Then print guest names in a clean sans-serif font and align them in tight but breathable rows. Finally, mount the chart on a smooth matte surface like foam board and avoid glossy lamination. If you want it to photograph even better, add a small caption like “Find your table letter” in a tiny, consistent font.
Skip overly thin brush fonts — they look cute and fail at 8-10 feet.
Don’t use script for guest names; only the headers get the artistic treatment.
8. A-to-Z Seating Chart on Tall Acrylic Stand with Stacked Letter Columns
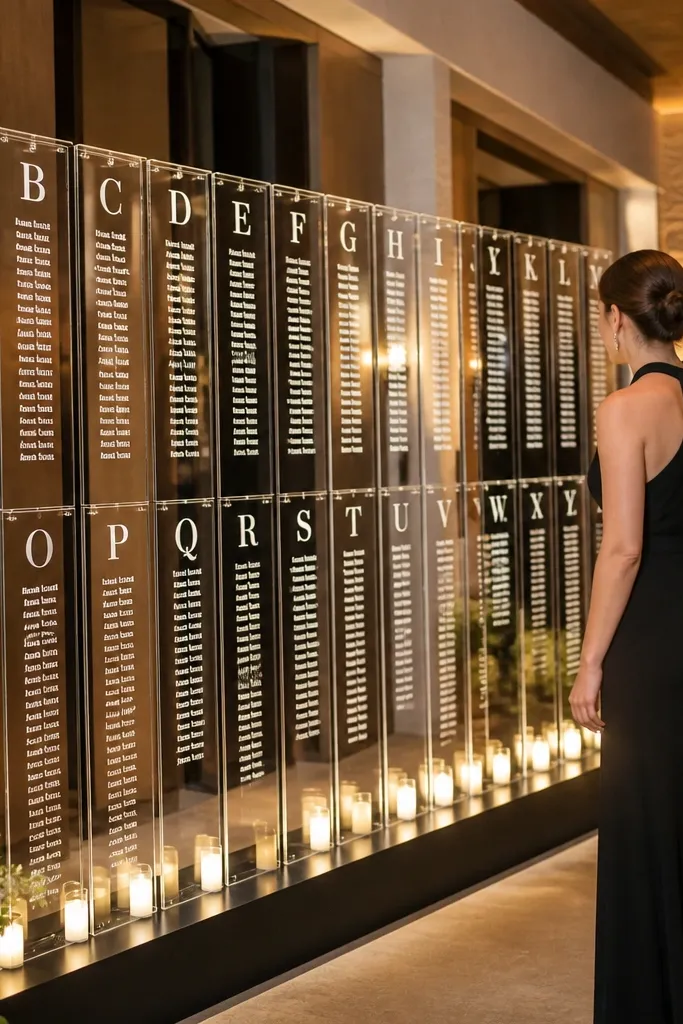
A tall acrylic stand is the easiest way to keep the chart readable when guests cluster around it. Stacked columns keep each letter block from sprawling, so people can find their table without scanning across the whole board. This is luxury seating chart wedding décor that also solves logistics at busy entrances. It’s a smart pick when you have many tables and need a vertical layout that still looks intentional.
Start by splitting your alphabet into 2-3 columns depending on how many tables you have, with each column containing a sequence like A-D, E-H, etc. Then build a tall acrylic stand with enough height so each letter block has breathing room and the names stay legible. Finally, print names in consistent font size and left-align them within each letter block for quick scanning. Place the stand so it’s visible before guests reach the seating area, not after they’re already seated.
Measure the stand placement — if it sits too low, guests read it from an angle and names blur in photos.
Avoid tiny grid spacing; stacked columns look premium only when the text has room.
9. Gold Foil Table Letter Cutouts on Cream Linen-Textured Board
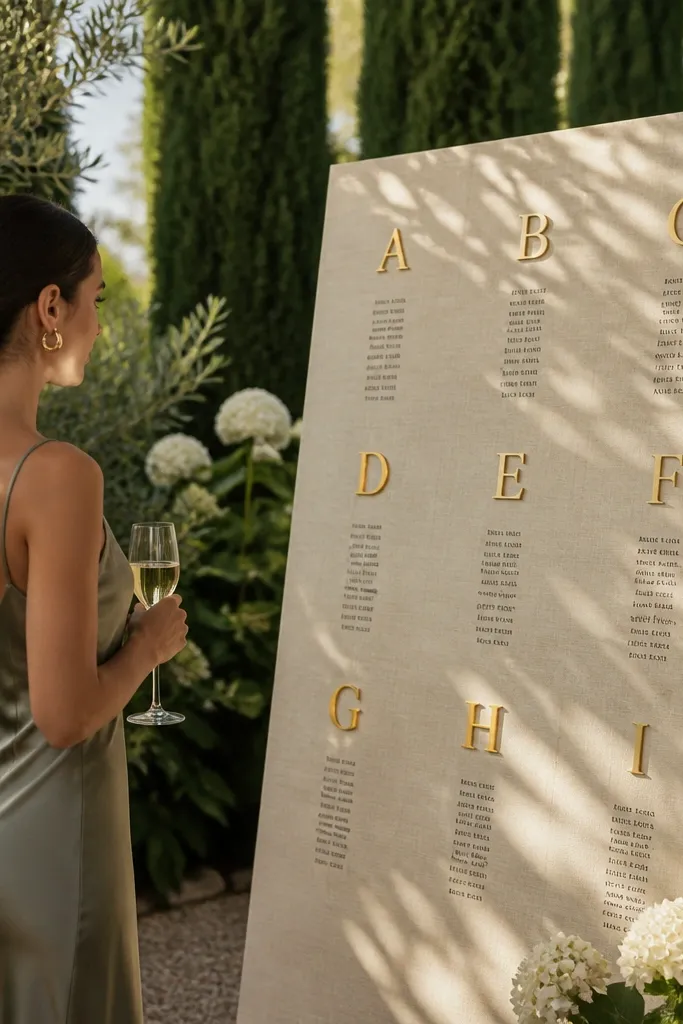
Cream linen texture makes the whole station feel like a styled backdrop, not a utilitarian sign. Gold foil cutouts on the table letters deliver that luxe shimmer without requiring acrylic. The guest names stay black and crisp on clean sections so people can scan quickly. This is a great choice for garden venues, country ballrooms, and any wedding that uses cream, champagne, and gold.
Start by picking a linen-textured board in a warm cream color and sizing it so each table letter block has a clear rectangle behind it. Then apply gold foil cutouts for the letters and print guest names on plain white label cards placed under each letter. Finally, use small spacing lines between blocks so the layout doesn’t look like one big sheet. If you’re printing labels, keep the label edges straight and consistent so the station looks designed in photos.
Quick tipFoil looks best under soft light — avoid harsh overhead glare and place the board facing indirect light.
Skip thisDon’t use gold for names; it turns legibility into guesswork.
10. Chalkboard-Look Seating Chart with White Alphabet Blocks
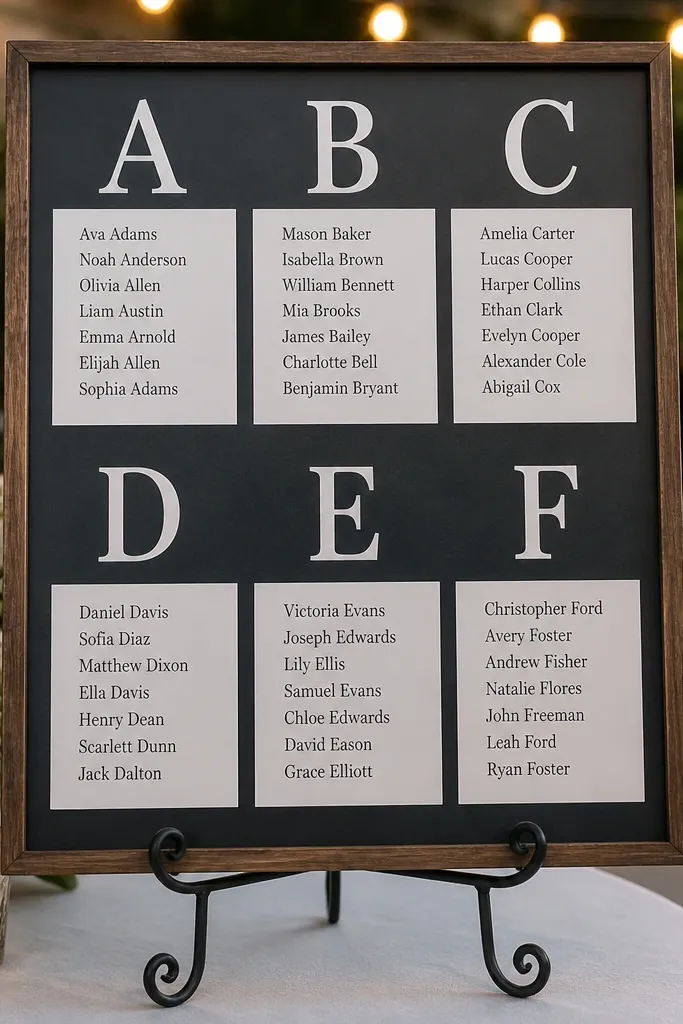
Chalkboard look can feel expensive when the design is disciplined: big white blocks for table letters and typed names for clarity. The contrast is excellent, and it photographs well when the background is matte. Use this style when you want a classic, slightly rustic aesthetic but still need a luxury seating chart wedding finish. It’s good for barns, outdoor receptions, and venues with warm string lights.
Start by selecting a matte chalkboard-style surface and planning table letter headers as white rectangles, not handwritten scripts. Then print names in black and align them in neat rows under each letter block. Finally, add a thin white border around the entire sign so it looks clean when photographed. Keep the alphabet blocks evenly sized so guests don’t have to “hunt” for the right table letter.
Use a matte protective spray rated for chalkboard surfaces so the sign doesn’t smear when handled.
Don’t rely on actual chalk for the final text; it smudges and looks uneven.
11. Monochrome Seating Chart with Large Letter Medallions and Photo-Friendly Spacing
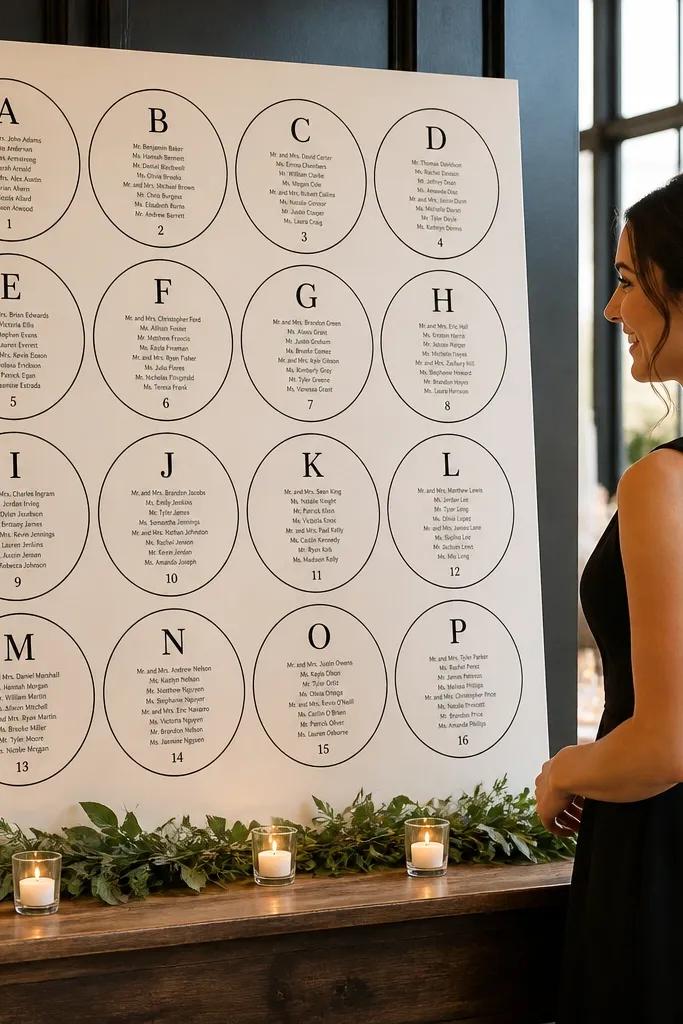
Medallions make an alphabetical seating chart wedding feel like décor because the letters become the hero design element. Use one color family, like black on cream or navy on ivory, so it looks intentional and upscale. The names should sit in clean lines inside each medallion’s corresponding section so guests can scan quickly. This style is excellent for weddings with minimalist palettes or modern invitations.
Start by designing each table letter as a large circle or rounded medallion, with the letter in the center. Then place guest name lists in a matching rounded rectangle area beneath each medallion to keep the layout cohesive. Finally, keep generous margins and avoid cramming multiple letters into one dense grid. For easy setup, print the chart in one large size like 24x30 inches and stand it on a stable easel.
Use rounded corners on every label; it makes the whole chart look more expensive in photos.
Avoid mixing medallion sizes — inconsistent circles make the chart look messy.
12. A-to-Z Table Letter Labels on Clear Acrylic Shelves (Mini "Bookcase")
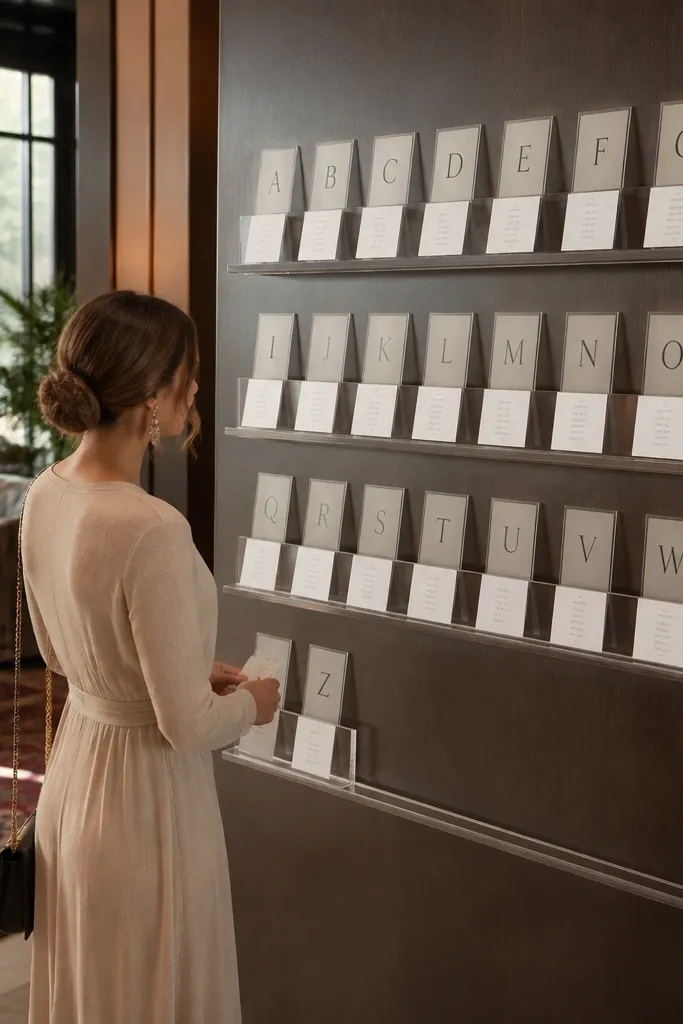
This is the most “interactive” seating chart look and it still stays alphabetical and fast. Clear acrylic shelves let you separate table letters physically, so guests see the right section instantly. It reads like a designed installation, not a paper sheet, and it photographs beautifully because each tier has clean lines. It works best for medium guest lists where you can afford multiple card placements without making the station too cluttered.
Start by choosing shelf tiers that match your letter ranges, like A-F on the top tier and G-L on the next. Then print guest names on individual cards sized to fit the shelf compartments, with each card labeled under the correct table letter. Finally, create table-letter tags and mount them at the front edge of each tier so guests don’t need to search upward. Keep card edges uniform so the whole display looks tidy.
Label the back of each card lightly in pencil so you can re-stack quickly during setup.
Don’t use too many tiny cards — if it becomes a pile, guests slow down and the look turns messy.
13. Alphabet Seating Chart on Large Light Wood Slat Backdrop with Vinyl Letters
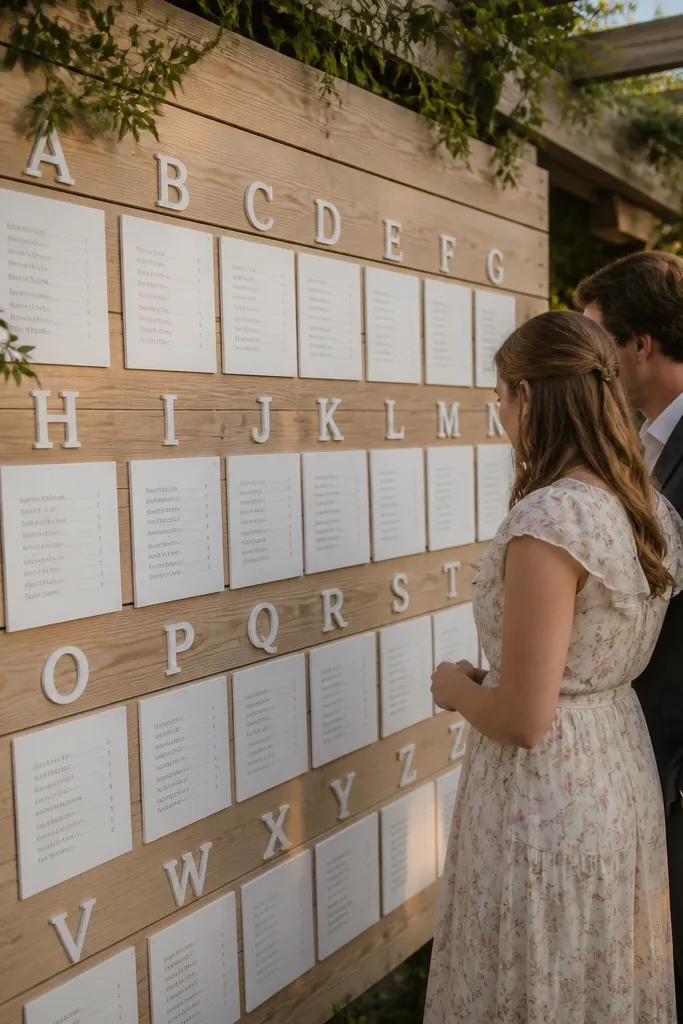
Wood slats create instant luxury because they add texture and depth behind the typography. The trick is to place guest names on smooth panels so the text stays readable over the texture. Vinyl table letters keep the system sharp and consistent. This works especially well for outdoor ceremonies that flow into a reception with a styled photo wall. It’s also easy to set up if you can transport the slat backdrop in one piece.
Start by choosing a slat backdrop size like 30x40 inches and plan table letters in a clean grid across it. Then mount smooth name panels (white or cream) behind each letter section so text stays legible. Finally, apply vinyl letters directly to the slat areas, and keep the name panels aligned under them. If you have lots of tables, split into two backdrops and keep the alphabet in order left-to-right across both.
Quick tipUse removable adhesive vinyl when possible so you don’t damage the slats when you pack up.
Skip thisAvoid printing names directly on wood — uneven texture makes the letters harder to read.
14. Black and Champagne Seating Chart with Thick Gold Divider Lines
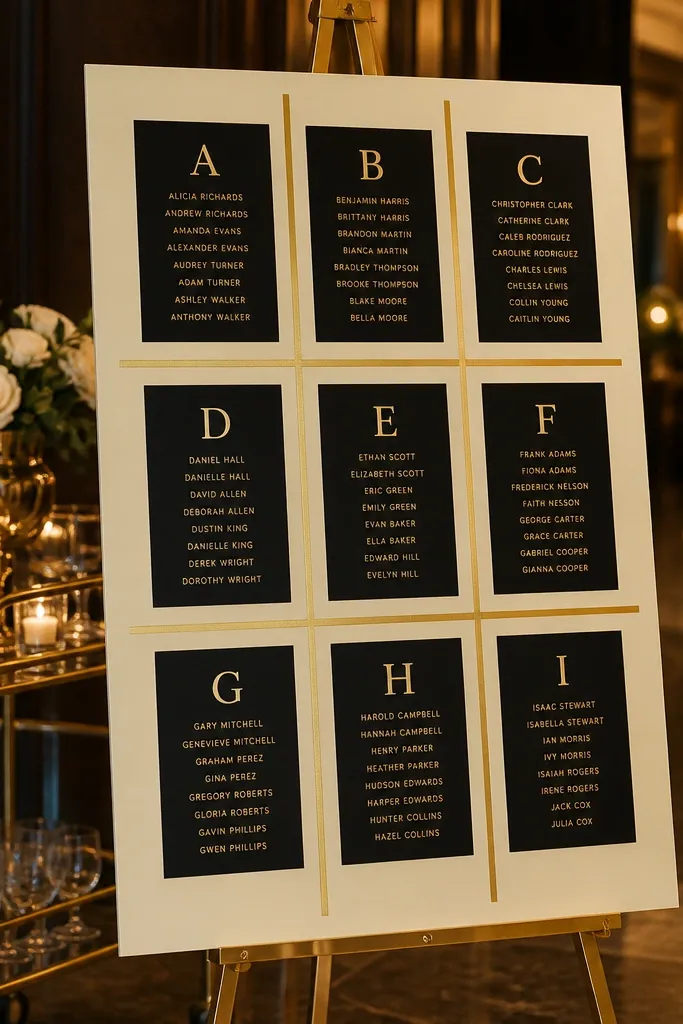
Thick divider lines look premium because they structure the page like a magazine layout. Use a champagne or ivory background so the black names stay crisp, then add gold dividers to separate table letter blocks. It’s a luxury seating chart wedding approach that looks expensive even if you keep it to one board. This style suits weddings with black and metallic accents.
Start by printing the seating chart on a champagne-colored matte board in a size like 24x36 inches. Then design table letter headers in black with thick gold lines outlining each letter block. Finally, place guest name lists in black and keep line spacing consistent, so the dividers do the work of organizing. If you’re splitting into multiple boards, match divider thickness across all pieces.
Use gold dividers as lines, not text; it keeps the station readable and more elegant in photos.
Don’t add extra decorative icons — the dividers are the design.
15. A-to-Z Seating Chart as a Photo-Ready Menu Board Style Sign
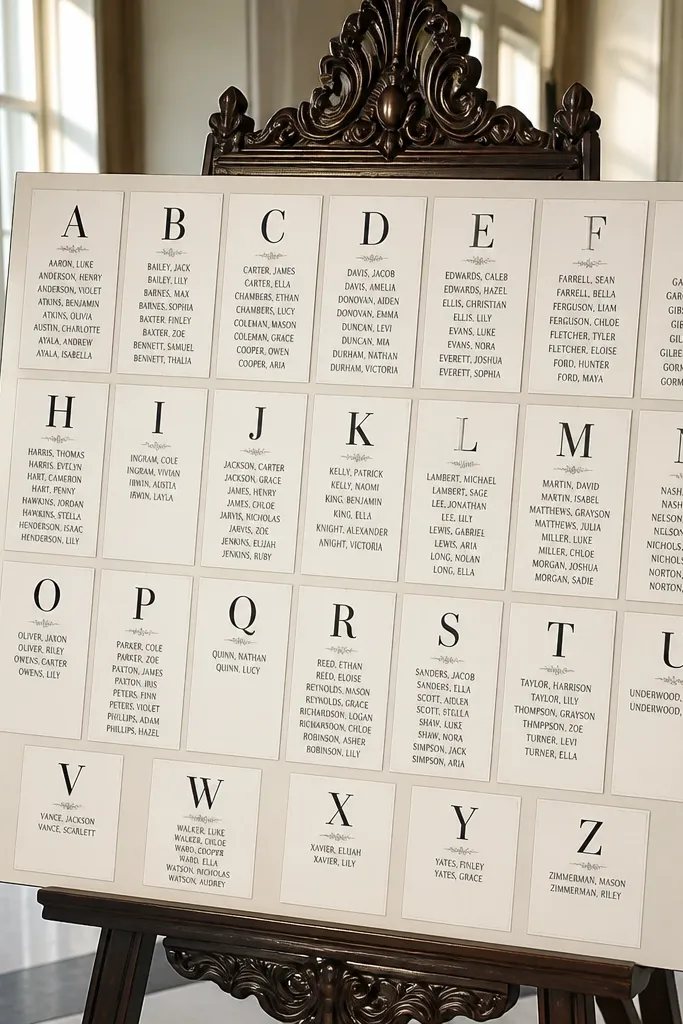
Menu-board style looks luxe because it has that restaurant clarity: big headings, clean spacing, and easy scanning. Put table letters in oversized header blocks like you’d see on a wine list, then align guest names in neat columns. It reads fast under natural light and looks great in venue photos because it resembles a designed display. This is a strong pick for modern weddings in cities where the décor is minimal but the typography is bold.
Start by sizing your board around 20x30 inches so it feels like a statement piece without being too tall to place near the bar. Then lay out table letters A to Z in evenly sized header rectangles and print names in aligned columns under each header. Finally, mount it on a stable stand or frame and keep the border thin and consistent. If you need more space, create two boards that follow the alphabet in sequence.
Quick tipUse column alignment for names; it’s faster for guests than long single lists.
Skip thisAvoid uneven header heights; a sloppy menu layout makes the whole chart look cheap.
16. Script-Letter Accent with Clean Sans Guest Names (A-to-Z Two-Font System)
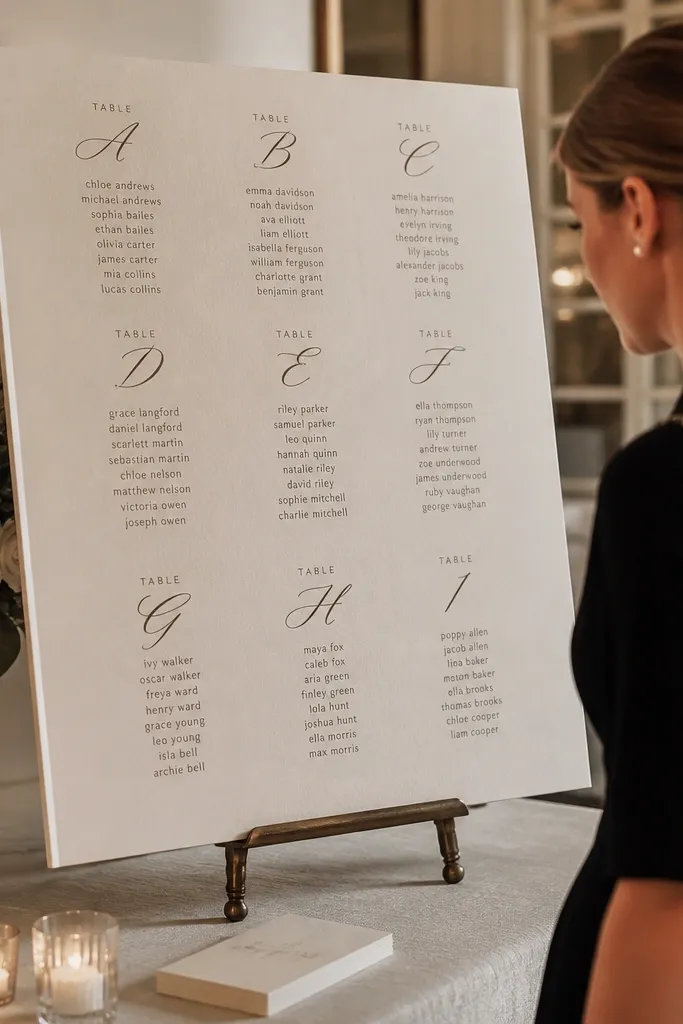
This look is luxury because it uses contrast between a decorative script for the table letters and a clean sans-serif for guest names. The script adds personality, while the sans-serif keeps the practical part readable. Guests scan the bold letter first, then read names in a type that doesn’t distort at distance. It’s a strong choice when your wedding invites use script elements and you want the seating chart to match.
Start by choosing one script font for table letters only and one sans-serif font for guest names, both in matching color families. Then print the chart on a matte cream background and keep the table letter headers large enough to read at 8-10 feet. Finally, keep the spacing between letters consistent so the design looks intentional rather than decorative chaos. If you have many tables, split the alphabet into two boards to avoid tiny script letters.
Quick tipLimit script to headers; if you let script creep into names, readability drops fast.
Skip thisDon’t mix three fonts — it looks like a craft project, not luxury seating chart wedding décor.
17. A-to-Z Seating Chart with Raised Felt Background Panels and Vinyl Letters
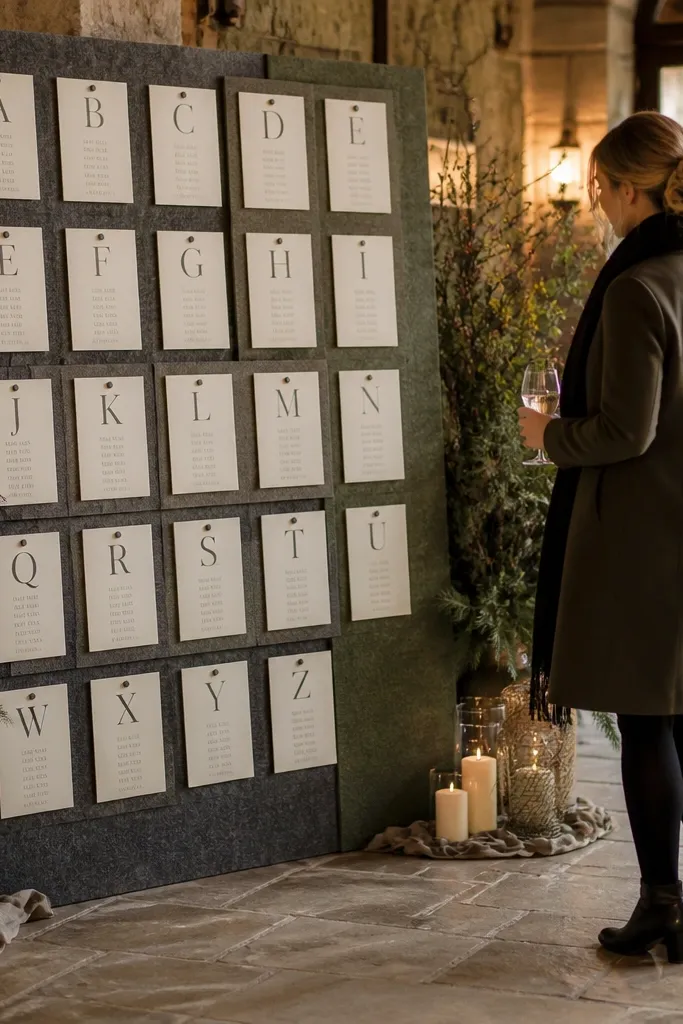
Felt panels make the station feel soft and high-end, especially for fall and winter weddings. The texture hides minor printing imperfections and makes the letter headers look like they belong on a designed set. Vinyl table letters stay sharp against the felt, and printed names remain readable on smooth label cards layered on top. This is a great choice for indoor venues where you want a cozy luxury look without glare.
Start by backing the whole chart on a felt base in a muted tone like deep green, charcoal, or oatmeal. Then create raised felt rectangles for each table letter block and mount smooth label cards for guest names on top. Finally, apply vinyl table letters onto the felt headers and keep the font size large. For setup speed, preassemble all blocks on a single backing board so you only need to place it on an easel.
Quick tipUse a lint roller on felt before you mount anything; it photographs cleaner.
Skip thisAvoid glossy label finishes on felt; glare shows up fast in photos.
18. Acrylic Stand with Frosted Table Letter Labels and Clear Name Cards
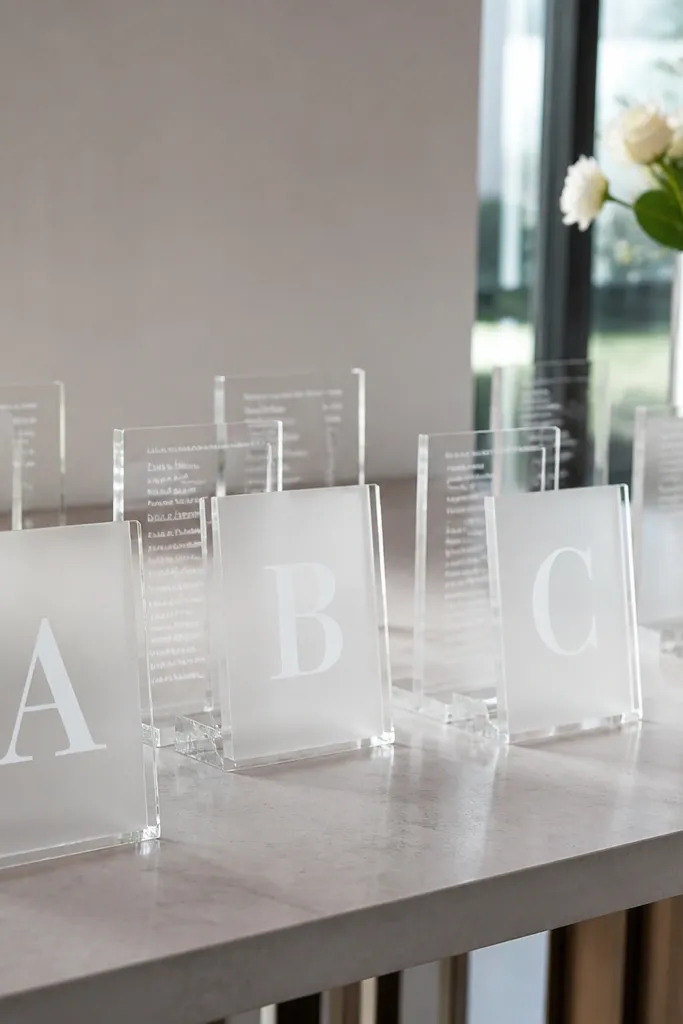
Frosted labels look luxury because they diffuse light and keep the typography crisp without glare. Clear name cards layered behind the frosted letters add depth, so the display feels designed. It also makes updates easier if you have last-minute name corrections, as you can swap cards without reprinting the whole chart. This is ideal for couples who want a premium look and have any chance of changes.
Start with a clear acrylic stand and plan a grid of frosted label rectangles for table letters A to Z. Then print guest names on clear or white-backed cards that slide behind each frosted label section. Finally, mount each name card in the correct slot and keep the layout consistent across all letters so guests don’t get confused. If your station will be outdoors, choose acrylic and card materials that handle humidity.
Print a few extra blank name cards so you can correct errors without scrambling.
Don’t use tiny font sizes on clear cards; they wash out when layered.
19. Framed Seating Chart Triptych with Alphabet Split Across Three Panels
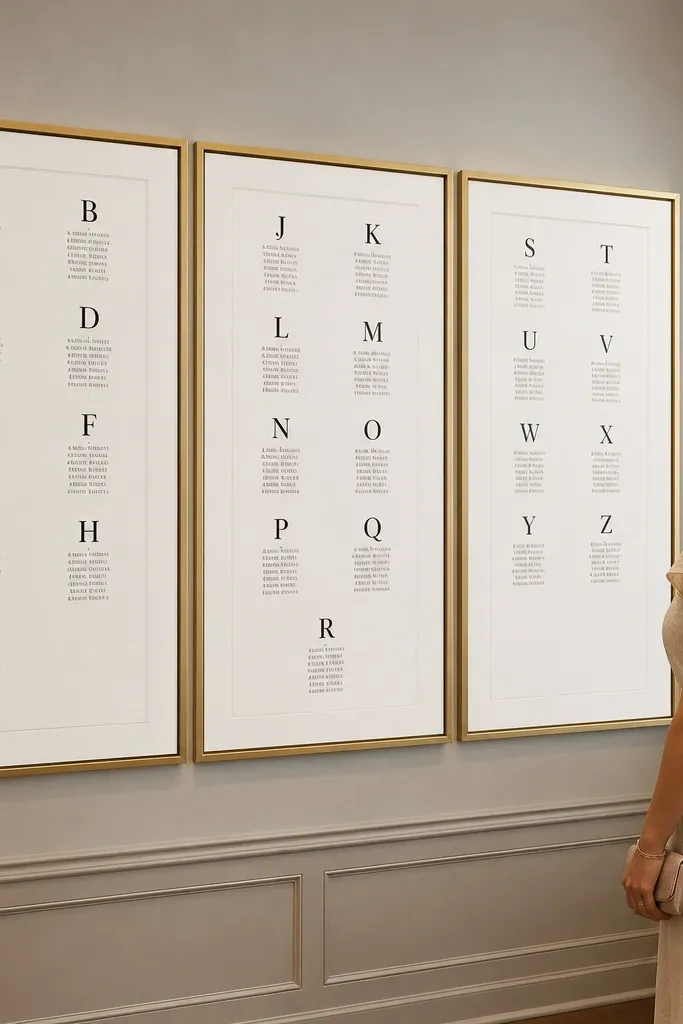
A triptych gives you luxury scale without making one huge board impossible to move. Splitting the alphabet across three framed panels keeps the text bigger and more readable, which matters when guests are in a hurry. The framed look also makes it feel like décor, not a sign. This style is ideal when you have a lot of tables and want the chart to look intentional in photos from multiple angles.
Start by splitting your alphabet into three chunks based on table count, like A-F, G-M, N-Z. Then design each panel as its own layout with consistent header sizing and name spacing. Finally, frame each panel with matte glass to reduce glare and mount them as a triptych display. Keep the panel order left-to-right in alphabet sequence so guests follow naturally.
Use frames with the same width and mat color so the triptych reads as one design.
Avoid mixing panel sizes — it breaks the clean, luxury symmetry.
20. Alphabet Seating Chart on Mirror-Style Acrylic with Black Name Blocks
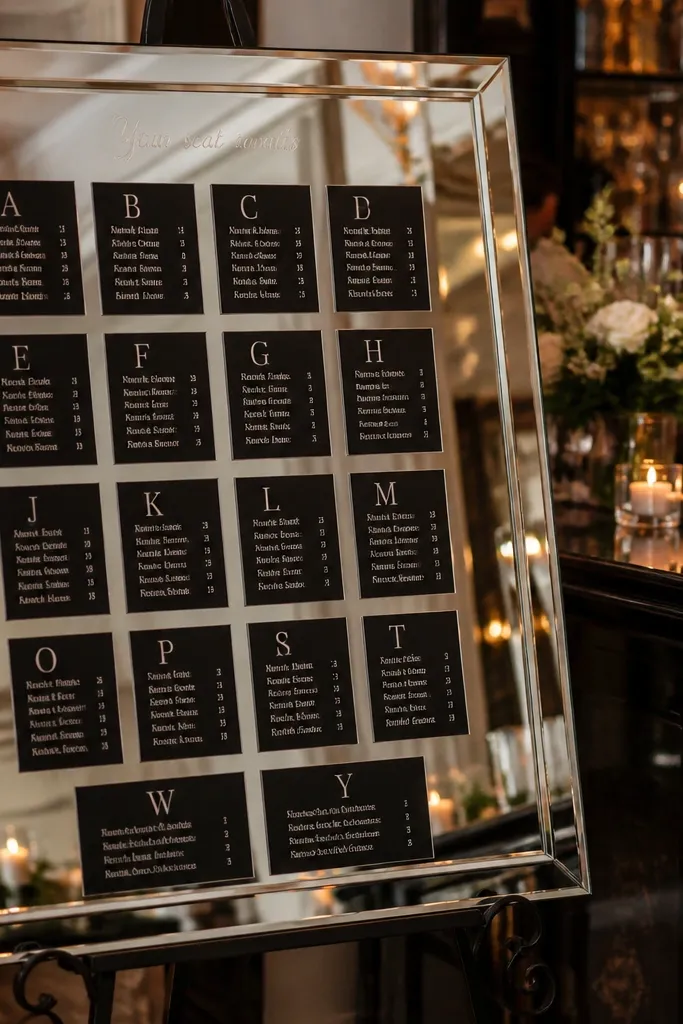
Mirror-style acrylic looks glamorous and high-end because it adds shine and reflects venue lights. It only works for luxury seating chart wedding setups if you keep the text on solid black rectangles so reflections don’t blur the letters. Guests get a high-contrast, easy-to-read chart that looks great in photos near bars and welcome areas. This is best for indoor receptions where you control lighting and can position the mirror panel away from direct sun.
Start by using mirror-style acrylic and designing the layout with black rectangles behind each table letter and name block. Then print names in white or cream text and keep font sizes consistent across all letters. Finally, mount the panel securely and angle it slightly so the reflection doesn’t cover the text. If you have many tables, make two panels instead of trying to cram everything into one mirrored sheet.
Angle the sign 10-20 degrees off perpendicular to the camera so the reflection doesn’t wash out the text.
Don’t use light text on mirror acrylic without solid blocks; reflections turn it into glare.
21. A-to-Z Seating Chart with Gold Frame Border and Minimal Header Typography
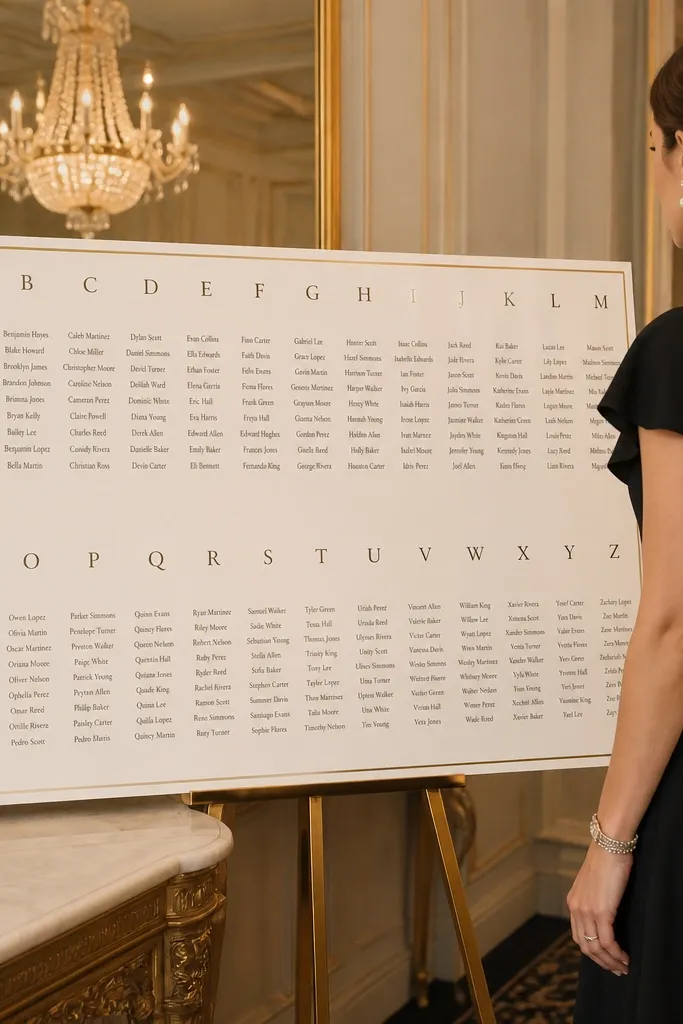
A thin gold frame border makes the chart feel like a gallery piece, and it stays classy even with a simple alphabet grid. Keep the header typography minimal: large table letters and nothing extra, so guests can scan without distraction. This style looks great in traditional venues and pairs well with classic invitation design. It’s also friendly for easy setup because it’s one clean board that reads quickly.
Start by printing the seating chart on a matte cream board in a size like 24x30 inches. Then add a thin gold border around the edges and place large table letters A to Z in consistent positions across the board. Finally, print guest names in one font weight and keep line spacing even. Mount the board in a frame or on a stand with a stable base.
Quick tipUse a matte board finish, not glossy — gold borders look better without reflections.
Skip thisSkip decorative icons inside each letter block; minimal typography reads faster.
22. Chic Table Letter Cards on a Standing Acrylic Tray Wall
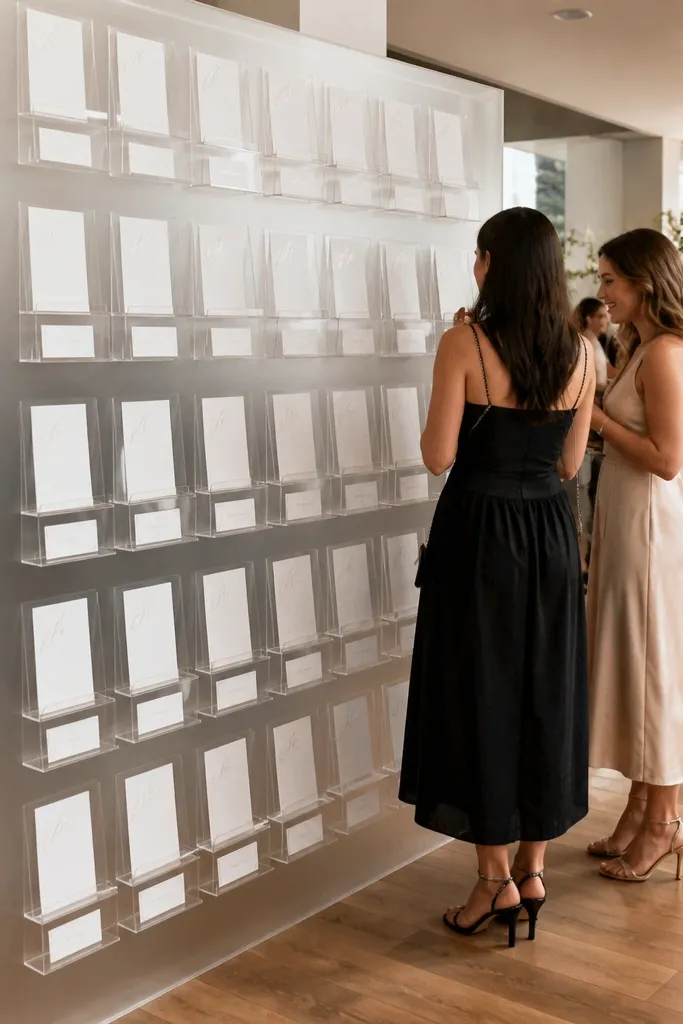
A standing tray wall feels like luxury retail display and makes the seating chart easy to browse. Guests can flip their eyes from table letter card to the matching name cards beneath, which reduces “where am I?” questions. It’s photogenic because the cards create layered depth and a clean vertical rhythm. This works well when you have a decent number of tables but want a more styled station than a single big sheet.
Start by selecting a tray wall unit or building a simple acrylic riser with compartments sized for letter headers and name lists. Then print table letters on upright cards and guest names on matching cards placed in the correct tray rows. Finally, arrange the trays in strict alphabet order and label the top row with a small instruction like “Find your table letter.” Keep card sizes consistent so the station looks expensive, not DIY.
Number the back of trays lightly so you can set them up in the right order quickly.
Don’t let trays mix sizes; uneven compartments make the display look chaotic.
23. A-to-Z Seating Chart on Thick Card Stock with Hand-Tied Ribbon Headers
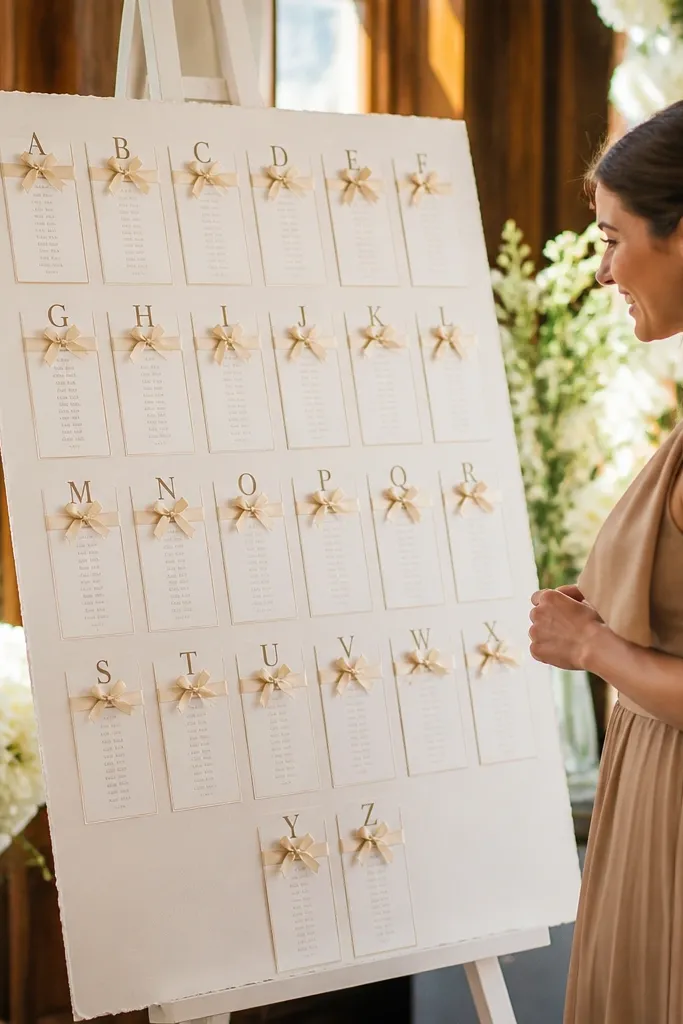
Ribbon headers are one of the fastest ways to make a seating chart look bridal and styled, even if you’re using printed names. The ribbon adds dimension and soft movement in photos, while the table letters stay clear and structured. Keep the ribbon tied to the header only, not across the entire name area, so the text stays flat and readable. This is a great choice for spring and summer weddings with soft color palettes.
Start by printing the full seating chart on thick card stock like 250-300 gsm and cutting it to a size that fits your easel. Then add ribbon-tied headers for each table letter block using a single ribbon color and width, like 1 inch satin. Finally, mount the chart on a foam board backing so it stands up straight. If you have more than 12 tables, do two boards so you can keep names large enough to read.
Quick tipUse a satin ribbon in a solid color, not patterned, so the photos look clean and the letters remain the focus.
Skip thisDon’t tie ribbon over any name lines; it blocks readability.
24. Alphabet Seating Chart with Large Table Letters on Clear Acrylic Hanging Frames
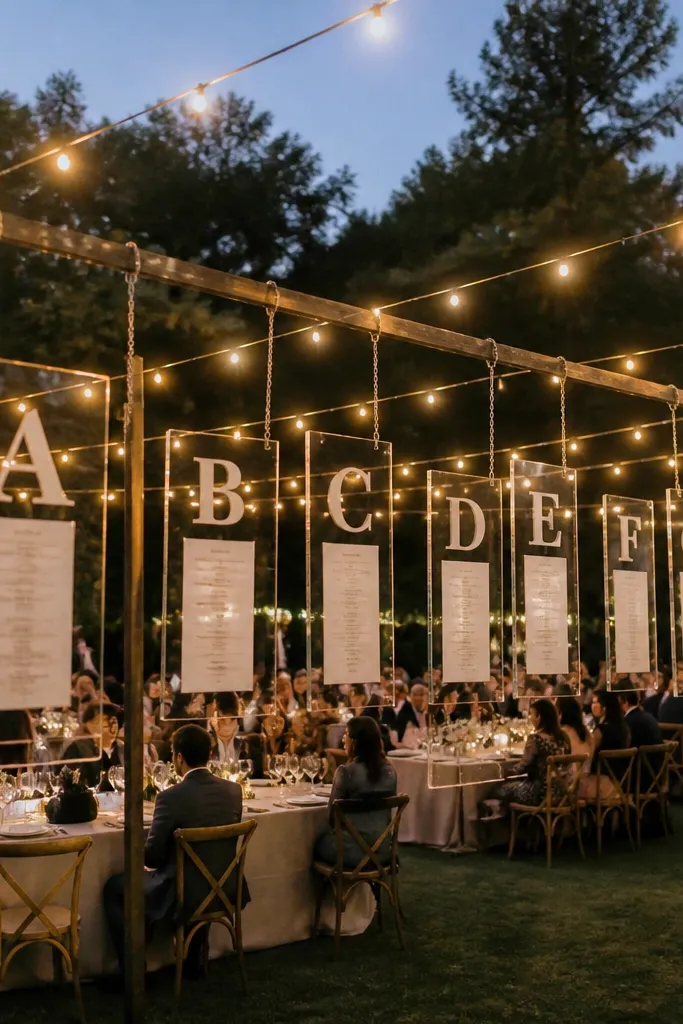
Hanging frames look luxury because they create vertical motion and a designer feel without needing a huge board. Each frame can carry one table letter block, so guests find their letter quickly. The clear acrylic keeps the display light and airy, which works beautifully in outdoor receptions or venues with open ceilings. It’s also easy to update if you print separate name cards per frame.
Start by choosing hanging frame sizes that match your table letter content, like 10x14 inches per frame. Then print guest names on cards that fit inside each frame under the large table letter. Finally, hang frames in strict alphabet order across a straight line so guests don’t have to interpret the sequence. Use the same spacing between frames and secure the hanging points so the line stays level.
Quick tipHang at a height where guests look up slightly but don’t crane their necks; around 5-6.5 feet is a good target.
Skip thisAvoid random spacing between frames; uneven gaps make guests slow down.
25. A-to-Z Seating Chart on Light Gray Board with Dark Navy Name Cards
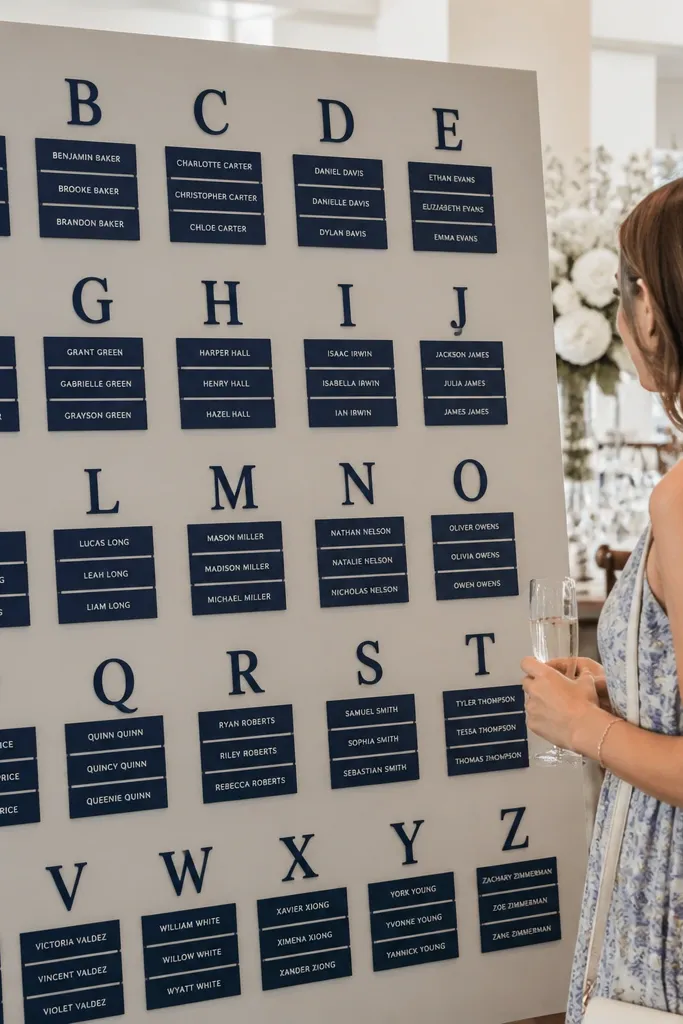
This color combo looks expensive because it’s modern and high-contrast without going harsh like pure black and white. Navy name cards create a clean, card-like texture that reads well in photos and in real life. The table letters can stay in dark navy or a metallic accent, but the names need a solid card background for legibility. It works best for weddings that use navy, slate, and champagne tones.
Start by printing table letter headers in dark navy on a light gray matte board. Then print guest names onto navy cards with cream or white text and mount them in rows under each letter block. Finally, add thin divider lines in a slightly lighter gray so the grid stays clean. If you need speed on setup day, pre-cut and label all cards by table letter before the wedding.
Quick tipUse matte navy card stock; glossy cards catch light and make text harder to read at angles.
Skip thisDon’t use navy text on gray; you lose contrast and guests squint.



