
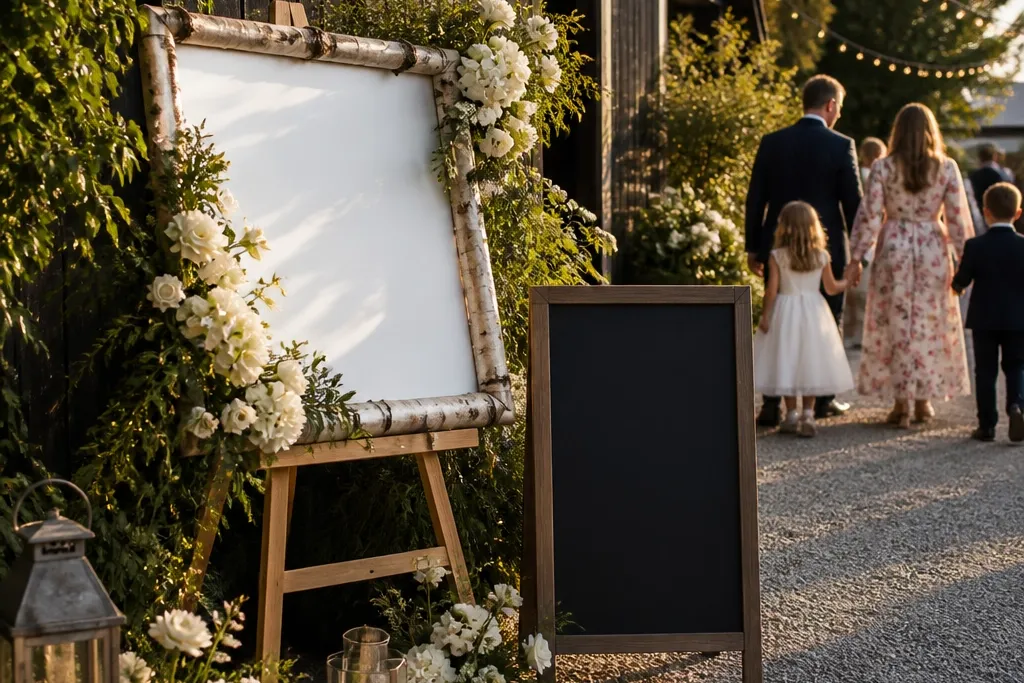
1. Birch-framed welcome sign on a low garden easel
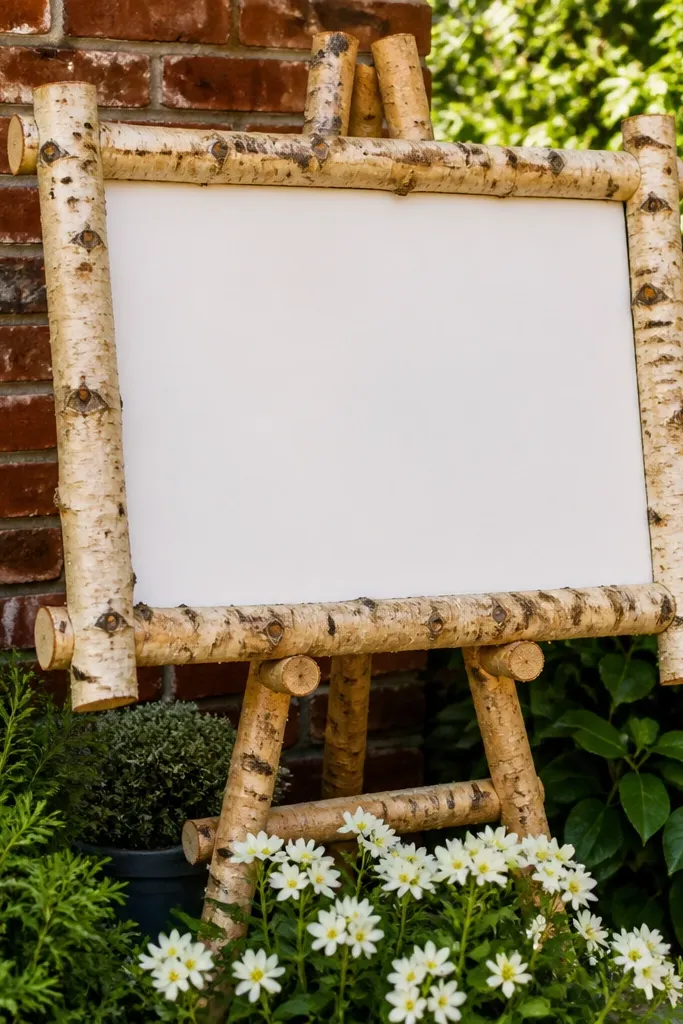
This is the cleanest family-friendly welcome sign entrance look when your venue has greenery or brick. Birch reads warm in daylight and stays bright in photos without looking too “party.” The low easel keeps the bottom of the sign visible while leaving space for strollers to pass. Add a small cluster of white flowers at the base and a thin eucalyptus garland along one side so it looks styled rather than taped-on.
Start by buying or building a birch or light wood frame sized around 18x24 inches so it’s easy to read. Then mount vinyl lettering (or printed lettering) on the sign board and place it on a low easel so the text sits roughly 48-52 inches off the ground. Finally, set it near the entrance turn with a 4-foot clear path beside it and use two zip ties to secure any greenery to the frame.
Quick tipIf wind is common at your venue, use a weighted base or screw the easel legs into a flat board for stability.
Skip thisAvoid thin poster-board signs on a tall stand — they wobble and blur in photos.
2. Arched floral welcome sign at the gate
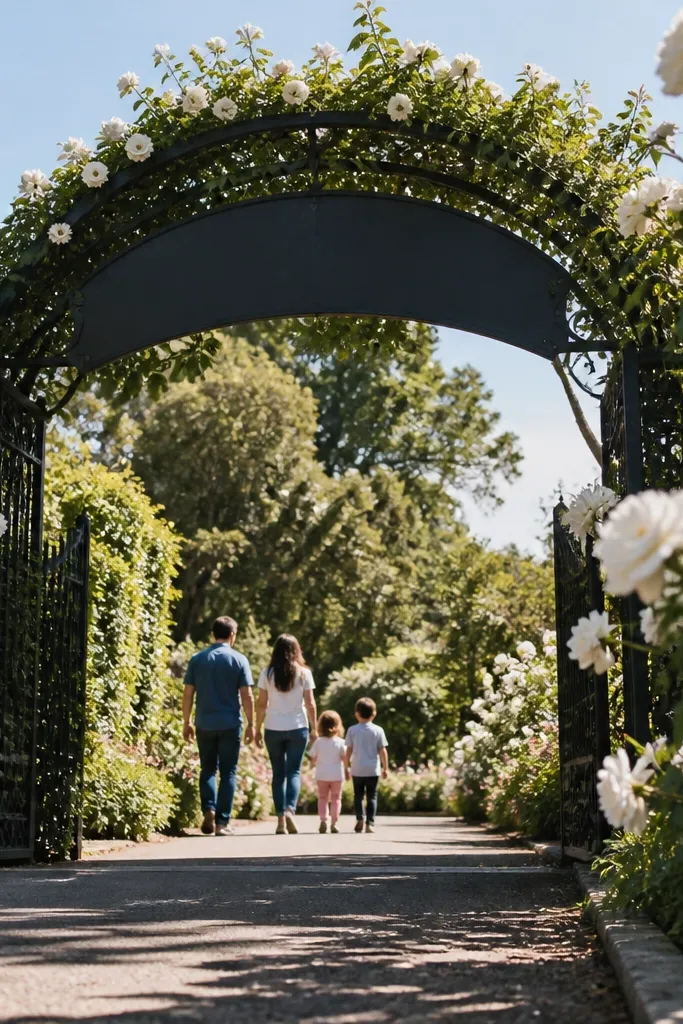
An arched welcome sign makes the entrance feel like a photo moment without crowding the walkway. It frames the guest and gives you a natural “walk-through” composition for families, couples, and kids. Choose a compact arch width around 36-42 inches so it fits tight gates. Use soft white flowers and greenery for a universal look that doesn’t clash with most wedding colors.
Start by selecting an arch frame (metal or wood) sized to fit the gate opening. Then attach a cream sign panel with dark lettering and wrap greenery only on the sides and top curve so it doesn’t cover the text. Finally, place the arch just inside the gate on the side where guests naturally stop, and leave at least 4 feet for stroller and wheelchair access.
Quick tipHang a small lantern or warm LED fairy light inside the arch for evening photos.
Skip thisAvoid covering the sign with thick florals — it kills readability for the family-friendly entrance.
3. Chalkboard welcome sign with a white script border
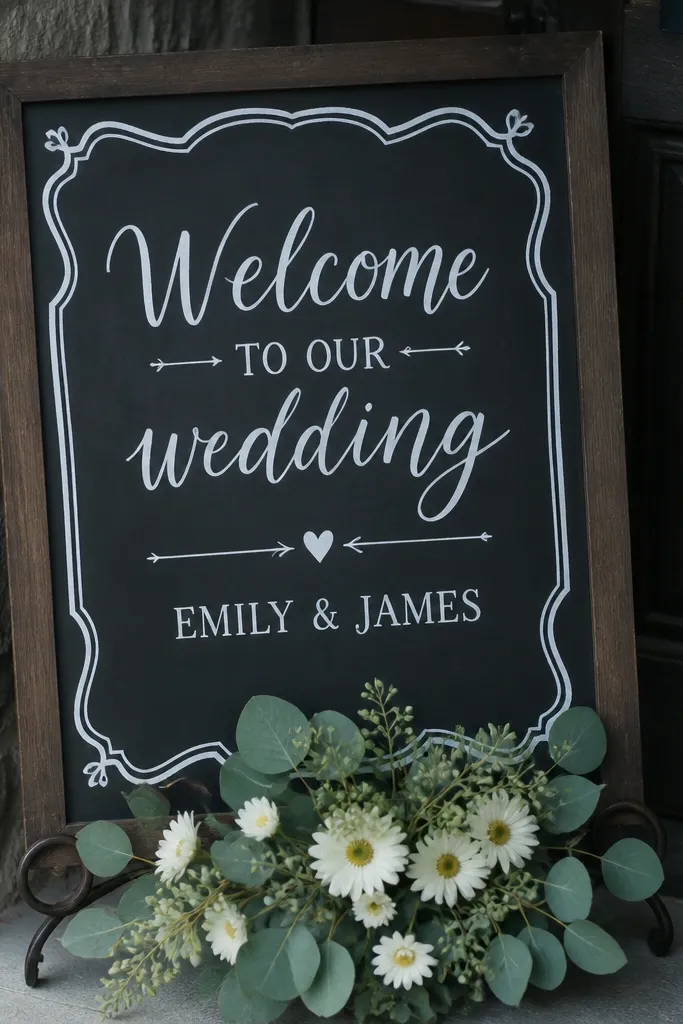
Chalkboard looks cozy and friendly, which is exactly what you want for a family-friendly welcome sign entrance. The key is contrast: black board plus white border makes the message pop even in shade. Keep the message short — “Welcome to our wedding” and names — so the writing stays legible. A small bouquet at the bottom adds softness and keeps the frame from feeling flat.
Start with a chalkboard that’s at least 24 inches wide so the letters don’t look tiny from the driveway. Then draw a thick white border first and fill the center with bold chalk lettering (use a stencil for consistent strokes). Finally, set it on a sturdy easel and protect it from drips by placing a clear plastic rain cover if there’s any chance of mist.
Quick tipUse a chalk marker or chalk pen for crisp edges that photograph cleanly.
Skip thisSkip freehand fancy loops for long lines — they look messy on camera.
4. Wood pallet welcome sign with layered name cutouts
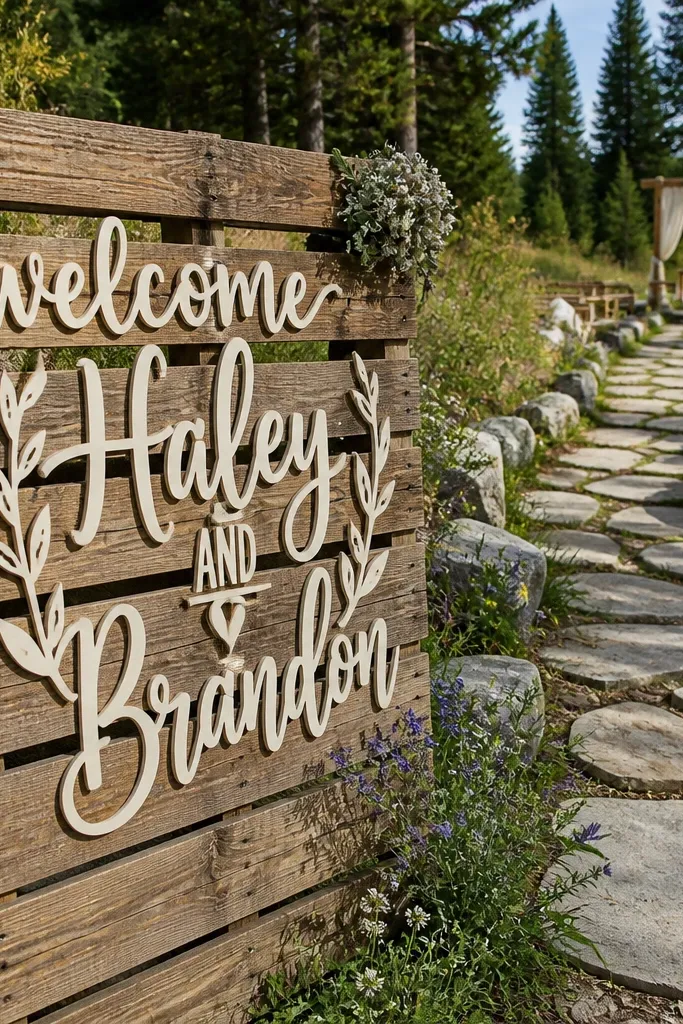
If you like a rustic but still tidy entrance, layered name cutouts on reclaimed-looking wood do the job. The texture reads warm, and the dimensional cutouts catch light for a more “designed” look than flat printing. This works great for outdoor ceremonies and farm-style venues where the ground is natural and photos feel grounded. Keep the palette simple: dark lettering, one greenery trim, and maybe a small gingham ribbon tie for family-friendly charm.
Start by choosing a pallet-style wood sign board and sand the surface so vinyl lettering sticks cleanly. Then layer cutout names in a contrasting color (cream letters on dark wood, or dark letters on light wood). Finally, add a simple greenery garland at the top edge and place the sign near the driveway path where guests slow down.
Quick tipSeal the wood with a matte clear coat so the wood grain doesn’t glare in photos.
Skip thisAvoid using too many colors — wood textures already add visual noise.
5. White folding screen welcome sign with gold frame lettering
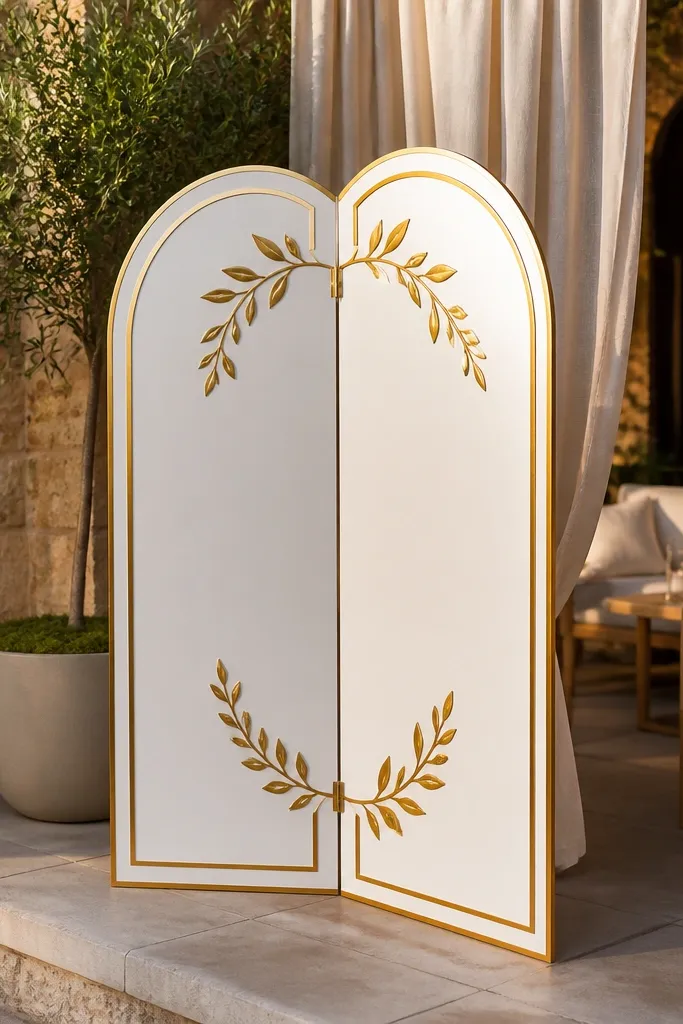
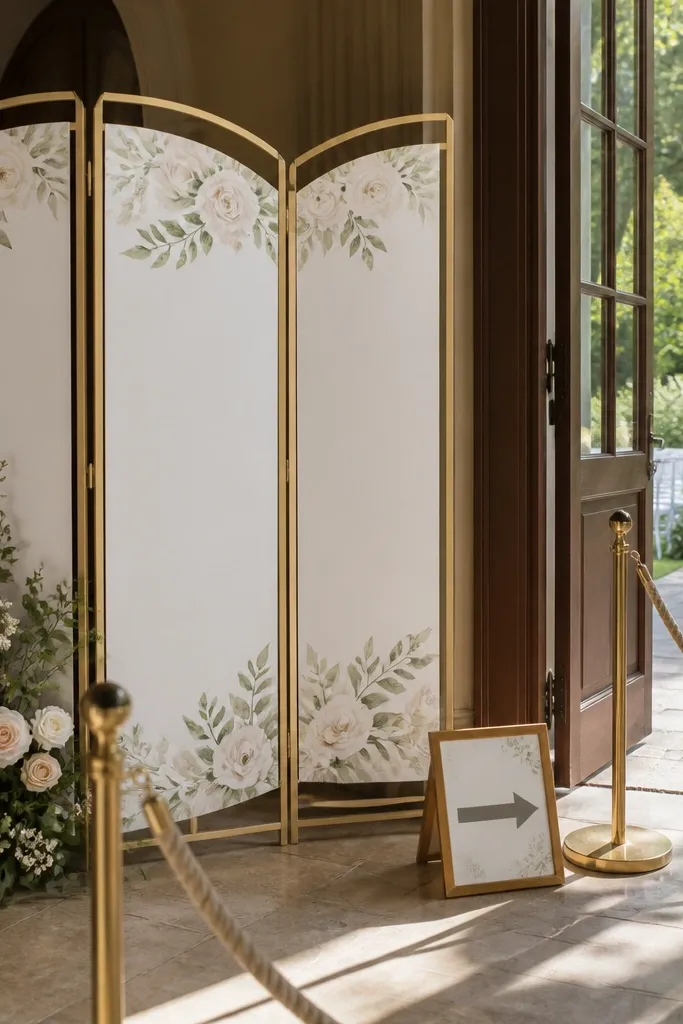
A folding screen gives you a tall, photogenic backdrop without needing an arch frame. It also looks great for family-friendly photos because it creates a clean “photo wall” behind guests, including kids. Choose a white screen so it stays bright in daylight and doesn’t fight with colorful flowers. Gold frame lettering adds a celebratory feel while still looking classy and readable.
Start by using a white folding screen and placing it on a flat surface near the entrance. Then mount a cream panel or printed message on the center panel, with gold lettering bordered by a thin line. Finally, add small greenery at the top corners and secure it with zip ties so it doesn’t sag.
Quick tipIf your venue is windy, anchor the screen legs with sandbags or weighted bases.
Skip thisSkip thin paper panels — they ripple and look cheap in photos.
6. Navy-and-cream welcome sign entrance with rope border
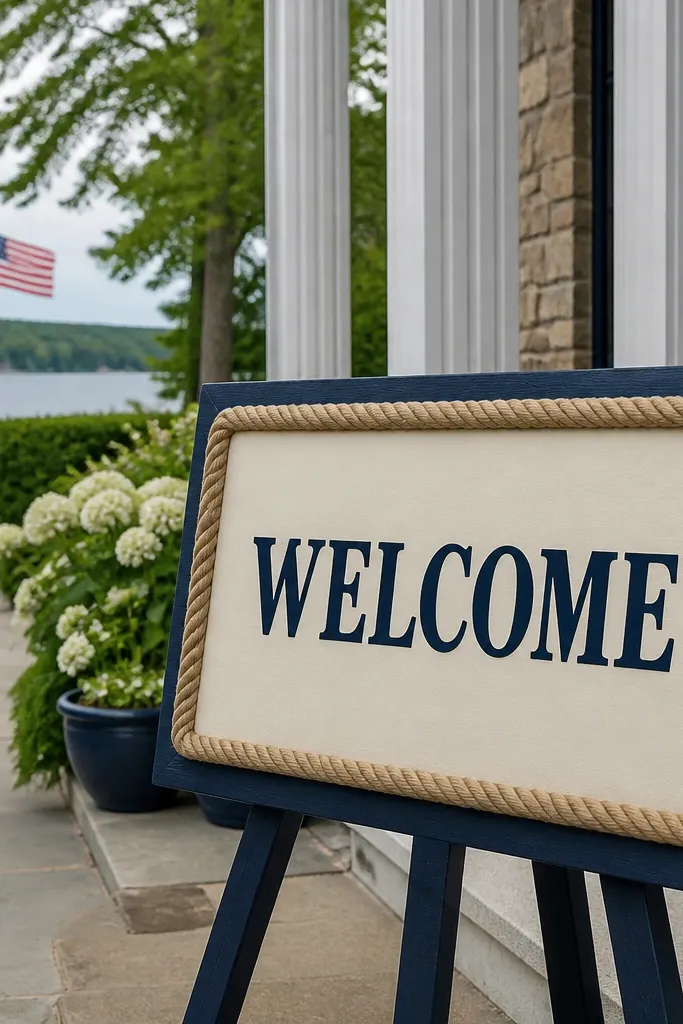
Navy and cream is a strong color combo for a family-friendly welcome sign entrance because it reads clearly and looks intentional in both outdoor and indoor venues. The rope border adds texture and makes the sign feel “finished” without adding clutter. This style works especially well near coastal venues, lake houses, or any entrance with stone and light wood. Keep the message centered and simple so kids can read it too.
Start by painting or getting a navy board and adding cream vinyl lettering in a bold font. Then frame it with a rope border using hot glue or a rope trim adhesive, leaving the middle clean. Finally, place it on a weighted stand near the entry path and add a small sprig of greenery at one corner for balance.
Quick tipUse matte vinyl for the lettering so it doesn’t reflect overhead lights.
Skip thisAvoid glossy paint — it throws glare and makes photos look washed out.
7. Vintage window welcome sign with greenery garland
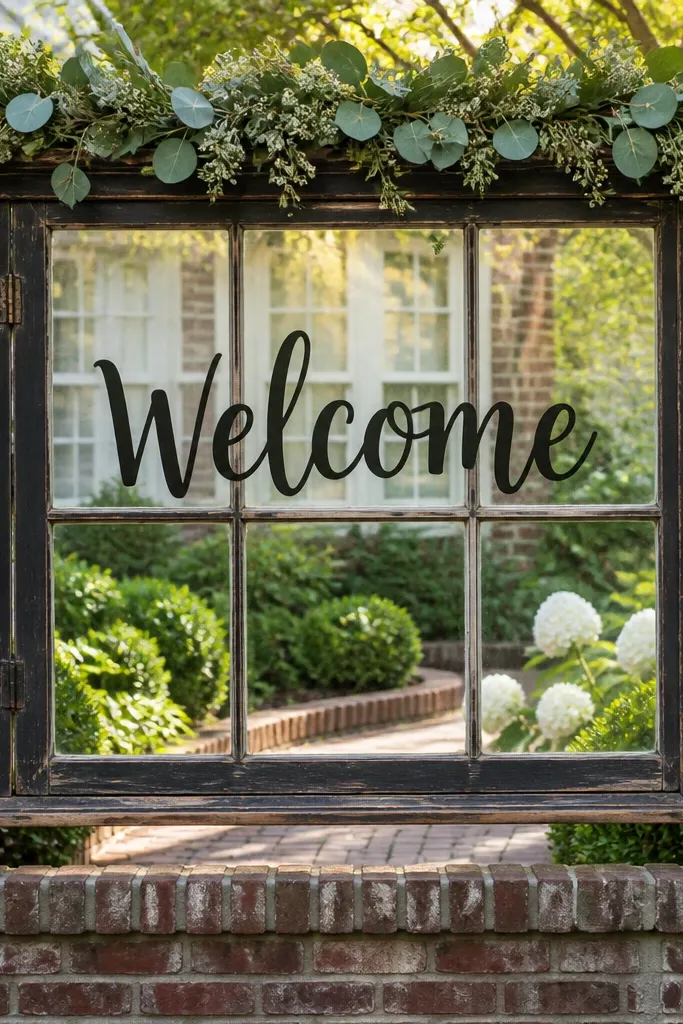
A vintage window frame makes your entrance feel like a styled set, which is exactly what you want for a photogenic family-friendly welcome sign entrance. The window shape naturally directs attention to the center message. It also hides clutter behind it because you can mount the sign panel inside the frame. Use dark lettering on a light panel so it stays readable even from a distance.
Start by sourcing a real vintage window frame or a high-quality replica, then clean it and stabilize any loose hinges. Mount a light sign panel inside (cream or ivory) and apply dark lettering with straight alignment. Finally, weave greenery garland across the top edge of the window and place the sign near the walkway where people naturally pause.
Quick tipAdd a small number of LED battery candles inside the window for evening entrances.
Skip thisSkip overcrowded props inside the window — it makes the message harder to read.
8. Monogram marquee welcome sign with kid-friendly arrow
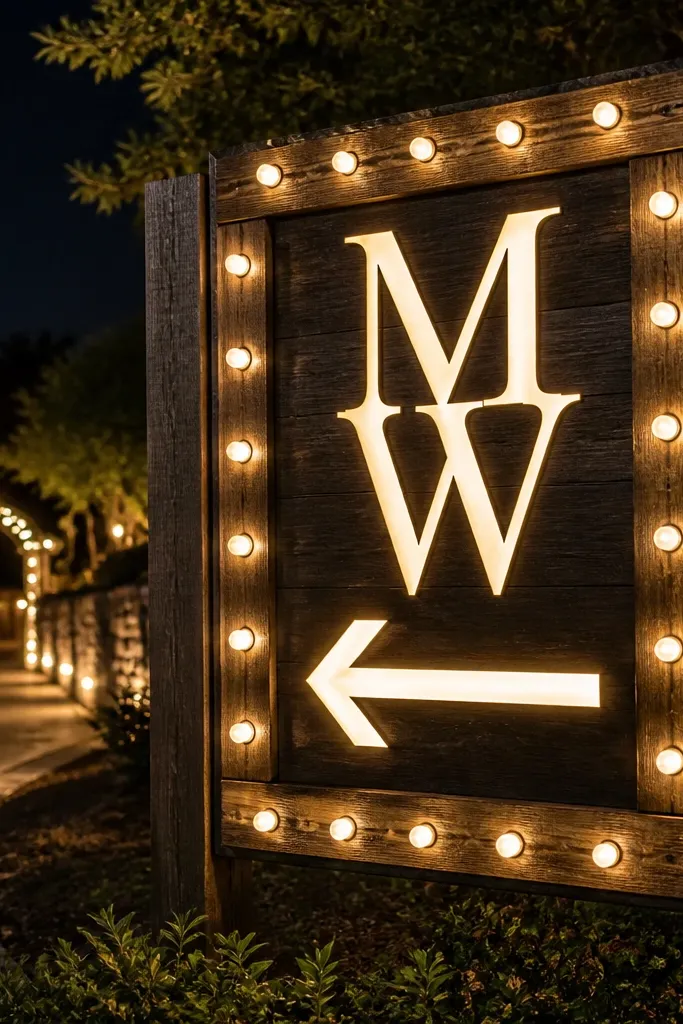
If your entrance is confusing, a marquee-style welcome sign with a simple arrow fixes it fast. The glowing look is photogenic and it helps families find the right direction in low light. Add a short message like “Welcome” and then a clear arrow pointing to the ceremony or reception entry. Keep the arrow graphic thick so it reads from a stroller height and from across a parking lot.
Start by picking a marquee or lighted sign frame and selecting a warm white bulb color. Then create the arrow and text in vinyl or printed panels that fit inside the lighted frame. Finally, place it at the first decision point (after the parking turn) and aim it so the arrow points directly down the walking path.
Quick tipBring extra batteries or a backup power plan for the sign so it doesn’t go dark during arrival.
Skip thisAvoid tiny arrows or thin lines — they vanish in night photos.
9. Tennis-ball green welcome sign with lemon accents
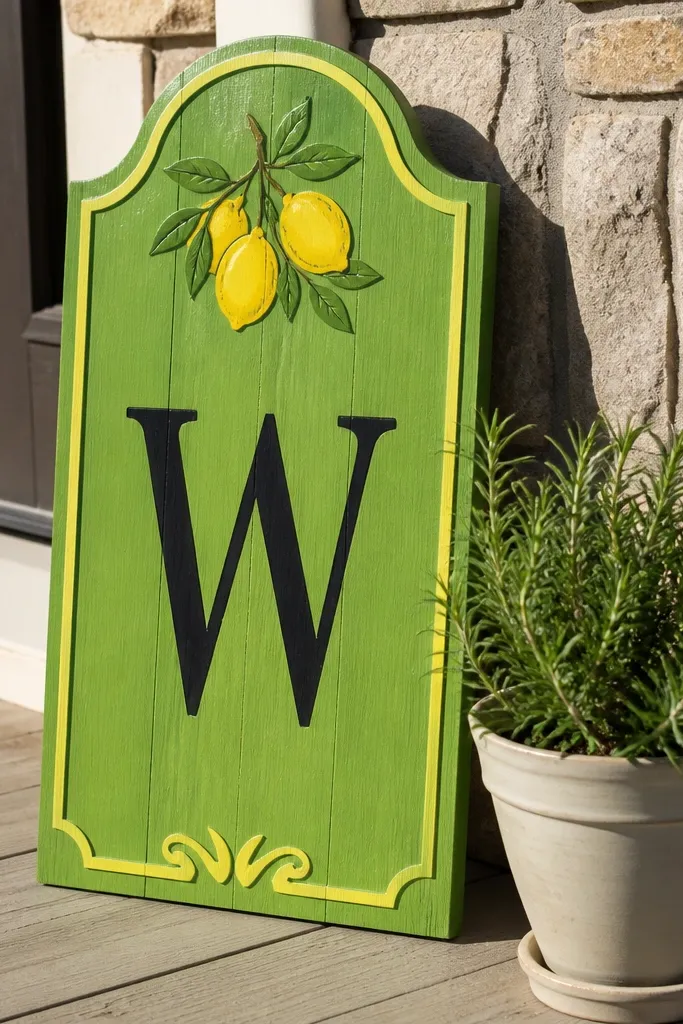
This is the playful option that still looks stylish. Bright tennis-ball green paired with lemon-yellow accents photographs beautifully, especially on neutral stone or light wood entrances. It’s also kid-friendly visually, which matters if families are arriving with toddlers who get overwhelmed by fancy decor. Use a clean, bold font and keep the design to one color plus one accent so it doesn’t look like a theme park.
Start with a bright green board or print on a foam panel and apply black or deep navy lettering for contrast. Then add lemon accents using small stickers, cut vinyl shapes, or a thin illustrated border. Finally, mount it on a sturdy stand and place it where sunlight hits it directly for a crisp look.
Test your color in the actual lighting — neon shades can wash out under heavy shade.
Skip multi-color confetti graphics — they make the text unreadable.
10. Terracotta welcome sign with woven rattan frame
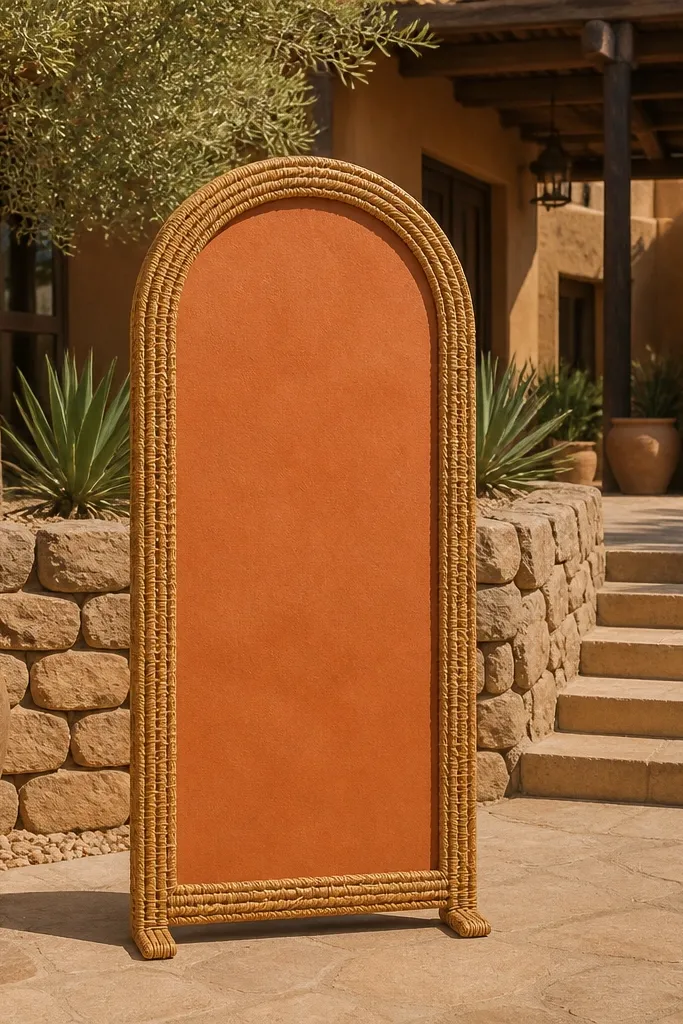
Terracotta and rattan is one of those combinations that looks expensive but stays warm and family-friendly. The woven frame creates soft texture that photographs nicely, and the terracotta background makes the entrance feel grounded. This works well for outdoor ceremonies, desert-inspired venues, or any space with neutral landscaping. Keep the lettering in a dark brown or deep charcoal so it stays readable.
Start by choosing a rattan or woven frame size around 24x30 inches so the message is visible. Then mount a terracotta panel inside with dark lettering and a thin cream border line. Finally, place it near the entrance path and add a small neutral greenery cluster (sage or olive) at the bottom corner.
Use a matte finish on the terracotta panel to reduce glare.
Avoid white-on-white layouts inside rattan — the text can blend into the frame.
11. White linen tablecloth welcome sign with ribbon tassels
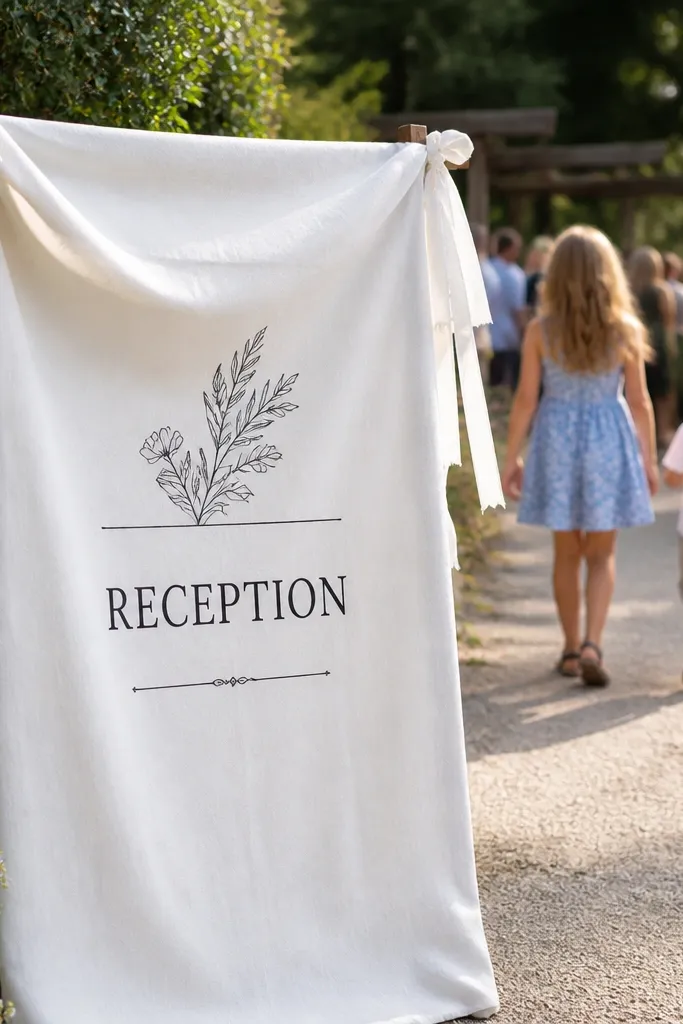
This entrance idea looks soft and welcoming, which is exactly what families respond to. A linen drape around the sign makes it feel like part of the overall decor, not a separate prop. Ribbon tassels add movement in photos when guests walk by, especially in light wind. Choose dark lettering on white linen so the sign remains readable and doesn’t blur into the background.
Start with a stiff sign board (foam core or wood) and cover it with white linen using spray adhesive. Then add a ribbon tassel trim along one side or the bottom edge and apply dark lettering in a bold font. Finally, mount the sign on a stand and place it at the entrance step or near the first seating area so families see it immediately.
Quick tipUse ribbon that’s 8-10 inches long so it sways, but doesn’t smack kids' hands.
Skip thisSkip long tassels that hang into the walkway.
12. Blackboard sign on a ladder-style stand
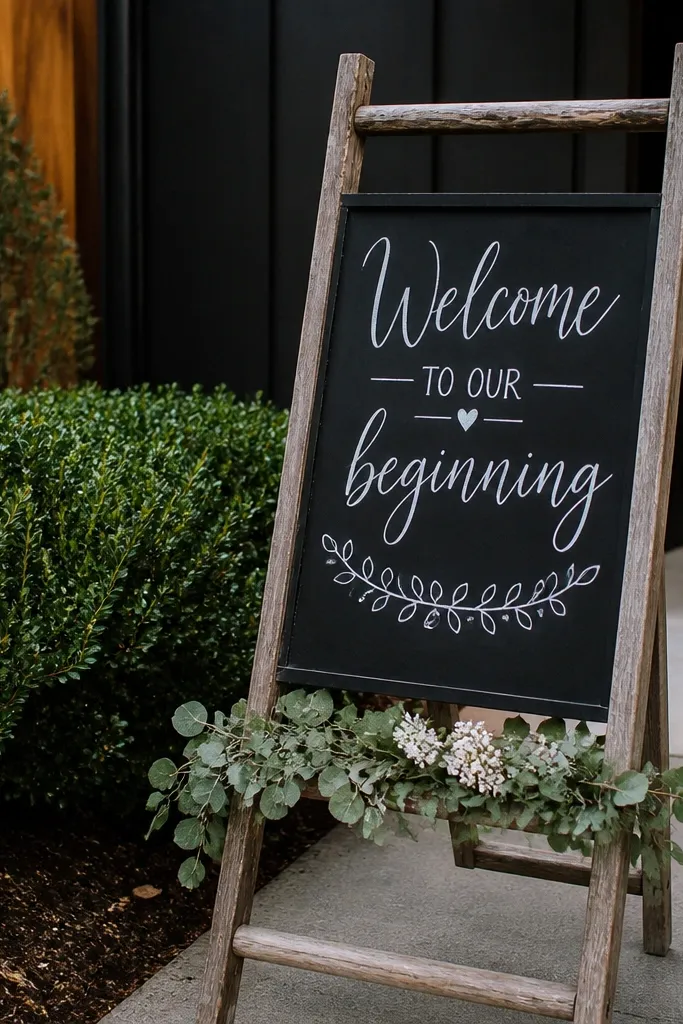
A ladder-style stand gives you vertical height without building an arch. It’s great for entrances where you need a sign to stand out against low hedges or fences. The chalkboard look keeps it friendly, and the ladder makes it feel like decor you could style anywhere. Add a small greenery garland along one rung and keep the text short so it’s readable for families arriving fast.
Start by using a ladder stand with a stable base and set the top of the chalkboard around 6 feet for visibility. Then apply chalk lettering using stencils for clean lines and add a simple border. Finally, place the ladder near the entrance where guests slow down, and add a small protective cover if wind or rain is likely.
Quick tipPosition it so the sign faces the sun at a slight angle for crisp contrast.
Skip thisAvoid clutter on the ladder shelves — extra frames steal attention from the message.
13. Acrylic welcome sign with floating vinyl lettering
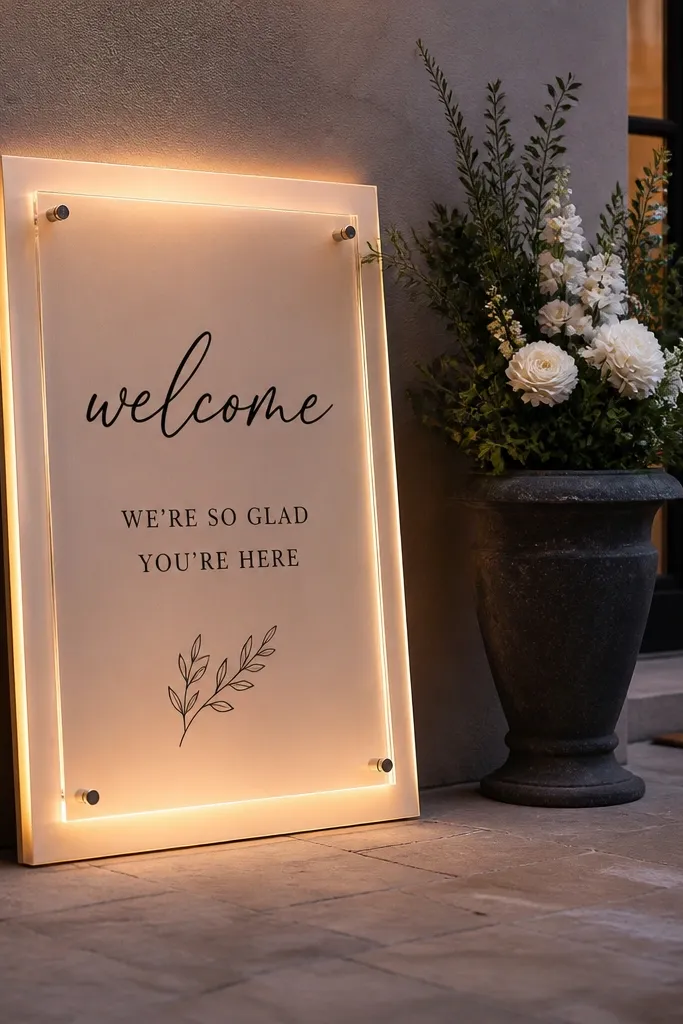
Clear acrylic looks modern and photogenic, especially when you add warm LED lights behind it. It also works well for family-friendly welcome sign entrance setups because it feels light and doesn’t visually block the walkway. The best way to keep it readable is floating vinyl lettering on a light backing panel, not etched text that can get hard to see. Pair it with a simple LED border and one small greenery sprig for a clean finish.
Start with a clear acrylic sign panel and a light backing (white or cream) so the lettering pops. Then apply vinyl lettering and add a warm LED strip behind or around the edges. Finally, place the sign near the entrance where you can get a clean line-of-sight from the driveway, and secure the stand so it can’t tip.
Quick tipChoose warm white LEDs (2700K) so the sign looks inviting in evening photos.
Skip thisSkip frosted acrylic with light lettering — it kills contrast.
14. Garden stake welcome sign with layered moss border
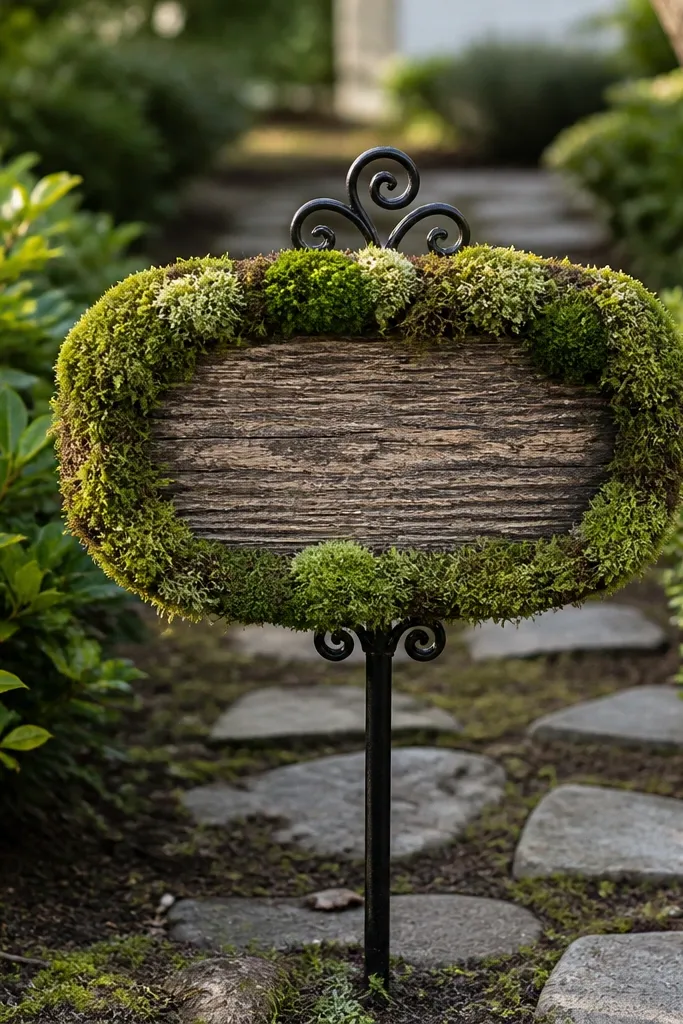
When you want a family-friendly welcome sign entrance that feels natural, stakes with a moss border do it. The moss adds texture and softness without looking too themed, and the stake format works in tight spaces where a stand would block traffic. This style is great for entrances lined with shrubs or pathway stones. Keep the lettering bold and dark, and limit florals to one small cluster so it stays neat.
Start by using a sturdy stake holder and attach a sign panel sized around 10-12 inches wide so it stays visible but doesn’t dominate the path. Then add a moss border around the sign edges using foam-backed moss sheets. Finally, place two stakes — one for the welcome message and one for a short second line like “Ceremony starts at 4” — and position them at the same angle for a clean photo.
Quick tipMist the moss lightly before the wedding so it looks lush in daylight photos.
Skip thisAvoid heavy real flowers all over — they wilt fast and look messy.
15. Sunflower welcome sign with gingham ribbon frame
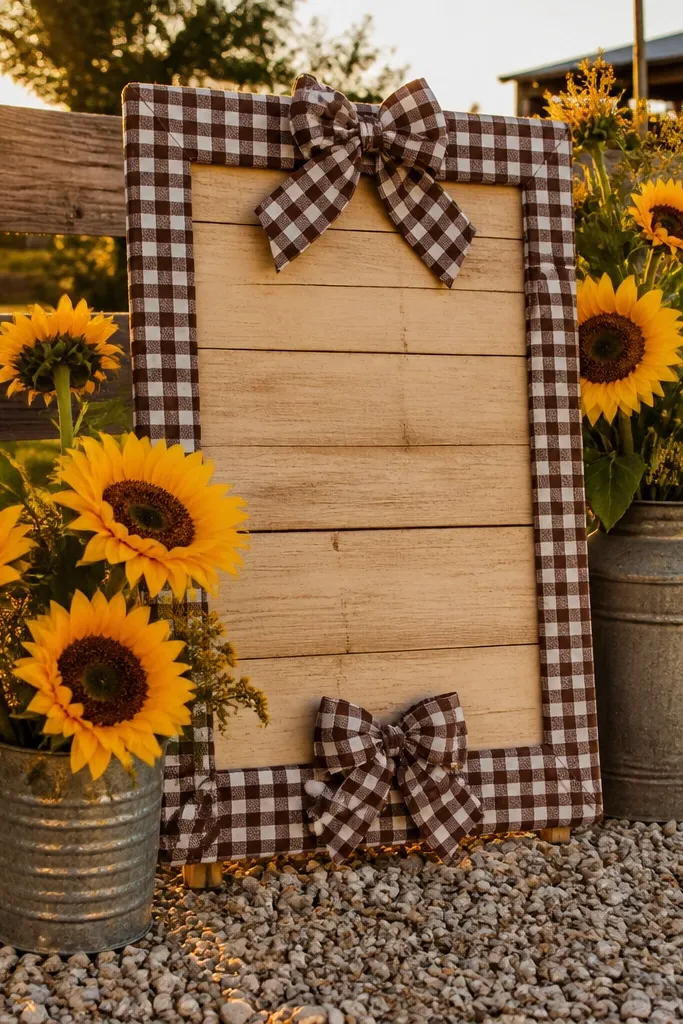
Sunflowers bring instant warmth, and gingham keeps it family-friendly instead of overly formal. This entrance style looks especially good in late summer and early fall when golden light hits the scene. Use a white background with deep brown lettering so the sunflower accents don’t steal the show. For photos, the gingham frame adds a patterned edge that looks great from both close and wide angles.
Start with a sign board on a white base and apply deep brown or black lettering using vinyl. Then wrap gingham ribbon around the sign edges like a picture frame, leaving the center open and clean. Finally, attach a few sunflower picks or silk sunflowers at the corners and place the sign near the entry step where guests gather.
Quick tipChoose sunflower stems with short heads so they don’t poke into kids' line of sight.
Skip thisSkip too many sunflower heads — it turns the sign into a bouquet and reduces readability.
16. Neutral pampas welcome sign with cane frame
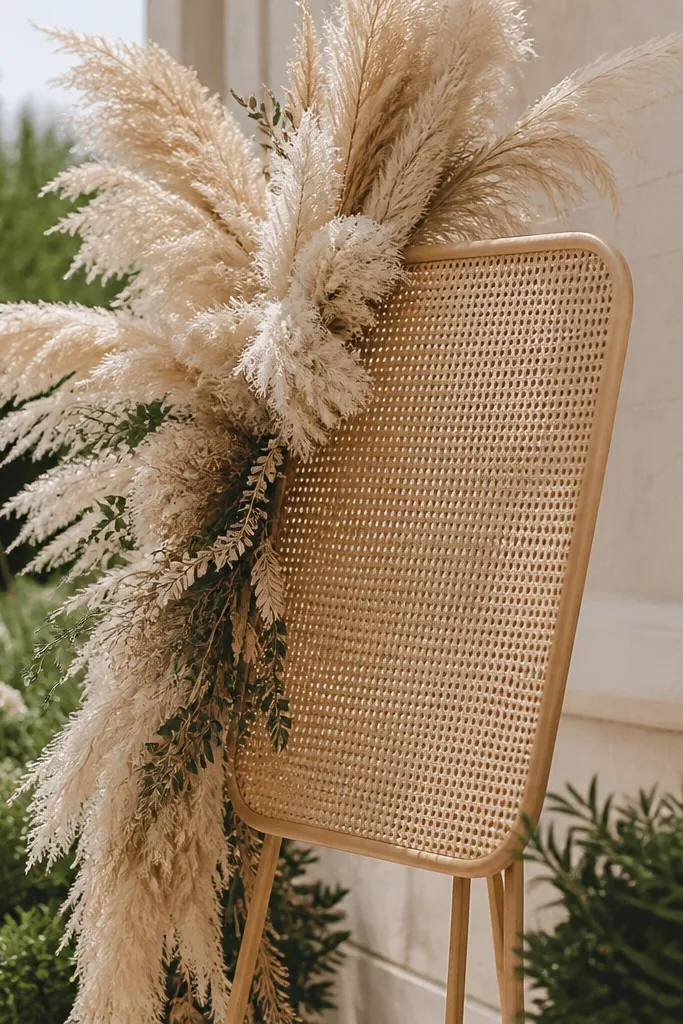
A cane frame plus pampas grass creates that airy look that still photographs cleanly. It’s a strong choice for a family-friendly welcome sign entrance when you want something soft, not sparkly, and you have a neutral venue background. Pampas texture is photogenic from the side, which helps if families are walking past toward the ceremony. Keep the signage simple and use cream or light background with dark lettering for contrast.
Start by choosing a cane frame large enough for a 18x24 sign panel. Then attach the sign panel and add pampas grass in a small cluster at the top corners only, not across the text. Finally, place it just inside the entrance where it catches natural light and doesn’t block the path.
Quick tipIf you’re using real pampas, secure it tightly with florist wire so it doesn’t shed in wind.
Skip thisAvoid placing pampas too low — it brushes strollers and looks messy in photos.
17. Minimalist white welcome sign with green leaf border
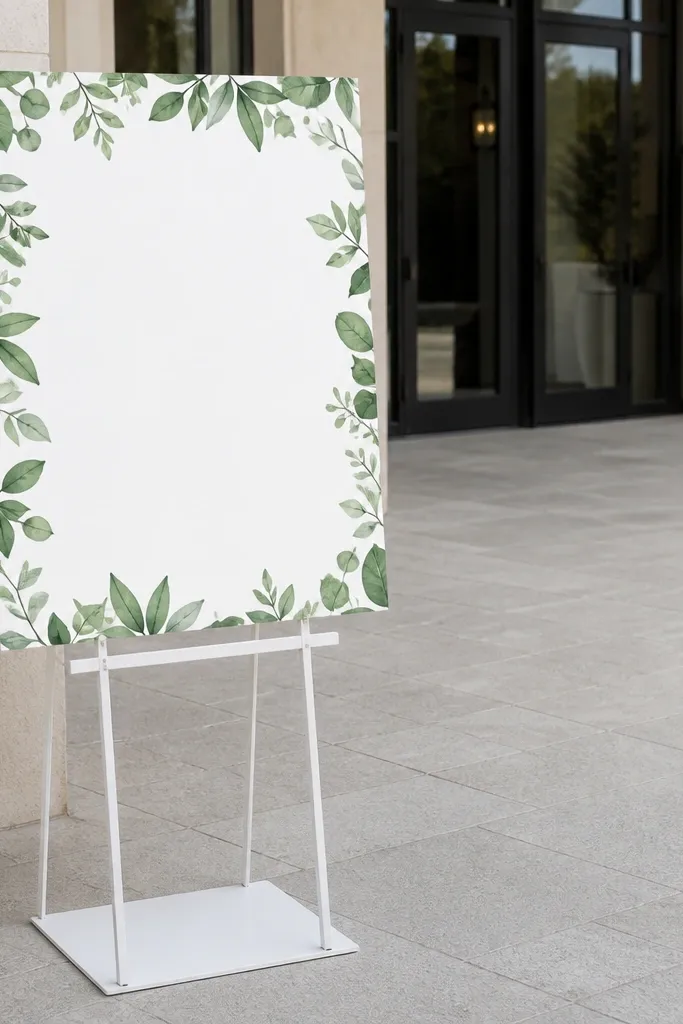
Minimal doesn’t mean boring. A white sign with a green leaf border looks fresh, reads clearly, and works in almost every venue because it doesn’t fight the background. This is a smart family-friendly welcome sign entrance option when you’re also using lots of other decor and you don’t want the entrance to feel busy. Use a thick border line and keep the message centered so it’s easy for kids to read.
Start with a white sign panel and apply dark lettering in a bold, simple font. Then add a leaf border using vinyl leaf decals or printed border tape, keeping the leaf density light enough to avoid covering letters. Finally, mount it on a stand with a clean base and place it where guests first enter the main path.
Quick tipUse a matte finish so the sign doesn’t glare under overhead lights.
Skip thisAvoid thin, delicate fonts — they disappear in distance shots.
18. Color-block welcome sign with pastel stripes and dark names
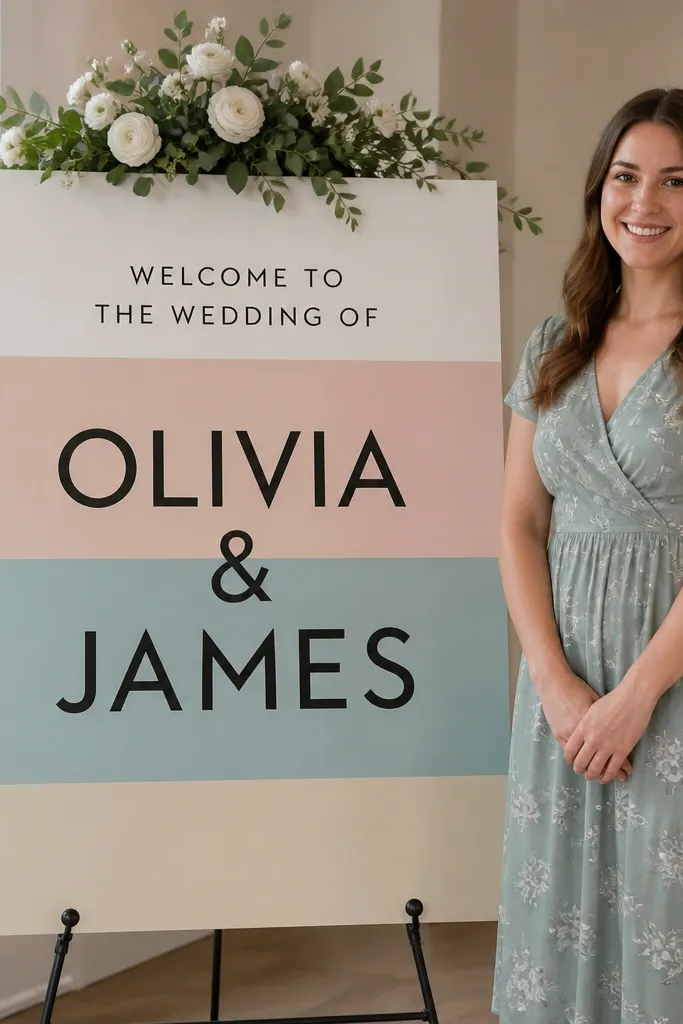
Pastel color blocks make the entrance feel fun and family-friendly without turning it into a theme. The trick is keeping the typography dark and thick, then using stripes only as a background element. This style is great for indoor venues where walls are neutral and you want the sign to pop in photos. It also works outside on overcast days because the stripes add brightness.
Start by designing a sign panel with pastel vertical stripes and a solid center area for the main message. Then apply dark names and dates in a thick font so they stay readable. Finally, mount it on a flat, sturdy stand and place it at eye level so families can read it when they arrive.
Keep stripes to 3-5 colors max so the sign doesn’t look chaotic in photos.
Skip tiny text under decorative elements.
19. Lighted garland welcome sign on a simple wood frame
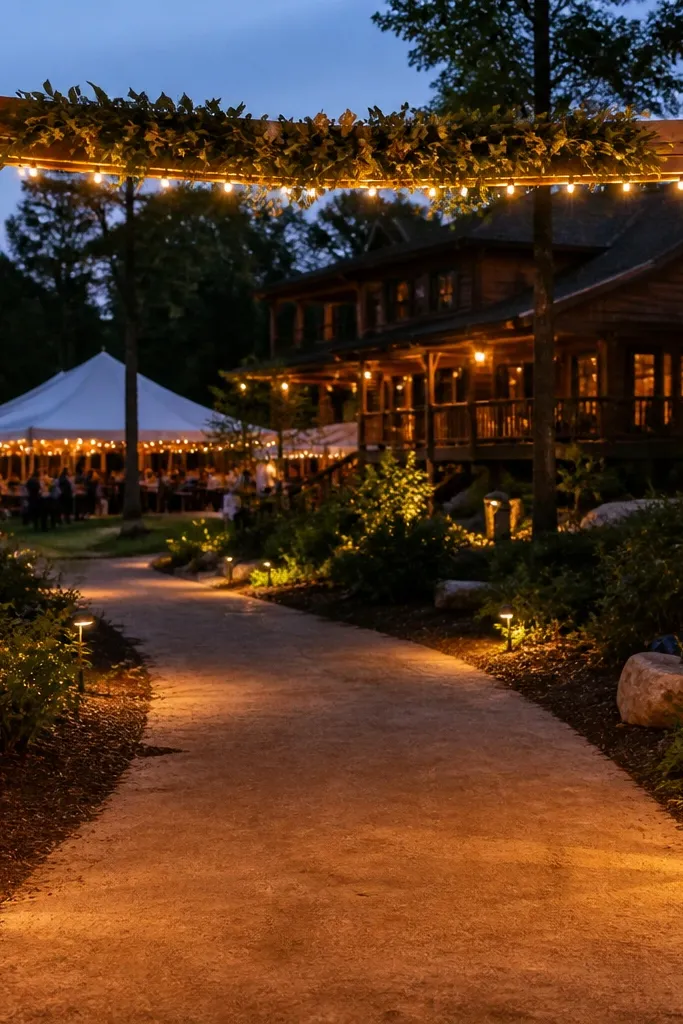
This is the most reliable evening-friendly option for a family-friendly welcome sign entrance. Warm string lights make the sign look inviting, and the wood frame keeps it from looking like random decor. Add a small greenery garland only at the top so the message stays crisp. It’s perfect for receptions that start after sunset or venues where the entrance is shaded by trees.
Start with a wood frame and a cream sign panel sized around 20x30 inches. Then wrap warm white fairy lights around the inside perimeter of the frame and attach a light greenery garland along the top edge. Finally, place it near the walkway where people line up, and power it with a battery pack if you’re avoiding extension cords.
Quick tipUse battery lights with a remote if you expect the sign to be photographed at multiple times.
Skip thisAvoid blue LEDs — they make skin tones look off in family photos.
20. Terrace-step welcome sign with matching mini menu board
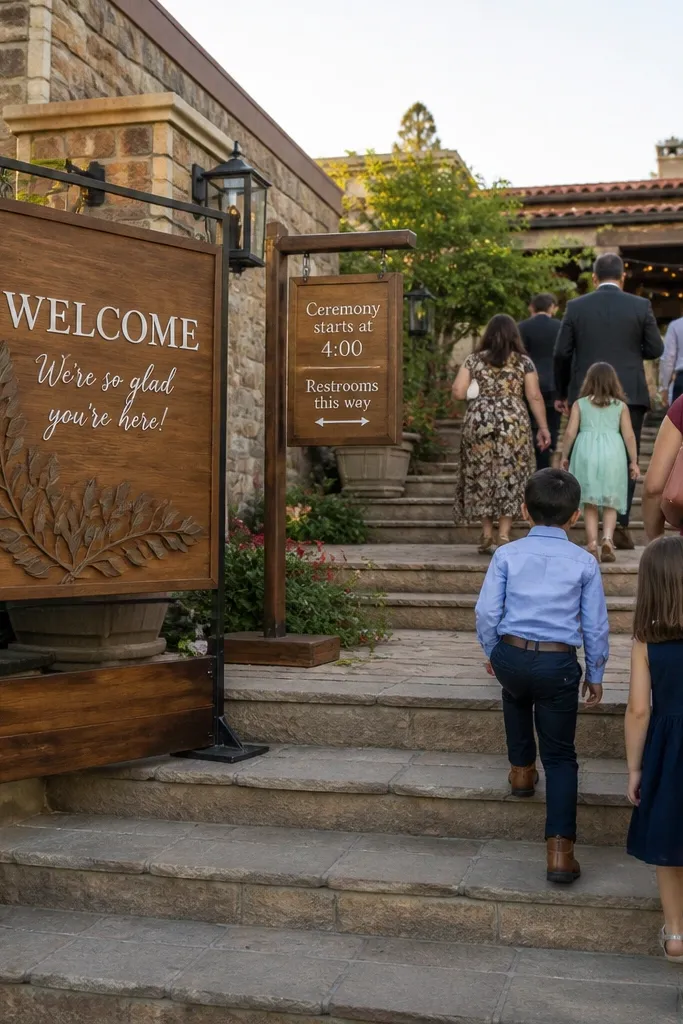
If your entrance includes steps or a terrace, use the steps as your stage. A large welcome sign plus a small matching mini board (like “Ceremony starts at 4:00” or “Restrooms this way”) makes the entrance helpful for families without adding clutter. The mini board is especially good for parents juggling kids because it reduces questions. Keep both boards in the same palette and font so the whole setup looks intentional in photos.
Start by placing the main welcome sign on the first stable step, angled slightly toward the main walkway. Then add a smaller companion board next to it at stroller-friendly height (around 36 inches) with simple directional text. Finally, secure both signs so they don’t slide on stone and add a small greenery strip along the base for a cohesive look.
Quick tipUse short lines on the mini board — two lines reads better than paragraphs.
Skip thisSkip tiny fonts on the mini board — it defeats the point for families.



