
1. Black + Cream "WELCOME" with a thin gold frame
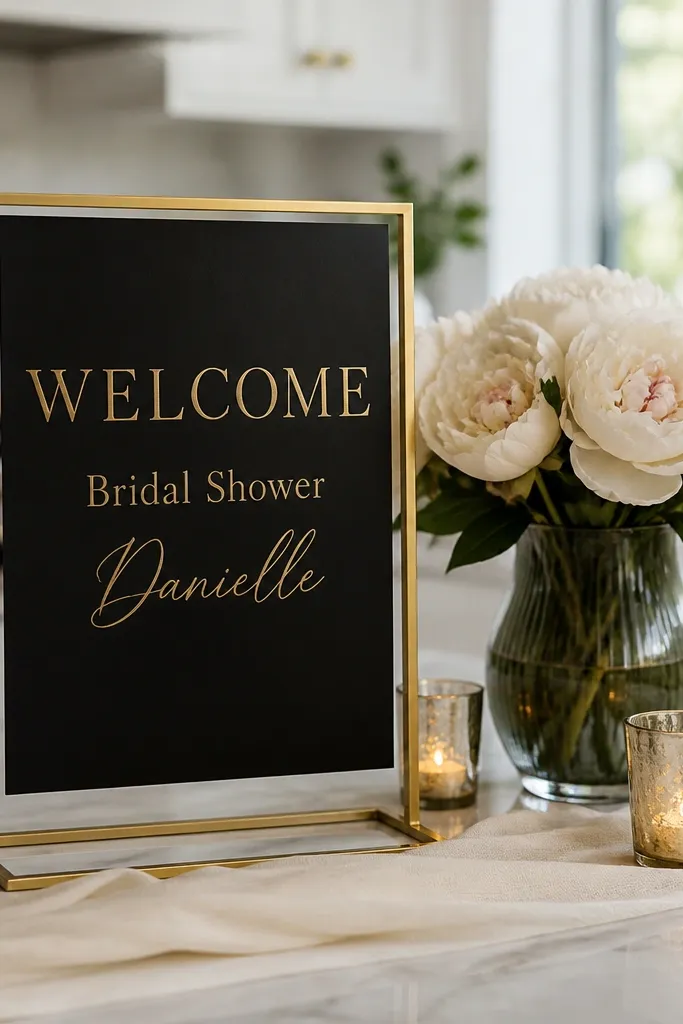
Step 1: Design a 11x14-inch sign with a 1.25-inch margin and a thin rectangular border. Step 2: Print on matte cardstock (or heavyweight matte photo paper) and mount it to a 12x18-inch foam board for stability. Step 3: Place it on an easel at the entry table so the top of the letters sits around eye level.
This is the cleanest budget look because it relies on contrast, not extra materials. Make “WELCOME” the headline in a bold serif or modern sans, then set “Bridal Shower” and the bride’s first name smaller below. The thin gold frame gives a polished edge in photos without needing real gold foil. If your shower decor is neutral, this sign stays classy and doesn’t compete with florals or balloons.
Skip thisDon’t add three fonts; one headline font and one simple body font look intentional.
Quick tipUse matte cardstock and avoid glossy lamination — reflections ruin the look in daylight and indoor lighting.
2. Terracotta + blush watercolor wash with "You're Invited"
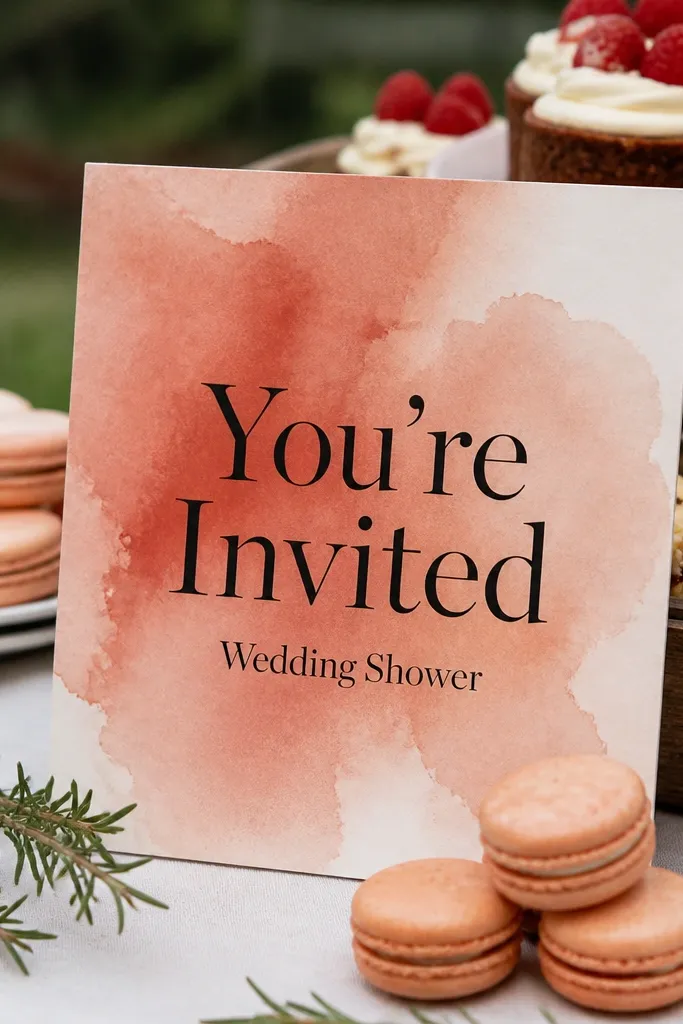
Step 1: Pick a 8x12-inch sign size and create a background that covers the full page with uneven edges (no hard blocks). Step 2: Print and trim cleanly, then mount to a cream backing sheet. Step 3: Insert the sign into a clear acrylic frame or stand it on a small riser so the wash stays visible.
Watercolor-style backgrounds look expensive because they create soft movement behind the text. For a shower welcome sign, use a loose wash in terracotta and blush, then put “You’re Invited” in crisp black or deep espresso. Add “Wedding Shower” as a smaller line so guests understand the purpose instantly. This works especially well for spring and early summer showers where you want a warm, airy feel.
Skip thisSkip busy patterns behind the text; watercolor should be the only “busy” element.
Quick tipKeep the background lighter at the center so the text stays readable from a distance.
3. Navy + white nautical "WELCOME ABOARD" for a beachy shower
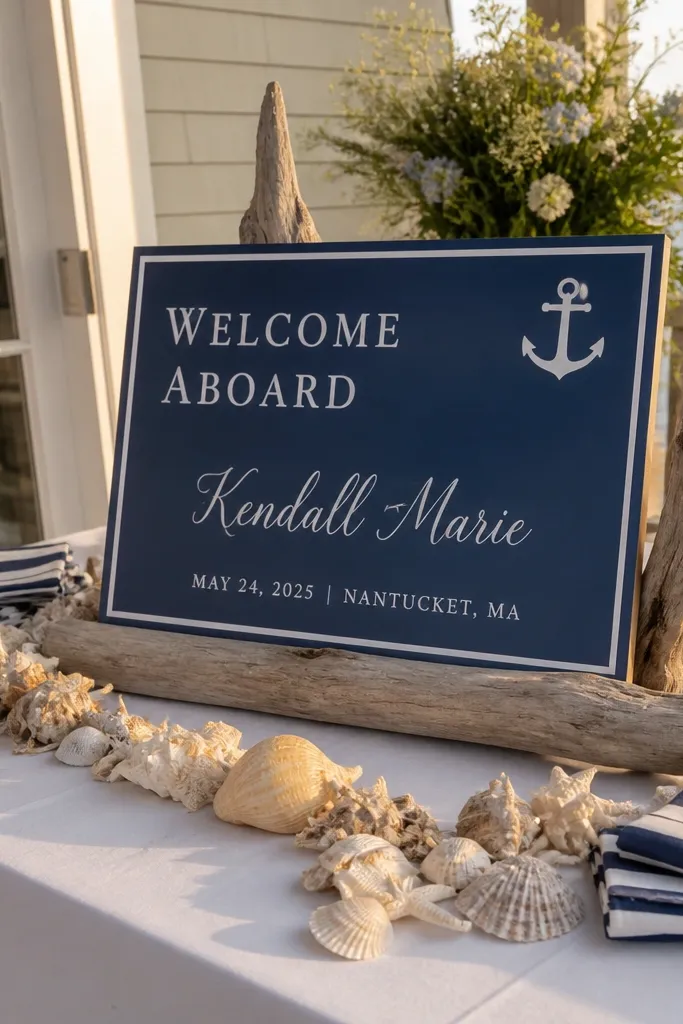
If your theme is beach, coastal, or just breezy, “WELCOME ABOARD” is instantly fun and photo-ready. Pair navy text with white lettering and a small anchor or wave icon in the corner. Keep the layout simple: one line headline, one line for the bride, and one tiny line for date or location. It looks great on a table with stripes, shells, or light wood textures.
Step 1: Choose a 12x16-inch sign and set “WELCOME ABOARD” in all caps in navy ink. Step 2: Add a small white anchor icon on the left margin and keep it under one inch tall. Step 3: Print in two steps if needed (white ink effect can be simulated by using white text on navy paper), then mount to a light wood clipboard base.
Use rope-style ribbon to tie the clipboard to a stand — it hides hardware and looks nautical.
Don’t add multiple nautical icons; one anchor or one wave is enough.
4. Sage green + cream arch frame with "Bridal Shower Welcome"
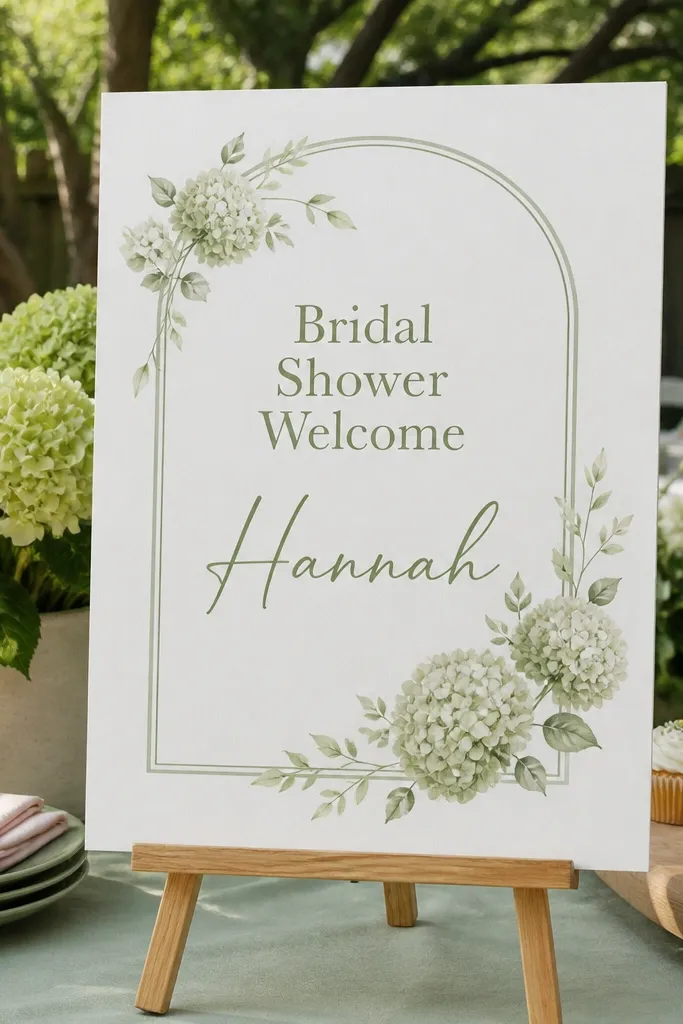
Arch frames are flattering because they create a natural focal point and mimic a doorway shape. Use sage green for the arch outline and cream background, then place “Bridal Shower Welcome” in the center. Add the bride’s name in a larger size so it reads like a personal invitation, not a generic sign. This is a strong choice for garden parties and showers with greenery garlands.
Step 1: Make a 10x14-inch sign with an arch that touches the sides and sits about 2 inches below the top. Step 2: Print on cream cardstock, then outline the arch with a matching sage pen if you want extra crispness. Step 3: Mount to a foam board and prop on a table so the arch aligns with balloon or plant height.
Match the sage to your table runner or napkins so the sign looks like part of the set.
Avoid thin, light-gray text; it disappears in photos with greenery behind it.
5. Blush pink scalloped border with "Welcome to the Shower"
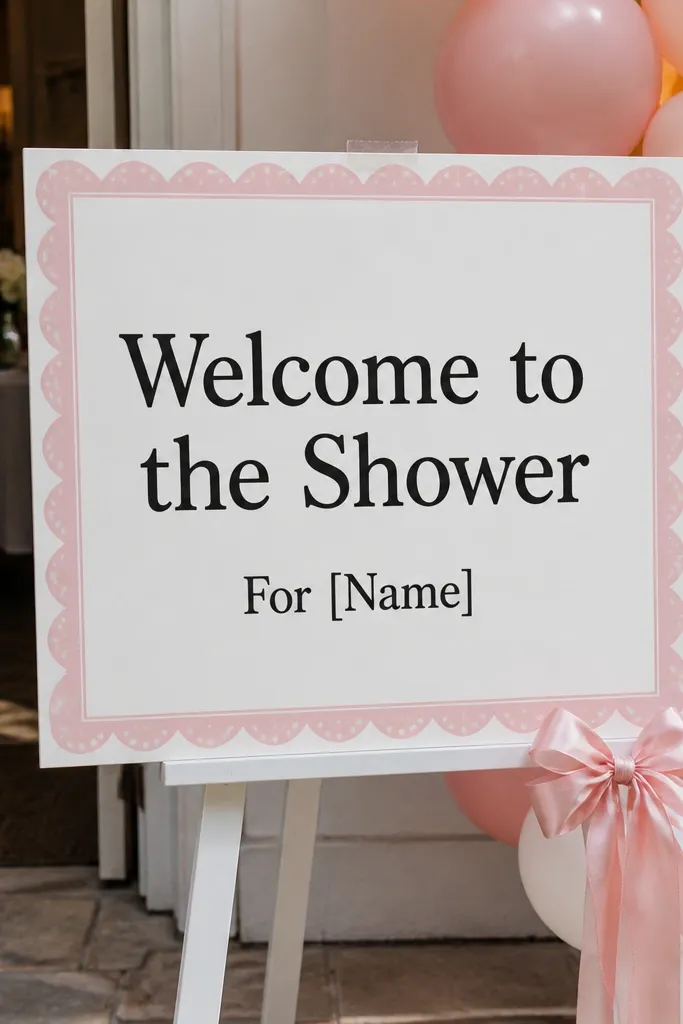
Step 1: Design a 11x14-inch sign with a scalloped border that’s about 1 inch thick. Step 2: Print on thick matte paper and trim precisely so the scallops are crisp. Step 3: Mount to a white board and place on a mantel or entry table with a simple vase behind it.
Scalloped edges read soft and feminine without needing florals. Use blush as a border only, then keep the center white or cream for readability. Write “Welcome to the Shower” in bold black, and add “For [Name]” smaller beneath. This looks great with balloon clusters and pastel table settings, especially for fall-forward colors like blush and mauve.
Skip thisSkip lace textures printed across the center — they make the text harder to read.
Quick tipUse a thick black font for the headline; it holds up better under warm indoor bulbs.
6. Monochrome checkered pattern with "WELCOME BRIDE-TO-BE"
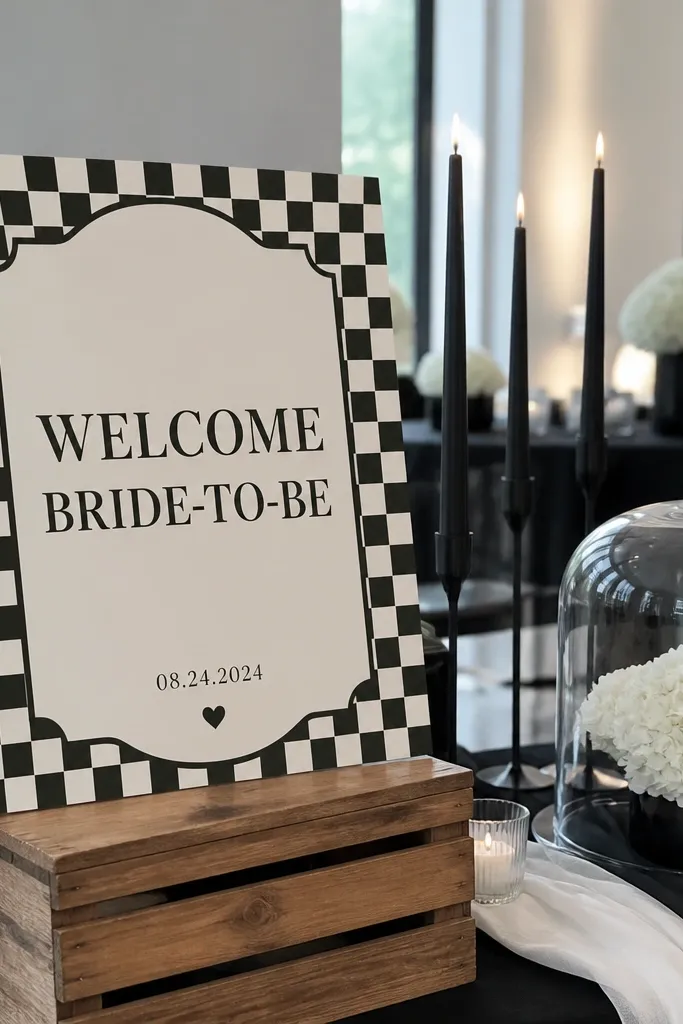
A checkered pattern instantly looks intentional and styled, even when your decor is minimal. Keep it monochrome (black and white) so it won’t clash with whatever florals you have. Put “WELCOME BRIDE-TO-BE” as the headline and add a small date line at the bottom. This idea works for modern showers and for couples who like clean, graphic looks.
Step 1: Create a 8.5x11-inch sign to stay budget-friendly, with a checkered background that’s around 1-inch squares. Step 2: Print on matte paper and keep the text in solid black with no outlines. Step 3: Mount to a black clipboard or stand it on a black easel for a cohesive look.
Make the check squares bigger than you think; tiny checks get muddy in photos.
Don’t add color accents — the black and white contrast is the whole point.
7. Cream sign with navy "WELCOME" and tiny gold confetti dots

Step 1: Design a 11x14-inch sign with a navy headline and a cream background. Step 2: Add 20-40 small gold dots of varying sizes and keep them outside the text area. Step 3: Print on matte cardstock and mount to a thick white foam board so it stands up straight.
Confetti dots make a sign feel celebratory without adding glitter. Use navy for the headline and add small gold dot accents in the corners or along the bottom edge. Keep the rest clean so the sign reads fast. This is a smart fit for showers where you have bright balloons but want the sign to stay readable and not compete.
Skip thisDon’t cover the background with dots; it turns into visual noise.
Quick tipIf you want extra sparkle, add a few dots with a metallic gel pen — keep it minimal for a clean photo.
8. White sign with green leaf line art and "Come Celebrate"
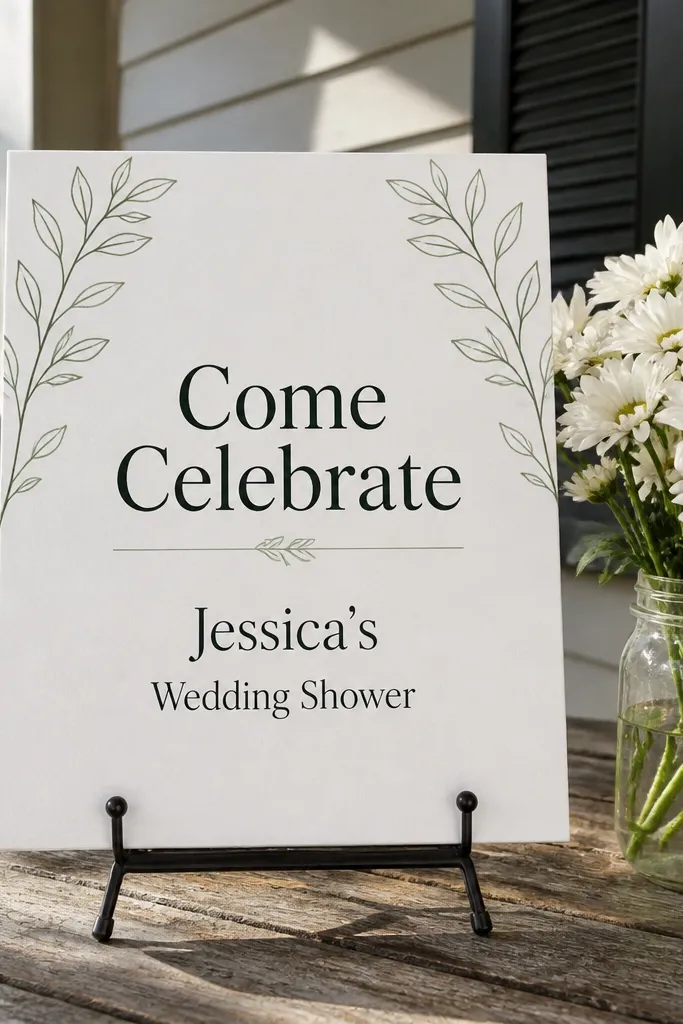
Line art is your budget cheat code. A simple leaf outline in green gives a fresh, organic look while staying printable and crisp. Use “Come Celebrate” as the headline, then add the bride’s first name and “Wedding Shower” in smaller text. This works well for spring, outdoor, and rustic-elegant setups where you want something airy instead of heavy florals.
Step 1: Make a 10x15-inch sign with leaf line art in the top corners only. Step 2: Print on bright white matte paper and keep text in a dark green or deep charcoal. Step 3: Mount to a natural wood board or a tan cardboard backing and prop it near the garland.
Use one leaf style (simple outline) and one leaf color; mixing styles looks messy fast.
Don’t add full-bleed leaf patterns; leave breathing space for readability.
9. Dusty rose gradient with "Welcome, Sweet Bride"
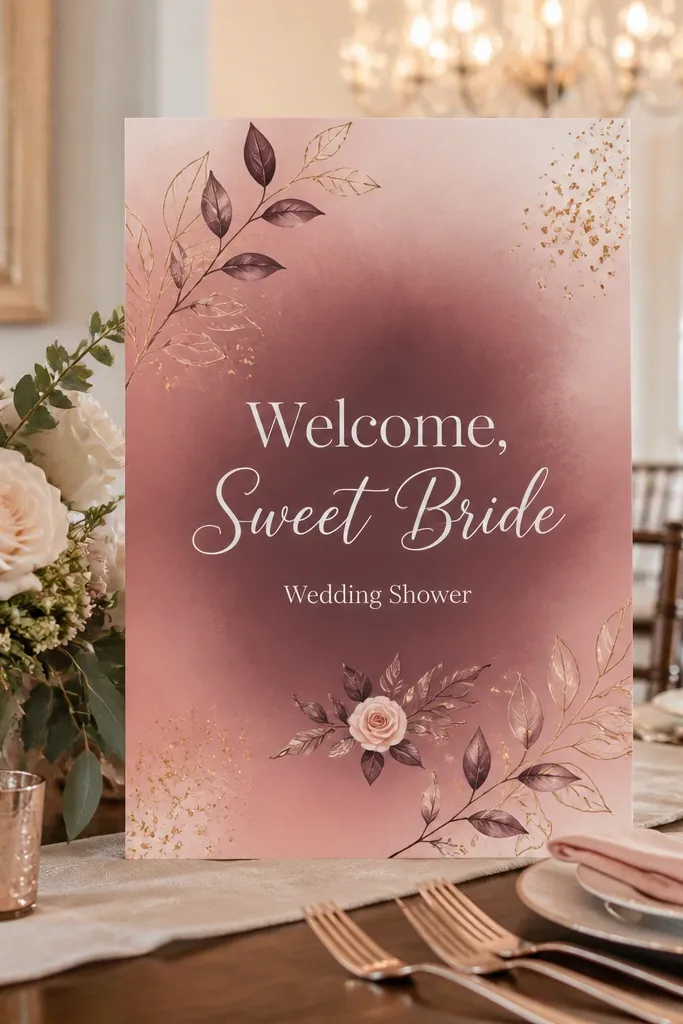
Step 1: Design a 9x13-inch sign with a gradient that’s darker at the center and lighter at the edges. Step 2: Print on matte paper and choose text color that matches the center contrast. Step 3: Mount to a pale pink or cream backing and place on a tabletop riser at a slight angle for photos.
A soft gradient feels romantic and modern, and it photographs beautifully when the text sits in the darkest part of the gradient. Put “Welcome, Sweet Bride” as the headline in white text or deep charcoal depending on contrast. Add “Wedding Shower” as a smaller line so guests get context instantly. This fits well for indoor showers with warm lighting and pastel table decor.
Skip thisAvoid tiny script fonts; gradients make thin strokes disappear.
Quick tipTest readability by squinting at the printed sheet; if you can’t read it quickly, adjust contrast.
10. Gold "WELCOME" on kraft paper with black brush script
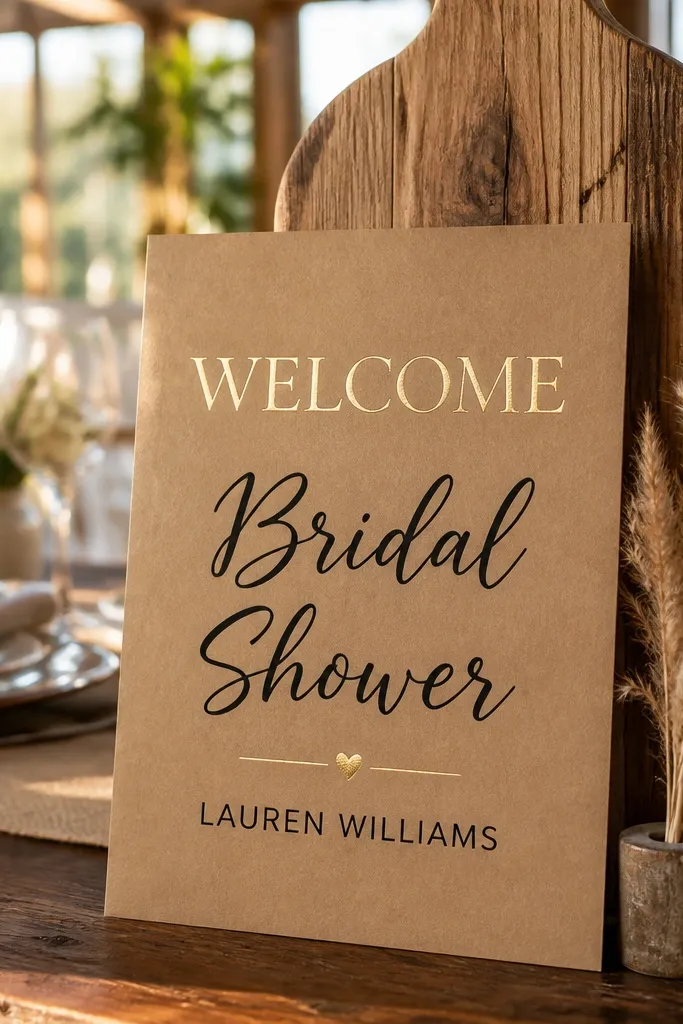
Step 1: Choose an 8x12-inch size and print on kraft paper cardstock (or brown textured paper). Step 2: Use a stencil-style gold effect for the headline and keep the brush script short. Step 3: Mount to a black foam board and place on an easel to keep the texture visible.
Kraft paper plus bold typography looks expensive because the material texture does the work. Use gold lettering for “WELCOME” (printed gold effect or metallic transfer) and black brush script for “Bridal Shower.” Add the bride’s name in a clean sans below. It pairs perfectly with rustic tables, wooden serving boards, and neutral linen.
Skip thisSkip multicolor inks on kraft; it turns muddy under warm indoor lighting.
Quick tipUse a black marker to thicken the brush script edges if the print looks too light.
11. Whiteboard-style layout with faux chalk "Welcome"
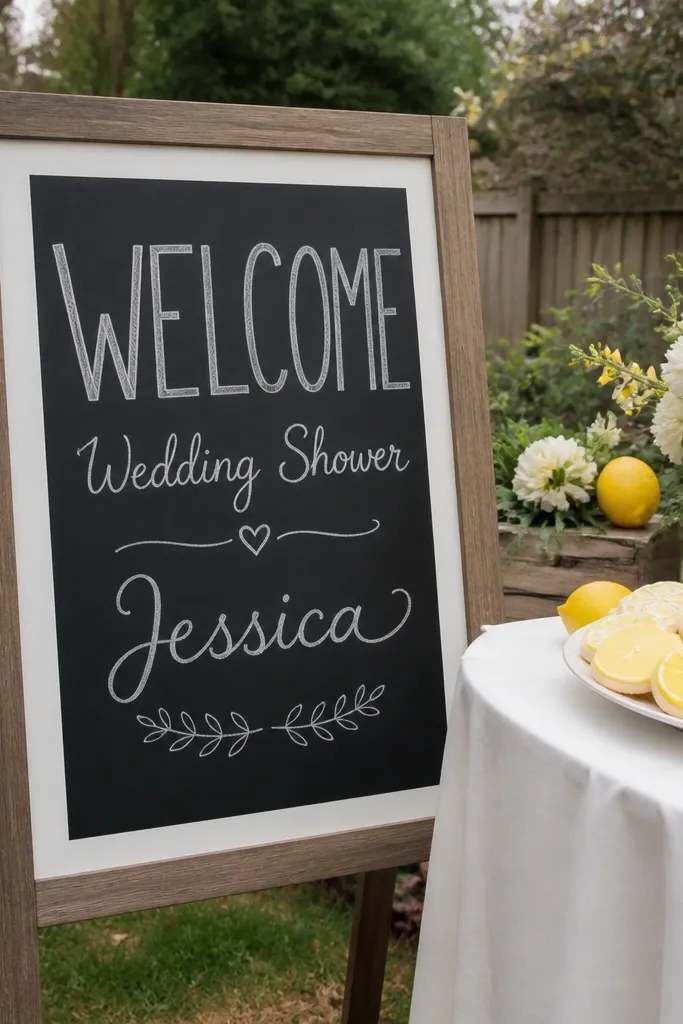
Step 1: Design a 11x14-inch sign with an off-white background and chalk fonts or chalk-like strokes. Step 2: Print on matte paper and lightly distress the edges with sandpaper so it looks worn (still readable). Step 3: Mount to a white foam board and place it near the entry table where guests naturally gather.
This look is simple and surprisingly photogenic. A faux-chalk style makes the sign feel handmade and casual, which works for backyard showers and friend-hosted vibes. Use “WELCOME” in large chalk-style lettering, then add “Wedding Shower” and the bride’s first name in smaller lines. Keep the background off-white so it reads like a real board.
Skip thisDon’t pick a gray background; it kills the chalk contrast in photos.
Quick tipPhotograph it with light coming from the side; chalk textures pop with angled light.
12. Lavender + white "Welcome to Our Bridal Shower" with simple florals
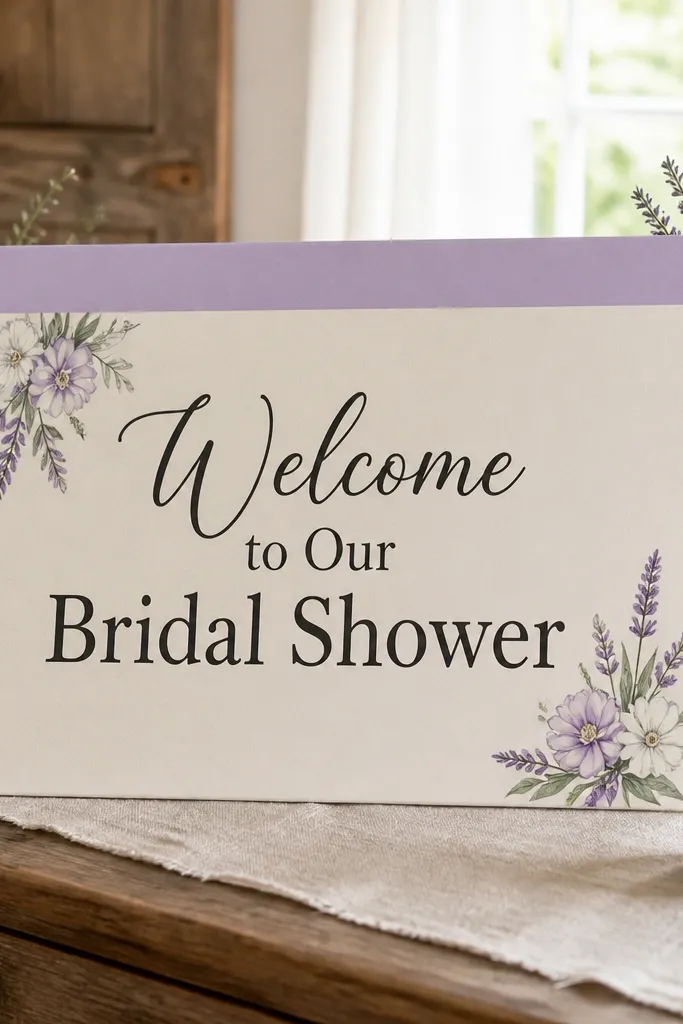
Small florals keep the sign pretty without turning it into a cluttered poster. Use lavender as a header strip or thin top border, then set the main text in dark charcoal. Add two tiny floral sprigs in opposite corners so the sign feels balanced. This is a great fit for couples who like soft color but want the sign to stay readable and not too girly.
Step 1: Make a 12x16-inch sign with a 1.5-inch lavender header band. Step 2: Place the bride’s first name centered and bigger than the rest. Step 3: Print on matte cardstock and mount to a white board so the lavender stays clean.
Keep floral sprigs small — if they take over half the sign, the text becomes secondary.
Avoid heavy drop shadows; they look cheap in indoor lighting.
13. Greenery garland frame with "Welcome, Friends"
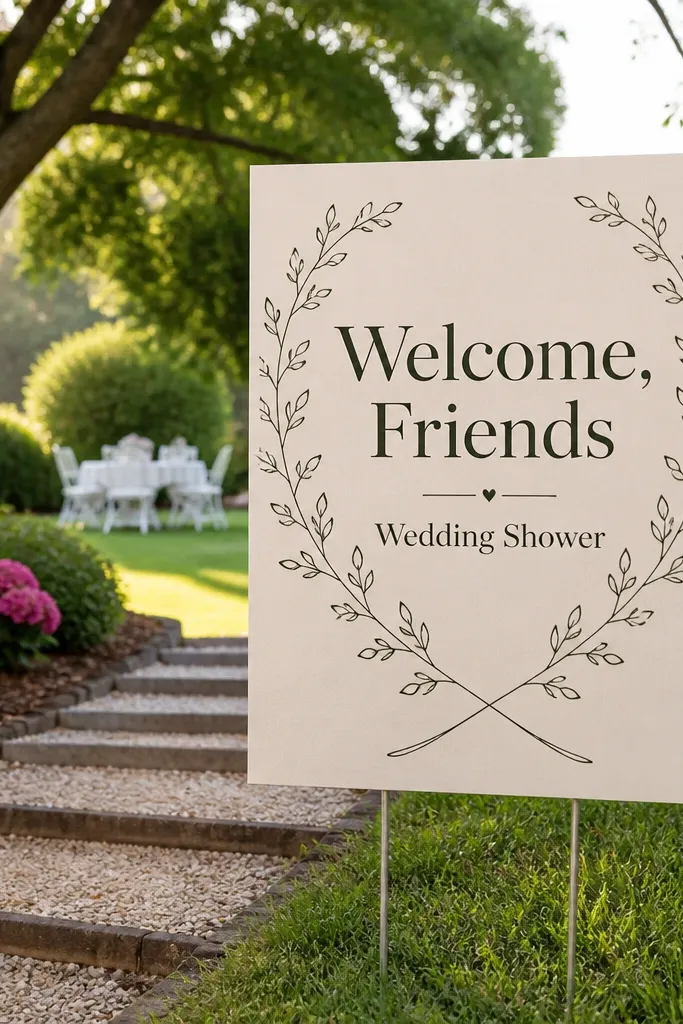
A garland frame makes the sign look like it belongs to real decor, even if it’s printed. Use a cream background with a green vine outline that drapes from the top corners and meets near the bottom. Put “Welcome, Friends” as the headline and add “Wedding Shower” below. This works best when your venue has any real greenery nearby, so the sign matches the surrounding textures.
Step 1: Design an 11x14-inch sign with a vine outline frame that stays thin. Step 2: Print and mount to a board, then add two small faux leaves near the corners if you want extra dimension. Step 3: Place it at the main entry to catch the first glance in photos.
If you have real greenery, align the sign frame height with the garland on the table so it looks coordinated.
Don’t use chunky leaf shapes; thin vines read more realistic and look better on camera.
14. Black matte sign with white "WELCOME" and a single red rose icon
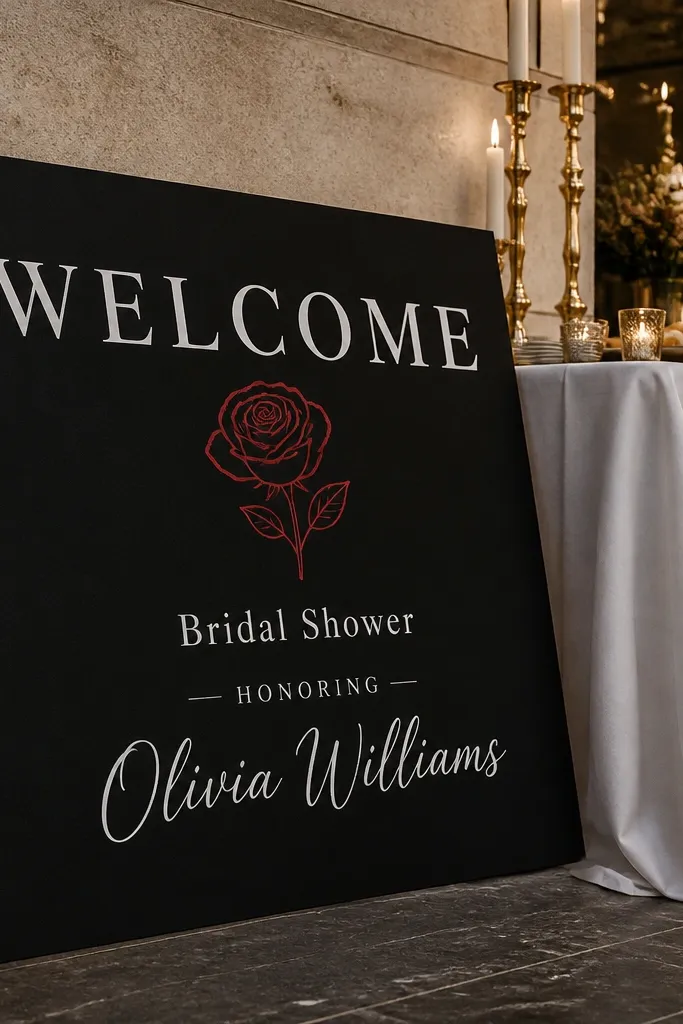
Step 1: Create a 12x18-inch sign with a matte black background and white headline text. Step 2: Add one red rose icon in the lower right corner sized about 2-3 inches wide. Step 3: Print and mount to a board, then place on an easel so the black background doesn’t get washed out by bright tables.
This is dramatic and simple. The black matte background makes the white text pop, and one red rose icon adds a focal point without turning the sign into a collage. Use “WELCOME” as the biggest text, then “Bridal Shower” and the bride’s name beneath. This looks great when the rest of your decor is neutral or when you have one strong accent color like red.
Skip thisAvoid multiple red icons; one is enough to look intentional.
Quick tipChoose a matte finish for black; glossy black turns into glare in photos.
15. Pastel rainbow stripes with "Welcome Baby & Bridal"
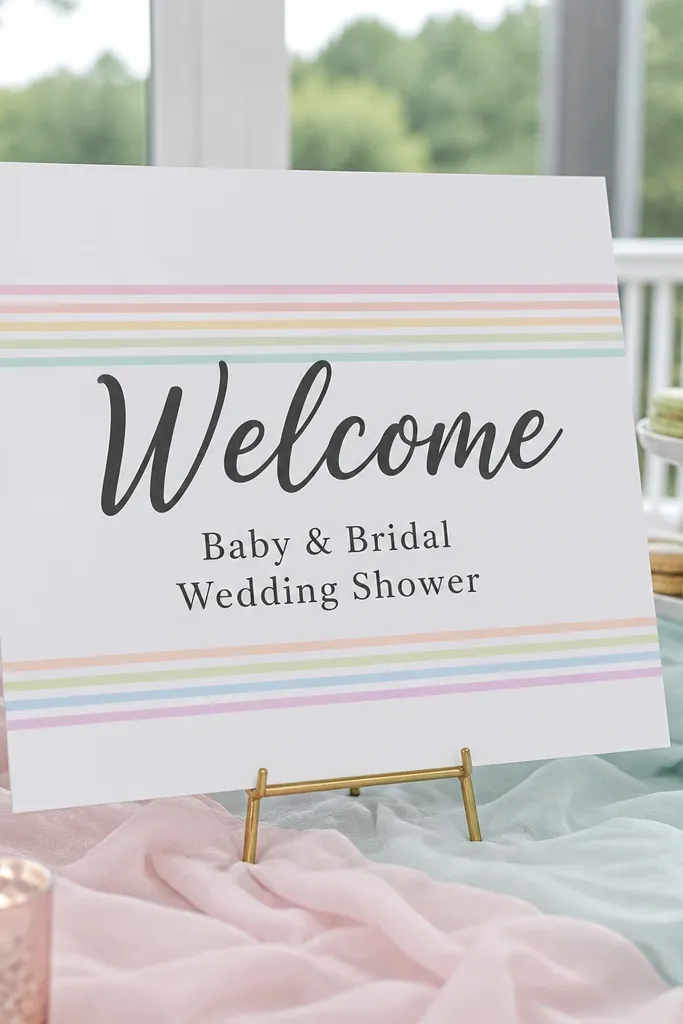
Step 1: Design a 10x15-inch sign with 6-7 pastel stripes at equal widths. Step 2: Center the headline and place the supporting text in a single line beneath. Step 3: Print on matte paper and mount to a white backing so stripes don’t look dull.
If your shower is a combined celebration or has playful energy, pastel rainbow stripes look cheerful and still clean when done right. Use thin stripes and keep the text in dark charcoal so it stays readable. “Welcome” should be the headline, and “Wedding Shower” goes as a smaller line for clarity. This is a good choice for indoor showers where you want color that won’t clash with floral arrangements.
Skip thisDon’t add extra patterns on top of stripes; the stripes are the design.
Quick tipKeep stripe width consistent; uneven stripes look like a mistake in photos.
16. White sign with navy "Mr. & Mrs." mini banner and welcome text
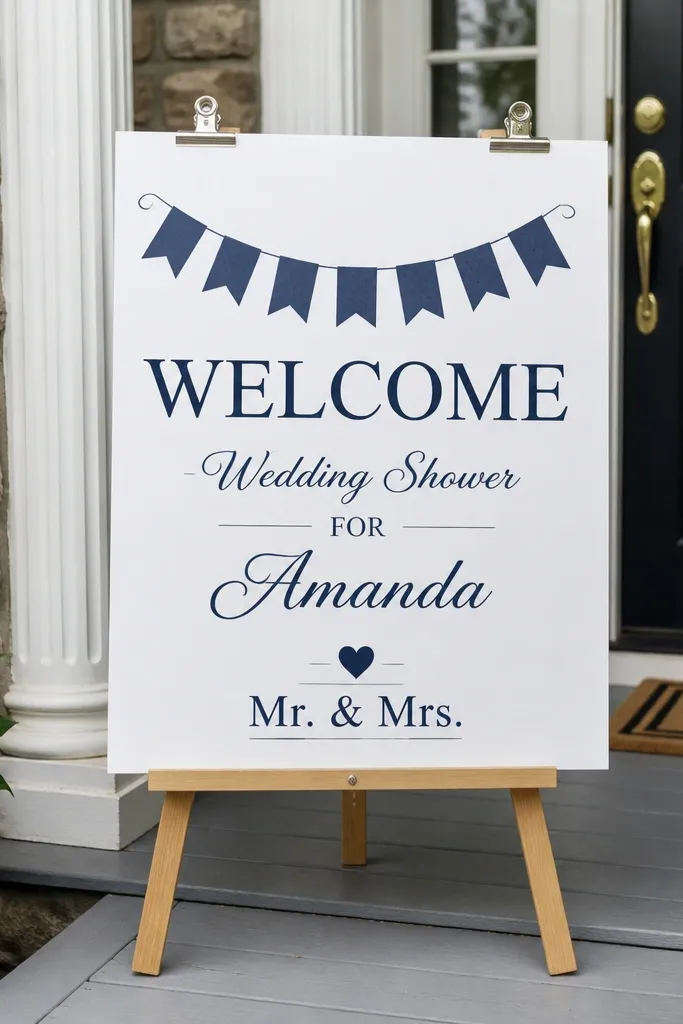
Mini banners look cute without costing much, and they give the sign a built-in decoration. Use a white background, navy banner shapes, and crisp typography: “WELCOME” large, then “Wedding Shower” and the bride’s first name. Add a small heart icon or a dot between “Mr. & Mrs.” so it looks complete. This suits classic showers with navy napkins, striped table linens, or simple floral vases.
Step 1: Make a 8.5x13-inch sign so it’s affordable to print and easy to place on tables. Step 2: Add the mini banner at the top, then center the welcome text in the middle. Step 3: Print on matte cardstock and mount on a navy foam board for a strong frame.
Use a 2-inch top margin so the banner doesn’t feel cramped.
Skip tiny text in the corners; it’s not readable from a room away.
17. Monogram letter "M" welcome sign with bride name in the center
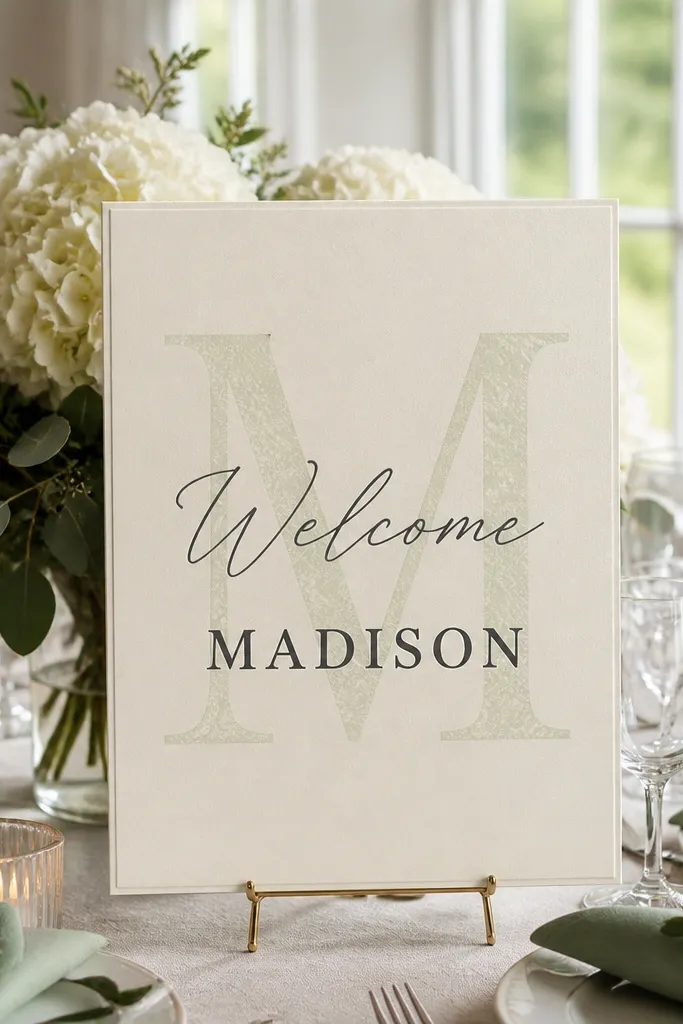
Step 1: Choose a 12x18-inch sign and set the monogram to about 60% of the sign height. Step 2: Place “WELCOME” in a thick font across the monogram and keep the bride’s name as the focal line. Step 3: Print and mount to a board, then stand it where the monogram won’t be blocked by centerpieces.
A big monogram letter makes your budget sign feel custom. Put a large initial (like “M”) in the background, then layer “Welcome” on top and the bride’s full first name in the center. Choose either a solid color monogram or a subtle pattern monogram so it doesn’t overpower the text. This works when you want the sign to match invitations or when your shower decor already has a monogram vibe.
Skip thisAvoid busy patterns inside the monogram; a clean fill looks more expensive.
Quick tipIf you have printed invitations, match the monogram color to the invitation ink for a cohesive set.
18. Cream sign with black script "Welcome" and date in a small rectangle
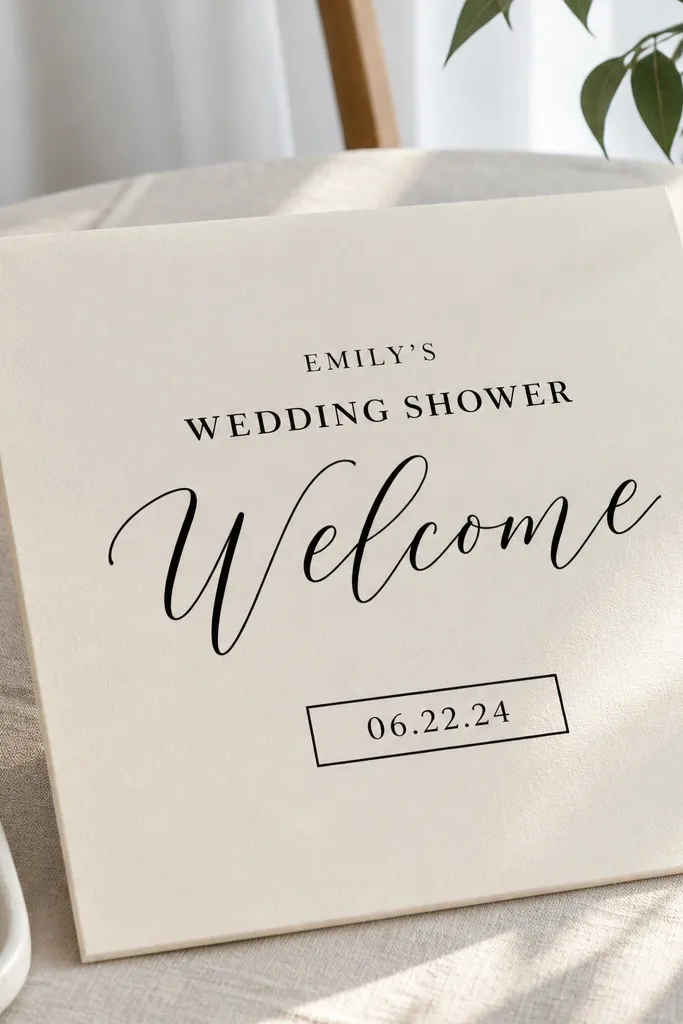
This is the kind of layout that looks styled in every photo angle. The big script “Welcome” brings warmth, and the date rectangle adds structure so guests can quickly find the time and context. Keep the rest minimal: bride’s name and “Wedding Shower” only. It’s a great fit for showers with simple centerpieces where you want the sign to do the visual work.
Step 1: Design a 11x14-inch sign on cream cardstock with black script for “Welcome.” Step 2: Add a small outlined rectangle under it for the date and keep the text inside centered. Step 3: Print and mount on a darker backing board (charcoal or black) so the cream stands out.
Choose a script font with thick strokes; thin scripts blur when printed and photographed.
Don’t cram the date and location into the same line; keep them separate or remove one.
19. Acrylic-look printable on white with "glow" effect border
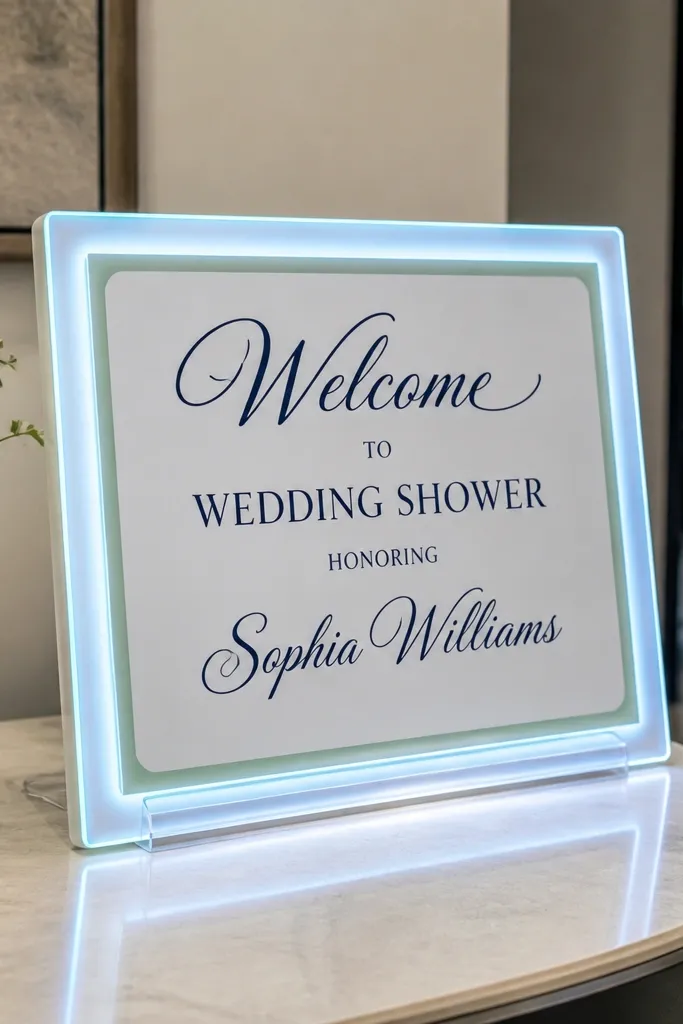
Step 1: Design a 8x12-inch sign with a rounded rectangle border and a soft glow effect around the edges. Step 2: Print on matte cardstock and mount to a clear acrylic stand if you already have one, or to a white board with a stand. Step 3: Place it against a light wall or white table backdrop so the border glow reads clearly.
You can fake an acrylic look without buying acrylic. Use a white background and a soft “glow” border effect in a light color like light blue or sage, then put navy text in the center. Add a subtle shadow behind the letters for depth. This is a good option when your decor is modern and minimal, and you want the sign to look sleek rather than rustic.
Skip thisAvoid heavy neon glow colors; they read cheap on camera.
Quick tipIf you’re using a stand, test that the sign sits flat and doesn’t tilt; tilt makes the glow look uneven.
20. Blackboard-style frame with white "Welcome" and linen-texture paper
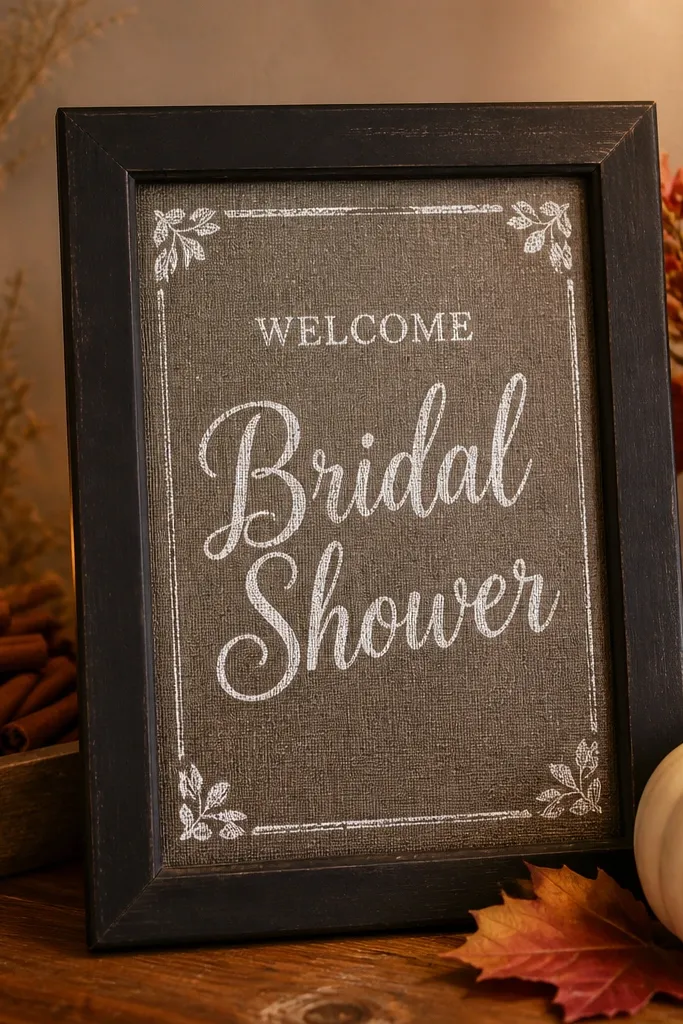
Linen-texture paper gives texture without extra craft supplies, and a blackboard-style frame makes it feel cozy. Use a dark charcoal background or a linen-texture sheet, then print white “WELCOME” plus “Bridal Shower” below. Add a small chalk-style border line so it looks like it was drawn by hand. This works for fall and winter showers when you want warmth and depth in photos.
Step 1: Use a 12x16-inch sign and pick linen-texture paper in charcoal or deep gray. Step 2: Print white lettering and keep the layout centered with wide margins. Step 3: Mount to a wood board or stand and place it near warm lighting (candles, lamps, or golden bulbs) for the best contrast.
Avoid placing it under harsh overhead fluorescents; the white text loses contrast fast.
Don’t use thin white fonts; choose thick lettering so it stays readable.



