
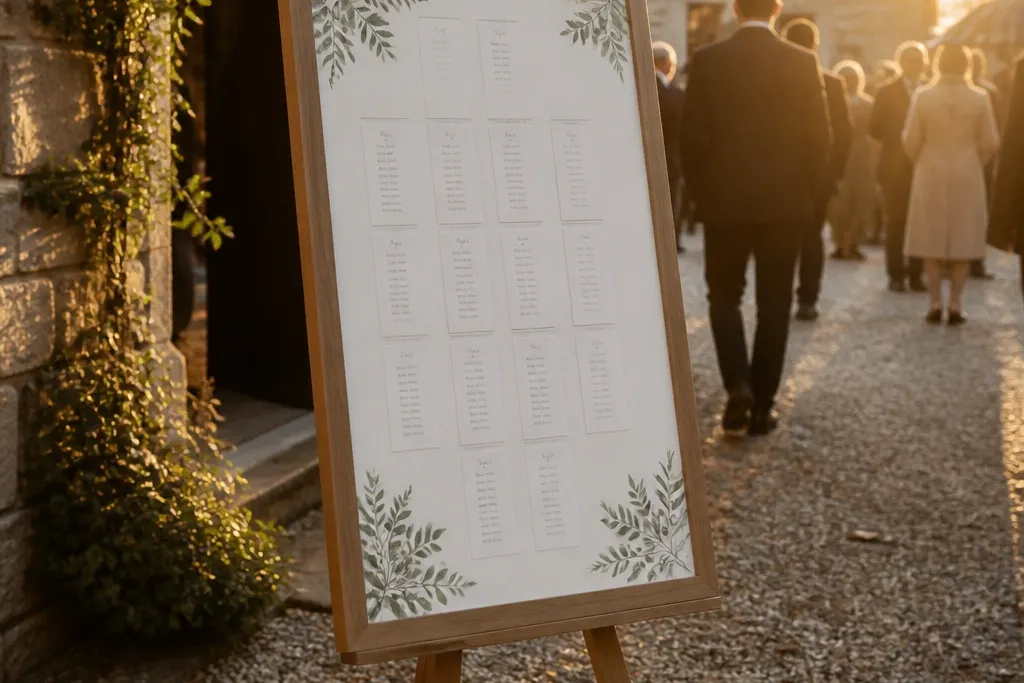
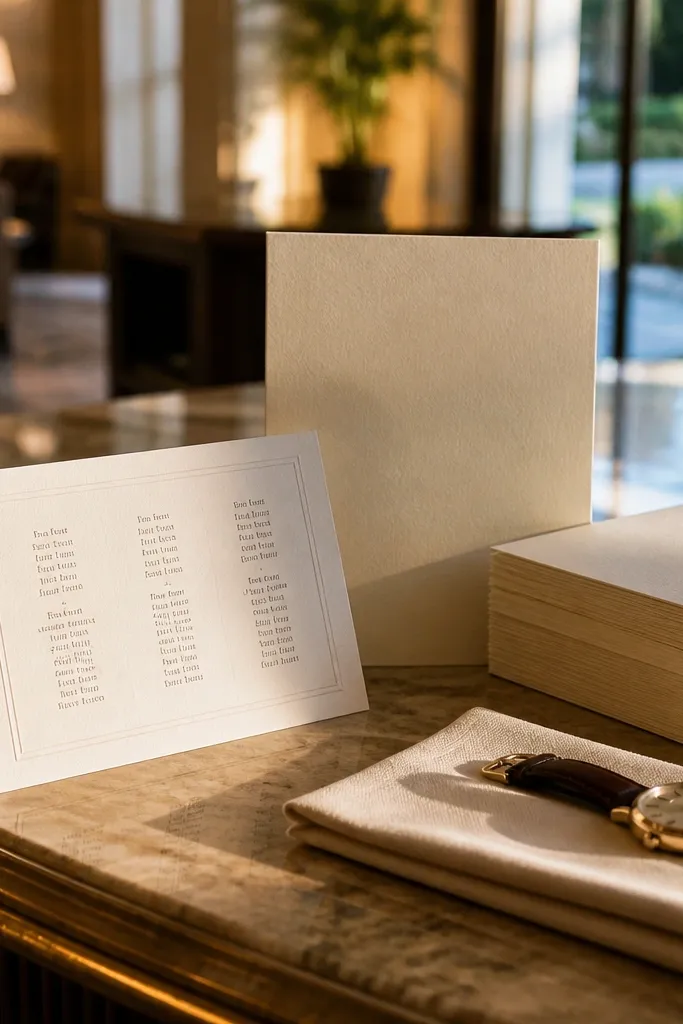
1. Gold-Trim Mirror Seating Chart with Table Number Cards
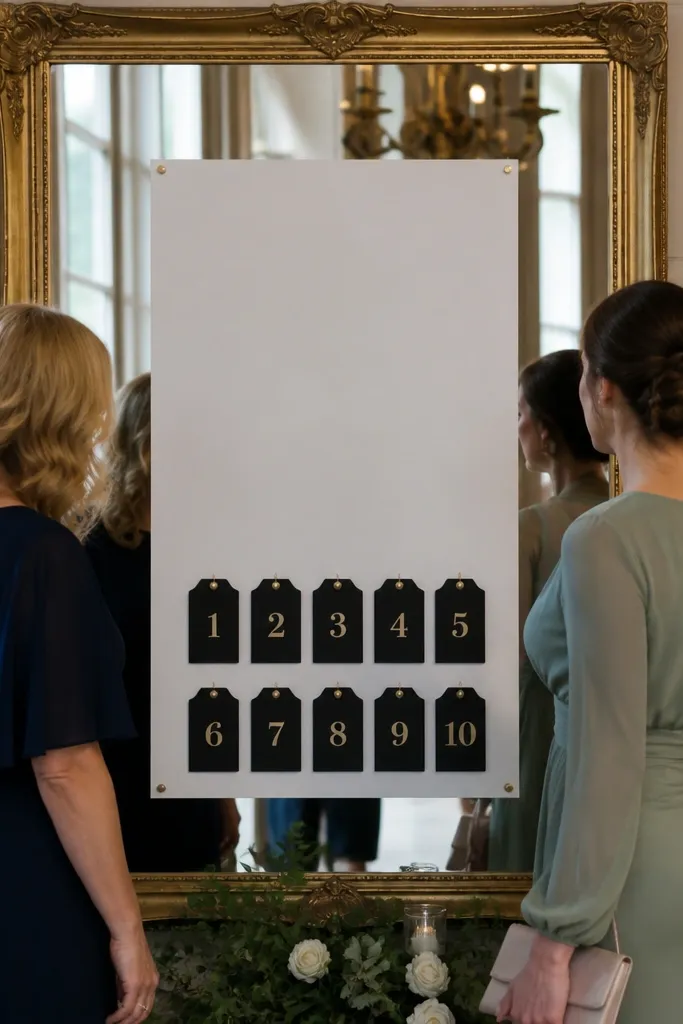
A mirror display looks fancy because it doubles the visual space and reflects ambient light, which makes the seating chart feel bigger than it is. Use it when your venue has warm lighting or natural light near the entrance because the reflection adds glow to the paper. Keep the chart centered and use table number cards in a grid so guests can scan without reading tiny names. This works especially well for indoor arrivals and shaded outdoor entries where direct sun won’t blast the glass.
Start by setting the mirror on a stable easel or stand so the chart sits at about chest height (roughly 45-55 inches from the ground). Then mount or clip the seating chart backing on a board behind the mirror so the text stays crisp, and attach table number cards with small standoffs or binder clips. Finally, place it near the welcome table — within 10-15 feet of where guests first stop, so they don’t have to walk to find it.
Test for glare by holding your phone at guest height; if it reflects bright light, switch to matte paper and black ink.
Skip glossy vinyl letters on mirrors — they catch light and turn readable names into glare.
2. Whitewashed Farm Table with Layered Seating Cards
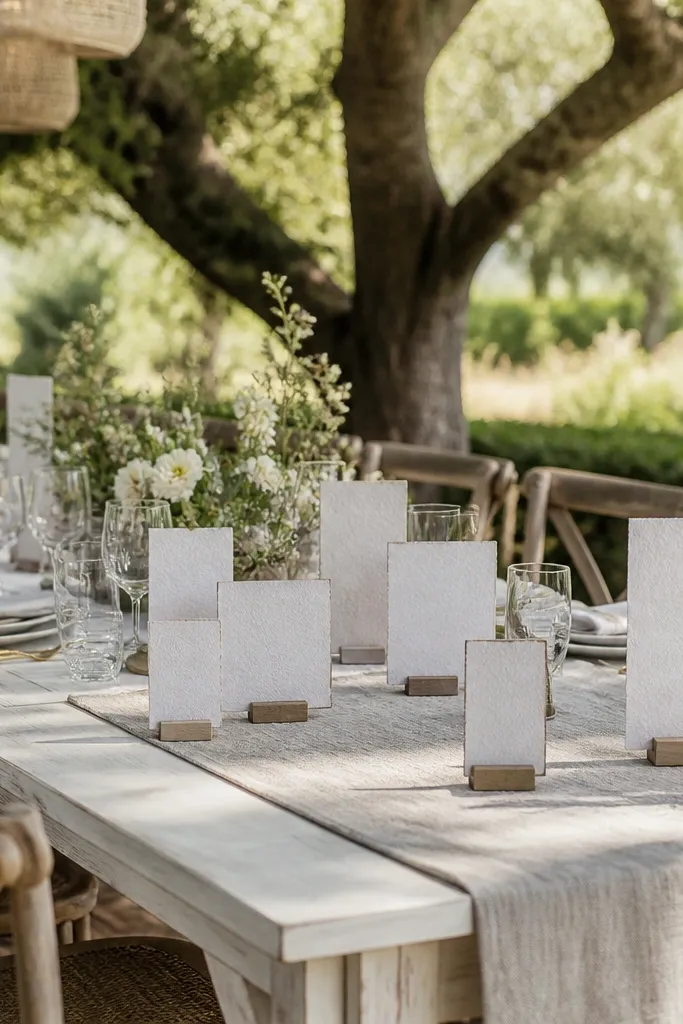
A farm table display gives you that editorial, lived-in look without needing fancy signage. The layered cards create depth, and depth reads well in photos, especially when you use a neutral runner and a few height differences. It’s a smart choice for barn weddings, backyard venues, or any place where guests gather around a welcome area. Put the chart where people naturally linger, because the table invites them to browse.
Start by choosing a table height that matches guest comfort — you want cards at roughly 30-40 inches so people don’t bend. Then lay a linen runner (cream or warm ivory) and place table number cards in neat stacks with a clear heading behind them. Finally, add two small “find your table” prompts in the top corners so guests know how the cards are organized.
Quick tipUse thick cardstock (at least 200 gsm) so names don’t shadow through in evening light.
Skip thisDon’t cram all cards flush together — separate table numbers with small spacing so photos don’t look messy.
3. Arched Backdrop Seating Chart on a Standing Frame
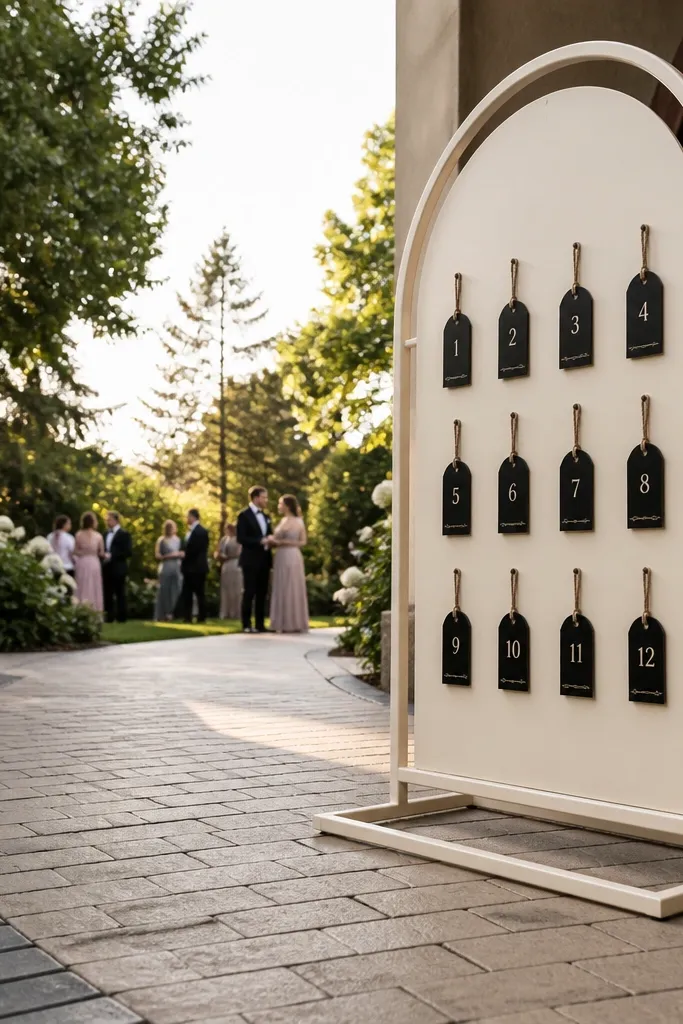
An arched frame makes the seating chart feel like a photo prop, not a chore. The curve gives you a built-in composition, and hanging or pinned table number tags add movement and texture. This is ideal for outdoor receptions where you want guests to photograph at the entrance before walking in. Choose off-white or black backing depending on the venue lighting; off-white looks softer, black looks sharper.
Start by selecting an arched frame with enough width so the chart sits centered and doesn’t look cramped (aim for 30-36 inches wide). Then mount a matte board inside the arch and pin table numbers in a vertical pattern that matches how your guests will look up and down. Finally, place it just inside the entrance path so guests see it within seconds of arriving.
Quick tipHang table numbers slightly lower than the chart header so guests' eyes land on numbers first.
Skip thisSkip tiny fonts and long paragraphs — this setup needs quick scanning, not reading.
4. Chalkboard on Black Display Stand with Gold Table Numbers
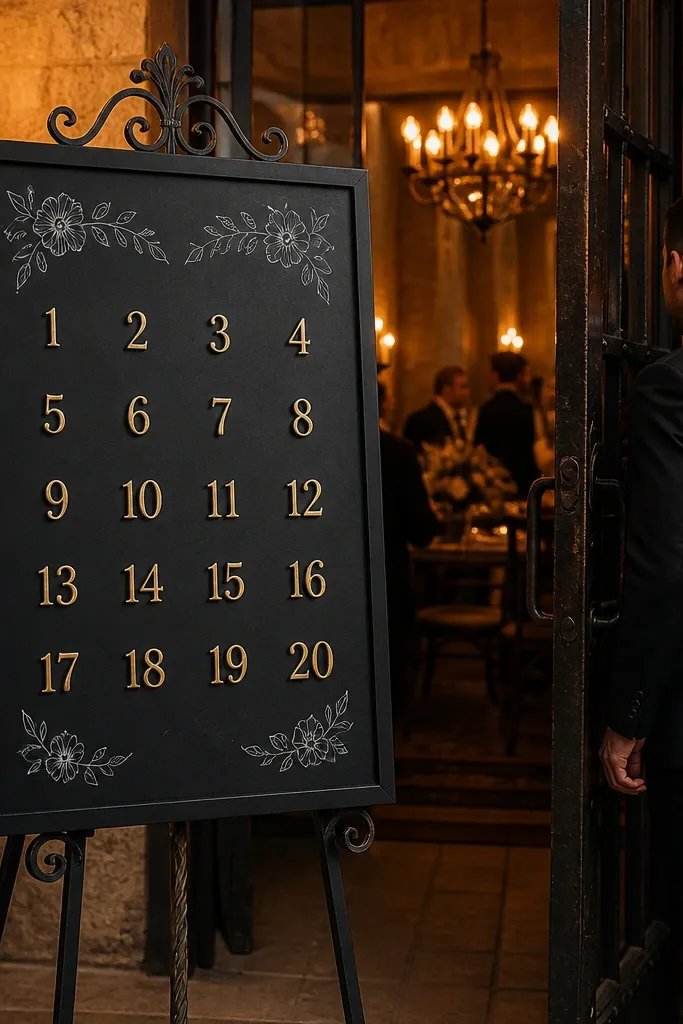
Chalkboard looks timeless and photographs well when you use controlled contrast. The black surface gives you that dramatic look, and gold table numbers pop in both daylight and warm indoor lighting. Keep the chalk accents limited to headings and table numbers; do the guest names in a clean typed font on paper to prevent messy smudging. This is a great pick for late afternoon ceremonies moving into evening receptions.
Start by using a black matte chalkboard or a black board with matte chalk paint. Then write only the headings and table numbers in gold, and mount the seating list as flat paper sheets behind an acrylic cover or under glass to keep it neat. Finally, position the display where the light hits from the side (not overhead) to avoid chalk glare.
Quick tipUse a small piece of museum gel or tape to hold paper edges so nothing curls when humidity rises.
Skip thisAvoid fully handwritten lists in chalk — it reads slower and smears when guests get close.
5. Terracotta Easel Seating Chart with Terracotta-Leaf Place Cards
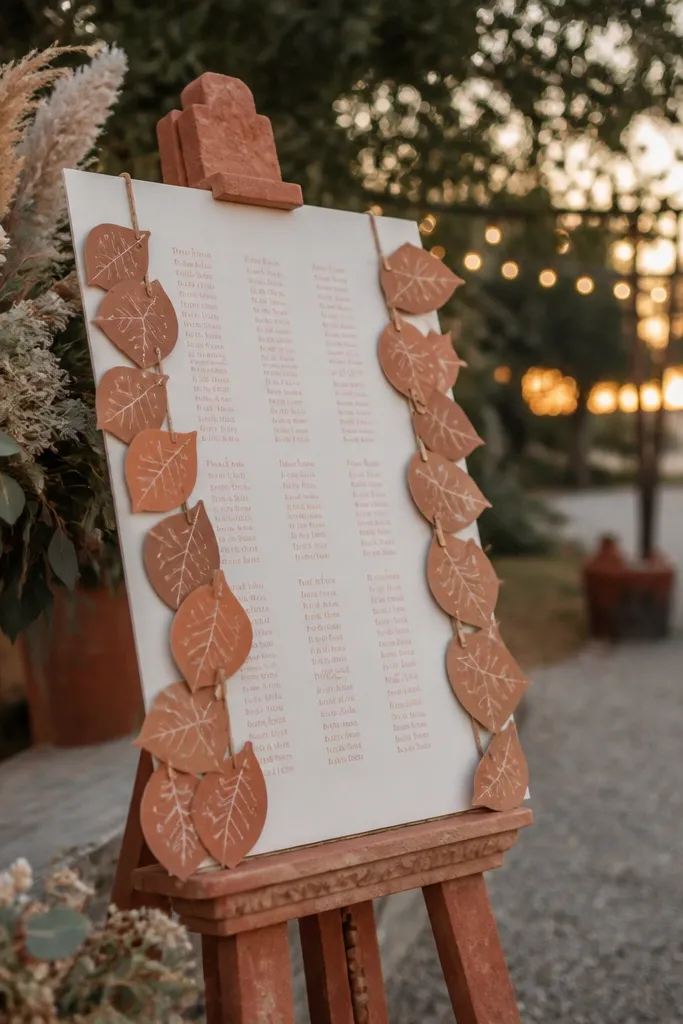
This setup looks warm and intentional, especially at outdoor venues. The terracotta tones pair beautifully with greenery and sunlit photos, and the leaf-shaped cards add a “details you notice” layer. It works best in spring and early fall when the color palette matches the environment. Keep the seating chart itself simple; the leaf cards should do the visual work, not tiny typography.
Start by choosing a terracotta or clay-colored easel and a matte cream chart backing. Then attach table number cards shaped like leaves, arranged in a clear grid or row-by-row stack. Finally, place it near a plant feature or garden edge so the colors blend instead of fighting the background.
Use dark brown ink for names so the letters stay readable against warm paper.
Skip busy leaf patterns behind the text — it makes the chart harder to scan.
6. Framed Gallery Wall Seating Chart with Numbered Tags
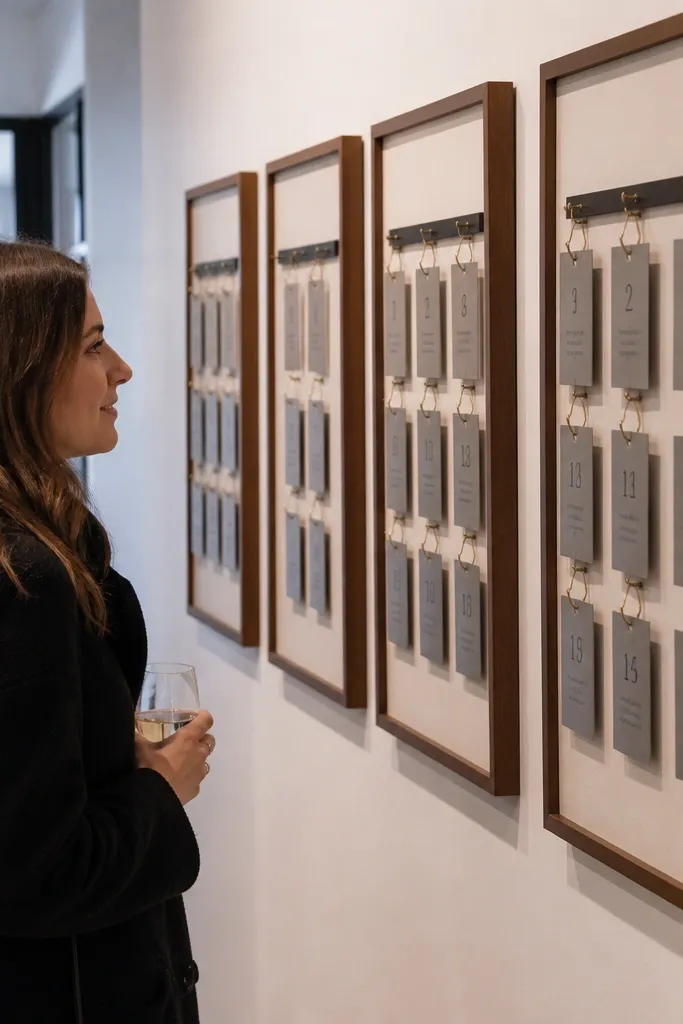
A gallery wall is one of the cleanest ways to make a seating chart look like décor instead of admin paperwork. Multiple frames create visual rhythm, and numbered tags let guests match tables quickly without hunting for one giant sheet. This looks best on a blank wall near the reception entry or corridor where guests walk past. It’s also great for larger guest counts because you can split tables across multiple frames.
Start by using 3-5 frames of the same size for consistency, with a matte white or cream background inside each. Then split tables into sections and mount each section with a bold table heading and a short list of names. Finally, add numbered tags at the bottom of each frame so guests can scan table numbers before reading names.
Quick tipPut the wall where guests naturally face it; if they walk past sideways, frames blur in photos.
Skip thisAvoid mixing frame sizes wildly — it makes the chart look like random wall art instead of a map.
7. Bookshelf Seating Chart with Table Numbers as Book Spines
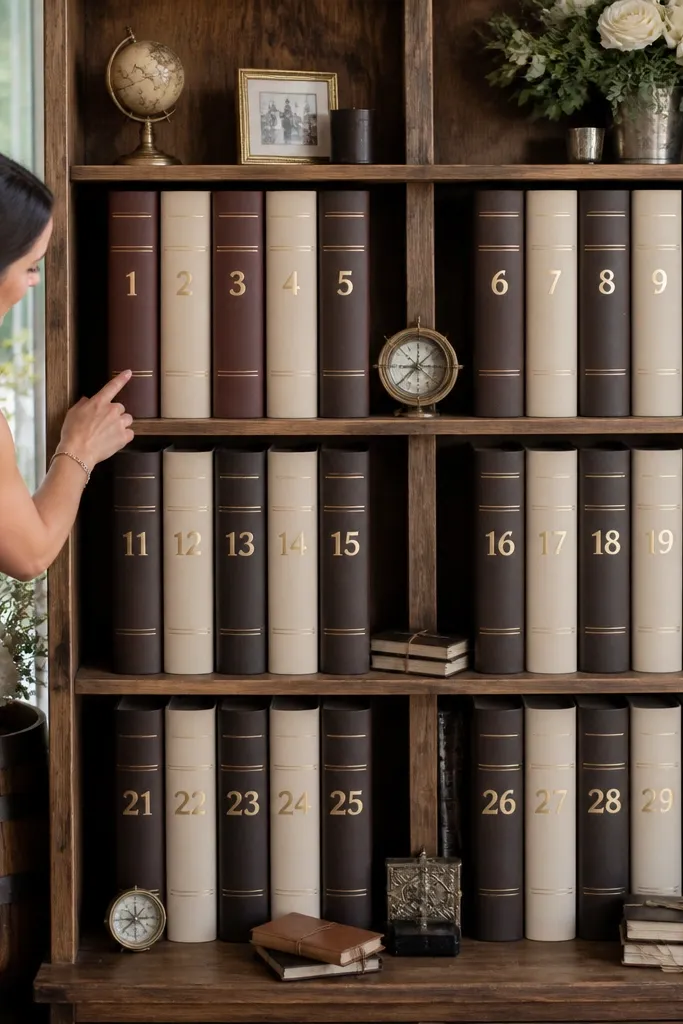
A bookshelf display turns table numbers into a design element, which makes the chart feel cohesive with the rest of your wedding décor. It’s photogenic because it creates a vertical pattern and gives you depth with real-looking props. This works best for venues with rustic-industrial vibes, libraries, or any space where shelves won’t look out of place. Use it for smaller to mid-size weddings so names don’t become cramped.
Start by getting a narrow bookshelf or ladder shelf with 8-12 slots. Then label each slot like a book spine with the table number in a consistent font, and place the matching seating list behind a clear panel or inside a hinged card. Finally, position the shelf at the welcome area where guests line up or wait briefly.
Quick tipChoose a consistent label color across tables so the shelf reads as one system in photos.
Skip thisSkip tiny name columns — on a shelf, small text looks fine in person and disappears in camera shots.
8. Acrylic Stand with Frosted Vinyl Table Grid
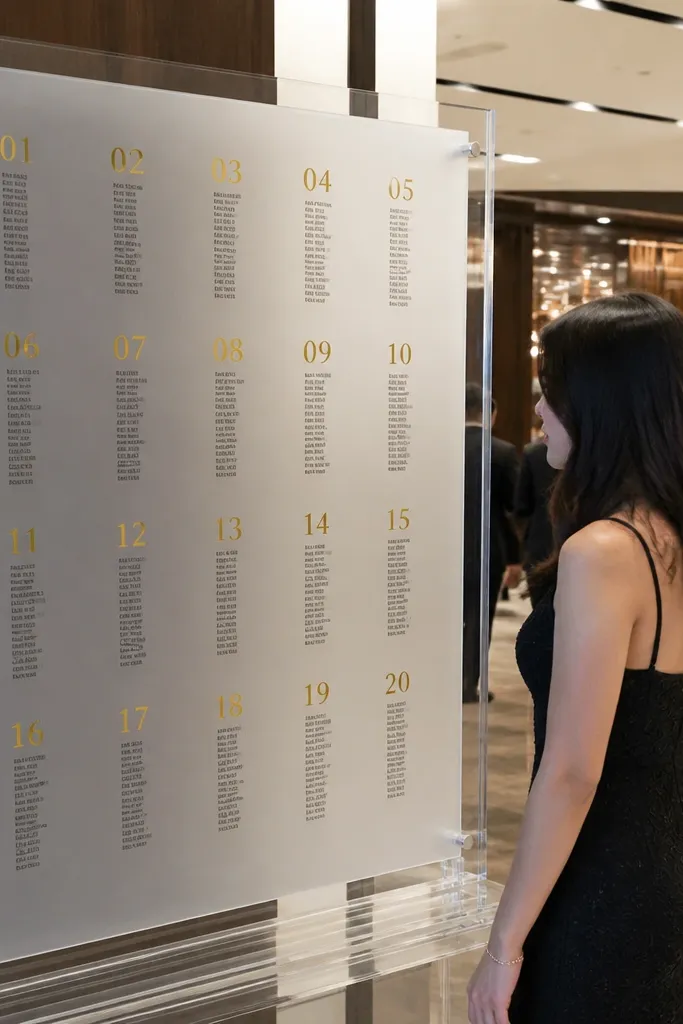
If you want modern and sleek, a frosted vinyl grid on clear acrylic looks crisp and clean. The frosted layer reduces glare compared to fully transparent vinyl, so names stay readable in daylight. This is a strong choice for contemporary venues, hotel ballrooms, and receptions with minimal décor. Keep the design tight and structured: grid layout, bold numbers, and consistent spacing.
Start by buying or renting a clear acrylic seating stand with a flat face about 24x36 inches. Then apply frosted vinyl for the background grid and add black vinyl or printed names inside the grid. Finally, place it under covered entry lights or away from direct sun so the stand doesn’t reflect overhead glare.
Do a quick “walk test” from 10 feet — if names blur, increase font size before you print final labels.
Avoid glossy vinyl overlays on acrylic — they create shiny hotspots that ruin readability.
9. Vintage Window Frame Seating Chart with Hanging Name Strips
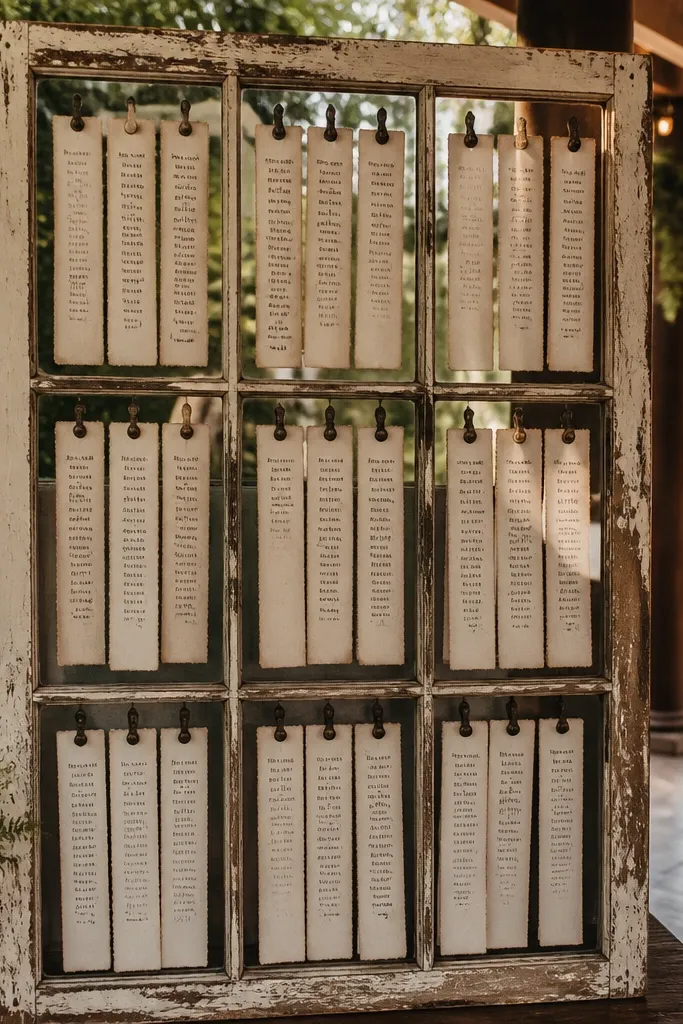
A window frame seating chart gives you instant charm and a built-in “grid” look. Hanging name strips add motion and make the chart feel interactive, which also helps guests slow down and find their table. It photographs beautifully because the frame adds texture and the hanging strips create layered depth. This is ideal for outdoor ceremonies, rustic venues, and spring settings where the background has enough light.
Start by mounting a matte board inside the window frame and marking table number positions. Then hang thin name strips under each table number using clips or small rings, keeping the strips aligned so they don’t tangle. Finally, place the frame where guests face it head-on, not at a sharp angle.
Use uniform strip widths so the display looks tidy in every photo angle.
Don’t use different clip styles per table — mismatched hardware reads messy.
10. Large Fabric Flag Seating Chart with Rope Line Table Rows
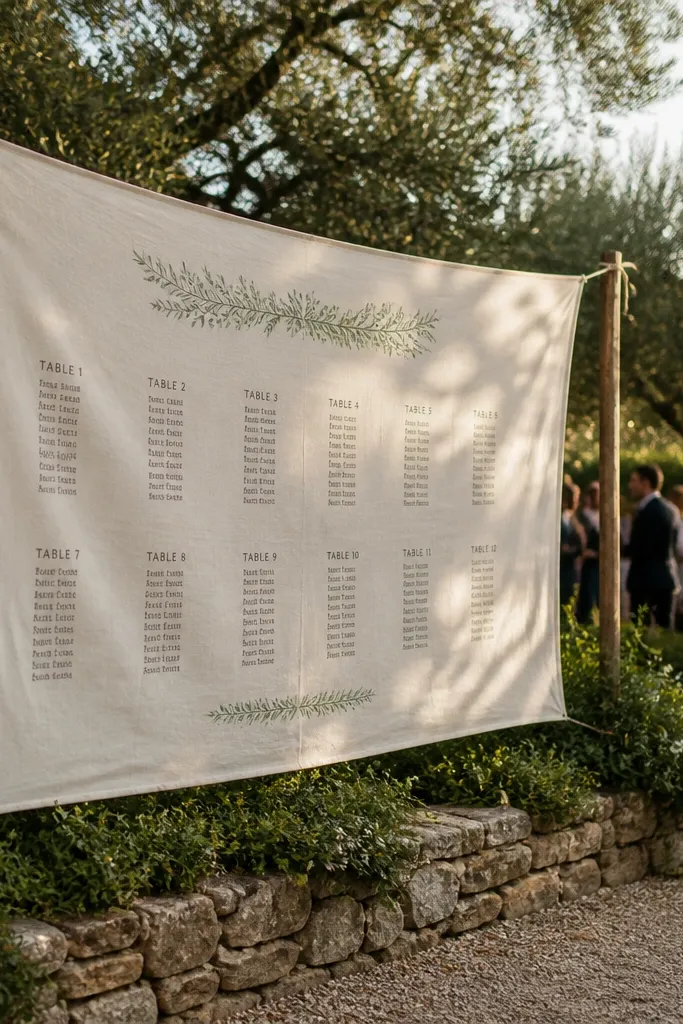
A fabric flag display is soft, romantic, and forgiving if the wind picks up. The cloth moves slightly in photos, which looks natural instead of stiff, and the texture helps the chart stand out from plain walls. Use it for garden weddings, beach-adjacent venues, or any space where you want a “welcome” feeling. For readability, keep each table row separated by rope lines and use high-contrast labels.
Start by stretching a heavy canvas or linen flag onto a frame so it stays flat while guests approach. Then create table rows with rope lines and attach table number tags to each row, with names printed in short columns. Finally, anchor the display in a sheltered spot near the entrance so wind doesn’t whip the edges.
Print names on matte fabric transfer paper or use iron-on letters on thick card — thin paper curls and reflects.
Skip lightweight chiffon — it flutters too much and names blur in photos.
11. Neon-Style Edge Lighting Seating Chart on White Board
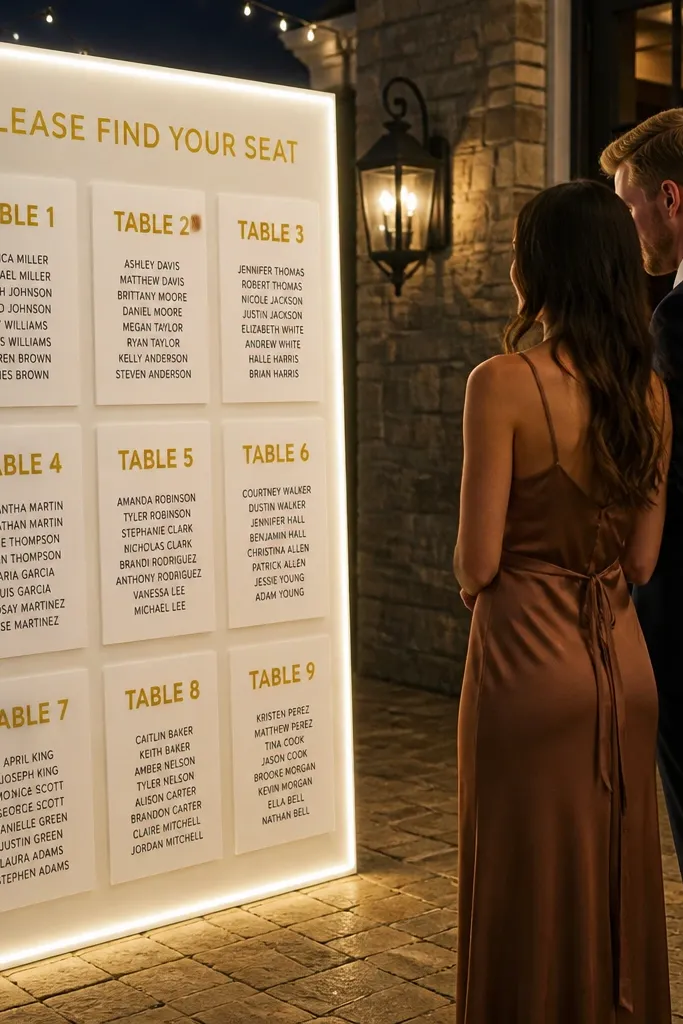
Edge lighting turns a seating chart into a night-friendly décor piece. It’s especially effective for evening receptions where lighting is low and you want the display to be the brightest thing in the area. Use a white board with bold black names and bright table numbers, then add LED edge strips around the border for a clean, modern look. This works best when your venue has neutral walls and controlled lighting so the LEDs don’t fight other bright sources.
Start by choosing a white matte board sized around 24x30 inches, mounted on an easel or stand. Then print names in black and table numbers in a single bright color, and install LED edge lighting with a diffuser cover. Finally, place it near the entrance so guests see it while walking in, and plan power access or battery packs before you arrive.
Quick tipUse warm-white LEDs for weddings — cool blue LEDs make skin tones look off in photos.
Skip thisAvoid placing it under spotlights — the chart becomes glare soup and the LEDs lose impact.
12. Wood Slat Seating Chart with Laser-Cut Table Numbers
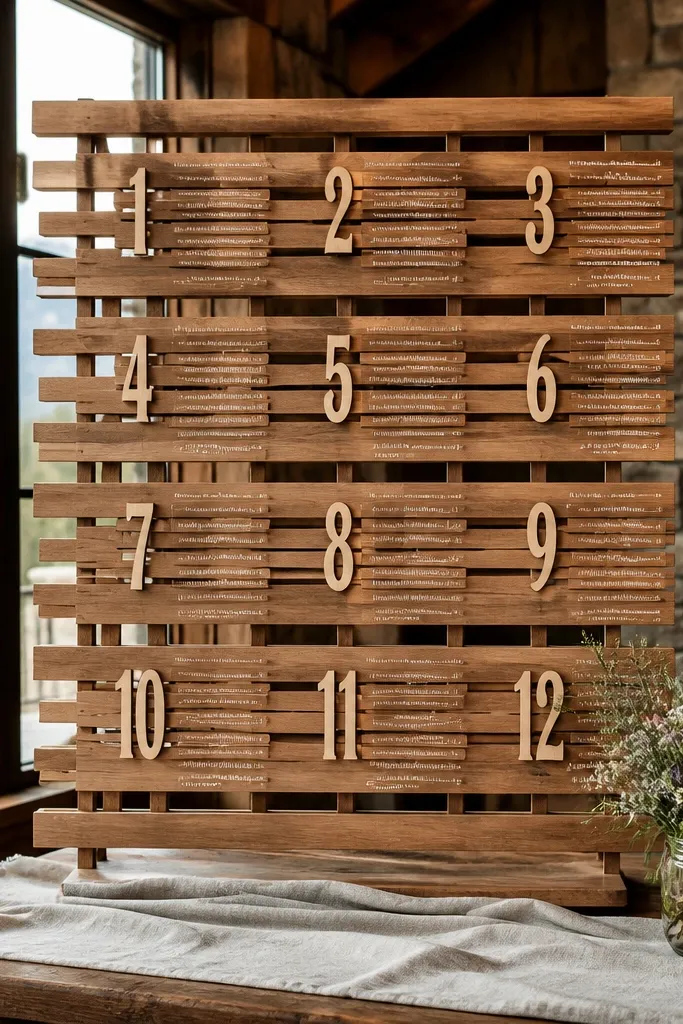
Wood slats create a built-in pattern, and laser-cut numbers add that “designed” look without clutter. The texture makes photos feel warm and intentional, and the open slats reduce the flat-paper effect. This is a great option for rustic-modern weddings, mountain venues, and any space with natural materials. Keep your names on a matte paper backing behind the slats so the chart stays readable.
Start by using a slatted wood panel about 30-36 inches wide with consistent spacing. Then attach a matte backing sheet behind the slats and mount table number pieces in front so they visually anchor each section. Finally, set the panel at the welcome area, not in the middle of the room where people won’t stop.
Match your table number font across all signage so the chart feels like one system.
Skip busy carvings behind the names — the slats already add texture.
13. Botanical Wreath Seating Chart on a Wall Hanger
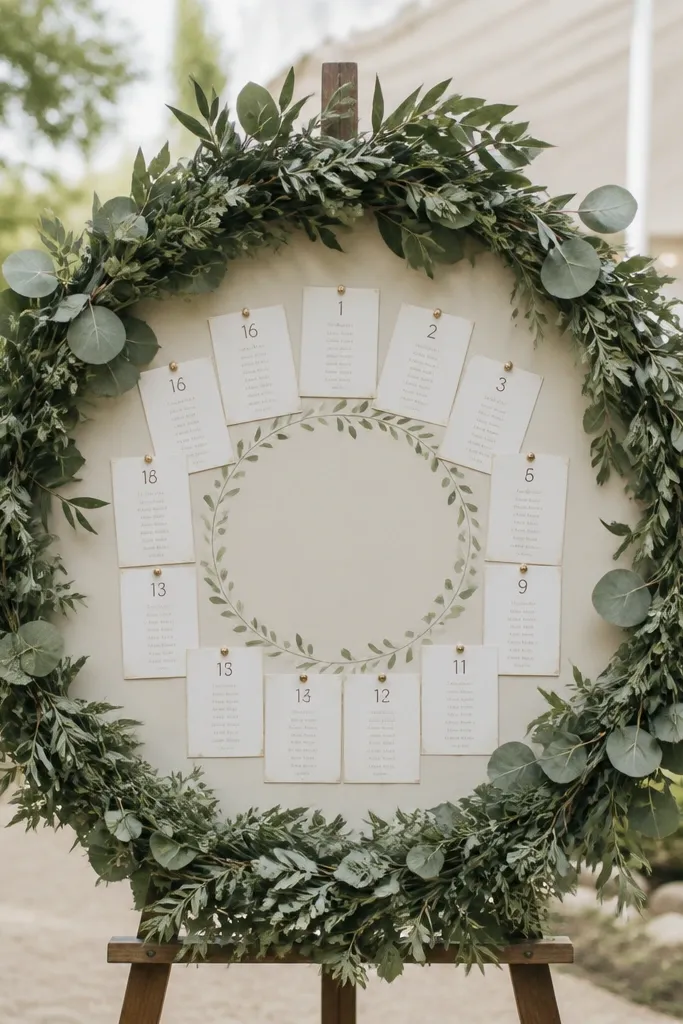
A wreath-style seating chart looks like décor first and signage second, which is exactly what you want for a good-looking entrance. The circular shape gives you a natural layout for table numbers, and greenery softens the scene in photos. This works best for spring and summer weddings, especially with garden backdrops or neutral reception walls. Put names in a clean central panel so the wreath frames the chart without covering text.
Start by hanging a wreath with a sturdy backing board behind it, sized around 24-30 inches across. Then place table numbers in a ring-like layout, and mount a central seating list panel with bold headings. Finally, hang it where guests can stand and read without blocking the entrance flow.
Use dried greens if your wedding is in heat — fresh wreaths wilt and sag near doors.
Don’t cover the edges of the seating list with leaves — it makes the chart look random.
14. Black-and-White Photo Strip Seating Chart with Table Blocks
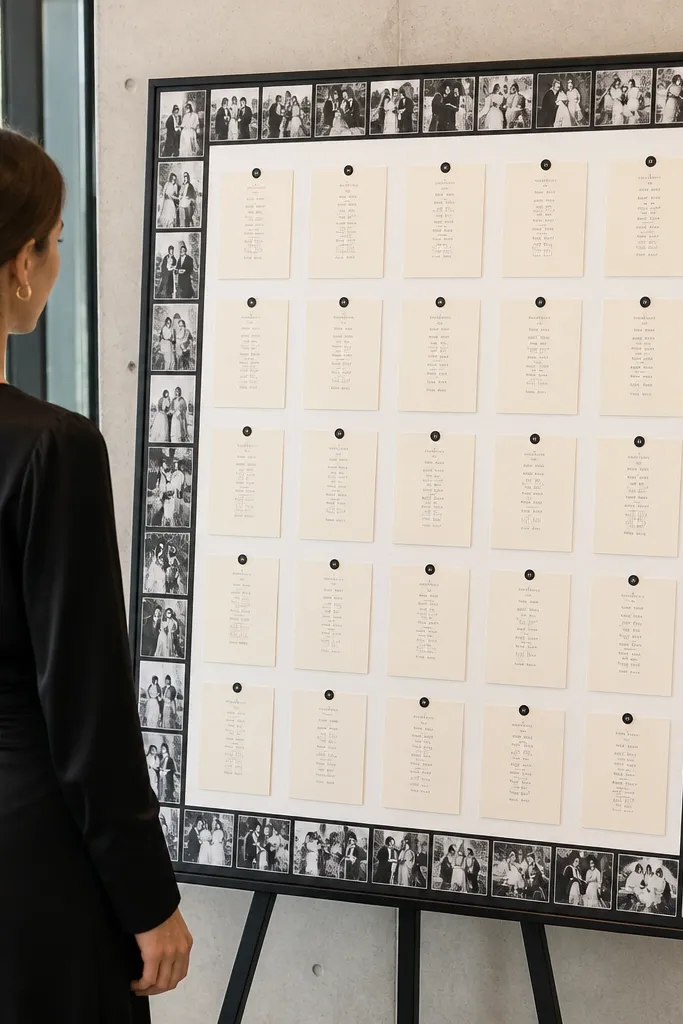
This is a graphic, modern look that reads well in photos because the contrast is strong. Use black-and-white photo strips as a border, then keep the seating chart itself in clean table blocks. It’s a good fit for couples who want something styled but not overly decorative, especially in minimal venues. For best results, limit the photo strip height so the names remain the star.
Start by printing black-and-white photo strips as a thin border around a matte board. Then create table blocks with thick borders and large table numbers, and place names in rows that match each table block. Finally, position the board near the bar or entrance where guests pause and glance upward.
Quick tipUse a single photo crop style across strips so the border looks intentional, not random.
Skip thisAvoid too many photos — the border competes with the names.
15. Large Calligraphy-Style Header Seating Chart with Photo Corners
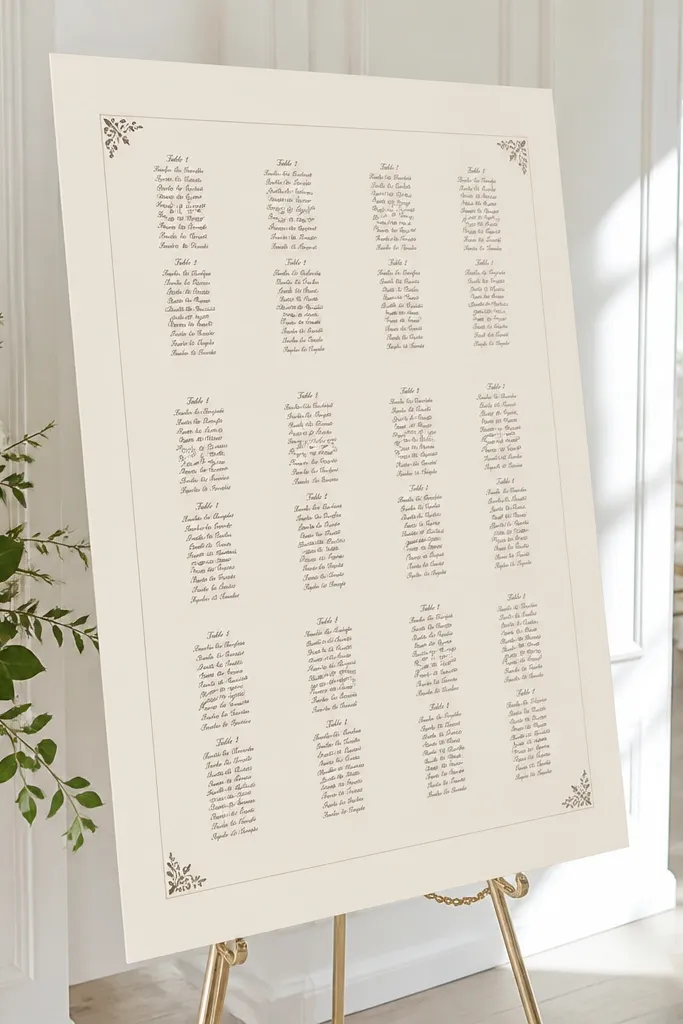
A big header is how you make a seating chart feel like a design piece. Pair a calligraphy-style header (printed, not handwritten) with photo corners or small printed accents in the corners, and keep the main list simple and high-contrast. This looks best in light-colored venues — think white walls, airy reception spaces, and soft daylight. It’s great for weddings where you want the seating chart to match invitation typography.
Start by designing a board that’s mostly negative space — aim for 60% cream background and 40% text. Then print the header in a bold script-like font, and format names in a strict grid under each table number. Finally, mount it on foam board or a lightweight stand and place it at the welcome area where guests look first.
Choose one font style for names and another for table numbers; mixing three fonts makes it look DIY.
Skip thin, light-colored text — cream on gray backgrounds disappears in evening photos.
16. Lantern Cluster Seating Chart with Pinned Table Sheets
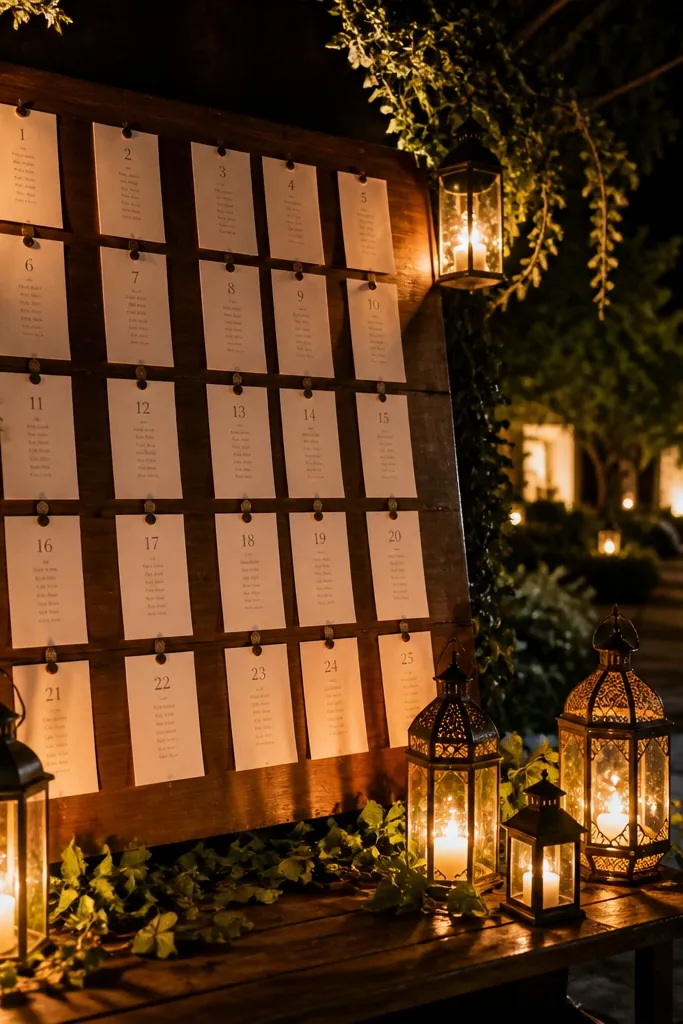
Lantern clusters create a warm, romantic glow and frame the seating chart like a mini installation. The pinned sheets give guests a clear way to scan by table, and the lantern light makes the display look good at night. This is ideal for outdoor evening receptions, courtyard weddings, and any venue where you want the entrance to feel cozy. Use lanterns in two sizes so the display has depth without becoming chaotic.
Start by building a base with a small table or stand, then group lanterns around it so the chart sits at the center. Then pin seating sheets to a board behind the lanterns, with table numbers printed large and placed at the top of each sheet. Finally, place the whole cluster near the path guests take from cocktail hour to dining.
Quick tipUse LED tea lights for reliability; real flames near paper increase the risk of heat damage.
Skip thisAvoid placing the chart behind dense lantern glass — it reduces contrast and makes names harder to read.
17. Wooden Paddle Seating Chart with Hanging Table Numbers
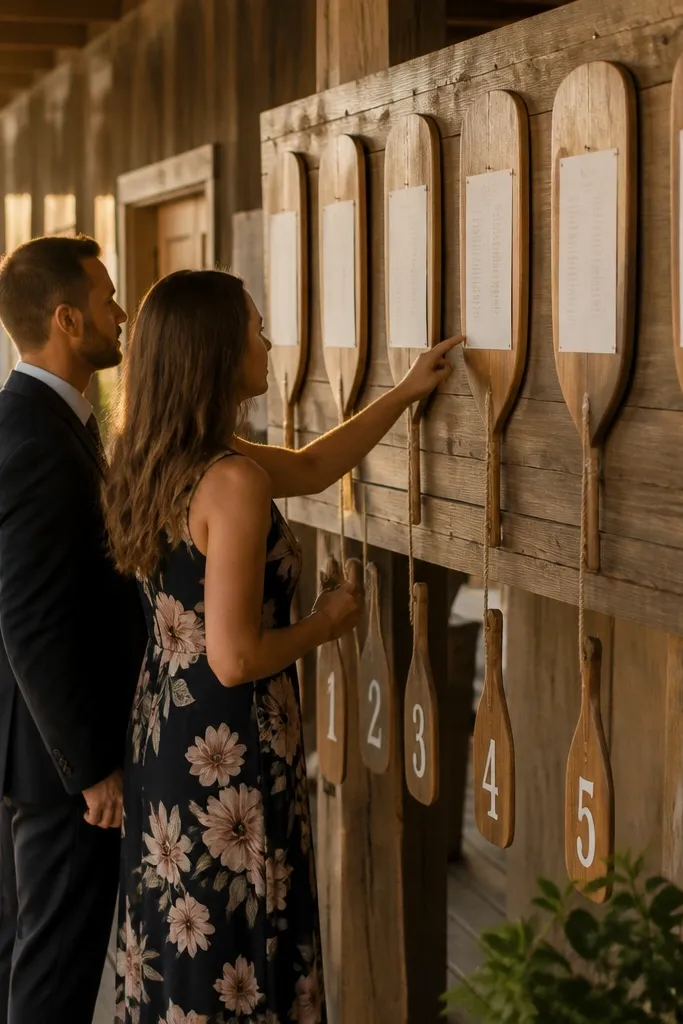
Wood paddles look rustic and intentional, and they photograph well because the surface texture catches light. Hang table numbers from the paddles or pin them along a central board, then include names in a clean list format. This works for beach weddings, barn venues, and any place where wood décor fits naturally. Keep paddles spaced so the viewer can follow the layout without squinting.
Start by arranging 6-10 wooden paddles in a fan or staggered line on a stand. Then add a central board behind them for names, with table numbers attached to each paddle as the anchor. Finally, place the display right where guests enter so they see it before they start moving toward tables.
Quick tipUse dark stain paddles with off-white paper — it keeps contrast strong in afternoon light.
Skip thisSkip crowded names on multiple paddles — the layout becomes a puzzle in photos.
18. Rolling Suitcase Seating Chart with Open-Lid Place Cards
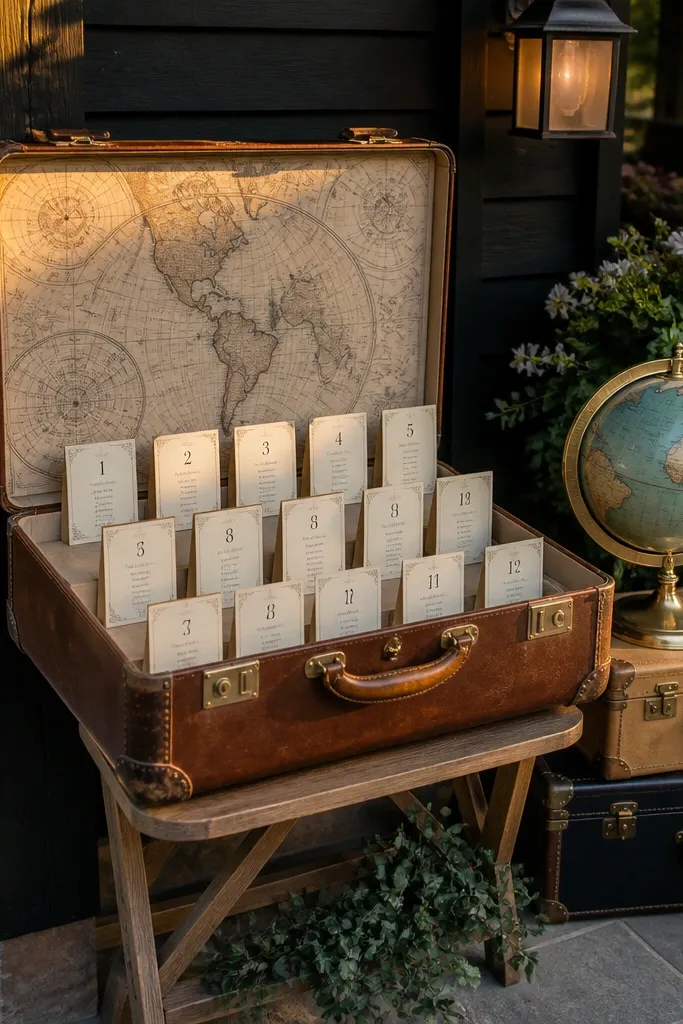
Suitcases make a seating chart feel like travel décor, and open lids create a natural “frame” for cards. This looks great in travel-themed weddings, but it also works for any couple who wants a vintage, playful entrance. It’s best for smaller guest lists because the open suitcase has limited space for text. Put it at the welcome table so it’s part of the guest arrival ritual.
Start by choosing a suitcase with a flat open lid and a sturdy base, then place a matte board inside for the chart backing. Then arrange table number place cards in rows so each table is distinct at a glance. Finally, position it under warm light or near the entrance so photos don’t wash out the paper.
Use magnetic card holders or clips so cards don’t shift if someone bumps the stand.
Avoid glossy suitcase interiors — reflections make names harder to read.
19. Terrace Tile Seating Chart with Numbered Ceramic Tags
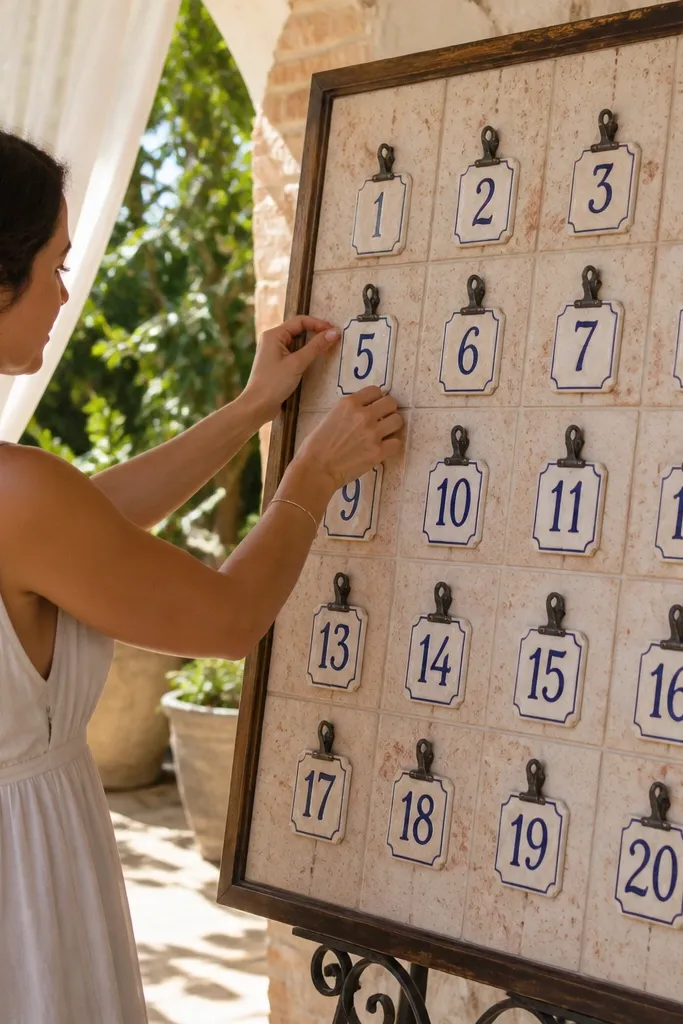
Tile-style boards and ceramic tags look premium because they feel architectural. The texture reads well in both daylight and evening, and ceramic numbers add a tactile, collectible vibe. This is a strong choice for outdoor courtyards, Mediterranean-inspired venues, and modern receptions that still want warmth. Keep the seating list printed on a matte surface behind the tags so the names stay crisp.
Start by building a board that looks like tile with a grid layout, then print names and table sections on a matte backing. Next, attach ceramic table number tags over each section so the numbers are the first thing guests notice. Finally, place the display near a walkway where guests pass slowly, like the route between cocktail hour and dinner.
Choose a single ceramic color family (cream, black, or terracotta) so the chart feels cohesive.
Skip small ceramic numbers — they look cute up close and disappear in wider photos.
20. Suspended Ribbon Seating Chart with Hanging Table Lists
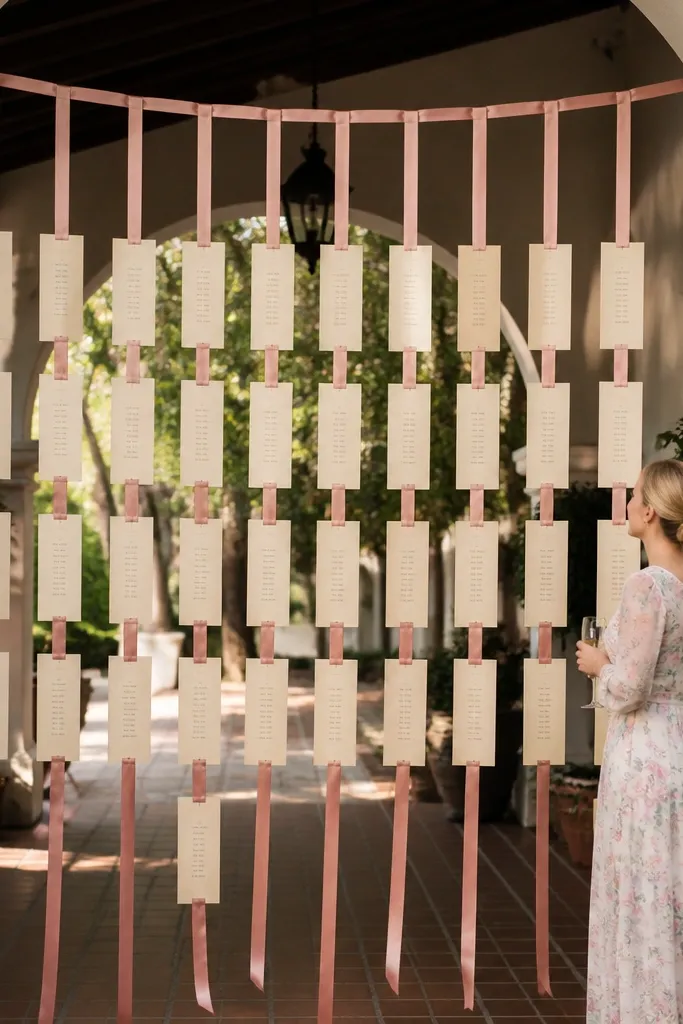
Suspended ribbon displays look airy and elegant because they create vertical lines that lead the eye. Hanging table lists are easy to separate visually, and the movement in the ribbons adds softness to entrance photos. This works best under a covered entry, pergola, or indoor space with enough vertical clearance. Keep the names on matte paper to reduce glare and make the lists readable.
Start by installing two anchor points above your display area and stretching ribbons horizontally across. Then attach short hanging cards below each ribbon with table numbers at the top and names in a tight grid. Finally, place the setup at the entrance so guests look up while they walk in, not after they’ve already started seating.
Quick tipUse two ribbon widths max; too many widths makes the display look cluttered in camera frames.
Skip thisAvoid placing it low near pathways — guests bump ribbons and cards shift.



