
1. Champagne linen runner with three-glass bud vase cluster
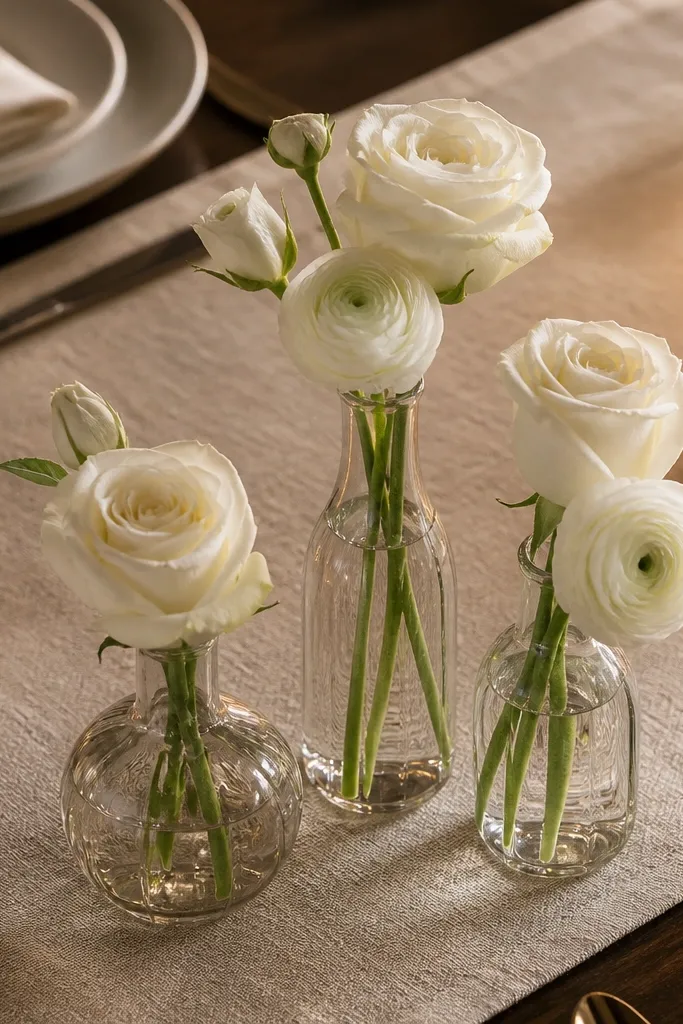
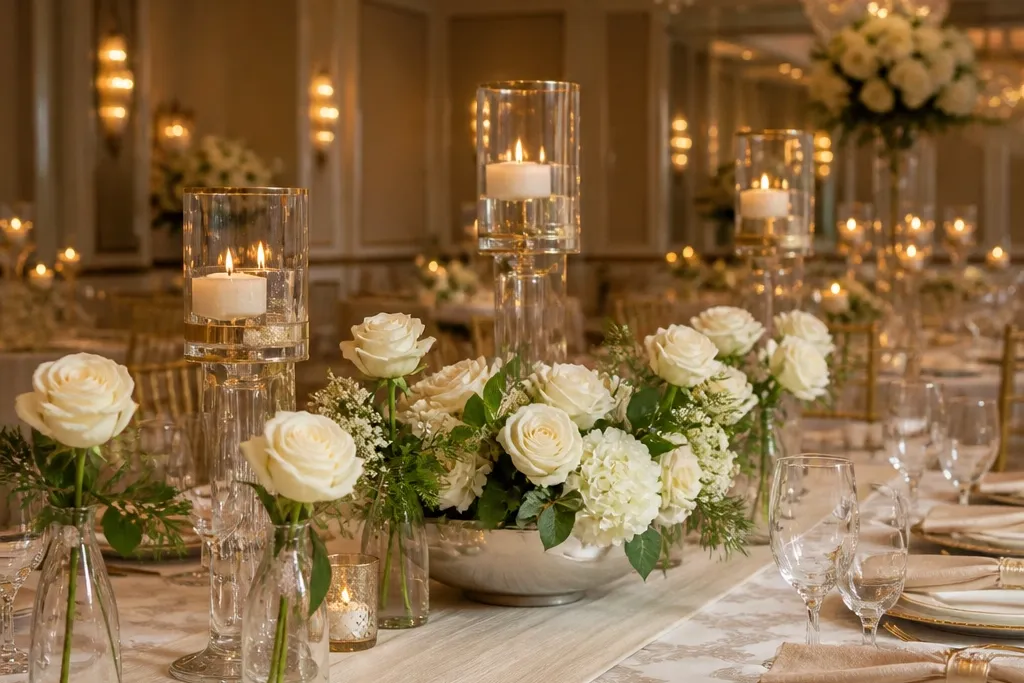
Start with a champagne linen runner that looks slightly textured, not shiny. Then anchor the center with three different-height glass bud vases (clear glass, not colored) and small blooms like white roses or ranunculus. This setup looks expensive because glass reflects candlelight and the height variation creates depth without bulky floral. Keep the stems tight and the blooms small so the table stays airy. It suits spring and summer weddings, especially in venues with natural window light.
First, lay the runner centered and iron out any wrinkles so it falls straight. Next, group three bud vases in a line, spacing them 6-8 inches apart, with the tallest vase in the middle. Finally, add warm white LED candles around the cluster but not inside the vases so the glow stays crisp. For a budget-friendly version, use faux blooms only for the top layer and keep the stems real-looking with green filler.
Quick tipIf your venue lighting is dim, choose matte champagne linen and clear glass — the contrast makes it photograph brighter.
Skip thisDon’t use a satin runner; it shows every wrinkle and makes the whole table look cheaper.
2. Deep forest taper candles on a mirrored tray
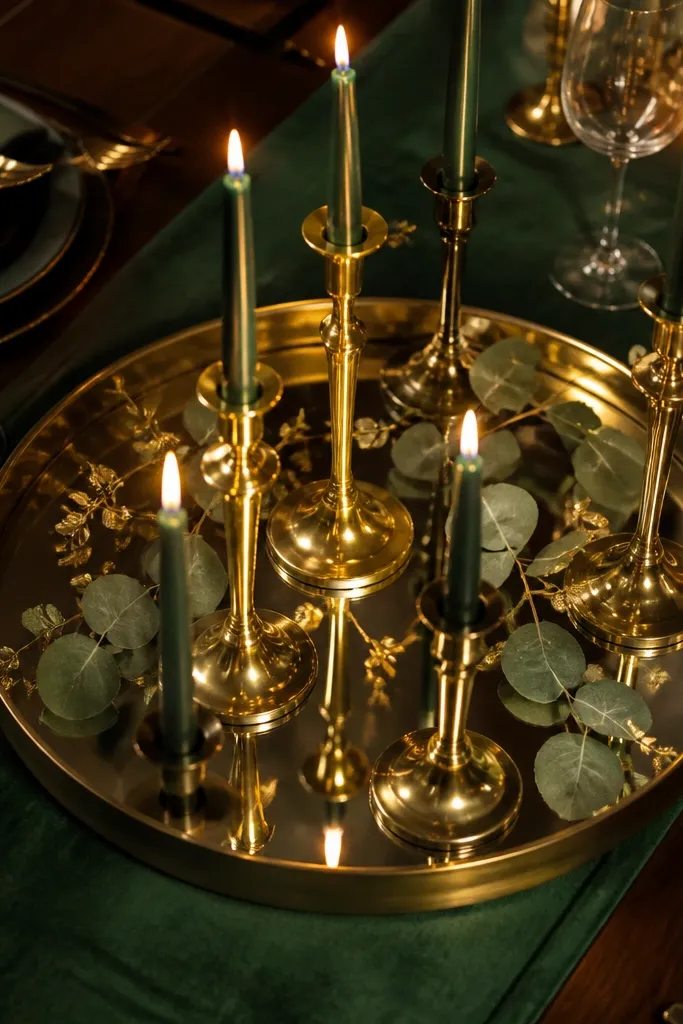
A mirrored tray instantly adds the “expensive” feel because it doubles light and makes candles look more abundant. Pair it with deep forest taper candles in holders that match your metal direction (warm brass or gold). Keep the styling minimal: a few eucalyptus sprigs and a small cluster of gold-leaf accents. This works best for fall and winter receptions because the deep greens look rich under warm lighting. The mirrored base also photographs cleanly, even if the room lighting is inconsistent.
First, center a rectangular mirror tray on the table with the short side facing guests. Next, place three taper candles in a triangle layout, using one candle as the tallest. Finally, tuck eucalyptus at the tray edges and add one small gold accent cluster near the front corner. Use LED tapers if the venue has restrictions; the mirror still reflects the glow.
Choose holders with a slightly flared top; they catch candlelight and look more styled in photos.
Skip a crowded tray with too many elements; the mirror will make clutter multiply.
3. Tall bud vases with single-stem statement flowers
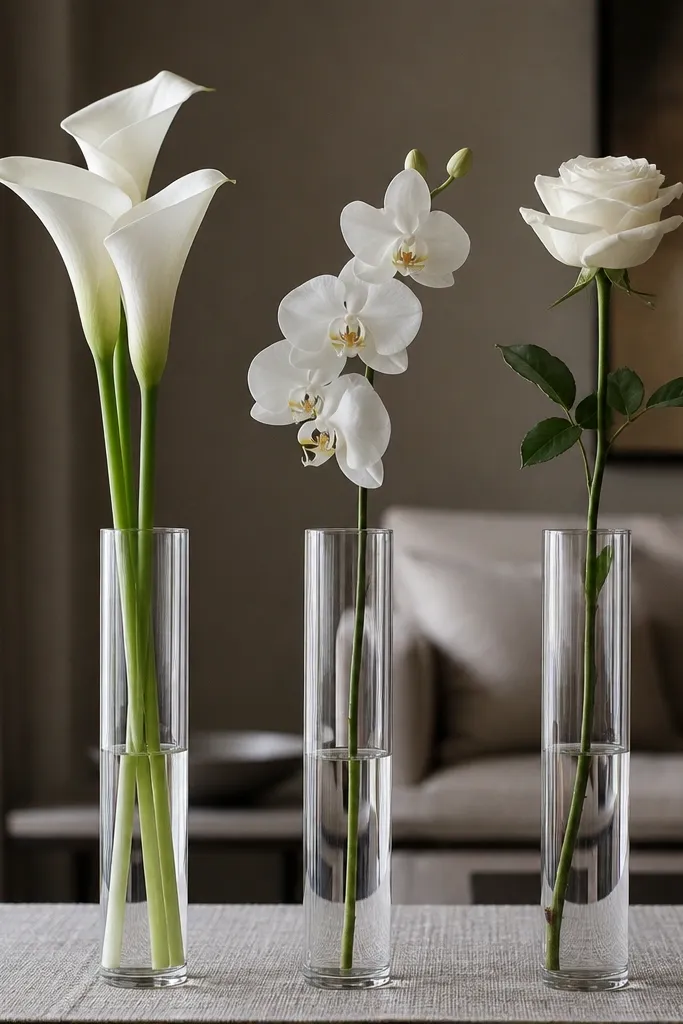
This is a clean, high-end look that reads like a professional florist. Use tall bud vases (clear or frosted) and place one statement stem per vase: orchids, calla lilies, or long-stem roses. The “expensive” part is the negative space — you’re not filling every inch with filler. Keep leaves minimal and let the stems lean slightly inward toward the center. It suits modern receptions and looks incredible in black, white, and neutral venues.
First, pick 5-7 vases and arrange them in a gentle arc across the centerpiece zone. Next, cut stems to similar lengths so the tops form one clean contour line. Finally, add a strip of greenery only at the base of each vase so the top stays airy. If you’re using faux flowers, prioritize realistic petals and use real-looking greenery for the base.
Use frosted glass vases for a softer look if your venue has harsh overhead lights.
Don’t use many small blooms; it turns into a craft arrangement fast.
4. Black acrylic menu card stands with gold foil name cards
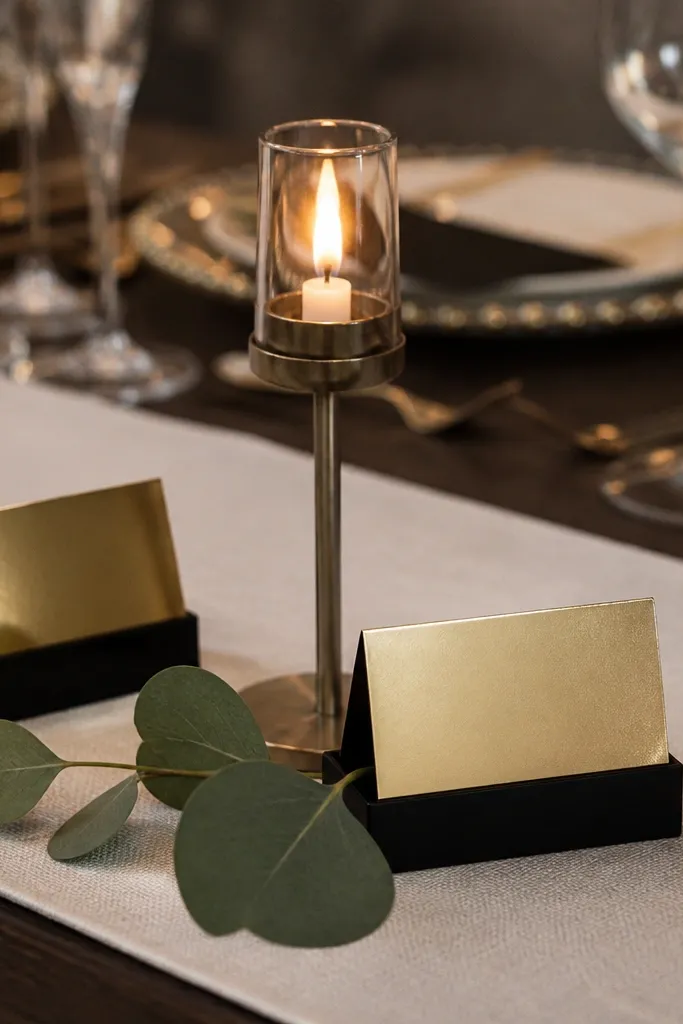
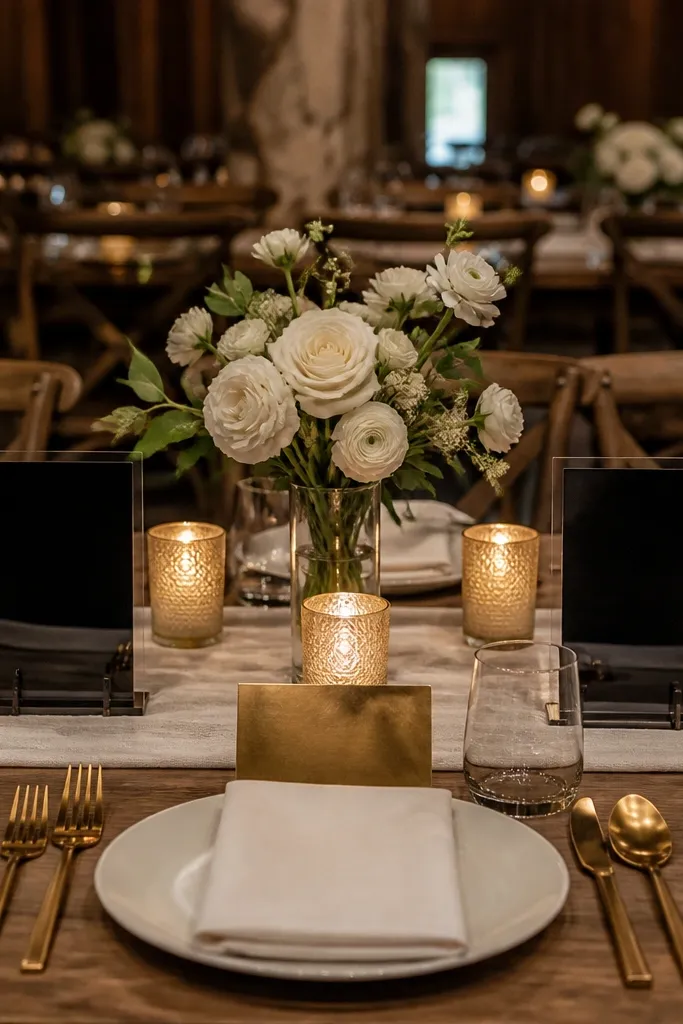
Place cards are small, but they control how the whole table feels in photos. Black acrylic stands look sleek, and gold foil name cards add that “expensive paper” vibe without heavy decor. Pair this with a neutral runner (ivory linen or taupe) so the cards pop. Keep the rest of the table simple: one candle and one low floral bowl. This setup is great for venues with modern decor or when you want the table to look polished even with minimal flowers.
First, line your table with a neutral runner and place the place cards aligned with plates. Next, position one tall menu stand or slim card holder in the centerpiece area so it repeats the black-acrylic look. Finally, add gold foil cards only for the centerpiece or for all place settings if budget allows. Print on thick cardstock so the foil doesn’t look thin.
Make sure all cards are the same height and angle; small inconsistencies show badly on camera.
Skip flimsy paper; it looks flat and cheap next to acrylic.
5. White ceramic bowl with floating candles and lemons
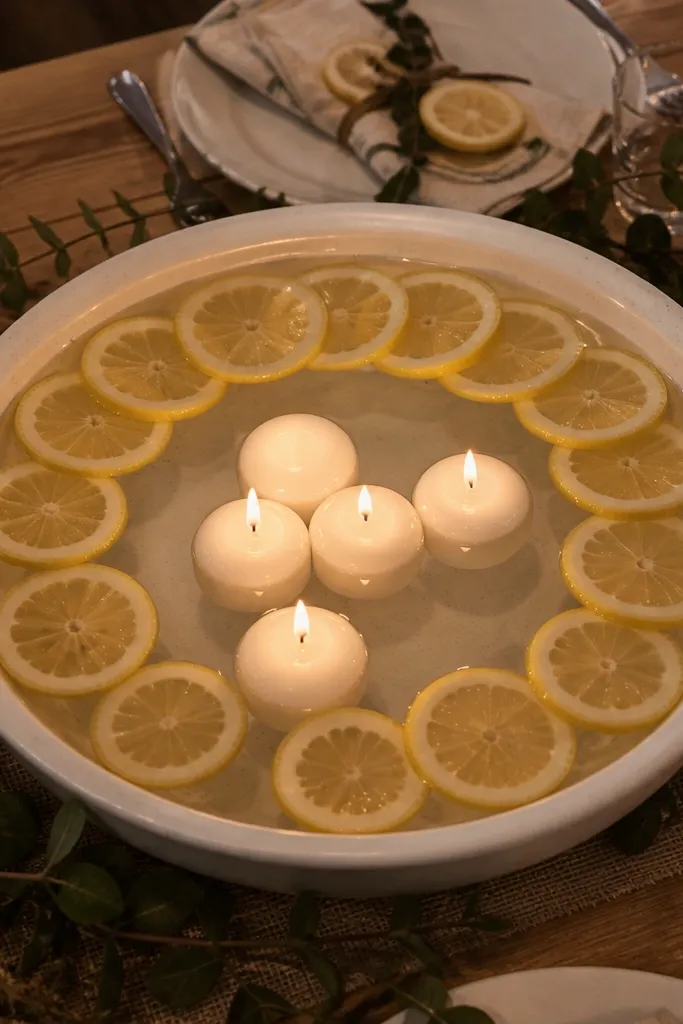
A single ceramic bowl can look designer when you style it like a centerpiece, not a prop. Fill a wide white bowl with water, add floating warm LED candles, and scatter thin-sliced lemons or orange slices around the rim. The citrus adds color and texture that reads well in photos, and the candle glow makes it look warm even in daylight. This works beautifully for summer and destination weddings, especially in bright venues. It also keeps the centerpiece low enough for easy conversation.
First, choose a bowl that’s wide enough to cover the centerpiece space (about 14-18 inches across). Next, add a shallow layer of water and place 3-5 floating candles evenly across the surface. Finally, tuck citrus slices at the edges and add a few mint leaves or rosemary sprigs for green contrast. Use LED candles with a flat base so they sit stable.
Wipe the bowl rim with a dry cloth before guests arrive so water spots don’t show in photos.
Don’t use very thick citrus slices; they look bulky and block the candle glow.
6. Terracotta pots with airy baby's breath and warm brass accents
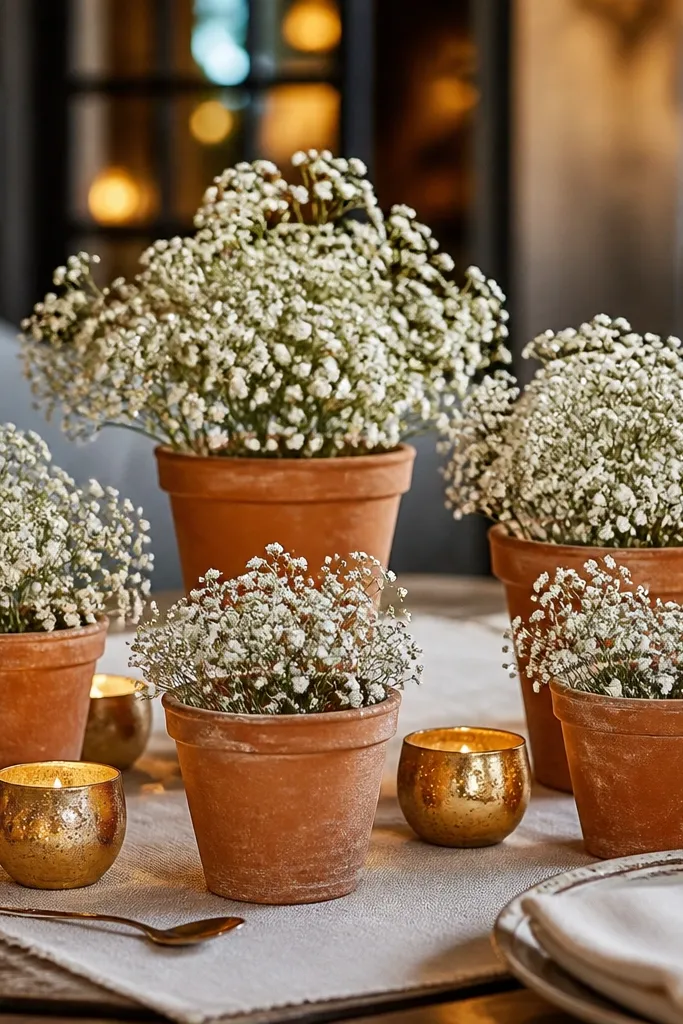
Terracotta instantly warms up a table and reads handmade in a good way. Use small terracotta pots grouped in odd numbers (5 or 7) and fill them with airy baby’s breath or small white blooms. Add warm brass accents — like brass votive holders or a brass spoon-shaped utensil detail. The airy texture gives movement, while terracotta grounds the look. This suits rustic venues, outdoor receptions, and late summer weddings where you want cozy but still polished.
First, set your terracotta pots on a tray or directly on a neutral runner to keep them aligned. Next, trim stems so the tops land at a consistent height across the group. Finally, place brass votives at the front corners of the centerpiece zone and keep baby’s breath mostly above the pot rim. For faux, use high-quality airy stems so it doesn’t look like plastic.
Quick tipSpray a tiny amount of matte sealant on terracotta if it’s dusty; it looks cleaner under flash.
Skip thisSkip dark potting soil showing above the rim; it reads messy in photos.
7. Long table runner with staggered micro-candle heights
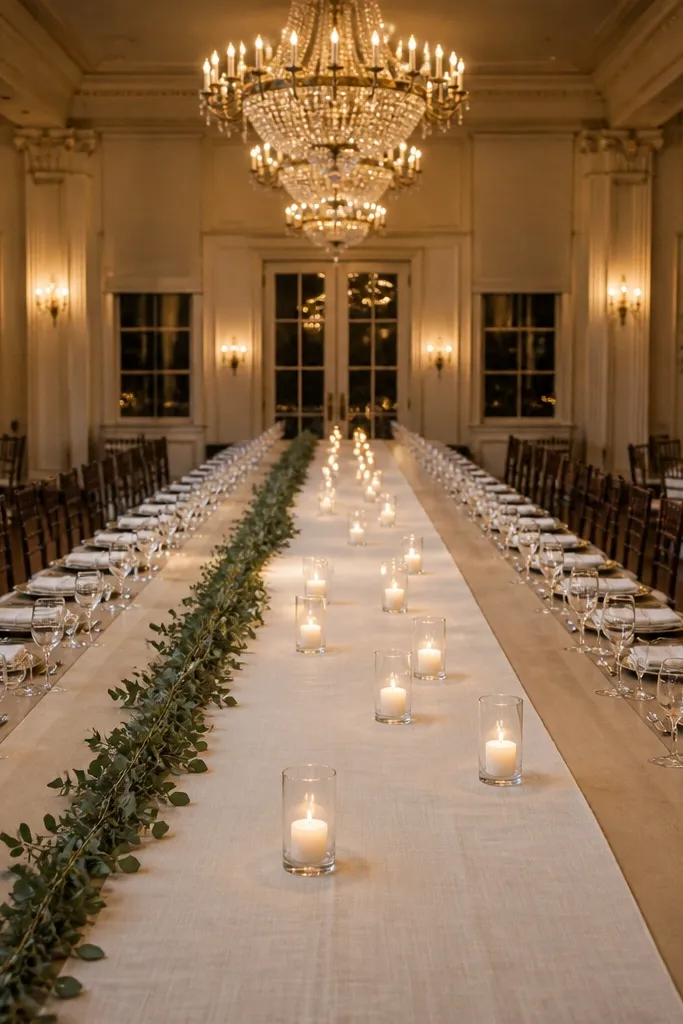
For long banquet tables, the “expensive” look comes from rhythm. Use an ivory runner and place small pillar or micro candles in staggered heights, not a straight line. Add minimal greenery — just a thin strip or a few eucalyptus sprigs — so the candles stay the star. This setup fills empty space without looking cluttered and photographs evenly across the entire length. It’s ideal for winter receptions and candle-forward aesthetics.
First, map your candle positions with painter’s tape before placing anything. Next, set candles in alternating heights every 10-12 inches along the runner’s centerline. Finally, tuck greenery only at the candle bases and keep it off the table edges. For safety and consistency, use LED pillars and pick the same color temperature for all candles.
Quick tipIf you’re using real candles, keep a spare lighter and wick trimmer on a side table for quick fixes.
Skip thisDon’t crowd candles too close; a tight row looks like a budget party instead of a styled reception.
8. Gold candlestick trio with blush rose bud ring
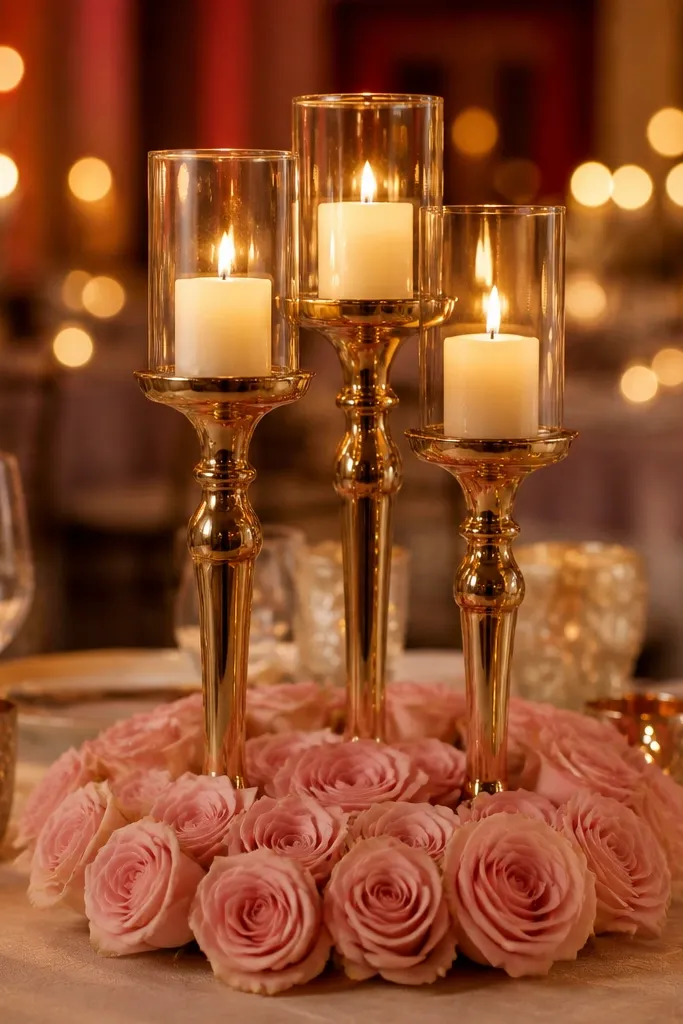
Candlesticks are a straight path to good-looking aesthetic that look expensive because they create vertical lines. Use a trio of gold candlesticks in matching heights, then build a blush rose bud ring around the base. Keep the ring tight and the stems short so it looks like a designed circle, not scattered petals. This is especially flattering for classic ballroom weddings and couples who want romantic without going full garden party. Warm blush and gold also handle flash photography well.
First, place the candlestick trio centered on a small tray so the base stays tidy. Next, arrange blush rose buds in a ring at the base, using floral foam or a hidden ring inside a shallow holder. Finally, add one neutral filler like small white baby’s breath only inside the ring gaps. Keep the rest of the table clear so the candlestick trio stays the focal point.
Use matte gold candlesticks if your room has lots of reflective decor; glossy gold can glare on camera.
Skip mixed flower colors; the ring should read blush, not multicolor.
9. Clear cylinder vases with floating white orchids
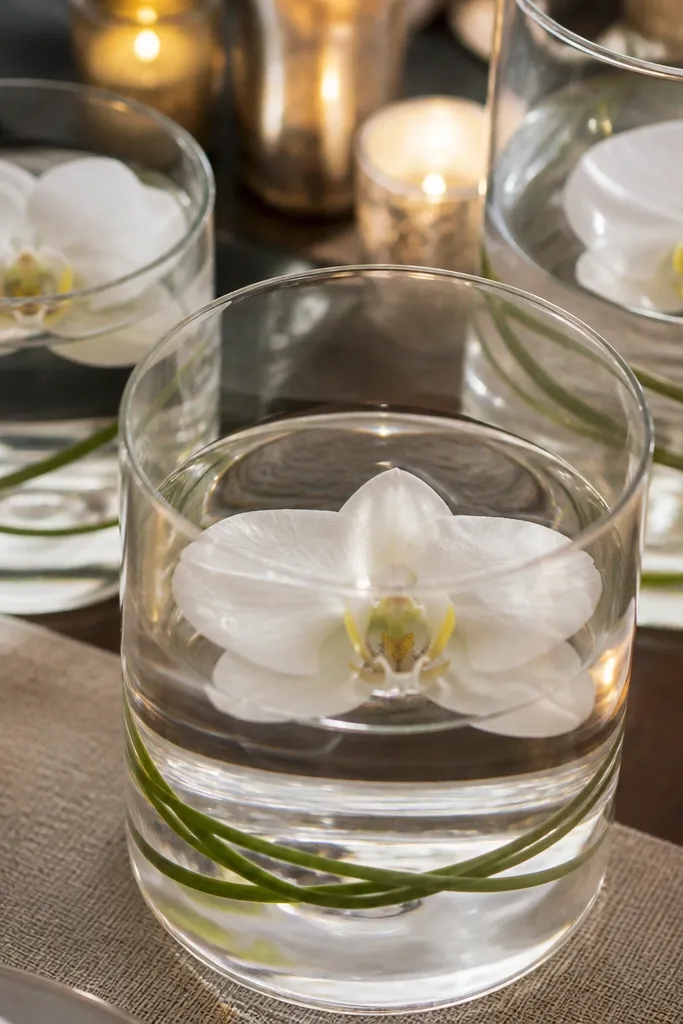
This look is clean, modern, and surprisingly lush in photos. Use clear cylinder vases filled with water, then float white orchid blooms on the surface. Add a few thin orchid roots or green strands only if they look neat; otherwise keep it simple and let the flowers float naturally. The glass edge and the water line make the centerpiece look high-end and deliberate. It’s perfect for spring, indoor receptions, and tables with a lot of natural light.
First, fill each cylinder with water to the same level so the waterline matches across vases. Next, float 1-2 orchid blooms per vase and adjust until the petals sit flat and centered. Finally, add a warm LED candle behind or beside the vase, not inside, to keep the glow from overpowering the petals. Use a consistent vase height so the table looks uniform.
Quick tipRinse vases right before the event so the glass is crystal clear under flash.
Skip thisDon’t use colored water or heavy filler; it makes the orchids look like a craft display.
10. Smoked glass bud vases with blackberries and sage
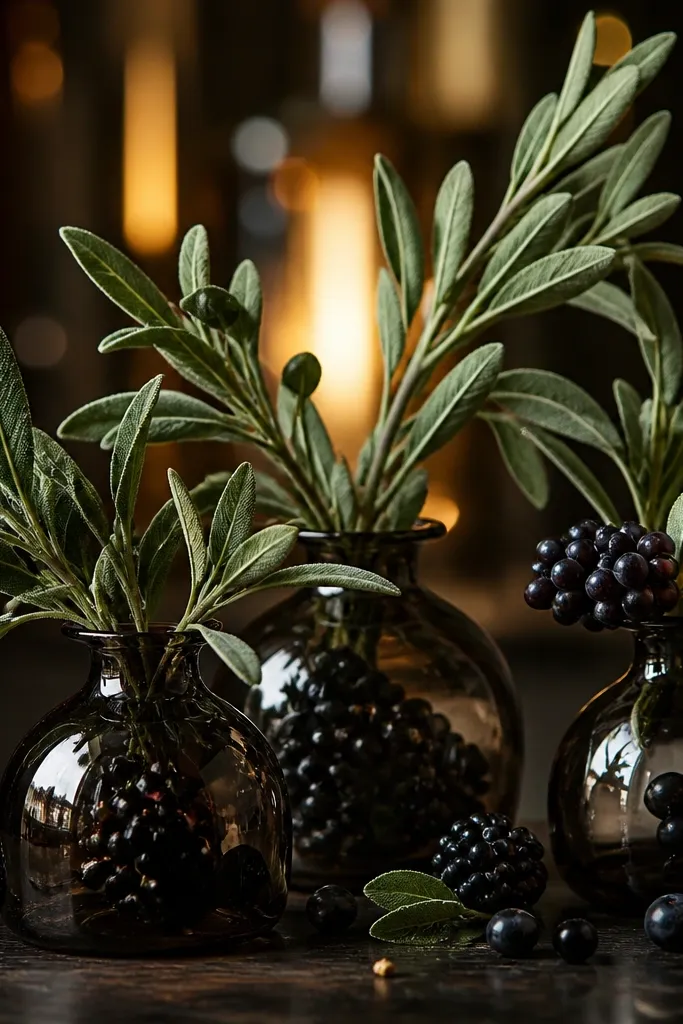
Smoked glass is one of those details that instantly reads expensive because it softens light and adds mood. Fill smoked bud vases with sage sprigs and tuck in blackberries or dark grapes for a jewel-tone accent. Keep the stems long and angled, so the arrangement looks intentional rather than packed. This works best for late summer into fall when you want that moody, editorial look. It also pairs well with black table linens and warm candlelight.
First, choose 3-5 smoked vases and set them in a cluster on a runner or tray. Next, build the greenery base with sage first, then insert berries in small groups so they don’t fall everywhere. Finally, place one candle at the front corner and let the rest of the glow come from behind the vases. If using faux berries, choose ones with a matte finish so they don’t shine like plastic.
Buy berries a day early and keep them dry in the fridge; wet berries slide and ruin the look.
Avoid glossy fake berries; they catch flash and look cheap.
11. Ivory tulle runner with gold wire orb candles
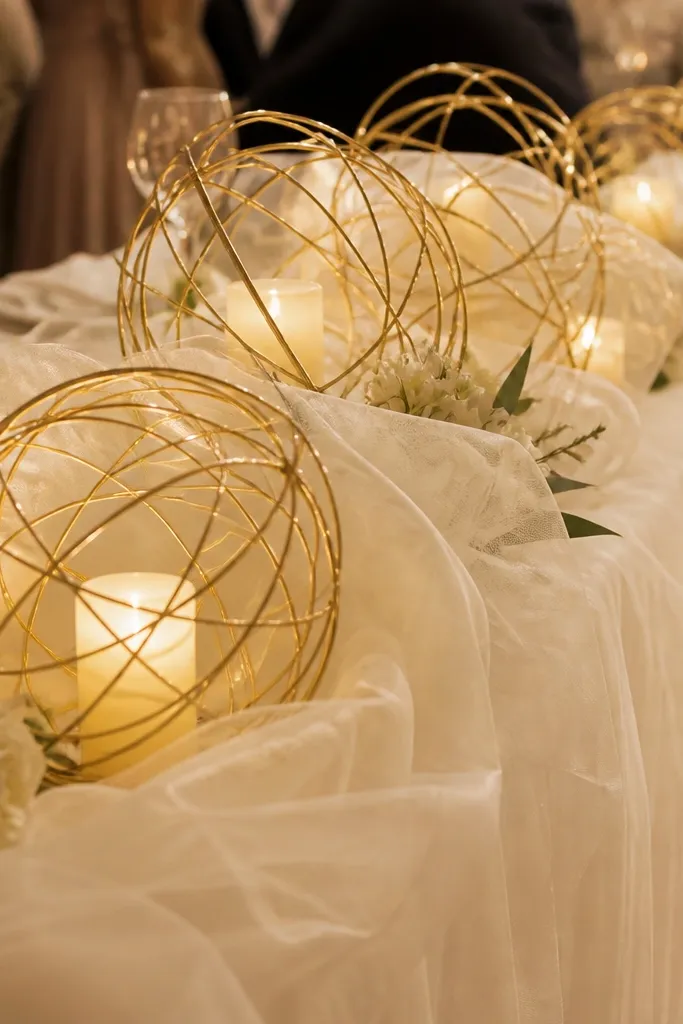
If your venue is simple and you want a “wow” without big floral budgets, tulle is the trick. Use a soft ivory tulle runner (not the stiff kind) and top the centerpiece with gold wire orb candle holders. The wire pattern looks delicate and expensive, and tulle adds movement when people walk past. Keep the centerpiece restrained: 3 orb candles and one small faux floral bundle. This suits winter receptions, indoor ceremonies, and couples going for romantic glam.
First, drape the tulle runner with slight gathers so it looks intentional, then align the centerpiece so it’s centered. Next, place three gold wire orbs in a triangle formation, using warm LED candles inside. Finally, add a tiny amount of greenery or white blossoms only around the base of the orbs. Secure tulle corners with double-sided tape under the runner edge.
Use warm LED candles with a flicker effect if your lighting is flat; it makes the wire look alive in photos.
Don’t use too much tulle; if it covers the plate area, it looks like a costume.
12. Monochrome white flower bowl with sculptural eucalyptus
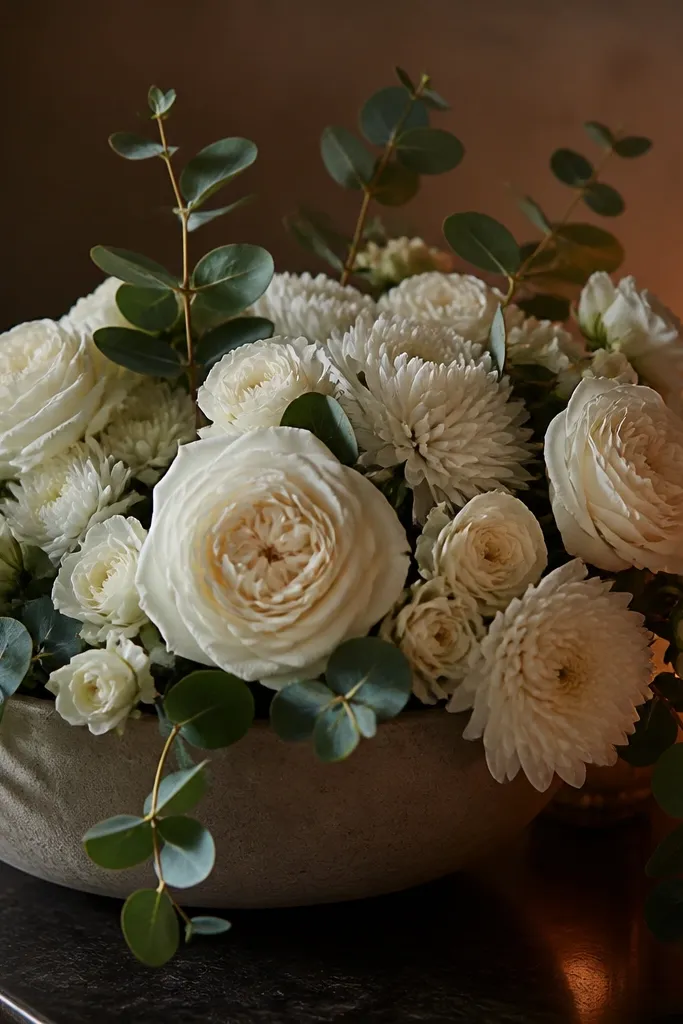
Monochrome white gives that high-end clean look, and eucalyptus adds shape so it doesn’t look like plain filler. Use a low, wide bowl (ceramic or glass) and fill it with white blooms like garden roses, stock, or chrysanthemums plus sculptural eucalyptus. The key is texture contrast: smooth petals against matte leaves. This setup photographs crisp in both daylight and evening. It works for classic venues, modern venues, and weddings where you want a timeless palette.
First, choose a bowl width that matches your centerpiece zone, typically 12-16 inches across. Next, place eucalyptus stems first to create the outer silhouette, then insert white blooms so they sit at different heights. Finally, add one warm LED candle at the side of the bowl, not in the center, so the glow doesn’t flatten the petals. Keep the waterline or foam hidden so the bowl looks clean.
Cut eucalyptus stems at angles; it holds the arrangement shape longer than straight cuts.
Skip mixed colors; once you add cream, blush, and yellow, the bowl loses the crisp monochrome effect.
13. Black runner with pearl-like beads and mini glass vases
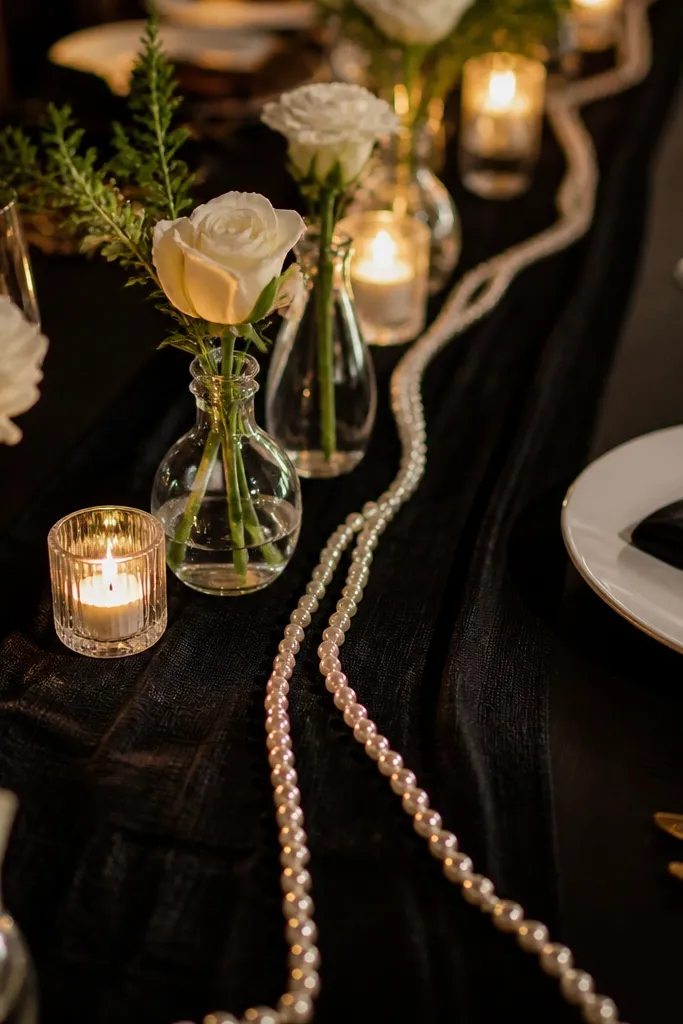
Black linen plus small glass vases reads expensive fast because it creates contrast. Layer a black runner and add pearl-like bead strands along the centerline, then place mini clear vases with single stems or small clusters. The bead strand catches candlelight and adds sparkle without needing glitter. This look works best for winter weddings, evening receptions, and couples going for glam with a modern edge. It’s also great if your floral budget is small — the decor carries the table.
First, iron the black runner so it falls flat and doesn’t ripple. Next, lay a bead strand down the runner center and secure with clear tape underneath. Finally, place 5-7 mini vases evenly spaced along the beads, with stems trimmed to the same height. Keep beads away from plate edges so the dining area stays clean.
Quick tipUse clear tape sparingly and place it under the runner seam so it doesn’t show in close photos.
Skip thisDon’t let beads spill into the place setting; it looks messy and distracts from the plates.
14. Silver mercury glass vases with pale greenery and white candles
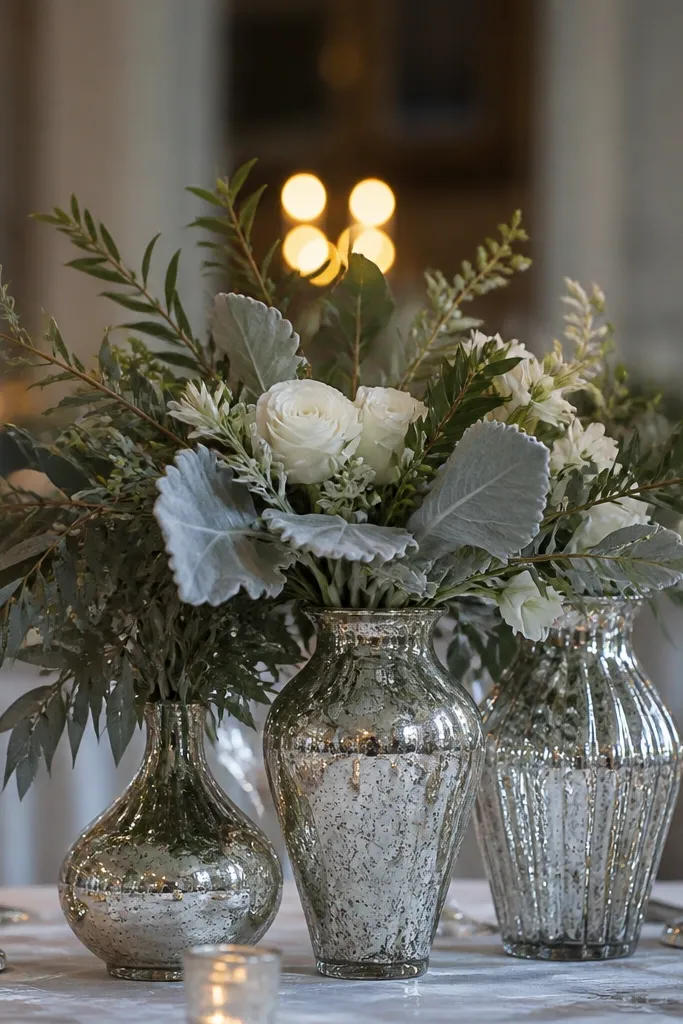
Mercury glass has that old Hollywood shine that looks pricey in almost any venue. Use silver mercury vases grouped in odd numbers and fill them with pale greenery like dusty miller or olive-toned leaves plus a few white blooms. Add white candles in slim holders to keep the look refined. This setup is perfect for classic indoor receptions and winter events. It also handles mixed lighting well because the vases reflect it back in a flattering way.
First, pick a consistent vase size set (same height family) so the cluster looks intentional. Next, arrange greenery first, then tuck white blooms only at the front of each vase so the cluster reads cohesive from one angle. Finally, place three white candles in line across the front of the cluster, keeping spacing equal. Use warm LED candles if real candles aren’t allowed.
Quick tipWipe mercury glass with a microfiber cloth right before setup to remove haze from handling.
Skip thisSkip random vase sizes; mismatched heights make the cluster look like leftovers.
15. Terrarium-style glass cloche with moss and micro florals
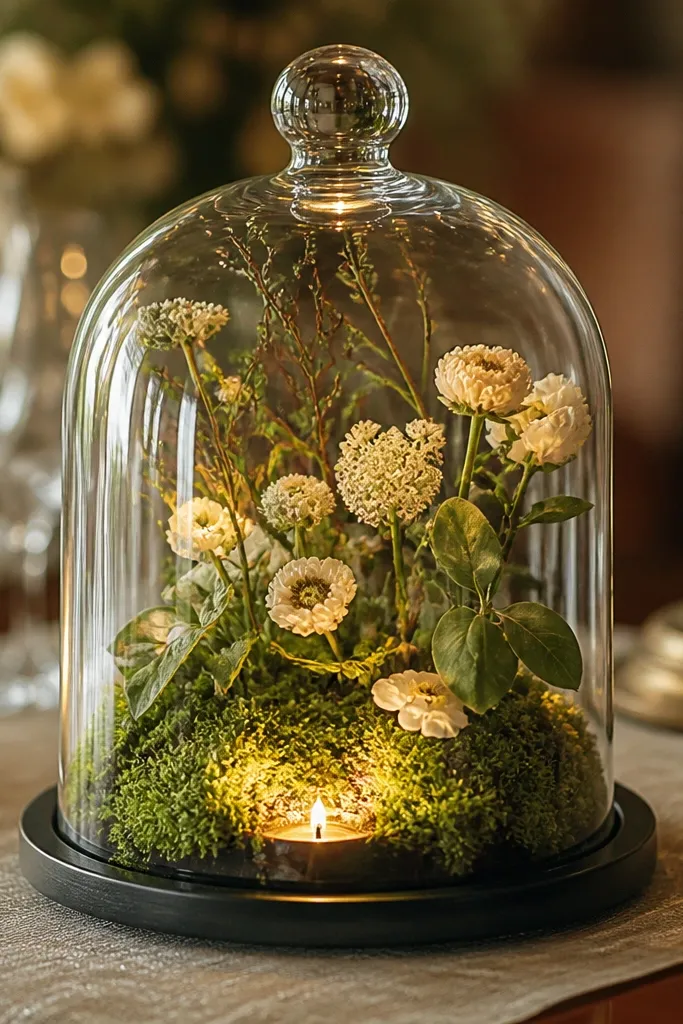
A cloche reads like a designer detail because it creates a contained, curated scene. Place a glass cloche over a base of moss and micro florals in cream and soft green. Add a tiny warm LED tea light under or beside the base so the moss glows gently. This works for intimate tables, head tables, or any reception where you want a “slow-looking” centerpiece that still photographs well. It’s especially good for indoor fall and winter weddings.
First, build the base inside a shallow tray so it lifts cleanly and doesn’t spill. Next, position moss evenly and place 3-5 micro florals in a small triangle under the cloche. Finally, add a warm LED tea light at the base and set the cloche on top once everything is centered. Keep the cloche handles or knobs aligned so photos look tidy.
Bring a lint roller; moss sheds and it shows fast on light tablecloths.
Don’t overfill the cloche; too many flowers flatten the scene.
16. White rose and candle lanterns on a dark wood table
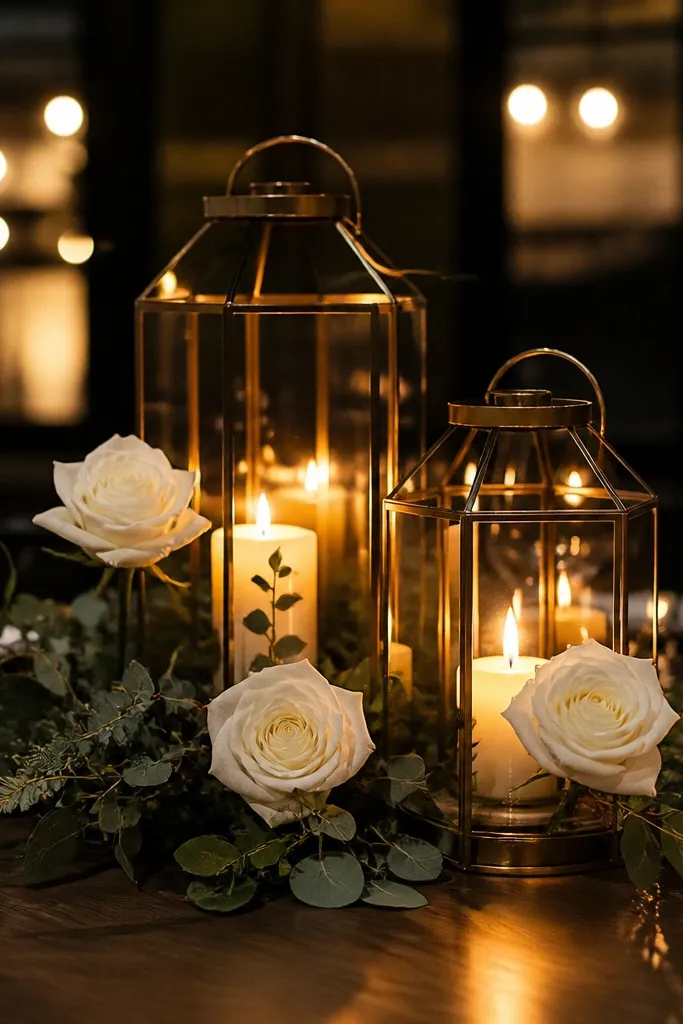
Lanterns add height and a built-in light source, which is why they look expensive even with modest flowers. Use two to three lanterns in the center area and fill them with warm LED candles. Add white rose stems tucked at the lantern sides so the floral feels integrated, not pasted on. Dark wood tables make this look extra rich because the lantern glow contrasts with the surface. It’s a strong choice for outdoor receptions with covered lighting or indoor rustic venues.
First, clear the center area and set lanterns on a tray or runner so they don’t slide. Next, place roses in short vases or foam pockets at the lantern openings so the stems stay upright. Finally, keep greenery minimal and repeat one green tone in every lantern. Use the same candle height across lanterns for a clean photo line.
Quick tipPick lanterns with glass panels that are clear, not smoky, so the candle light reads bright.
Skip thisSkip mixed lantern finishes; silver and black together look chaotic unless the whole table matches.
17. Single-color hydrangea mound with mirrored base
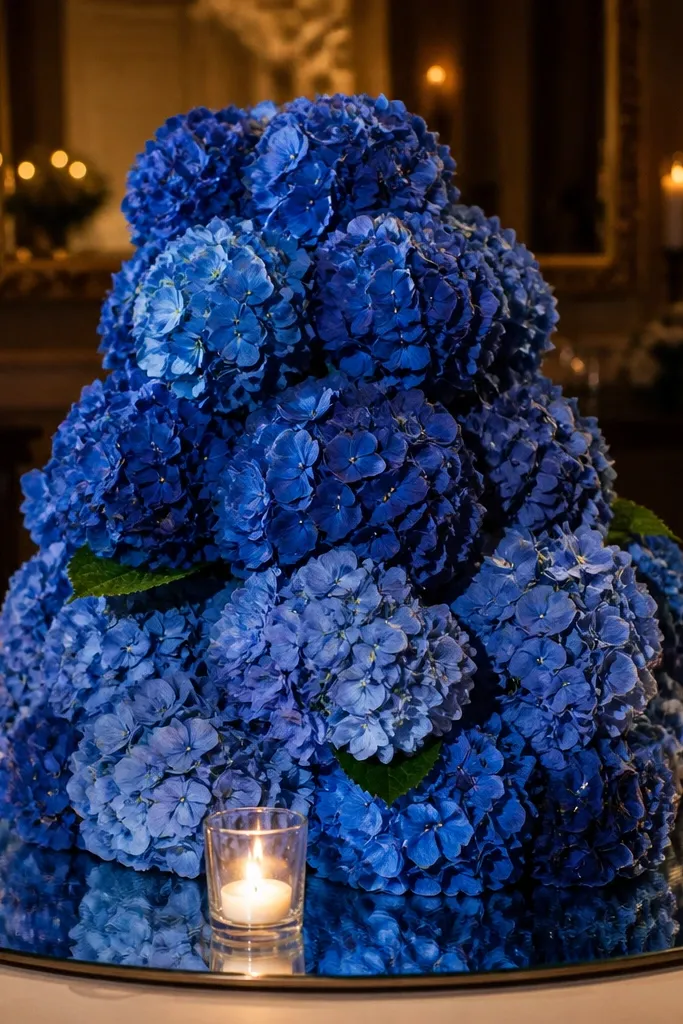
Big hydrangea heads look expensive because they read full and sculptural. Build one mound per table centerpiece using a single color hydrangea (blue, white, or mauve) and place it on a mirrored charger or reflective tray. Add just two or three votive candles on the mirrored base edges. The mirror makes the hydrangea look even fuller in photos, while the minimal candles keep the look sleek. This works in spring, summer, and early fall when hydrangea is visually at its best.
First, choose a centerpiece base that reflects light, then place it dead center. Next, secure hydrangea stems in a hidden foam block so the mound doesn’t sag. Finally, add votives at the front corners and keep the rest of the table open. Use warm LEDs so the hydrangea color looks true under reception lighting.
If your hydrangea is fresh, spritz it lightly the morning of setup so petals look crisp under flash.
Don’t mix hydrangea colors; it kills the clean “mound” shape.
18. Rose-gold frame with floating taper candles
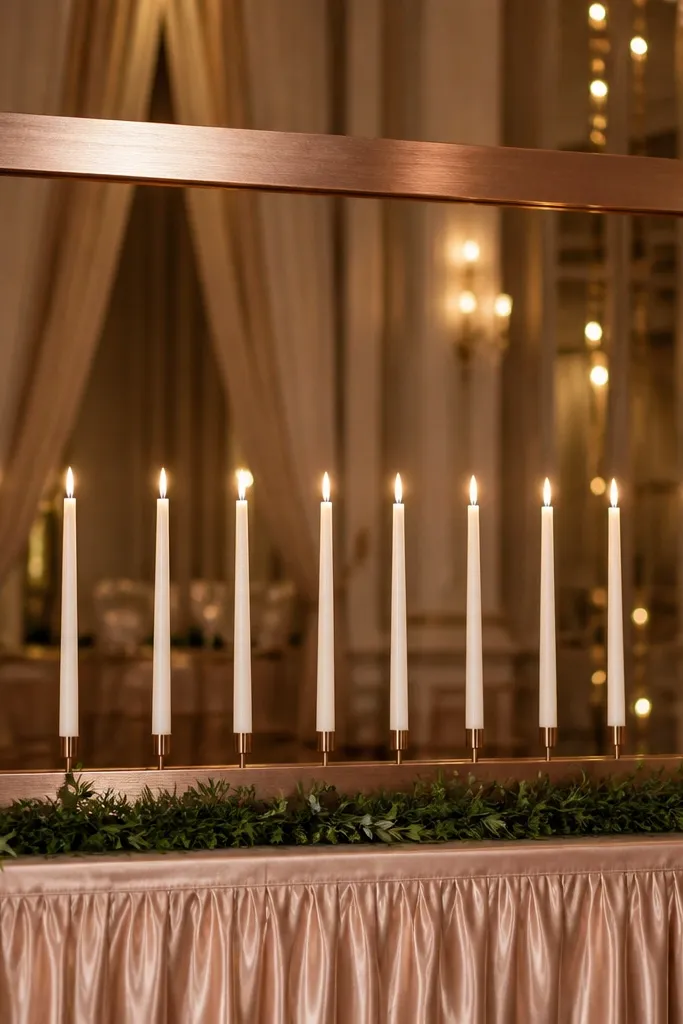
This is a styling trick that looks custom without custom work. Use a rose-gold picture frame as a backdrop and arrange taper candles along the frame base so it looks like a designed candle display. Add a thin strip of greenery or small rose stems at the bottom edge so the frame feels intentional. Rose gold photographs warm and polished, especially with blush linens or ivory tablecloths. It’s best for sweetheart tables, head tables, and any reception where you want height without a tall floral installation.
First, place the frame on a stable base or a wide charger so it doesn’t wobble. Next, position 3-5 taper candles evenly across the bottom line of the frame using holders that match the frame finish. Finally, add greenery only along the bottom edge and keep the center clean. Use LED tapers for safety and to keep the look consistent across tables.
Test the frame angle from guest seating distance; tilt it slightly to avoid glare in photos.
Skip thick garlands across the frame; the frame disappears and the candles lose focus.
19. Matte black vase with long pampas and white blooms
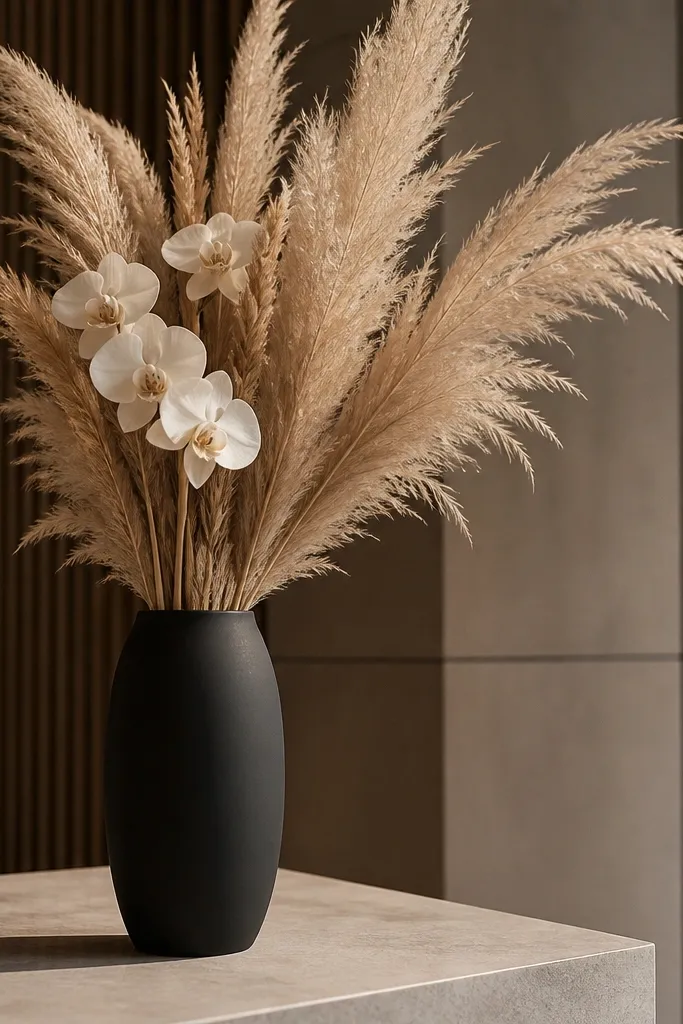
Matte black vases turn neutral decor into a modern, expensive-looking statement. Use long pampas grass for texture and height, then add a few white blooms for contrast. Keep it controlled: one vase per table or two max, with the pampas leaning slightly toward the center. This looks great in minimal venues and modern reception halls because it creates a strong silhouette. It’s also excellent for fall weddings when you want neutral warmth without heavy color.
First, choose a matte black vase tall enough that pampas reaches about 18-24 inches above the vase rim. Next, bundle pampas and tie with a ribbon or florist tape to keep the silhouette clean. Finally, insert 2-4 white flowers at the top third so they don’t get lost. Arrange the vase so the pampas direction faces the main guest view.
Quick tipUse a fabric-safe hairspray on pampas lightly to reduce shedding during setup.
Skip thisDon’t use multiple pampas colors; stick to one neutral tone so it reads intentional.
20. Glass cloche runner with mini gold ornaments and candles
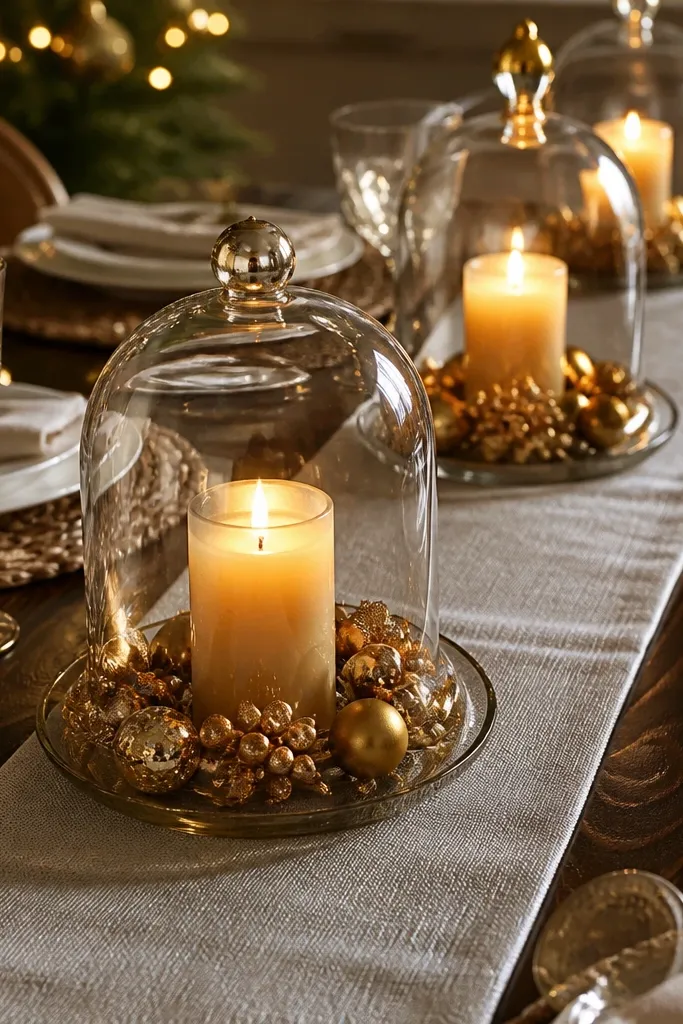
If you want a table that looks styled from every angle, use small cloches spaced along the runner. Put a warm LED candle under each cloche and add mini gold ornaments or faux berries around the candle base. The cloche shape hides mess and makes the centerpiece feel designed, not random. This setup is excellent for winter and holiday-adjacent weddings where you want glam without thick floral installations. It also works on round tables because the cloches create a repeating pattern around the surface.
First, measure the runner length and decide how many cloches fit with 10-12 inches between them. Next, place cloches and set LED candles inside, then add mini gold ornaments at the base level. Finally, finish with one low greenery strip across the runner edges so the cloches don’t float visually. Keep ornament color consistent across every cloche for a clean look.
Quick tipUse battery candles with a consistent flame pattern so photos don’t show uneven lighting between cloches.
Skip thisDon’t mix cloche sizes; it breaks the pattern and reads cluttered.



