
1. Fresh Meadow Arch With Ribbon Ties
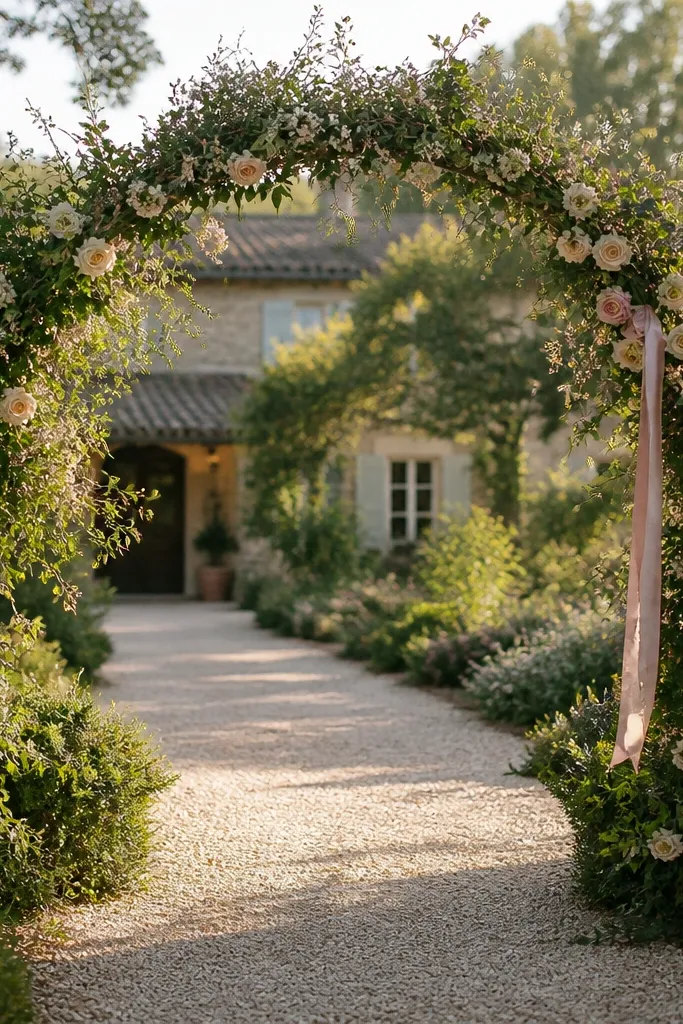
A meadow-style arch gives you an immediate “walk-through” moment that photographers love because it frames faces naturally. Go for a mixed greenery arch with small blooms (think ranunculus-size heads or similar) rather than big statement flowers that look heavy in photos. The ribbon ties add movement in photos without needing extra props. This entrance works best for outdoor ceremonies, garden venues, and any place where you can place a freestanding arch on a flat surface. In summer, keep the blooms smaller and lean — the entrance stays bright instead of collapsing.
Start by choosing an arch width that matches your photo zone — aim for 6-8 feet wide. Then build the color plan: one main greenery, one accent flower color, and one neutral ribbon (ivory or sage). Finally, secure the arch with sandbags or weighted bases on both legs and tie ribbons at three points so they flutter but don’t tangle with people’s hands. If you’re doing this near a food station, place the arch slightly off-center so trays don’t block the frame.
Bring spare twist ties in your kit so you can fix drooping sections right before the first look.
Avoid giant, top-heavy blooms that droop into the frame and blur in photos.
2. Candle-Lit Doorway With Glass Lantern Cluster
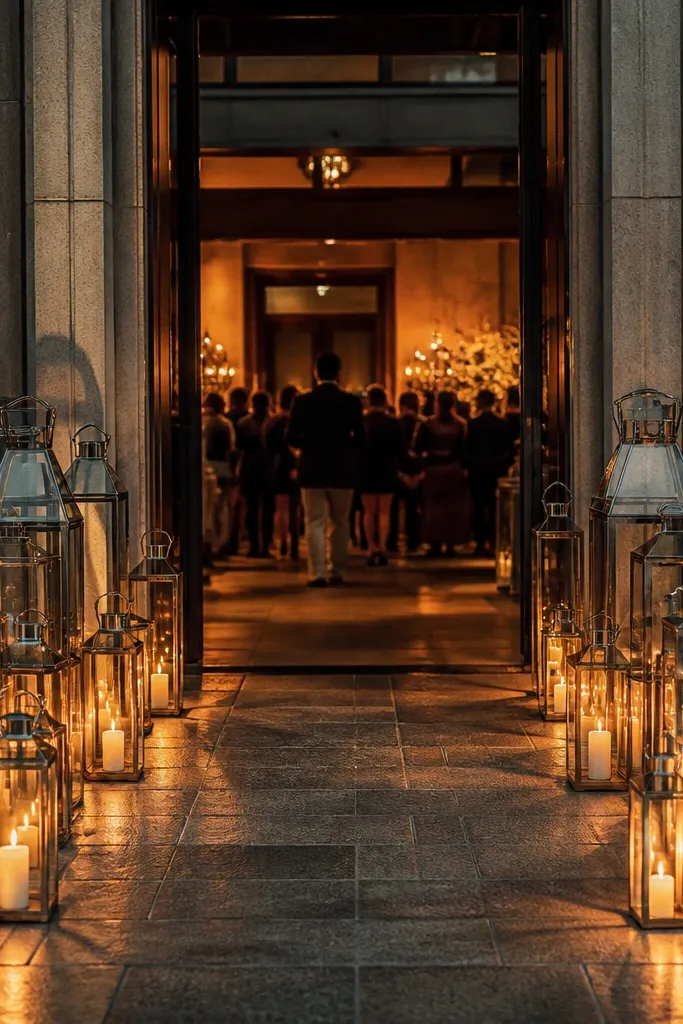
If your entrance is a doorway or hotel corridor, lantern clusters create a “warm glow” that reads beautifully in photos. Use glass lanterns so the light reflects and looks dimensional, especially at dusk. Keep the cluster tight enough to form a visual wall, but spaced so guests can walk through without brushing them. This works for indoor venues, covered patios, and nighttime ceremonies where you want cozy, intimate mood. It’s also a smart choice when you can’t hang anything from the ceiling.
Start by measuring the doorway width and plan a cluster that fits within it — leave at least 12 inches of clearance on each side. Then use battery candles or real candles only if the venue allows and you have safe placement; real flame looks best but requires approval. Finally, set the lantern bases on weighted trays or board bases so the cluster doesn’t slide when doors open. For food guide wedding decor planning, keep food trays away from the lantern line so the glow doesn’t reflect off chaotic toppings near the lens.
Use warm white candles (around 2700K) so photos don’t go blue.
Avoid mixing cold blue LEDs with warm candles — it makes the entrance look uneven in every shot.
3. Fabric Backdrop Wall With Oversized Pom Poms
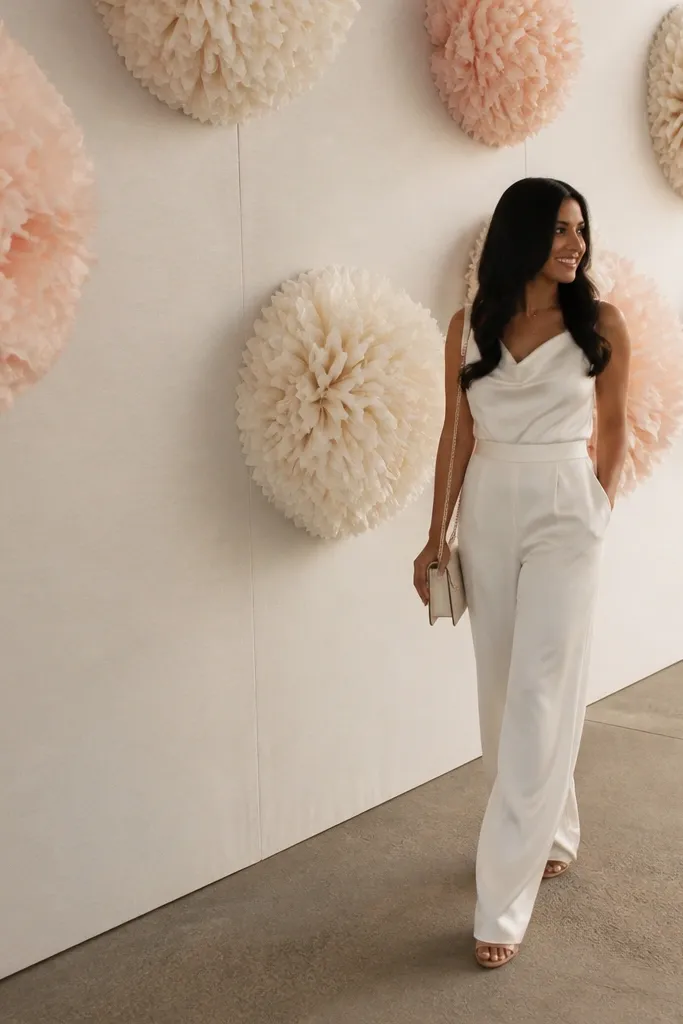
A fabric backdrop wall is a lifesaver for venues that don’t have a naturally photogenic entrance. Choose a matte fabric like cotton or linen-look so it doesn’t glare in flash. Oversized pom poms add playful texture and scale, which makes the first-look photos pop even when the venue is plain. This is best for indoor receptions, banquet halls, and any space with a blank wall near the entry. It also handles wind poorly compared to freestanding arches, so keep it indoors or under a covered area.
Start by picking a backdrop width that matches your main photo — 8-10 feet usually covers two people comfortably. Then hang the fabric on a floor stand or tension rod system that won’t scratch walls; keep it taut with clips every 8-12 inches. Finally, place pom poms in a staggered grid: two rows, with one color as the anchor and one color as the accent. If you’re adding a snack table nearby, place the table one step to the side so the backdrop stays the clear hero.
Press fabric flat with a steamer the day before so it doesn’t show wrinkles in flash photos.
Avoid shiny satin backdrops — they reflect overhead lights and blow out highlights.
4. Balloon Arch in One Color, Matched Ribbon Drops
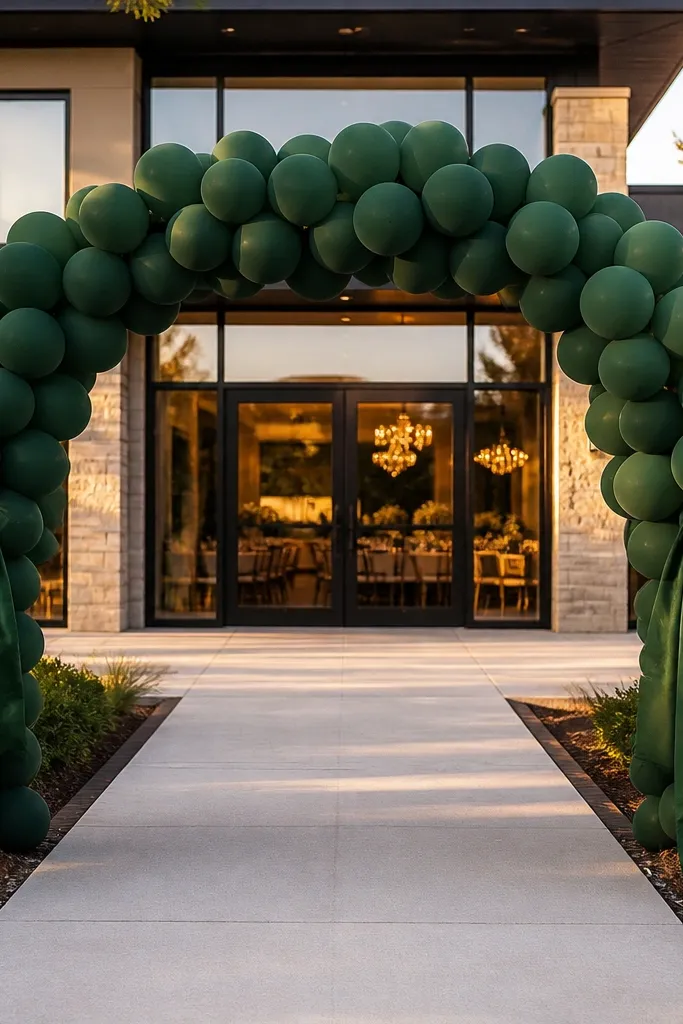
A single-color balloon arch looks clean and modern in photos when it’s done with discipline. Choose one color family (champagne, deep green, or dusty rose) and keep the balloon palette tight — too many shades turns it into a party wall. Add ribbon drops to bring motion and give photographers something to frame without clutter. This works for both indoor and outdoor entrances, especially when you want a ceremony-ready look without heavy installs. It’s also a great option for short timelines because balloon setup can be fast.
Start by selecting balloon shades that match your wedding palette and choose a finishing balloon type (matte or semi-matte looks better than high-gloss). Then build the arch with a pre-made frame or a secure base so it stands straight; anchor the legs with weights. Finally, attach ribbon drops at consistent heights — around chest level — so the ribbon doesn’t end up dragging across shoes. For food guide wedding decor planning, keep the balloon line separate from snack trays so balloons don’t float too close to food or drinks.
Quick tipUse matte balloons and keep ribbon widths around 1-2 inches for a more polished look.
Skip thisAvoid multicolor “confetti” balloon mixes — they look messy in wide-angle first-look photos.
5. Greenery Runner Aisle Border With Candle Posts
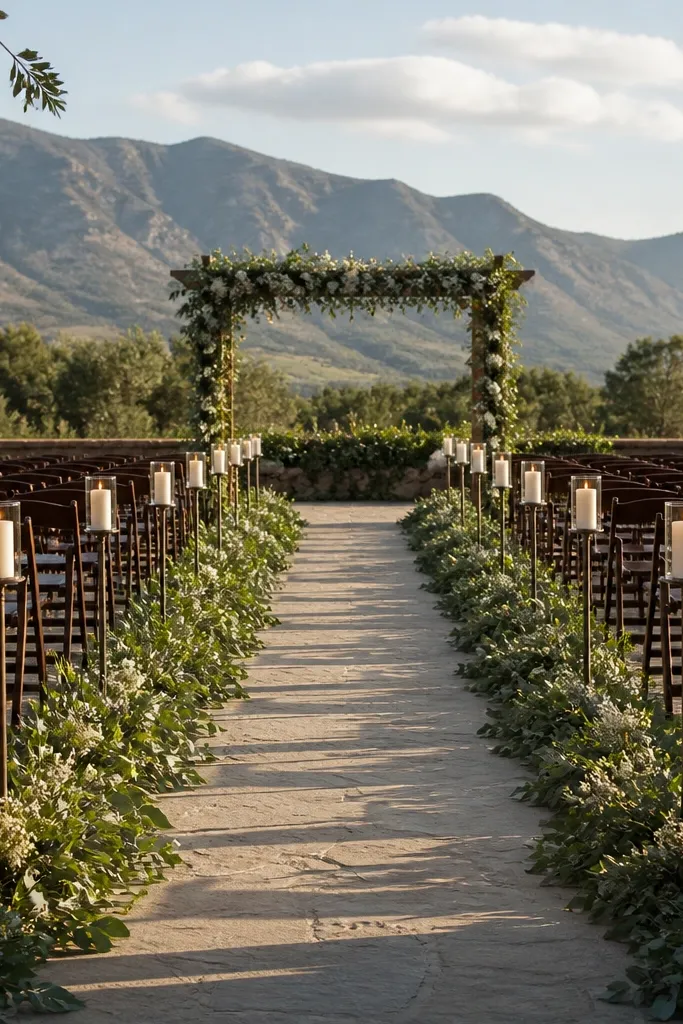
If your entrance leads into a walkway, the trick is to frame the path, not decorate the doorway. A greenery runner border guides the eye straight to the ceremony space, and candle posts add warmth without blocking movement. This idea photographs well because it creates strong leading lines — your first look has a clear direction. It works best indoors with a defined aisle or outdoors along a walkway that you can line safely. Keep it lower than knee height so guests don’t feel crowded.
Start by laying down a runner or using an existing walkway line as your reference, then place greenery clusters along the edges at 2-3 foot intervals. Then add candle posts or pillar candles on weighted bases at every other cluster so the entrance glow repeats. Finally, secure everything with zip ties or stakes so it doesn’t shift as people walk through. For food guide wedding decor planning, keep the snack area behind the first candle line so guests don’t create drag marks across your greenery.
Quick tipPlan candle spacing so the flame is never directly under where the photographer will stand.
Skip thisAvoid tall greenery that spills into the walking lane and makes the path look crowded.
6. Oversized Floral Planters On Either Side
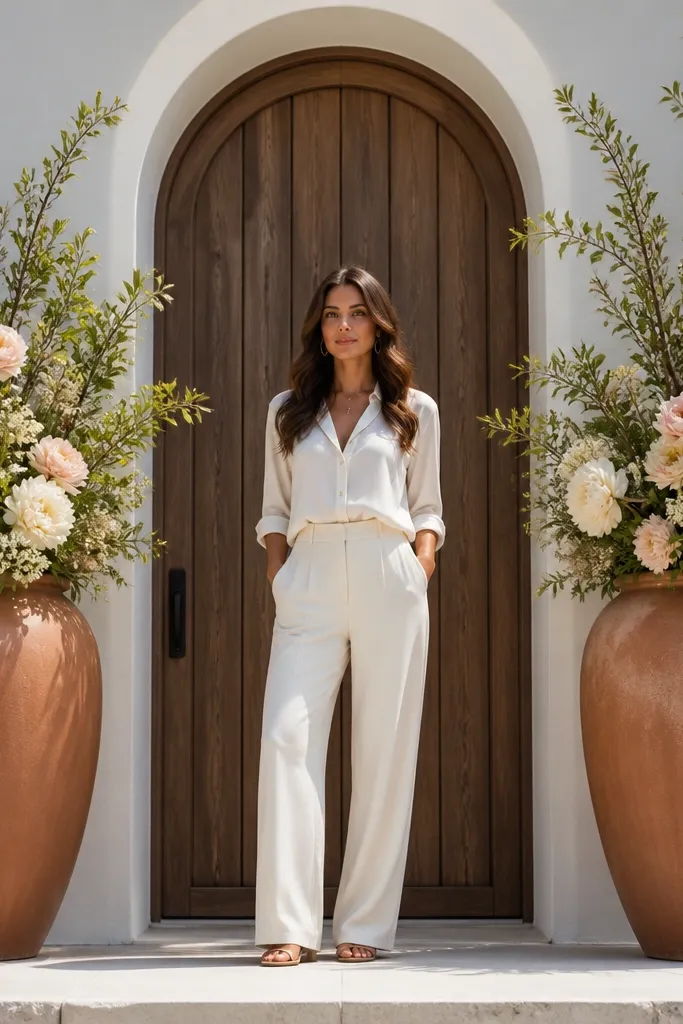
Oversized planters make an entrance feel designed even if you have a plain wall or parking-lot entry. They create instant symmetry, and symmetry is what makes first-look photos feel “put together.” Choose planters that match your venue style: matte ceramic for modern spaces, woven baskets for rustic. This works in gardens, outdoor ceremony spots, and indoor venues with sturdy floors. It’s also practical because you can reuse the plants later as part of a reception lounge.
Start by picking two matching planter sizes (think 18-24 inches wide) so the scale reads correctly in wide shots. Then fill with a mix: one tall greenery element, one medium filler, and one anchor flower color. Finally, place them at the entrance corners so the center path stays open; add saucer trays or foam blocks to keep stems stable. For food guide wedding decor planning, keep planters away from the serving line so guests don’t brush petals while grabbing snacks.
Quick tipUse foam blocks or oasis inside planters if you’re doing fresh florals — it keeps stems from collapsing in heat.
Skip thisAvoid mismatched planter heights — it breaks symmetry and your photos look off.
7. Floating Candle Centerpiece On Entry Table
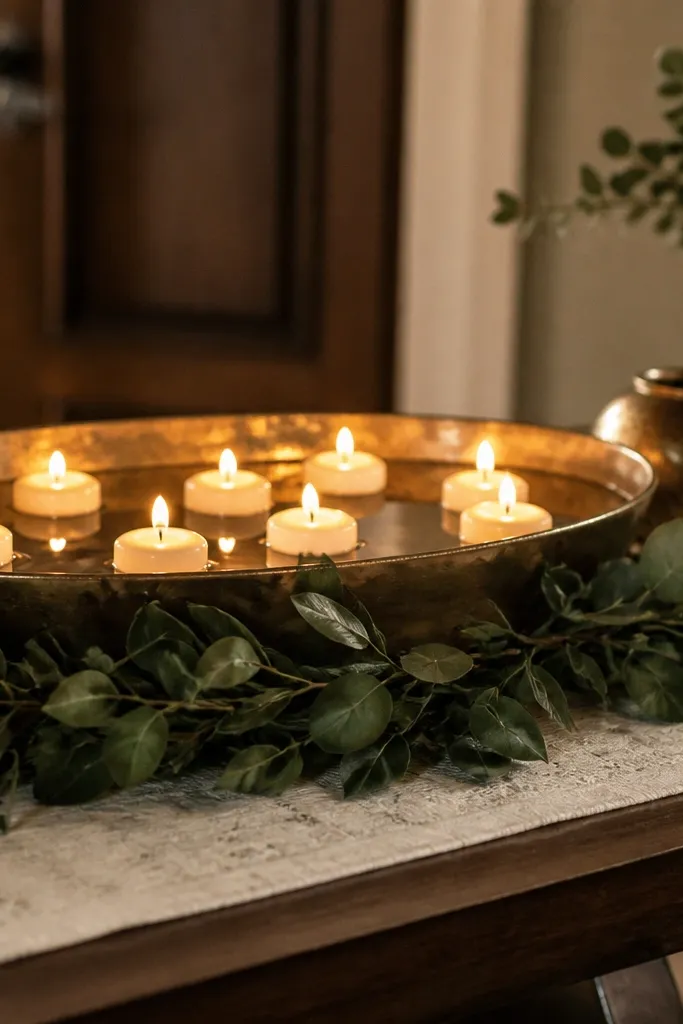
A long entry table with floating candles looks elegant and photogenic, especially when it’s the first place guests stop. Floating candles in a shallow tray create a calm, glowing surface that reads beautifully from across the entrance. Add a low greenery garland so it doesn’t block faces. This idea is best for venues that have a landing area near the entrance, like a lobby table or reception entry. It also pairs well with a “guest welcome” moment without turning into a crowded buffet.
Start by choosing a table length that matches your entry — 6-8 feet works well for photos. Then lay a low garland down the center and place floating candles in a shallow water tray or LED tray insert (real water setups need a stable tray and spill-safe plan). Finally, add one tall element at each end like a slim vase so the table looks intentional in both directions. For food guide wedding decor planning, keep the snack trays a few feet away so the floating candle glow stays the photo focus.
Use LED floating candles if you’re indoors with strict fire rules — the look stays clean in photos.
Avoid placing the table too close to the doorway hinge — the movement can knock trays and ruin timing.
8. Minimalist Signage Wall With Framed Menu Cards
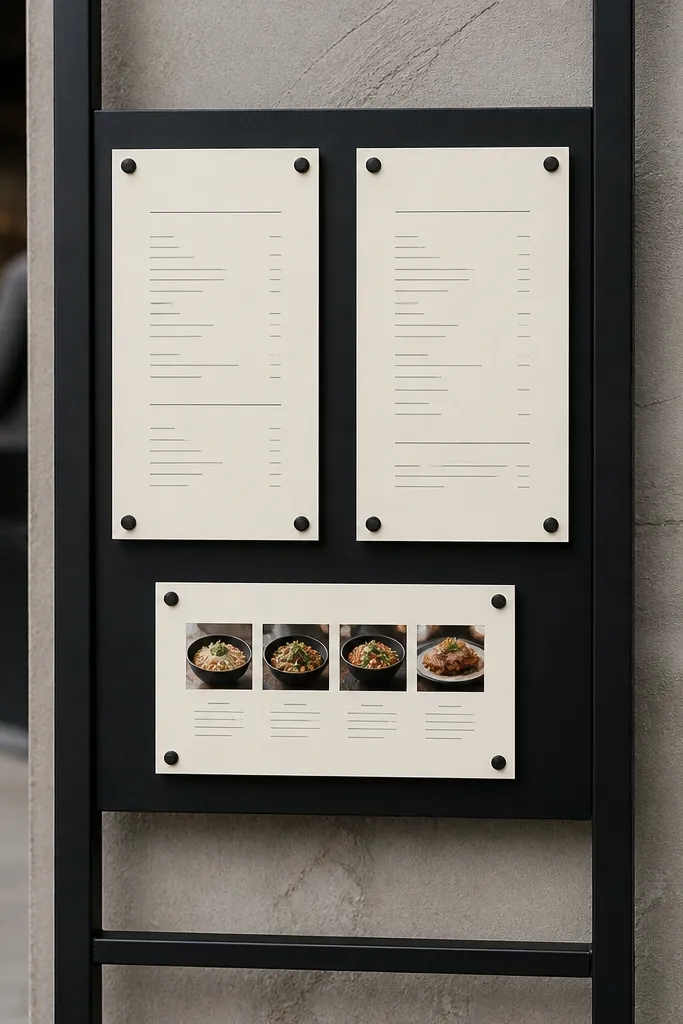
This is the entrance decor that still looks good when it’s packed with people. A minimalist signage wall with framed menu cards gives you a polished “welcome” look and ties directly into food guide wedding decor planning. Use large, readable fonts and high-contrast paper so the signage stays legible in photos. It works for venues with a natural wall near the entrance, like a hotel lobby or restaurant entry. It’s also great for daytime events because the paper tones look crisp even in bright light.
Start by choosing a sign wall width of 4-6 feet so it doesn’t dominate the entrance. Then print or buy menu cards with thick paper (cardstock 110-160 lb) and frame them in matching black or natural wood frames. Finally, hang or stand the frames with consistent spacing at face height; add one hero sign at the center. For a food guide wedding decor planning angle, include a simple snack or beverage guide like “First Look Drinks” or “Dessert Bar” with arrows, but keep it short so it doesn’t look cluttered.
Quick tipUse matte paper and avoid glossy lamination — glare ruins readability in photos.
Skip thisAvoid too many lines of text — busy signage turns into visual noise in wide shots.
9. Hanging Paper Lanterns With Neutral Pom Accents
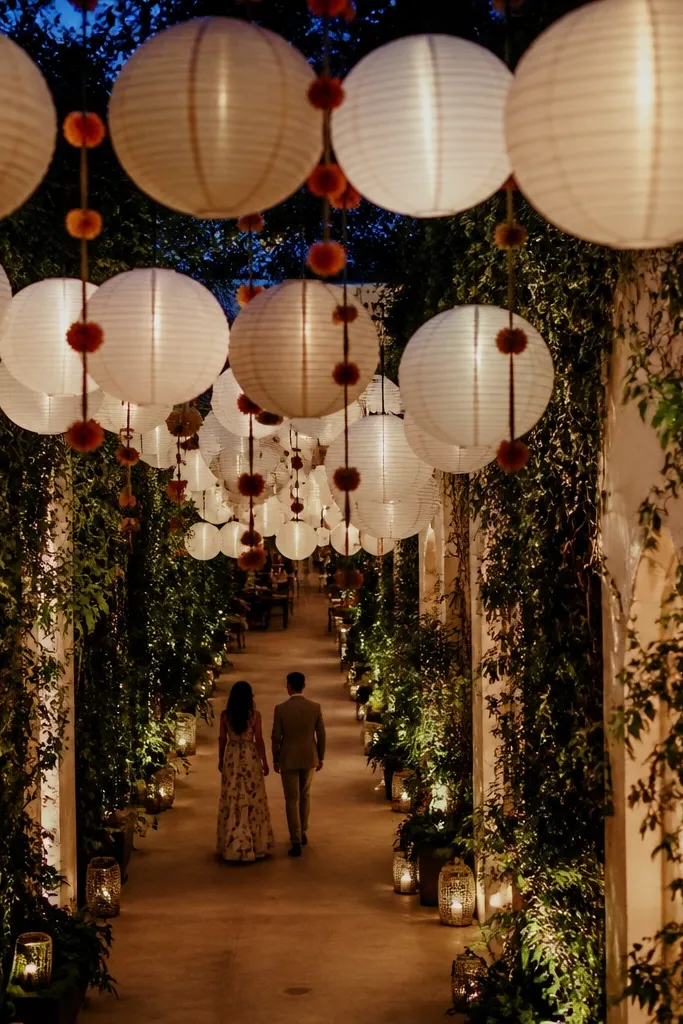
Hanging paper lanterns create a ceiling-level moment, which matters because the entrance photos often include height. Choose lanterns in neutral tones (ivory, sand, soft taupe) so they don’t compete with florals or clothing. Add small pom accents in one accent color so the entrance feels coordinated. This works best under a canopy, in a courtyard with string lights, or indoors with permission for hanging. It’s also perfect for evening ceremonies because lanterns give warm glow without needing a full arch.
Start by measuring the ceiling height and string length — keep the lowest lantern edge at least 7 feet from the floor. Then hang lanterns in a staggered pattern: bigger lanterns at the center, smaller ones toward the sides. Finally, secure the hanging points with proper hardware and tie-off knots so they don’t drift with wind. For food guide wedding decor planning, keep food stations below the hanging line out of the photo axis so the lanterns stay the top visual anchor.
Quick tipUse lanterns with pre-installed cords and test one height level before you commit.
Skip thisAvoid hanging too low — it blocks heads in first-look photos and looks cramped.
10. Natural Wicker Basket Welcome With Dried Florals
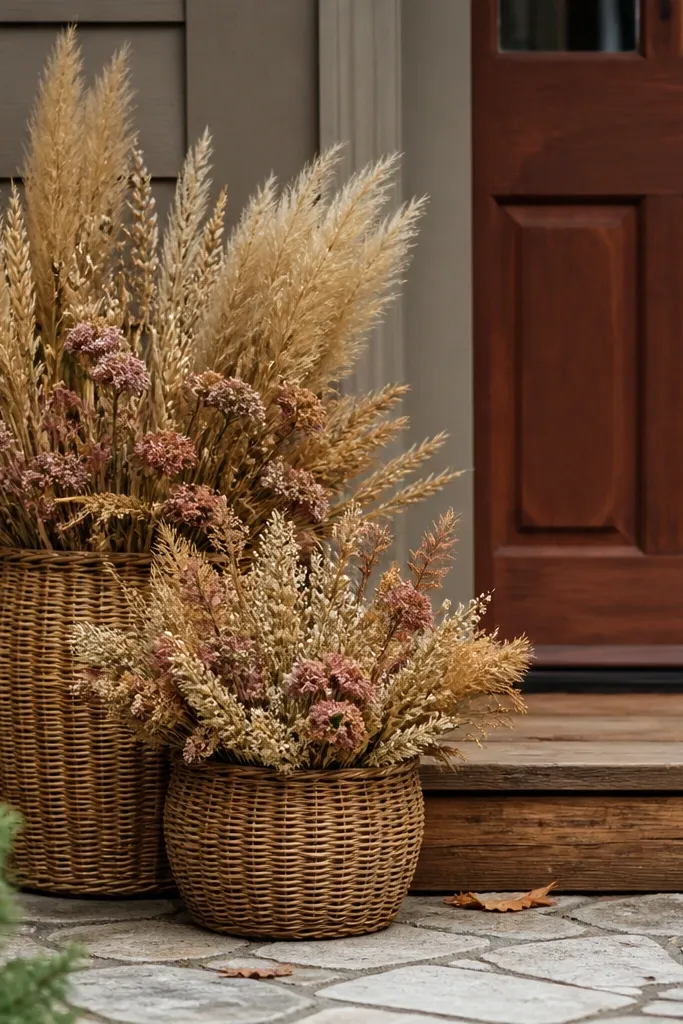
Dried floral baskets look warm, intentional, and photogenic without the stress of fresh blooms. Wicker adds texture you can’t fake with fabric, and baskets create a welcoming “hand-hold” feel for guests arriving. This entrance idea is especially good for fall and winter weddings, but it works year-round if you keep colors muted. It’s also budget-friendly because dried arrangements last through the whole event. Use this when your entrance is tight and you need decor that won’t block traffic.
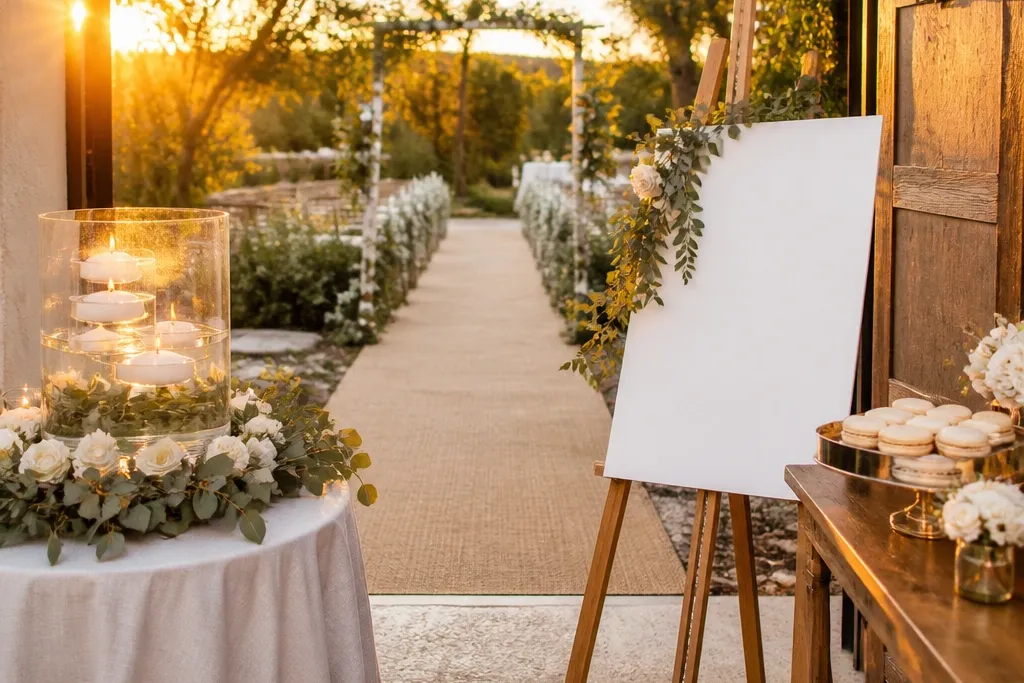
Start by choosing two to four wicker baskets in matching sizes and set them along the entry line, leaving a clear center path. Then build each basket with dried florals in one accent color plus neutral fillers like pampas-style grass or wheat tones. Finally, add a welcome sign on an easel or a small framed board inside the basket line, not in the center. For food guide wedding decor planning, place this near the check-in or beverage table so the baskets guide guests to the right spot without clutter.
Use floral foam or a mesh insert so dried stems stay upright and don’t shed onto floors.
Avoid bright neon dried colors — they look harsh and cheap in daylight photos.
11. Rose-Quartz Table Runner With Tea Light Grid
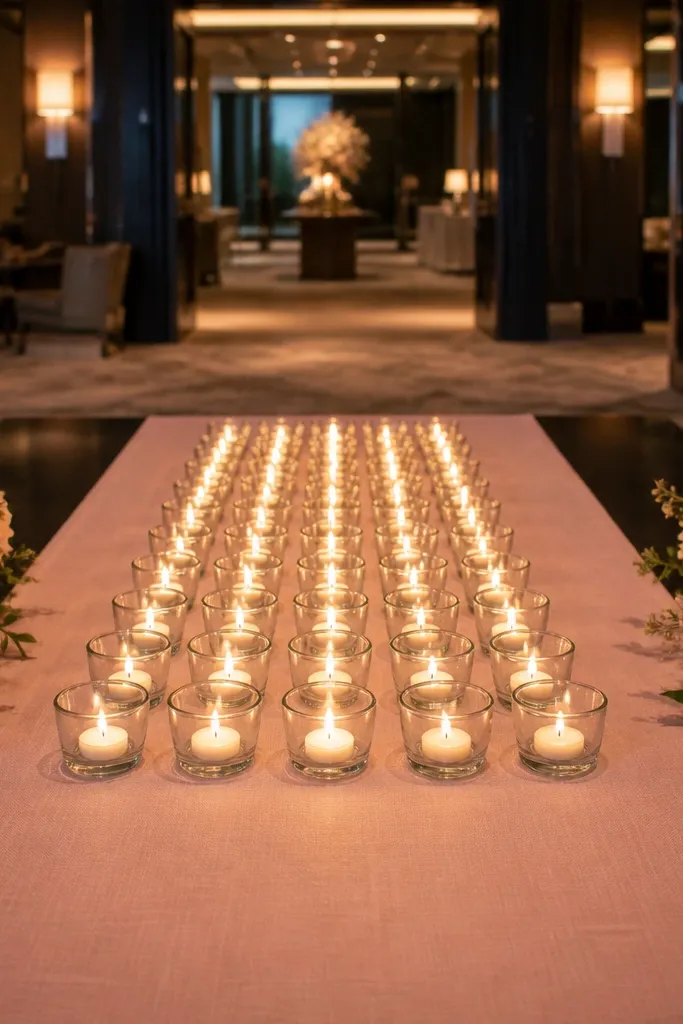
A table-runner entrance makes your first look feel styled even if you’re working with a simple entry table. Use a blush or rose-quartz runner with a subtle texture, then add a grid of tea lights for a clean, symmetrical glow. This is one of the easiest ways to get a high-end look because the lighting pattern reads well across photos. It works best indoors and at covered entryways. Keep the rest of the entrance minimal so the tea light grid becomes the visual anchor.
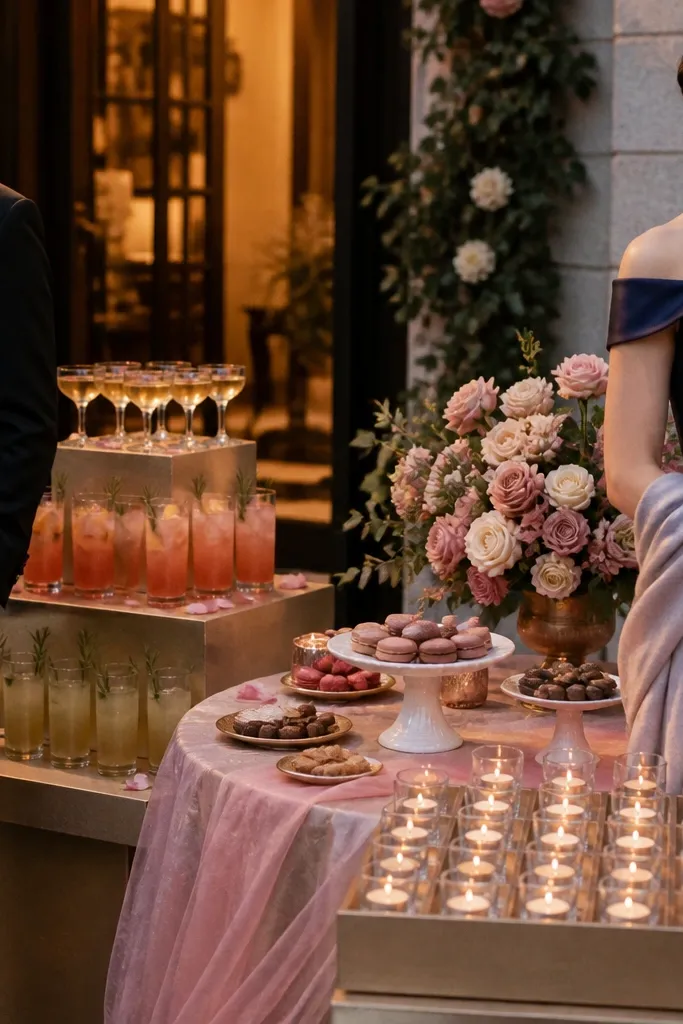
Start by laying the runner so it’s centered and straight — measure the table width and cut or hem if needed. Then mark a grid layout (for example, 4x3 tea lights) so the placement looks even in photos. Finally, set tea lights on heat-safe trays and secure the runner with double-sided tape on the underside so it doesn’t slide. For food guide wedding decor planning, keep the runner table for welcome cards only and move snacks to a separate side table.
Use warm white tea lights and keep wicks short so the flame doesn’t flicker too wildly.
Avoid a runner with heavy glitter — it catches flash and makes the scene look messy.
12. Deep Green Backdrop With Gold Foil Balloon Letters
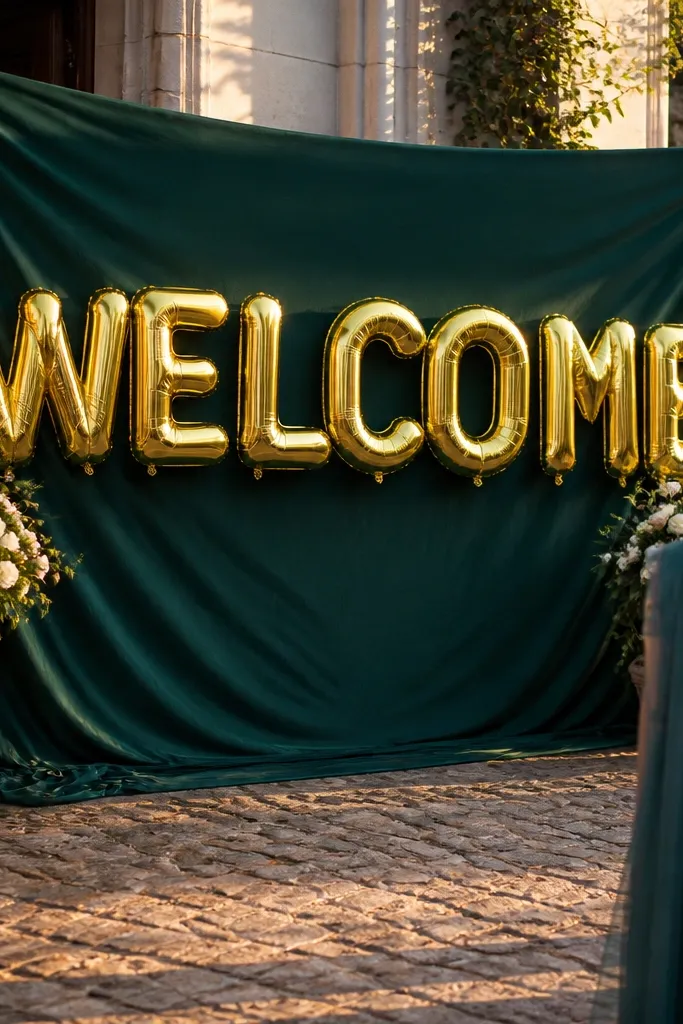
If you want a bold first-look backdrop, pair a deep green fabric wall with gold-foil balloon letters for a high-contrast photo. The letters give you a focal point that reads clearly even when guests move, which is what you need at an entrance. Choose the phrase carefully — “WELCOME” or the couple’s first names only — because too many words turn it into clutter. This works in venues with a clear wall or a rented backdrop frame. It also looks great at night with uplighting or string lights.
Start by selecting a backdrop color that matches your palette and won’t clash with bridesmaid dresses in photos (deep green is a safe anchor). Then place balloon letters at eye level and secure the base so it doesn’t tip when people walk past. Finally, add a thin garland line along the top edge in a matching neutral so the backdrop feels framed. For food guide wedding decor planning, keep the food guide signage separate from the balloon letters — don’t stack text on top of the letters.
Quick tipUse helium balloon letters only if you can keep them indoors or under a covered area — wind will ruin alignment.
Skip thisAvoid tiny letters — they become unreadable in wide first-look shots.
13. Monogram Lighting With Projector Gobo On Entry Floor
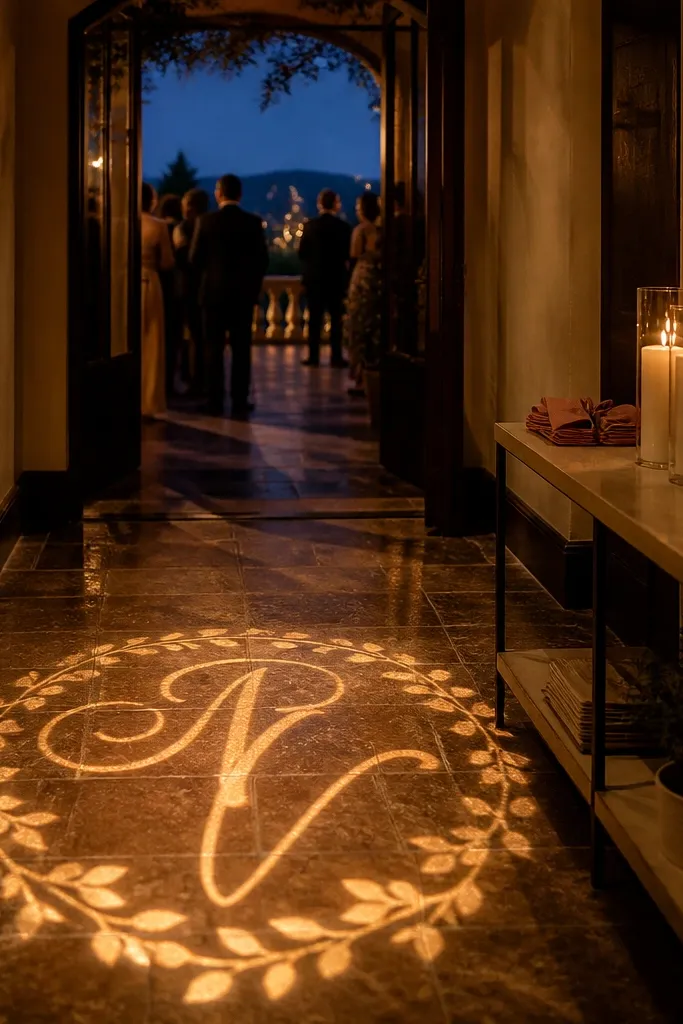
A floor monogram projection is one of the cleanest entrance upgrades because it doesn’t take up physical space. It’s especially good when your entrance is narrow or you can’t place heavy decor. The monogram creates a graphic look that photographers can frame easily, and it adds a “designed” feel without adding clutter. This works best at night or in darker indoor venues where the projection is visible. Pair it with minimal greenery so the scene doesn’t look empty.
Start by renting or borrowing a gobo projector and picking a monogram template that fits your space (aim for a projection about 4-6 feet wide). Then position it so the light lands on the entry floor area that the photographer will use for the first look. Finally, add two side accents like slim candle stands or small planters so the entry doesn’t look bare when the monogram is the main element. For food guide wedding decor planning, keep the food guide sign on the side of the monogram so it doesn’t compete with the graphic.
Quick tipTurn off nearby spotlights that wash out the projection — you want contrast, not brightness.
Skip thisAvoid projecting onto busy patterned floors — the monogram gets distorted and looks messy.
14. Terracotta And Sage Flower Wall Panels
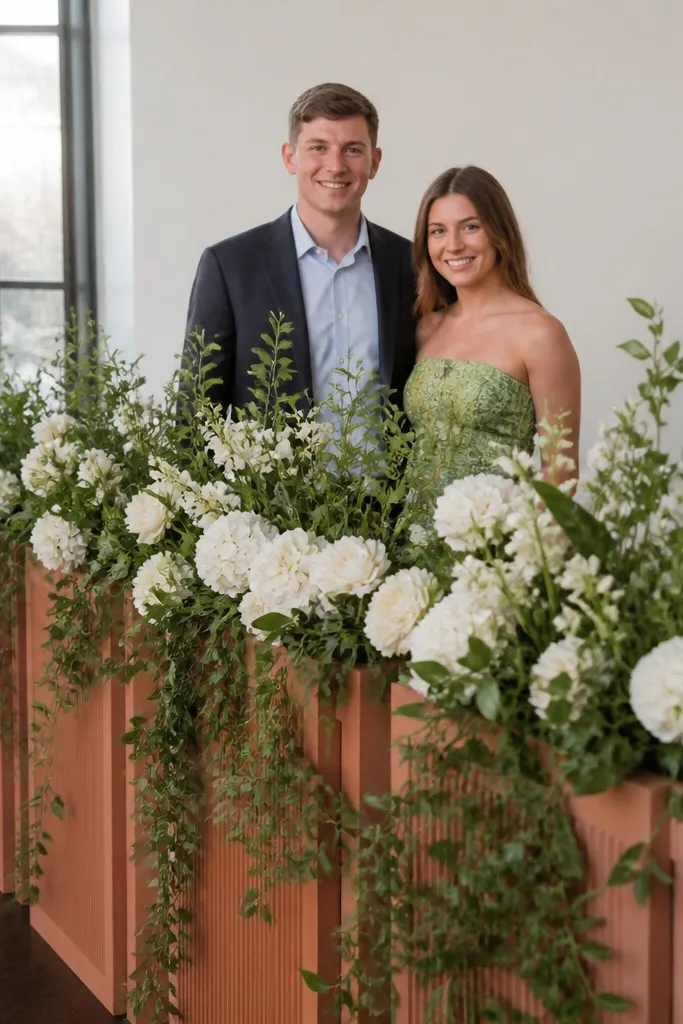
A flower wall made of panels gives you that “first-look wall” effect without needing a full arch. Terracotta and sage is a photo-friendly combo because it looks warm in daylight and still holds color at golden hour. Panels also make it easy to control the height so guests don’t block the top portion. This works for indoor halls and outdoor entrances where you can place panels on either side of a walkway. It’s ideal if you want consistent photos throughout the event because the wall stays put.
Start by renting or building two to three panel sections that add up to your desired width, usually 6-8 feet. Then place the panels on a stable base with weights so they don’t wobble when people pass. Finally, keep the center walkway clear and place your main sign or welcome cards at the side, not in front of the panels. For food guide wedding decor planning, position snack or drink tables behind or beside the panels so the wall stays the hero in first-look photos.
Use matte panel backings in a neutral color so the florals don’t look washed out.
Avoid overstuffing panels — too many blooms create a flat, messy look in photos.
15. Tabletop Welcome Bar On Weighted Risers
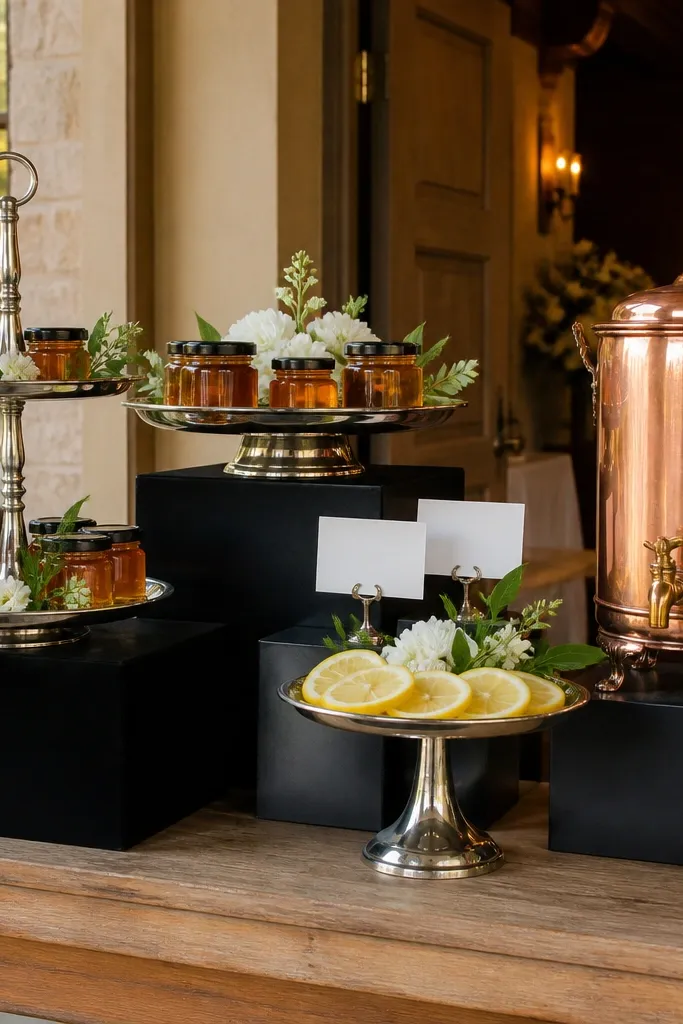
A welcome bar at the entrance is the best way to combine practical guest needs with photogenic decor. Tiered trays and neat labels look clean in photos, and the entrance becomes part of the food story instead of a separate mess. Use weighted risers so the display looks intentional and won’t slide as guests move around. This works for cocktail hour snack setups, dessert tastings, and “first look drinks” moments. Choose a color theme for the table runner and tray accents so the food guide wedding decor planning looks coordinated, not random.
Start by selecting a table size that fits your entry — 4-6 feet wide is usually enough for tiered trays and signage. Then build a two-tier setup: one tier for drinks or napkins and one for small bites; keep everything in a tight color palette. Finally, add a bold sign card with simple arrows like “Start Here” pointing toward the snack bar. For travel logistics, place the bar where it won’t block the photo path and keep it at least 6 feet away from the main first-look backdrop.
Use acrylic menu cards so the signage stays readable without adding bulky frames.
Avoid mixed-height chaos — uneven tray stacking looks sloppy on camera.
16. Ribbon Wand Aisle Entrance With Hanging Tassels
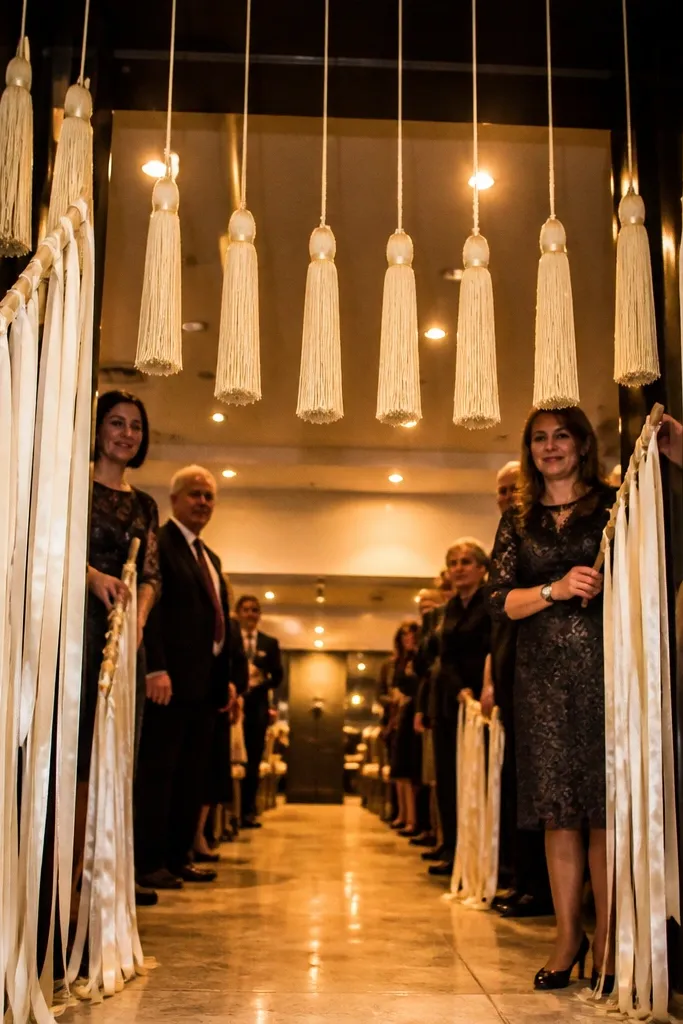
A hanging tassel line above the entrance gives motion and a “wow” effect without taking over the entire space. It photographs well because tassels catch light and create texture above eye level. Pair it with a simple ribbon wand or fabric strip aisle border so the entrance feels coordinated. This works for indoor venues with a permission-friendly setup and for covered outdoor entries where wind won’t shred the tassels. It’s best for smaller weddings where you want impact without heavy florals.
Start by using a lightweight hanging system with secure anchors so the tassels stay straight; keep it centered over the photo path. Then attach tassels in 2-3 staggered rows so the top line looks full but not dense. Finally, add ribbon wands or fabric strips along the sides of the walkway at ankle to calf height so guests feel guided without tripping. For food guide wedding decor planning, keep the tassel line away from buffet tables so the hanging pieces don’t get bumped by passing hands.
Quick tipChoose tassels in two tones max — one neutral and one accent — for a clean photo look.
Skip thisAvoid long tassels that swing into faces — they create blur and awkward photos.
17. Macaron Color Palette Balloon Clusters At Entrance Corners
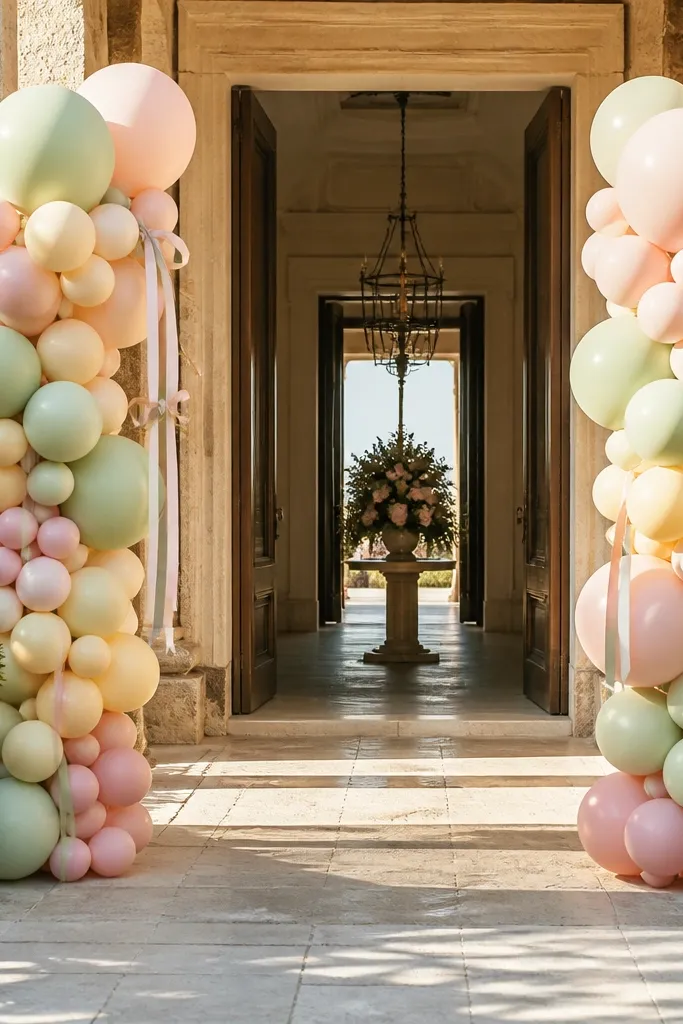
Corner balloon clusters give you color where it matters without building a full arch that can block sightlines. Pastel “macaron” tones look sweet in daylight and still read in evening photos if you keep the balloon finish matte. The key is placement: corners only, leaving a clear center walkway. This works for venues with a defined entrance boundary like a courtyard gate, front steps, or a lobby doorway. It also pairs well with food guide wedding decor planning because you can match the pastel palette to your dessert or drink colors.
Start by choosing four corner clusters max for a clean look — 2-4 clusters depending on entrance size. Then use balloon weights and secure ties so clusters don’t drift toward the center. Finally, add small ribbon tails that match your palette and keep them short enough not to tangle with shoes. For practical planning, keep food tables on the opposite side of the entrance so balloons don’t become background clutter behind trays.
Quick tipKeep balloons to matte finishes and avoid metallic mixes — they can look patchy under warm venue lighting.
Skip thisAvoid balloon clusters in the middle path — it blocks movement and ruins the first-look angle.
18. Terracotta Brick Wall With Dried Palm Fan Backdrop
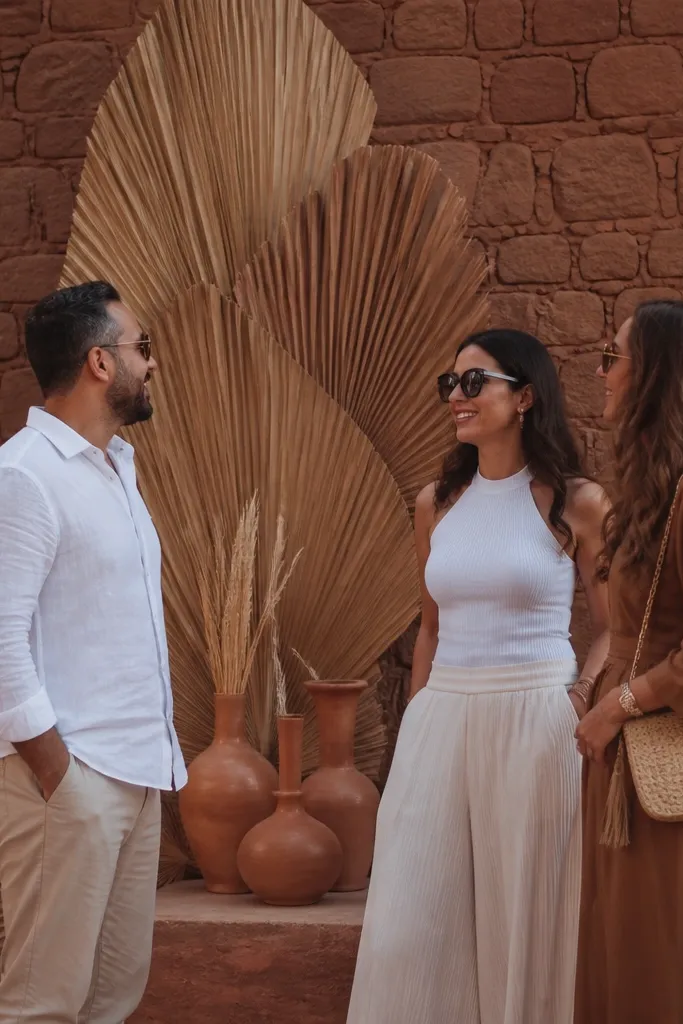
If you have brick, stone, or a warm wall, lean into it with dried palm fan panels and terracotta accents. This creates a textured, travel-inspired entrance that still looks wedding-ready because the materials are intentional. Photographers love this because it looks dimensional without needing a huge install. It’s a strong choice for outdoor venues, courtyards, and rustic indoor spaces. Keep the rest of the entrance simple so the texture does the work.
Start by placing one large dried palm fan backdrop section at the entrance focal point — usually 4-6 feet wide. Then add terracotta-toned elements like small vases, ribbon, or a welcome sign in the same color family. Finally, keep the walkway clear and place two small side candles or lanterns to balance the composition. For food guide wedding decor planning, add a short snack guide sign on a stand next to the backdrop, not in front of it.
Quick tipUse a neutral base mat under dried decor so loose fibers don’t spread onto pathways.
Skip thisAvoid mixing too many dried plant types — it can look like a craft corner instead of a styled entrance.
19. Monochrome Black And Cream Balloon Strip Entrance
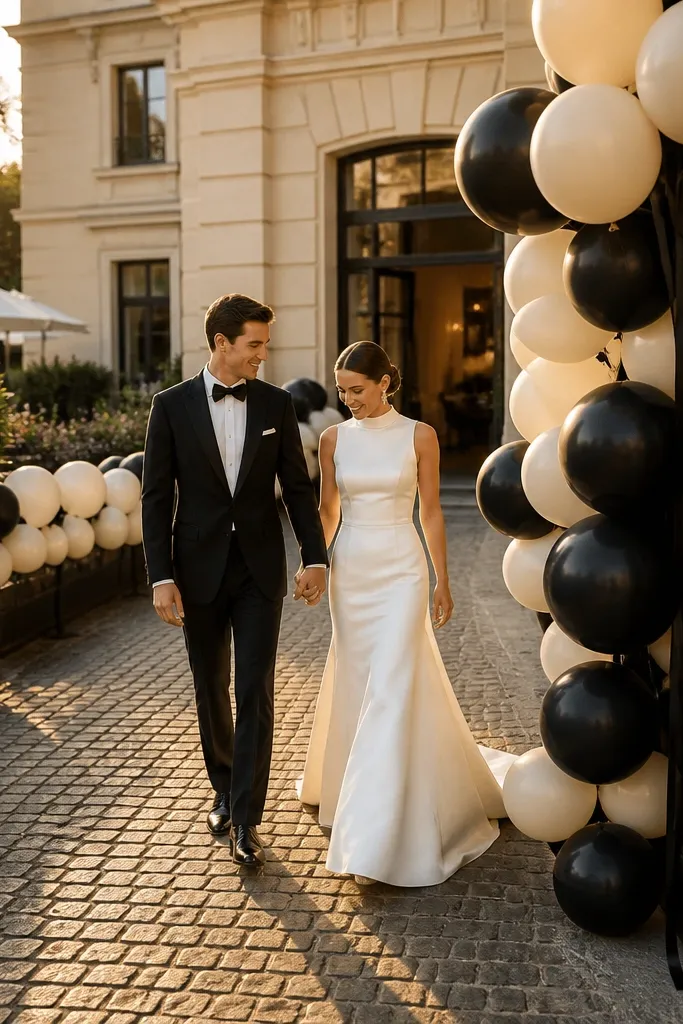
Monochrome balloon strips look graphic and modern, which is great if your wedding style is sleek or you want a “fashion editorial” first look. Black and cream creates contrast that reads well in photos without needing extra decor. Instead of a full arch, use a strip along the entrance edge so guests walk through a defined frame. This is best for indoor venues and covered outdoor entries where balloons stay aligned. It also works when you have limited space and need something that won’t block doorways.
Start by measuring the entrance edge you want to frame and plan a strip that runs 70-90% of that width. Then build the strip with two balloon sizes and keep the spacing consistent so it looks like one design. Finally, anchor the base with weights and add a neutral ribbon tie point at the center. For food guide wedding decor planning, keep the food station behind the strip line so the balloons don’t compete with labels and trays.
Use a matte cream balloon and matte black balloon — glossy mixes can look patchy in flash.
Avoid random balloon sizes — inconsistent spacing makes the entrance look unfinished.
20. Uplight Pathway With White Floral Edge
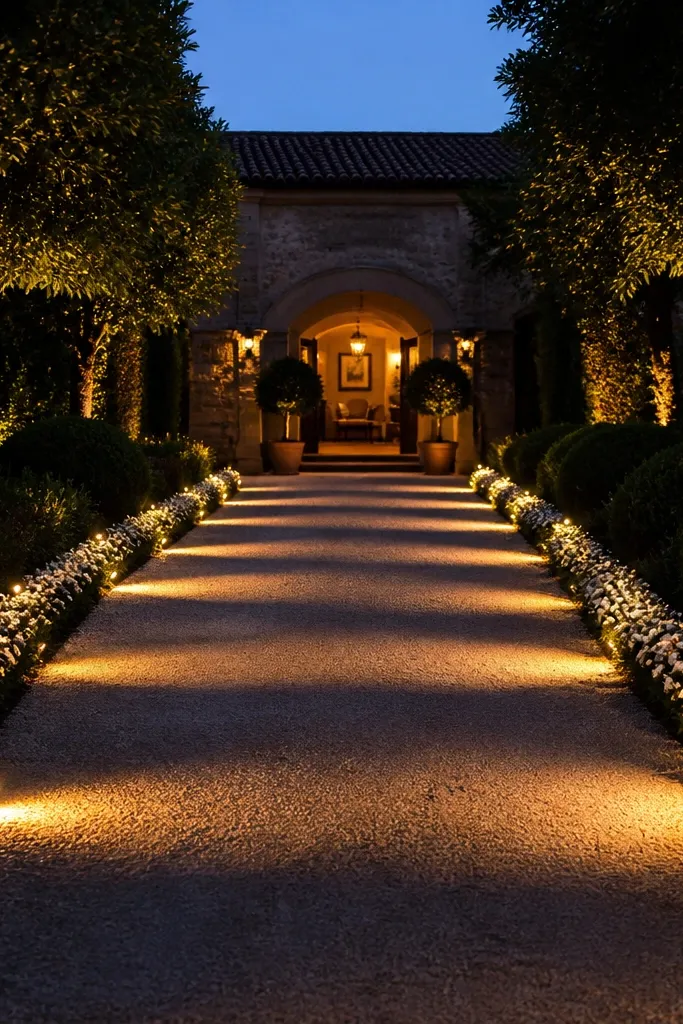
Lighting creates the “cinematic” entrance look, and uplights along the pathway are one of the cleanest ways to do it. Pair warm uplighting with a simple white floral edge so the entrance reads bright and elegant without being busy. This works for outdoor entries at dusk, indoor halls with dark floors, and any venue where you can place small uplights along a safe path. White florals also photograph well because they don’t fight with most wedding color palettes. Keep the florals low and narrow so people can move without touching arrangements.
Start by placing uplights along the pathway edges at even intervals — 3-5 feet apart depending on how narrow the entry is. Then add a low white floral edge using garland or small clusters tied to weighted bases or stakes. Finally, do a quick test photo at the first-look photographer position so you can adjust angles before guests arrive. For food guide wedding decor planning, place food tables off the lit path so the glow doesn’t make labels unreadable.
Quick tipUse warm uplights (around 2700K) so the entrance doesn’t look icy in night photos.
Skip thisAvoid pointing uplights straight up — angled light makes the entrance look uneven and harsh.



