
1. Champagne Linen + Candle Cluster Tables
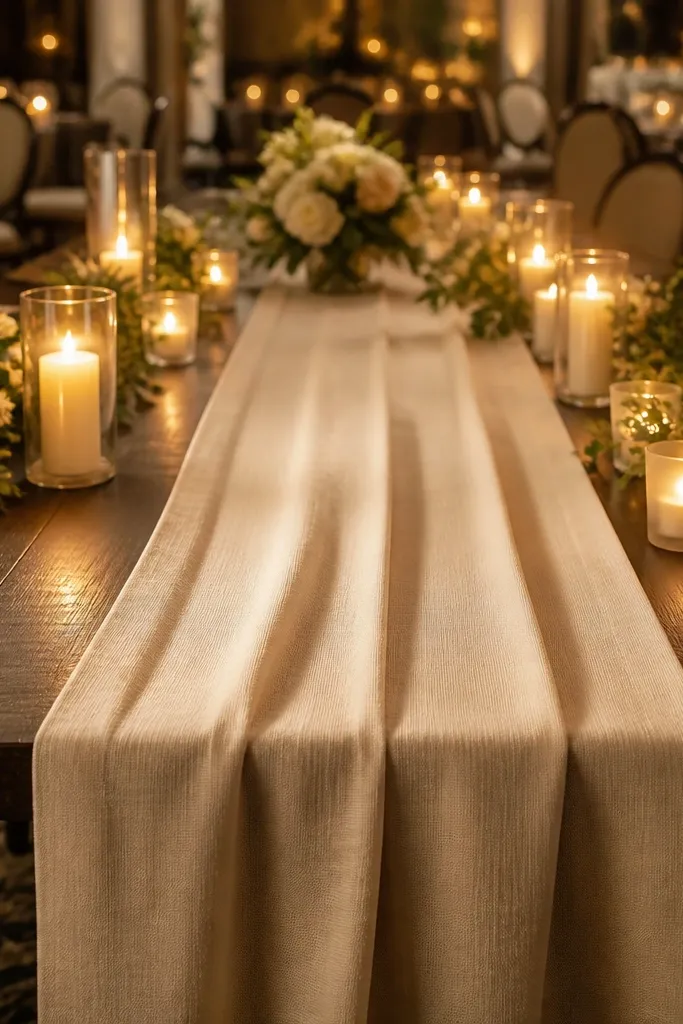
This look photographs like a magazine spread because the texture does the work. Champagne linen catches warm light without looking shiny, and candle clusters create that cozy glow that makes skin tones look better in photos. It’s perfect for dinner receptions, especially in hotels or restaurants where the room lighting is already flattering. If your venue is dim, candles help the scene feel intentional instead of flat. It also scales well: you can do one statement table or repeat the cluster across multiple tables for consistency.
Quick tipUse painter’s tape dots under the runner corners so it doesn’t shift when you seat guests.
Start by packing linen items rolled around a cardboard tube so the weave doesn’t crease. Then assemble candle holders at home using empty space in your suitcase for the small parts, and keep wicks and lids in a separate zip bag. Finally, bring a roll of painter’s tape for quick placement marks on the table so your clusters line up fast. For travel, choose battery candles if you’re flying or if the venue restricts open flame. Plan on 10-15 minutes per table for final spacing once you arrive.
Skip thisDon’t fold linen — it creates hard creases that won’t relax under venue lights.
2. Iced White Florals in Clear Glass Bud Vases
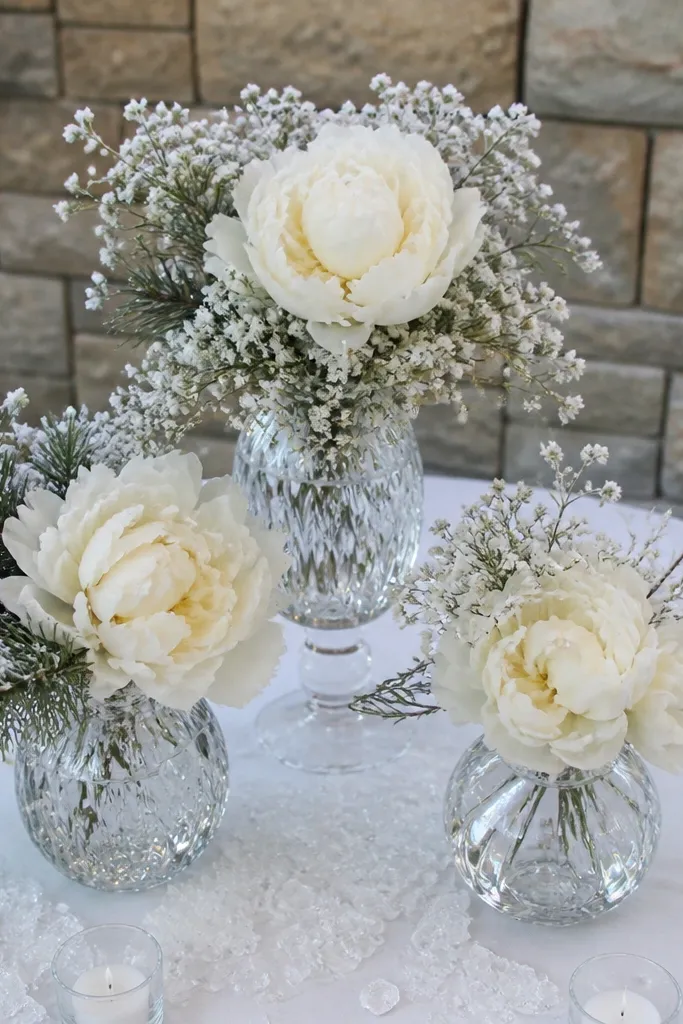
Clear bud vases look crisp in photos because they don’t interrupt the background. Iced white florals create a clean, airy palette that works for winter weddings and for venues with neutral walls. The best part is the “scatter” effect: you can place vases at different heights and still keep the look cohesive. This style also makes your centerpieces feel lighter, which helps if your tables are already busy with place settings. It’s a strong choice when you want a modern, minimal feel without going fully bare.
Pack your vases in a rigid box with paper separators so glass can’t touch glass. Then assemble the floral stems in small bundles using twist ties, not florist tape, so you can adjust heights quickly at the venue. Finally, plan a dry run: place the vases on the table in a layout before you add water or foam. Keep water for the last step if you’re driving; if you’re flying, use faux stems and skip the liquid. Budget time: 20-30 minutes for one table with 6-10 vases.
Bring a small spray bottle for last-second stem positioning and dust removal.
Avoid colored water — it can tint glass and make your whites look dirty.
3. Dark Denim Runner + Copper Candlestick Line
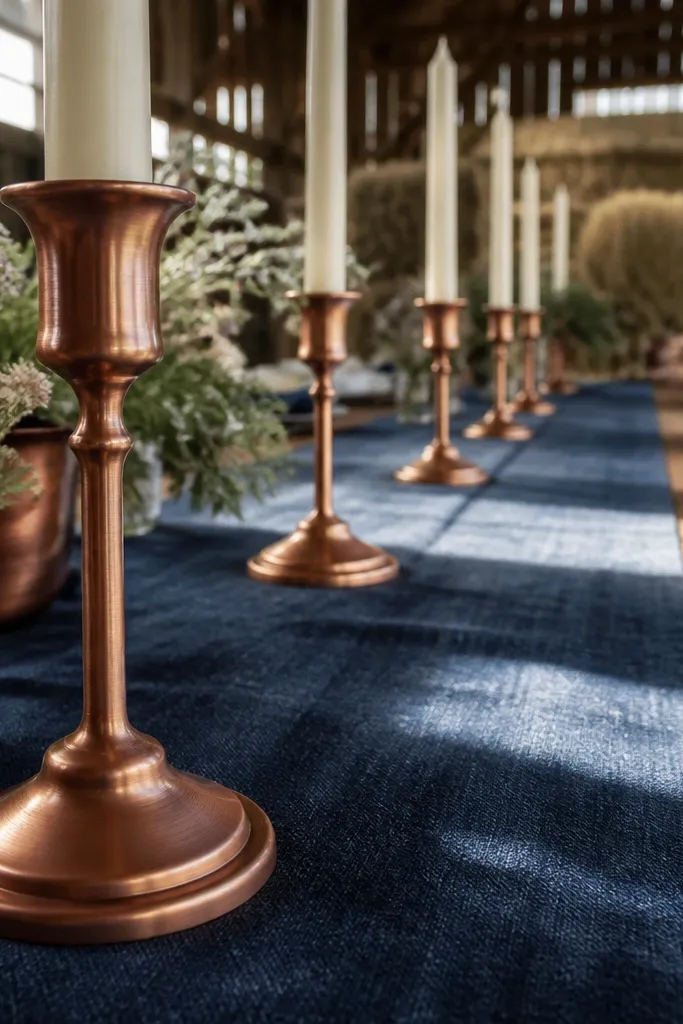
This combo is photo-ready because it creates contrast without needing lots of decor. Denim adds a casual, textured base, while copper brings a warm metallic glow that reads well on camera. It works for rustic-chic venues, barn spaces, and even modern lofts that need something grounded. The candle line makes the tables feel styled from end to end, so wide-angle photos don’t look empty. If you want something that feels intentional but not overly formal, this one lands right.
Start by buying (or cutting) a denim runner that’s the right length for your table and packing it rolled with the inside out to protect edges. Then wrap copper candlesticks in bubble wrap and store them upright inside a hard-sided tote. Finally, set up the runner first, then place the candles using spacing marks made with chalk or painter’s tape. If you’re driving, you can assemble at home; if you’re flying, keep candles separate and assemble at the venue. Give yourself 15 minutes per table for alignment and final spacing.
Use unscented candles — fragrance can overpower and make the room smell “off” in photos too.
Don’t pair denim with cool-toned silver — it fights the warm copper glow.
4. Pastel Macaron Color Paper Lanterns
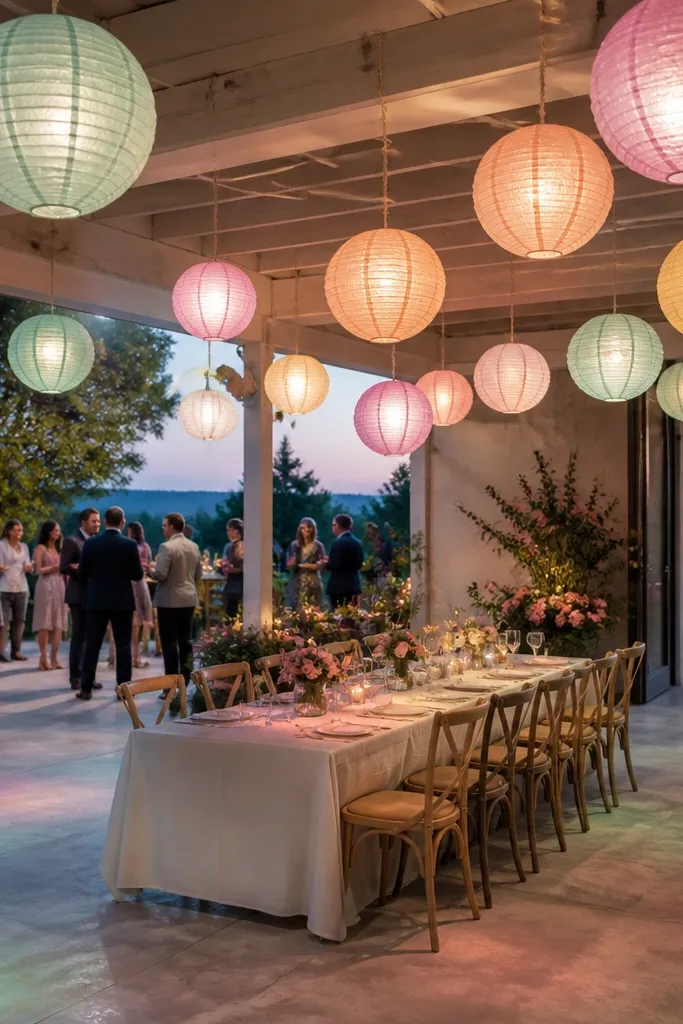
Paper lanterns are one of the easiest ways to make a room look styled without bringing fragile decor. The pastel palette reads sweet and modern, and the lantern light softens harsh venue lighting. This is best for receptions with open ceilings or outdoor-covered areas where hanging decor looks natural. It also gives your photos depth — you’ll see layers above guests, not just tables. If your goal is “pretty instantly,” lanterns deliver it.
Pack lanterns flat in a box with tissue sheets between layers so creases don’t show. Bring lightweight hanging kits: fishing line or clear monofilament plus small clips, and test the clip strength before you leave. Then set up anchors first — hooks or ceiling ties — and hang lanterns last so you don’t snag them during setup. If you’re flying, keep lanterns as carry-on in a flat box and keep cords coiled in a separate pouch. Plan 30-60 minutes for hanging depending on how many you have.
Hang lanterns at different heights: aim for 6-8 lanterns across, not one perfect line.
Don’t use heavy string — it sags and makes lanterns look uneven in photos.
5. Terracotta + Sage Modern Clay Vases
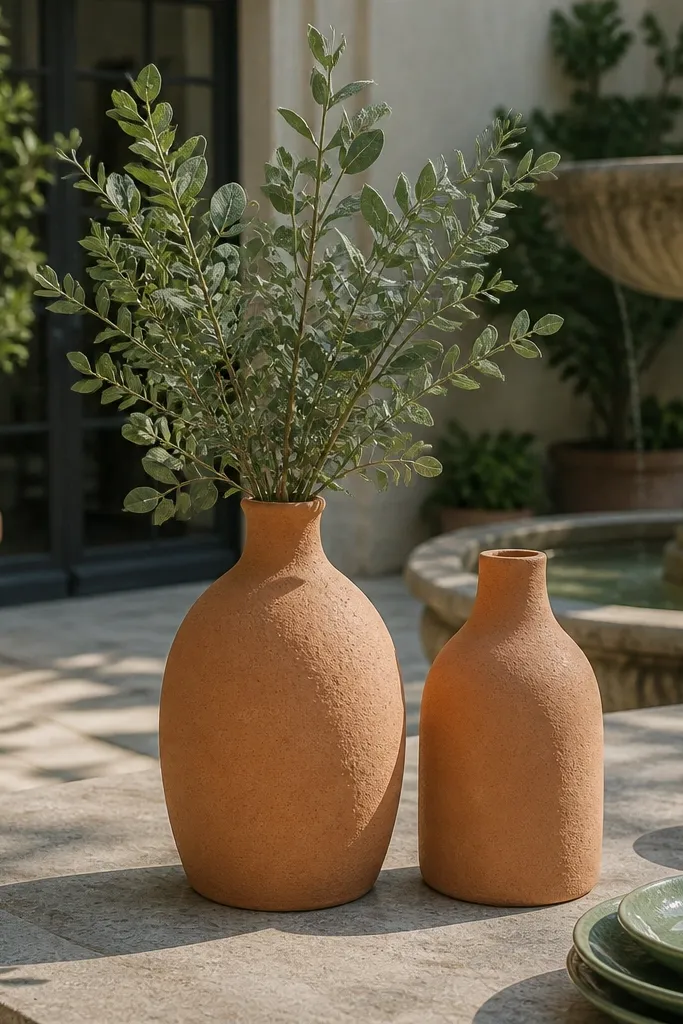
Clay vases look earthy and expensive in photos because their texture catches light differently than smooth glass. Terracotta and sage create a color combo that feels grounded and calm, especially in outdoor or courtyard venues. This style is great for daytime weddings where you want decor that looks good even in daylight. It also works with both dried stems and fresh-looking faux greens. If you want “modern organic” without going full boho, this is the sweet spot.
Quick tipBring a lint roller — clay dust transfers easily and shows on camera.
Choose vases that are stable and not too thin at the neck so they survive travel. Pack them in custom-cut foam or wrap with bubble wrap and place them in a tote that can’t tip. Then build your centerpieces with a limited palette: 1-2 greens plus one dried accent color. Finally, label each vase with a piece of painter’s tape so you can match layouts quickly at the venue. Budget 20-25 minutes to style one table with 4-6 vases.
Skip thisAvoid glossy vases with busy patterns — they steal attention from your flowers.
6. Black Acrylic Sign Set with White Vinyl Lettering
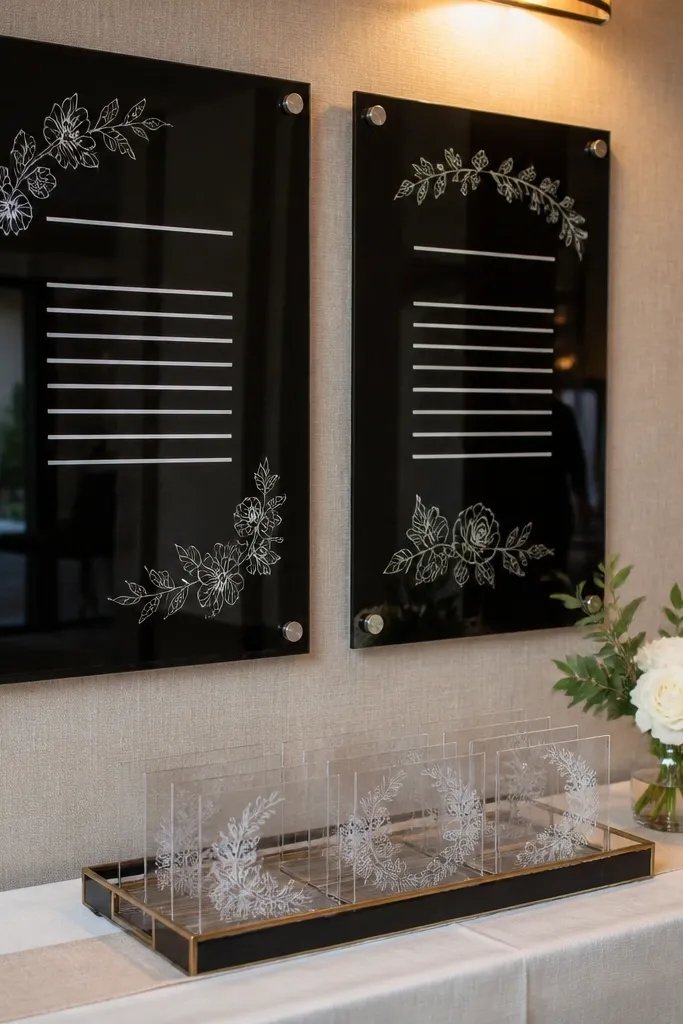
A black acrylic sign set is a clean, high-impact decor move because it reads clearly in photos and doesn’t clutter the background. White vinyl lettering looks sharp, especially under reception lighting, and it gives your event a cohesive graphic identity. This style is ideal when you want modern and polished without building physical structure. Place signs at the entrance, cocktail hour bar, and dessert table for consistent visual flow across your gallery. It’s also the easiest to transport since it’s flat and rigid.
Order pre-cut acrylic or bring a single large sheet and cut to size with a straight guide. Apply white vinyl lettering at home so edges are crisp, then wrap each sign in a cloth sleeve to prevent micro-scratches. Pack in a hard flat mailer or board box with corner protectors. At the venue, use removable stand bases or clear acrylic holders so you don’t damage surfaces. Plan 10 minutes for placement once you arrive.
Use a matte transfer medium vinyl, not glossy — it avoids glare in flash photos.
Don’t use thin cardstock signs at a venue with foot traffic — they bend and look cheap fast.
7. White Peony-Style Faux Florals in Oversized Rattan Baskets
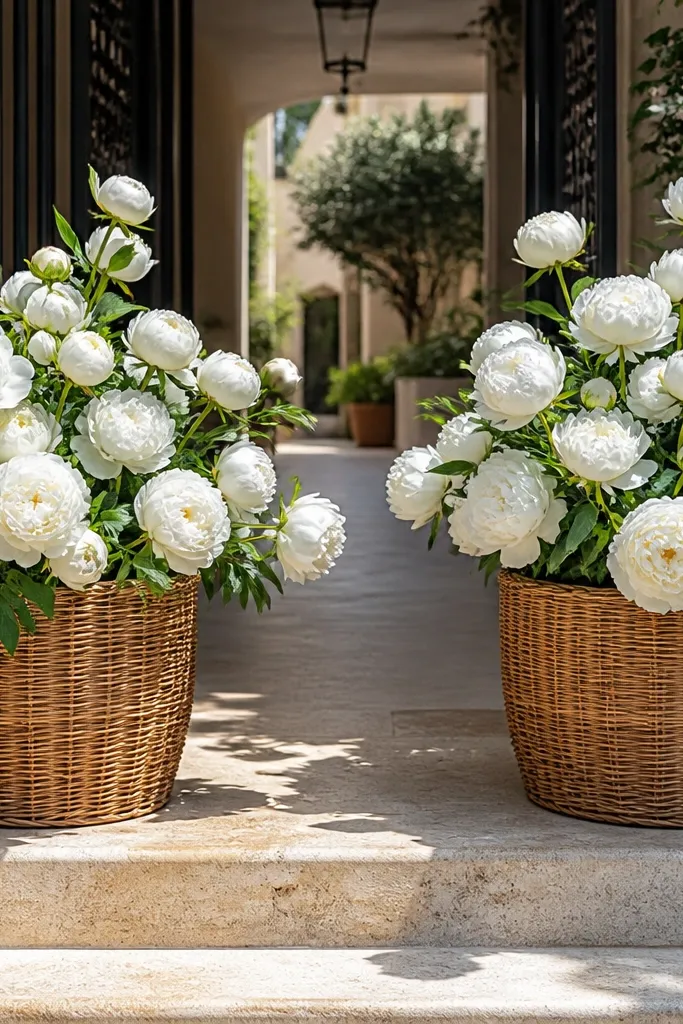
Oversized rattan baskets add warmth and structure, and the faux peony look gives you full, photo-ready volume. This style is great for entrances, photo backdrops, and ceremony aisles where you want a lush look without fresh flower logistics. Faux blooms also remove the timing pressure — you can set up early and not worry about wilting. White petals keep it bright, and the basket texture adds visual richness without extra clutter. It’s a solid pick for venues with neutral architecture that needs a focal point.
Pack baskets flat-bottomed or disassembled so they don’t crack. Then ship or carry faux stems in bundles and clip them into the basket using zip ties and floral picks. Finally, fluff petals at the venue — press and rotate stems so the “bloom face” points outward. If you’re driving, you can assemble one basket at home; if you’re flying, assemble all baskets on-site. Give yourself 25-35 minutes for a full entry set of 2-3 baskets.
Use zip ties hidden inside the basket — they hold volume better than tape.
Avoid tiny baskets — they make the faux blooms look like they’re drowning.
8. Monochrome Greenery Aisle Frames with Rolling Cart Delivery
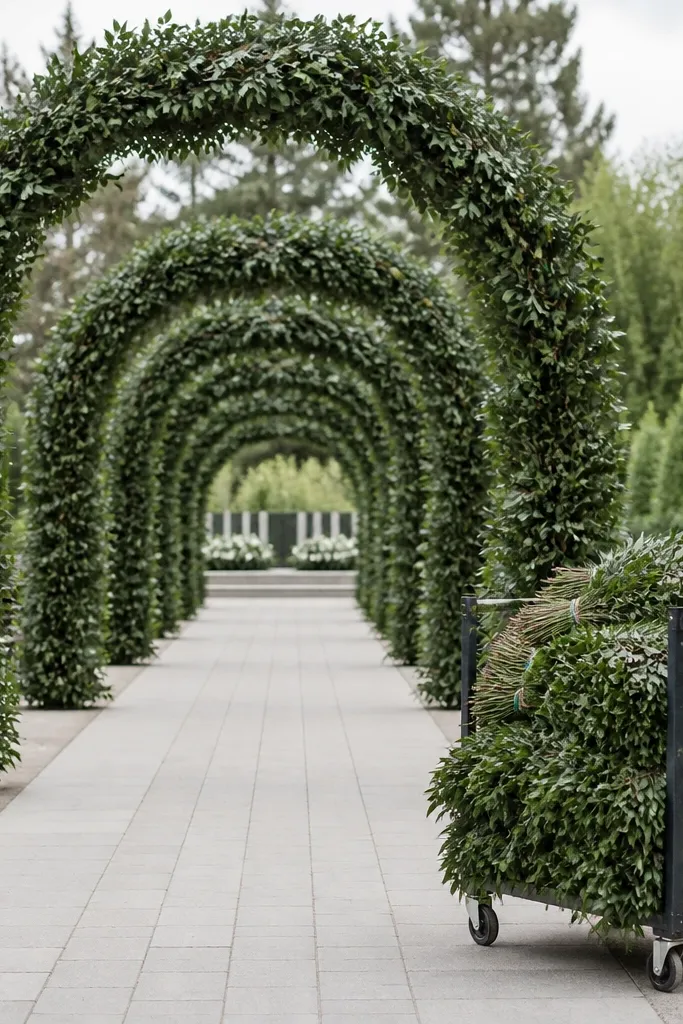
Monochrome greenery frames are photogenic because they create a repeating pattern leading the eye through the ceremony. The all-green palette also works in any season, especially if your venue has stone, wood, or concrete. You’ll get that “walk through a garden” look without needing heavy floral installations. This is best for ceremony spaces where you have a clear aisle line and can place frames at consistent intervals. It also photographs well for both videographers and stills because the geometry stays steady.
Rent or buy lightweight frames that fold — look for options that collapse to a manageable width. Pack them in a garment bag or a long box and use straps to keep hinges aligned. Then add greenery at the venue using pre-made garland panels and zip ties to attach quickly. Finally, place a small candle or lantern at each end for balanced wide shots. Plan a set-up window of 45-90 minutes depending on how many frames you have. If you’re driving, a rolling cart saves your back and keeps frames from sliding around.
Mark frame placement on the floor with chalk or painter’s tape before you start hanging garland.
Don’t mix too many greenery colors — it turns the frames into a messy patch instead of a clean aisle line.
9. Rose Gold Foil Geometry Place Card Display
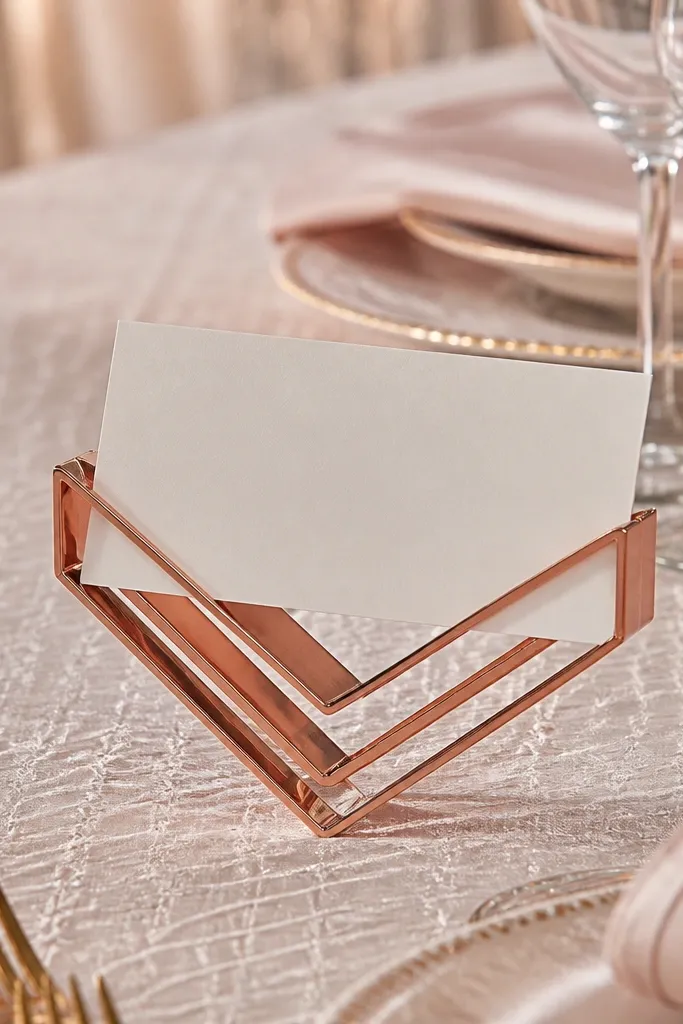
A geometry place card display looks like decor, not paperwork. Rose gold foil adds a warm metallic shine that shows up in both flash and soft ambient light. This style is ideal for weddings with a modern palette and clean table settings. It also helps guests find their seats quickly, so it’s functional and photogenic. If your reception space is simple, this one element makes the whole dining area feel styled in photos.
Buy or DIY a geometric stand, then print cards on thick matte paper so they don’t curl in humidity. Pack the stand in a protective box and store it flat so the edges don’t bend. Then bundle place cards in sets by table number and store them in labeled zip bags. At the venue, place the display near the entrance to the reception so it appears in guest flow photos. Allow 15-20 minutes for setup and placement checks.
Use matte cards — glossy ones reflect overhead lights and turn into glare blobs on camera.
Avoid flimsy stands — they wobble and look off in wide shots.
10. Tall White Pillar Candle + Dried Palm Frond Mix
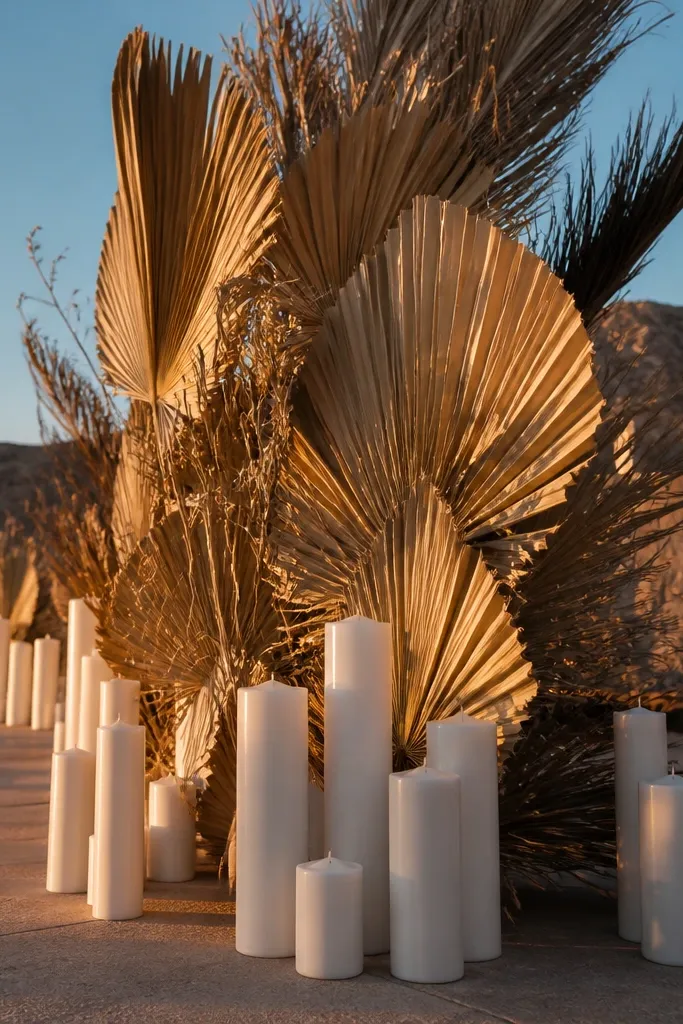
This style leans dramatic without needing complicated builds. Tall white pillars create vertical lines that read strongly in ceremony photos, while dried palm fronds add movement and a sculptural texture. It’s a great choice for desert, coastal, or late-summer weddings where you want heat-weather decor energy. The white base keeps it airy, so the dried texture doesn’t look heavy. It also works well for both indoor and outdoor venues because the pieces look intentional in bright light and in evening glow.
Pack candles upright with padding so corners don’t chip, and wrap fronds in paper sleeves to prevent breakage. Bring glass cylinders separately and assemble at the venue so you don’t crack anything during transit. Then place pillars first, add fronds in a fan shape, and secure the fronds with hidden floral wire. Finally, keep all small pieces in one labeled pouch so you don’t hunt for wire at setup time. Plan 20 minutes per arrangement, more if you’re doing many.
Use candle snuffer lids if you have open-flame candles — it keeps the flame looking steady for photos.
Don’t overcrowd fronds — too many makes the arrangement look tangled.
11. Butter Yellow Ribbon + White Signage Photo Backdrop
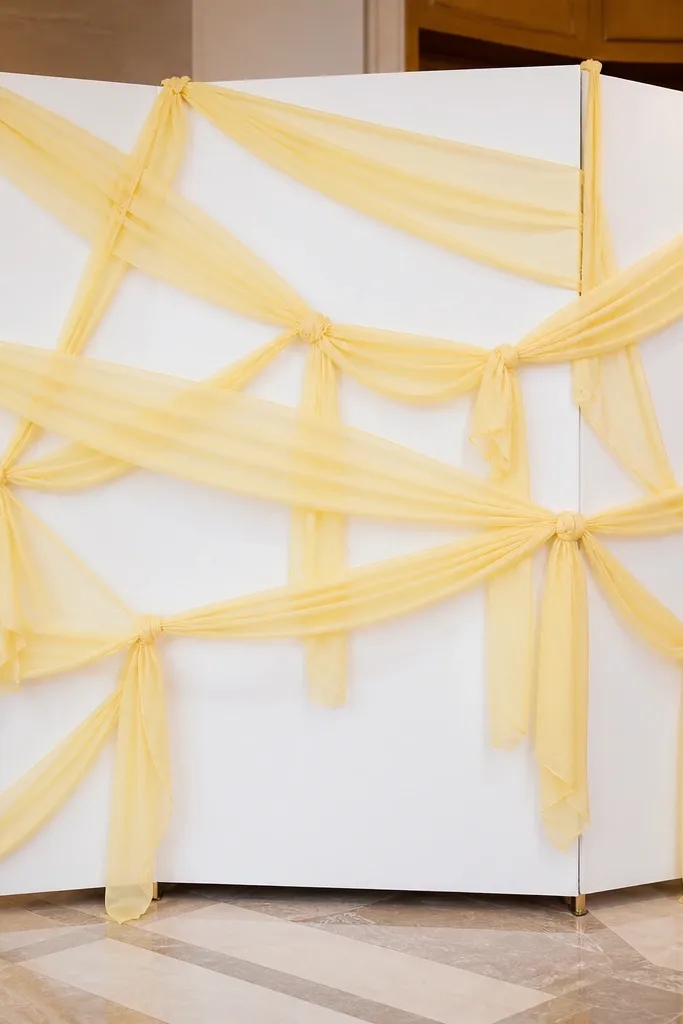
A ribbon-driven photo backdrop makes your wedding photos feel playful and coordinated. Butter yellow is warm on camera and pairs well with cream, white, and light denim outfits. The key is the contrast: white backdrop panels give you clean negative space, and yellow ribbon adds motion and color. This style is strong for engagement-style portraits and for guests who want something bright behind them. It also works in both indoor and outdoor settings as long as you manage wind and spacing.
Quick tipBring a small bottle of anti-static spray for ribbon — it reduces flyaway strands in indoor air.
Start by packing backdrop panels flat in a rigid cover, then roll ribbon onto a cardboard spool so it doesn’t tangle. Attach ribbon to a tension line at the venue using clips instead of knots, so you can adjust quickly. Add small signage squares only after the ribbon is set, so your lettering doesn’t get crooked. If you’re flying, choose ribbon that’s lightweight and avoid anything with heavy wire edges. Budget 45-75 minutes for a full backdrop depending on the size.
Skip thisAvoid long ribbon lengths that drag — they snag and look messy in candid photos.
12. Midnight Blue Velvet Runner + Brass Napkin Rings
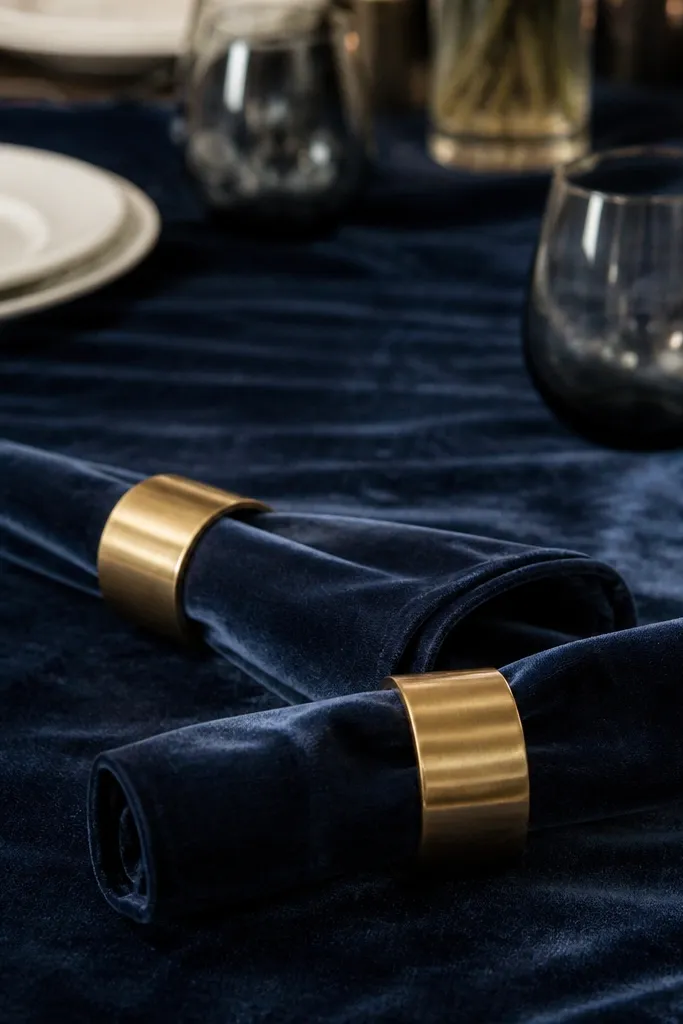
Velvet table runners photograph like luxury because they absorb light instead of reflecting it. Midnight blue looks rich under both warm and cool lighting, and brass napkin rings add a sharp metallic detail that shows up in close-ups. This style fits formal dinners, winter weddings, and any venue with neutral walls that need mood. It’s also a strong choice when you want decor that feels cohesive with dark attire and moody florals. The best part is that you don’t need heavy centerpieces — the runner does the heavy lifting.
Pack velvet rolled around a tube with tissue between layers to prevent crushing. Bring napkin rings in a small box so they don’t scratch other items, and keep them separated by felt squares if you have them. Then set runner first, place napkins, and add rings last so you don’t crease the fabric around folds. Finally, steam or hang the runner at the venue before guests arrive. Plan about 30 minutes for styling one long table and 10-15 minutes for each additional table.
Steam from a distance — direct contact can flatten velvet and ruin the texture.
Don’t fold velvet — it leaves permanent lines that show in photos.
13. Terracotta Tile + Linen + Micro Dried Stem Buds
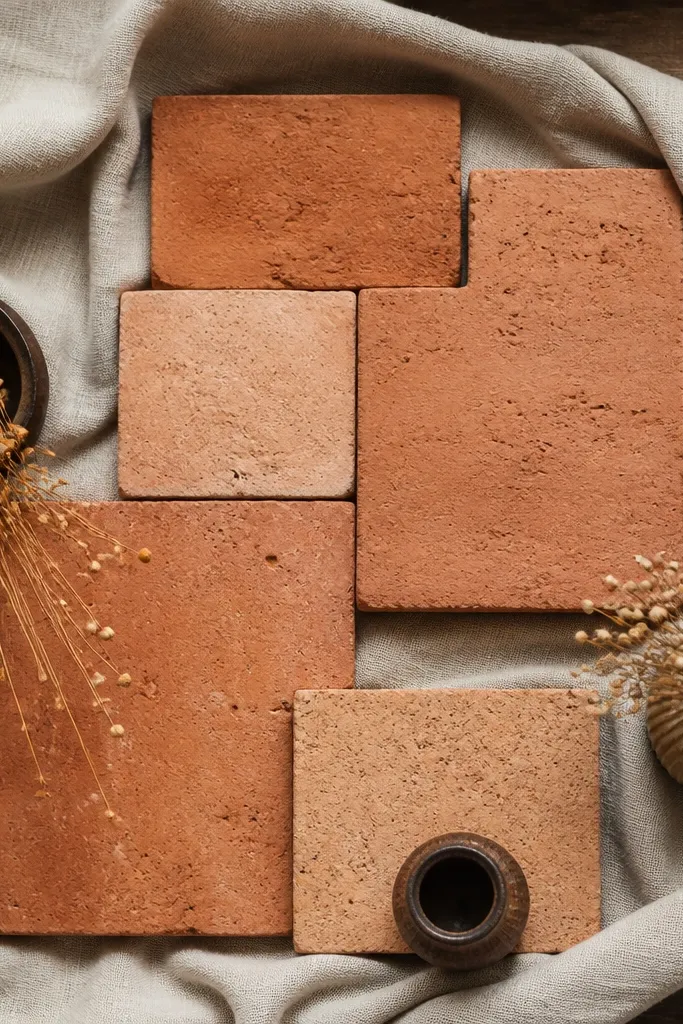
This is a grounded, artsy table look that reads intentional in both close-ups and wide shots. Terracotta tile adds a warm base you can style like a mini exhibit, and micro dried stems keep it light enough to travel. Linen keeps the palette soft, so the whole table looks curated instead of rustic chaos. It’s a great fit for micro-weddings, welcome tables, and dessert spreads where you want decor that feels handcrafted. If your wedding palette is neutral with warm tones, this lands beautifully.
Pack terracotta tiles in a rigid container with foam corners so they don’t chip. Then bring mini bud vases in bubble wrap and group stems by color in small zip bags. At the venue, set the tile on a stable surface and lay linen over the edges if needed for grip. Finally, place stems in a tight cluster and add 1-2 extra buds at varying heights for depth. Budget 15-25 minutes per setup, depending on how many tiles you bring.
Use rubber shelf liner under tiles if the venue floor is slick.
Avoid huge dried bundles — they look heavy and block guest sight lines.
14. Clear Balloon Clusters with Confetti Inserts
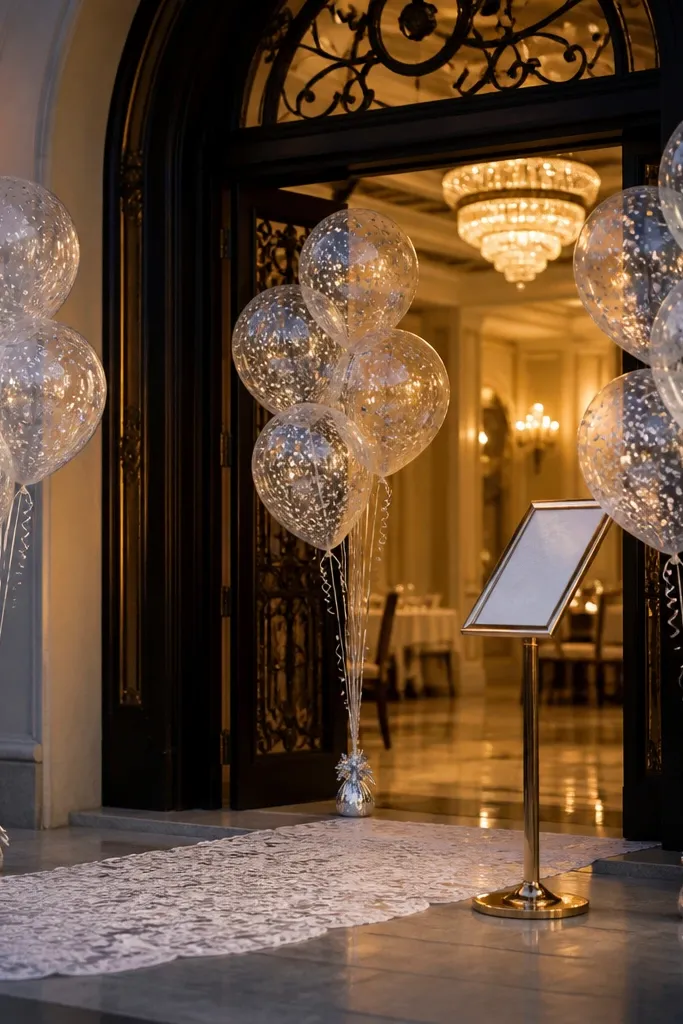
Balloon clusters can look surprisingly high-end when you use clear balloons with confetti inserts. The confetti reflects light and creates sparkle that shows up in flash and evening shots. This style is best for entrances, dessert tables, and photo corners because it frames people quickly. It also adds celebration without requiring a full build. Clear balloons keep the background visible, so your venue doesn’t get hidden under decor.
Pack balloon components separately: confetti and balloon shells in protective bags, and keep valves capped. Inflate at the venue or use a balloon pump with a long nozzle so you don’t fight the timing. Then insert confetti, seal, and tie balloons to a weight or anchor point. Finally, cluster by height: 2-3 tall balloons in front, shorter ones behind for a layered look. Plan 20-40 minutes for an entrance cluster depending on size. If you’re flying, you’ll want to buy the balloons locally and travel the confetti only.
Bring extra weights — if one pops, your whole cluster doesn’t collapse.
Avoid latex balloons — they yellow and look off under stage lighting.
15. Blush Ombre Draped Fabric Walls with Carried-Flat Panels
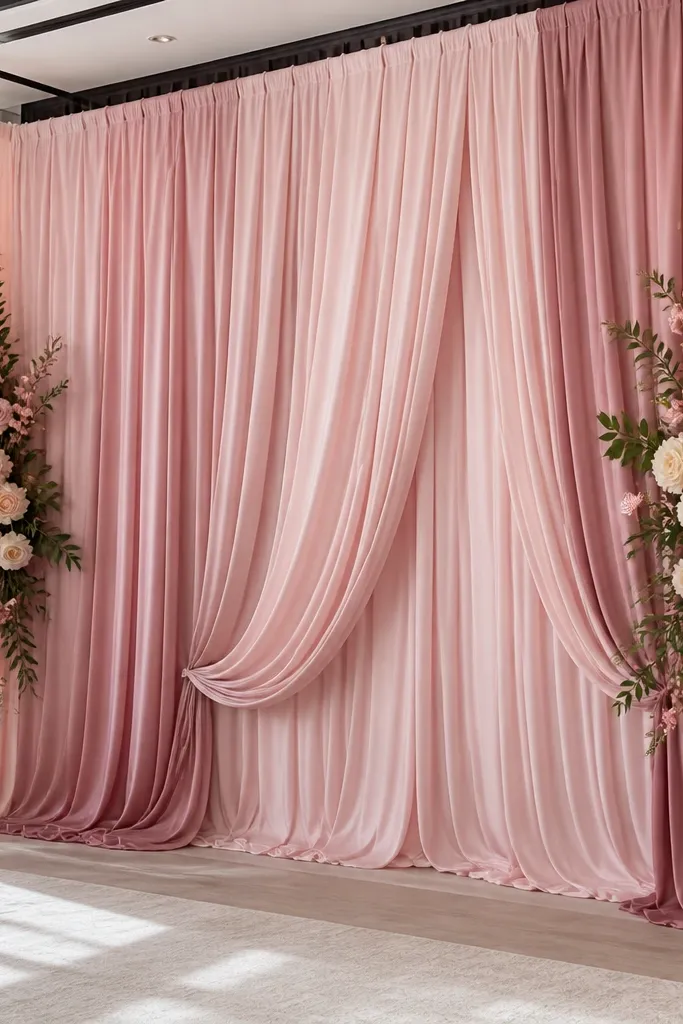
Fabric walls are one of the fastest ways to make photos look expensive because they create a smooth background with zero visual clutter. Blush ombre is flattering on skin tones and pairs with almost any floral palette. This style works best at indoor venues or outdoor covered patios where wind won’t whip fabric around. It’s also perfect for ceremony backdrops, sweetheart photo spots, and dessert-table framing. If your venue is plain, draped fabric covers it instantly.
Pack fabric in flat layers between large garment bags so you don’t crease the gradient. Bring a tension rod kit or install a backdrop line at the venue before you hang fabric. Then attach fabric panels using clips or ties, adjusting from the top so the ombre stays centered. Finally, press wrinkles with a handheld steamer at low heat — do it before anyone arrives for photos. Allow 60-90 minutes for a full wall, less if you’re doing a smaller photo corner.
Use clothespins with wide jaws — they leave fewer marks than small clips.
Don’t hang fabric first and steam later — steam can drip and leave stains on light colors.
16. Sunset Gradient Florals in Low Clear Water Trays
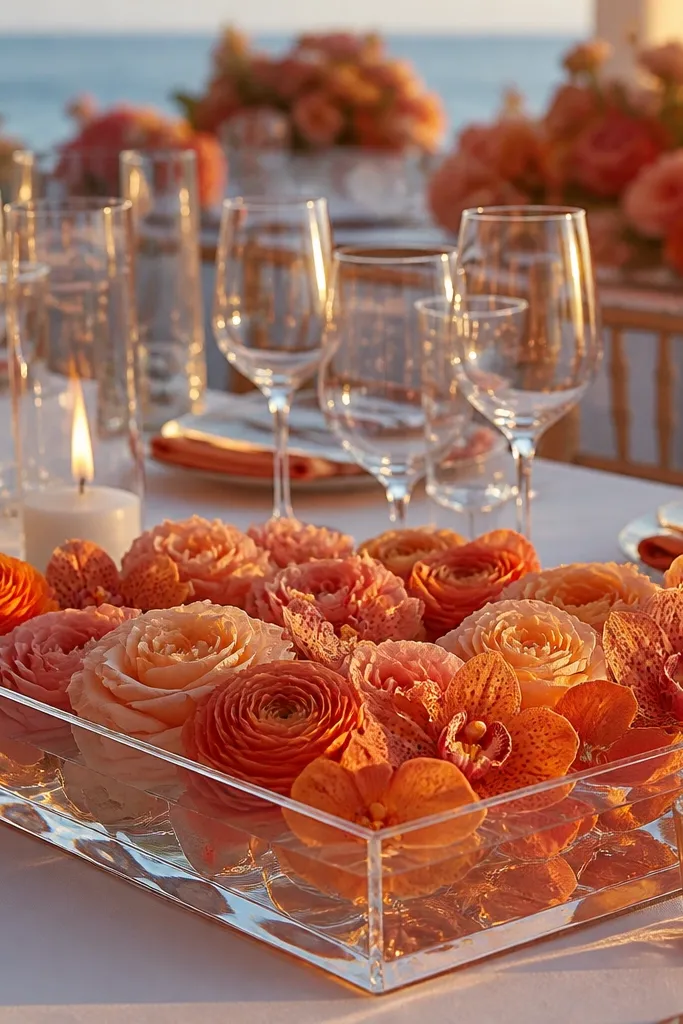
Low clear trays create a modern, editorial look because you see the flowers clearly without tall stems blocking faces. Sunset gradients — think peach, coral, and soft orange — look incredible in golden-hour light and warm indoor lighting. This style is great for cocktail tables and head tables where you want color that reads from across the room. Clear acrylic or glass keeps the palette clean and makes the scene feel airy. It’s a strong choice when you want “wow” without a ton of bulk.
Pack trays in protective foam or use bubble wrap with cardboard corners to prevent chips. Then prep stems in small water-safe bundles and keep them separate until you’re ready to pour water or insert floral foam. At the venue, place trays on a level surface and build the gradient from outer colors toward the center for a smooth look. Finally, add a thin layer of greenery to connect the colors and stop the arrangement from looking patchy. Plan 25-35 minutes for one head-table tray set.
Bring spare clear plastic wrap to cover trays if you need a quick transport reset between rooms.
Avoid tall bouquets in trays — they look awkward and collapse under their own weight.
17. Classic Black + White Striped Table Decor with Green Herbs
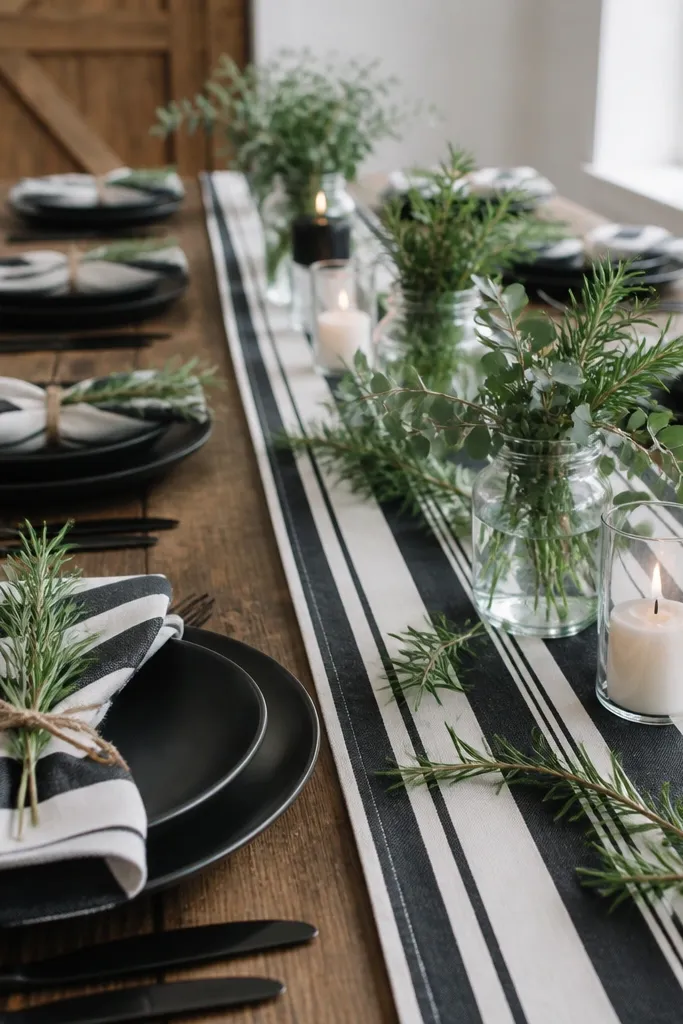
Striped table decor turns a standard table into a photo subject. Black and white stripes give you crisp contrast, and the green herbs add just enough color to keep it from looking harsh. This style works for modern farms, city venues, and weddings with a graphic theme. The key is restraint: keep florals small and herb-like so the stripe remains the star. In photos, stripes lead the eye across the table and make centerpieces look more intentional even when they’re simple.
Quick tipUse black napkins or chargers — stripes look better when the rest of the table has a clean anchor color.
Pack runners rolled around a tube and protect them with tissue so stripes don’t get crushed. Then choose small herb bundles and store them in damp paper towels inside zip bags to keep them looking fresh. At the venue, place the runner first, then add candle holders or low vases that don’t compete with the stripes. Finally, space herb bundles evenly down the center so the pattern reads symmetrical in wide shots. Give yourself 20 minutes for one table.
Skip thisDon’t mix in too many different greens — it turns the center into a random pile.
18. Moody Burgundy Florals in Black Metal Stands
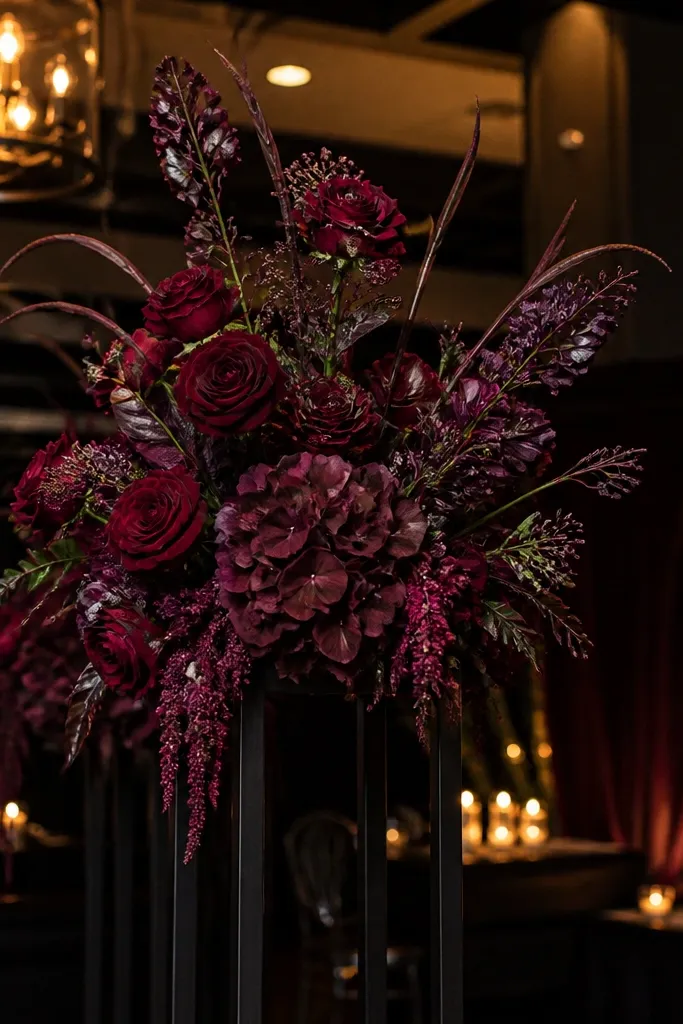
Burgundy florals look dramatic and camera-friendly because the color absorbs light and reads deep, not muddy. Black metal stands add structure and make the floral shape pop without needing extra props. This style is perfect for evening weddings, indoor ceremonies, and venues with dark walls where you want the backdrop to feel weighty. It also photographs well from the side because the stand frames the arrangement. If you want “moody and styled” rather than bright and airy, this is it.
Quick tipKeep the arrangement slightly wider at the bottom — it looks fuller in photos from guest height.
Pack stands disassembled in a bag with labeled parts so you don’t lose screws. Then pack faux burgundy stems flat in bundles and protect delicate petals with tissue. At the venue, assemble the stand first, then insert stems from the top down so the shape builds naturally. Finally, secure with floral wire inside the stand so it doesn’t shift when someone walks past. Plan 40-60 minutes for two to three large arrangements depending on stand height.
Skip thisAvoid mixing burgundy with too much orange — it cheapens the mood and shifts the palette.
19. Ivory Candle Lanterns with Linen Wicks and Twine Handles
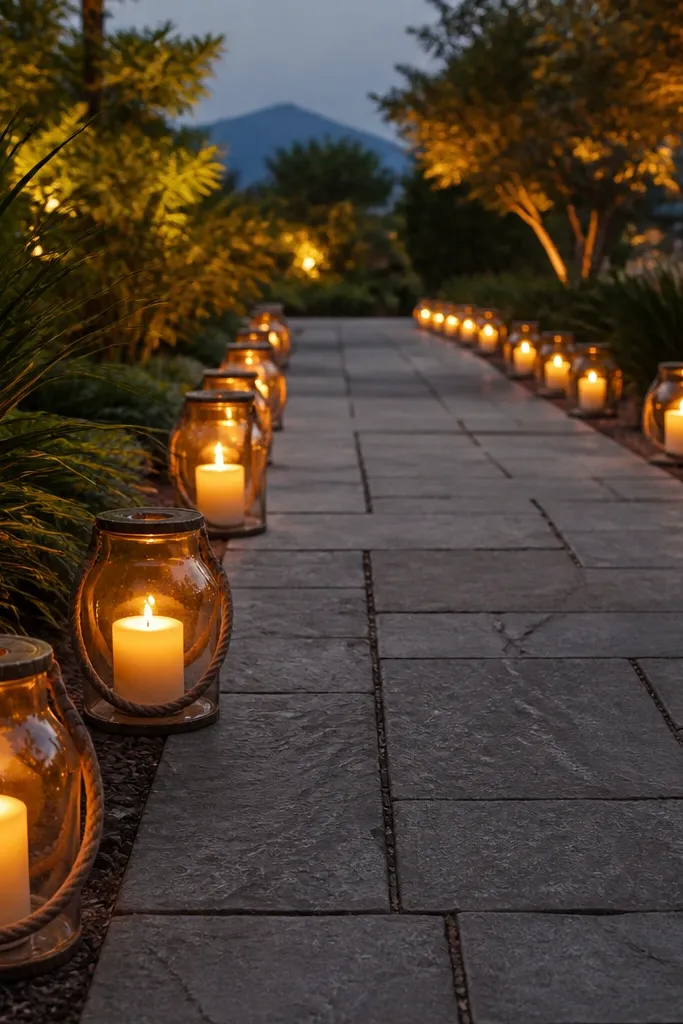
Lanterns create a guided, storybook feeling without needing a complex backdrop. Ivory tones keep it soft and romantic, and the linen-wick detail makes the look feel handmade instead of store-bought. This style works for outdoor paths, ceremony aisles, and cocktail hour walkways where you want lighting that also looks good on camera. It’s especially effective at dusk when lantern glow becomes the main light source. If you want decor that photographs as warm, not harsh, lanterns are the move.
Quick tipUse the same candle type in every lantern so the glow color stays consistent in photos.
Pack lanterns with candles removed and store glass panels separately with cardboard sheets. Then wrap lantern bases in cloth to prevent scuffs that show on close-ups. At the venue, assemble lanterns in a straight line and place them using chalk marks so spacing is even. Add candles last so you don’t waste time and so flames look fresh for photos. Plan 20-45 minutes depending on the number of lanterns. If you’re flying, choose battery candles and skip open flame entirely.
Skip thisDon’t mix lantern sizes randomly — it creates visual noise along the aisle.
20. Cream Paper Fan Backdrop with Gold Thread Ties
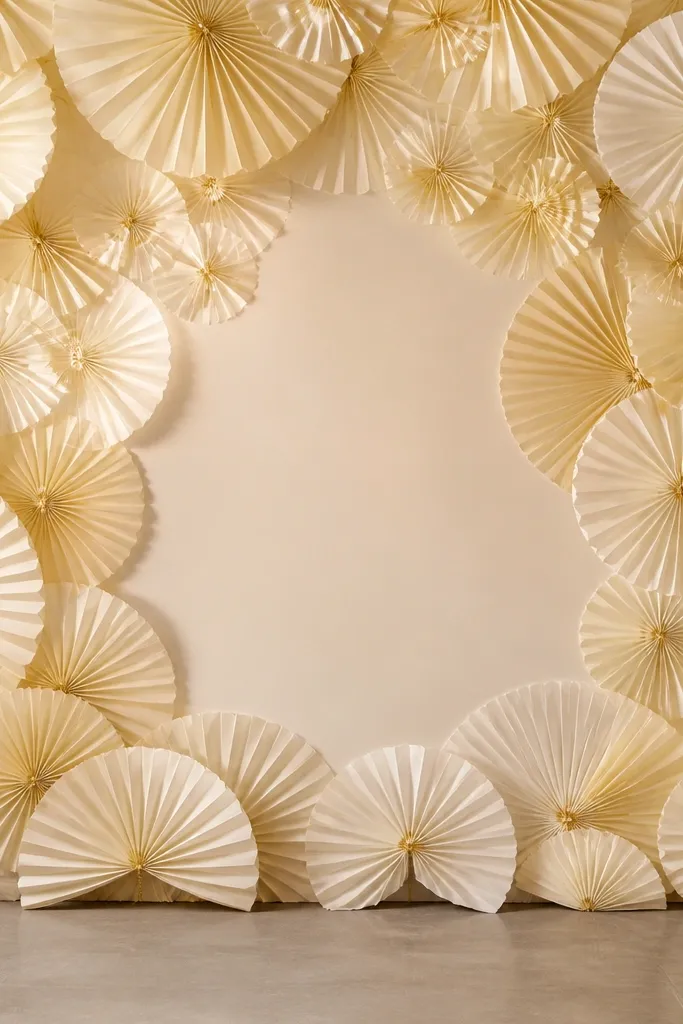
Paper fan backdrops look clean, airy, and extremely photogenic because they create a textured wall that still reads bright. Cream tones make the backdrop flexible for any floral palette, and gold thread ties add just enough sparkle for celebration photos. This style is ideal for indoor photo corners, bridal portraits, and compact venues where you need big impact without heavy builds. It also packs well because fans flatten and stack. If you want a structured look that still feels soft, this is a strong pick.
Quick tipUse two sizes of fans — larger on the outside, smaller in the center — it frames faces better.
Pack fans flat in a folder or rigid box so the pleats stay crisp. Then pre-cut a length of gold thread or thin twine and bring it wound around a small spool for speed. At the venue, attach fans to a tension line or wall grid using clips, then tie thread accents between clusters. Finally, add a minimal sign on a separate stand so it doesn’t overlap the fan texture. Plan 45-75 minutes for a full backdrop depending on size and wall access.
Skip thisAvoid busy signage fonts — the fan pattern already does the visual work.



