
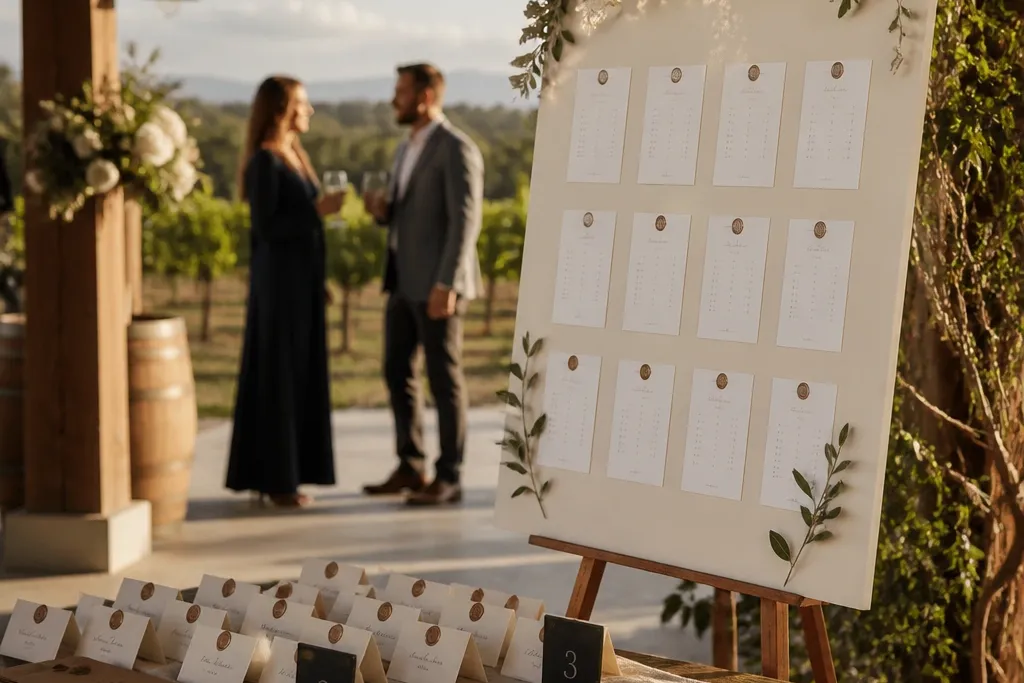
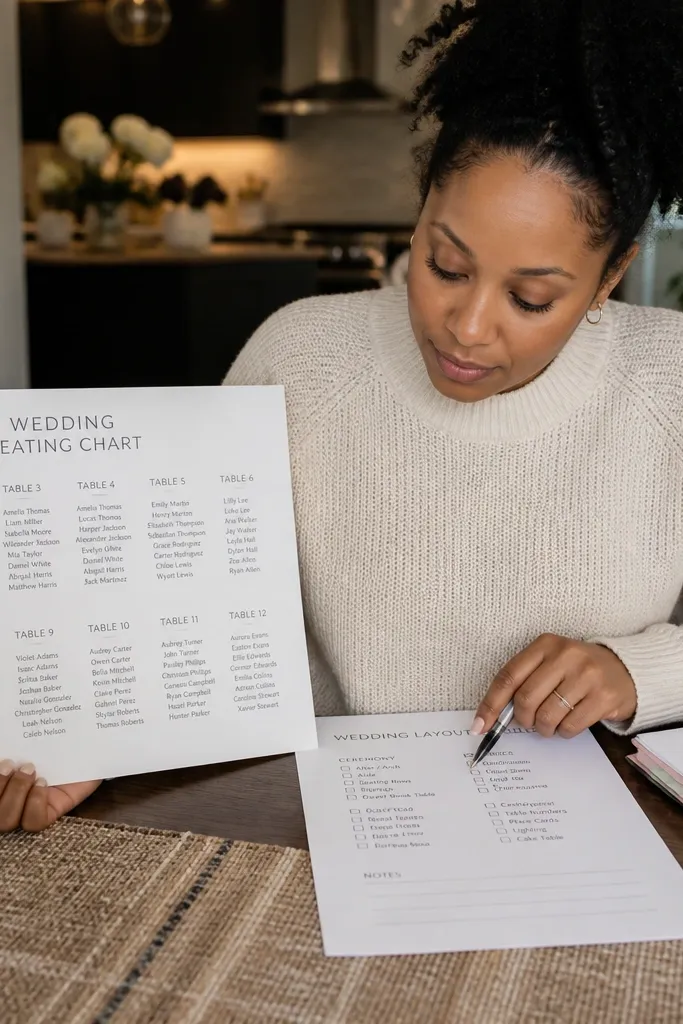
1. Ivory Board with Table Numbers in a Single Vertical Column
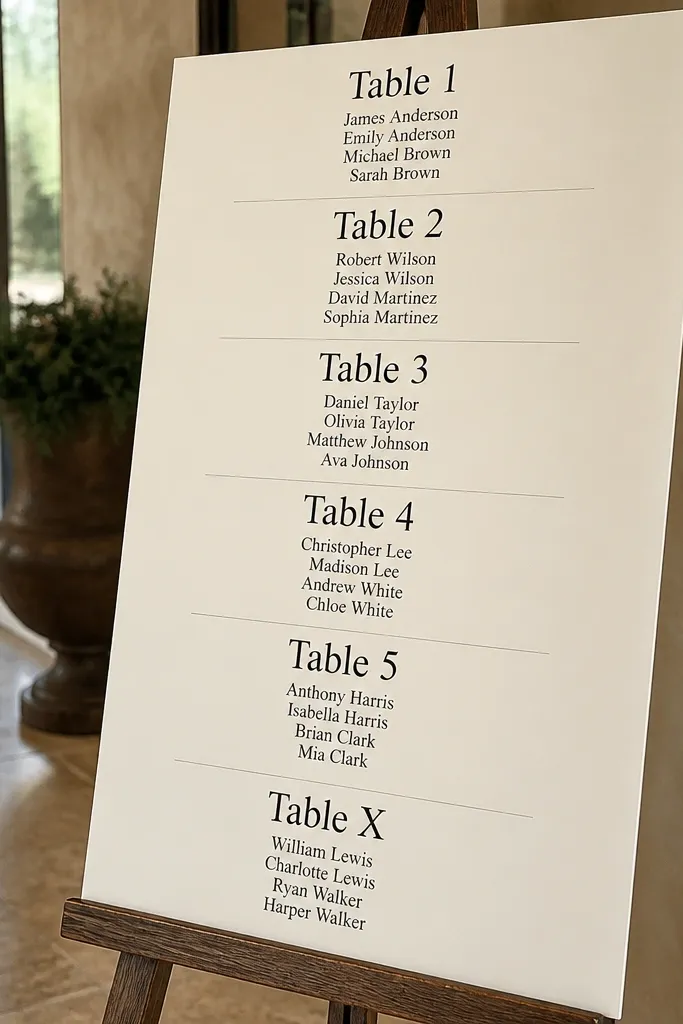
This is the cleanest beginner-friendly seating chart wedding option because it turns a list into a scanning experience. A tall board with “Table 1” through “Table X” in one column keeps the eye moving in a predictable path. Put names under each table header in neat blocks, and keep the font size large enough that guests don’t squint. It looks elegant in photos because ivory paper and black text create high contrast, and the layout stays orderly even when the guest list changes.
Start by printing table headers and name lists on cardstock or laser-printed paper, then mount them on a large foam board or poster board. Use a simple grid: table header at the top of each block, names centered or left-aligned within the block, and at least 1 inch of spacing between table sections. Then place the board at the arrival stop, not deep in the room, and add a small directional arrow sign next to it to pull people toward the right direction.
Print your final guest list on the day before and do one test read from standing height to check legibility.
Avoid mixing cursive and tiny sans-serif fonts on the same board; it looks pretty but reads poorly.
2. Two-Panel Seating Chart with a Left-to-Right Name Flow
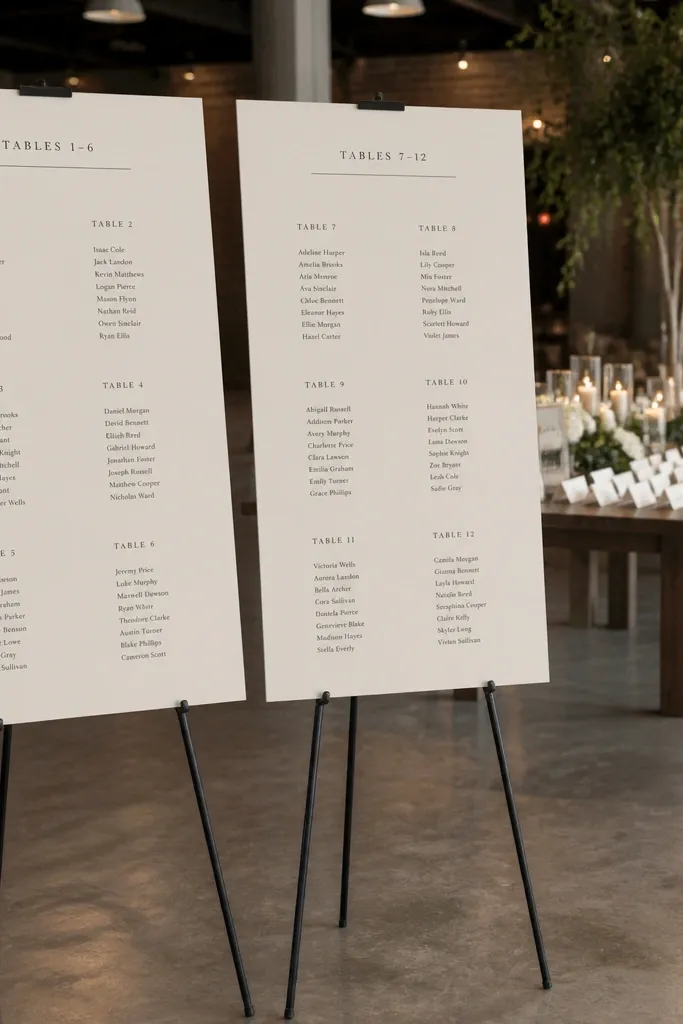
Start by measuring your display area and choose panel sizes that let you keep at least 3-4 lines of names per table without cramming. Print each panel as a separate page set, mount on lightweight boards, and add matching header strips at the top of each panel. Finally, set both panels on easels at a slight angle so the text faces the walkway, then label each panel with a small “Tables 1-6” / “Tables 7-12” strip for instant orientation.
A two-panel setup gives you “room to breathe” while still looking minimal. Panel one holds Tables 1-6, panel two holds Tables 7-12 (or whatever range fits your count). Guests don’t feel trapped at one board, and photos look modern because the panels create balanced negative space. It’s a smart choice for medium guest lists where a single board gets crowded fast.
Skip thisSkip narrow panels; if the text is too small, the whole look turns into a blur.
Quick tipAngle the panels 10-15 degrees toward where guests stand so glare doesn’t flatten the text.
3. Framed Seating Chart with Removable Name Tags
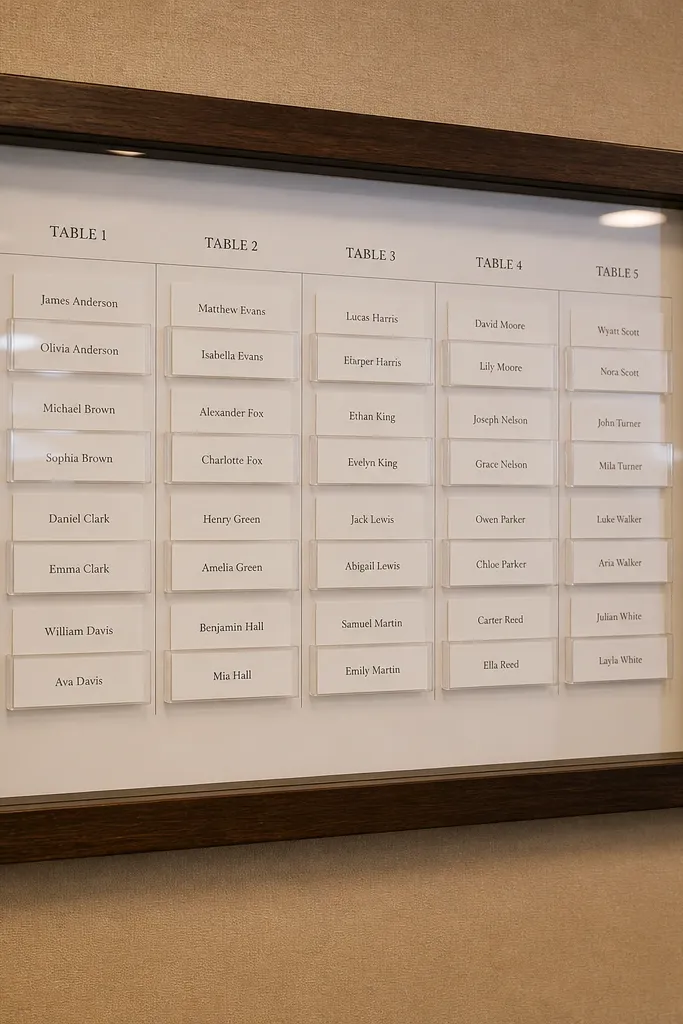
Start with a printed grid showing table numbers and spacing, then add clear plastic sleeves or small pocket cards behind each table header. Create individual name strips on cardstock sized to fit each pocket, using the same font and consistent capitalization. Then hang the frame near the entrance and keep a small “updates” envelope next to it so you can swap tags quickly after final RSVP checks.
This looks high-end because it reads like a gallery display, but it’s beginner-friendly because you can adjust names without reprinting the entire chart. Use a large frame or shadow box with a printed table grid inside, then add name tags that slide into pockets or sit on small clips. In photos, the structure looks crisp, and the modular names make the chart feel intentional. It’s perfect when you expect last-minute changes or when you want a polished, consistent style across multiple signs.
Skip thisAvoid mixing different label sizes; uneven name tags make the board look messy even if the layout is correct.
Quick tipUse matte clear sleeves instead of glossy so the text stays readable in bright daylight.
4. Acrylic Stand with Black Text and Wood Table Key
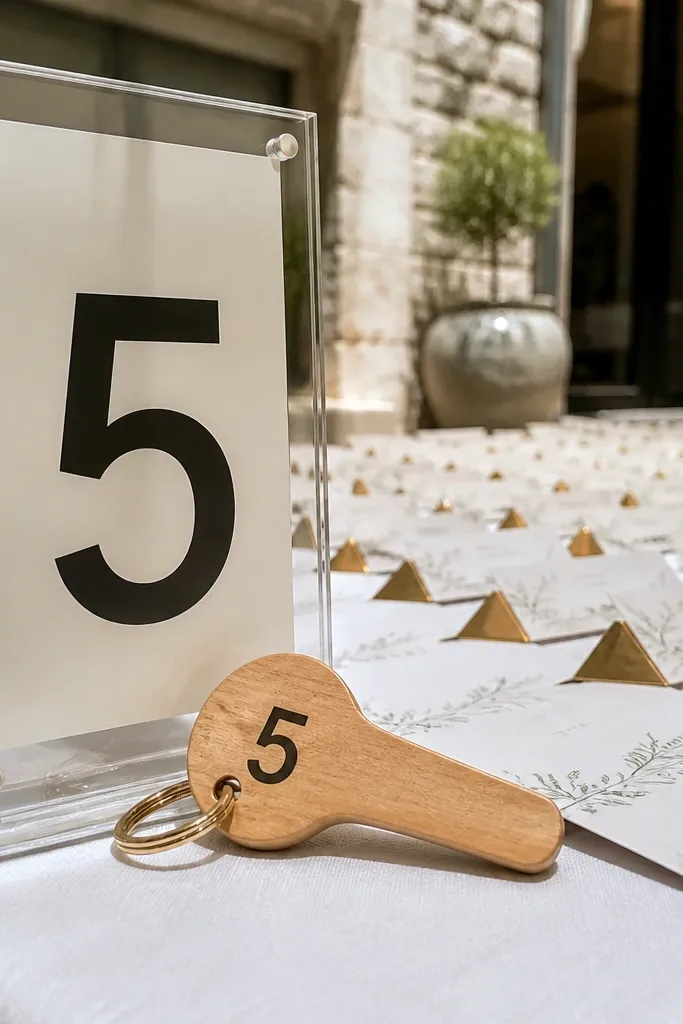
Start by printing your seating chart on thick matte paper and placing it behind acrylic on a clear stand. Add a small wood plaque or laser-cut insert that labels the chart categories, then mount everything on the stand so the chart sits at eye level. Finally, position it on a side wall or near the check-in area so guests see it while entering, not after they’ve already walked past.
If you want an elegant, modern look, acrylic plus black typography is hard to beat. The black text reads cleanly, and acrylic creates a polished “event brand” feel without complicated design. Add a small wood key showing table numbers or sections so guests can match the chart to place cards fast. This is especially good for indoor venues where lighting is controlled and glare can be managed by placing it slightly off direct sun.
Skip thisSkip thin acrylic stands that wobble; shaking signs make people avoid reading them.
Quick tipUse matte acrylic or keep the sign out of direct sunlight to avoid glare across the text.
5. Chalkboard-Style Seating Chart with Typed Labels
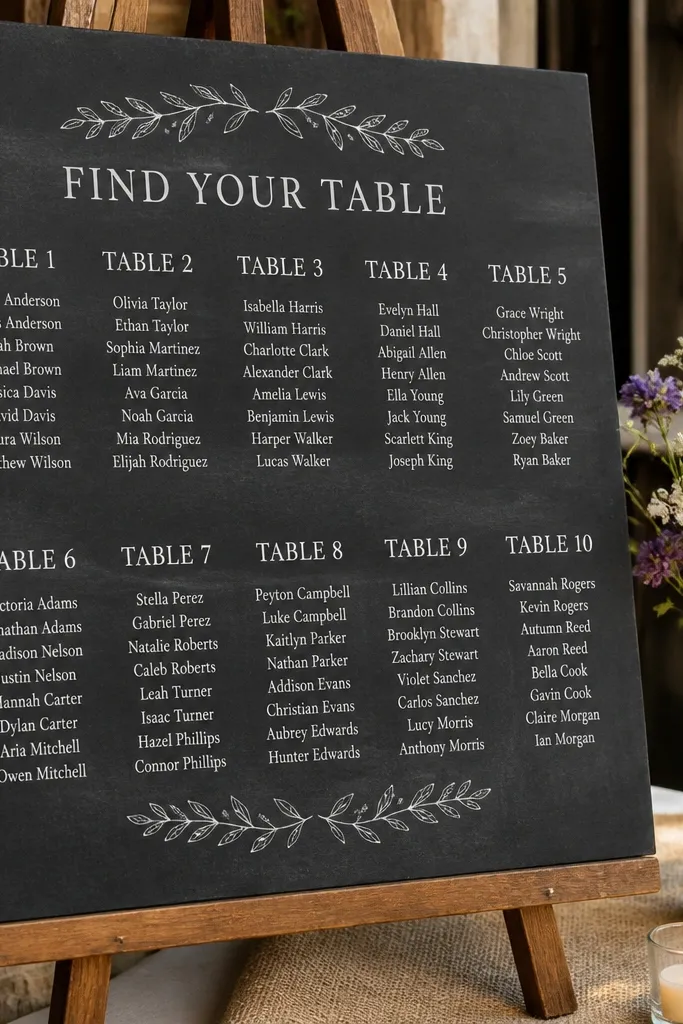
Start with a chalkboard-textured sign board or chalkboard paint panel, then print table headers and names on paper and cut them to fit. Mount the cut labels with thin double-sided tape or removable adhesive so you can update names later. Place the board near the doorway and add a simple “Tables 1-12” label at the top for instant scan.
Chalkboard-style signs look romantic in photos, but freehand chalk often turns into messy spacing. The beginner-friendly version is typed labels on a chalkboard background so the typography stays consistent and readable. Use a chalkboard-textured board in matte, then print table headers in larger font and names in a smaller but still legible size. It gives you that classic wedding vibe without the “why does this look uneven?” problem.
Skip thisDon’t use handwritten name lists; guests read faster with consistent typed text.
Quick tipChoose a matte chalkboard surface and keep lighting overhead rather than from behind the sign.
6. Menu-Card Seating Chart Layout (Restaurant Style)
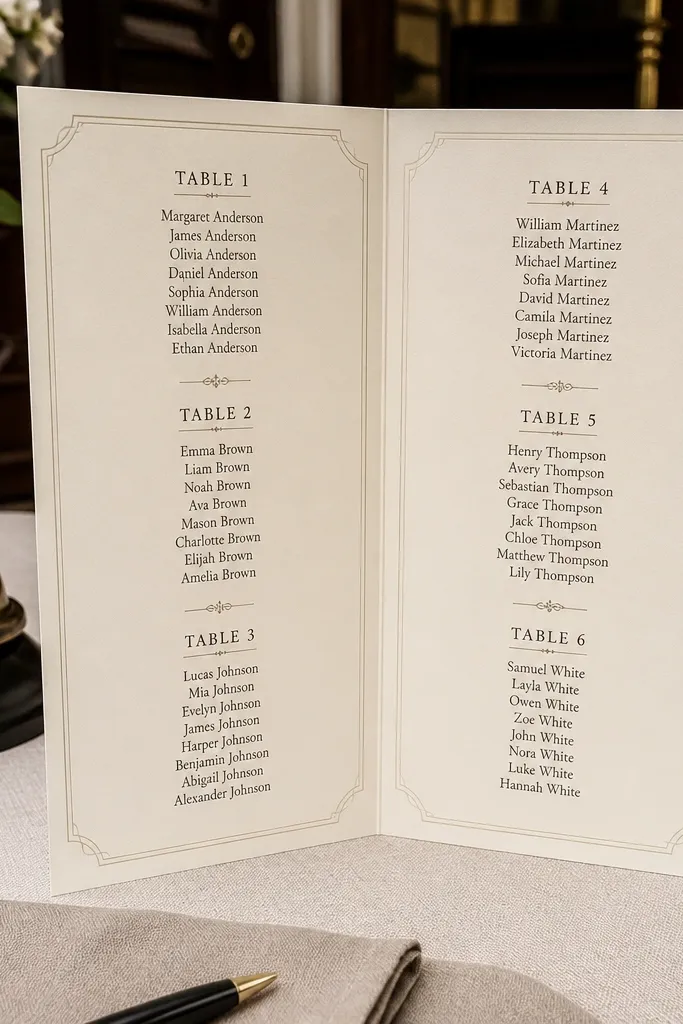
Restaurant-style layouts look elegant because they follow a familiar reading pattern: headings, then grouped lists. Folded menu-card format also keeps the sign compact, which helps if your venue has tight entry space. This setup is beginner-friendly because you can format each table section like a menu page and reprint only the page that changes. Photos look polished because the layout looks designed, not improvised.
Start by choosing a tri-fold or two-page menu size that fits your display area, then create a “Table 1-X” section per panel. Print table headers with bold type, then list names in a single column under each header. Set the menu cards on a small stand or easel so guests can walk up and read at their pace.
Use a thicker paper for the pages so the sign looks expensive and doesn’t curl at the edges.
Skip tiny font sizes meant for close reading; this format still needs 6-10 foot legibility.
7. Greenery Frame Seating Chart with Clear Name Blocks
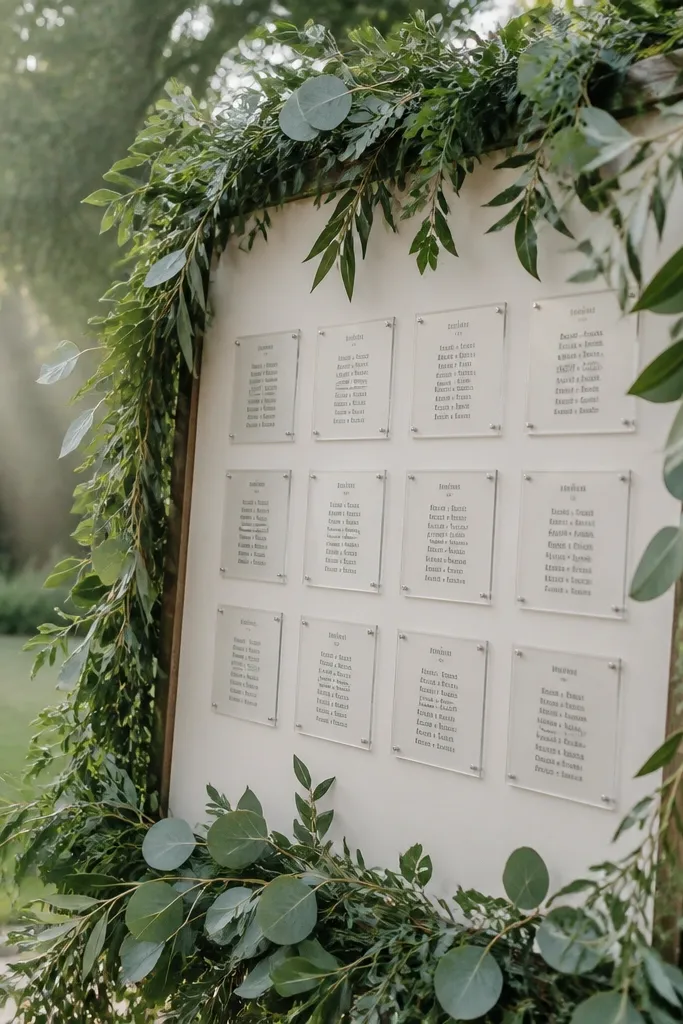
Start by building a simple rectangular frame on a foam board or using a pre-made greenery arch panel without the arch part. Mount your printed seating chart center, then attach greenery around the edges with floral wire, not hot glue. Place it near the reception entry, and keep the chart face perpendicular to the walkway so names don’t distort.
A greenery frame makes the whole chart look styled, not plain. The key is keeping the names on clean blocks of paper so the leaves don’t compete with the text. This is a great option for outdoor weddings or venues with natural decor, and it photographs beautifully because greenery adds texture around a simple typography center. It’s beginner-friendly because the chart layout stays straightforward; you’re adding a frame, not redesigning everything.
Skip thisAvoid covering the chart edges so densely that guests lose the board outline in photos.
Quick tipUse one greenery type (like eucalyptus) for a cleaner look than mixing five plants.
8. Wood Slat Seating Chart with Vinyl Labels
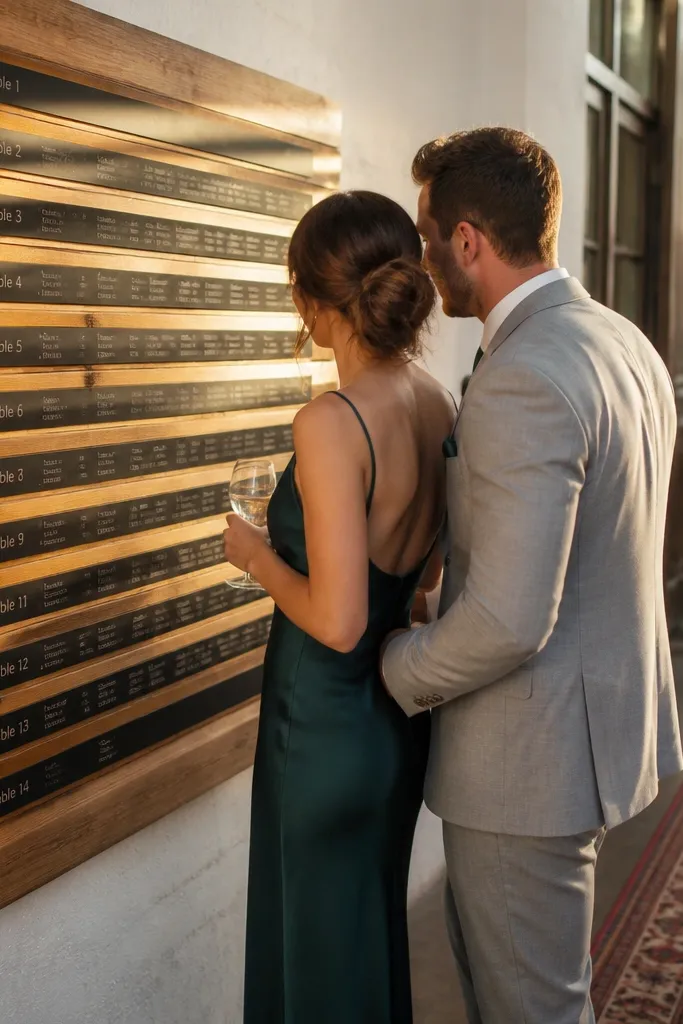
Start by getting a wooden slat board or building one with narrow wood strips spaced evenly. Apply vinyl labels for table headers, then add name labels under each header in consistent font size and alignment. Mount the slat board on an easel or stand, then label it clearly with “Seating” so guests don’t wonder what it is.
Wood slats look warm and modern, and vinyl labels make it beginner-friendly because you can update without remaking the whole board. The slats create natural lines that guide the eye, so your table sections feel organized even if the guest list is long. In photos, the wood texture adds depth while the vinyl text stays sharp. This works especially well for rustic-chic venues and outdoor receptions.
Skip thisSkip hand-cut vinyl with uneven letters; it reads sloppy fast in photos.
Quick tipUse removable vinyl if you expect changes; it keeps the wood from looking scuffed.
9. Sectioned Seating Map with Table Numbers by Area
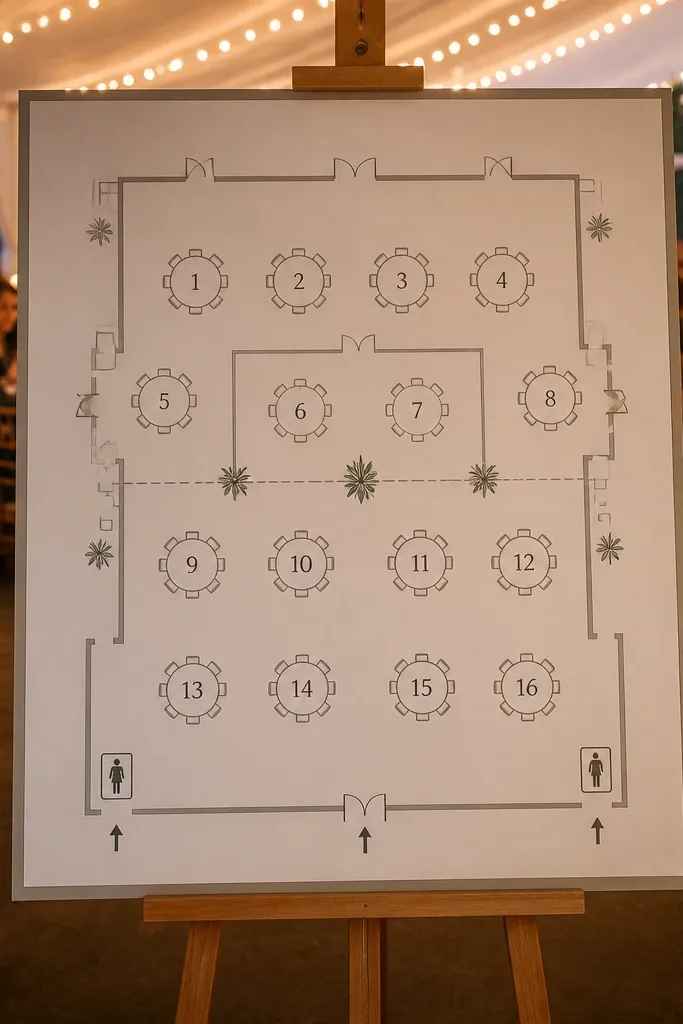
Start by sketching a simple overhead layout of your reception space: entrances, bar, dance floor, and table clusters. Place table numbers on the map in the approximate positions, then add a legend that lists where each section’s names go (like “Section A: Tables 1-4”). Finally, print the map on a single board and keep a small “How to use this” instruction line under the title.
If your tables are spread out, a single list board forces guests to search. A sectioned seating map fixes that by showing table numbers in the same areas they’re located in the room or tent. It looks elegant because the map is clean and structured, and it feels helpful rather than chaotic. This is a beginner-friendly seating chart wedding choice for larger venues where assigned seating needs direction more than it needs a long list.
Skip thisAvoid a map with tiny table numbers; if people can’t spot their cluster quickly, it defeats the point.
Quick tipUse a thick black outline around the map so it stays readable from across a room.
10. Clear Acrylic Pocket Chart with Insertable Cards
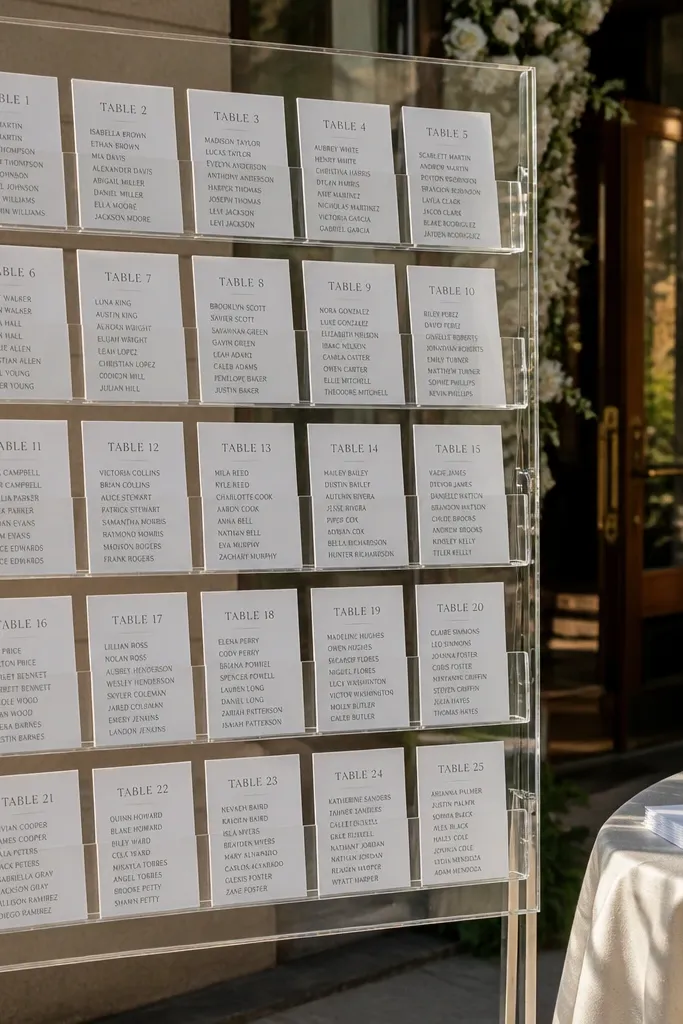
Pocket charts look organized and instantly “event-ready,” and they stay beginner-friendly when you need updates. Each table gets its own pocket for a card listing names, so guests can flip their attention from one table to the next without hunting. The acrylic frame keeps the whole thing clean and modern in photographs, especially with black or dark gray cards. It’s a strong option for weddings with a lot of tables because the structure prevents clutter.
Start by choosing a pocket chart size that matches your number of tables, then print one name card per table on card stock. Insert the cards into the pockets and keep the pocket labels aligned at the top. Place the chart at the reception entry and add a sign above it with “Find your table by name” in simple wording.
Use dark card stock for headers and white for names so the contrast stays high.
Skip decorative fonts for names; the whole point is fast scanning.
11. Table-Number Escort Cards on a Single Ribboned Rail
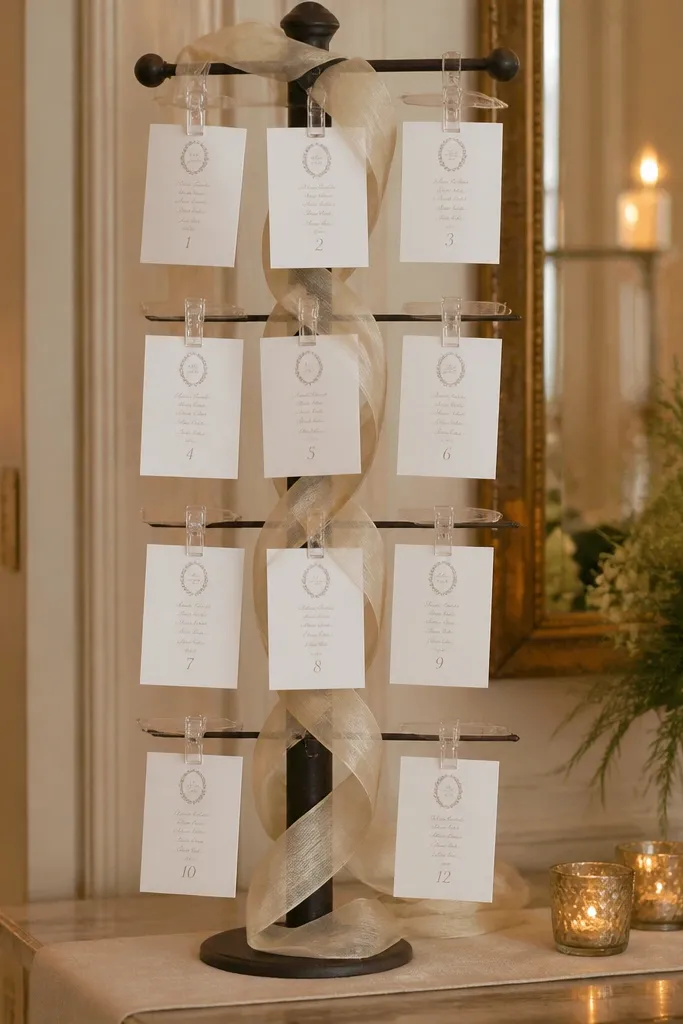
If you like a more interactive look, a ribboned rail with escort-style cards gives you visual movement without complicated design. Each card is labeled with a table number and a name, and guests spot their table quickly by the tags. The look is elegant because the rail creates a consistent vertical rhythm, and ribbon adds softness. This works well for weddings where assigned seating is needed but you want guests to feel guided rather than stuck reading a wall of text.
Start by setting up a rail or long frame with ribbon stretched taut, then hang individual name cards with table number tags. Use uniform card sizes so the spacing stays even, and keep the table numbers in bold at the top of each card. Place the rail near the entrance and add a small legend sign showing which side is “Table 1” progression.
Choose ribbon color that matches your palette, then keep it to one ribbon so the rail doesn’t look busy.
Avoid mixing card widths; uneven cards make the whole rail look cluttered.
12. Minimalist Seating Chart on White Tiles with Black Vinyl
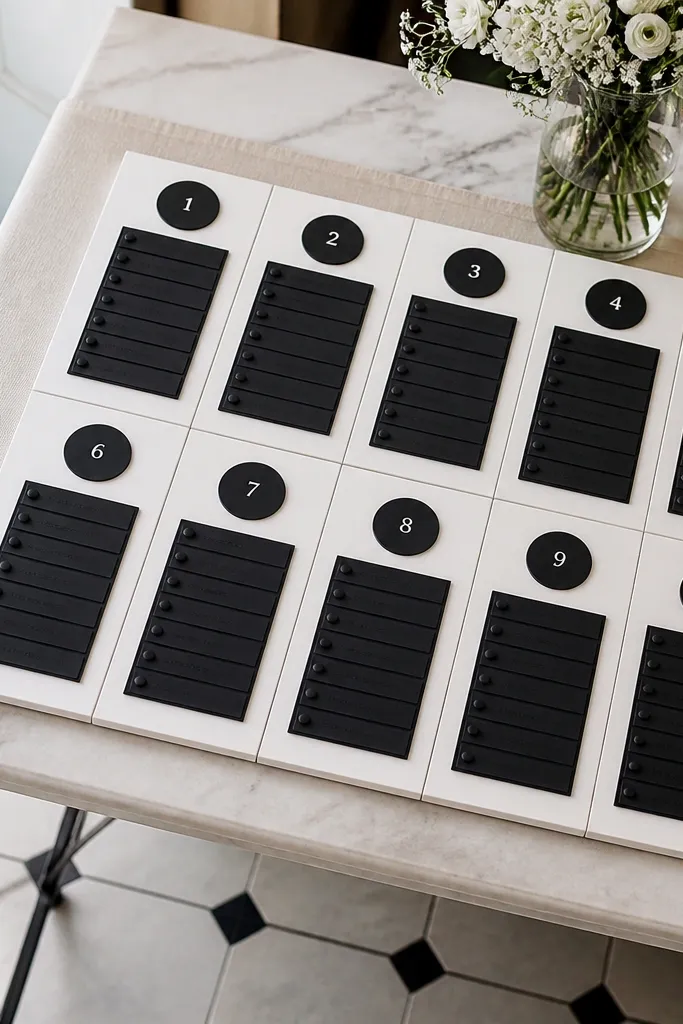
Start by laying out a grid on a backing board using tiles sized to your space and table count. Apply black vinyl for table numbers and names, then mount each tile to the backing with strong removable adhesive. Set the final board on an easel and add a title strip at the top so guests know where to look.
White tiles with black vinyl look crisp and architectural, and they photograph beautifully because the surfaces stay clean. It’s beginner-friendly because you can build it as a grid and swap only the tiles that change. The aesthetic is modern and calm, which makes it a good match for indoor receptions with neutral decor. Guests can scan table headers fast, and the layout stays neat even when names are long.
Skip thisSkip glossy tiles; reflections make the vinyl harder to read on camera.
Quick tipUse a matte tile finish to reduce glare from overhead lights.
13. Seating Chart with Large Name Blocks and Small Table Headers
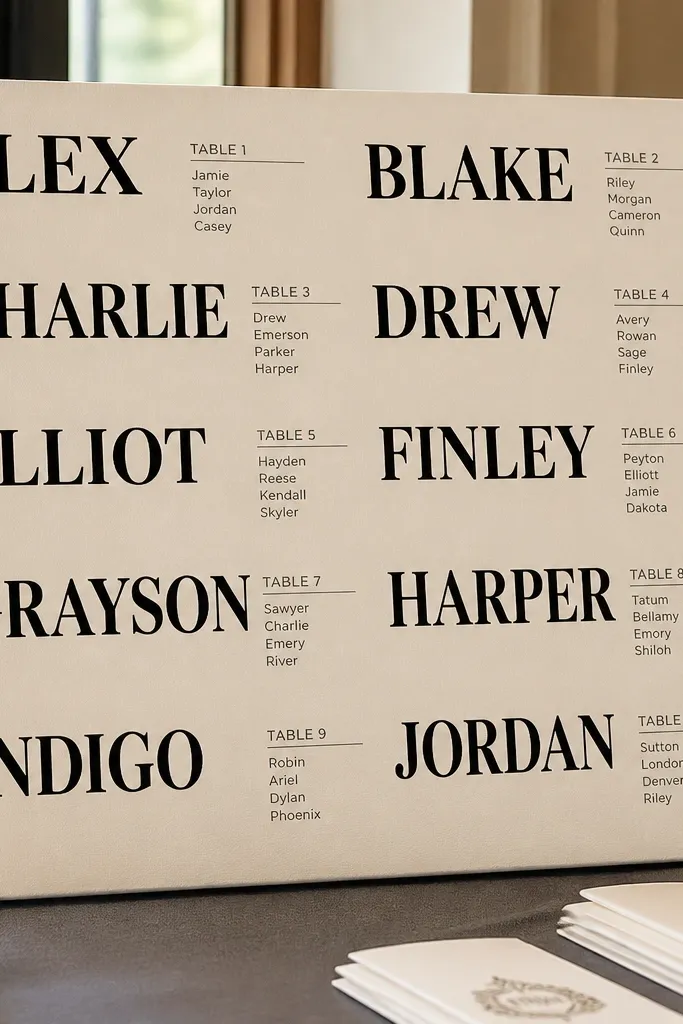
Start by printing a table of contents style chart: use large text for last names or full names, then include a small label for their table number. Organize alphabetically in columns so the board doesn’t look like a random list. Mount on foam board with clear margins, and place it near the entrance so guests can find themselves quickly before they drift away.
Most seating charts list tables first, but guests often search for their names. Flip the hierarchy by putting names in large blocks and adding a small table number header beside or above each name group. This makes the chart feel elegant and practical because it reduces the work guests do with their eyes. It’s beginner-friendly because you can group names alphabetically and keep everything consistent. Photos look good because the layout has bold typographic moments instead of dense paragraphs.
Skip thisAvoid long full-name lines if your font is small; shorten to first name + last name for readability.
Quick tipUse alphabet breaks with larger section labels like A-C, D-F to speed up scanning.
14. Chic Typography Seating Chart on a Roll-Up Display Stand
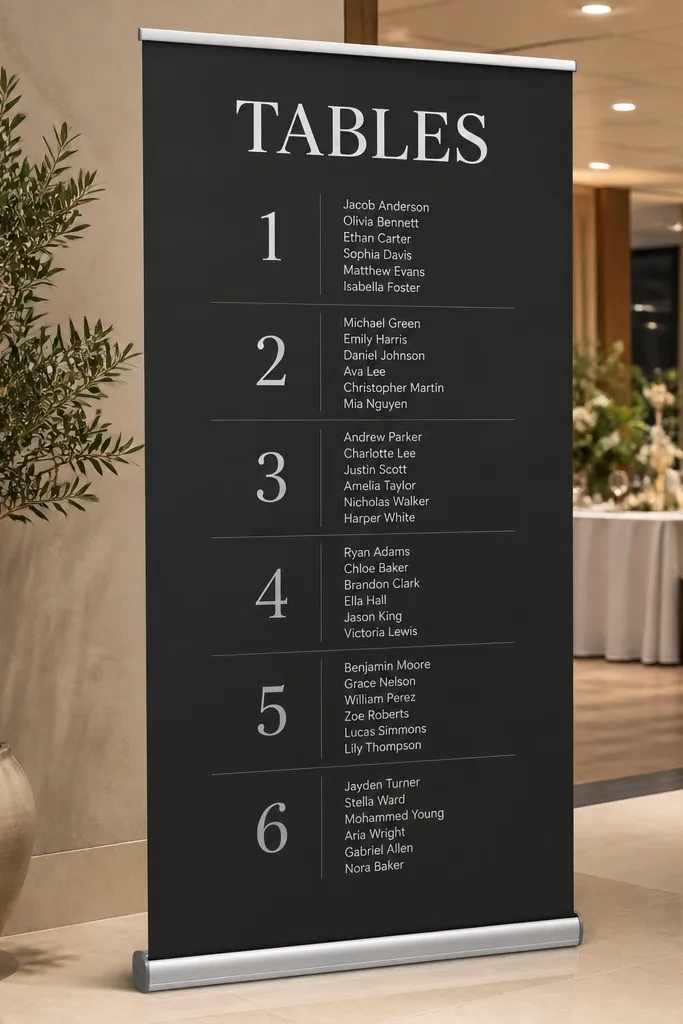
Roll-up display stands look like event signage, which makes them instantly feel polished. The best part for beginners is that the layout stays flat and consistent, and you can update by replacing the printed insert. Use bold typography and a simple table list format to keep it elegant. This is ideal for venues where you need the chart to be portable or where storage matters after the wedding.
Start by choosing a roll-up stand size that fits your expected name list without shrinking the text too far. Design the layout in blocks: “Table 1” header, then names in a clean column, repeating down the stand. Print the insert on matte paper, slide it into the stand, and set it at eye level near the entry point. Add a small arrow sign directing guests to the dining area after they find their table.
Test the print at the venue lighting; matte inserts read better than glossy for scan speed.
Skip tiny fonts to fit more names; readability is the whole point.
15. Table Number Cards on a Ladder Shelving Display
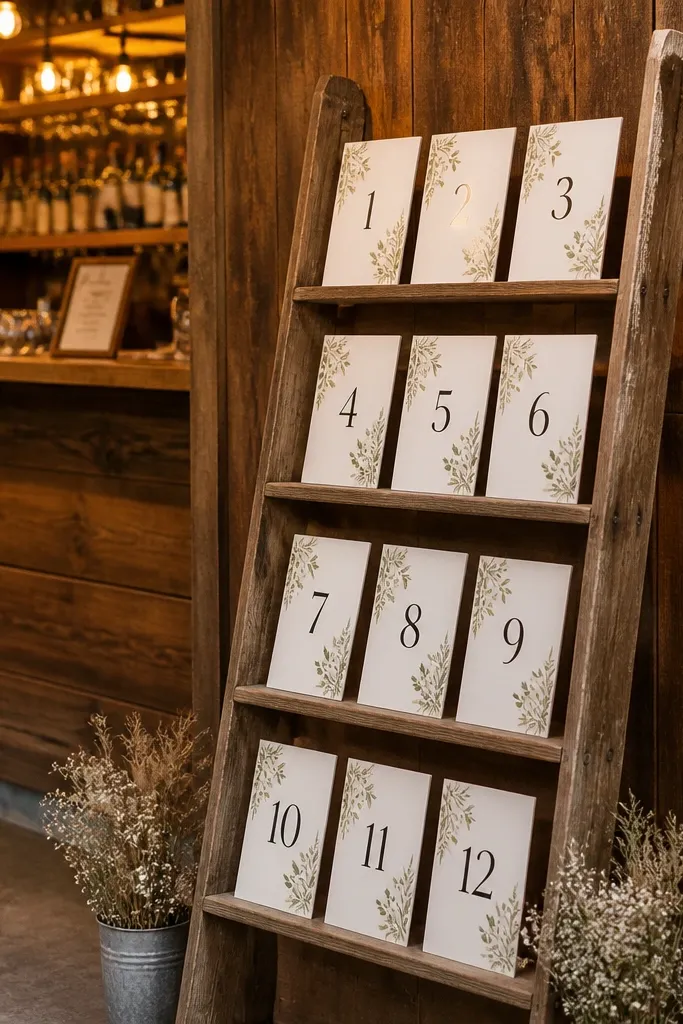
A ladder shelving setup turns a seating chart into decor. Each shelf holds a table number card, and guests can skim without feeling like they’re reading a wall. It looks elegant because the vertical structure creates rhythm and gives you clean photo angles from multiple sides. This is beginner-friendly because you can keep each table list on its own card and reprint only the card that changes.
Start by selecting a small ladder shelf unit that fits your space and won’t block foot traffic. Print one card per table with a large table number at the top and names below in a single column. Place the ladder at the entry with enough space for guests to stand and read, then keep the cards aligned so the shelves look uniform in photos.
Use a neutral card stock color so the ladder doesn’t steal attention from the text.
Avoid overstuffing each shelf card; keep name lists short enough to scan in under 10 seconds.
16. Seating Chart on a Large Menu Board with Chalk Dot Labels
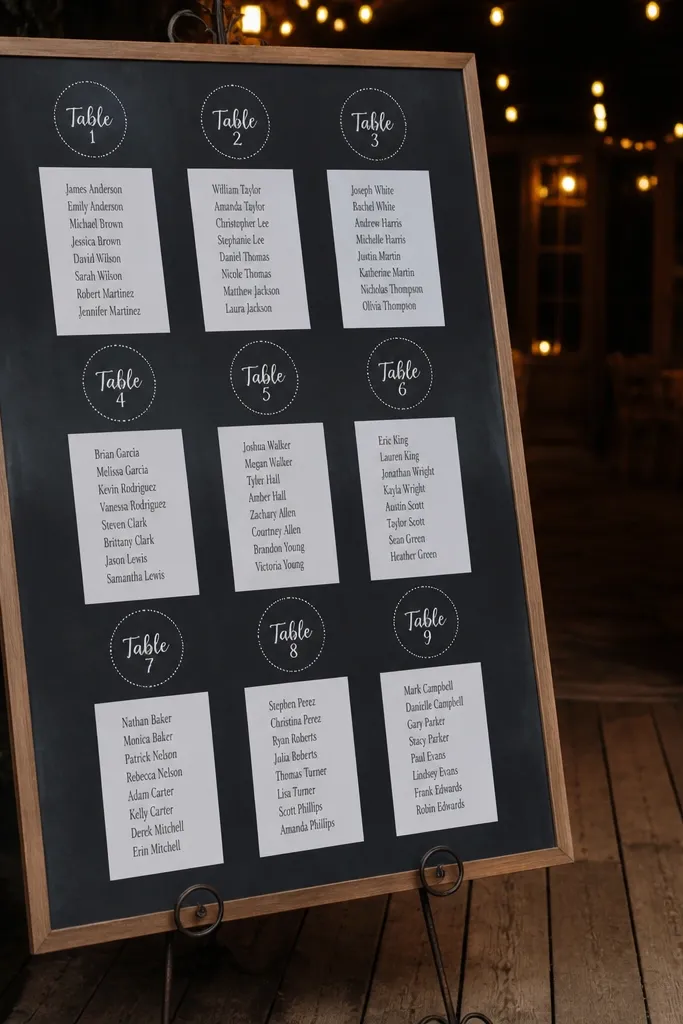
Start with a large menu board or chalkboard panel, then print table headers and mount them in consistent positions. Use chalk dots or small printed dot stickers next to each table header to indicate sections or table clusters. Finally, add a simple legend at the bottom and place the board near where guests queue, so they can read while waiting.
This hybrid style looks artsy and still stays readable. The menu board provides a bold background and the chalk dot labels work like quick markers for tables. You get an elegant, “designed” look without the pressure of perfect calligraphy, because the dots and printed labels do the scanning work. It’s great for venues with a bar or food station vibe where guests expect signage.
Skip thisSkip relying on chalk-only text; printed headers keep it clean.
Quick tipUse a dark board with white paper labels for high contrast in both daylight and evening lighting.
17. Window Seating Chart with Frosted Film Name Labels
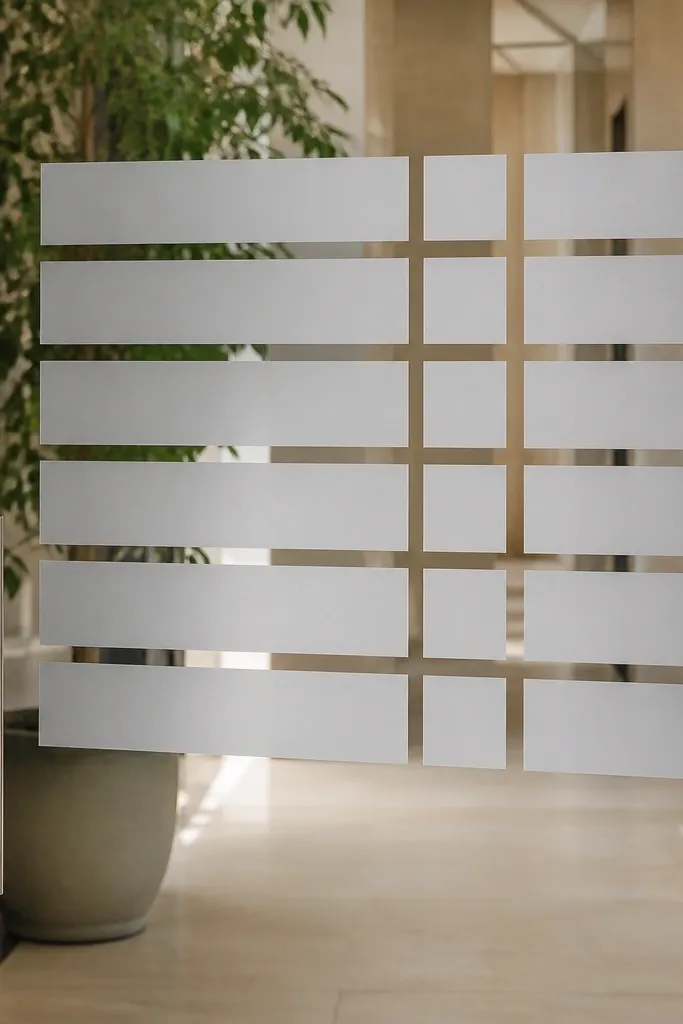
If your venue has a window or glass door, use it. Frosted film labels look sleek and modern, and they read clearly when placed at the right height. This is beginner-friendly because you can cut labels yourself or order custom vinyl and then apply them in a grid. Photos look striking because the chart appears integrated into the architecture, not pasted onto a random board.
Start by mapping where guests will stand and choosing label height so text sits around eye level. Apply frosted film labels for table numbers, then add name labels underneath in the same grid order. Keep the spacing consistent and limit the color palette to black text on frosted white. Finally, clean the glass right before applying so the edges look crisp and don’t lift in humidity.
Use removable glass-safe vinyl if you need to avoid residue on venue windows.
Avoid placing labels too high; guests will miss them and keep walking.
18. Seating Chart with Gold Foil Headers and Matte Name Cards
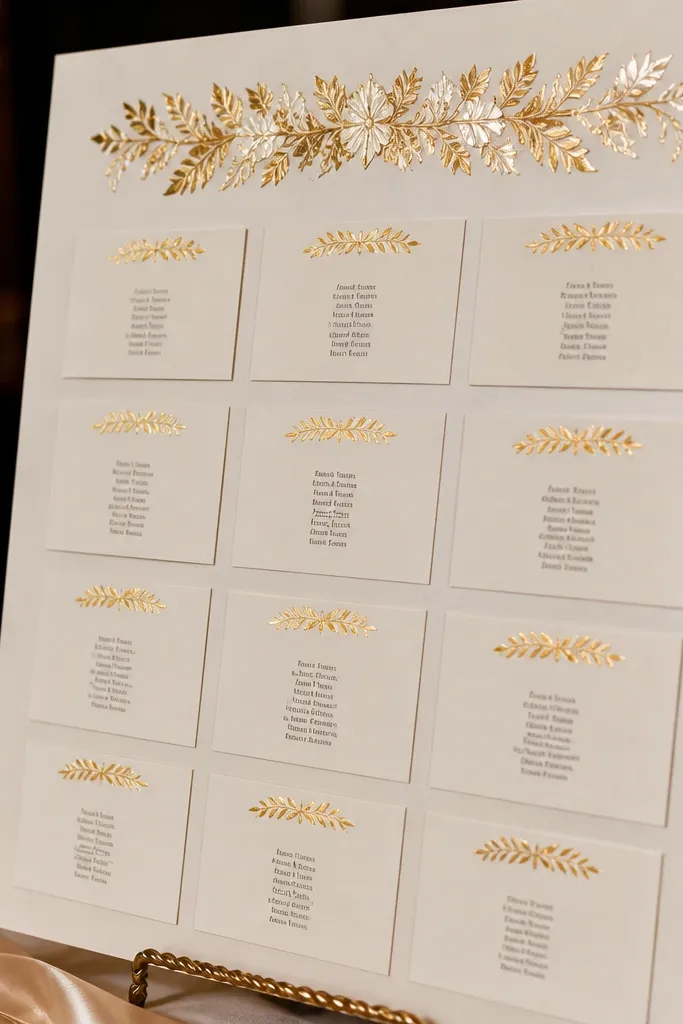
Start by printing a base chart with table blocks and matte name lists on cardstock. Create gold foil table header strips using printable foil label sheets or pre-made foil header paper, then mount those strips at the top of each table block. Place the board on an easel and use neutral background decor (cream linens, simple greenery) so the foil looks intentional.
Gold foil headers instantly push a simple layout into elegant territory. The trick is to keep the names on matte cards so the gold doesn’t overpower readability. This style photographs well because foil catches light in a controlled way, while matte text stays legible. It’s beginner-friendly for couples who want a little glam without learning design software beyond basic print-and-mount.
Skip thisSkip full gold text; keep foil for headers only so names stay readable.
Quick tipChoose foil that matches your other metallics; mismatched gold tones look off in photos.
19. Aisle-Style Seating Chart for Long Tables with Side Labels
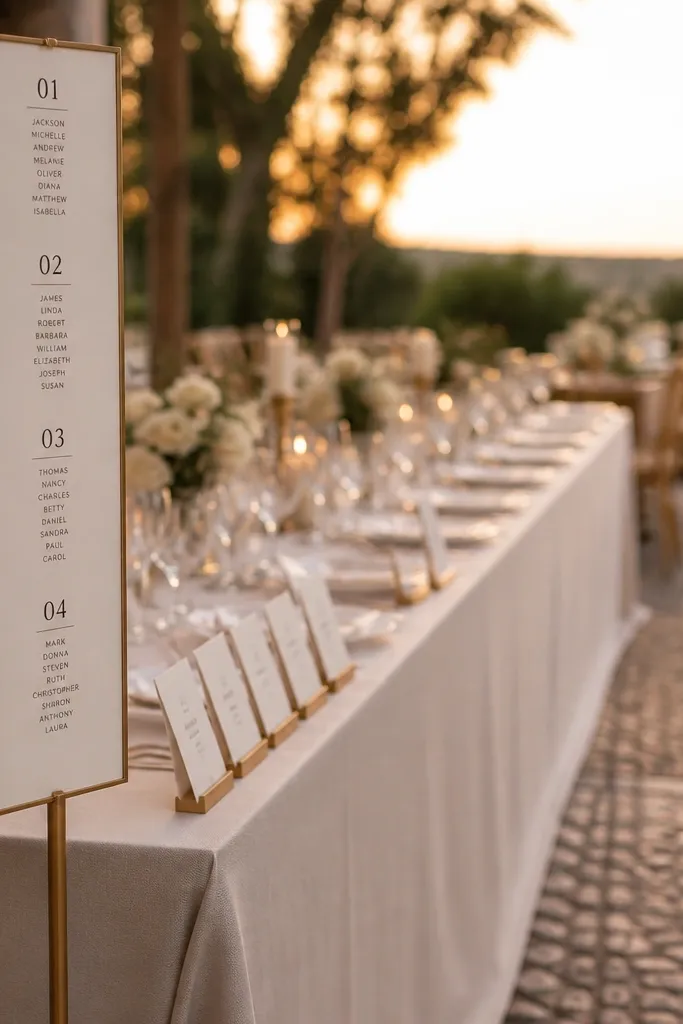
Start by dividing the long tables into sections (like “Table 1 Left,” “Table 1 Right,” or “Section A/B”) based on where your guest mix sits. Print side labels with the table number and a short name list for that section, then place them on stands or small signage holders at the entrance points. Finally, coordinate the place cards so the same section label appears on the table assignments, preventing mix-ups.
Long tables are gorgeous, but the seating chart needs to respect how people actually find seats. Aisle-style labels go on the sides near where guests enter their table section, so they don’t have to search down the length. This looks elegant because the labels align with the table’s linear shape and keep the center of the table clean. Beginner-friendly seating chart wedding readers love this because it’s practical and it avoids clutter near the dining area.
Skip thisAvoid placing the seating chart at the far end; with long tables, people need info at the start of their section.
Quick tipUse consistent color for section labels so guests can find their side even in crowded conditions.
20. Escort Card Table with a Simple Name-to-Table Number Key
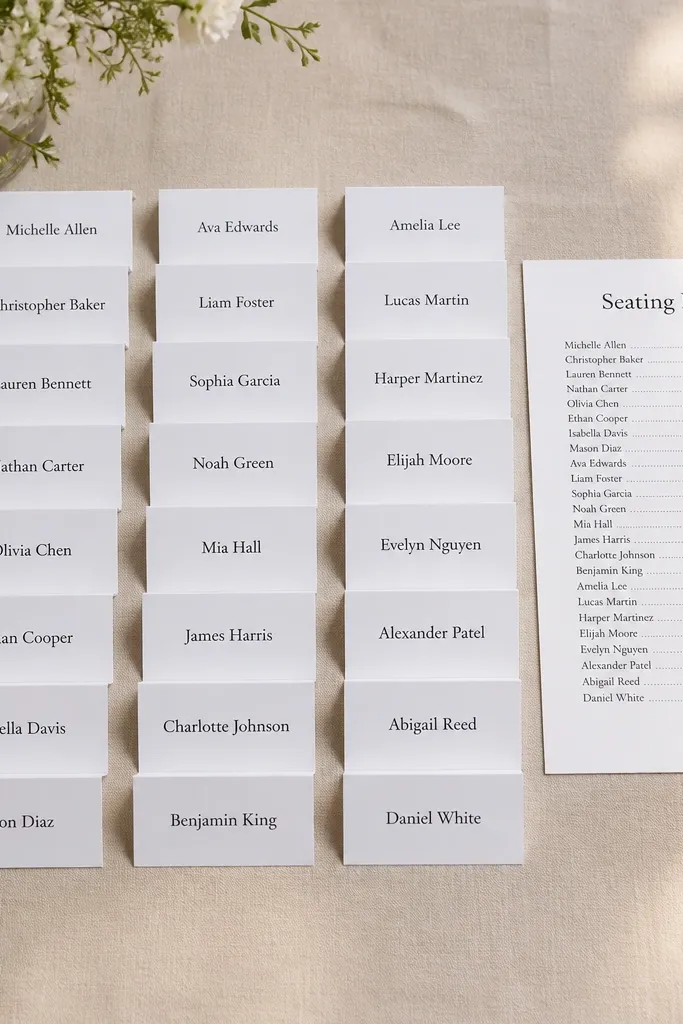
An escort card table can look elegant even when it’s simple, as long as you give guests a quick key. Instead of making them hunt through a big chart, put name cards in order and add a small printed key that shows how to find the table number. This is beginner-friendly because the system is intuitive, and it’s easy to keep consistent with place cards. Photos look clean because the table has a clear surface order rather than scattered signage.
Start by arranging escort cards alphabetically on a long tray or table surface. Each card should include the guest name and a large table number, printed in the same font style across every card. Add a small header sign above the table with a simple instruction line and a key if you use abbreviated section labels. Then set the escort table near the point where guests naturally arrive before walking to their seats.
Use a tray with raised edges or a clear acrylic cover to keep cards from sliding in wind or foot traffic.
Avoid handwritten name cards; a printed uniform look reads faster and looks better in photos.



