
1. Low glass candle clusters with weighted bases
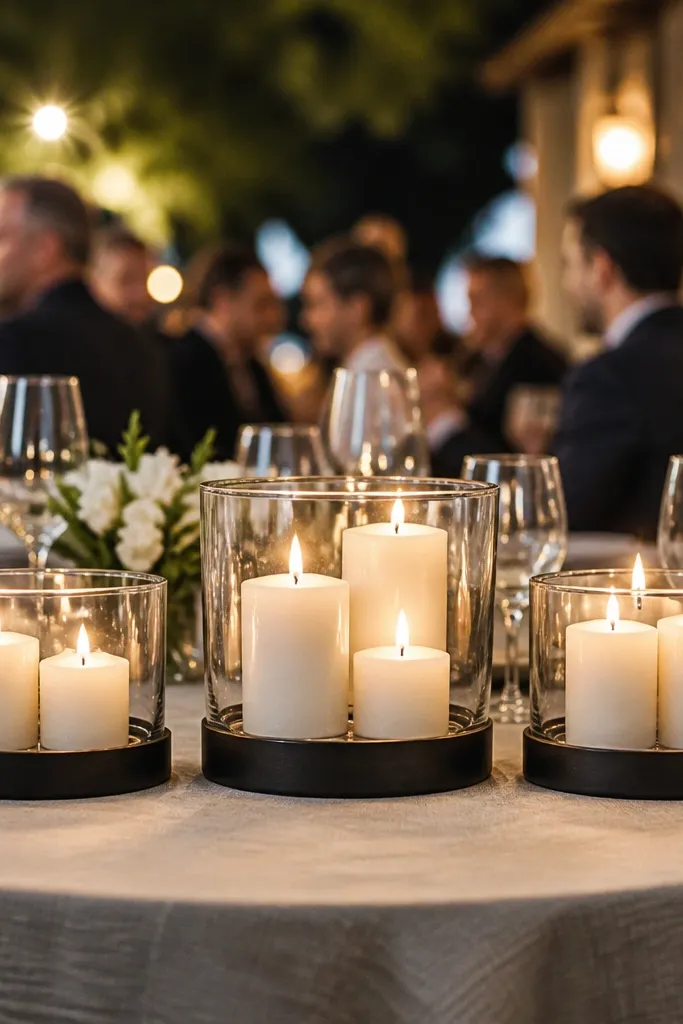
This look wins because it reads intentional at every distance: close-up shows clean glass lines, and wide shots show warm light without blocking faces. Keep everything low — under 10-12 inches — so guests can talk and still look at each other in photos. Candle clusters also handle mixed centerpieces from different vendors, because glass and flame unify the table. It suits fall and winter receptions, and it also works in spring if you’re using warm whites instead of icy tones.
Quick tipIf the venue has strict rules, swap candles for LED tea lights in the same holders and keep the height the same.
Start by choosing 3-5 candle holders with thick glass bottoms so the cluster feels stable on a table runner or flatware. Then use pillar candles or short candles (about 2-3 inches tall) and group them in a tight triangle or rectangle so the light looks dense. Finally, set the cluster on a tray or mirrored acrylic disc to help light bounce and to protect linen from wax drips. Budget tip: buy holders and reuse candles; most costs live in the glass, not the flame.
Skip thisAvoid skinny, mismatched holders — thin glass flashes in photos and looks cheap fast.
2. Bud vase sweep using one flower type
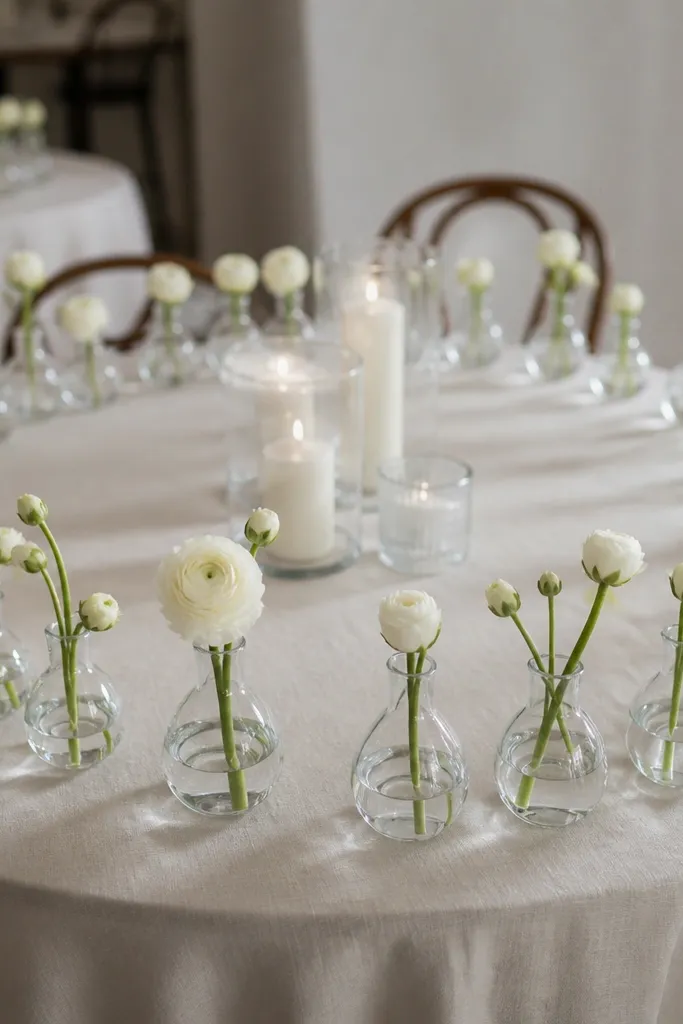
A bud vase sweep gives you that styled look without needing a full floral centerpiece. The secret is repetition: use one flower type and vary only the bloom size, not the flower variety. On round tables, this works because the “sweep” wraps naturally around the circle when you place vases at consistent distances. It’s a strong choice for modern weddings and for venues where you want the table to feel light, not heavy.
Quick tipUse florist tape to pre-assemble vases with stems the day before so you’re not scrambling at setup.
Start by picking 6-10 bud vases in the same shape or finish (matte ceramic or clear glass) and keeping them under 8 inches tall. Then place them around the center in a ring, spacing about 8-10 inches between vases so each one reads separately. Finally, add one low filler element in the middle — like a small bowl of greenery or a single candle — so the center doesn’t look empty. For cost control, buy fewer stems and stretch them by trimming to different heights.
Skip thisSkip mixed finishes like brass + chrome + rough stone in the same table — it fractures the look.
3. Low floral bowl with moss base and short stems
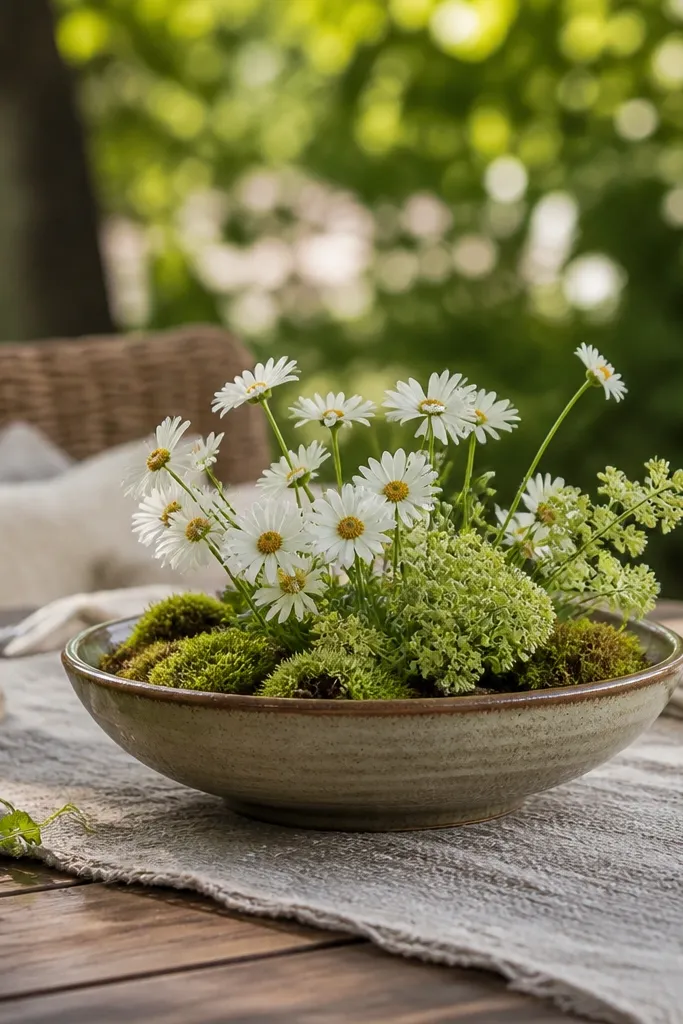
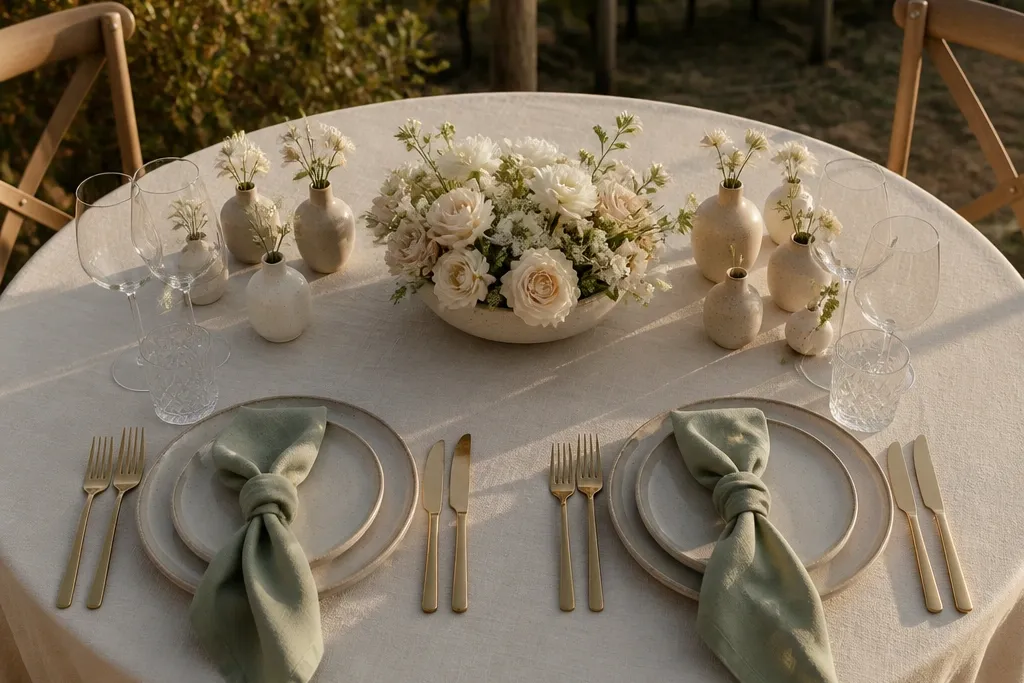
A shallow bowl forces the centerpiece to stay low, which is exactly what round tables need for guest comfort and clean photos. Moss or moss-look base makes the arrangement feel lush without spending on tall stems. This is the best choice when you want real flowers but you’re trying to keep costs down, because you can use fewer stems by focusing on density at the bowl edges. It suits spring and early summer, especially with palettes like ivory + blush or sage + white.
Quick tipPick bowls in one material family — ceramic or clear glass — and keep metal color consistent for candle trays.
Start by choosing a bowl about 12-16 inches wide and 3-5 inches deep, then line it with floral foam or wet floral mechanics plus moss-look filler. Next, insert short stems first — keep most stems under 8 inches — and build outward so the bowl rim looks full. Finally, add 1-2 “face” flowers (like ranunculus or garden roses) and let the rest be greenery and smaller blooms. If you’re renting the bowl, confirm pickup timing so you’re not paying rush fees.
Skip thisAvoid tall, spiky stems in the center — they break the conversation-friendly height rule.
4. Faux greenery ring with bud vase centers
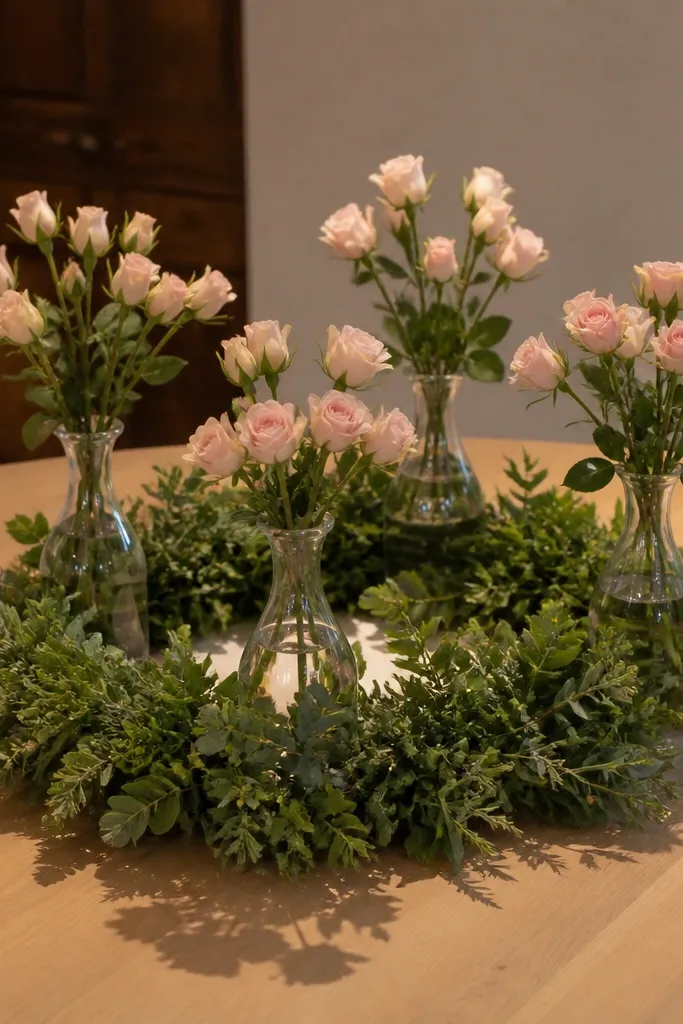
This is a budget-friendly way to get the “full” look people think costs a fortune. A ring of layered faux greenery reads rich because it creates shadow and texture around the tabletop, and it frames whatever you put in the middle. Pairing it with 3-4 bud vases keeps the table from looking like one flat mass of green. It’s ideal for rustic-modern, garden, and boho styles, and it works indoors and outdoors.
Quick tipMist the faux greenery lightly with water before styling to reduce that dry, plastic look under bright venue lights.
Start by buying faux greenery bundles with varied leaf shapes (look for at least two textures, like matte leaves and shiny leaves). Then form a ring that’s about 14-18 inches in diameter so it fits the table without crowding the place settings. Finally, place 3-4 bud vases inside the ring and keep stems short so the ring stays the hero. Cost saver: use real candle holders or thrifted vases and spend on greenery only.
Skip thisSkip single-note greenery that’s all the same shade and shape — it photographs flat.
5. Mirrored tray centerpiece with floating candles
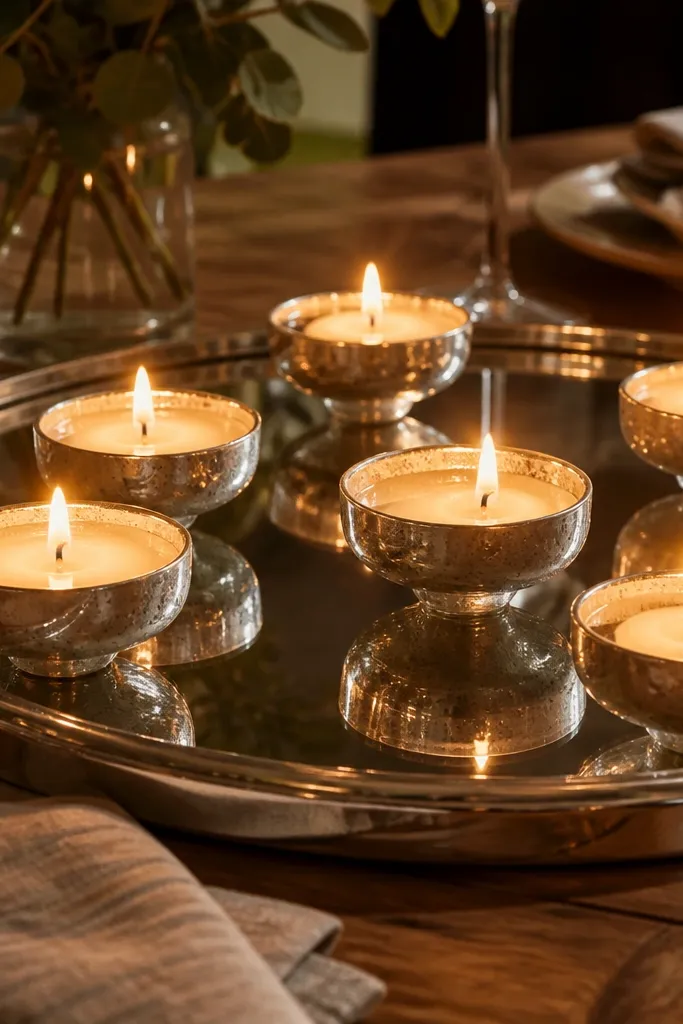
A mirrored tray doubles the effect of candlelight and makes even simple centerpieces look intentional. Floating candles look clean and calm, and the reflection fills the space under the flame so you don’t need tall décor. This is great for round tables because the reflection turns the circle into a full visual frame. It suits evening receptions and venues with darker floors where the mirror helps anchor the table.
Quick tipUse LED floating candles if the venue has wind or strict fire rules; reflection still does the work.
Start with a round or square mirrored tray sized so it covers about half the table width, usually 18-24 inches. Then add shallow water (or a water-holding insert) and float 5-7 tea candles, keeping the flame height low. Finally, place a low ring of greenery or petals around the tray edge so it doesn’t look like a random bowl. Practical step: do a mock setup first to check candle placement before guests arrive.
Skip thisAvoid open-water setups without supervision — spills and slippery trays are a setup-day nightmare.
6. Fabric runner with two-tone napkin styling and a minimal center
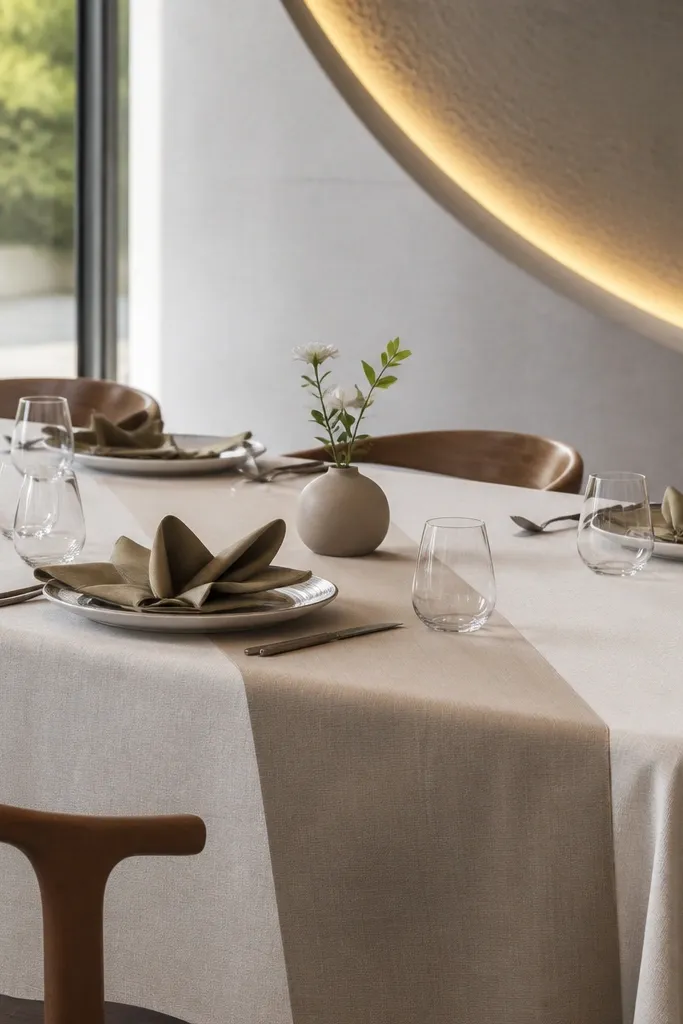
When budget is tight, linen does the heavy lifting. A fabric runner creates movement and depth, and coordinated napkins make the table look designed even if the centerpiece is small. This works best when your venue already has visual interest — like a beautiful wall, garden view, or architectural lighting. It’s also the easiest way to get consistent photos because linen color is predictable across tables.
Start by choosing a runner fabric with texture, like linen-cotton blend or matte satin, and size it to cover roughly one-third of the table’s diameter. Then fold napkins in a shape that shows edges clearly, like a simple rectangle fold or a fan fold, and keep napkin colors two-tone: one neutral and one accent. Finally, use a minimal centerpiece like a single bud vase with greenery or one low candle. Budget move: buy napkins in bulk and reuse runners across the reception.
Pick runner and napkin colors from the same fabric family so they match under both daylight and warm venue lighting.
Avoid glossy table overlays — they glare in overhead lighting and make the whole table look cheap.
7. Vintage glass bottles grouped with foraged-looking stems
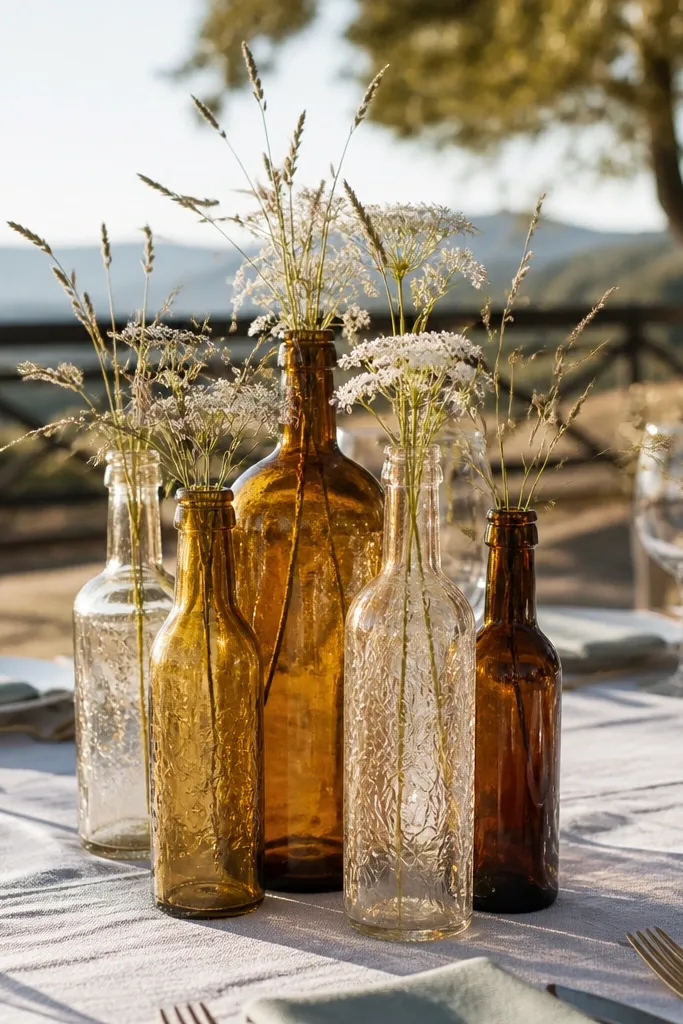
Grouped bottles look collected, not purchased, and that reads upscale in photos when the bottles share a color story. This style gives you texture without needing expensive florals, especially if you use greenery and one accent bloom. It’s a strong choice for outdoor receptions and casual weddings where the table can feel a little imperfect in a good way. The look is forgiving too — if one bottle is slightly taller, the group still reads intentional.
Quick tipUse a shallow tray under the bottle group to make setup faster and protect table surfaces.
Start by gathering 5-8 bottles in one color family — clear with slight tint, amber, or smoky green. Then fill them with short stems trimmed to different heights, keeping the tallest bottle under 10 inches. Finally, tie the group together with a shared filler — eucalyptus-like greenery or olive leaves — so the color stays consistent. If you’re renting bottles, confirm you can return them clean and dry to avoid replacement costs.
Skip thisSkip neon-tinted bottles and random colored glass — it fights your wedding palette.
8. Color-blocked floral grid using foam-free technique
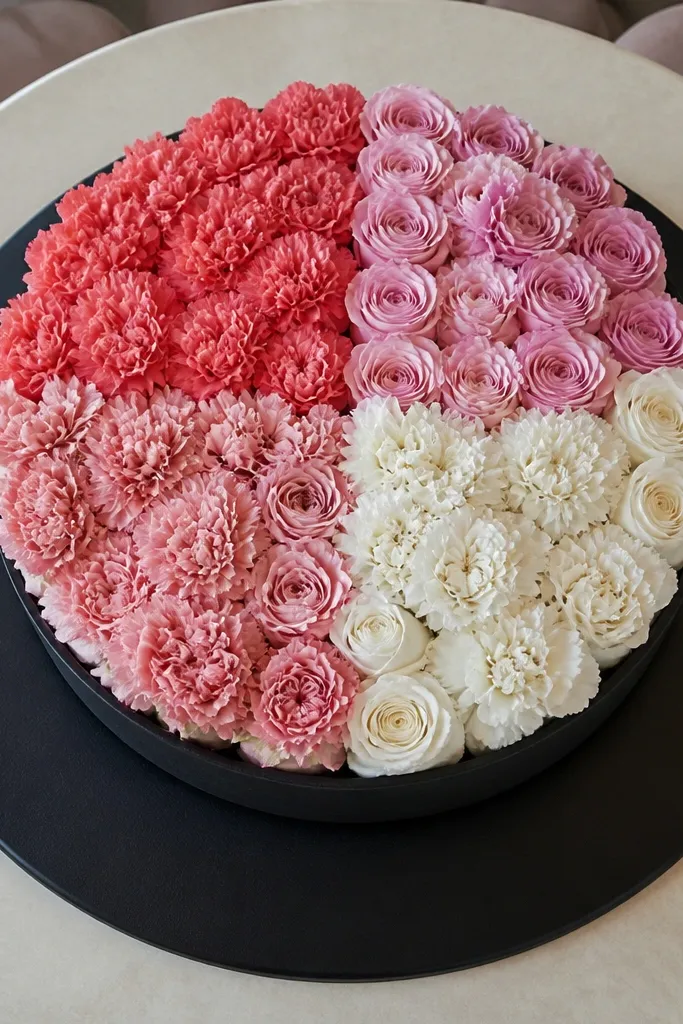
A color-blocked grid is the cleanest way to get a modern centerpiece without tall chaos. You build it with short stems and a structured placement so each color reads like a panel. This is a good match for brides who want a bold palette but don’t want the center to look like a loose bouquet. It also photographs well because the shapes stay crisp and repeatable across tables.
Quick tipIf you can’t find a frog system, use floral grid netting and wire it to the container rim before adding stems.
Start with a foam-free base like a shallow chicken-wire grid or a frog system in a low container, sized around 12-14 inches. Then insert short stems in blocks: keep stems trimmed to 6-8 inches and group by color so you can see the separation. Finally, fill gaps with greenery sparingly so the grid stays sharp instead of fluffy. Cost control comes from using fewer stems per block and focusing on the colors that show.
Skip thisAvoid long-stem inserts — they ruin the grid look and raise the centerpiece above conversation height.
9. Floating flower petals in shallow bowls
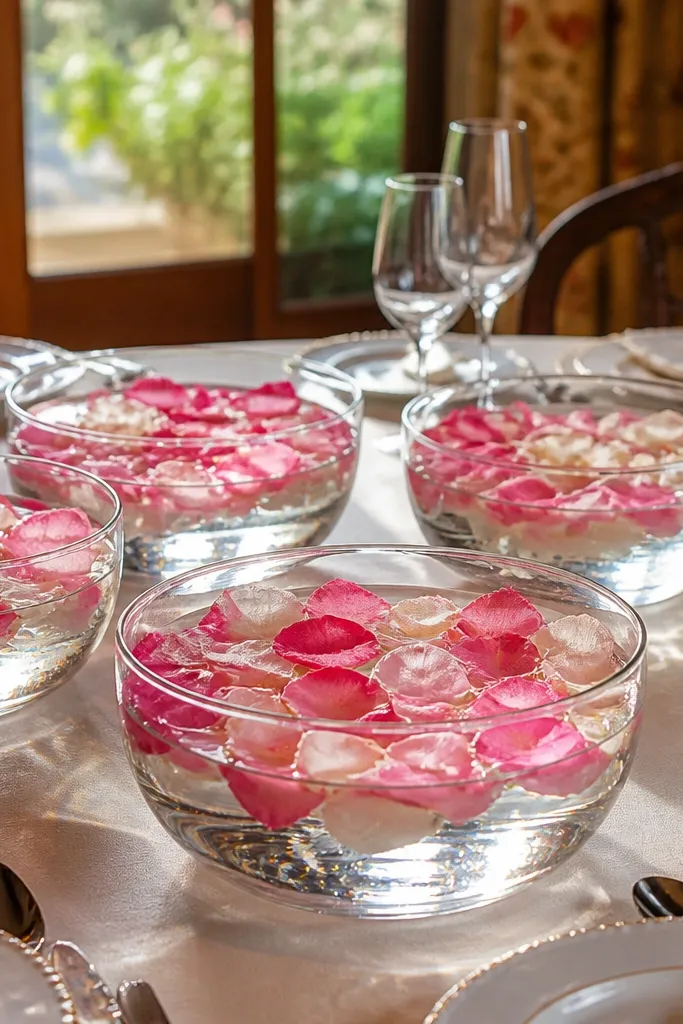
Petals in water are low effort and high impact, especially for daytime receptions where candles won’t do much. This look creates a soft, reflective surface that fills negative space on a round table. It’s also one of the best options for spring weddings because petals look natural with sunlight. You can keep the rest of the table clean and let the bowls do the visual work.
Quick tipKeep bowls on coasters or trays so water doesn’t touch table fabric during the reception.
Start with 2-4 shallow bowls about 8-10 inches wide and fill them with a small amount of clean water. Then add petals — use fresh petals if you can keep them cool until setup, or use high-quality dried petals if you’re doing a non-perishable look. Finally, anchor each bowl with a single low element like a floating leaf or one mini bloom so the petals don’t look like they’re just floating randomly. Do a quick test setup to see how petals settle.
Skip thisSkip heavy petals that clump — choose petals that spread and float cleanly.
10. Taper candle heights with a low base runner
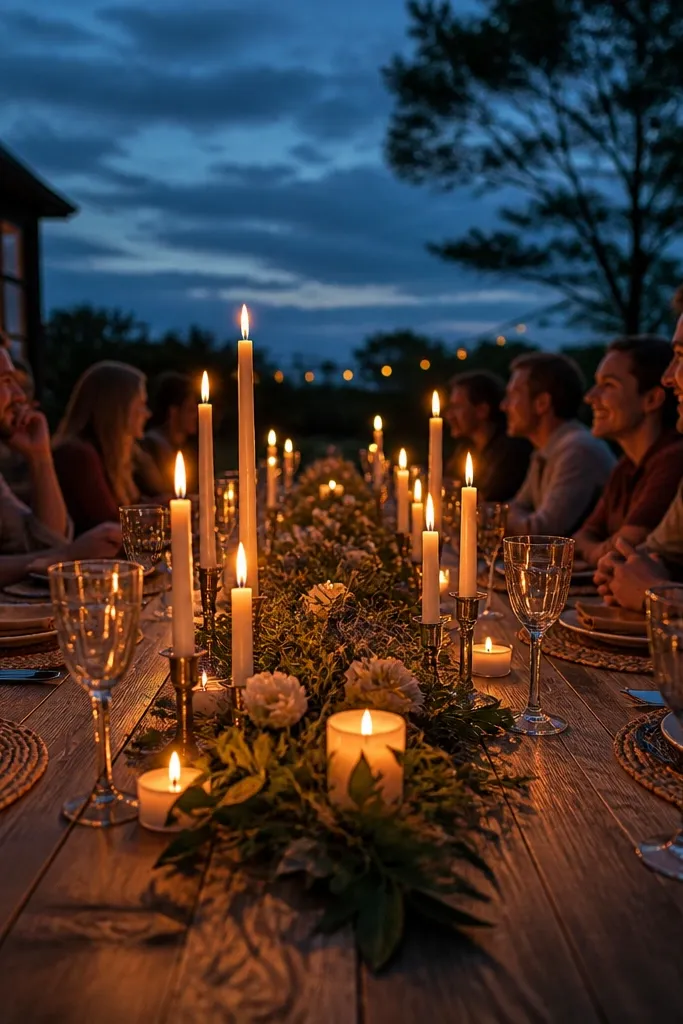
If you love the drama of tall candles, you can still keep round tables comfortable by using a low base runner that holds tapers at the edges instead of the center. The result looks cinematic in photos and gives you height without blocking faces. This style works best when tables are close enough to see multiple candles but not so close that guests are constantly turning around. It suits winter weddings and any reception with strong lighting.
Quick tipUse weighted taper holders so tapers don’t wobble when staff move chairs.
Start by placing a low runner or wide ribbon band across the table center, then arrange tapers in holders along that runner with the tallest candles kept under about 18 inches. Keep the center gap clear so people can see each other. Finally, add one small low floral accent in the middle — like a short bud vase or a tight moss ball — so the center isn’t empty. This is a good rental-friendly look because candle holders are reusable.
Skip thisAvoid placing tapers in the center line — it blocks faces and creates ugly shadows.
11. Mini terrarium center with moss and one bloom
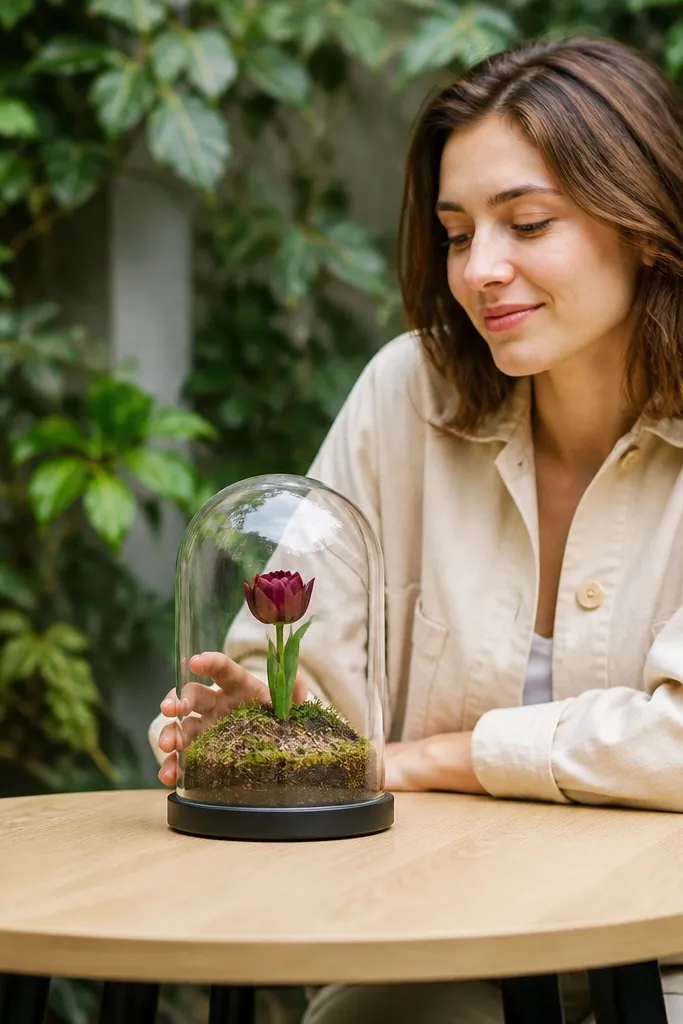
Terrarium-style centers feel modern and intentional, and they’re a smart choice when you want decor that’s small, clean, and easy to reset. The moss base gives you texture, and one bloom keeps it from looking like a craft project. This is especially good for spring and summer weddings with a garden theme, and it works well in venues where tables are smaller or where you need to keep sightlines open. It also photographs nicely because glass catches light in a controlled way.
Start with glass containers or cloches sized so the top sits around 10-12 inches tall. Add moss (real or high-quality faux) and place one statement bloom or two small buds. Then add 2-3 tiny filler elements like seed pods or small stones for texture. Keep everything dry and stable so setup is fast. Cost saver: buy a few terrariums and reuse them by resetting the bloom each time.
Pack moss in advance and keep containers covered until the last minute to stop dust.
Skip clutter inside the container — too many items makes it look messy on camera.
12. Olive branch and herb styling for Mediterranean tables
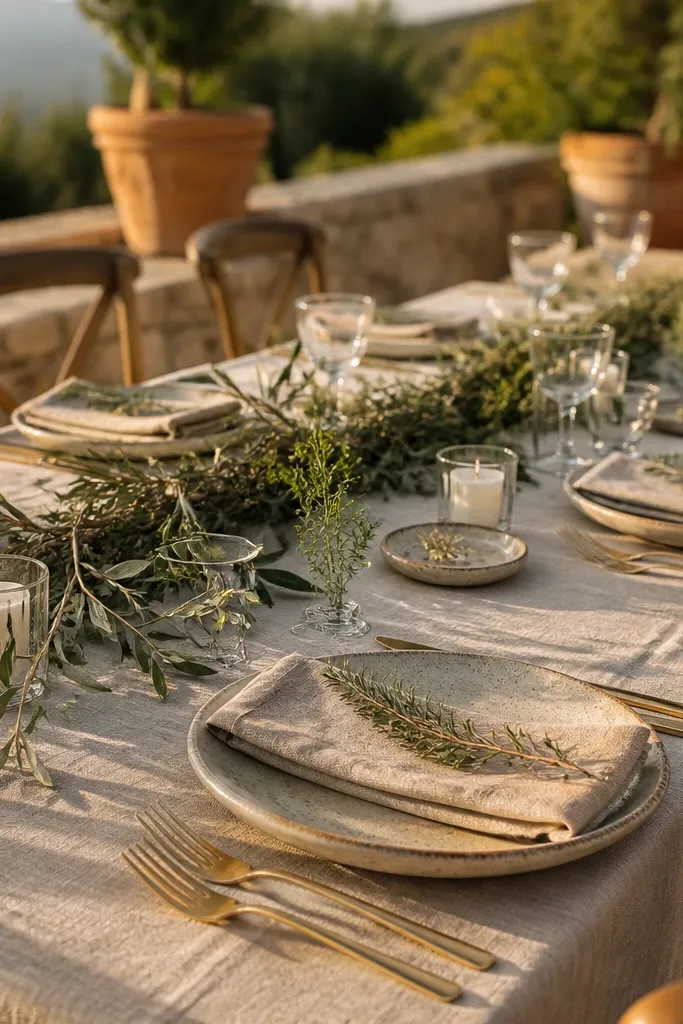
Herb and olive styling gives you a clean, Mediterranean look that feels special without being fussy. It’s also practical: the table smells good, and the styling can feel intentional even if you keep the arrangement minimal. Olive branches create natural structure, and herbs like rosemary add texture that reads well in daylight. This works best for outdoor or open-air receptions where guests are moving between tables and want something fresh-looking.
Quick tipMist herbs right before setup and keep them shaded until guests arrive.
Start by placing 3-5 short herb sprigs in small vases or jars spaced evenly around the center. Then add one olive branch loop in the middle, trimmed to keep height under 12 inches. Finally, scatter a few herb leaves around the base and keep the rest of the table styling simple. Cost control comes from using fewer stems and choosing branches with natural fullness.
Skip thisAvoid wet leaves on linen — rosemary and olive can stain if they’re dripping.
13. Monochrome white candle and bud vase combo
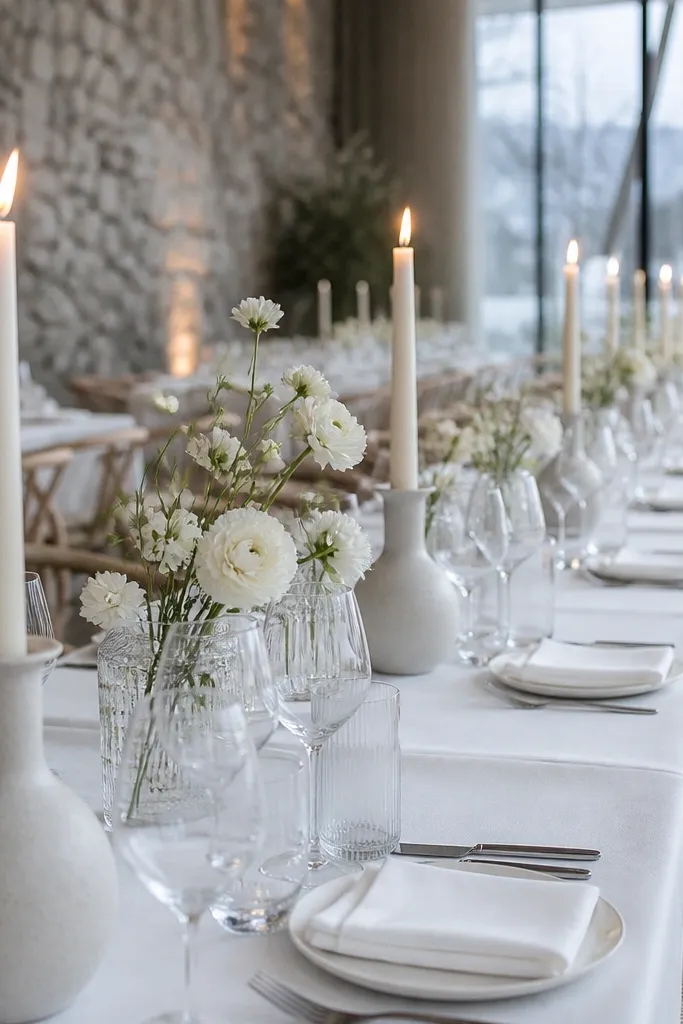
Monochrome styling is the fastest path to a high-end look because you remove color chaos. White candles plus white bud vases create a clean visual rhythm, and the table reads cohesive even if individual items vary slightly. This is strong for modern weddings, winter weddings, and venues with neutral walls. It also works in photography because white reflects light and keeps the centerpiece readable from different angles.
Quick tipUse candle wax color that matches the vase finish — warm cream wax looks better with ivory glass than with icy white glass.
Start with 6-8 bud vases in matching finishes, then place 2-3 low candles in coordinating glass holders in the center. Keep everything in the same white family: ivory, warm white, and soft off-white. Then add greenery sparingly, like thin eucalyptus or dusty sage, so the whites don’t blend into the tablecloth. Finally, adjust heights so the tallest element stays under about 12 inches.
Skip thisAvoid mixing bright optic white with warm ivory in the same table — it looks mismatched under warm lights.
14. Rattan or wicker charger base with low floral accents
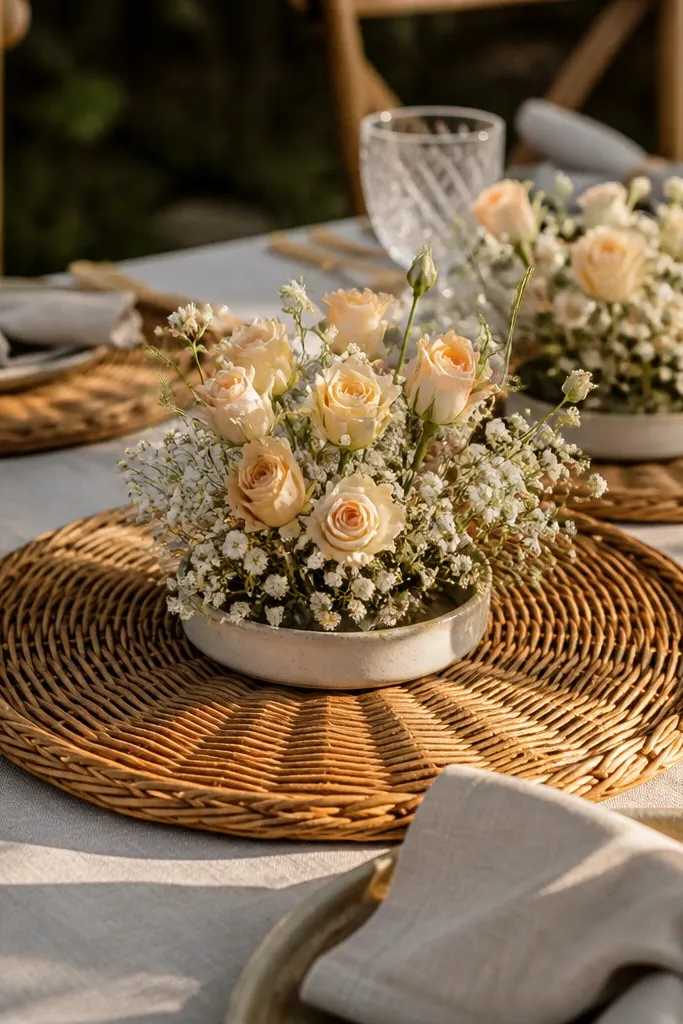
A rattan or wicker base changes the whole feel of a table in a way flowers alone can’t. Even a small floral accent looks designed when it’s sitting on a textured charger. This is a great budget option because textured chargers are usually cheaper than large centerpieces, and they add warmth that reads well in both indoor and outdoor venues. It fits boho, rustic-modern, and coastal styles.
Quick tipClean and dust chargers before event day; woven textures show dirt under bright overhead lights.
Start by choosing a round rattan/wicker charger about 14-16 inches wide, then place it centered on the table. Add a tight low arrangement — like 6-8 stems in a small vase or a short floral bowl — keeping height under 10 inches. Finally, add 2-3 small filler accents around the base, like dried citrus slices or a few eucalyptus leaves. If you’re using real citrus, keep it dry to avoid sticky residue on the charger.
Skip thisAvoid thin, floppy chargers — they sag and look tired in photos.
15. Dried florals in a low pedestal bowl
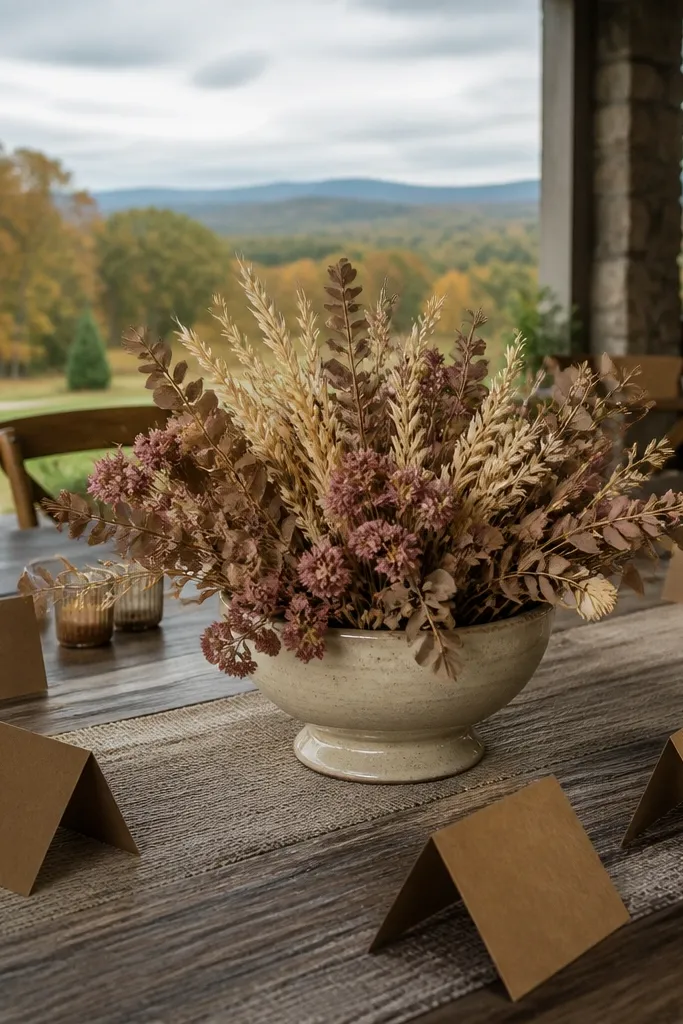
Dried florals look styled even when they’re not fresh, and they solve the timing problem of real blooms. A low pedestal bowl creates height without blocking sightlines, and dried stems keep their shape through the whole reception. This is a smart choice for fall weddings and for couples who want decor that can be kept after. It also works in venues with strong air conditioning where fresh flowers wilt fast.
Quick tipPack dried stems in tissue and keep them away from humidity; condensation ruins color quickly.
Start with a bowl around 12-18 inches wide and a pedestal height that keeps the top under 14 inches. Add a base layer of dried greenery, then insert dried blooms in clusters, trimming stems so the tallest pieces don’t exceed your conversation-height target. Finally, add a few seed heads or grasses for movement and keep the palette tight: one neutral + one accent color. Cost saver: dried flowers are often cheaper per stem than fresh, so you can buy fewer items and still get volume.
Skip thisAvoid using random dried stems with wildly different thickness — it looks like a mixed craft bag.
16. Statement lanterns with low greenery inside
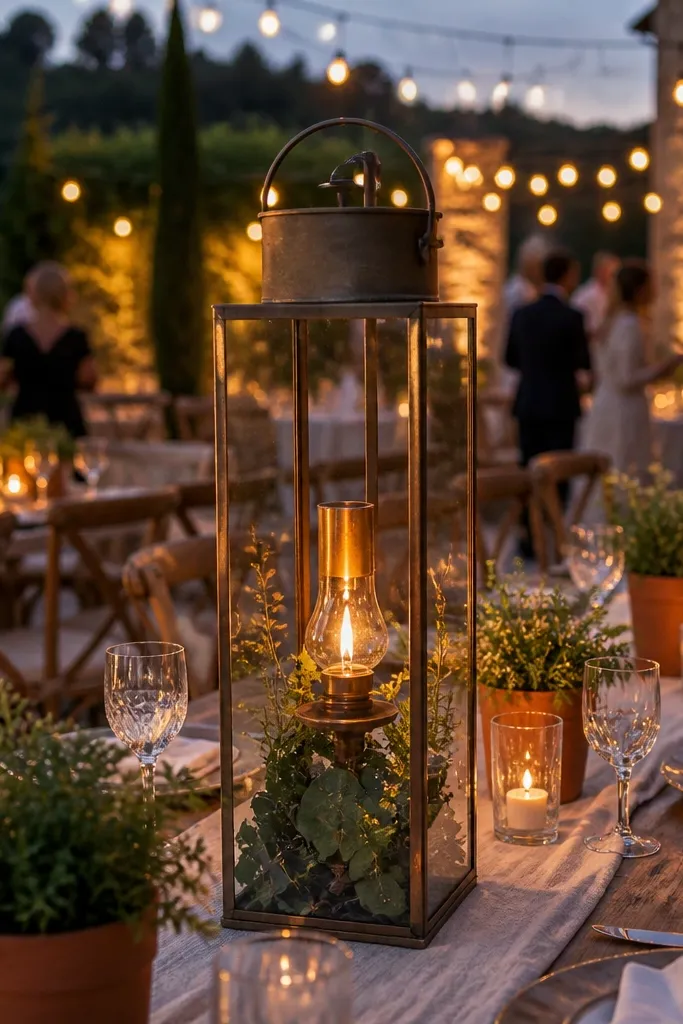
Lanterns give you a built-in frame, which makes tables look dressed even when you keep the centerpiece low. Put a lantern at the center and use low greenery inside so guests can still see each other. This look is great for evening receptions and outdoor venues because lanterns feel purposeful in low light. It also gives you a consistent shape across tables, which makes photos look cohesive.
Quick tipUse warm LED candles inside lanterns if you want consistent results without fire risk.
Start by choosing 1-2 lanterns per table that fit the scale, usually 10-14 inches tall, and keep the flame or light source inside. Then fill the base with low greenery and a small number of blooms so it stays under 12 inches. Finally, place a tray under the lantern to catch drips and to keep the placement consistent. If you use real candles, confirm with the venue and use appropriate holders.
Skip thisAvoid oversized lanterns — if the top crosses 14-16 inches on a round table, it starts blocking faces.
17. Color-matched table scatter with one centerpiece anchor
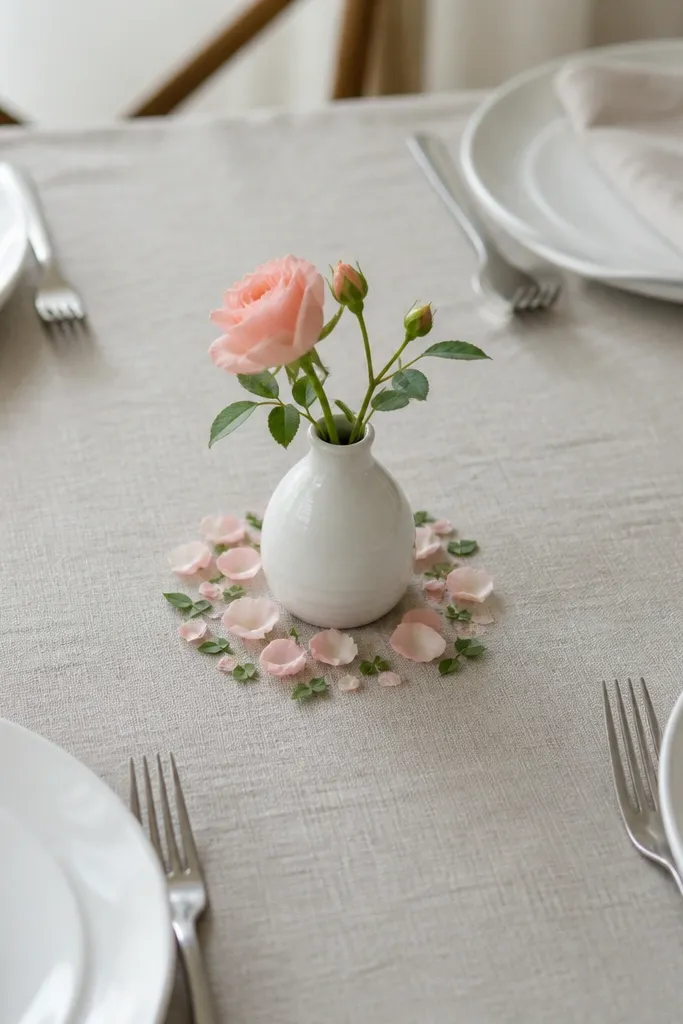
Scatter styling makes the whole table feel finished, even when the centerpiece is small. The trick is to keep scatter in a tight color range and to use it only around the centerpiece zone, not across the entire table. This look is great when you want variety across tables without buying expensive big items. It also photographs well because scatter adds micro-details that show up in close shots.
Quick tipUse a shallow tray to pre-load scatter so you don’t spill on linen during setup.
Start by choosing one scatter material: petal confetti, glass gems, or dried citrus slices, and keep it in a single color story. Then place a low anchor centerpiece in the middle — like a bud vase or a candle cluster — and apply scatter in a ring around it. Finally, keep scatter height low so it doesn’t interfere with place settings, usually under 1 inch. Cost control is simple: scatter materials are cheap per table and you can reuse trays for setup.
Skip thisAvoid scatter that sheds or smears easily — it turns into mess when guests brush the table.
18. Thrifted bud vase mix with consistent ribbon wrap
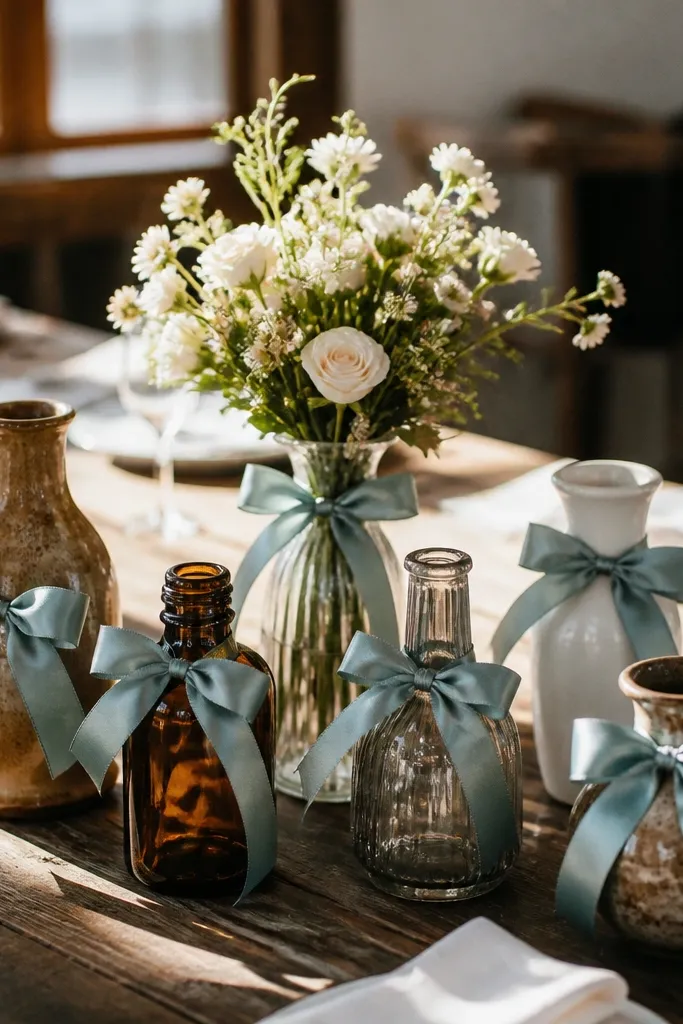
Thrifted bud vases can look designer if you unify them with one consistent styling element. Ribbon wraps or twine bands in the same color family make different shapes look intentional. This is a budget-friendly way to build volume without paying for matching sets. It suits rustic-modern and casual weddings, and it’s especially good when you want the table to feel handmade but not chaotic.
Quick tipChoose ribbon with a matte finish; satin catches flash and makes the table look shiny in a cheap way.
Start by selecting 6-10 vases in thrift stores that are the same height range (about 5-8 inches) even if the shapes vary. Then wrap each vase with ribbon or twine in one color and keep the wrap height consistent so the line looks clean across the table. Finally, insert short stems and keep the centerpiece under 12 inches. Cost saver: you’re paying for flowers, not for matching ceramics.
Skip thisAvoid wildly different vase heights — it makes the round table look uneven and messy.
19. Peony-look silk blooms in low compote bowls
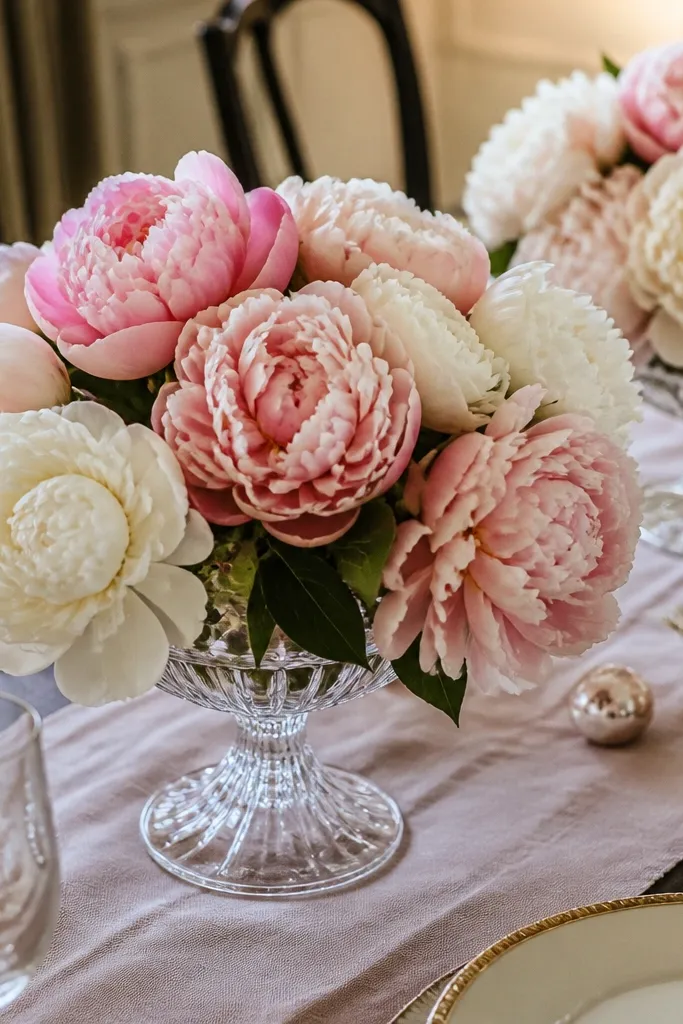
If you love the look of big peony-style blooms but hate the cost, silk-look blooms in compote bowls are a solid compromise. The bowl shape keeps the centerpiece low and gives the flowers room to look full without needing tall stems. This works best for romantic palettes like blush, dusty rose, and warm white. It’s also a good option for destination weddings where fresh flower logistics can turn into a headache.
Quick tipBefore setup, wipe silk petals with a dry microfiber cloth so dust doesn’t show under bright lights.
Start by choosing compote bowls about 10-14 inches wide and 3-4 inches deep. Then build the arrangement with 3-5 silk-look blooms and trim stems so the petals sit close to the bowl edge. Finally, add greenery sprigs sparingly to hide the base and keep the illusion believable. Cost control is in the number of blooms; you get the impact with fewer large flowers.
Skip thisAvoid cheap-looking single-stem silk — large compote bowls need full, layered petals to read real.



