
1. Gold Framed Mirror with White Orchid Corner Spray
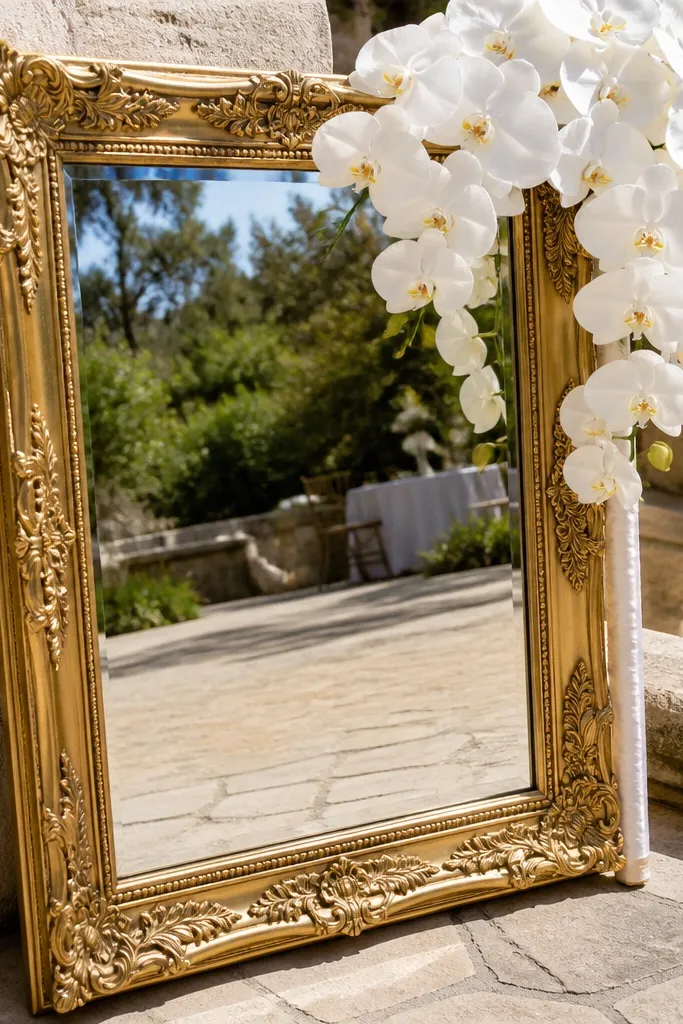
This look wins because the gold frame warms the reflection and the orchid clusters give your mirror something soft to “hold” visually. The white flowers pop against the mirror without turning into a flat sticker in photos. It suits classic spring and early fall weddings where you want the welcome moment to feel bright, not heavy. The mirror reads clean on camera when the orchids are placed at the corners instead of covering the center.
Start by hanging or propping a gold-framed mirror so the text sits at eye level for guests. Then add two orchid corner sprays (top-left and top-right) with thin floral wire so you don’t cover the message area. Finally, place the mirror near light-colored decor like an ivory runner or pale drapery so the reflection looks creamy, not messy.
Quick tipAim to photograph this setup in late afternoon so the gold doesn’t flare from direct sun.
Skip thisDon’t crowd the mirror center with flowers; it kills legibility and turns reflections into visual noise.
2. Black Mirror with Hanging Eucalyptus and Airy Script
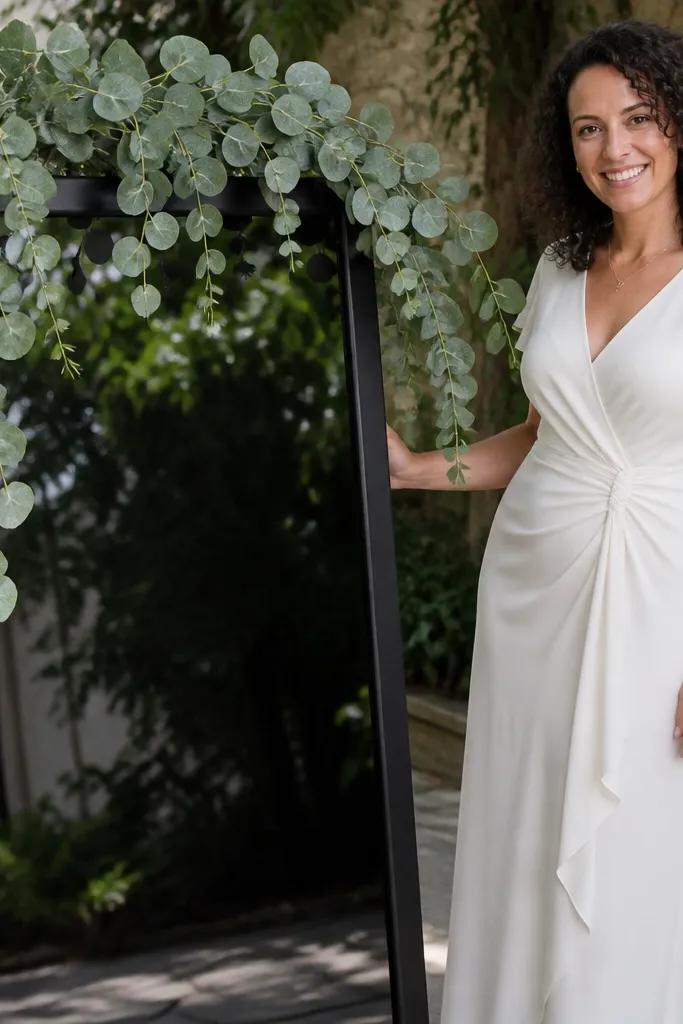
A black mirror frame makes the welcome sign look modern and intentional, especially with eucalyptus trailing down like a curtain. The green tones reflect in the glass for a layered look without needing a lot of extra props. This works best for woodland venues, garden courtyards, and fall weddings when you want “fresh” greenery instead of bright summer flowers. The key is keeping the script lettering light and thin so it stays readable against the reflective surface.
Start by choosing a black-framed mirror with a slim profile so it doesn’t overpower the florals. Then attach a eucalyptus garland that drapes from the top corners, leaving the middle clear for the welcome text. Finally, position the mirror slightly angled (about 15-25 degrees) so the guest-facing text faces your camera while the garland still catches side light.
Quick tipFor travel planning, schedule your floral install 45 minutes before your photo window to let stems settle.
Skip thisDon’t use thick, heavy garlands that block the mirror edges; they create dark reflections and muddy photos.
3. Silver Mirror with Meadow Grasses and Neutral Ribbon
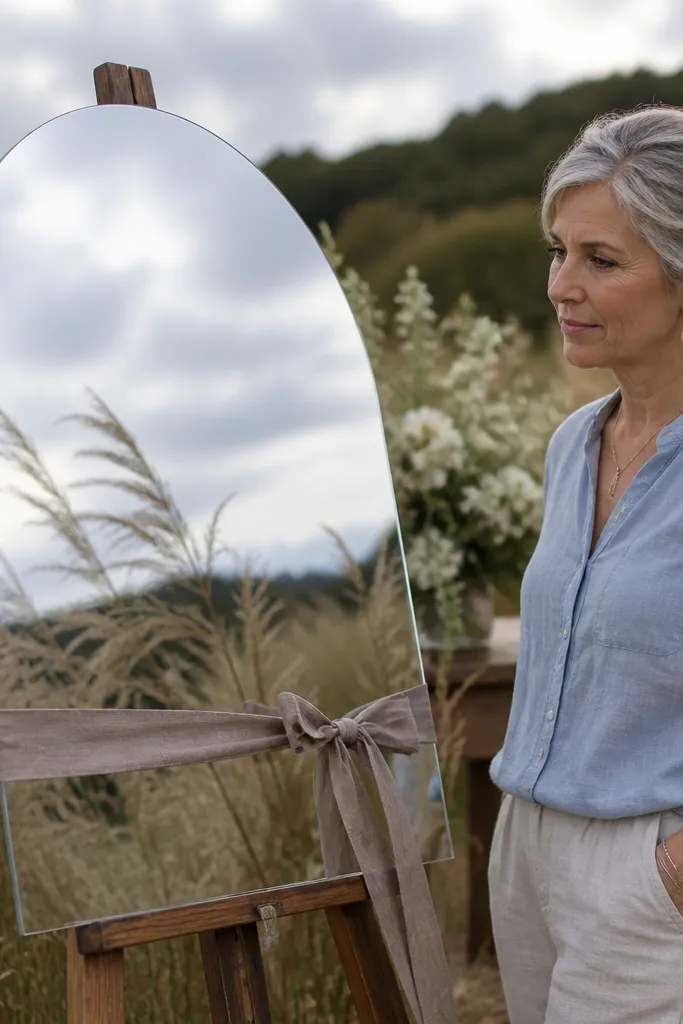
Silver mirrors feel crisp and airy, and the meadow-grass texture adds movement that shows up beautifully in wind and natural light. Neutral ribbon keeps the look soft instead of rustic-chaotic. This is a strong fit for beach-adjacent venues in late summer, desert gardens, and destination weddings where you want travel-proof decor that doesn’t wilt instantly. The mirror makes the grasses look fuller because the reflection doubles the texture.
Start with a silver mirror and a ribbon in oatmeal, sand, or light taupe. Then place a small bundle of meadow grasses at the top center, tied with the ribbon so the ends fall symmetrically. Finally, put the mirror on a stand or easel in front of a plain wall or light curtain so the reflection doesn’t catch random clutter.
Quick tipBring a lint roller for the ribbon — dust shows fast in reflective setups.
Skip thisSkip bright red or neon ribbon; it reflects and turns the whole sign into a color flare.
4. Round Mirror with Blush Peony Clusters
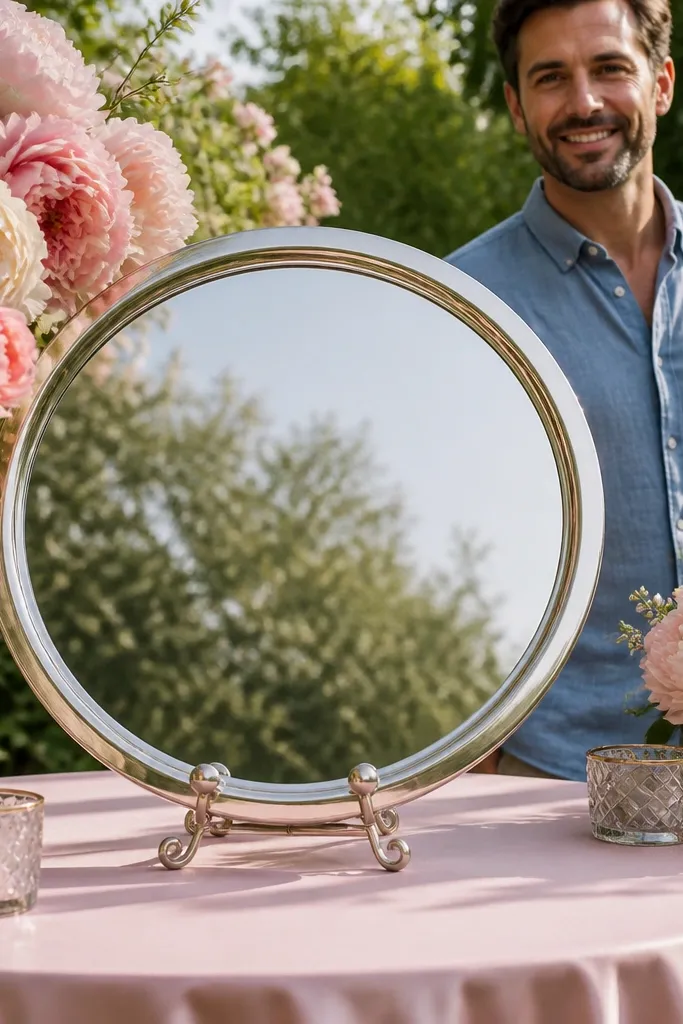
Round mirrors are friendly and frame the couple’s name in a way that feels romantic without looking stiff. Blush peonies give a gentle color story that photographs well in spring and early summer. The circular shape also helps hide small imperfections in placement because the eye naturally centers on the middle. Keep the flowers to the top half so the welcome message stays readable.
Start by selecting a round mirror with a diameter between 18 and 26 inches so it fits most welcome sign tables. Then attach peony clusters with floral tape and wire, keeping the bottom area open for the text. Finally, set it on a table covered in a light fabric (cream or pale blush) so the reflection reads smooth.
Quick tipIf your venue has strong afternoon sun, rotate the mirror so the glare lands on the table fabric, not the letters.
Skip thisDon’t add too many tiny flowers; they create a speckled reflection that makes the message harder to read.
5. Oversized Rectangle Mirror with White Linen Draping
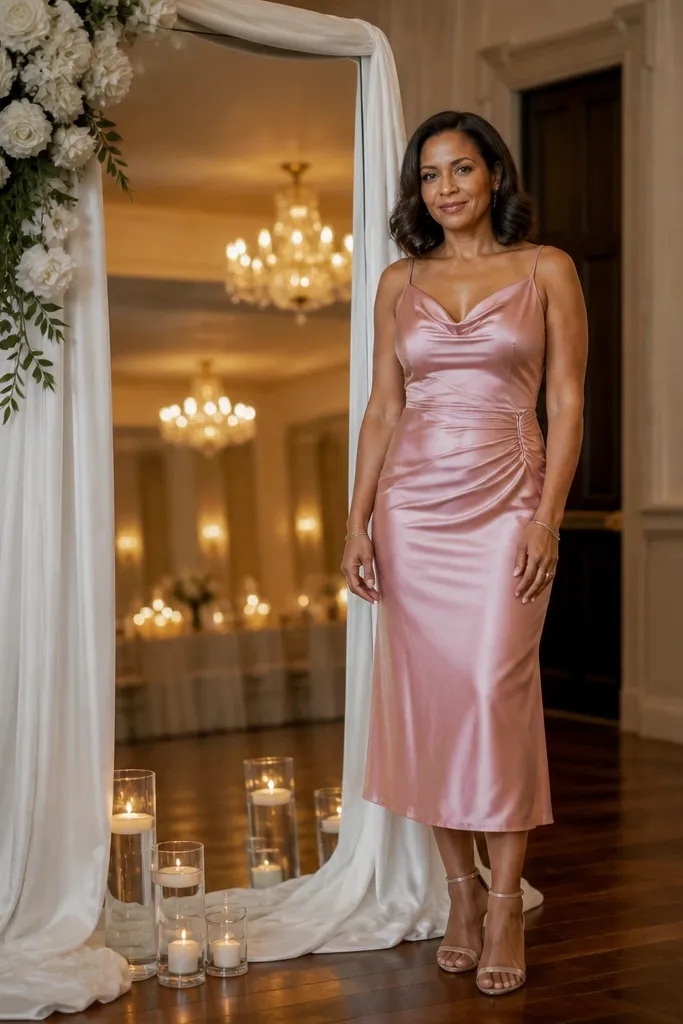
Oversized rectangle mirrors look like design pieces, not just signage. White linen draping adds texture that shows even in low light and makes the mirror feel “styled” without heavy florals. This is a great choice for indoor ballrooms and covered patios where you can control lighting. Linen also hides small setup flaws because folds look intentional in photos.
Start with a rectangle mirror at least 30 inches tall so it fills the welcome area. Then drape white linen around the mirror edges, tying it with hidden knots at the corners. Finally, mount the welcome text on a clean acrylic or printed panel placed slightly in front of the mirror so the letters don’t disappear into reflections.
Quick tipSteam the linen before travel — wrinkles show up sharply on mirror reflections.
Skip thisDon’t use black linen; it makes the mirror look like a void and swallows the welcome text in photos.
6. Mirrored Welcome Sign with Pressed Fern Border
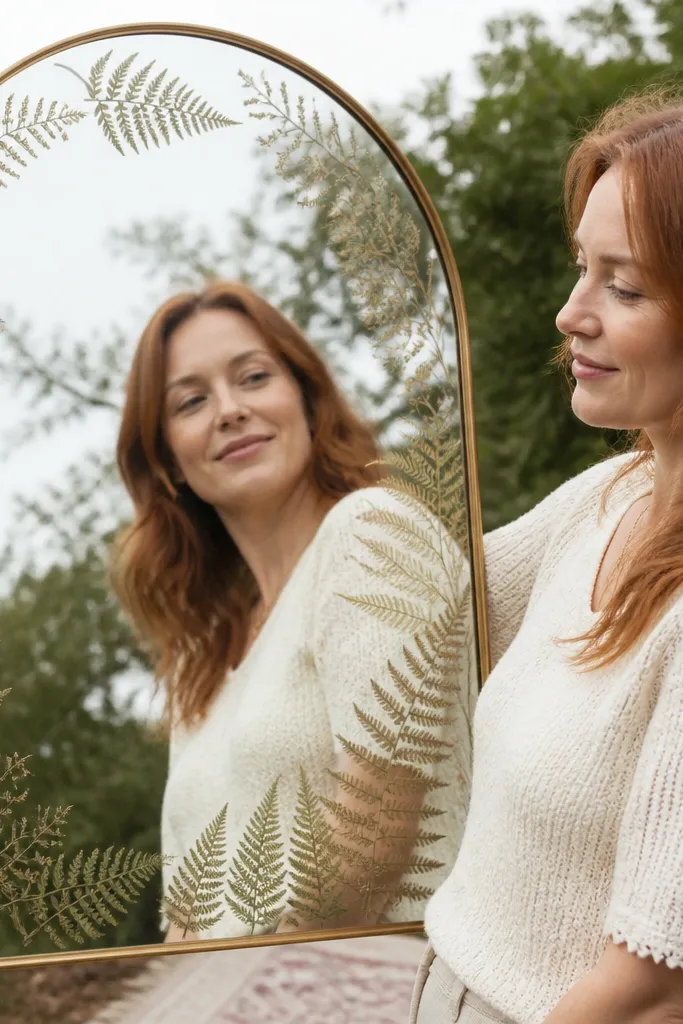
Pressed ferns give a delicate botanical border that looks curated and calm. The mirror turns the border into something dimensional because the fern texture reflects and repeats. This works best for spring weddings and indoor ceremonies where humidity is controlled, since pressed botanicals can warp if they get damp. It’s also a smart choice when you want a clean aesthetic with minimal bulk for travel.
Start by placing the welcome text on a clear panel mounted at the center of the mirror. Then frame it with a thin band of pressed ferns using archival glue or clear tape on the panel edges. Finally, set the mirror on a stand and keep the area behind it neutral so the fern border is the focal point.
Quick tipPack the pressed ferns flat with tissue paper so edges stay crisp for install day.
Skip thisSkip fresh greenery here; it wilts and smears on reflective surfaces.
7. Mirror with Cascading Pampas Feathers and Warm Lights
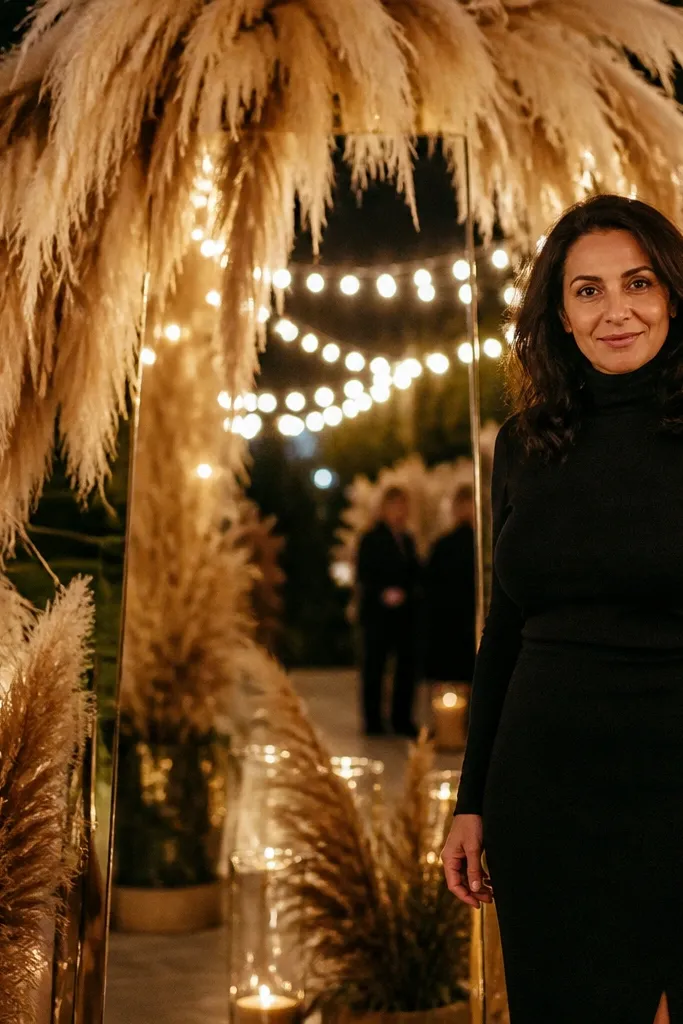
Pampas feathers create a soft, sculptural silhouette that looks great in evening photos. Warm string lights add glow without needing a full neon setup, and the mirror multiplies the light points for a dreamy welcome moment. This is ideal for fall and winter weddings because the decor matches the cozy vibe and the lighting stays flattering. The mirror makes the plumes look fuller without covering the message.
Start by placing the mirror on a stable easel and outlining the frame with warm white fairy lights (small bulbs, not huge lantern-style). Then attach pampas plumes so they cascade from both sides, keeping 6-8 inches clear in the center for the welcome text. Finally, test the angle under your venue lighting so the letters stay readable and the glow sits behind them.
Quick tipUse battery-powered lights if you’re traveling; it avoids outlet hunting and last-minute extension cord chaos.
Skip thisDon’t use bright cool-white LEDs; they make mirrors look harsh and wash out the florals.
8. Chalkboard Overlay on Mirror with Sage Green Accents
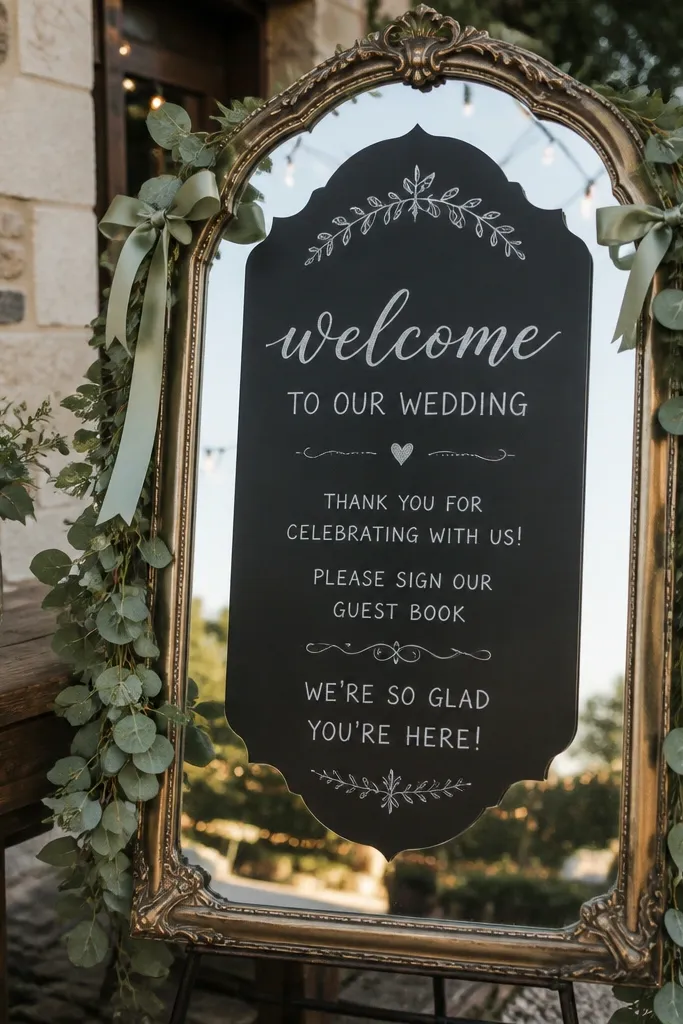
This is the trick for mirror signs that need maximum readability. A chalkboard overlay gives contrast that survives reflections, and sage accents keep it modern and calm. It’s perfect for outdoor weddings where light changes quickly, because the dark writing stays legible even when reflections shift. The mirror still adds shine and depth, so it doesn’t look like a flat chalk sign.
Start with a chalkboard-style panel (or a matte chalkboard finish) sized to sit cleanly in the mirror center. Then write your welcome message with chalk markers in white and soft gold, keeping consistent line thickness. Finally, add sage ribbon or a thin sage garland at the bottom corners so the mirror frame looks styled from every angle.
Quick tipSeal chalk with a matte fixative meant for chalk surfaces so it doesn’t smear if someone brushes the decor.
Skip thisAvoid glossy chalk markers; they reflect light and turn your message into glare.
9. Mirror with Dried Lavender Sprigs and Neutral Twine
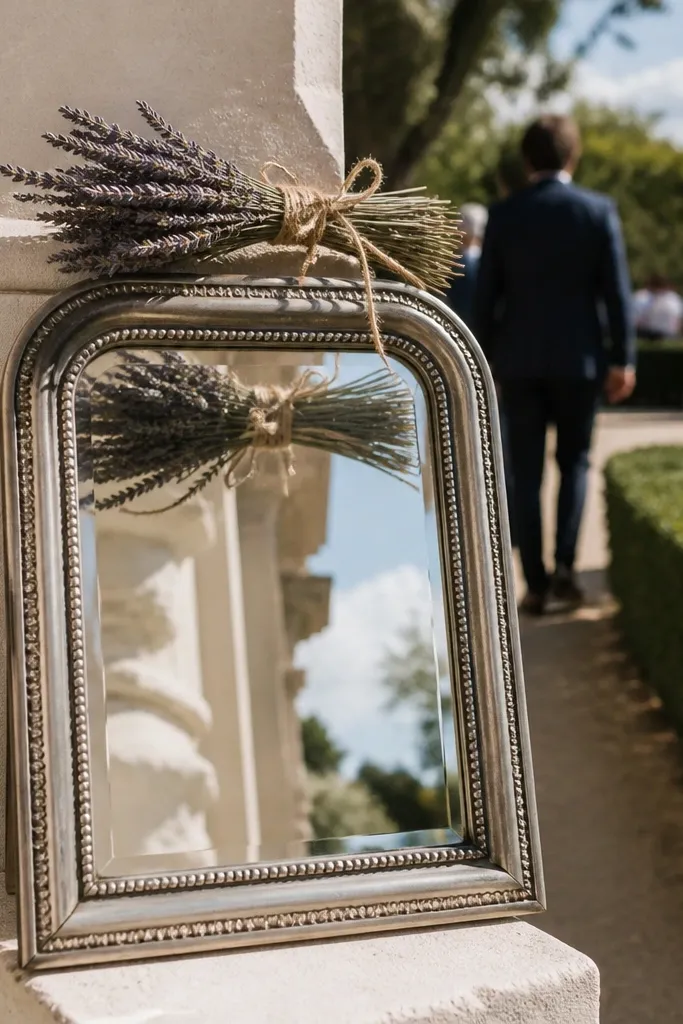
Dried lavender sprigs look intentional and travel-friendly, and the muted purple reads beautifully against both silver and gold frames. The mirror reflection doubles the lavender texture, so the setup looks fuller even with a small amount of product. This works especially well for summer destinations and outdoor events where you want decor that doesn’t depend on fresh flowers. Keep the lavender along the top and sides to prevent the center from getting busy.
Start by tying dried lavender sprigs into small bundles with neutral twine. Then attach them along the top edge and two side points, leaving a clear rectangle for the welcome text. Finally, place the mirror near a light wall or drape so the purple doesn’t look muddy in shadow.
Quick tipIf you’re packing, store lavender in a rigid box to avoid crushing the stems.
Skip thisSkip heavy perfume-scented lavender in enclosed venues; the smell can be strong for guests.
10. Mirror with White Hydrangea Clusters and Clear Acrylic Name Plate
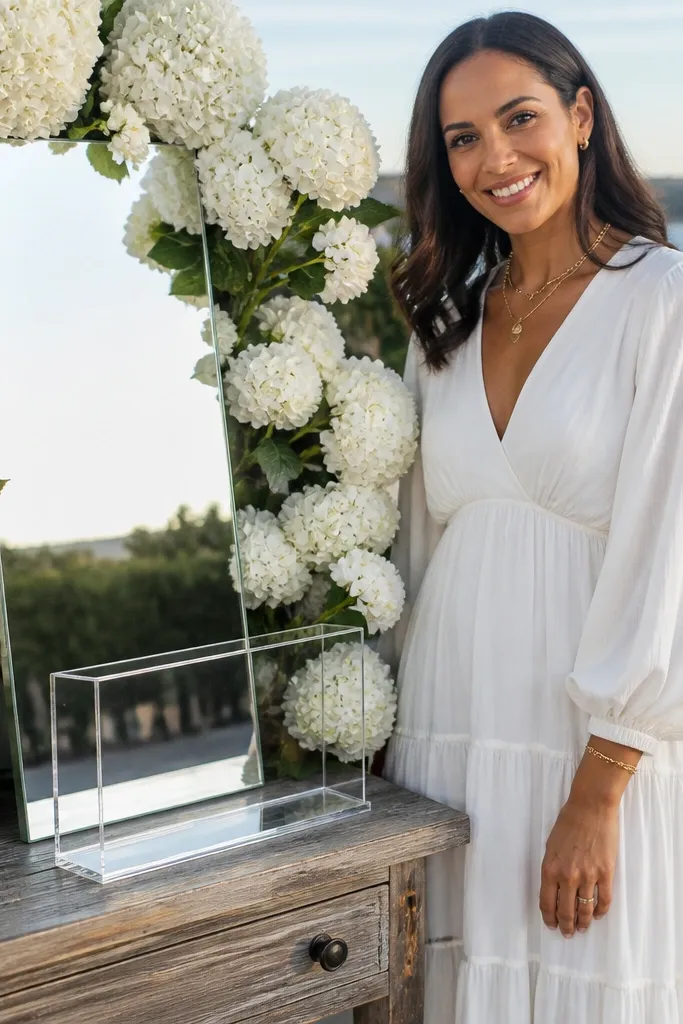
White hydrangeas are a classic wedding flower, and the mirror makes their petals look crisp and abundant. A clear acrylic name plate keeps the message sharp because it sits in front of the reflective surface. This is a great match for spring weddings and coastal venues where you want clean, airy decor that photographs well in bright conditions. The combination reads elegant without needing a lot of extra signage.
Start by attaching hydrangea clusters at the top left and top right, plus a small bottom center accent so the composition feels balanced. Then mount a clear acrylic name plate with your welcome text, using standoffs so it doesn’t touch the mirror. Finally, set the mirror on a stand and choose a backdrop that’s light and solid to keep the reflection tidy.
Use standoffs that add at least 1 inch of spacing so glare doesn’t bounce straight into the camera.
Don’t print the text directly on the mirror surface; it disappears when the reflection shifts.
11. Black Mirror with Burgundy Velvet Ribbon Bows
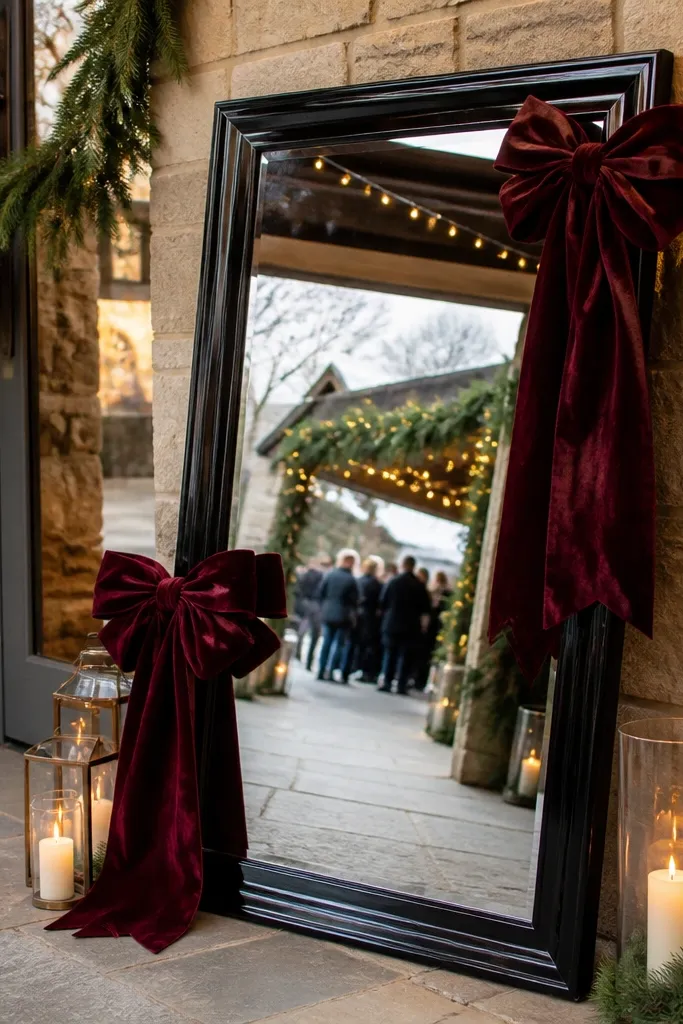
Burgundy velvet bows look rich in photos, and the black mirror frame makes the color feel intentional instead of costume-y. This look fits fall and winter weddings where you want a darker, moodier welcome moment. Velvet also photographs with soft texture, and the mirror adds a second layer of depth. Keep the welcome text centered and simple so the ribbon bows frame it, not compete with it.
Start by placing the mirror on a table or easel where the frame edges are visible in photos. Then tie four velvet ribbon bows or two corner bows, securing them with hidden wire loops behind the frame. Finally, add a deep red welcome panel or vinyl lettering that sits slightly forward of the mirror surface for readability.
If the venue is warm, bring a steamer. Velvet flattens during travel and looks better with a light steam.
Don’t use shiny satin bows; they reflect the light and make the mirror area look messy.
12. Mirror with Peony and Baby's Breath Top Garland
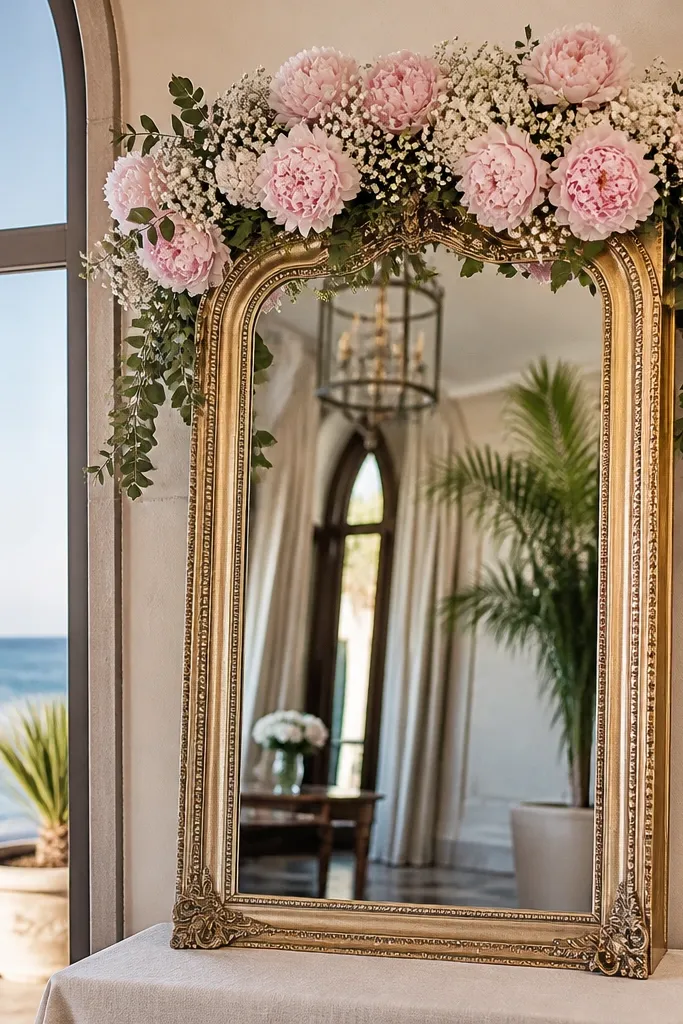
This setup is photogenic because it gives you airy volume without crowding the center. Peonies bring shape and baby’s breath fills space, so the mirror reflection looks full even from side angles. It suits spring weddings, especially in venues with lots of natural light where you want the welcome sign to feel soft and romantic. The mirror helps the tiny baby’s breath dots catch light and look delicate.
Start with a mirror and a white welcome panel placed in front of the reflection. Then build a top garland that sits across the upper third only, with peonies as anchor points and baby’s breath filling the gaps. Finally, keep the garland secured with floral foam-free ties so it doesn’t sag during the event.
Photograph right after setup. Baby’s breath looks best before it settles and compresses.
Avoid placing baby’s breath too low; it makes the text area look hazy in photos.
13. Round Mirror with White Tulip Centerpiece and Green Leaves
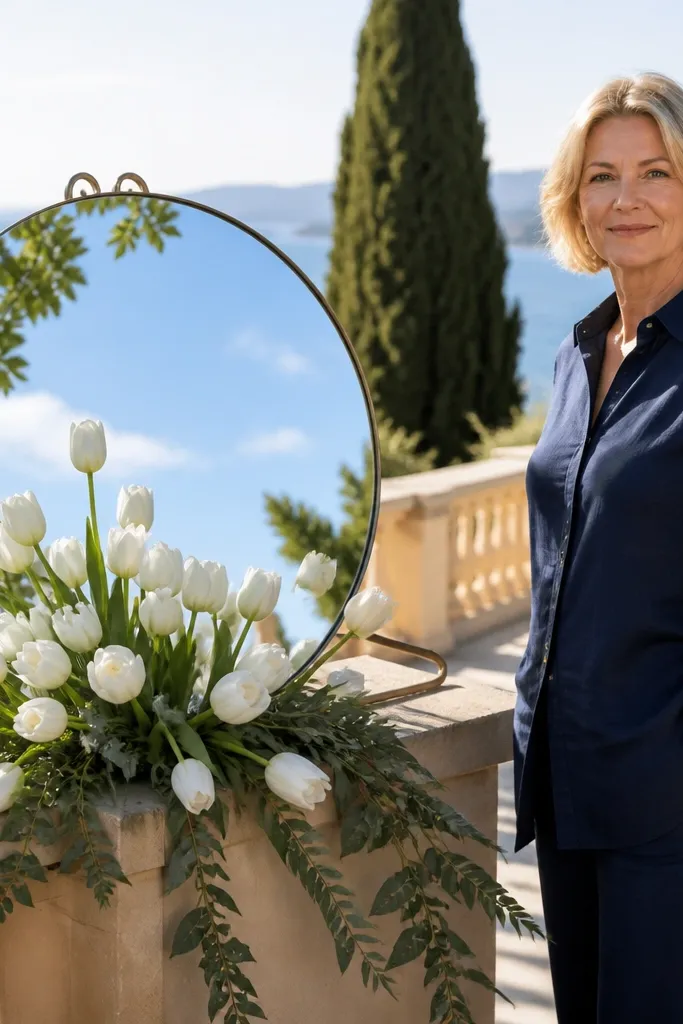
A round mirror plus tulips gives you a clean spring look that’s easy to style and easy to photograph. White tulips are bright without being loud, and the green leaves add contrast that shows up clearly in reflections. This is a strong choice for destination weddings where you want decor that packs well and doesn’t rely on specialty florals. The mirror shape also makes the welcome sign feel centered and welcoming.
Start by choosing a round mirror 20-24 inches wide so it fills your welcome table without dominating. Then create a small tulip centerpiece that sits at the bottom of the mirror frame, using green leaves as a frame. Finally, place your welcome panel in the center and tilt the mirror slightly so the tulips reflect behind the text instead of in front of it.
Quick tipSchedule your install for early afternoon so you’re not rushing in the last hour before golden hour.
Skip thisSkip tall, top-heavy arrangements; they block the mirror and shrink the readable area.
14. Mirror with Neutral Pampas + Monogram Initials in Black Vinyl

Monogram initials on a mirror look graphic and modern, and pampas adds softness so it doesn’t feel too stark. Neutral pampas in beige or oat tones reflects warm light and looks good in both indoor and outdoor venues. This setup suits minimalist weddings and city venues where you want a clean welcome moment without heavy florals. It also photographs well because the black vinyl stays crisp against the reflective background.
Start by applying black vinyl monogram initials to the mirror center or upper third, keeping the letters large enough to read from 6-10 feet. Then place pampas plumes on both sides, anchored at the bottom so they don’t drift into the text area. Finally, set the mirror against a solid backdrop and avoid clutter so the vinyl doesn’t catch confusing reflections.
Use transfer tape and a squeegee to avoid bubbles. Mirror surfaces show even tiny vinyl edges.
Don’t pick thin, delicate vinyl fonts; they look elegant in person and disappear in photos.
15. Mirror Welcome Sign with Colored Glass Gem Border

A gem border is the fastest way to make a mirror welcome sign look high-end and party-ready. The glass pieces catch light and throw subtle color flecks across the mirror, which reads like luxury in photos. This idea is great for weddings with a color theme, especially in evening settings where you can control lighting. Keep the gem border thin so the welcome text stays the main event.
Start with a mirror and a center panel for the welcome message in white or gold. Then arrange a single-row border of small glass gems around the panel edges, using clear adhesive or removable putty so you can transport safely. Finally, test lighting by holding a phone flashlight at an angle to see how the gems sparkle before you finalize placement.
Quick tipPack gems in a separate compartment. One cracked stone can ruin the clean border look.
Skip thisAvoid mixing too many gem colors; it turns into a random confetti effect in reflections.
16. Mirror with White Feather Fan Backdrop and Minimal Text
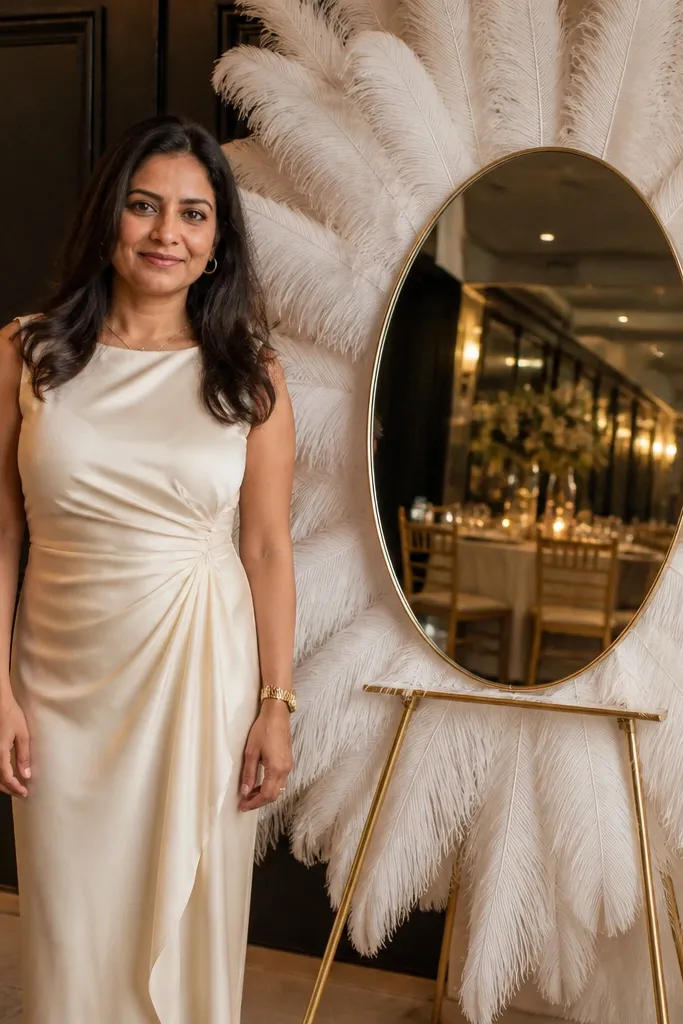
Feather fans create a soft, dramatic backdrop that looks incredible in portraits and wide venue shots. White feathers keep it airy and bridal, while the mirror adds shine and depth so the fan doesn’t look flat. This is a great choice for indoor receptions, especially if you want a modern, showy welcome moment without heavy florals. Minimal text matters here — the feathers already do the visual work.
Start by placing a white feather fan or multiple feather arcs behind the mirror, centered and slightly taller than the text area. Then choose a short welcome message in a clean serif or thin sans font, printed on a matte panel so it doesn’t glare. Finally, angle the mirror so the feathers reflect softly rather than blasting direct highlights onto the letters.
Quick tipIf feathers shed, handle them over a tarp and wipe the mirror with a microfiber cloth before guests arrive.
Skip thisDon’t add long paragraphs of text; feathers plus mirror reflections make clutter quickly.
17. Mirror with Sea Glass Border and Coastal Welcome Panel
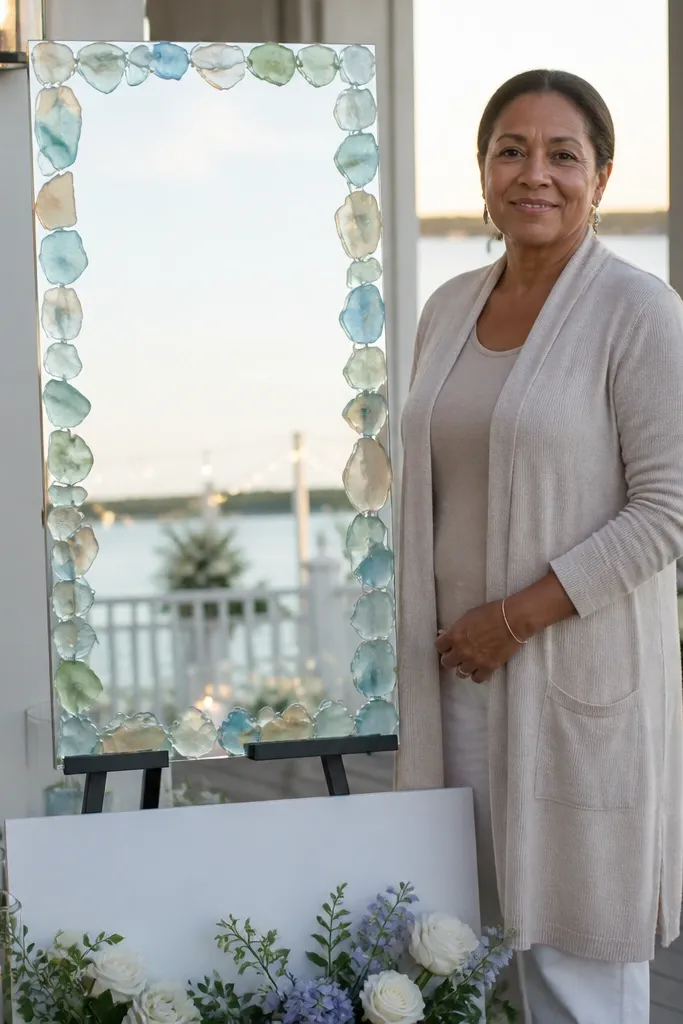
Sea glass border details look gorgeous because they mimic light scattering, which works perfectly with a reflective surface. The colors — pale aqua, seafoam, and soft sand — stay calm in photos and match coastal destinations. This is ideal for beach weddings in spring and early fall when humidity isn’t extreme. The mirror makes the sea glass look like it’s floating around the welcome text.
Start by choosing a mirror with a simple frame so the sea glass is the star. Then place sea glass pieces in a thin outline around a centered welcome panel, using clear craft adhesive that dries transparent. Finally, keep the backdrop light and uncluttered so the mirror reflection doesn’t compete with beach decor.
Use a clear sealant on the adhesive so pieces don’t loosen in salty air.
Skip dark sea glass-heavy borders; they absorb light and make the panel look heavy.
18. Mirrored Sign Table with Candle Row and Blush Rose Petals
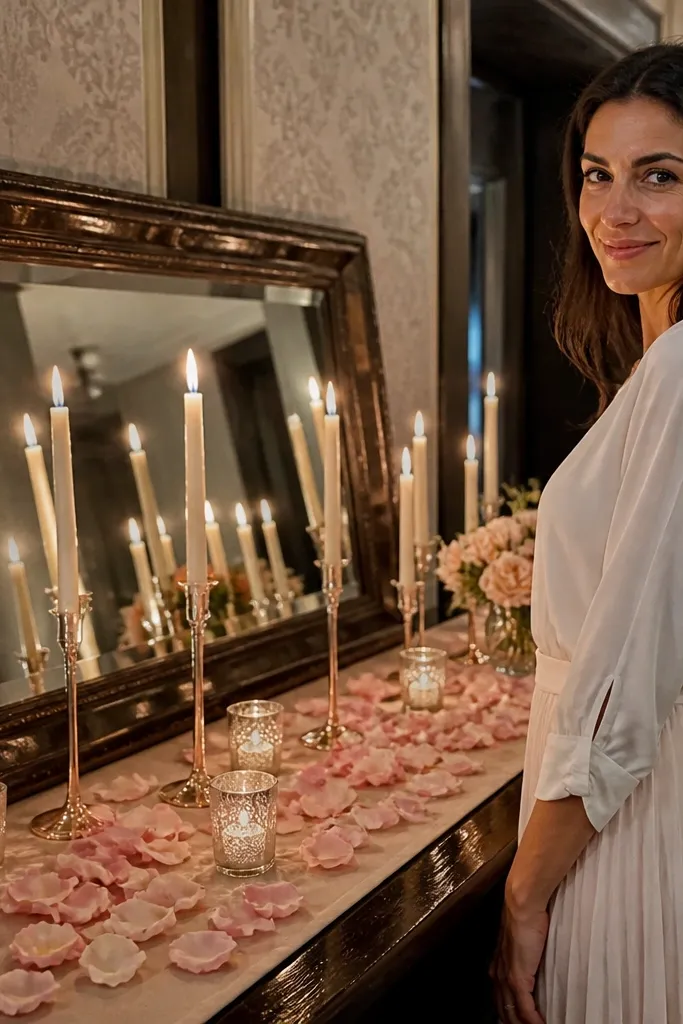
This idea makes the mirror welcome sign feel like part of the lighting plan. Candles give warm, flattering glow and blush rose petals add color without needing big florals. The mirror reflects the candle flames and petal tones, which creates a romantic effect that reads clearly in evening photos. It’s best for indoor receptions or outdoor covered areas where wind won’t knock over candles or blow petals everywhere.
Start by setting the mirror on a sign table with a light tablecloth (ivory or pale blush). Then arrange a straight row of pillar candles on either side of the mirror base, keeping the flames slightly lower than the welcome panel. Finally, scatter a thin layer of blush rose petals in the foreground area only so the mirror reflection looks soft instead of messy.
Quick tipUse hurricane candle holders. They protect flames and keep reflections steady for photos.
Skip thisDon’t use too many petals — excess looks like confetti and blurs the welcome sign.
19. Mirror with Drape of Champagne Satin and Gold Leaf Text

Champagne satin drapes make the mirror look like it belongs in a high-end event, and gold leaf lettering reads warm in almost every lighting setup. The satin’s sheen gives the mirror a smooth background, so your text stays crisp instead of blending into reflection. This is an excellent choice for evening weddings and winter events where you want a polished, celebratory feel. Keep the drape controlled — a little goes a long way for photos.
Start by draping champagne satin behind the mirror and letting it fall in gentle folds, secured with hidden clips. Then add gold leaf style lettering on a matte panel placed in front of the mirror, not on the reflective surface. Finally, set the mirror so it faces your guest walkway and test with your phone camera to confirm the gold doesn’t glare.
Bring a handheld steamer for install day. Satin looks better with one pass than with creased travel folds.
Don’t pair champagne satin with overly busy florals; the reflections get chaotic fast.
20. Antique Mirror with Terracotta Tile Backdrop and Carved Wood Letters

This one looks expensive because the mirror feels like it came from a real old courtyard — the warm glass tone plus terracotta tiles gives instant “European market” energy. The carved wood letters add texture you can actually see in photos, especially in late-afternoon light when shadows fall into the tile grooves. It suits couples doing a rustic-meets-romantic theme, and it also works for outdoor ceremonies where the background might otherwise look flat. For best results, plan your photo moment around late spring through early fall when the air is clear and golden light hits the tiles without turning everything gray. If your venue has a courtyard, garden wall, or patio with earthy tones, this setup makes the space look styled even before anyone walks in.
Step 1 — Find the mirror and build the backdrop: use a slightly aged mirror (antique silver finish) and mount it over a board covered in terracotta-look peel-and-stick tiles or removable tile panels. Keep the mirror centered and leave a 2-3 inch border of tile showing so the welcome sign reads clearly. Step 2 — Add the letters: use carved wood letters or thick wood vinyl cutouts, then attach with removable adhesive so you can reuse the mirror for other events. Step 3 — Travel plan for the “best time to visit mirror signs”: book for the warm months and schedule arrival at least 1 day early so you can scout where the sunlight hits the tile texture; spend about 2-3 hours on setup and photos. Rough cost is usually $120-$250 for a temporary tile backdrop plus $80-$180 for letters, depending on size and material.
Choose a mirror size that leaves at least 10-12 inches of tile visible on both sides. That extra frame area makes the whole sign look intentional in wide shots.
Don’t use glossy, bright-white tiles behind an antique mirror — it makes the mirror look cheap and washes out the carved letters.



