
1. Acrylic "Table Key" with Sliding Name Tags
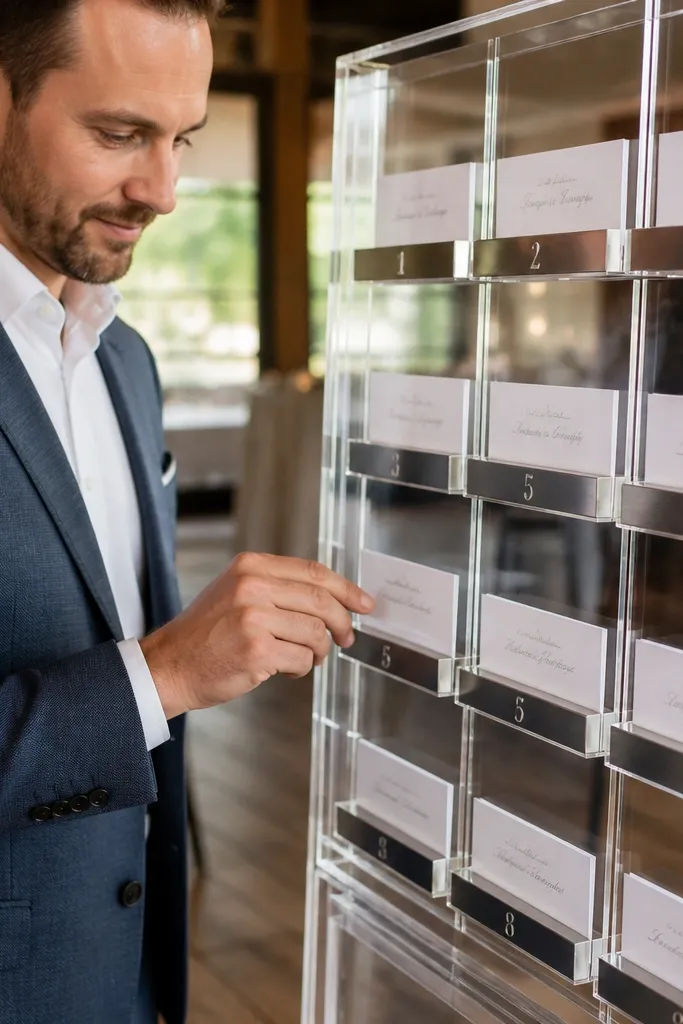
This setup looks sleek because the names sit inside a clear acrylic grid, like a modern display case. Guests pull their own name tag horizontally and it lands into a small tray labeled with the table number. It feels interactive without turning the seating plan into a game that wastes time. It also photographs clean in winter venues because the reflective acrylic catches ambient light instead of looking flat. This is a strong choice for year round seating chart wedding formats where you want a polished, “designed” look that still reads fast.
Start by measuring the space where people will stand and choose an acrylic grid that fits the wall or a freestanding frame. Print names on cardstock, then mount each on a thin foam sheet so it slides smoothly and doesn’t bend. Add table number labels above each row, and place a shallow tray under each row so removed tags don’t scatter. Finally, assign a helper to replace any tags that get pulled out of order during peak arrivals.
Buy extra acrylic name-tag blanks so you can reprint quickly if you catch a typo the week before.
Don’t use glossy paper without a matte finish; it glares under overhead lights and slows reading.
2. Escort Card Station with Color-Coded Ribbon Pulls
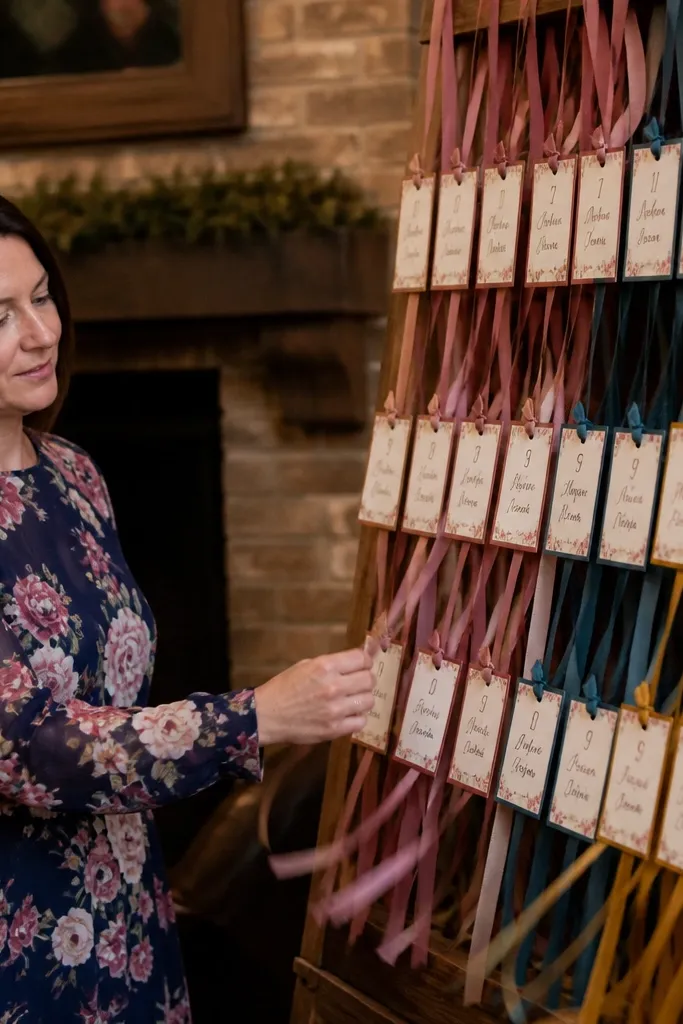
Color-coded ribbon pulls make the seating chart feel like an event, not a chore. Each ribbon ends with a laminated card that shows the table number and a large first name. The movement is photogenic — ribbons sway, hands reach in, and the station looks styled from every angle. It works well year round because you can keep the cards laminated and contained in a simple organizer box. Guests also get a gentle “line control” effect because they step forward, pull, then step aside.
Start by choosing 4-8 table colors based on your number of tables, then buy satin or grosgrain ribbon in those exact colors. Tie ribbons to a mounted board with enough spacing for fingers to grab without tangling. Create laminated cards with bold table numbers and first names, then attach the cards to the ribbon ends. Set a small signage card at eye level that says “Pull your ribbon — take your card to your table.”
Use a single ribbon length across the whole station so guests don’t yank too hard and knock cards loose.
Skip mixed fonts on the cards; one bold table number style keeps scanning fast.
3. Stamp-and-Go Seating Chart with "Passport" Cards
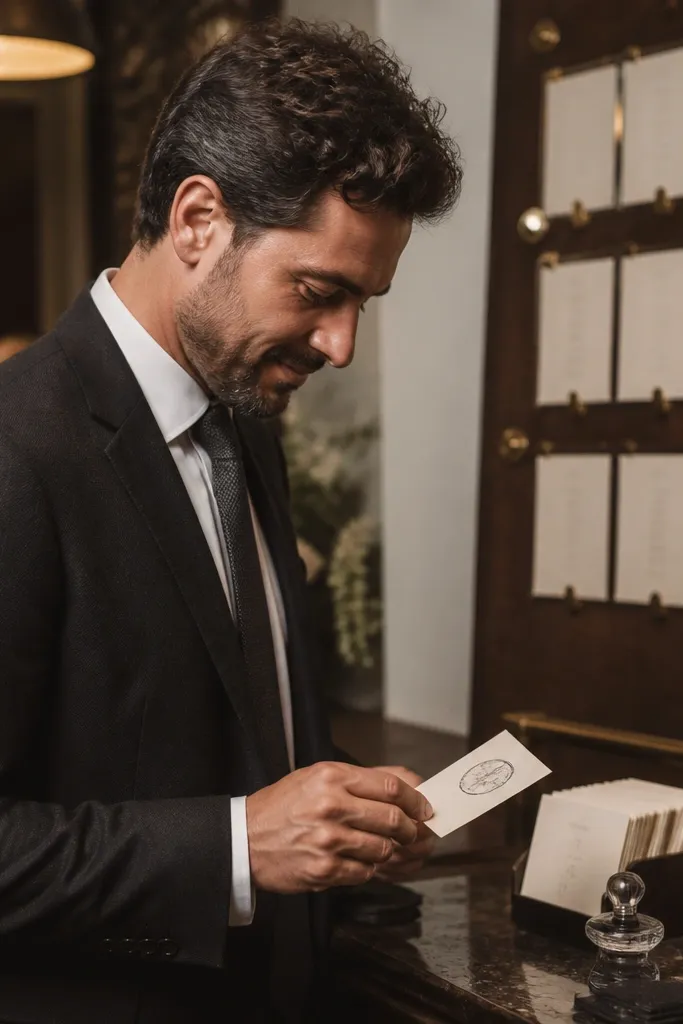
If you want something interactive that still feels classy, a stamp-and-go system is perfect. Guests pick up a small “passport” card at the entry, then get stamped at the seating chart station with their table number. The stamp moment creates a clear photo focal point and gives people a reason to pause and smile. It also helps with crowd flow because each stamp station has a defined place to stand. This idea works in any season because the passport cards and stamps are simple to keep clean and legible.
Start by printing passport cards with blank boxes labeled by table number, then include a space for the guest’s first name. Place a stamp pad and a stamp set near the chart, using ink that won’t smear on laminated cards. When guests arrive, hand them the passport card and direct them to the chart area for the stamp. After stamping, point them to a second sign that says “Find your seat by table number.”
Quick tipUse quick-dry ink pads and do a test stamp on your exact card stock so it doesn’t smudge in warm indoor rooms.
Skip thisDon’t make the passport card too small; tiny text creates slow reading and messy stamps.
4. Glass Jar "Table Tokens" with Matching Name Stickers
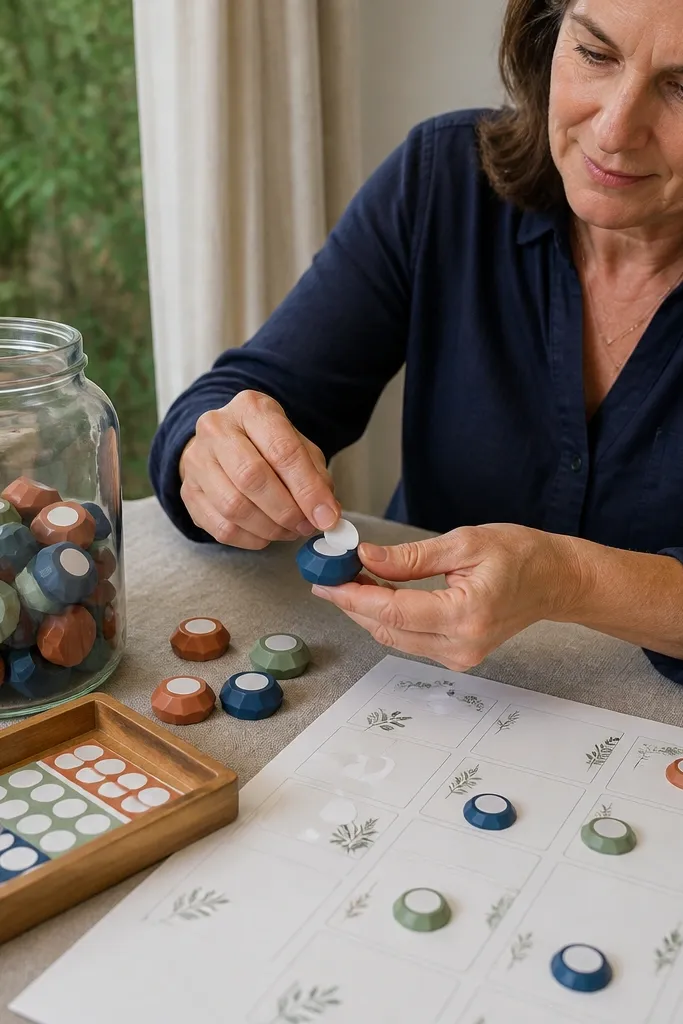
This is a clean way to make the seating chart feel tactile without clutter. The seating chart shows a grid of names, but the interactive part is grabbing a table token from a jar. Each token matches a color and table number, and guests stick a matching name sticker onto their token label so they can show it at the seat-finding point. It looks great in photos because glass jars feel intentional and styled. It’s also practical year round because jars and tokens don’t care about wind or humidity like paper displays do.
Start by listing your table numbers and choosing a jar color system that’s easy to repeat across the room. Print name stickers with large first names and table numbers, then place them in a labeled station next to the jars. Put a token for each table in its matching jar, and label the jar lids with table numbers. Set up a final “seat finder” sign that tells guests to head to the dining area and look for their token color and table number.
Quick tipPick tokens with flat sides so sticker labels don’t curl at the edges.
Skip thisSkip tiny jars; guests need to see labels without leaning over.
5. Seasonal Window Frame Seating Chart with Velcro Name Cards
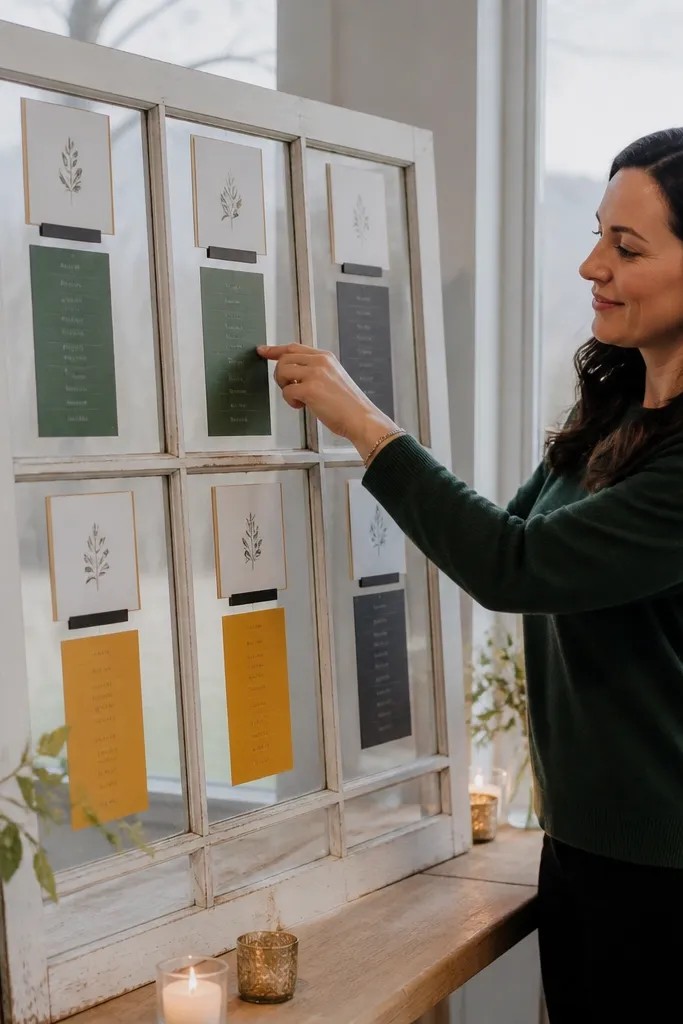
A window frame chart looks like décor first, signage second, which is exactly what you want for an aesthetic year round seating chart wedding. Guests press their name card onto the velcro strip under the correct table number, or they remove it if you prefer a “take it to your seat” model. The frame creates natural structure and makes the seating chart look like a design piece even when it’s not crowded. It’s great for indoor venues, and you can also use it outdoors under a covered area without worrying about wind ruining cards.
Start by finding a real vintage frame or buying a lightweight faux frame, then add mesh or velcro panels inside. Print name cards on thick cardstock and apply velcro dots to the back. Arrange cards in rows by table number and keep the table labels at the top of each row. Put a small “Find your name” sign at chest height so guests don’t crane their necks.
Quick tipUse weatherproof mounting tape for the frame so it doesn’t shift on smooth indoor floors.
Skip thisDon’t use velcro that’s too strong; if name cards rip off, the station looks messy fast.
6. Table Number Origami Cranes as Name Holders
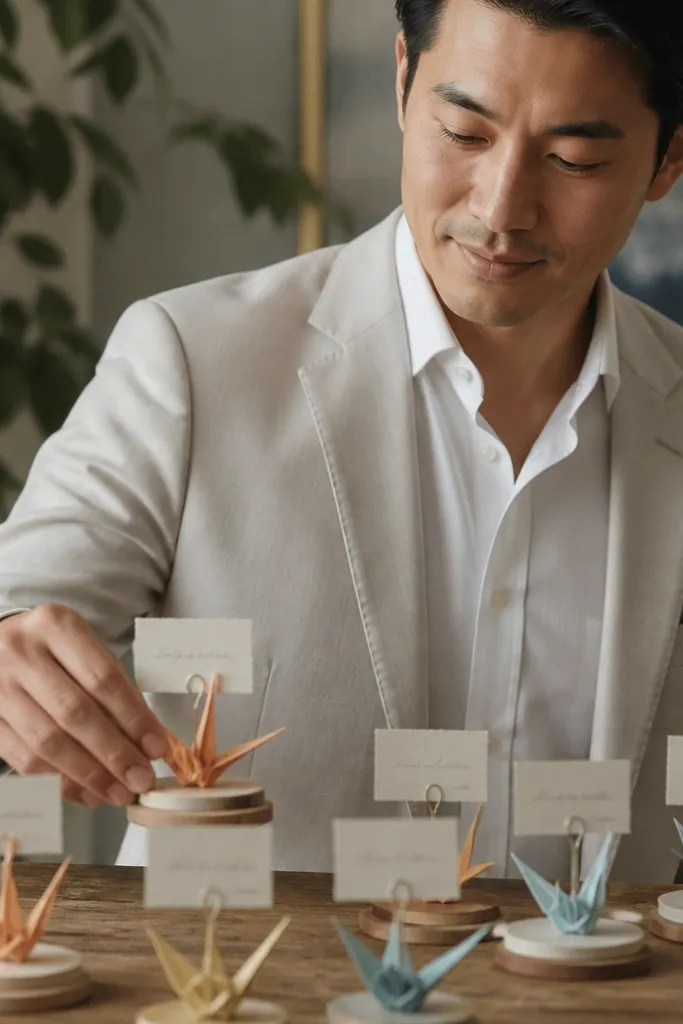
Origami cranes create instant whimsy and look good in close-ups, especially if you choose paper colors that match your wedding palette. Each crane holds a small name card and a table number tag, so guests still find seating quickly. The interactive element is that guests pick up the crane from a labeled base, like a mini scavenger moment. This works best for indoor year round weddings because cranes are paper — but you can protect them with clear acrylic domes or keep them under a canopy outdoors.
Start by selecting 4-6 crane paper colors tied to table sections, then fold cranes in bulk ahead of time. Build a base for each crane with a small acrylic stand or a foam block labeled by table number. Attach the name card so it sits visibly and doesn’t slide. Place the bases in a neat grid so the station looks intentional from photos.
Quick tipIf you’re using a canopy, bring a clear plastic sheet to cover the station during breaks between guest waves.
Skip thisSkip thin paper cranes; they sag and look sloppy under warm lighting.
7. Interactive Menu Board Seating Chart with "Order Your Table"
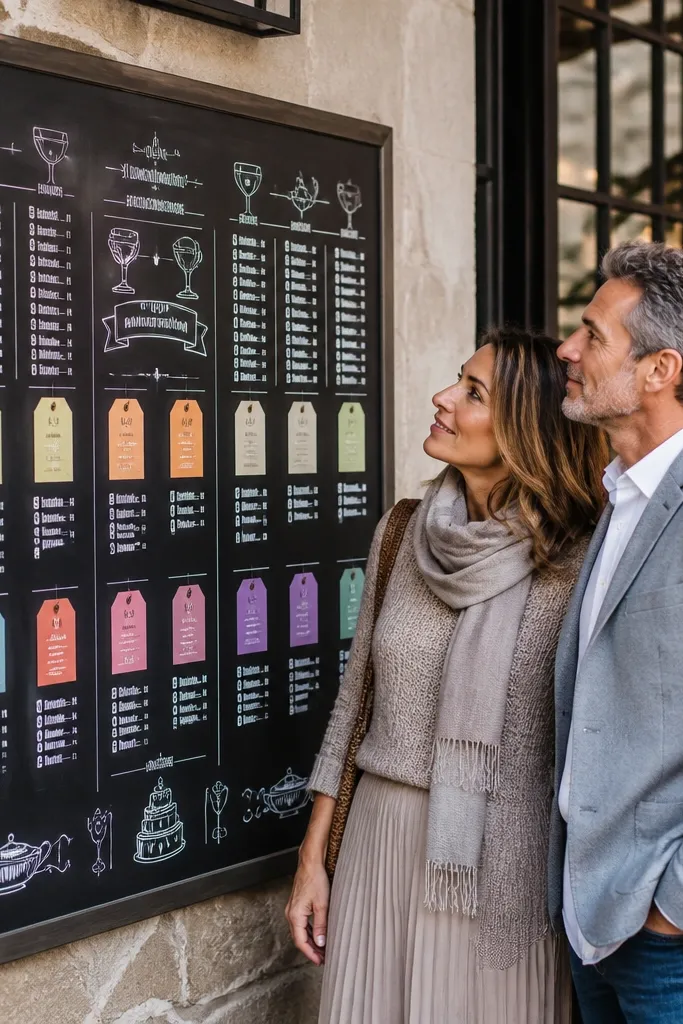
This is for couples who want a seating chart that looks like part of the event branding. A menu board format makes names feel intentional, and the “order your table” wording turns it into a playful moment. Guests scan for their name, then take a card that matches their table number. It photographs like a café — especially if you use chalk-style lettering on a dark board. It works year round because boards are durable and the cards can be laminated.
Start by choosing a large menu board (or two smaller ones) and block out sections by table number. Print name cards with bold table numbers and first names, then insert each into small acrylic holders on the board. Add a sign that says “Find your name, grab your table card.” Finally, set up a small basket of table cards so guests can carry them to the seating area without crowding the board.
Quick tipUse a matte board finish and white/cream markers to avoid glare under spotlights.
Skip thisDon’t cram names into tiny rows; legibility matters more than design.
8. Polaroid-Style "Find Your Seat" Display with Mini Photo Stickers
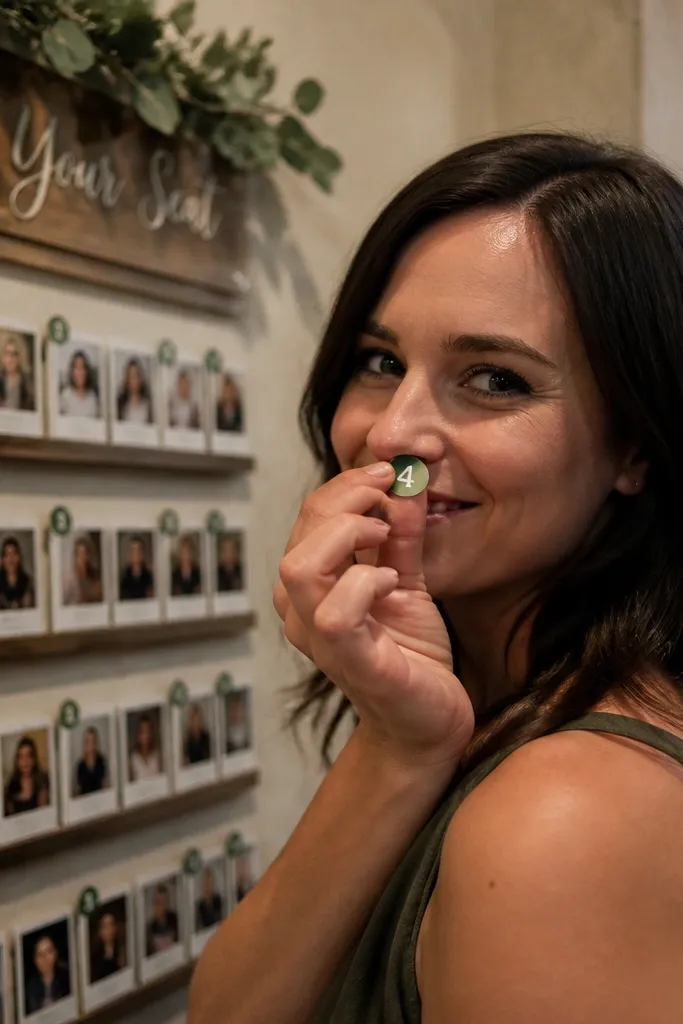
Polaroid-style cards make the seating chart feel like décor because they look like little keepsakes. Guests find their first name on a card, then peel off a mini sticker that matches their table number. The peeled sticker is the interactive step, and it gives you a neat “handheld” moment for photos as guests walk to their tables. This works year round because cards can be laminated and the sticker layer can be replaced easily if you revise the plan.
Start by designing polaroid-style cards with a consistent layout: name large, table number bigger, and a small icon color. Print the cards on thick paper and laminate them. Add a removable table-number sticker on each card front, and place the cards on a grid wall display. Put a small sign next to the wall explaining “Peel your sticker and head to your table.”
Test the sticker adhesive on a sample card — some laminates make stickers lift unevenly.
Skip busy backgrounds behind the cards; they make names harder to read.
9. Compass Rose Seating Chart with Directional Table Numbers

A compass rose layout looks stunning in travel-themed weddings and turns the seating chart into a design focal point. Guests find their name in a direction sector, then follow a simple “north tables / east tables” map to the dining area. The interactive part is the directional navigation, which feels like a mini adventure. This is especially photogenic in fall and winter because indoor lighting and textured floors make the compass graphic pop. It still works year round since you can print on foam board and laminate for durability.
Start by mapping your table numbers into 4-8 compass sectors based on how many tables you have. Print a large foam board compass rose with clear directional labels and name lists inside each sector. Laminate the board and mount it at eye level. Place small floor markers (like arrow signs) leading guests toward the correct tables so they don’t guess.
Use two arrow markers per sector to reduce backtracking when guests carry drinks or programs.
Don’t rely on guests reading tiny direction labels; make “Table 12” the biggest element.
10. Chalkboard Wall with Magnetic Name Tiles
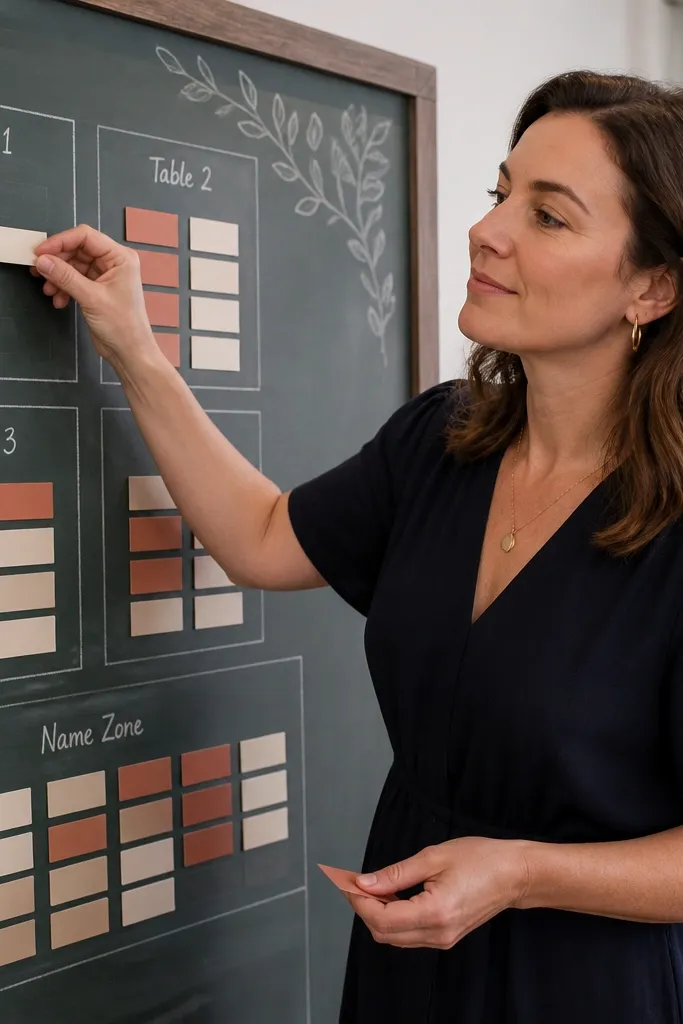
Magnetic name tiles are the cleanest interactive version of a chalkboard seating chart. Guests move their own tile from a “name zone” to a “table zone,” and that action looks great in candid photos. It also solves a real problem: when you update the seating plan late, you can swap tiles instead of reprinting a whole board. Year round practicality is strong because the tiles are sturdy and magnets hold firm even in drafty spaces. The chalkboard look also fits almost any wedding palette.
Start by buying a large sheet of magnetic chalkboard or using a chalkboard panel with a magnetic backing. Cut name tiles from metal sheet or use pre-made magnetic cardstock tiles, then print names and table numbers in bold. Create two sections on the board with taped borders: “Find your name” and “Place to table.” Then set a small tray of extra tiles so late changes are easy during arrival.
Use a label maker for table numbers on the borders so they stay perfectly consistent.
Skip thin tiles; they flex and pop off magnets when people brush past.
11. Table Map on a Fabric Runner with Velcro Seating Cards
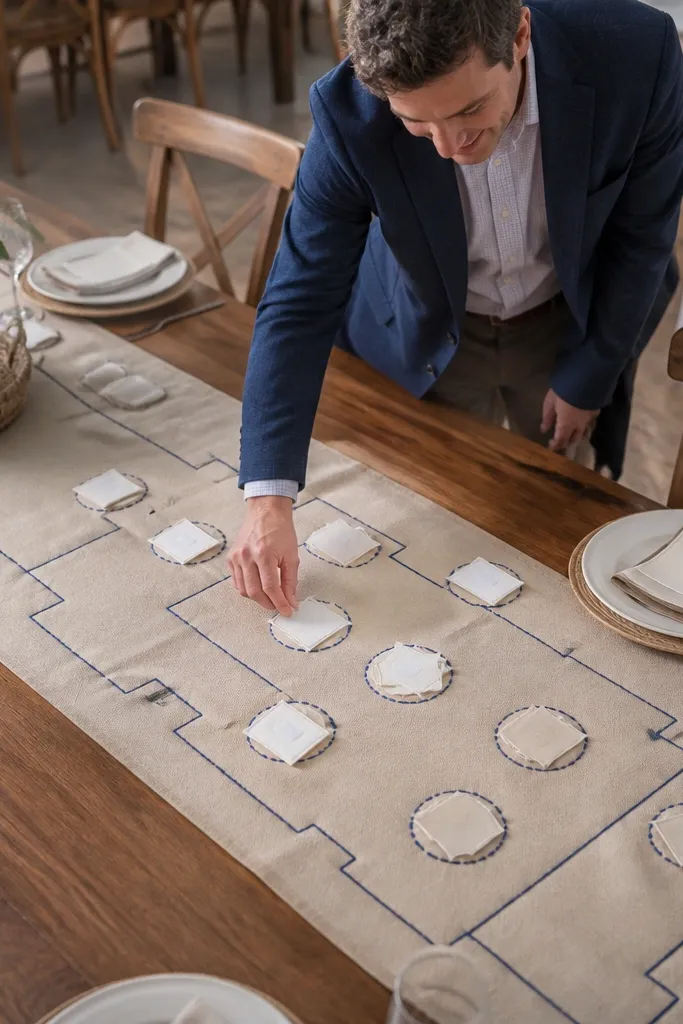
This is a travel-couple favorite because fabric layouts look soft and styled, not like a flat sign. A fabric runner laid on a table shows a simple map of the dining layout, and guests place their velcro card onto the correct table spot. It creates a satisfying “place it down” moment and makes the chart look like a game board. For year round seating chart wedding setups, fabric stays warm-looking indoors and hides small imperfections better than paper. It also makes a great backdrop for a welcome area.
Start with a large fabric runner or tablecloth in a neutral color, then draw the dining layout with washable fabric marker. Create velcro-backed seating cards and place them in a labeled basket by table number. Set up the runner at a table-height station so guests can reach comfortably. Add a clear “Place your card” sign and station a helper to keep the cards from getting mixed.
Quick tipUse fabric protector spray on the runner so spills don’t ruin the look.
Skip thisDon’t use dark fabric with low-contrast marker; it kills readability in photos.
12. Neon-Outline Seating Chart with Backlit Name Cards
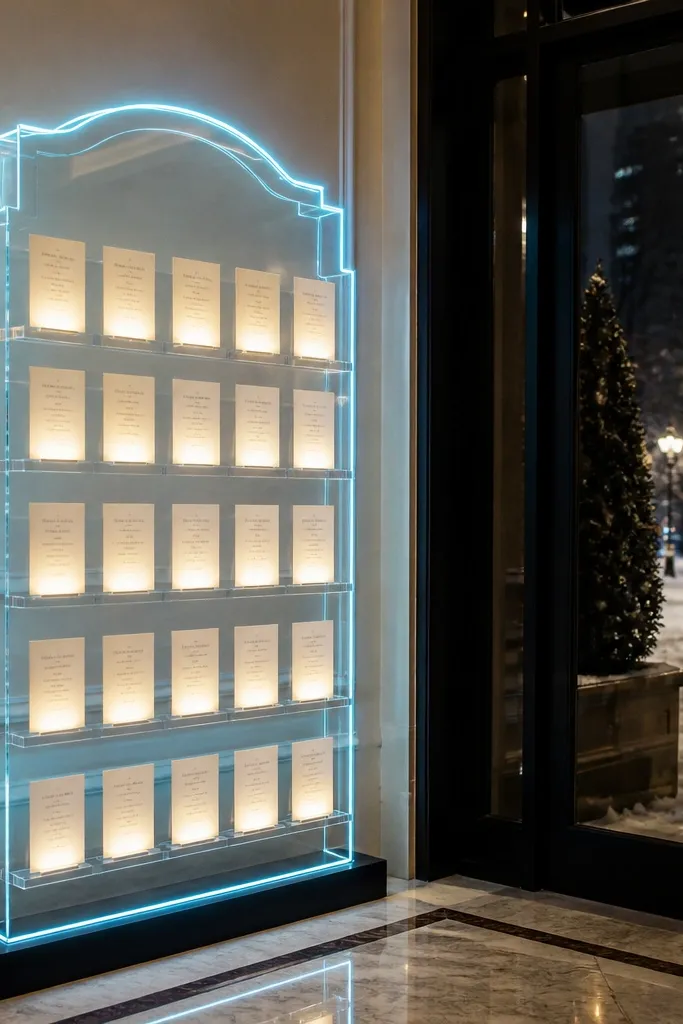
Backlit name cards look dramatic and modern, even in a traditional wedding. The chart outline guides the eye, and the glowing names create a clear focal point for photos and nighttime arrivals. This is one of the best interactive options for year round weddings because it works in winter light conditions and still looks intentional indoors. Guests find names faster because the backlight makes the text pop. The interactive part is a simple “tap to claim” system using removable cards.
Start by choosing a frame shape that matches your venue — a rectangle for a wall, or a freestanding arch. Use LED battery strips behind the frame and keep them behind a diffuser so the glow is soft. Print name cards with table numbers and insert them into thin acrylic sleeves. Make each sleeve removable by sliding it out so guests can take their card and head to their table.
Quick tipBring spare batteries or a compact power bank — battery lighting fails fast during long receptions.
Skip thisAvoid harsh direct LEDs; they create glare that makes names harder to read.
13. Vintage Suitcase Seating Chart with Drawer Pull Labels
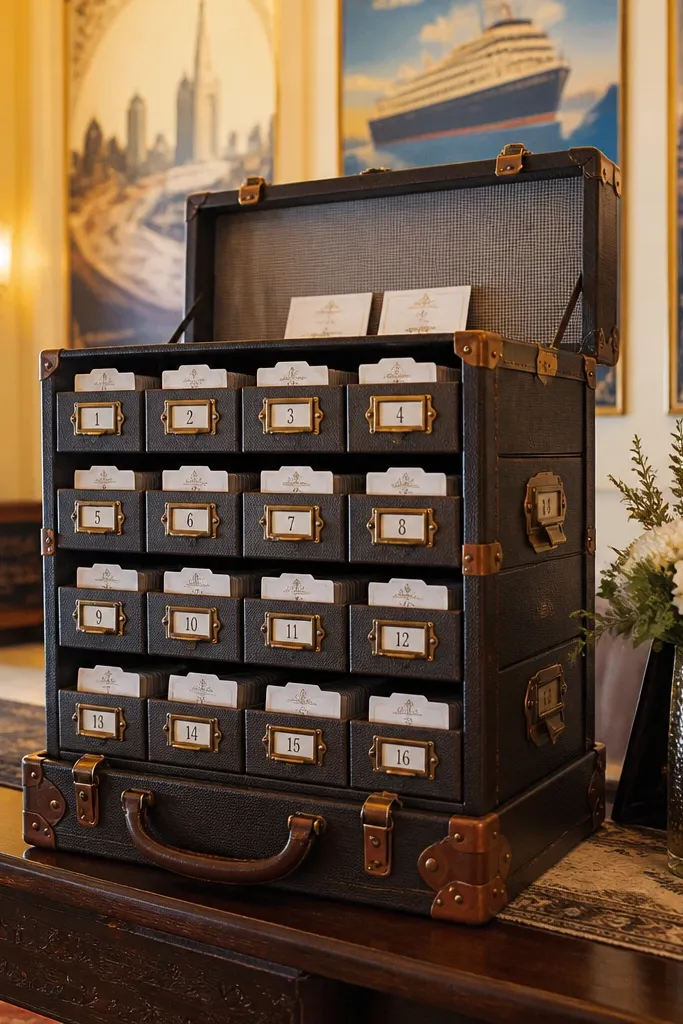
This is peak travel aesthetic. A vintage suitcase organizer with small drawers makes the seating chart look like luggage you’d want to photograph, not a plain sign. Guests pull open the drawer for their table number and grab their name card from inside. It’s interactive, but still controlled, so you avoid chaos at the entrance. It works year round because the structure is sturdy and the name cards can be laminated for easy cleanup. Add a luggage tag style label for each drawer to keep it readable.
Start by buying a suitcase organizer with multiple compartments, or use a wooden organizer trunk with removable drawer inserts. Label each drawer with a large table number and a matching tag color. Print name cards and place them inside small clear sleeves so they don’t bend. Position the suitcase station on a table with a small sign that says “Open your table drawer, take your card.”
Quick tipSet the suitcase station near a power source for a small lamp so the station is bright for photos.
Skip thisSkip tiny drawers; if guests have to rummage, the station looks messy and slows entry.
14. Garden Trellis Seating Chart with Hanging Tag Names
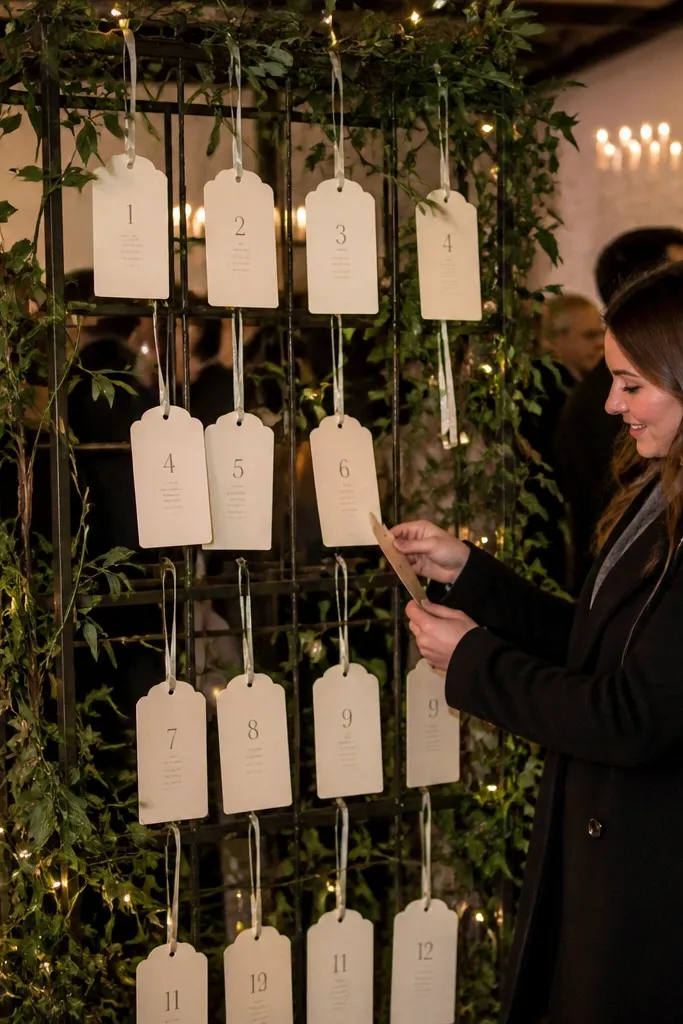
A trellis-style chart looks romantic and works beautifully for spring, summer, and fall, but it also holds up in winter if you keep it indoors. Guests find their tag by table number and then untie it to reveal their seat info. The hanging tags create great depth and texture in photos, especially with greenery or fairy lights. The interactive element is the untie step, which feels satisfying and gives you a clear before-and-after look. For year round seating chart wedding decor, it also hides the mess of rearranging names because you can rehang tags quickly.
Start by building or renting a small trellis panel and securing it to a stand. Print name tags on thick cardstock, laminate them, and punch holes for string. Tie each tag to a branch with a short length of ribbon so guests can untie without pulling down the whole row. Add table number placards at the base of each section and place a basket of extra string ties for late changes.
Use satin ribbon in a single knot style so tags untie consistently under guest hands.
Don’t use paper tags without lamination; humidity and condensation ruin edges fast.
15. Floating Candle Lantern Seating Chart with Candle-Number Labels
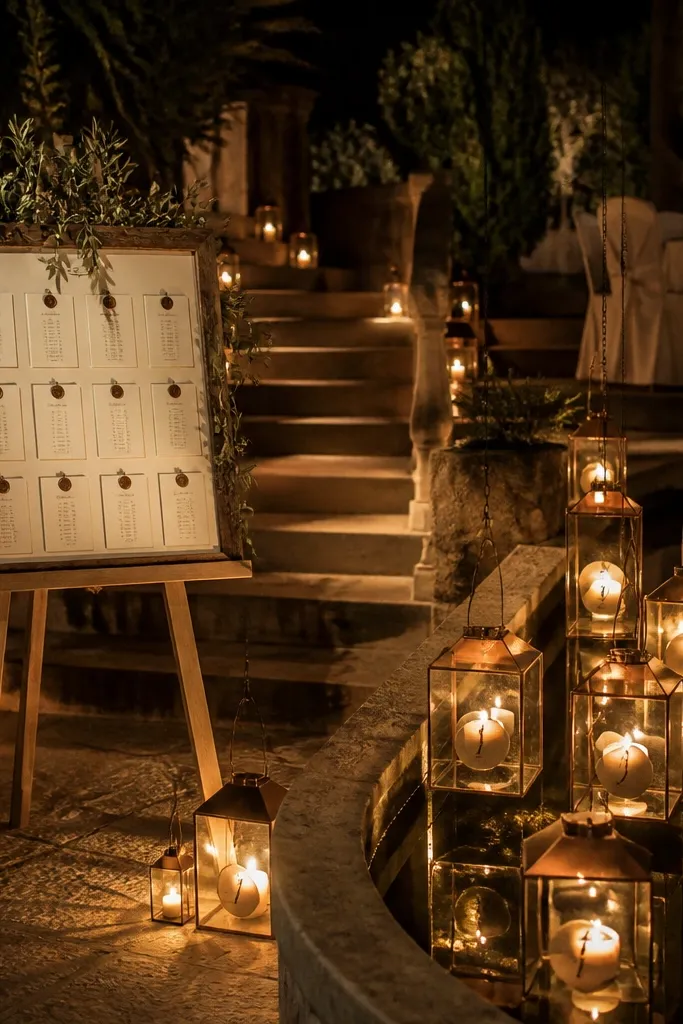
Lantern-based seating charts look magical in low light and make the station feel like décor. Guests find their table by first name on the chart, then pick up a lantern label that matches their table number. It’s interactive through a “take your label” step, and it photographs well because lanterns create warm highlights. This idea is excellent for a year round seating chart wedding where you might have early evening ceremonies in winter or darker venues in any season. Keep the actual seating info readable and separate from the lantern labels so it’s not confusing.
Start by placing lanterns or pillar candle holders in a semicircle around a main chart board. Print a main name list board with bold table numbers and first names, then laminate it. Create lantern labels with table numbers only, and place them on a small ring or clip board so guests can grab them quickly. Add a sign that says “Take your table label — find your table number.”
Quick tipUse LED candles if you’re outdoors or in close quarters; it keeps the look without the risk.
Skip thisDon’t bury the main name list under lanterns; the seating chart must be the first thing people read.
16. A-Frame "Name Ladder" with Clip-On Rungs
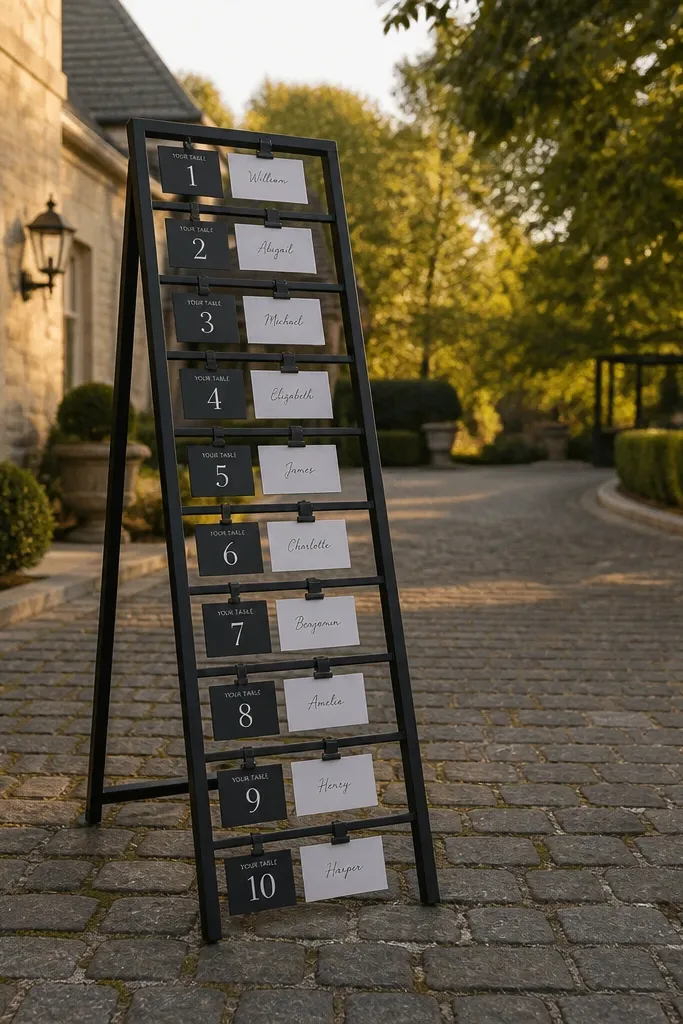
A-frame ladder signage is clean, graphic, and easy to read from a distance, which matters for any year round seating chart wedding with arrivals in waves. The interactive part is clip-on rungs: guests clip their name card onto a “your table” section, so the station becomes a visual cue of progress. It looks great because it has strong lines and a structured grid. You also get a practical advantage: when seating changes, you only swap affected cards. The station stays photo-friendly because it has a consistent, tidy design.
Start by building an A-frame or buying one that can stand outdoors under cover. Create a “name zone” and “table zone” on the frame with clear signage. Print name cards with large first names and table numbers, then attach them with small binder clips or peg clips. Set up a basket of extra clips so replacements are quick during guest arrival.
Quick tipPlace the A-frame where guests naturally pause, like near cocktail service — it reduces rushing and lines.
Skip thisSkip low-contrast card colors; clip systems look stylish but text still has to be readable.
17. Folding Fan Seating Chart with Table Slices
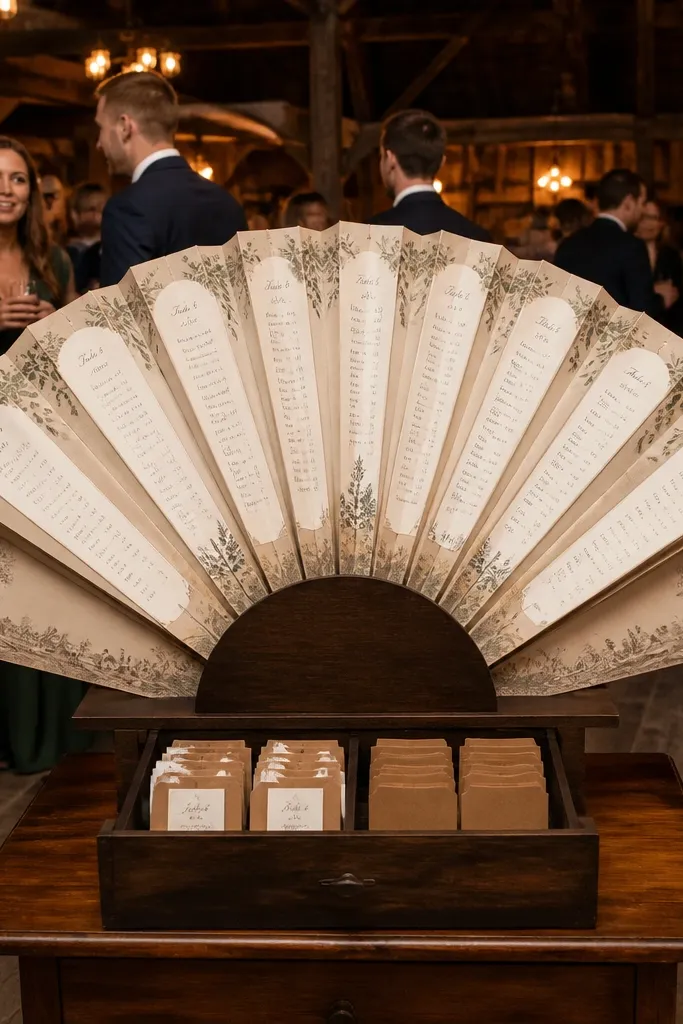
A folding fan chart looks like art and feels different from any standard seating sign. You open it, and the fan sections show tables in slices, each with a name list. Guests flip to the section that matches their table number, then grab a matching card from a small tray attached to that slice. It’s interactive, but not chaotic, because the fan physically restricts what guests can access. This works year round because the folded display is compact and the cards can be laminated for repeated use.
Start by building the fan structure from thick foam board panels or buying a folding display fan frame. Create one section per table group and print a name list per section in a consistent layout. Attach a small tray at each section where guests can grab a laminated table card. Place the folded fan in a stand near the entrance so guests can open it without blocking traffic.
Use a magnetic closure so the fan stays closed when staff move it between photo setups.
Don’t put too many tables on one fan slice; if the text gets small, the whole thing fails.
18. Gallery Wall Seating Chart with Pinboard Name Tags
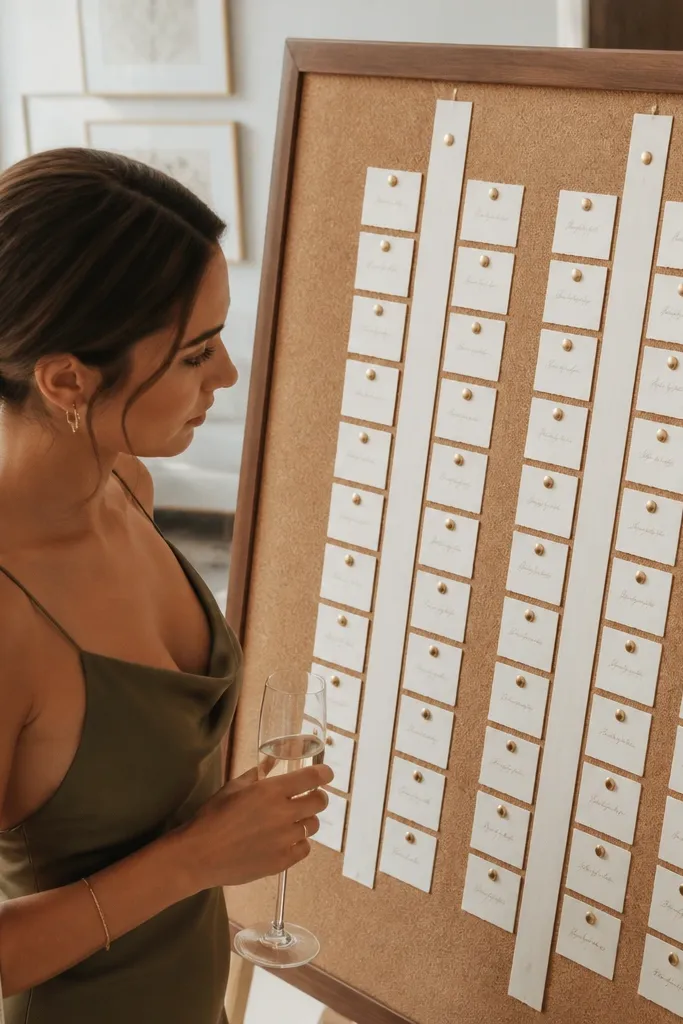
A gallery wall seating chart looks like intentional décor, especially in modern venues. Guests pin their name tag to the correct table number strip, then take a small card that confirms their seat. The interactive act of pinning creates a satisfying visual and keeps people engaged while they wait. This works year round because pinboards handle indoor lighting well and the name tags can be laminated. It also gives you an easy photo backdrop that doesn’t look like a spreadsheet.
Start by setting up a pinboard or cork board in a grid with table number strips at the top of each section. Print name tags with bold first names and a tiny table number icon for quick scanning. Provide a small bag of pushpins and a “Find your name, pin it here” sign at the entrance of the station. Finally, add a separate tray of table confirmation cards so guests don’t crowd the board.
Quick tipChoose pushpins with colored heads that match table numbers; it looks cleaner in photos.
Skip thisSkip overcrowded boards; too many tags create visual noise and slow reading.
19. Table Number Lightbox with Removable First-Name Cards
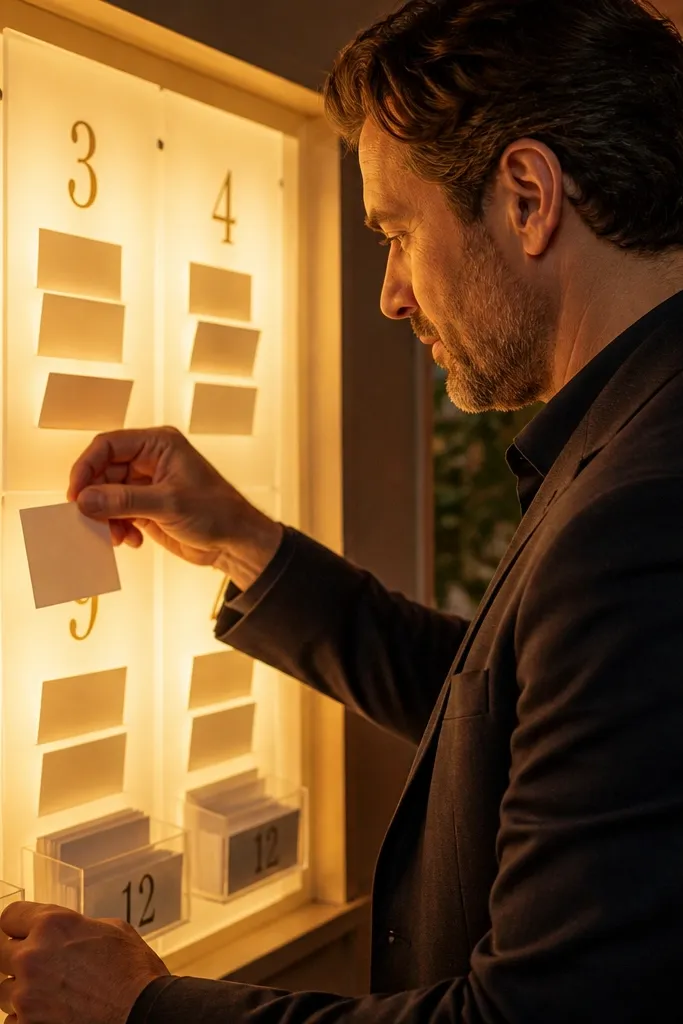
A lightbox seating chart is the most “designed” option for evening weddings, and it looks great in winter when venues are dim. Table numbers glow behind, and first-name cards sit in front in labeled slots. Guests remove their card and place it into a small return tray marked with the table number — that drop-in action is quick and interactive. It also handles late updates because you can swap individual cards without breaking the whole system. This is a strong fit for a year round seating chart wedding when you want the chart to look intentional in every season.
Start by choosing a lightbox size that matches your guest count and distance — aim for a readable layout from 8 feet away. Print first-name cards with table numbers, then insert them into acrylic sleeves or plastic card holders. Label the return tray by table number so guests know where to put the card after removal. Place the lightbox at the entry path where guests naturally slow down and take photos.
Use a warm white glow and avoid rainbow lighting; warm light looks better on skin and photos.
Don’t use thin fonts on cards; backlighting makes thin text disappear.
20. Floating Frame Seating Chart with Hanging "Your Table" Tags
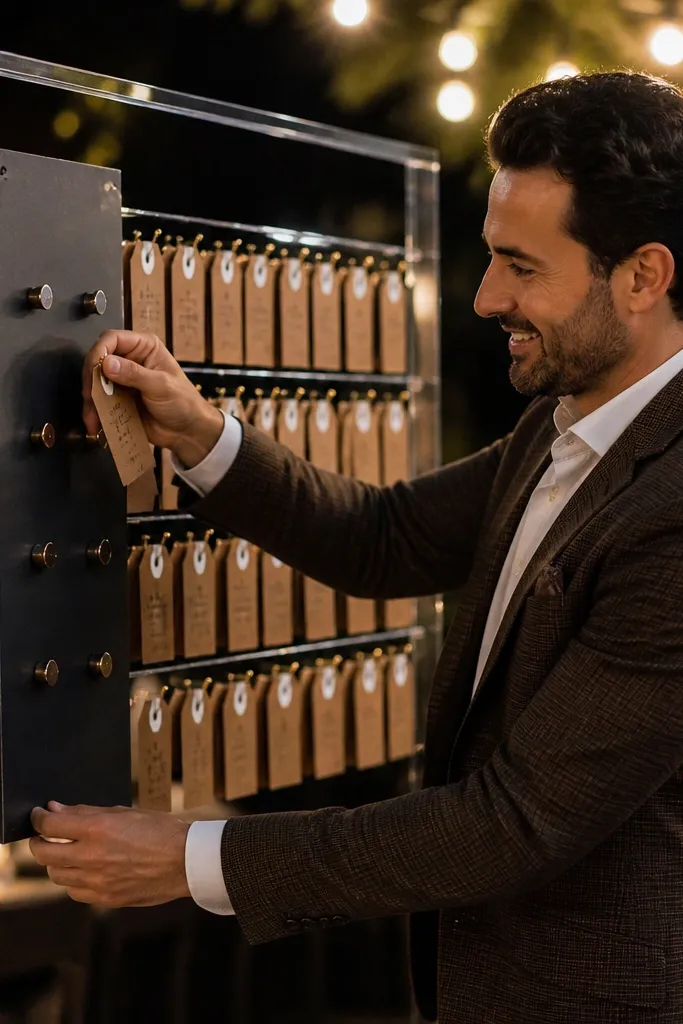
Floating frames look premium and keep the seating chart from looking like a poster. Guests pull down a hanging tag labeled with their first name and table number, then clip it onto a “Your Table” board at the side. That clipping step gives you a clean interactive moment without messy handling. The tags also create depth for photos because they hang in front of the frame. For year round seating chart wedding planning, the frame can be indoors or outdoors under cover, and the tags are easy to laminate.
Start by mounting a floating frame or shadow box on a stand so it’s at eye level. Print hanging tags with a large first name and table number, then laminate them and add a small ribbon loop. Add a side board with table number hooks where guests clip their tag after they find it. Place a sign that tells guests to “Pull your tag, clip to your table.”
Quick tipUse identical ribbon lengths so tags hang evenly and look consistent in photos.
Skip thisSkip loose string knots; they twist and tangle when guests pull tags quickly.



