
1. Black Frame Mirror with Vinyl Table Blocks
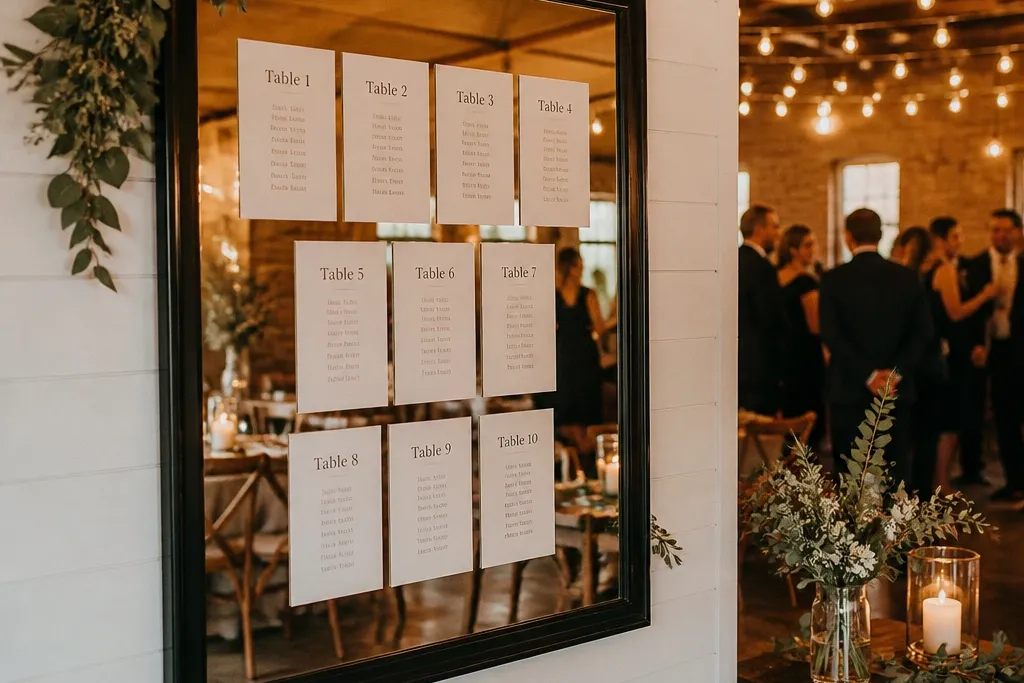
This is the cleanest option for an on a budget seating chart wedding because the mirror does the heavy lifting: it makes the chart look styled instead of taped. A black frame keeps the mirror looking sharp in photos, even if your lighting is warm. Vinyl labels also look crisp and stay flat, which matters when guests move through quickly. Use a grid with table numbers at the top and names grouped under each number so scanning feels natural.
Start with a 20x30 inch black-framed mirror from a thrift store or discount home section, then clean the glass with rubbing alcohol so vinyl sticks without lifting. Next, design your labels in a simple grid using bold table numbers and smaller name text, and cut them in a vinyl cutter or order pre-cut vinyl. Finally, place the mirror at eye level and add two soft lights or candles behind you so the text stays readable.
Quick tipUse matte vinyl for names and slightly thicker vinyl for table numbers so the hierarchy shows in photos.
Skip thisAvoid cursive fonts for names; they look pretty up close and turn unreadable at distance.
2. Acrylic Lettering Seating Chart on Mirror Backer
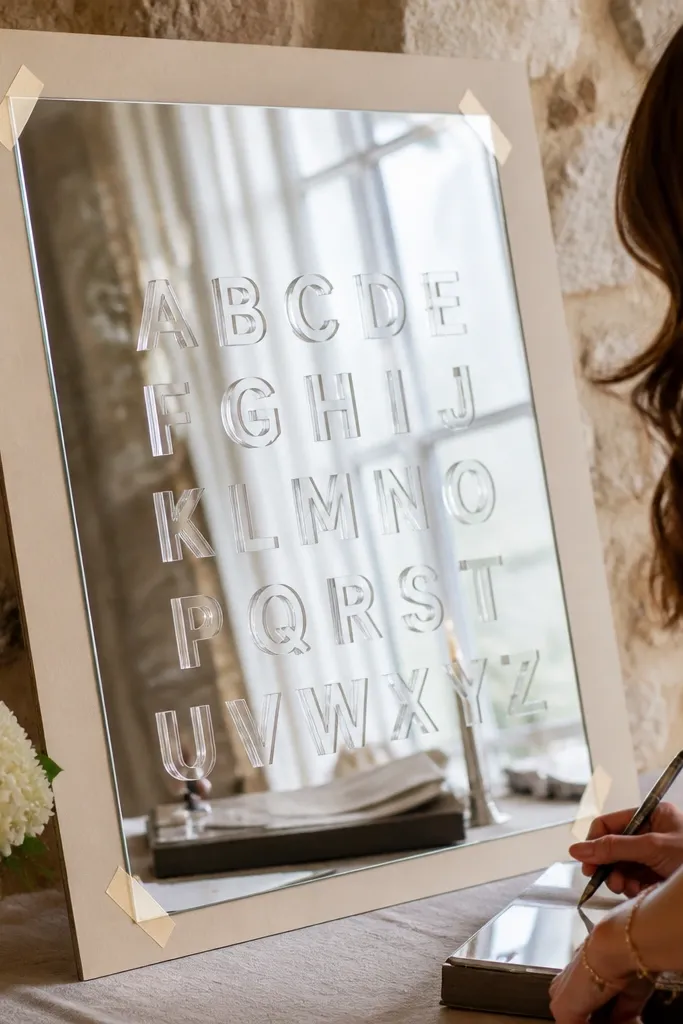
If you want that “high-end stationery” look without paying for a custom sign, acrylic lettering is the move. The clear pieces sit on a backer, so the mirror surface stays clean and the chart looks intentional. This works especially well for minimalist weddings because the lettering looks modern and doesn’t depend on lots of florals. It also photographs well because the letters catch light instead of blending into the mirror.
Start by mounting a thin foam board or acrylic sheet behind the mirror so you have a solid surface for letters. Then order acrylic letters in two sizes: large for table numbers and smaller for names, and place them with a ruler so rows line up. Finally, add a simple border line with vinyl or paint marker at the edges so the whole chart looks framed.
Quick tipChoose frosted or lightly tinted acrylic to reduce glare when the mirror catches overhead lights.
Skip thisSkip heavy gloss acrylic if your venue has bright spotlights; glare makes names disappear.
3. Dry-Erase Mirror with Color-Coded Sections
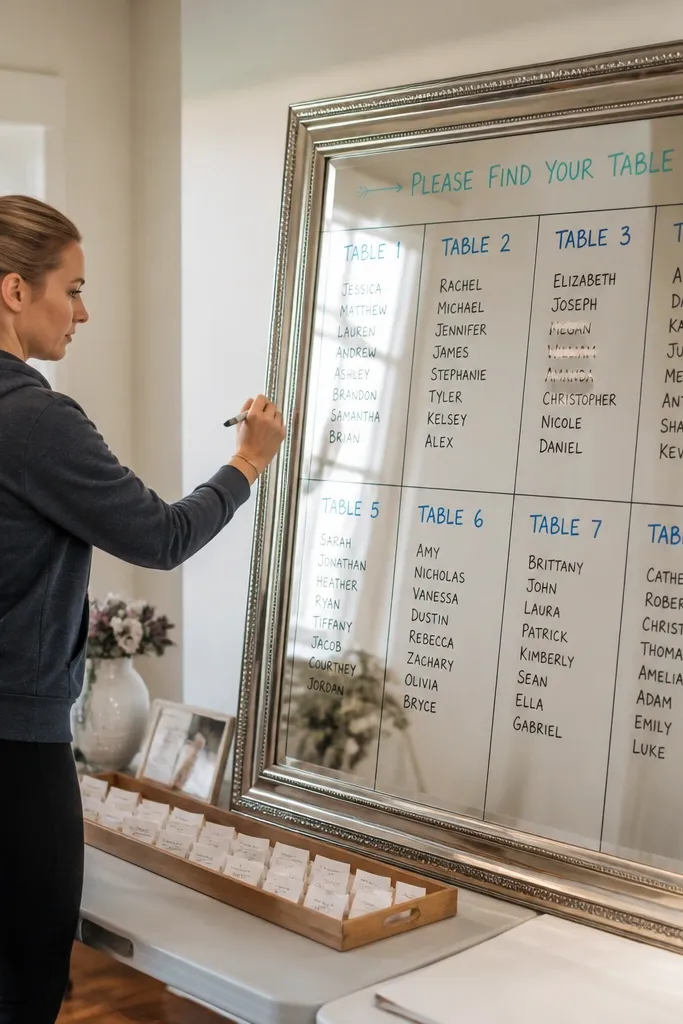
A dry-erase mirror is the most practical budget option when your guest list changes or you’re still finalizing assignments. The mirror backdrop makes it look styled, and color-coding helps guests find their table faster. Use one color for table numbers, another for names, and keep the rest white space so it doesn’t look messy. This setup is also forgiving for mistakes because erasing is quick and the display still looks clean.
Start with a mirror and mount a lightweight dry-erase board behind it or use a dry-erase coating product meant for glass. Then write your table numbers in a thick marker and names in a lighter marker, using a ruler for straight rows. Finally, assign one color per room section and test readability from the entry spot before the day of the event.
Quick tipWrite a day-of backup copy on paper; if a marker smears, you can re-copy fast.
Skip thisDon’t use too many colors; four max keeps the chart readable and photos looking tidy.
4. Gold-Trim Mirror with Burlap Ribbon Header
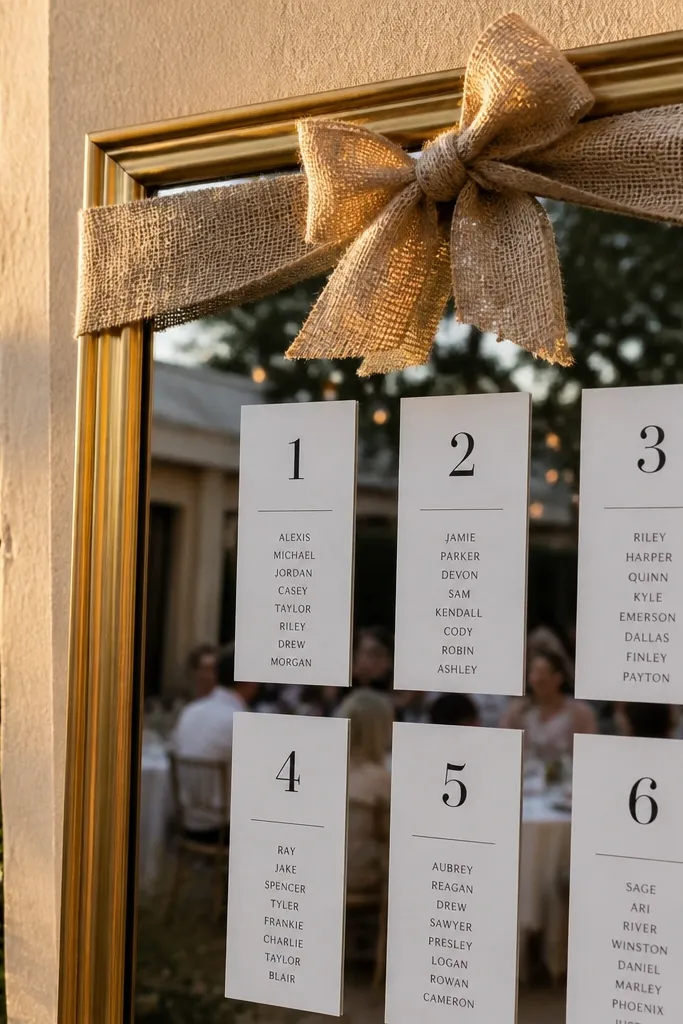
This is the “farmhouse but still pretty” mirror setup that reads warm in photos. A gold-trim mirror gives you shine, while a burlap ribbon header adds texture without costing much. Keep the actual seating chart simple with vinyl or printed labels, and let the header do the styling. It looks especially good for outdoor weddings where you have natural light and wood tones.
Start with a thrifted mirror that has a slim gold edge, then measure the width so the ribbon header spans most of the chart. Next, attach burlap ribbon across the top with clear double-sided tape and add a vinyl title like “SEATING” in all caps. Finally, place your table numbers in a grid below and add a couple of small faux stems at the corners only.
Quick tipUse wired ribbon so the banner sits flat and doesn’t wave when guests walk by.
Skip thisSkip big florals on the mirror face; they hide the text and make it look cluttered.
5. Round Mirror with Radial Table Number Layout
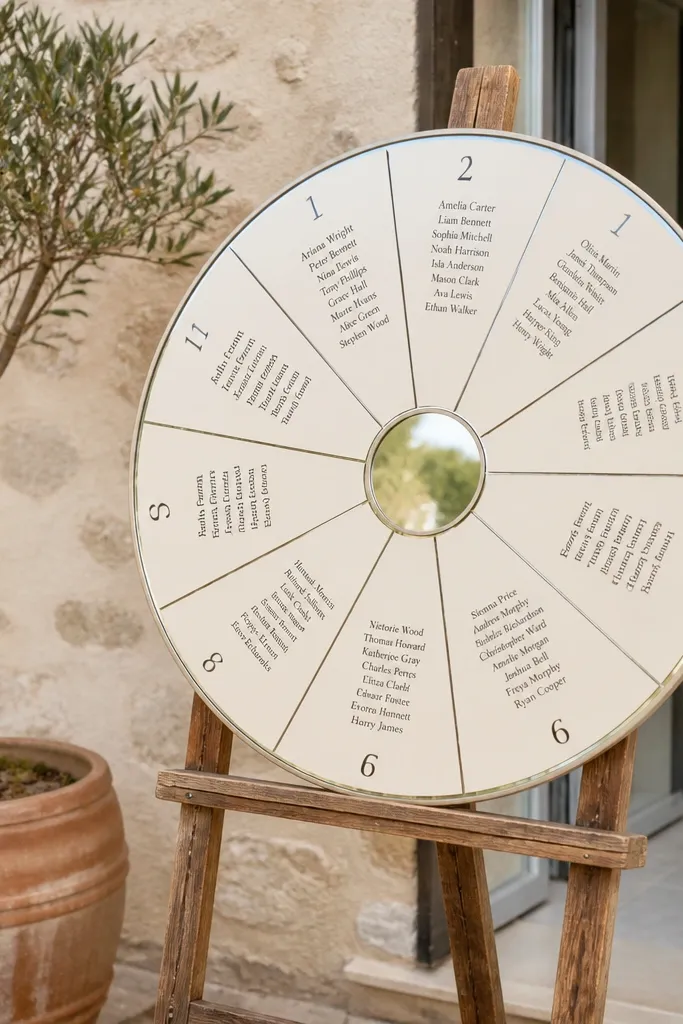
A round mirror changes the vibe instantly, and it’s a fun alternative to the usual rectangle chart. The radial layout is photogenic because it creates a clear design pattern, and guests can scan by moving their eyes around the circle. This works best for smaller weddings where you have fewer tables, since the wedges can get crowded fast. Keep your names short and grouped so the chart stays clean.
Start with a round mirror around 24 inches wide so you have space for wedges. Then draw a faint circle guide behind the glass or on the backer and split it into equal wedges for tables, using vinyl labels for table numbers and name lines. Finally, anchor the mirror on an easel and place it near the entrance where people naturally pause.
Use slightly smaller font for names in the wedges so the layout doesn’t look cramped in photos.
Avoid cramming too many tables into one round mirror; it turns into a blur.
6. Mirror with Chalkboard-Style Name Cards Behind Glass
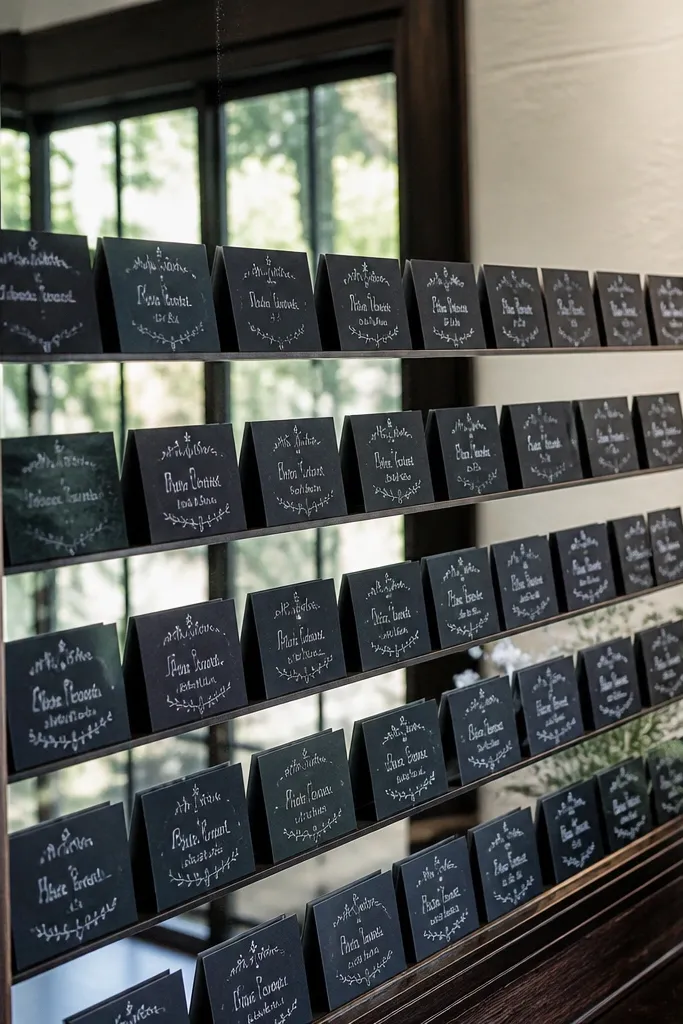
This idea gives you the chalkboard look without the mess on the glass itself. Small name cards behind the mirror make the chart feel curated, and the mirror reflection adds depth so it photographs better than a single board. It’s also flexible: you can swap a card if your seating list changes. Use thick card stock and matte finish so the “chalk” lettering looks consistent.
Start with a mirror and a sheet of black or dark gray craft board placed behind it as the backer. Then create table headings and name cards on cardstock with chalk marker lettering, and place them in a grid using small spacers so they don’t touch. Finally, add a simple border line or corner accents so the display looks intentional, not random.
Quick tipPrint your table headings in one consistent font and handwrite only names — that keeps the overall look uniform.
Skip thisSkip glossy cards; glare on the mirror makes the lettering look washed out.
7. Clear Acrylic Sheet Mirror with Hanging Tags
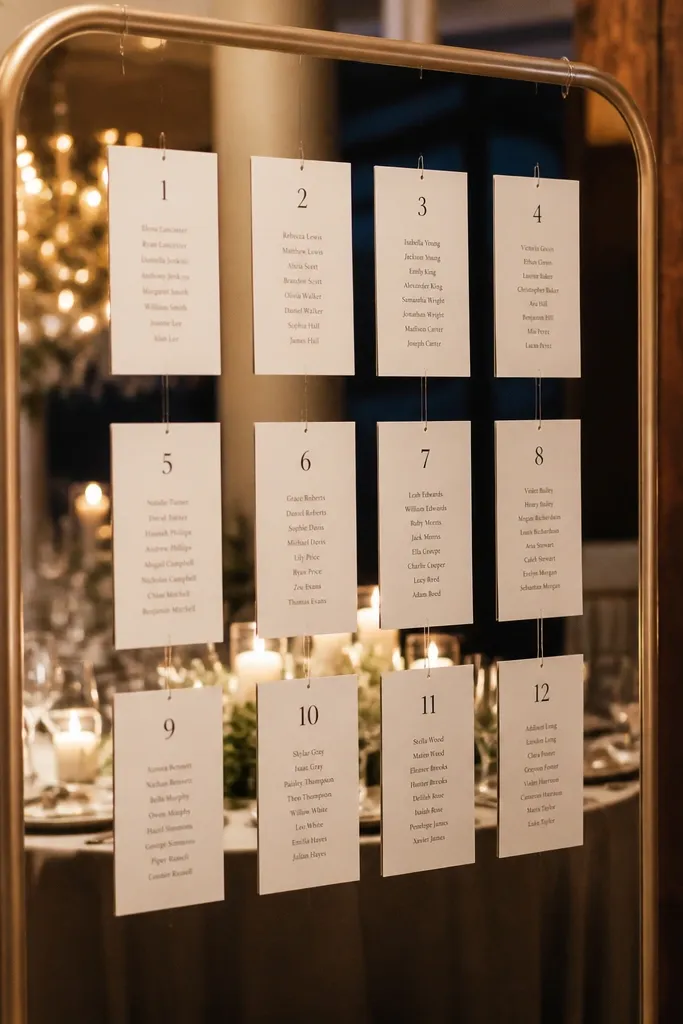
Hanging tags turn the seating chart into a “moment” instead of a flat sign. This works great for on a budget seating chart wedding when you want movement in photos without spending on a big prop. Guests can spot their table tag quickly because it’s vertical and separated. Keep tags small and consistent so the display looks designed, not like a craft project.
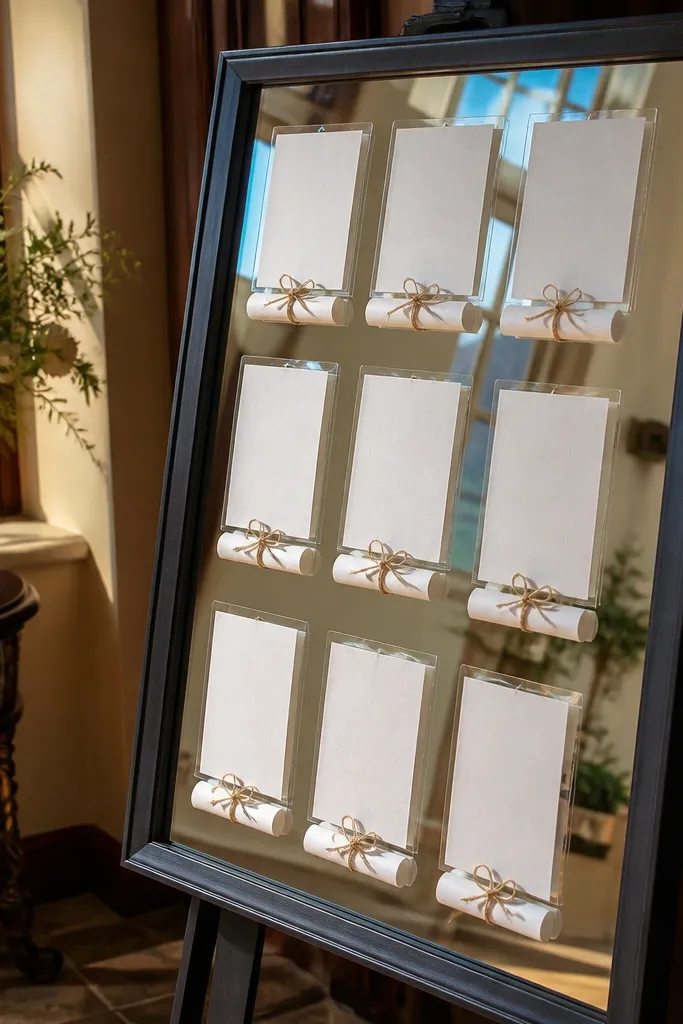
Start with a clear acrylic panel or mirror-like sign board and mount it on a stand so it’s stable. Next, hang small cardstock tags in a straight grid using thin twine, with table numbers on the top tag and names on the slips below. Finally, group tables by section and label sections at the top so scanning is fast.
Quick tipUse identical tag sizes and punch holes with the same template so spacing looks tight in photos.
Skip thisDon’t hang too many names per tag; it becomes a tangled block visually.
8. Mirror Seating Chart with Photo Frame Border
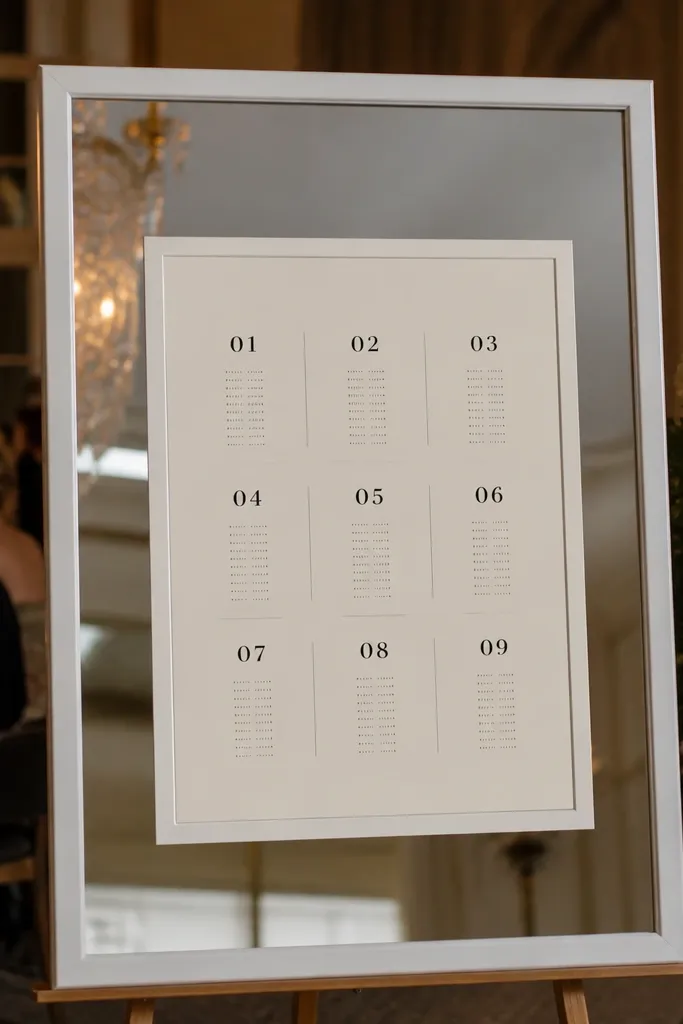
This is a clever budget hack: you make the chart look like it’s “framed,” even if the mirror is plain. A photo frame border (thin, matching color) gives you a polished edge and makes the seating chart feel like part of the venue design. It’s perfect if you already have a plain mirror but want it to look styled. Use a minimal vinyl grid so the border does the decorating.
Start with a basic mirror and choose a thin frame border style that matches your wedding palette, like white or matte black. Then add the border using adhesive trim or a strip of wood trim, leaving a clean interior space for the chart. Finally, apply vinyl table numbers and name text in rows and place the mirror where it catches soft light.
Quick tipMeasure your interior space and keep everything inside that rectangle so the chart never looks off-center.
Skip thisSkip uneven border widths; even small differences show up fast in photos.
9. White Shiplap Mirror with Table Number Peg Display
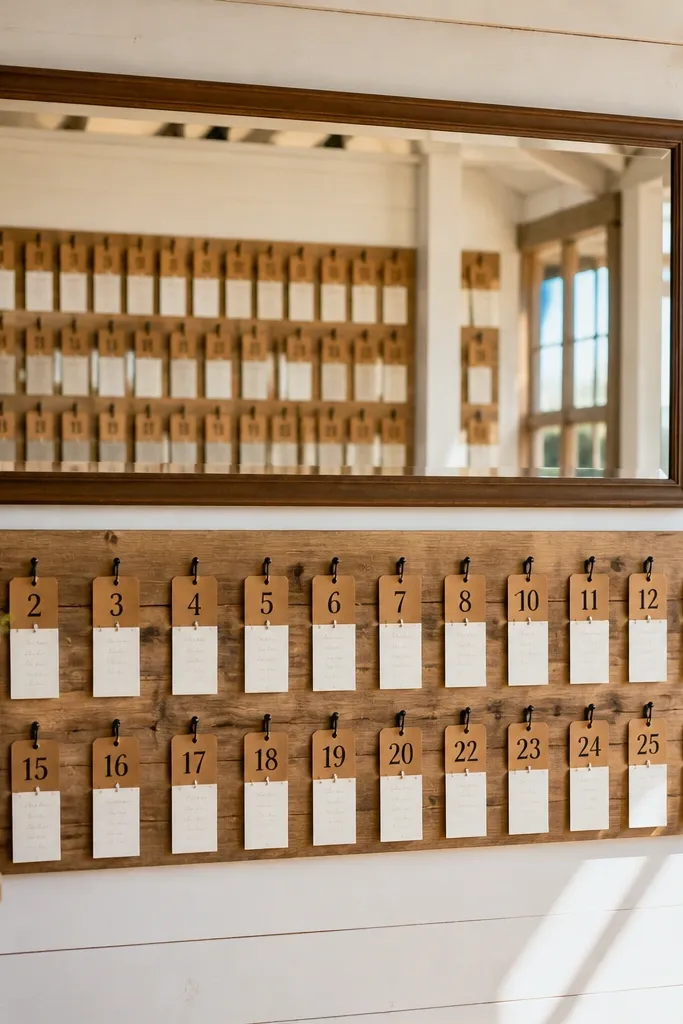
This setup looks warm and intentional, and it’s surprisingly affordable if you use craft wood backing. The mirror reflects the display, making the peg cards look more abundant than they are. It also helps guests because table numbers are visible at a glance, while names sit neatly on cards. It suits rustic, modern farmhouse, and backyard weddings with wood or neutral decor.
Start by cutting a shiplap-style board panel to the mirror size or using pre-made shiplap board behind it. Then mount a row of small pegs or mini clothespins and attach table number cards on top, with name strips clipped underneath. Finally, add a simple title vinyl at the top and place the mirror at the registration area.
Use weathered wood-look backing if you want texture without painting — it saves time and looks real in photos.
Don’t use thin flimsy cards; they bend and look messy when guests hover.
10. Mirror Seating Chart with Pampas-Style Feather Corner Frames
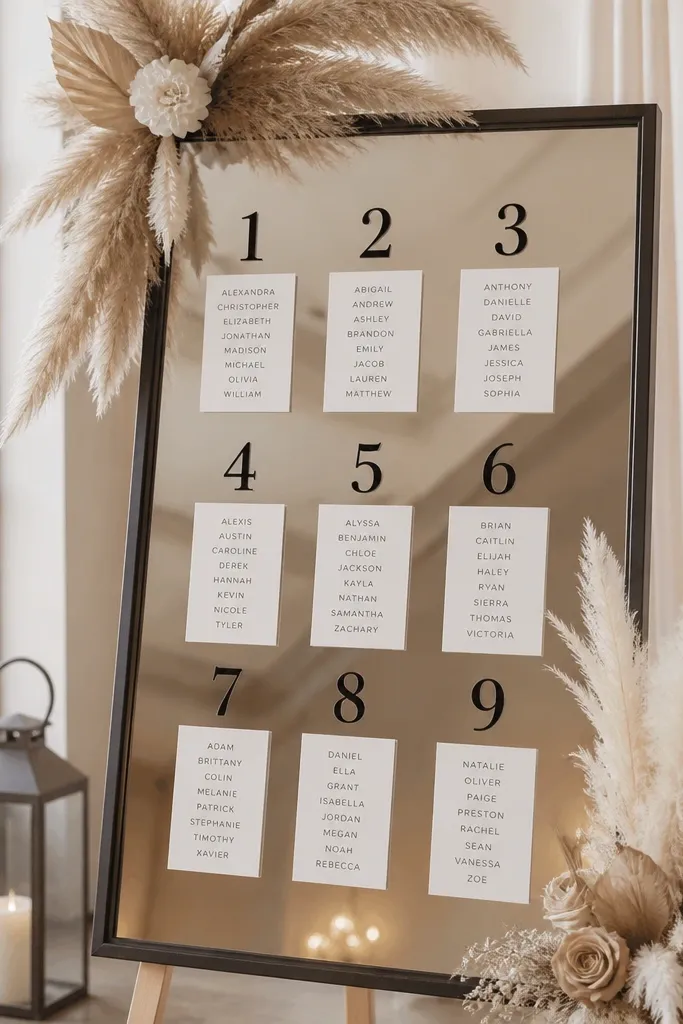
If you want a stylish, airy look without a full floral wall, corner decor is the smartest way to frame the chart. Feather-like stems (or pampas-style decor) make the mirror feel intentional and look great against glass. Keep the chart itself minimal and high-contrast so the text stays readable. This works especially well for modern weddings with neutral linens and soft lighting.
Start with a mirror and a backer board in off-white or light gray, then design a high-contrast vinyl grid for tables and names. Next, attach small bundles of feather-like stems at the top corners using zip ties or hot glue on a hidden base. Finally, place the mirror on a stand so the stems don’t block the chart and keep the display near the guest entry.
Quick tipAngle the mirror slightly toward the light source so the text stays sharp and the stems catch highlights.
Skip thisAvoid putting tall stems across the text area; it creates shadow bands in photos.
11. Vintage Window-Style Mirror with Numbered Place Cards
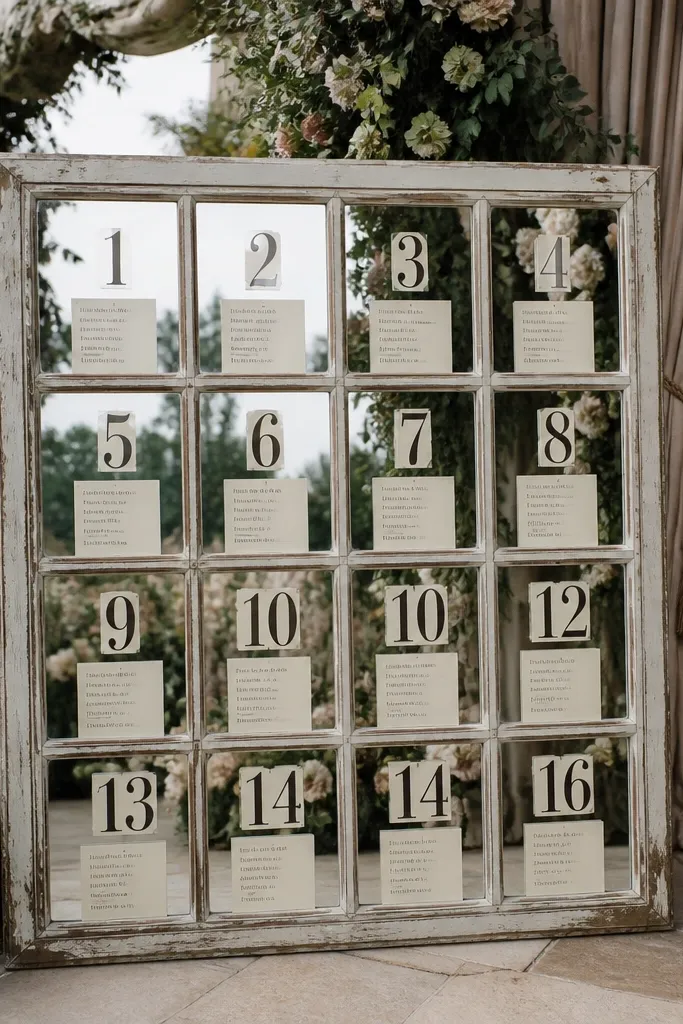
A window-style mirror gives you built-in structure, which is perfect for seating charts. You’re basically using the mirror’s “panes” to organize tables, so it feels designed even when you’re on a tight budget. Place numbered cards in each pane and write names on smaller cards beneath or beside. Guests find their table faster because the layout matches the visual grid.
Start by choosing a mirror with a visible window grid or add a grid overlay with thin vinyl lines. Then create numbered cards for each pane using cardstock and place them so they sit flat against the mirror surface or backer. Finally, keep names in short lines and use consistent spacing so the panes don’t look crowded.
Use a matte pen for names so they don’t reflect glare back into cameras.
Skip mixed card sizes; mismatched panes make the whole chart look chaotic.
12. Mirror Seating Chart with Fabric Ribbon Rows
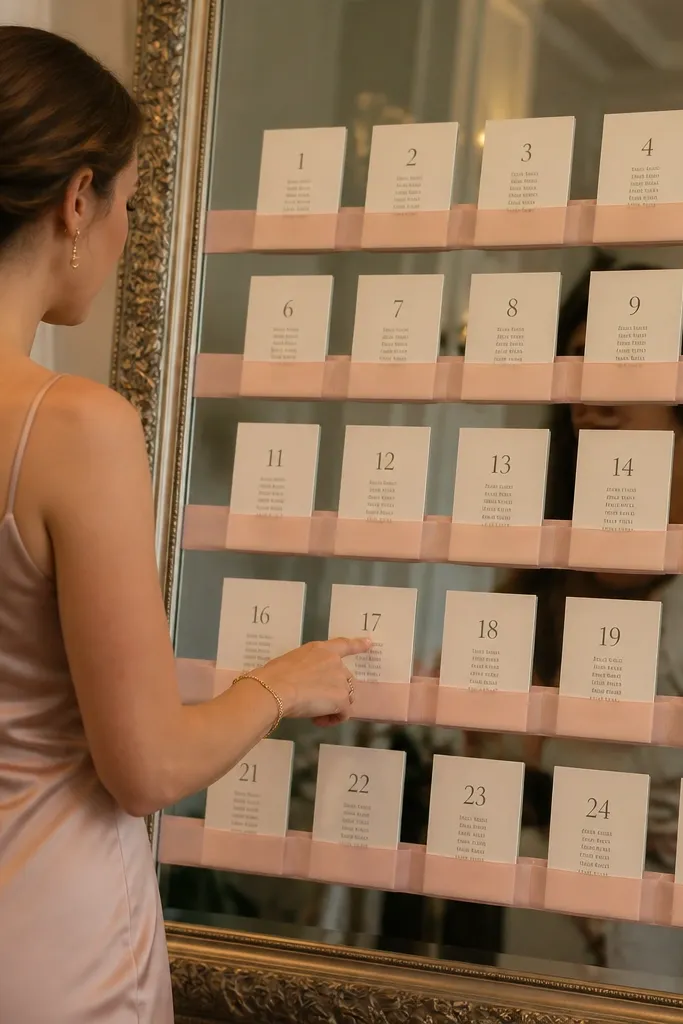
This one looks soft and romantic without expensive florals. Fabric ribbon rows act like invisible dividers, so the chart has structure even if your handwriting or font isn’t perfect. It’s a good fit for weddings with blush, sage, or cream palettes. The mirror keeps everything polished, and ribbon texture adds visual interest in photos.
Start with a cream or white mirror and decide your layout: one ribbon row per table section. Then attach ribbon strips horizontally across the mirror backer using double-sided tape, and mount table numbers on top of each ribbon with small cardstock labels. Finally, write names on matching cards and slide them under the ribbon row so they stay aligned.
Quick tipUse grosgrain or satin ribbon in a single width so your dividers look consistent and tidy.
Skip thisDon’t use slippery ribbon that droops; it makes the chart look uneven quickly.
13. Large Mirror with Tiered Table Number Signposts
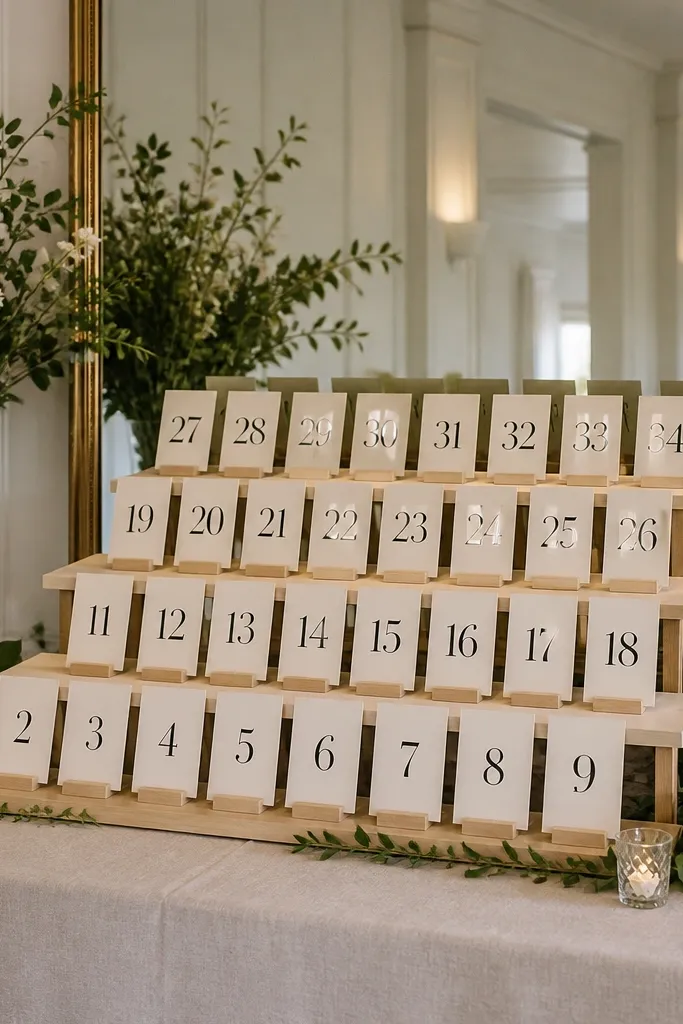
Tiered signposts make the seating chart look like a display, not a list. With the mirror behind it, the tiers reflect and look fuller, which is exactly what you want when you’re trying to look stylish on a budget. This works best when you have a moderate number of tables and want a clean, modern look. Use simple typography and keep each tier focused on one table range or section.
Start with a large mirror around 30x40 inches if possible, or use two smaller mirrors side-by-side if you need the width. Then build tiers using stacked acrylic risers or foam board platforms, placing table number signs on each tier. Finally, mount the name text on a flat vinyl grid behind the tiers so names stay readable even when the signs cast light shadows.
Quick tipPlace the tiered display slightly off-center toward the guest entry so reflections don’t hide the middle.
Skip thisAvoid placing all text on the tiers; raised surfaces make names harder to read.
14. Mirror with Framed Printed Seating Chart Strips
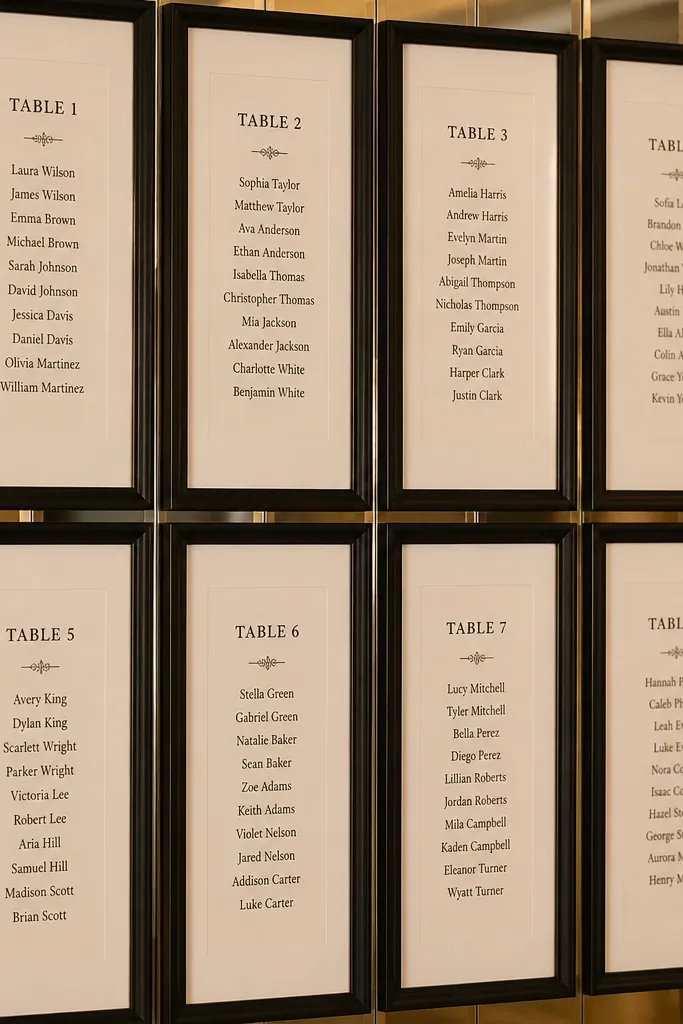
This idea looks designer because it uses printed strips, then frames them like mini artwork. You get perfect typography without paying for custom calligraphy, and the mirror reflection makes the frames look intentional. It’s also a great choice for on a budget seating chart wedding because you can print multiple strips on regular paper and mount them in inexpensive frames or frame-like mats. Keep the strips narrow and evenly spaced for the clean photo look.
Start by formatting your seating chart into vertical strips for each table or section, then print on cardstock or thick paper. Next, buy inexpensive frame mats or small display frames and mount each strip so the edges are crisp and aligned. Finally, place the framed strips on a backer board behind the mirror and secure the whole piece on a stand.
Quick tipUse a laser printer if you can; inkjet smears on some mounting adhesives and looks messy in close photos.
Skip thisSkip busy background designs in the print; keep it white and let the mirror do the style.
15. Mirror Seating Chart with Floating Name Panels Using Clear Stand-Offs
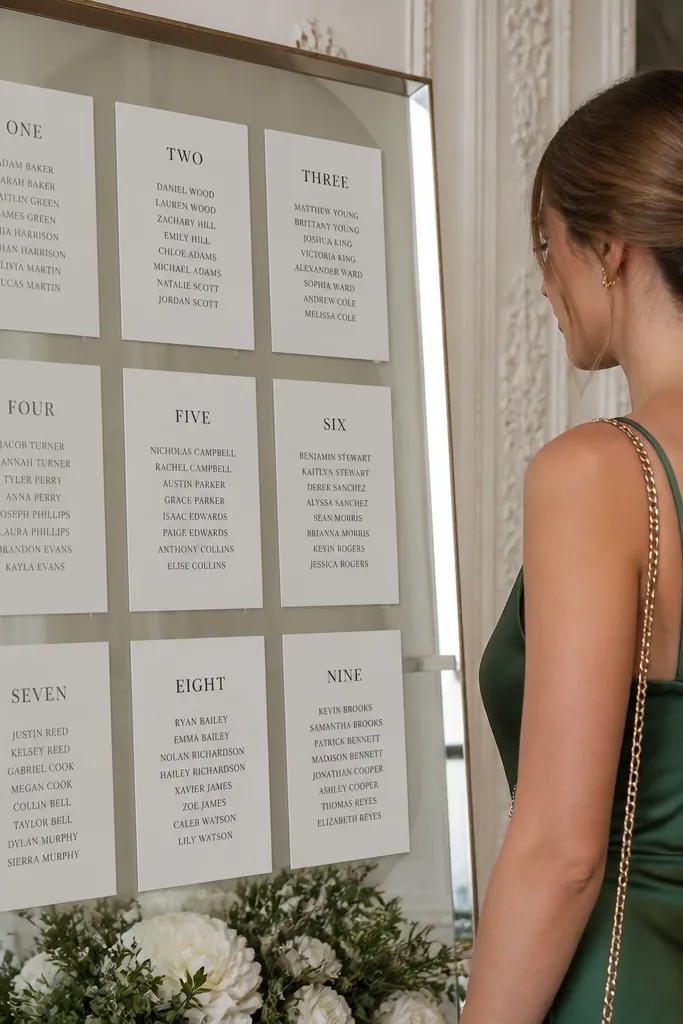
Floating panels look expensive because they create depth, and mirrors amplify that effect. You can keep the panels simple — one panel per table section — then list names in neat columns. Clear stand-offs hide the attachment, so the panels look like they’re hovering over the mirror. This is a strong option for modern weddings where you want clean lines and a “gallery” vibe.
Start with a mirror and decide on panel size, like 8x10 inches for sections, so each panel stays readable. Then print or write the seating text on matte acrylic or cardstock panels and attach them using clear stand-offs mounted to a backer board. Finally, adjust spacing so panels don’t overlap in reflections and place the mirror near a light source for crisp visibility.
Quick tipUse matte panels instead of glossy so your text stays readable even under overhead venue lights.
Skip thisDon’t crowd panels too close; overlapping reflections make names hard to pick out.



