
1. Oversized thrifted glass apothecary bottles for the bar
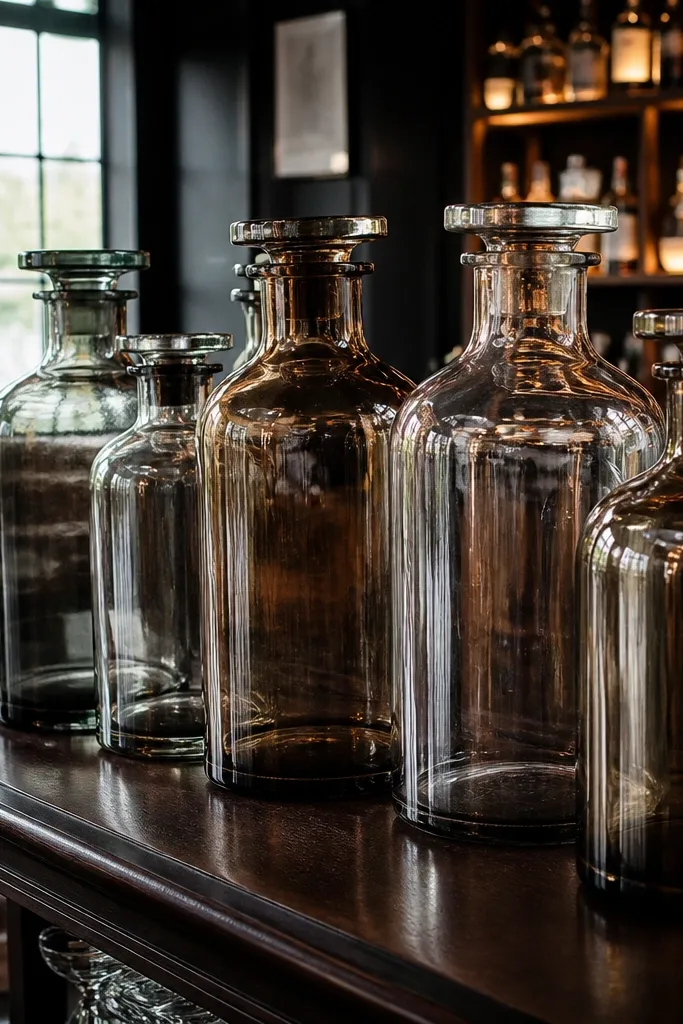
Use thrifted glass apothecary bottles when you want luxury high end wedding decor without buying a full rental bar setup. The shape reads high-end because the glass has weight, height, and a clean silhouette that photographs well with soft lighting. Stick to clear or faintly tinted glass (amber or smoky) and keep labels off or removed so the scene looks curated. Group them in a tight cluster so they look like a designed display, not a collection. This idea is especially strong for receptions in hotel lobbies, modern ballrooms, or any venue with warm ambient light where glass catches highlights.
Start by sourcing bottles that are at least 12 inches tall and have a wide mouth or a classic apothecary shape. Then remove labels with warm soapy water and a plastic scraper; for stubborn glue, use a little rubbing alcohol on a cotton pad. Finally, cluster 3 to 7 bottles on a tray or long bar runner and add one repeated filler — either faux eucalyptus sprigs or clear glass marbles at the bottom for sparkle. If you’re using real florals, keep stems short and cover the base with a thin foam ring or plastic wrap so the glass stays clean in photos. Expect to spend about $20-60 total depending on how many bottles you grab, and plan 1-2 hours for cleaning and label removal.
Quick tipLight the bottles from the side with a single warm LED lamp or string light so they glow in photos.
Skip thisDon’t use mismatched mini bottles; small glass pieces read like party favors, not decor.
2. Gold-tone thrifted picture frames as a ceremony backdrop grid
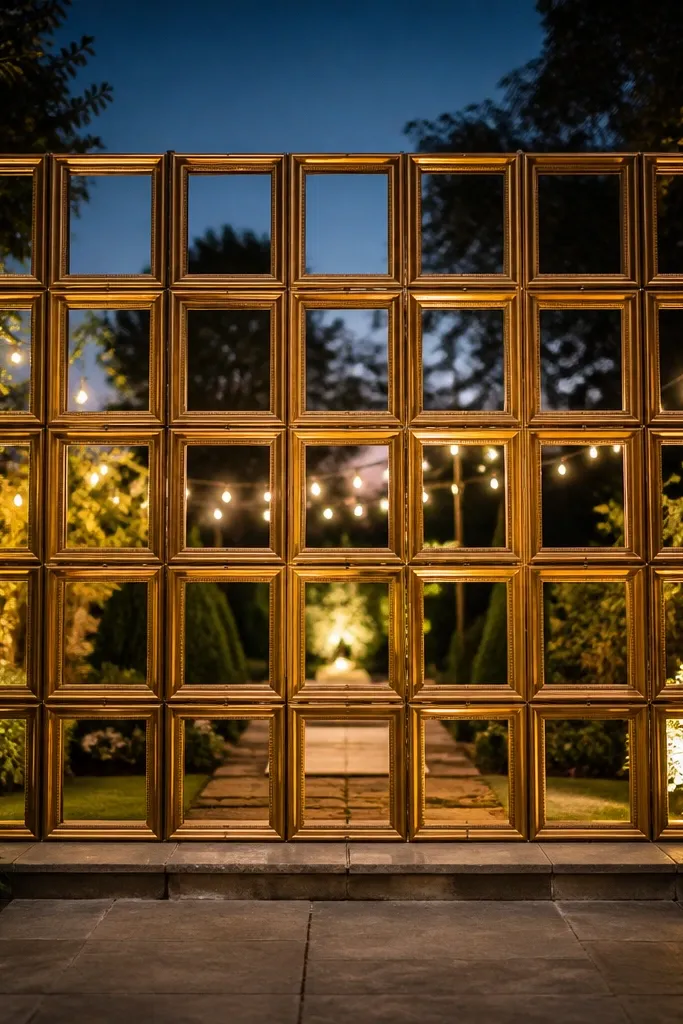
Thrifted picture frames are one of the fastest ways to make a ceremony backdrop look expensive. A uniform frame finish (gold-tone, brass-tone, or antique gold) creates that gallery feel that luxury high end wedding decor is known for. Use frames without glass if they’re heavy or scratched; the opening still gives structure for florals, greenery, or fabric. When you build a grid, the backdrop reads intentional even if the inserts change. This works great for indoor ceremonies, covered patios, and any spot where you can hang or stand a panel.
Start by collecting 8-16 frames with similar widths, ideally 8x10 to 11x14 and a consistent metal tone. Then decide your insert: plain cream linen, tulle, or a simple greenery mat; keep it matte so the frames do the work. Finally, arrange them into a grid on the floor first so you can see gaps, then secure them with zip ties to a backing board or with hanging wire to a wall grid. For a budget build, you can use a sheet of foam board or thick cardboard as the backing and attach frames with hot glue or Velcro strips. Set aside 2-3 hours and plan for $15-80 depending on frame count and how consistent you find the metal finish.
If frames look dull, rub them with a brass cleaner wipe lightly, then buff with a dry microfiber cloth to remove haze.
Don’t mix silver and gold-tone; mixed metals make thrift look accidental in every photo.
3. Tall thrifted floor candleholders for a warm aisle glow
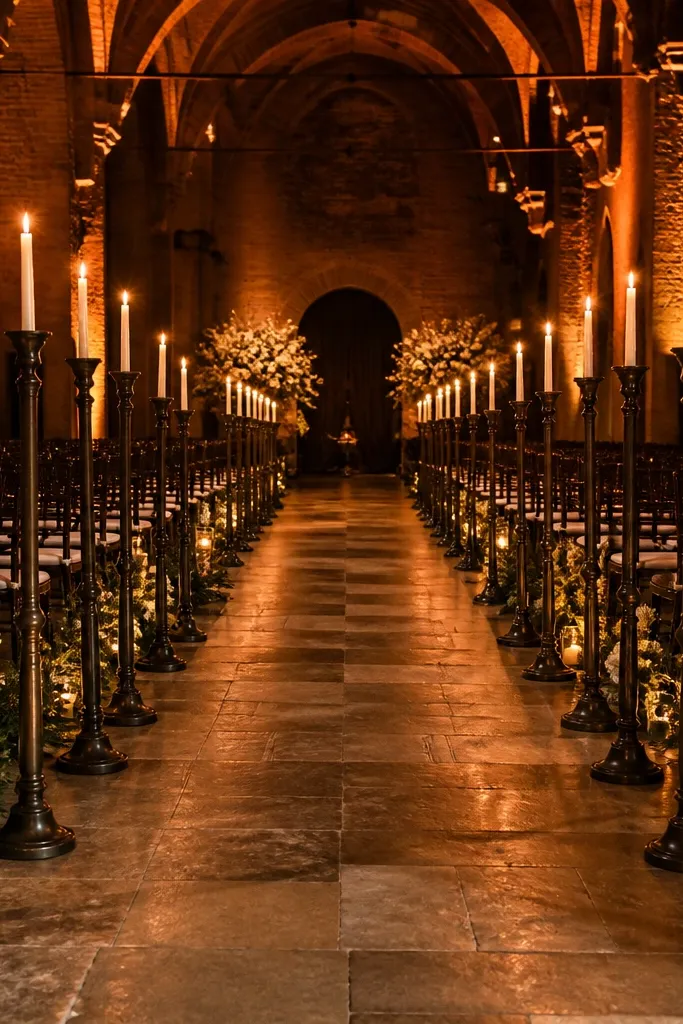
If you want luxury high end wedding decor that looks dramatic without floral volume, use tall candleholders. Floor candleholders create vertical lines that frame guests and make the aisle feel styled. Choose matte black, dark bronze, or espresso wood with a chunky base; those finishes photograph like high-end rentals. Keep candles consistent in color and height so the image reads clean instead of chaotic. This works best for evening ceremonies, indoor venues with dimmable lights, and any location where you can place candles on stable surfaces.
Start by finding 2-6 candleholders that are at least 16 inches tall, preferably matching silhouettes even if the bases differ slightly. Then test stability on-site if you can, and use LED taper candles if the venue has strict rules; LED also keeps the look consistent for photos. Next, line them down the aisle entrance or around the ceremony arch area in a symmetrical layout. Add a strip of matching ribbon or thin garland at the base to hide any gaps between holders and floor. Budget $25-90 depending on height and how heavy the pieces are; plan 1-1.5 hours to set and adjust spacing.
Quick tipUse painters tape to mark where each candleholder should stand before you place the candles.
Skip thisSkip tiny single candles; small holders look like you ran out of budget, not like you made a design choice.
4. Thrifted ceramic bud vases in a monochrome set
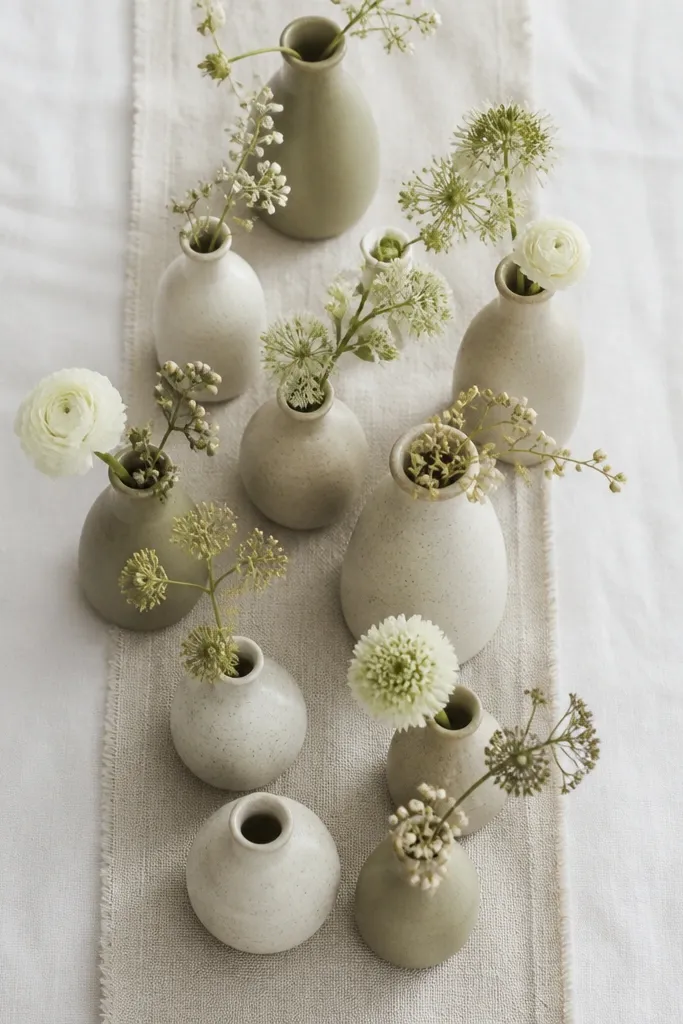
Monochrome bud vases are the clean, luxury-looking table move that costs almost nothing. Thrift lets you find dozens of ceramic vases with the right matte finish, but the secret is forcing them into one color story. Choose cream, oatmeal, stone gray, or soft sage and keep the glaze consistent so the table looks styled rather than assembled. Use single stems or short bud arrangements so each vase reads clearly on camera. This idea fits guest tables, escort card table spreads, and any reception where you want a calm, expensive look without a huge floral budget.
Start by collecting at least 10 vases with similar height (about 4-7 inches) and a matching color glaze. Then clean them thoroughly and check for chips; minor chips can be covered by a tiny touch of matching acrylic paint on the rim. Finally, group them as a runner across the table or cluster them around candles, keeping the spacing uniform (about 8-10 inches between vases). Add one stem per vase — think baby’s breath, small ranunculus, or even just greenery — and keep water lines hidden with a small piece of floral foam wrapped in plastic. Expect $10-40 for the vases and 1-2 hours for cleaning and arranging.
Quick tipUse clear, narrow tape to mask any visible water stains on the outside while you set the stems.
Skip thisDon’t mix glossy and matte ceramics; the shine differences show up instantly in photos.
5. Vintage mirrors for a luxe dessert table reflection
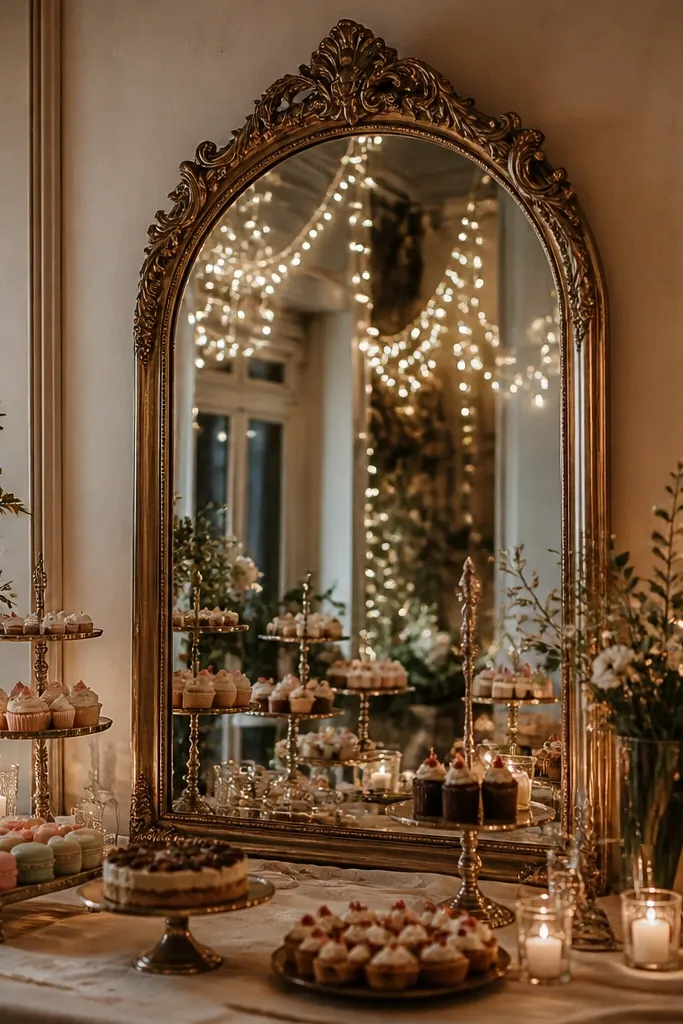
A vintage mirror is one of the most photogenic thrift upgrades for wedding tables because it doubles the light and makes everything look fuller. The trick with luxury high end wedding decor is that reflection creates depth, and depth reads expensive. Look for mirrors with an ornate but not overly busy frame, like aged gold, antique brass, or distressed wood. Place it behind the dessert table so guests' eyes catch the candles and cake styling from multiple angles. This works especially well for cake tables, late-night dessert stations, and reception corners that get photographed by the DJ backdrop.
Start by finding a mirror that’s at least 24 inches wide; leaning mirrors are easier than hanging ones. Then stabilize it with a weighted base or a purpose-built mirror stand; never rely on a table edge alone. Finally, position the mirror so it reflects your main lighting source — candles, uplights, or a warm lamp — and keep the front of the mirror clean and dry. Use the mirror to hide messy cords by placing a small tray with candles in front rather than letting items sit directly against the frame. Budget $25-120 depending on size and condition, and plan 30-60 minutes for setup and cleaning.
Quick tipBuff the glass with a microfiber cloth right before the event so you don’t get haze in photos.
Skip thisDon’t choose a mirror with heavy spotting; white marks look like glare in every camera.
6. Thrifted brass trays for a styled centerpiece base
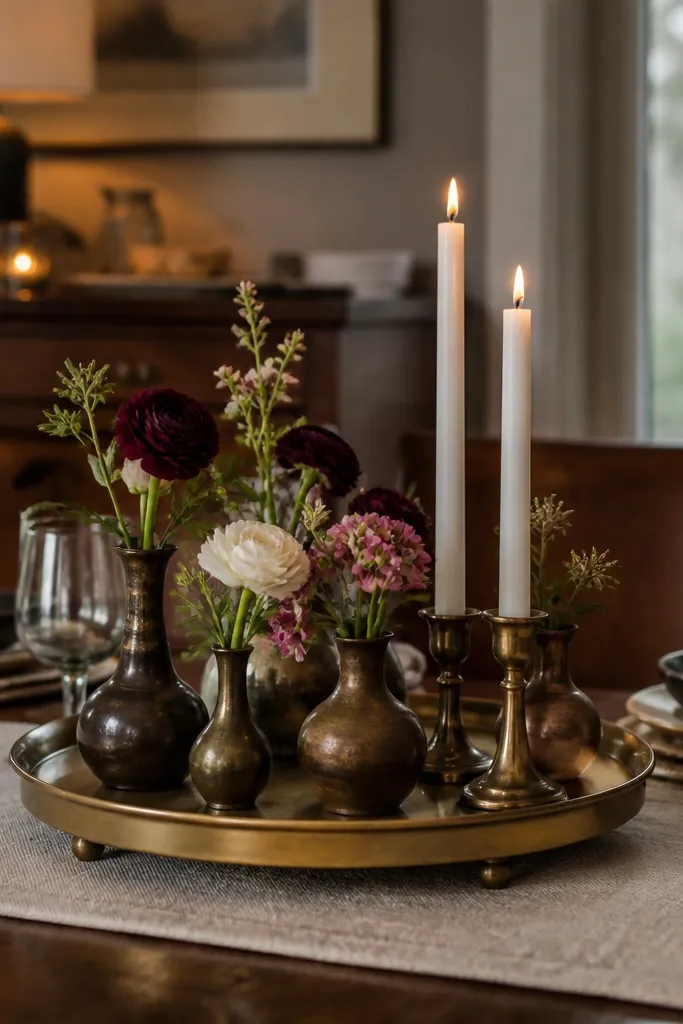
Brass trays make centerpieces look intentional because they give you a defined base and lift items slightly off the table surface. Luxury high end wedding decor often uses trays to create “staged height,” especially when candles and florals sit together. Thrift works well because trays are easy to clean, and the metal finish reads upscale even when you didn’t pay rental money. Pick trays with a raised rim or handles so they look substantial in close-up shots. This idea suits sweetheart tables, cake tables, and any table where you want a clean, elevated look without tall structures.
Start by sourcing 2-6 trays with a consistent brass tone; aim for widths of 12-18 inches. Then polish lightly with a brass cleaner wipe if needed, and wipe dry so the surface doesn’t look streaky. Finally, build your centerpiece on the tray: a candle cluster in the center, a few greenery sprigs around the perimeter, and one small “anchor” object like a bud vase or mini lantern. Keep the total height under 10 inches so the table doesn’t block guest sightlines. Expect $15-70 for trays, plus 30-90 minutes to style each one.
Quick tipUse felt pads under candle holders so the tray stays scratch-free and stable.
Skip thisDon’t stack too many items on one tray; fewer, taller pieces photograph better than crowded clusters.
7. Oversized thrifted vases with painted ombre stems
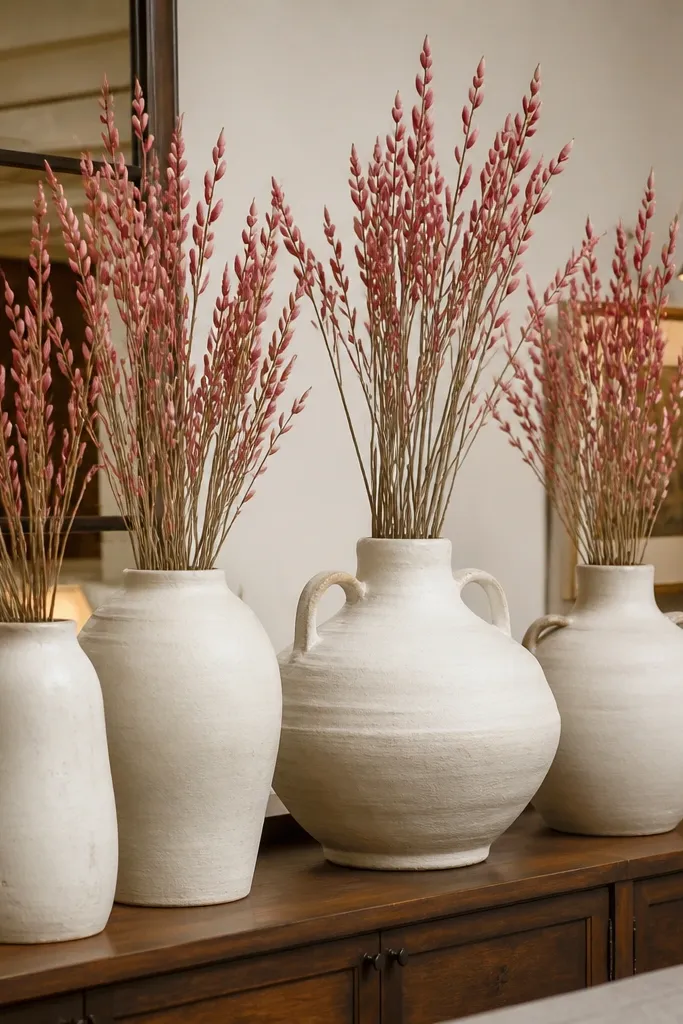
If you want that high-end “statement vase” look but you’re thrifting, use oversized vases and unify the stems with a simple paint trick. Luxury high end wedding decor looks cohesive when the color fade is intentional, and a soft ombre on stems gives that designer finish. Choose large vases from thrift stores that are at least 14 inches tall and have a wide opening. Use greenery or neutral flowers, then paint the lower stems or the stems themselves so the color gradient matches your palette. This idea is great for head tables, entryway tables, and any venue corner where you want one hero arrangement.
Start by finding 2-4 large vases with similar mouth width; you’re matching silhouette, not necessarily exact shape. Then mix craft paint with a bit of water to make a thin wash and paint stems from about halfway down, blending into natural color with a dry brush. Finally, build arrangements with a small foam block wrapped in plastic inside the vase so the vase stays clean and the stems stand upright. Keep the flower heads minimal and let greenery do the volume; too many blooms makes it look like a bouquet shop, not decor. Budget $20-80 for vases and $5-15 for paint supplies, and plan 1-2 hours for assembly.
Quick tipUse matte paint for stems, not gloss, so it doesn’t reflect harsh highlights in photos.
Skip thisSkip bright, saturated colors; ombre looks luxury when it stays in warm neutrals.
8. Thrifted lanterns with paper doily liners for candle glow
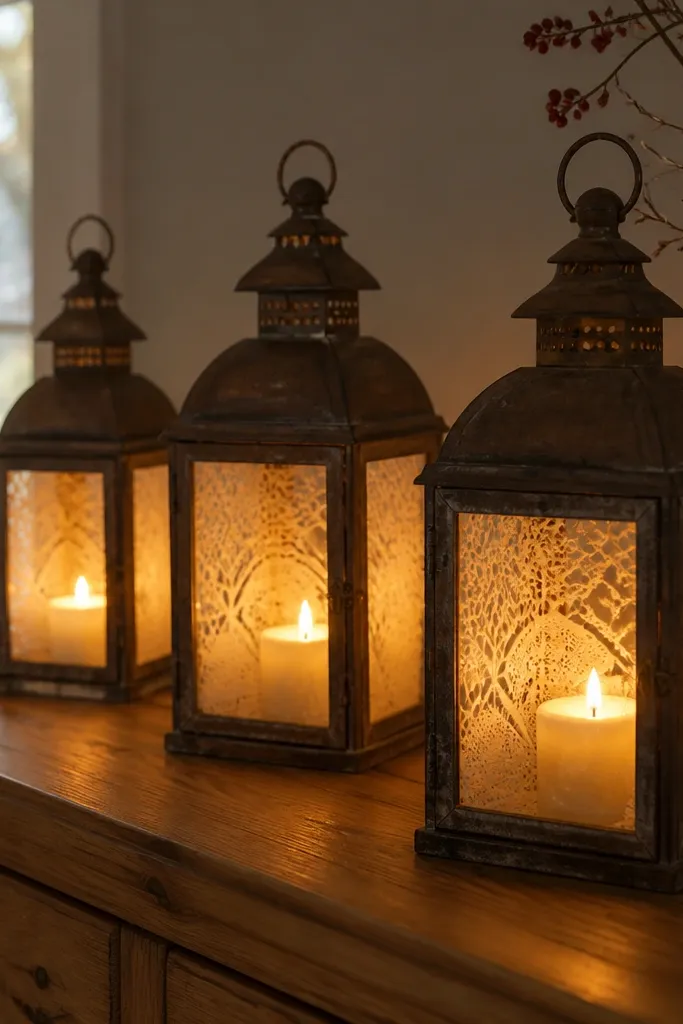
Lanterns give you instant romance and height, and the best part is they’re easy to thrift without it looking random. For luxury high end wedding decor, you want lanterns that look intentional from every angle, not just front-on. Use lanterns with glass sides or open frames, then add a paper doily liner inside so the candle glow spreads softly. That doily pattern makes the light look textured, which reads expensive on camera. This is ideal for outdoor ceremonies, cocktail hour tables, and any pathway lighting where you want a warm glow without buying fancy marquee pieces.
Start by finding lanterns with consistent size — 10-14 inches tall is a good range — and clean the glass thoroughly. Then cut paper doilies to fit inside the lantern base, and place them so the pattern sits behind the candle. Finally, use LED candles or real candles only if the venue allows and you have hurricane-safe setups; keep the wick area centered so the glow looks even. Add a ribbon tie or small greenery loop on the handle to connect it to your palette. Budget $20-90 depending on lantern quality, and plan 30-60 minutes to prep and place.
Quick tipIf the lantern metal is too brassy or too dull, spray just the edges with gold-tone metallic spray paint for a unified look.
Skip thisDon’t pick lanterns with heavy dents; shadows from dents show up in close photos.
9. Thrifted linen table runners dyed to match your palette
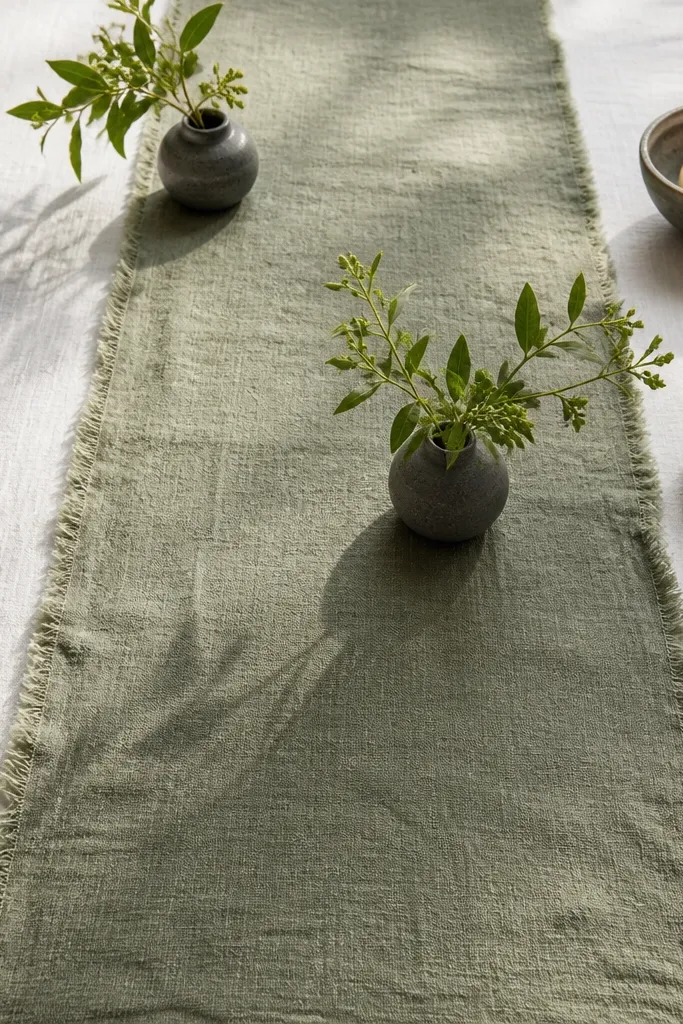
A real linen runner can make thrifted decor look expensive because fabric absorbs light and smooths out the whole scene. Luxury high end wedding decor often uses textiles as the “background,” and a runner gives you that foundation. Thrift for runners that are slightly imperfect, then fix the color with dye to match your palette instead of trying to find a perfect new one. Choose warm cream, oatmeal, or dusty olive so it looks romantic, not stark. This works for head tables, cake tables, and long buffet spreads where photos show the surface texture.
Start by buying 2-3 linen runners from thrift stores that are at least 14 inches wide and show a clear weave. Then choose an appropriate dye color (cream, oat, or olive) and follow the dye instructions for natural fibers; wash thoroughly after dye so it doesn’t transfer. Finally, iron or steam and lay them centered with a consistent overhang on both sides. Add one brass tray or candle cluster on top so the runner doesn’t look empty. Budget $15-60 for runners plus $10-25 for dye supplies, and plan 1 day for dye and drying.
Quick tipTest dye on a small corner first if the fabric is blended or previously dyed.
Skip thisDon’t use polyester runners; they look shiny and cheap under event lighting.
10. Thrifted vases with fabric-wrapped bases for a high-end finish
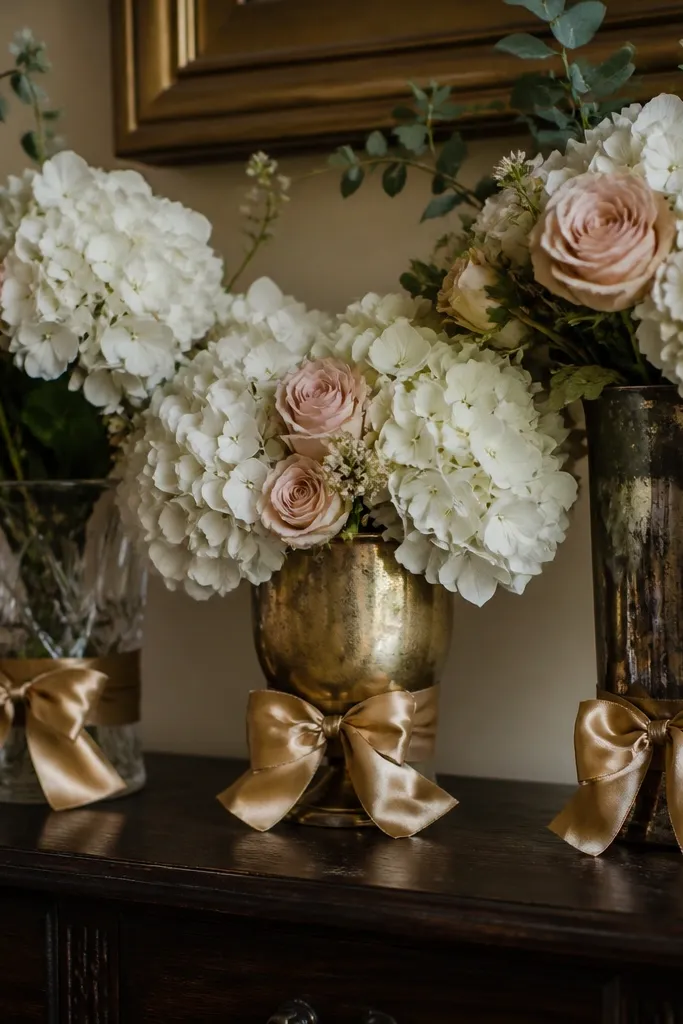
This is a styling fix that makes even plain thrift vases look designer. Luxury high end wedding decor often hides the ugly parts — foam blocks, water lines, and mismatched bases — and fabric wrapping does that fast. Choose vases with uneven bottoms or slightly scuffed areas, then wrap the base in satin ribbon or linen strips in your palette. The fabric hides imperfections and adds a soft sheen that photographs well. This suits table centerpieces, escort card tables, and any setup where vases sit next to glassware and you want everything to look cohesive.
Start by selecting vases with a diameter that lets you wrap without wrinkles; 3-6 inches wide works well. Then cut fabric strips and wrap them around the base, securing with double-sided tape or hot glue at the back seam. Finally, add florals in a foam block wrapped in plastic inside the vase so the water doesn’t wick onto the fabric. Keep the fabric color tight to your palette — cream, champagne, or deep forest — and keep the wrap height consistent across all vases in the photo. Budget $10-40 for vases and $10-25 for fabric, and plan 1-2 hours for wrapping and arranging.
Use narrow grosgrain ribbon if you want structure; use linen if you want a softer, matte look.
Don’t wrap the entire vase; the goal is hiding the base, not turning it into a craft project.
11. Thrifted marble-look trays for the cake table
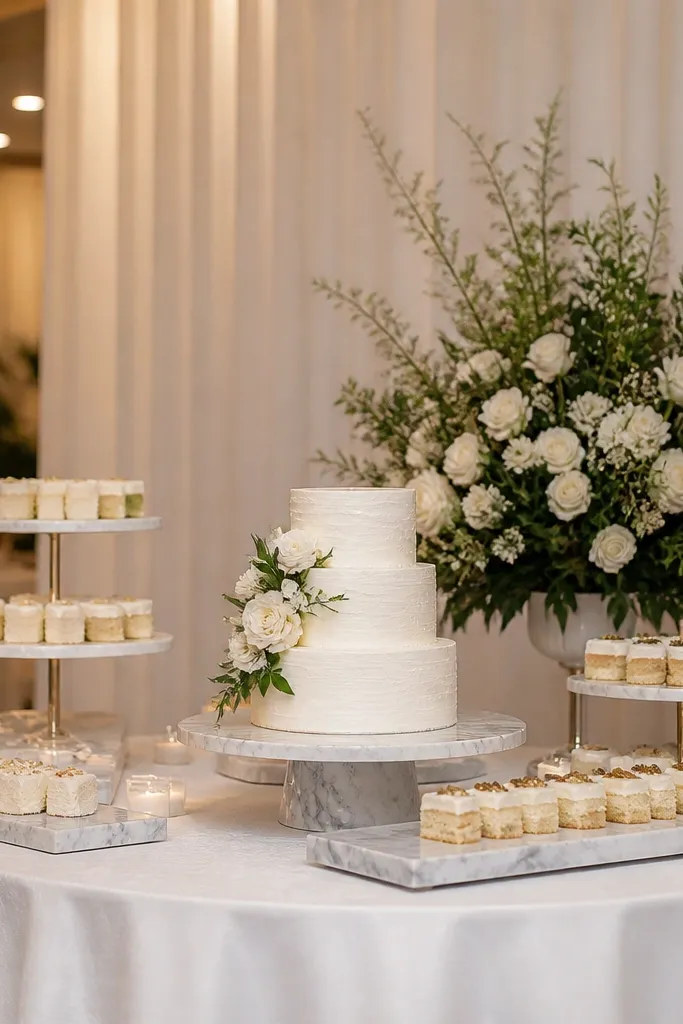
Marble-look trays make the cake table photo look polished because they give a high-end surface contrast. Luxury high end wedding decor uses clean, solid bases so cake styling looks crisp instead of messy. Thrift is great for this because many decor stores discard used serving trays and cake stands that are still structurally solid. Choose trays with a matte or lightly speckled finish, not glossy mirror marble, because gloss can cause harsh reflections. This idea works for small cakes, dessert bars, and any table where you want your focal pieces to look “set” like a magazine shot.
Start by finding a large tray or serving board around 16-20 inches wide; it should fit your cake stand without hanging off. Then clean it with a gentle degreaser and check for chips around the edges; small chips can be hidden with a matching felt strip. Finally, place the tray on a dyed linen runner or a thick white cloth and style with one candle cluster plus a few greenery sprigs. Keep decorations low and close to the tray so the camera reads a single surface. Budget $15-70 depending on tray quality, and plan 30-60 minutes for cleaning and styling.
Quick tipAdd a small layer of parchment or a thin cloth under the cake stand to prevent slipping and protect the tray.
Skip thisDon’t use trays that wobble; wobble turns a luxe setup into a stressful photo moment.
12. Thrifted mirrors and picture rails for a bar sign wall
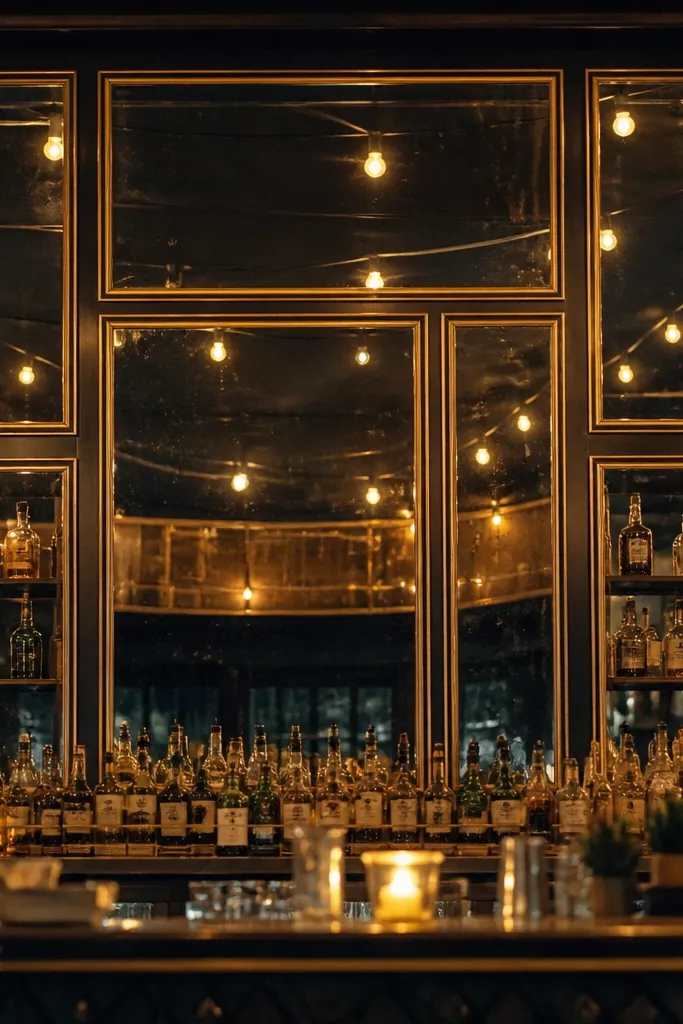
If you want luxury high end wedding decor that looks styled even when you don’t have a full rental bar, build a sign wall using thrifted mirrors and picture rails. The mirror panels add depth, and the rail lines create that structured, boutique look. Choose mirrors that are similar in size and frame tone, then hang them in a neat vertical rhythm. Add one simple bar sign in a matching neutral font style on cardstock or thick paper — keep it minimal. This is ideal for receptions where guests gather for drinks and photos happen at the bar corner.
Start by collecting 3-5 small mirrors or frames with similar widths, around 8-12 inches wide. Then mount them on a picture rail board or backing panel so you can hang the whole thing quickly at the venue. Finally, attach signage with removable tape so you don’t damage frames, and style the area with one tray of citrus or one bottle cluster on the counter below. Budget $25-120 depending on mirror quality, and plan 1-2 hours for hanging prep and signage printing. Measure your wall space so the mirrors sit at eye level for standing guests.
Quick tipUse painter’s tape templates on the wall so your spacing is straight before you commit.
Skip thisAvoid mixing too many frame styles; the wall should read uniform, not eclectic.
13. Thrifted sculptural planters as greenery vessels
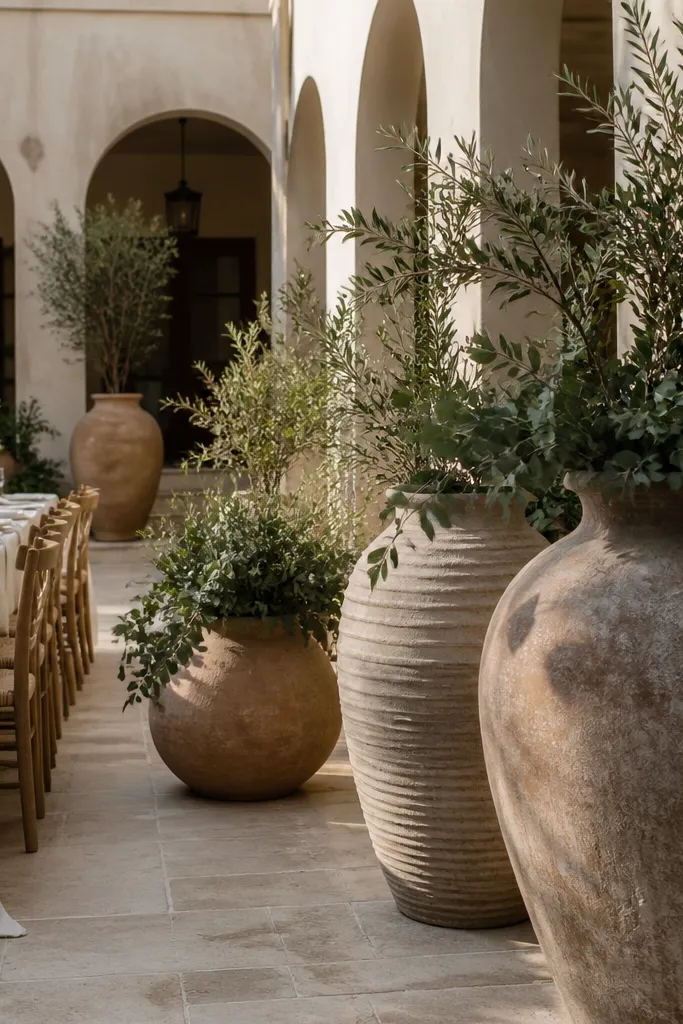
Sculptural planters are a smart thrift move because they look like decor even when you’re only using greenery. Luxury high end wedding decor uses negative space and clean shapes, and planters give you that structure without needing tons of blooms. Look for tall ceramic planters, textured terra cotta, or stone-look vessels with a bold silhouette. Add a simple greenery line — like olive, ruscus, or eucalyptus — and keep the flowers minimal. This works for aisle ends, entry corners, and any venue where the background is plain and needs shape.
Start by choosing planters that are 14-24 inches tall and heavy enough to stay stable; light plastic planters look cheap fast. Then clean the planter and insert a plastic bucket or foam block wrapped in plastic so you can water greenery without staining. Finally, build a greenery cascade or a straight vertical line, trimming so the top hits a consistent height across multiple planters. Group 2-3 planters for a strong photo, and keep spacing about 3-5 feet apart depending on aisle width. Budget $20-100 depending on planter size, and plan 1-2 hours for insertion and trimming.
Quick tipDry the outside of the planter after watering so you don’t get water spots in photos.
Skip thisDon’t overstuff; a few full stems beat a messy pile that collapses in the middle.
14. Thrifted dark wood cake stands with mismatched plates
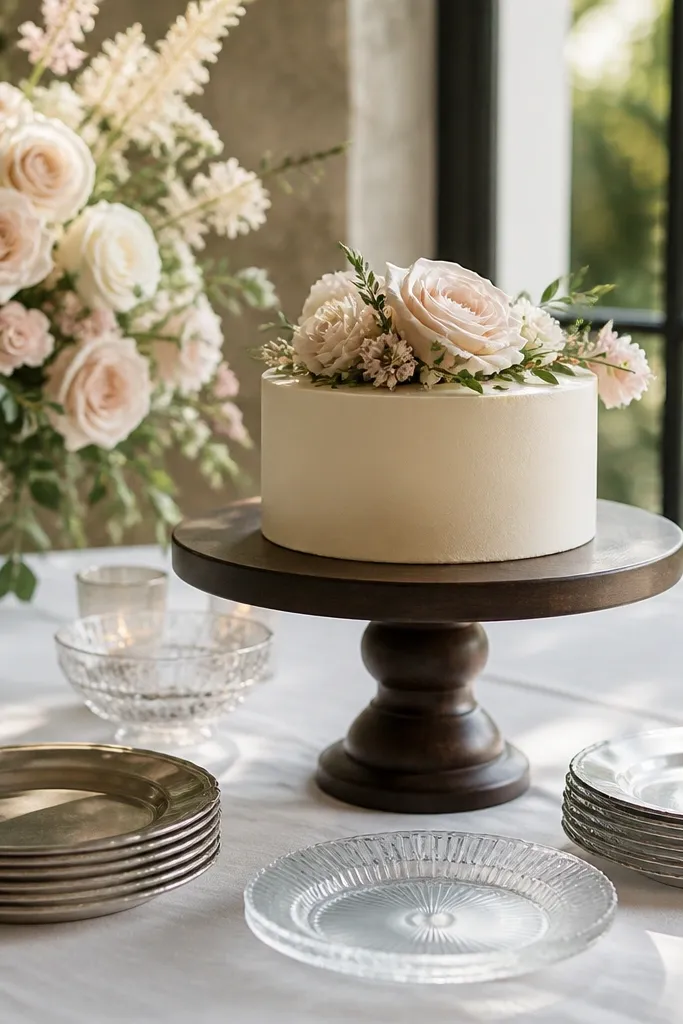
Dark wood cake stands look expensive because they add warmth and contrast against white linens and light florals. Luxury high end wedding decor often uses material contrast — wood against metal, matte against glass — and thrifted wood stands deliver that quickly. Choose stands with a pedestal base and a wide top, then style with thrifted plates that are close in tone (cream, oatmeal, or ivory). The mismatch is fine if the palette stays tight, because it reads collected rather than chaotic. This idea is great for rustic-modern venues, barns, and outdoor weddings where you want warmth without going full farmhouse.
Start by finding one main cake stand and 2-4 supporting plates for cupcakes or a dessert tier; keep the wood tone consistent (espresso or walnut). Then wipe everything clean and check the stand for wobble; if it rocks, skip it. Finally, build the table: place the cake stand on a linen runner, add one candle or small lantern nearby, and keep the floral topper minimal. If your venue allows, add a simple greenery crown around the base of the cake stand to unify the pieces. Budget $20-90 for stands and plates, and plan 45-75 minutes to set the table and adjust heights.
Quick tipUse a thin felt pad under the cake stand base to stop sliding and protect tablecloths.
Skip thisAvoid bright painted wood; it reads like thrift craft instead of decor.
15. Thrifted bud vase clusters on mirrored acrylic for extra shine
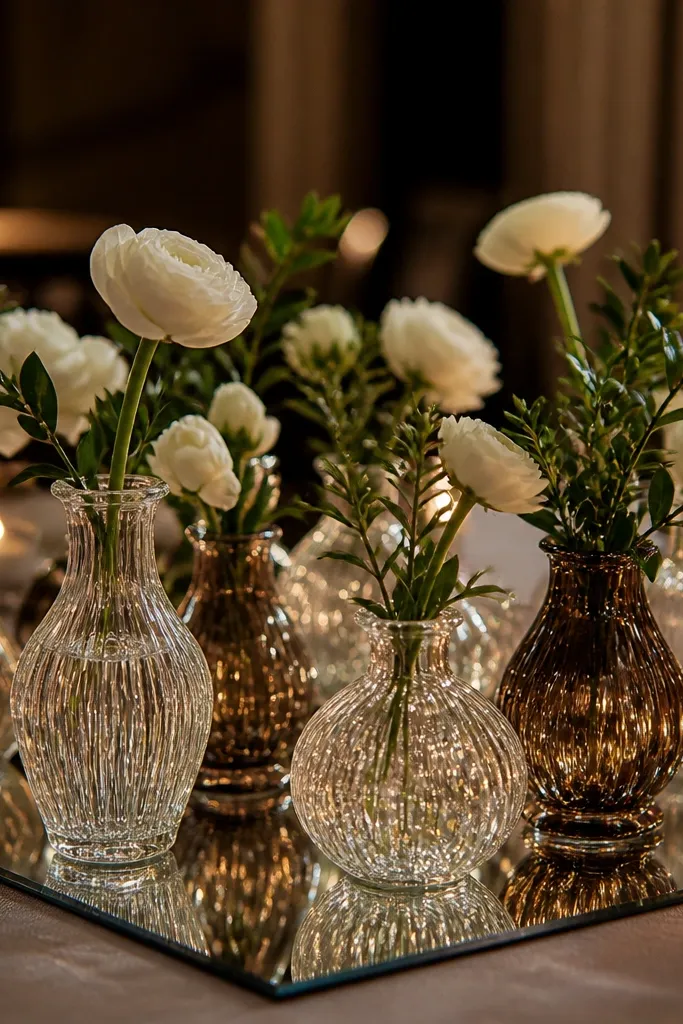
If your venue is dim or your photos need more sparkle, mirrored acrylic under bud vases gives you that luxury look without buying crystal. Luxury high end wedding decor uses reflective surfaces to bounce light, and acrylic is cheaper than mirrored metal trays. Thrifted bud vases keep the cost down, and you can unify them by color. Keep the cluster tight and use a limited number of vases so the reflection doesn’t look messy. This idea works for cocktail hour tables, sweetheart tables, and any surface that already has nice lighting.
Start by getting a mirrored acrylic tray or sheet cut to fit your table space; 12x18 inches is a workable size. Then thrift 8-12 bud vases in one color family and clean them thoroughly so fingerprints don’t show. Finally, place the vases on the acrylic and add a candle or two in the back so the reflection frames the cluster. Use clear tape to secure any vase that looks unstable on the slick surface. Budget $25-120 depending on acrylic quality, and plan 30-60 minutes to style and adjust angles so reflections don’t hide the flowers.
Wipe acrylic with glass cleaner right before photos; smears show as streaks immediately.
Don’t use too many random colors; reflections amplify clutter.



