
1. Linen table runners with a single satin ribbon line
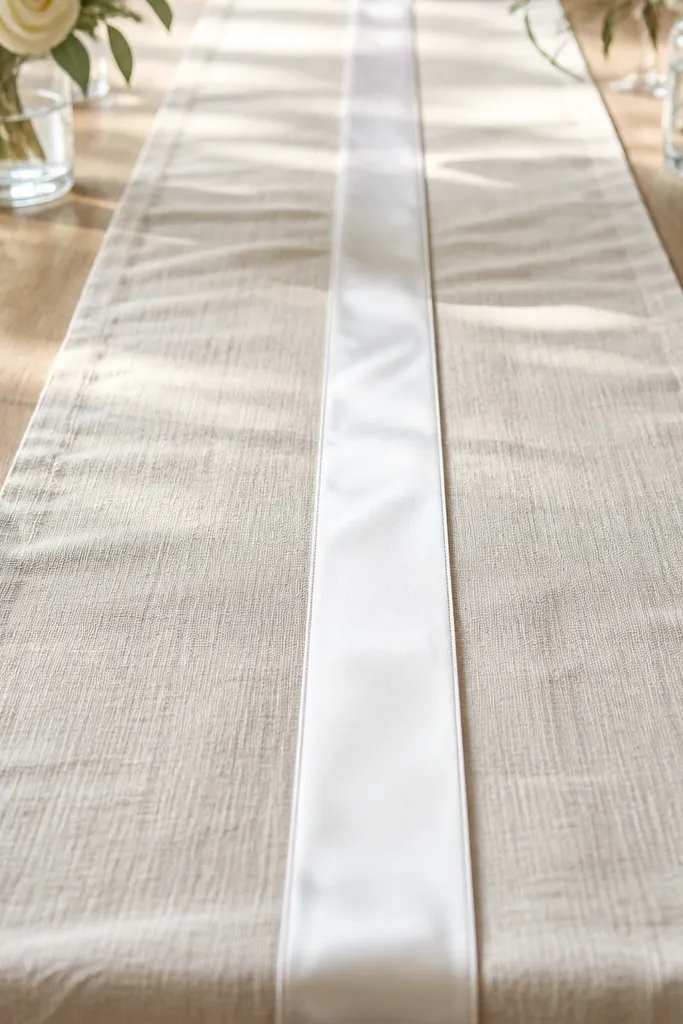
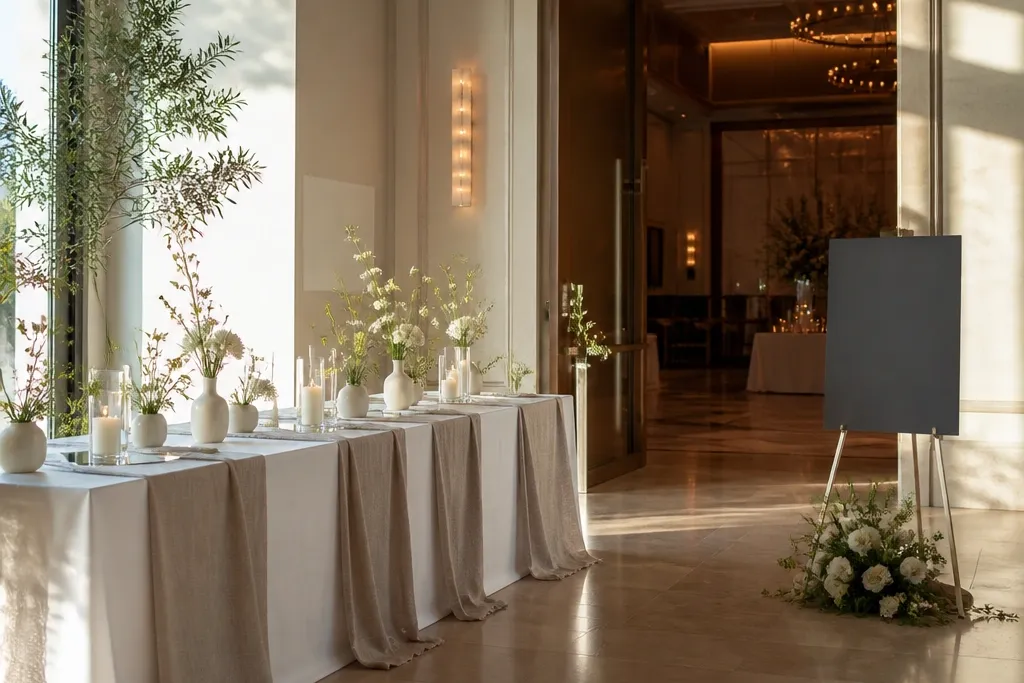
This is one of the simplest ways to make tables look styled instead of “covered.” Linen gives you that soft, slightly textured fall that reads expensive in natural light, while a thin satin ribbon adds a clean, reflective highlight. Keep the ribbon line centered and straight — that geometry is what looks polished in group photos. It also fixes a common visual problem: mismatched table coverings that compete with candles and place settings. This setup suits rustic venues, modern halls, and outdoor receptions because it stays elegant without fighting your room’s color.
Start by buying runners that are wide enough to drape — aim for about 14-18 inches of width per side over the table edge. Then choose a satin ribbon in a single metallic tone like gold or champagne and tie it into a straight band across the runner, not a bow mess. Finally, add one small anchor element at the center (a candle cluster or a single bud vase) so the ribbon looks intentional rather than decorative clutter. For a budget-friendly version, skip flowers and use taper candles on a tray.
Iron the runner the morning of with steam and a press cloth so the edges stay crisp on camera.
Avoid using a bulky ribbon with a messy bow — it reads chaotic in photos and eats up the table’s clean lines.
2. Monochrome bud vases in a staggered height row
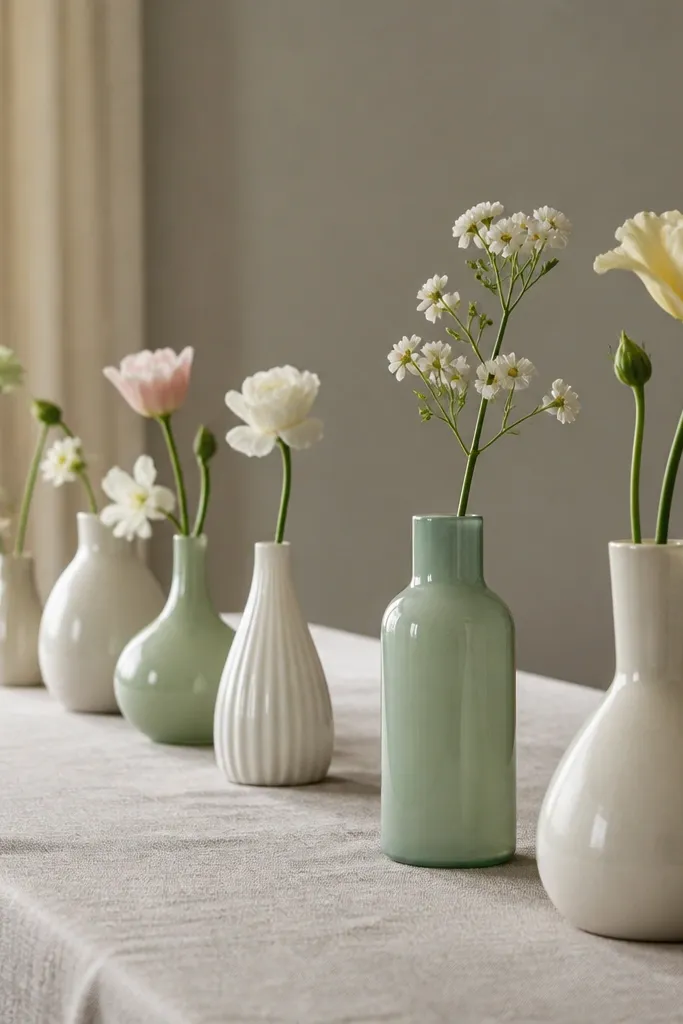
Bud vases are underrated because they look delicate up close and structured from across the room. A monochrome set in off-white, cream, and pale green keeps the look cohesive even if your blooms aren’t perfectly matched. The staggered heights create depth, so your table doesn’t look flat in wide shots. This also helps with the “common mistakes to avoid wedding decor” issue where centerpieces all sit at one height and block guests' faces. It’s a smart option for venues with strong lighting or patterned tablecloths because the vases bring order.
Start by selecting 9-15 bud vases that are the same style but different heights (thick glass bottles or simple cylinder vases work). Then pick one flower family and one filler — for example, white baby’s breath plus small garden roses, or pale spray roses plus eucalyptus. Finally, place them in a straight row and vary height by moving taller vases to the center and shorter ones to the ends. Use a tray or runner strip under the vases so the arrangement looks anchored.
Cut stems long enough to reach the top third of each vase so they don’t look like floating water cups.
Skip mixed vase styles with random heights — it looks cluttered even when the flowers are pretty.
3. A welcome sign on foam board with vinyl lettering
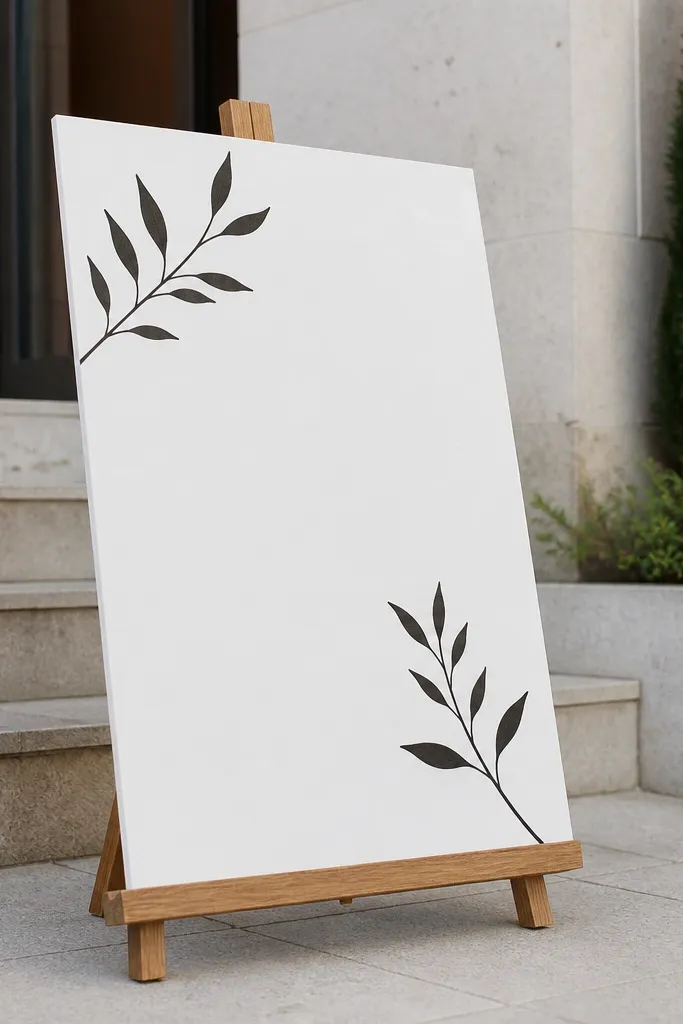
Start with a foam board at least 24x36 inches so it’s legible from a few feet away. Then design the text with one font weight and consistent spacing — keep it centered and limit to two lines plus a date or names. Apply vinyl lettering carefully and burnish the edges with a plastic card to prevent lifting. Finally, mount the sign on an easel or heavy stand and place it where guests naturally stop.
A simple welcome sign can look expensive when the typography is clean and the surface is matte. Foam board keeps the sign lightweight, and vinyl lettering gives sharp edges that don’t smear in photos. Choose a dark color for the letters, like charcoal or deep forest, against a bright background so it reads instantly. This idea works in both indoor and outdoor settings because it doesn’t rely on natural light to look good. It also avoids the usual problem where people use glittery materials that sparkle unevenly and blow out camera exposure.
Skip thisAvoid busy printed backdrops behind the sign — the camera will pick up competing patterns and your text gets lost.
Quick tipTest the sign in the exact venue lighting if you can — matte vinyl stays readable under strong sunlight better than glossy printouts.
4. Hanging paper lanterns with a single color ribbon tie
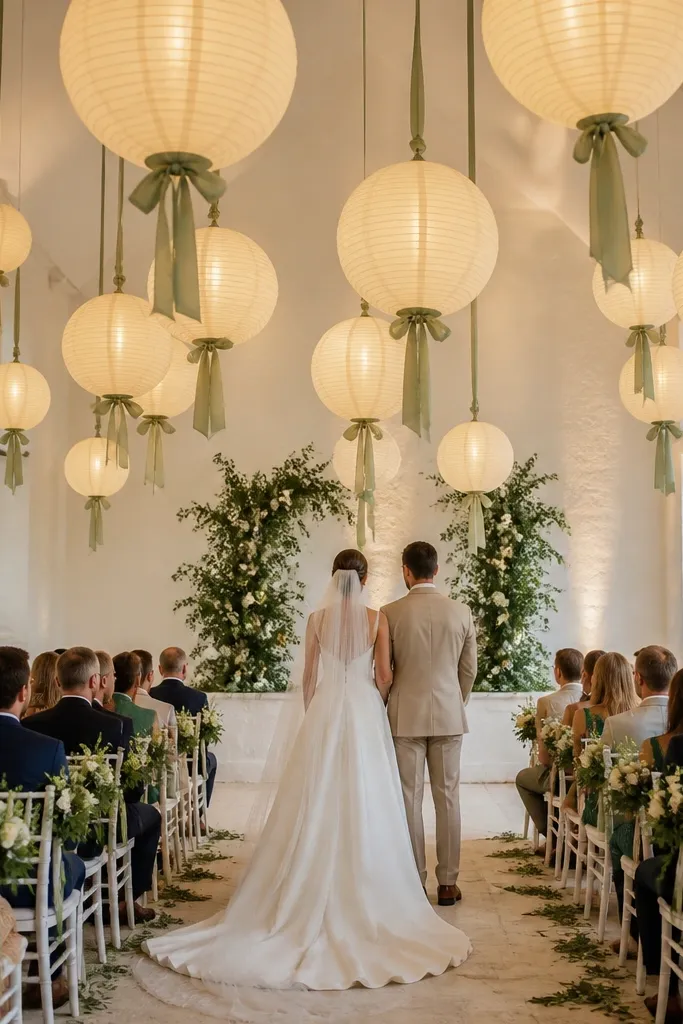
Start by measuring ceiling height and spacing so lanterns don’t crowd — a good spacing target is about 3-4 feet between lantern centers. Then pick lantern size mix: small (12-14 inches) on the edges and medium (16-18 inches) in the middle for balance. Finally, tie each lantern with the same ribbon color and length, and secure the top hook at the same height for a clean grid. Use LED lantern bulbs or warm-white lights if your venue allows.
Paper lanterns are one of the fastest ways to make a room feel intentional without building a big structure. In photos, they create a soft glow and a repeating shape, which makes backgrounds look complete. Tie them with one color ribbon so the lanterns look coordinated instead of random. Choose a cream or warm white lantern for most venues; it flatters skin tones and plays well with both gold and silver accents. This setup suits indoor receptions, covered patios, and evening ceremonies where overhead light is limited.
Skip thisSkip mixed lantern colors and sizes with no tie — it reads like party leftovers, not wedding decor.
Quick tipHang from existing truss points if possible to avoid last-minute rigging stress.
5. Chalkboard menu with a thick white border and linen swatch backing
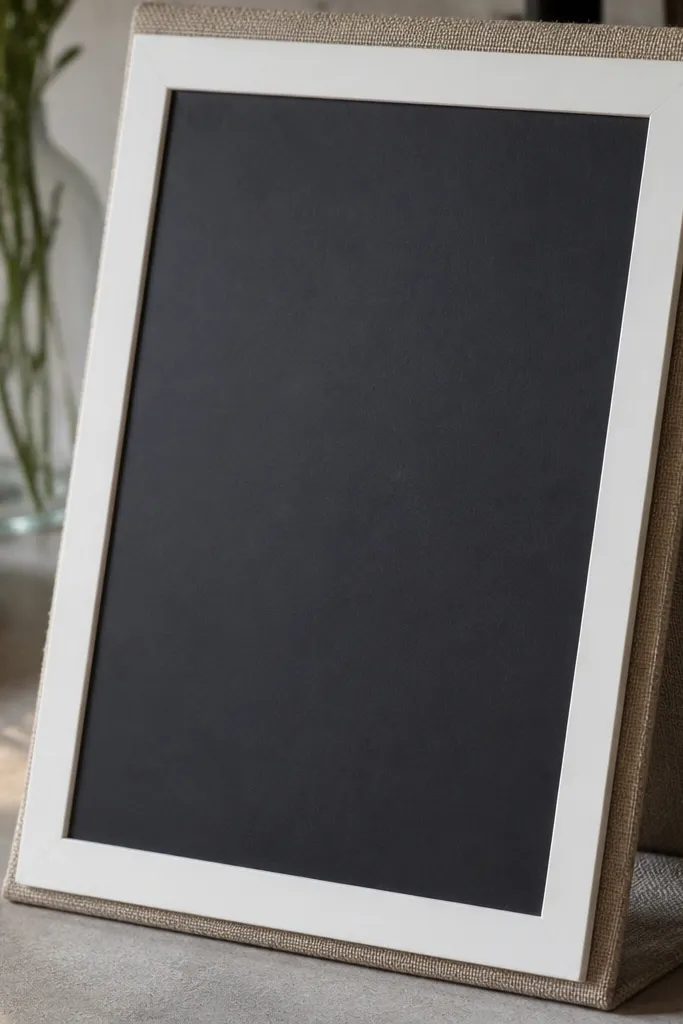
Start with a chalkboard sign at least 18x24 inches so the menu headings are readable in a wide shot. Then draw a thick border with white chalk or a chalk marker and use two font styles only: one for headings, one for items. Add linen swatch backing behind the chalkboard to keep the board from looking flat against wood or dark tablecloths. Finally, place it near the entrance to the dining area and keep it upright, not angled.
Menus look good in photos when they have a defined frame and a neutral backing. A chalkboard with a thick white border keeps the text crisp and prevents the board from blending into dark tables. Backing it with a linen swatch adds texture without adding color chaos. This is a practical decor win because it’s functional — guests will walk past it, read it, and it becomes part of the scene. It’s best for receptions where tables are styled simply and you want one more grounded visual element.
Skip thisAvoid thin, hairline borders — they disappear in photos and make the menu look unfinished.
Quick tipSeal chalk with a light mist of workable fixative if your venue has humidity — it prevents smudging on hands.
6. Mirrored tray with taper candles and scattered pearl beads
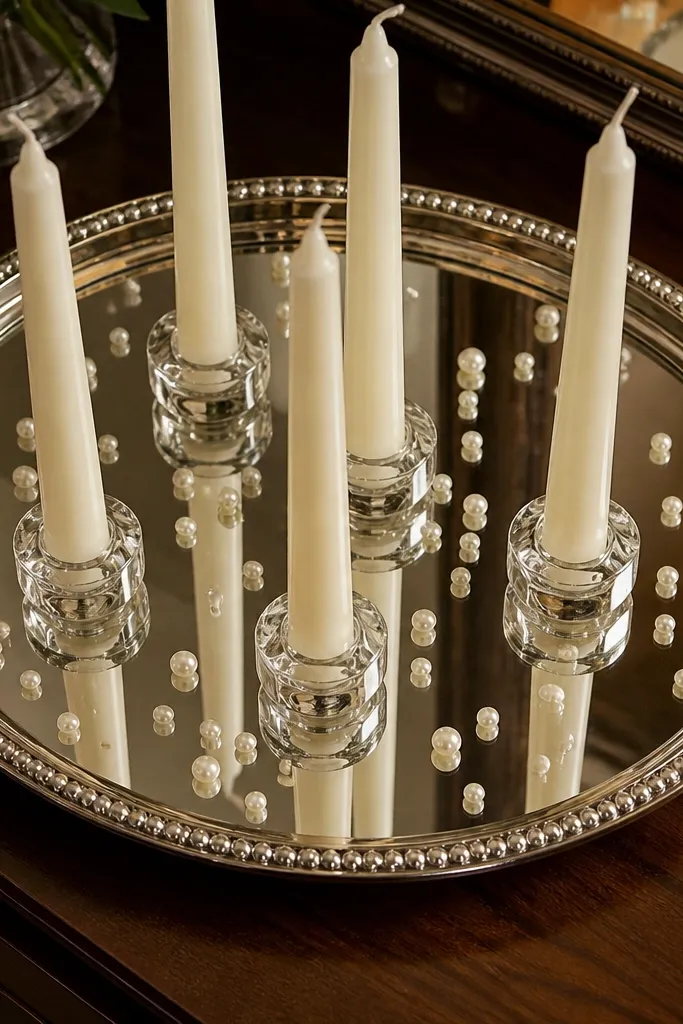
A mirrored tray turns a few candles into a photo moment because it multiplies reflections and adds sparkle without adding clutter. Tapers look tall and elegant, and pearl beads bring a soft, controlled shimmer that reads “bridal” on camera. Keep it monochrome — white candles and ivory beads — so the reflection doesn’t turn into a rainbow mess. This idea works for cocktail tables, sweetheart tables, and even as a centerpiece base when you want height. It’s also a good fix for decor that feels too plain; the mirror gives you structure.
Start by choosing a tray size that fits 3-5 tapers with space between them — a 12x18 inch tray works well for small tables. Then place taper holders securely and keep flames centered in the frame for photos. Scatter pearl beads loosely around the base, not packed into a mound, so light spreads across the tray. Finally, wipe the mirror with a lint-free cloth right before guests arrive to remove fingerprints.
Bring a small bottle of glass cleaner and cotton rounds — mirror decor always looks better when it’s spotless.
Skip colored beads or mixed metallic trays — it turns reflections into visual noise.
7. Ceremony arch with fabric panels instead of heavy florals
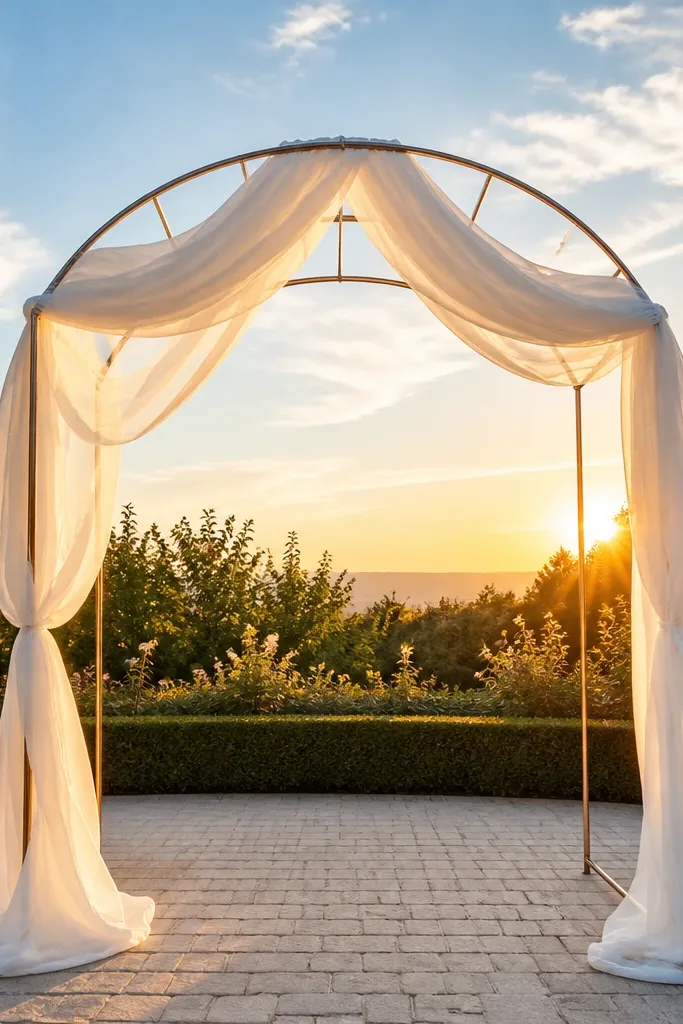
Start with an arch frame that’s sturdy and matches your venue style — black metal or natural wood both photograph well. Then drape 2-3 long fabric panels in a single tone like ivory or soft white and gather them at the top so they fall in vertical lines. Add minimal side greenery using a few garland sections or eucalyptus sprays to keep it from looking bare. Finally, anchor fabric tightly at the base so it doesn’t sag or twist when people walk by.
Fabric panels are the cleanest way to get a wow background without paying for a full floral wall. In photos, fabric reads as movement and softness, especially when there’s a light breeze or airflow from doors. Use a simple arch frame and let the drape do the design work. This keeps the look airy and gives your couple a clear focal point instead of a crowded floral ceiling. It also solves a common wedding decor mistake: installing heavy arrangements that block sightlines and look messy from angles.
Skip thisAvoid mixing multiple fabric colors and textures in the same arch — it looks patched instead of designed.
Quick tipChoose fabric with a matte finish, like chiffon or soft tulle — glossy polyester shows wrinkles and glare.
8. Aisle runner made from layered rugs with visible edges
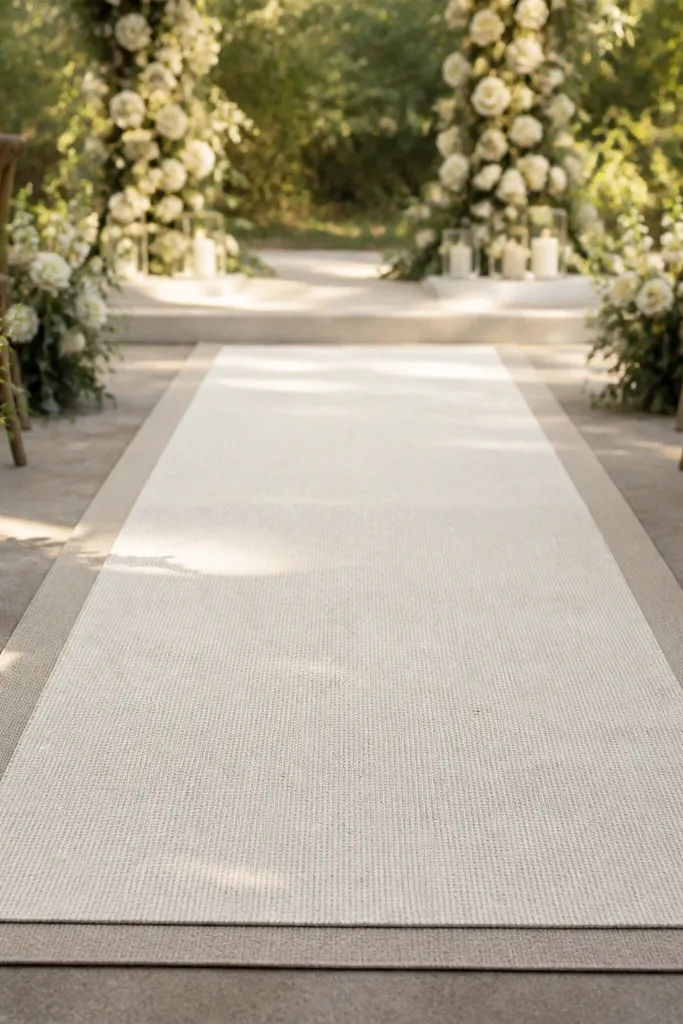
Rugs give you instant texture and a grounded color base for aisle photos. Layering two rugs creates dimension and makes the aisle look styled even when you don’t add many flowers. Keep the palette neutral — oatmeal, greige, or charcoal — so the scene doesn’t compete with the couple. This works especially well in outdoor ceremonies or venues with plain floors because it adds warmth and frames the walkway. It’s also a strong alternative if you want to avoid the mess of real runners that move around.
Start by measuring the aisle width and plan for overlap: about 6-10 inches of extra rug width on each side gives a clean border. Then choose one base rug in a darker neutral and a second lighter rug on top with subtle pattern or texture. Secure edges with double-sided carpet tape or stake corners outdoors so the layers don’t creep. Finally, place simple decor at the edges only — like lanterns or low bud vases — so the rug stays the hero.
Do a quick test walk with shoes — rugs can shift, and you want that solved before guests arrive.
Skip thin fabric runners that slide — on camera they look wrinkled and uneven.
9. Tall bud vase clusters at the corners of the sweetheart table
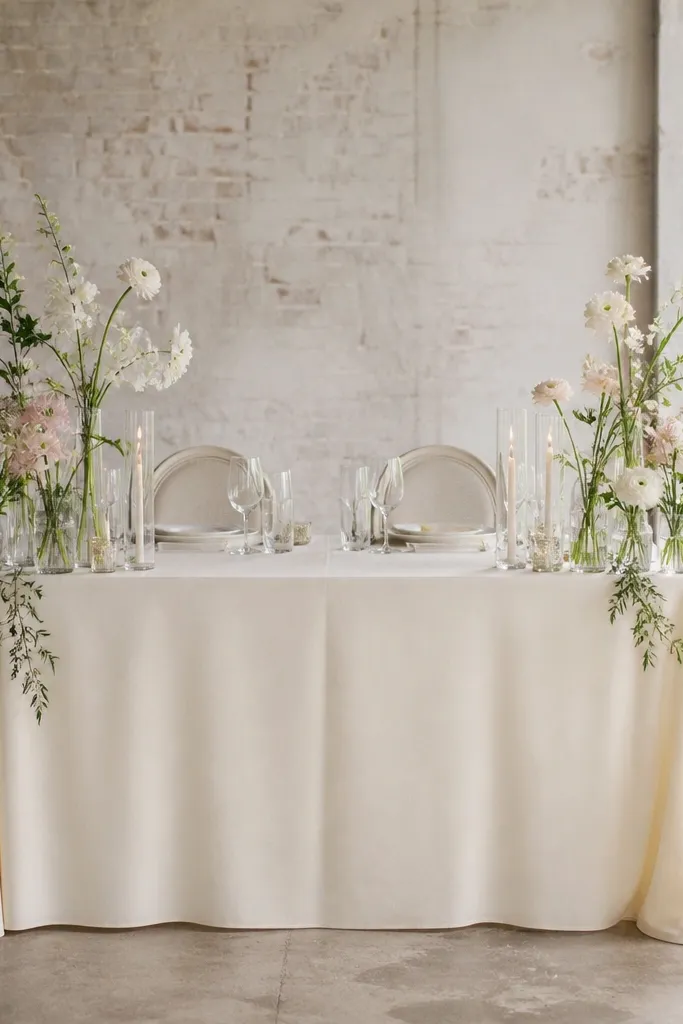
Start by choosing 4-6 bud vases per corner cluster with similar shapes and a shared color family. Then fill each vase with one stem type plus a little filler — for example, white spray roses with eucalyptus. Place the tallest vases slightly behind the shorter ones so the cluster has depth. Finally, anchor the cluster on a tray or weighted base so it doesn’t wobble when people pass behind the table.
Sweetheart tables look best when they have a frame. Corner clusters create a clear boundary and pull attention toward the couple without blocking the view of guests across the room. Tall bud vases keep lines vertical, which reads elegant and intentional in both wide and close-up photos. Keep the flowers simple and light — a few stems per vase — so the clusters don’t become heavy and messy. This is ideal for receptions where you have a backdrop that’s simple, like a wall, drape, or neutral chairs.
Skip thisAvoid one giant centerpiece in the middle — it blocks faces and looks lopsided in the frame.
Quick tipUse floral foam only if you’re placing it in a contained base; otherwise, use water tubes so stems stay fresh without spills.
10. Hanging photo display using clothespins on a linen string line
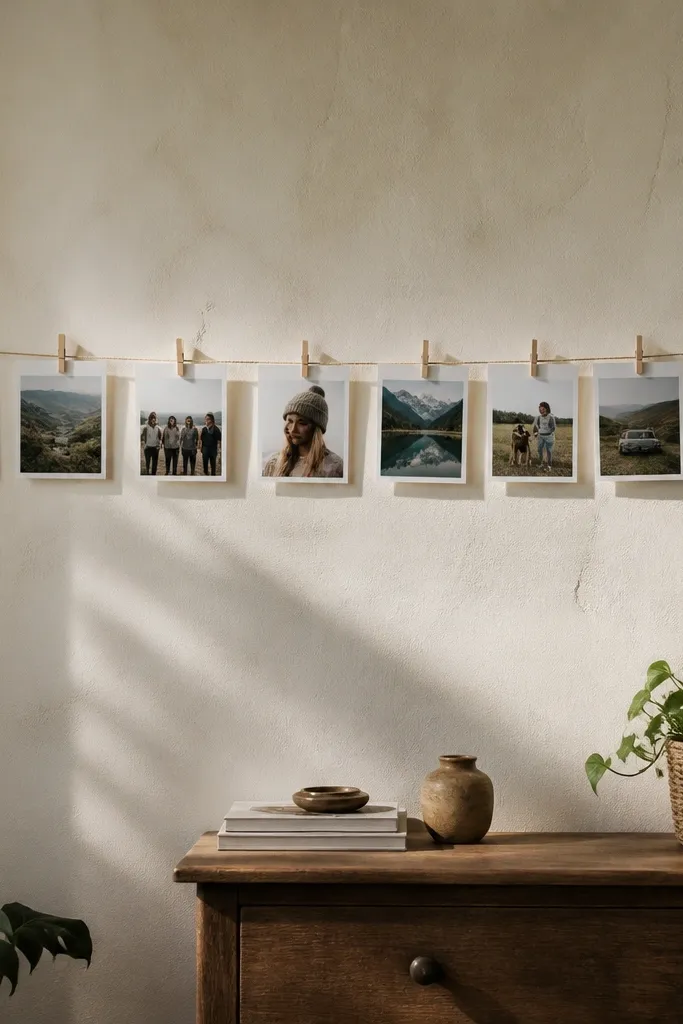
Start by picking a single photo print size, like 4x6, and set a target number that fits the wall width without crowding. Then stretch a linen string line horizontally at about 5.5-6.5 feet high so it sits at eye level for most guests. Clip photos with clothespins at even intervals and use the same spacing across the line. Finally, add a small label card at each end or a simple heading card so it looks designed, not accidental.
A photo display adds personality and fills wall space without needing big decor structures. The key is keeping it clean: a linen string line, evenly spaced clothespins, and a consistent photo size. In photos, it reads warm and lived-in, especially against neutral walls. This idea is best for venues with blank walls near the cocktail hour area, where guests will naturally linger and take pictures. It also prevents the common mistake of putting decor everywhere — this gives you one meaningful wall moment.
Skip thisSkip mixed photo sizes and random pinning — it looks messy and the wall becomes a blur in pictures.
Quick tipUse matte photo paper — glossy prints catch overhead lights and turn into glare streaks.
11. Color-matched napkins with a single knot fold
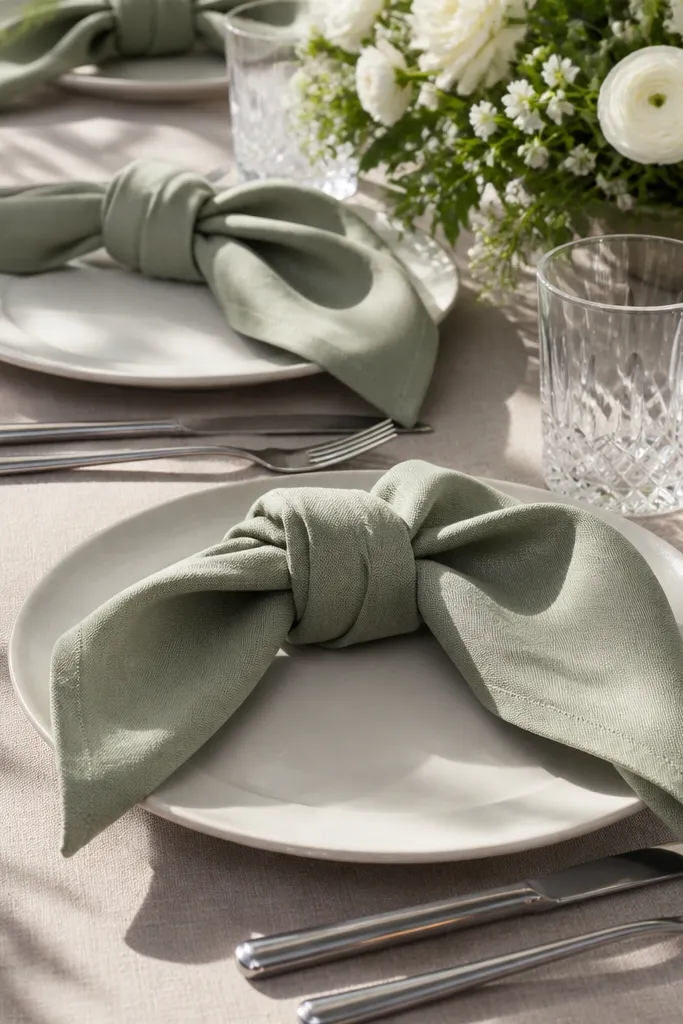
Start by choosing napkin fabric that holds a fold, like linen-blend or cotton with weight, in your accent color (dusty rose, sage, or deep navy). Then iron them flat and fold into a rectangle before tying a small knot at the center — keep the knot tight and centered. Finally, place napkins consistently on each plate, either on top or slightly to the side depending on how your tables are set. If your plates are ornate, use a simpler napkin color and keep the fold clean.
Napkins are one of the easiest places to create a consistent look because they repeat across every table. A color-matched napkin in your accent tone gives you that “styled” feeling without adding extra props. The single knot fold adds shape so napkins don’t look flat, and that shape shows up clearly in table photography. This idea works well when you want guests' food plates to remain the focus and still want the table to look intentional. It’s also a smart fix for the “common mistakes to avoid wedding decor” problem where tables look unfinished because place settings are plain.
Skip thisAvoid mismatched napkin colors across the same table — it reads like a last-minute swap.
Quick tipDo a quick test with your exact napkin fabric — some thin cotton won’t hold a knot and will look limp by dinner.
12. Single-stem statement flowers in slim glass bottles
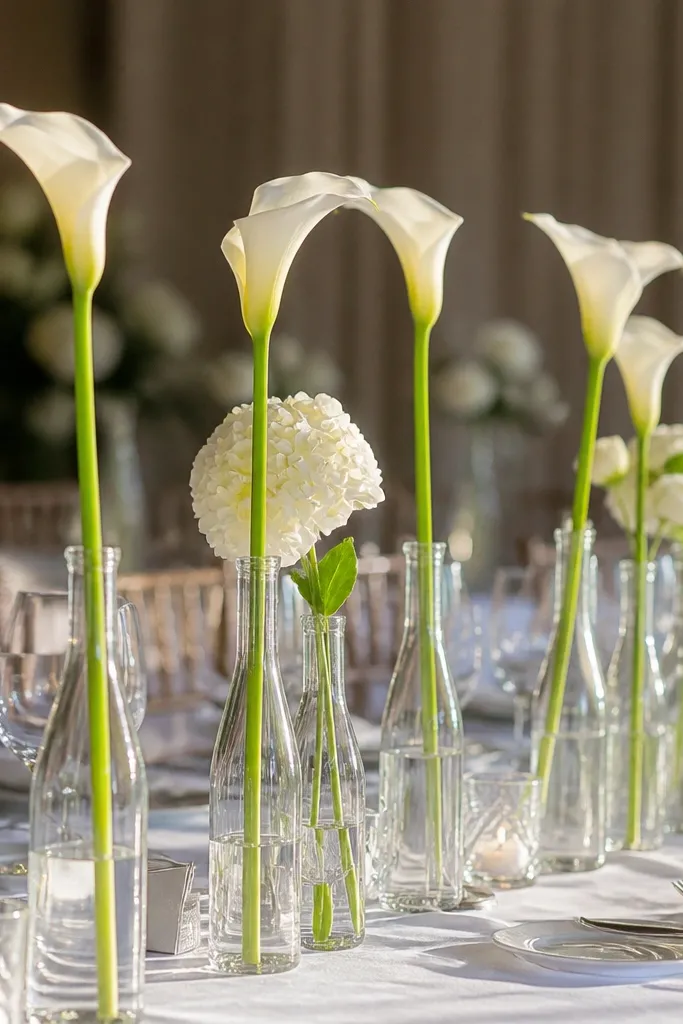
Start by choosing bottle height and spacing — slim bottles around 8-10 inches tall work well for tables, and you can do 8-12 bottles per long table segment. Then fill each bottle with water to at least halfway up the stem and trim so the bloom sits at a consistent height. Finally, line bottles in a straight row or in a gentle curve, and keep the table base simple with no extra clutter. If you want extra polish, add a thin strip of ribbon along the table edge.
Single stems in slim bottles look modern and expensive because they create clean vertical lines. This is a great option when you have a lot of tables or a large room and you need decor that scales without getting heavy. In photos, one strong bloom per bottle keeps the background from looking busy and keeps the color intentional. Choose one flower type for consistency — like white lilies, garden roses, or tall gladiolus. This setup also works in outdoor receptions because it doesn’t rely on fragile petals falling everywhere.
Skip thisSkip mixing flower types in the same row — it turns into a scattered bouquet instead of a designed line.
Quick tipTrim stems right before setup so flowers don’t droop and ruin the symmetry in photos.
13. Floating candles in glass bowls with citrus slices
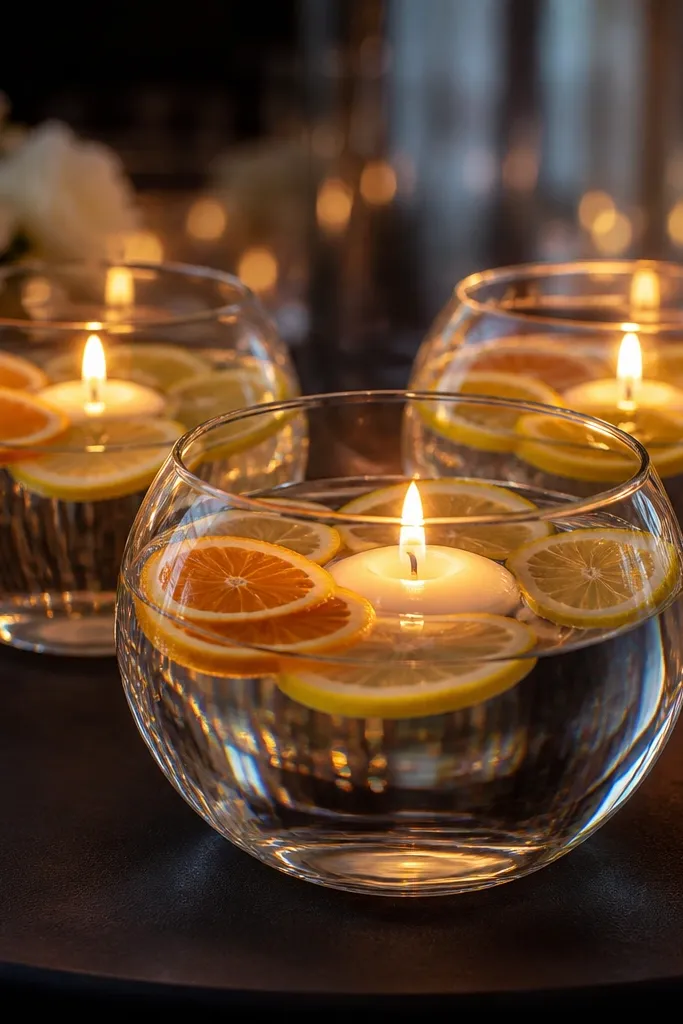
Floating candles look dreamy in evening light because you get both reflection and a soft glow. Citrus slices add color that stays subtle, so the photos look warm without turning orange-gold everywhere. Use clear glass bowls so the water line is visible and the scene looks fresh, not cloudy. This is best for cocktail tables, dessert tables, and centerpieces on larger surfaces where you can keep the bowls stable. It also helps avoid the “common mistakes to avoid wedding decor” issue where people use too many different textures that compete.
Start by choosing glass bowls with flat rims so they’re stable and easy to fill without spills. Then slice citrus thinly and soak or pat dry — too-wet slices can cloud the water. Place a floating candle in each bowl and arrange 3-6 slices around the flame for symmetry. Finally, fill with cool water right before the event so it stays clear.
Place bowls on a tray or under-surface that catches drips — water stains ruin tablecloth photos fast.
Avoid thick citrus slices — they float unevenly and look clumpy from camera angles.
14. Macramé-style plant hangers with trailing greenery
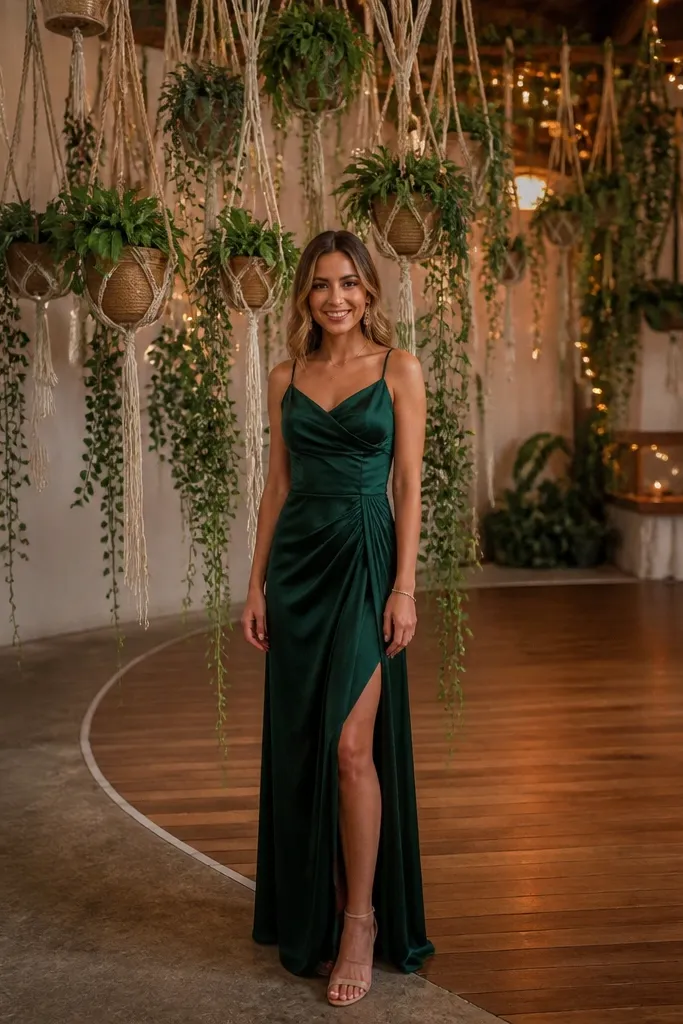
Hanging greenery makes a room feel layered without taking up table space, and it gives you height in photos. The macramé look adds texture, but trailing greenery keeps it soft and romantic. Use it as a backdrop element behind the dance floor or near the bar so guests have something pretty to frame in pictures. This also solves a common decor mistake: placing all your decor at ground level, which makes rooms look flat and empty above. It’s especially good for venues with high ceilings or plain walls where you need vertical interest.
Start by choosing hangers that are sturdy enough for live or faux trailing greenery and match your color palette (natural rope for neutral themes). Then hang two to four units at staggered heights, with the lowest greenery ends about 6-7 feet from the floor so it doesn’t hit guests. Use the same greenery type across all hangers for consistency — like eucalyptus-style trailing stems or faux ivy. Finally, keep the rest of the decor simple so the hanging greenery stays the hero.
If you’re using faux, brush or shake the vines before setup — they look fuller and less tangled on camera.
Skip random hang heights and mixed rope colors — it looks like an accident of supplies.
15. Matte acrylic place cards with thin gold wire stands
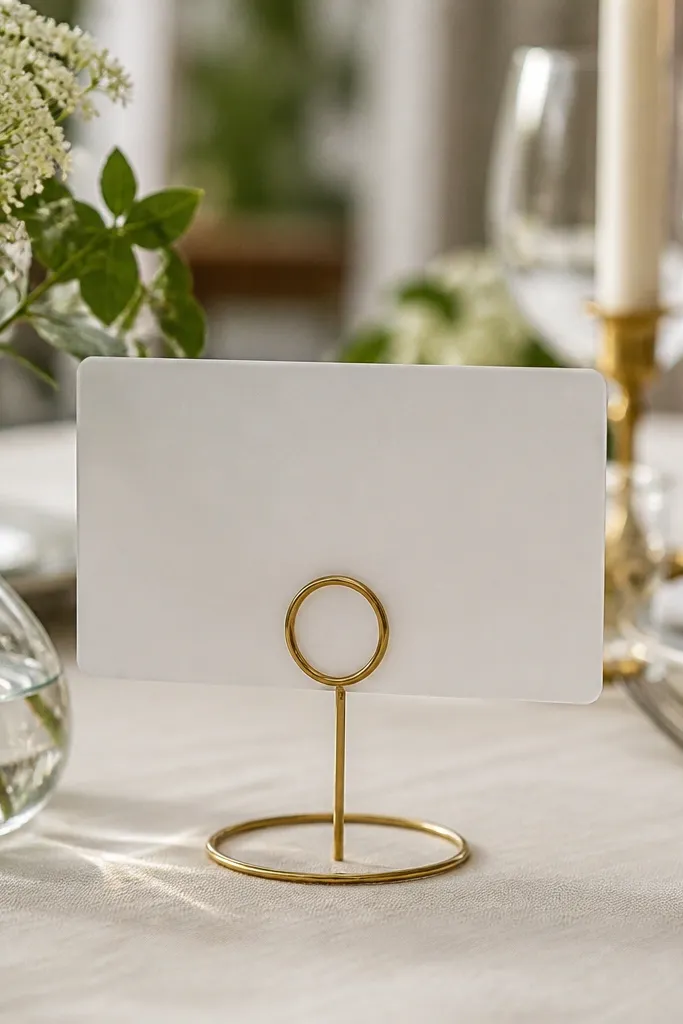
Start by ordering matte acrylic sheets sized to your table cards, then print names in a simple serif or clean sans type. Cut or finish the cards so edges are smooth and consistent. Then bend or purchase thin gold wire stands that hold each card at a slight angle for easy reading. Finally, place one card per seat in the same position relative to napkins so the composition looks uniform across the table.
Place cards are tiny, but in reception photos they’re one of the most noticeable details because they sit right at table level. Matte acrylic keeps text readable without harsh glare, and thin gold wire stands look light and modern. This setup gives your table a custom feel even if you’re using simple centerpieces. It also makes seating setup smoother because guests can spot their names fast. Pair this with a neutral tablecloth and one accent color so the place cards look intentional, not random.
Skip thisAvoid glossy acrylic — it reflects lights and turns place cards into glare blobs in photos.
Quick tipBring a lint-free cloth and wipe the acrylic before the first guest arrives — smudges show up under flash.



