
1. Ceramic Citrus Centerpiece Bowls
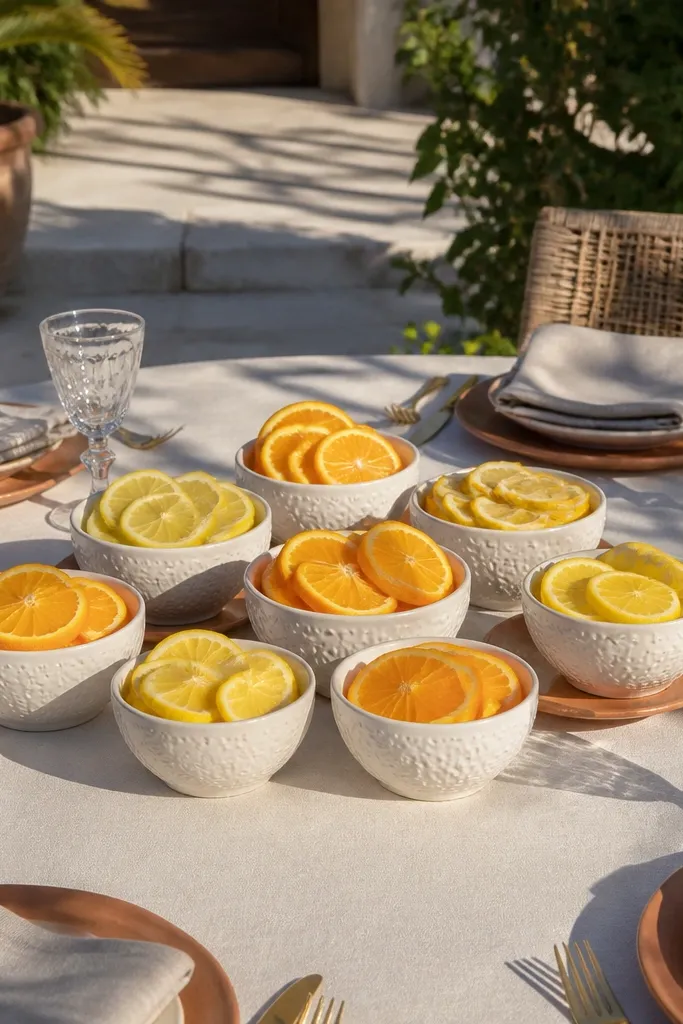
Start by placing three to five identical small ceramic bowls in a loose triangle pattern in the center of the table. Add a base layer of dried citrus or fresh orange slices (or even preserved citrus) with short sprigs of rosemary or bay leaves. Then tuck one low LED tea light under or behind the citrus so it glows through the gaps. Keep the total height under 10 inches so place settings stay visible.
This setup looks bright without looking busy because the citrus gives color in a compact footprint. Use multiple small bowls instead of one huge centerpiece — each bowl reads as intentional and the whole cluster feels full from every angle. It’s also a great choice when your venue has strict rules about open flames since you can swap in LED tea lights inside the bowls. The best part is that it photographs like “fresh market energy” even if you’re not doing a full floral budget.
Skip thisDon’t use tall vases here — the whole point is a low, round-friendly cluster that stays readable in photos.
Quick tipBuy citrus at least 2 days before and dry slices slightly so they don’t weep onto the tablecloth.
2. Terracotta + Linen Napkin Ring Halo
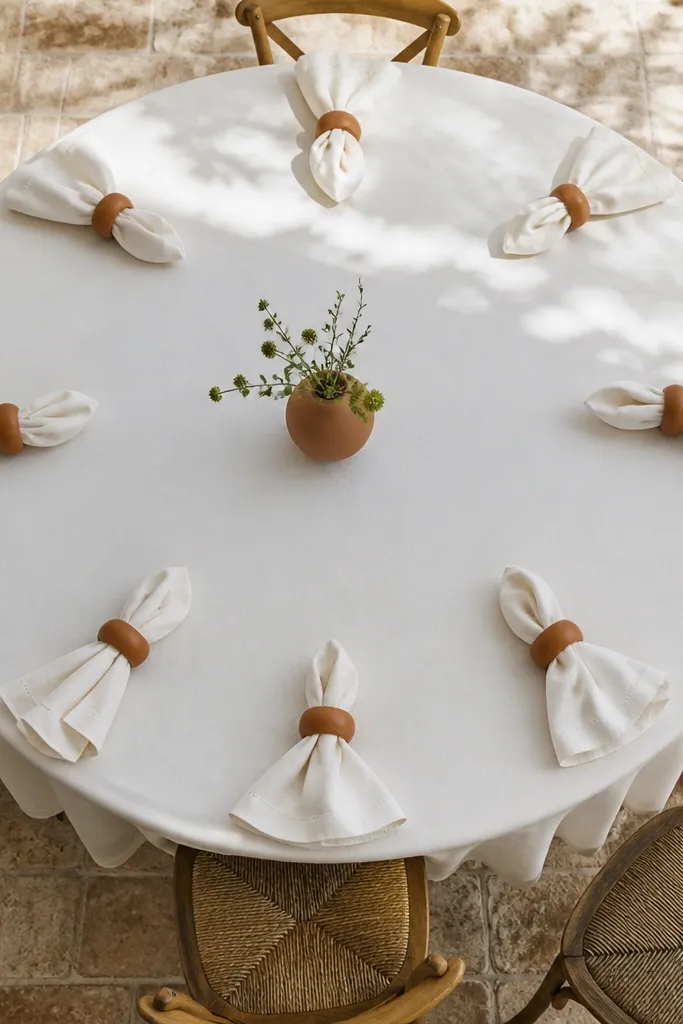
Start by choosing a linen napkin color that matches your palette — oat, sand, or sage all photograph well. Wrap each napkin with a terracotta ring, then set place settings in a consistent orientation so the folds face inward toward the center. Next, place a single low centerpiece in the middle; the napkin rings do the work at the perimeter. Finally, steam or lightly press napkins so the folds don’t look creased in pictures.
A round table looks “styled” when the edge has a repeating detail. These terracotta napkin rings create a halo effect because they repeat at equal spacing around the circle. Pair them with a simple linen fold and you get texture that holds up under harsh venue lighting. This is a strong option for hidden gems off the beaten path because you can source terracotta shapes from local artisan stalls or even bring home a few matching pieces.
Skip thisSkip plastic rings or metallic rings that look dull under overhead lights.
Quick tipIf you can’t find identical rings, choose one shape and vary the glaze — the repetition still reads as intentional.
3. Botanical Paper Fan Confetti Center
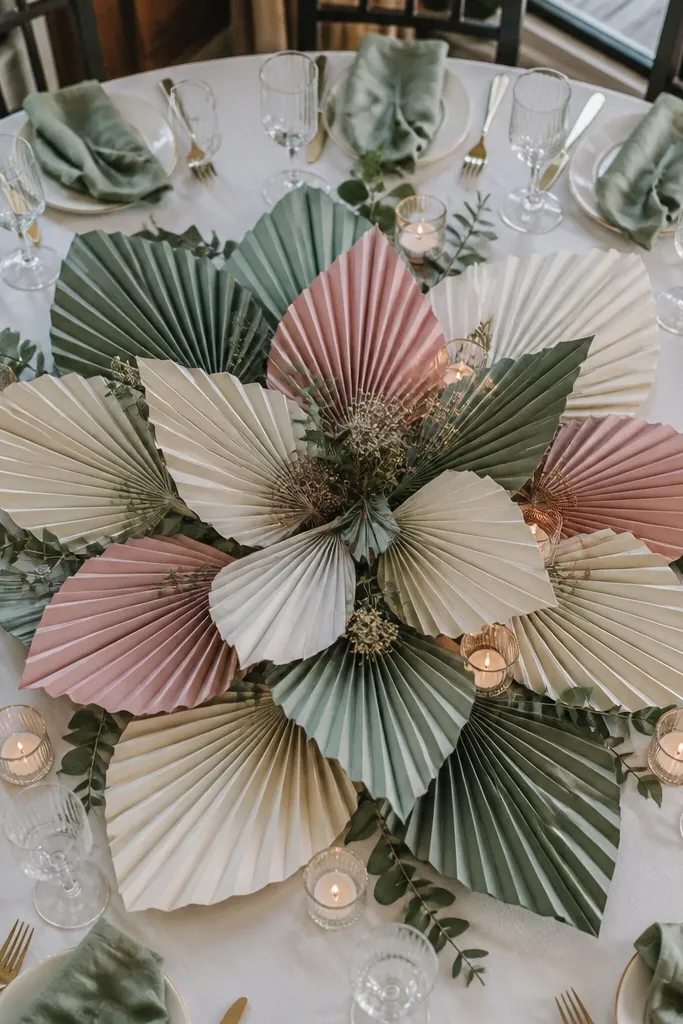
Start by building a low base: a shallow tray or round charger in the center. Place one bud vase or short glass cylinder in the middle, then fan out 12 to 20 small paper fans like a sunburst around it. Keep the fan height under 6 inches so you don’t block guests' sightlines. Then scatter a few dried leaves or small paper cutouts to connect the colors.
Paper fans sound too craft-y until you treat them like a design element. This arrangement uses a tight center cluster with paper fans radiating outward, so the table looks animated without needing tall flowers. The muted botanical tones look expensive when they’re all the same paper weight and finish. It’s also a lifesaver for venues where you can’t use real petals or you need something that won’t wilt mid-reception.
Skip thisDon’t mix shiny and matte papers in the same cluster; reflections make the setup look messy.
Quick tipUse matte cardstock in two tones max — one light, one darker — for a cleaner look in photos.
4. Floating Candle Dock in a Shallow Glass Bowl
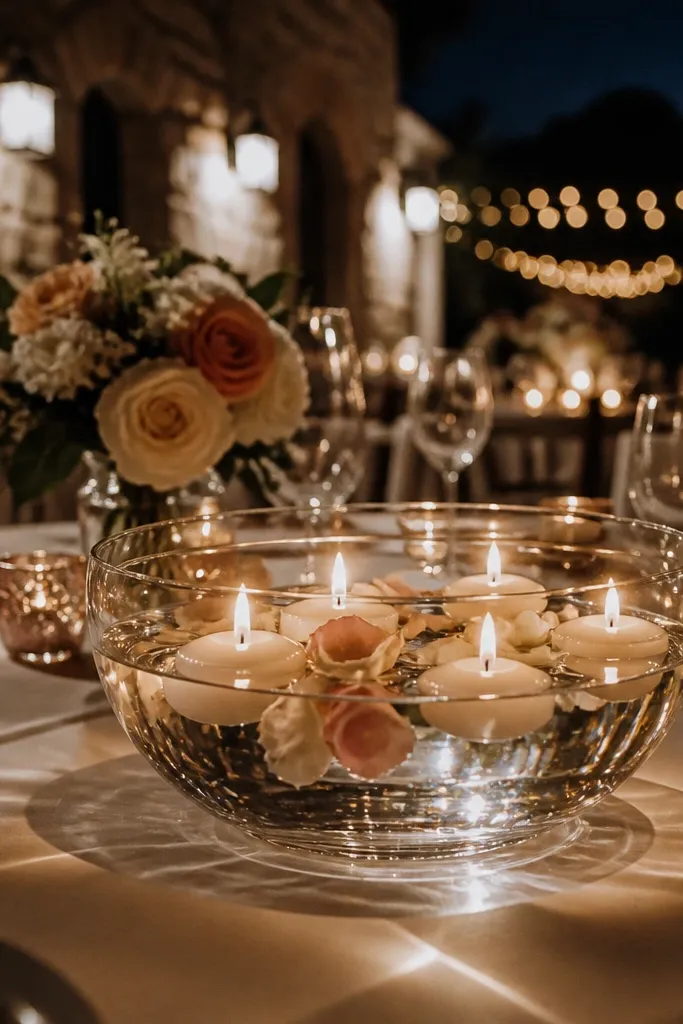
This is one of the most photogenic ways to fill a round table center without building height. A shallow glass bowl creates a “lens” effect for light, and floating candles make the center feel alive even in dim lighting. Choose petals that match your palette but keep it restrained — too many colors turns the bowl into confetti. It’s also a smart hidden gem off the beaten path option because you can use locally sourced dried petals or even foraged greenery if your venue allows it.
Start with a wide, shallow glass bowl that fits within the center third of the table. Add a thin layer of water or clear gel (if you’re using one) and float 3 to 5 LED tea lights or floating candle cups. Scatter a few petals and one sprig of greenery around the base so the bowl doesn’t look empty. Finally, place a matching tray under the bowl to catch drips and protect your tablecloth.
Do a quick test with your venue lighting — if the bowl looks too dim, add one extra LED candle rather than more petals.
Skip tall pillar candles here; the bowl needs to stay low for a clean circle look.
5. Round Moss + Mini Terracotta Steps
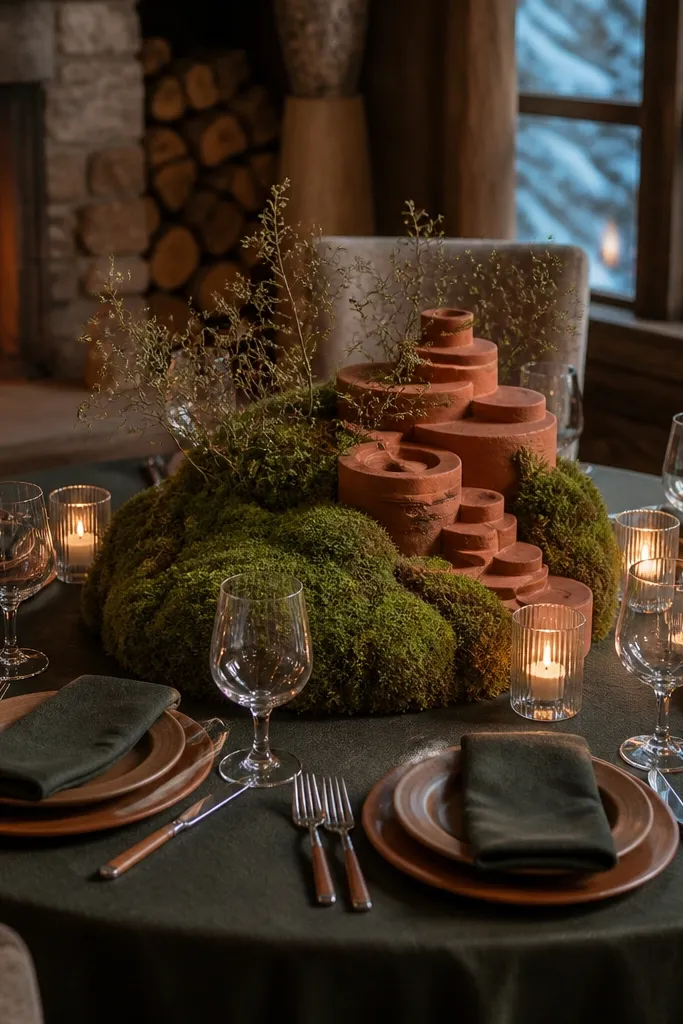
Start by cutting a moss ring or using a pre-made moss mat and placing it in the center on a round tray. Add 2 to 3 small terracotta pieces at different heights to form a gentle slope, then tuck a tiny candle or LED point light at the lowest section. Finish with one or two simple accents like dried seed pods or a small sprig so it doesn’t look overstuffed. Keep the total footprint within 14 to 16 inches on a typical round table.
This design gives you a sculpture-like center that still reads as natural. Moss creates instant softness, and mini terracotta pieces add warmth and craft detail. The “steps” idea — stacking small items on one side — gives direction and makes the photos feel composed rather than random. It’s perfect when you want wedding-table decor that doesn’t look like standard roses and greenery.
Skip thisDon’t pack moss too thick — it should look lush, not like a wet mat.
Quick tipMist moss lightly right before setup; dry moss looks dull under flash.
6. Vintage Book Page + Dried Pampas Ring

If your venue has a library vibe or your wedding is more editorial, this works. The dried pampas ring creates volume and movement, while book page scraps add a textured layer that reads “designed” up close. Keep the paper in warm tones — cream, light tan, or soft gray — so it doesn’t look like a craft project. This is a great hidden gem off the beaten path angle because you can source old books from local thrift shops near your travel stops.
Start by forming a pampas ring using a bundle tied with twine so it holds a circle shape. Place it on a charger or round tray at the center of the table. Tear book pages into small strips and tuck them under the pampas so they peek out, then add one small vase or candle in the middle. Keep the ring height around 10 to 12 inches so it frames plates rather than blocking faces.
Use a light hand with book pages — a few tucked strips look better than a scattered pile.
Avoid bright neon paper; overhead lighting turns it into a distraction.
7. Mercury Glass + Pearl Bead Candle Grid
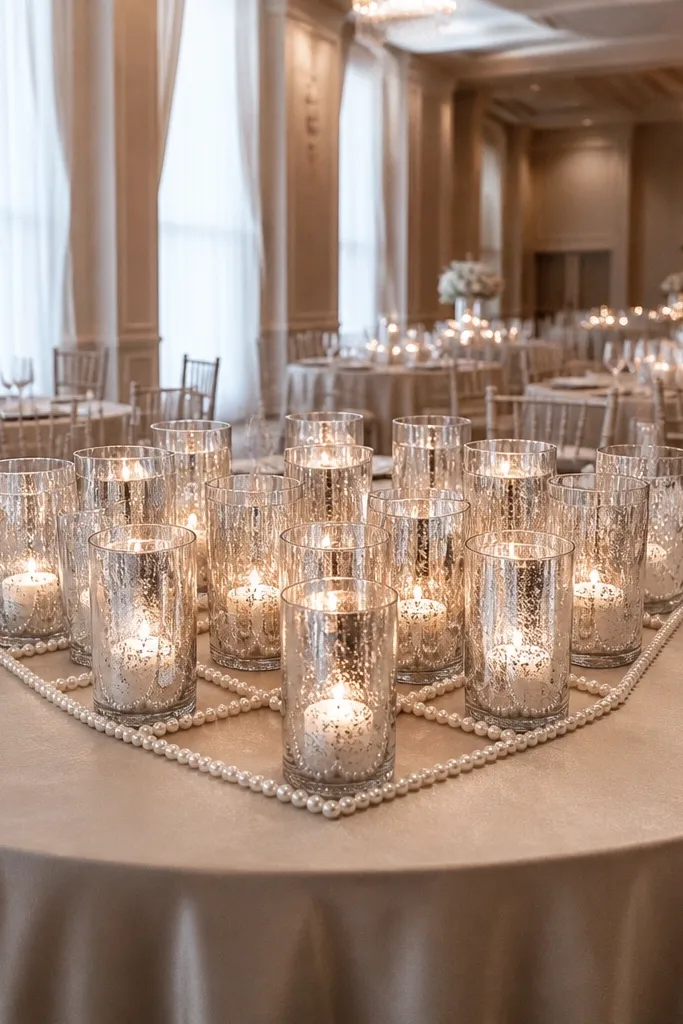
Start with a round base tray and place 4 to 6 mercury glass votive holders in a tight grid at the center. Pour or sprinkle pearl beads in the gaps between holders so the pattern looks intentional. Add one larger candle or LED pillar in the middle for a focal point. Finally, wipe the holders before guests arrive; fingerprints show up fast in photos.
This setup is all about sparkle control. Mercury glass catches light in a clean, reflective way, while pearl bead lines create a tidy pattern around the candles. It’s surprisingly flattering on round tables because the grid feels structured, not chaotic. Choose a limited palette — silver plus one soft neutral — and you’ll get that “night dinner” look without going full glam.
Skip thisDon’t add extra loose rhinestones — the bead grid already gives the sparkle.
Quick tipUse LED candles if the venue is warm — real flames create uneven smoke haze in flash photos.
8. Salted Pinecone + Clear Acrylic Tier
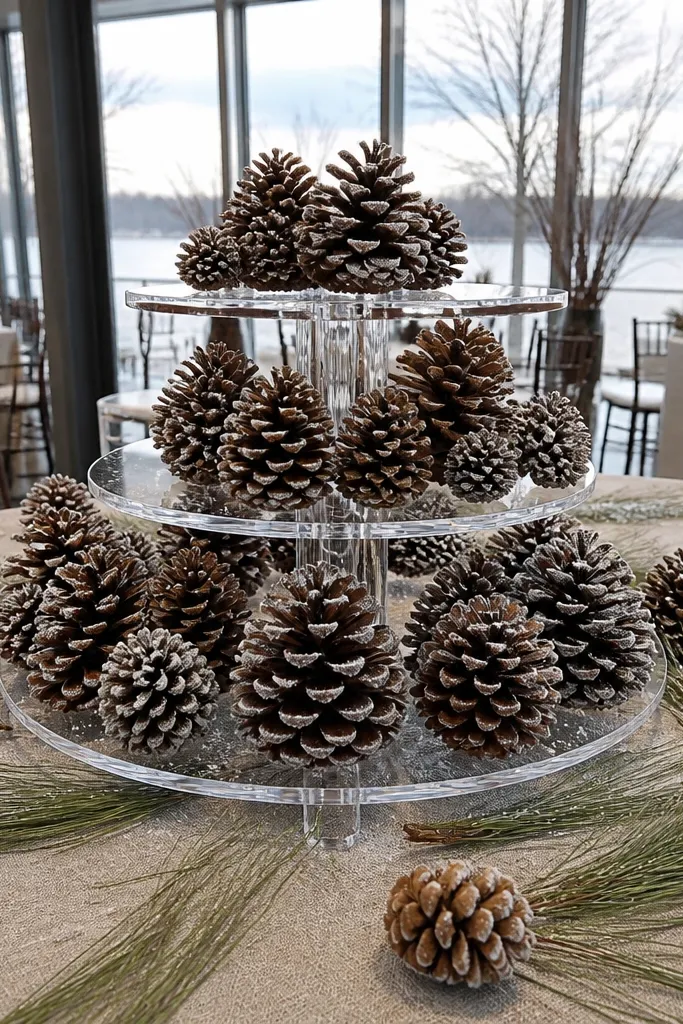
This is a winter-friendly option that still looks modern. The clear acrylic tier keeps everything crisp and photo-ready, while salted pinecones add a natural texture that reads upscale. If you’re doing a destination wedding, this is also a practical hidden gem off the beaten path idea because pinecones are easy to find in many regions and they travel well when sealed. The look is sculptural, so it doesn’t require a lot of flowers to feel complete.
Start by placing a clear acrylic riser or small tiered stand in the center of the table on a protective liner. Coat pinecones lightly with fine white salt or faux snow spray, then arrange 6 to 10 pinecones around the tier edges. Add one slim candle on the top and one small sprig of pine or eucalyptus on the side. Keep the stand height under 14 inches so guests can see each other across the table.
Seal pinecones with a clear spray after coating so salt doesn’t shed onto linens.
Skip glitter — it looks cheap under overhead lighting and sheds everywhere.
9. Matte Ceramic Bud Vases in a Spiral
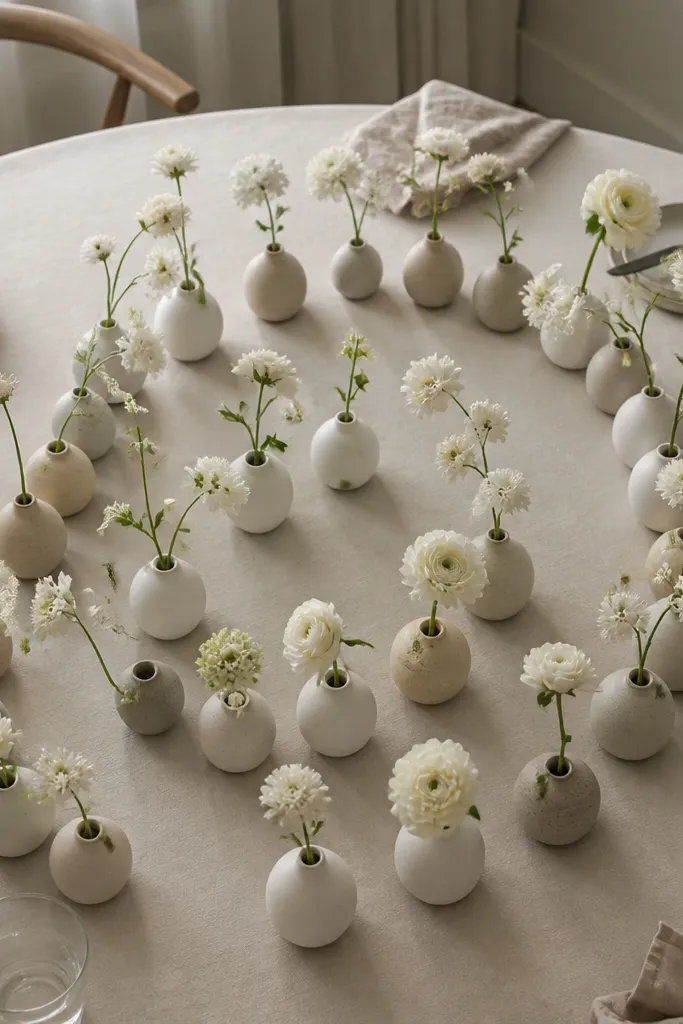
This is the cleanest “few flowers, big impact” centerpiece approach. A spiral of small matte ceramic bud vases creates motion and makes the center feel designed even if you’re using only single stems. It photographs well because each vase has a matte finish that avoids glare. This works for hidden gems off the beaten path if you collect mismatched ceramics from local markets — the key is keeping the glaze within one color family.
Start by placing a round tray or runner in the center and choosing 10 to 14 bud vases that share one glaze tone. Insert one short stem per vase, then arrange them in a spiral pattern so the stems angle slightly inward. Add one larger focal vase in the center with a slightly different shape for hierarchy. Keep stem length around 6 to 8 inches so the table stays readable.
Bring the vases to the venue dry and fill stems last. Less wilting means better texture in photos.
Don’t use tall vases with narrow openings; they tip easily and ruin the spiral symmetry.
10. Lantern + Dried Flower "Garden Window"
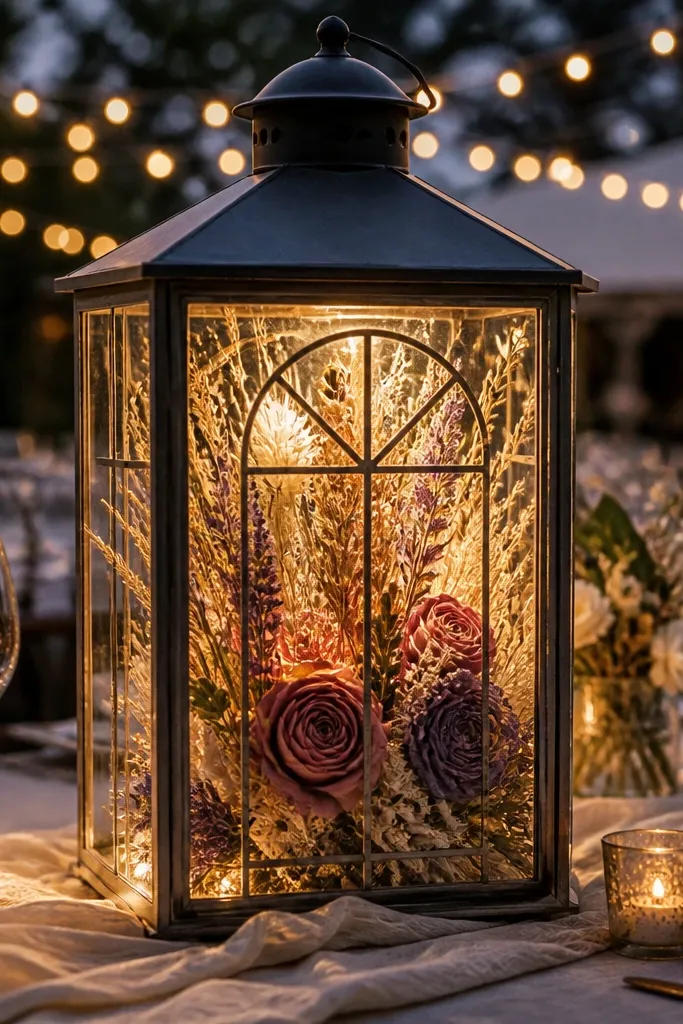
Start with a medium lantern and a round base tray. Arrange dried flowers in a small grid inside the lantern so they sit behind the glass without touching the sides. Add one LED candle inside and keep the flower height even so the “window” looks balanced. Finally, place the lantern in the center and add one matching filler element like dried eucalyptus on the tray edge.
If you want a centerpiece that looks like a little scene, this is it. A lantern creates a frame, so dried flowers look curated instead of scattered. It also softens the whole table because the glass diffuses light and hides small imperfections. This is a strong aesthetic pick for outdoor receptions at dusk — it reads cozy, not rustic. Hidden gems off the beaten path shows up here when you pick lanterns or jars from local flea markets and style them with what’s in-season.
Skip thisDon’t pack flowers too tight; they should look airy through the glass.
Quick tipUse LED candles with a warm color temp (around 2700K) so the glass doesn’t look bluish.
11. Hand-Dyed Ribbon Swag Across a Round Tray
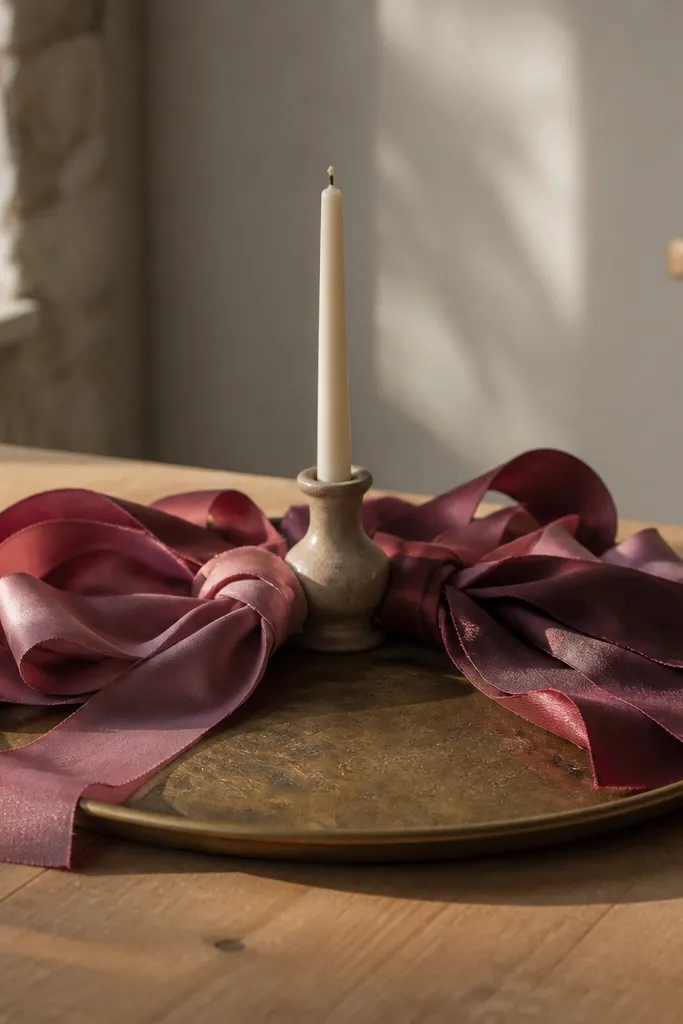
Start by choosing a ribbon width of 1.5 to 2.5 inches and tie it loosely around the tray edge points (three points works best). Drape it in a gentle swag so it creates a curve toward the center. Place one candle or small vase in the middle and add 2 to 3 sprigs of greenery tucked under the ribbon. Keep the tray diameter close to half the table diameter so it looks proportional.
This reads like high-end styling because ribbon creates movement without adding bulk. Put the ribbon across a round tray so it forms a soft arc, then anchor the center with a single candle or small bud vase. It’s perfect when you want a minimal look that still fills the circle. The color story feels personal if you choose hand-dyed ribbon from local shops during travel — that’s where the hidden gems off the beaten path factor actually shows up.
Skip thisSkip stiff satin — it won’t drape and the swag looks flat.
Quick tipSteam the ribbon before setup; wrinkled ribbon looks messy under flash.
12. Teacup + Saucer Stacking with Single Blooms
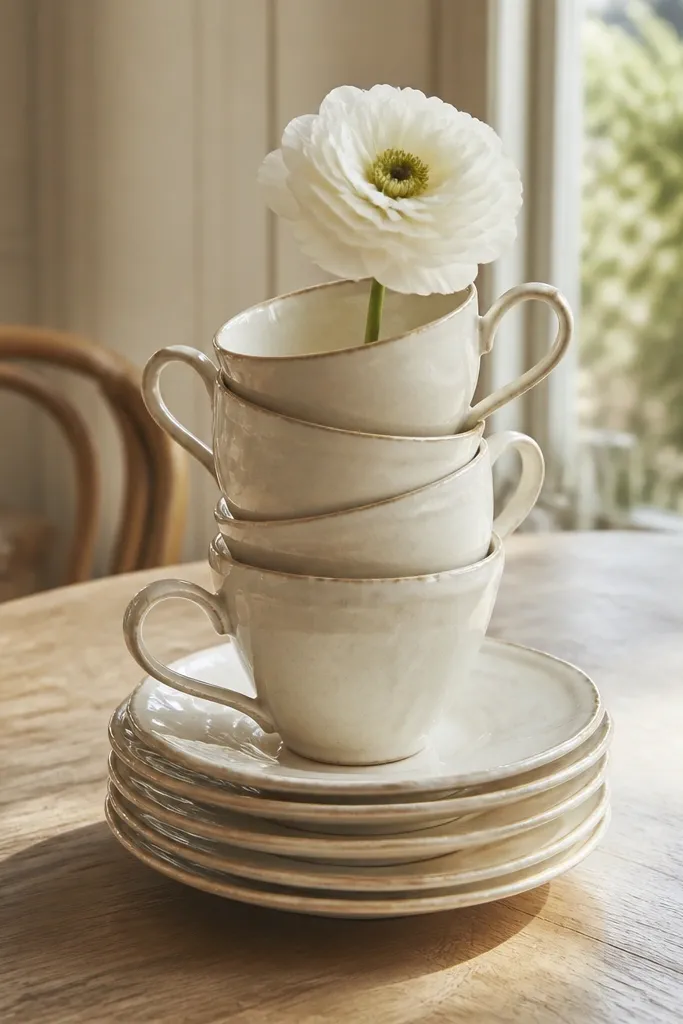
Start by selecting 1 teacup and 2 saucers per table, all in the same color family. Build a stack in the center: saucer on the base, teacup on top, then second saucer slightly offset or flat depending on stability. Add a small floral oasis insert or a tiny water tube inside the teacup and place one short stem. Finish with a few petals scattered on the tray edge, not across the whole table.
This centerpiece turns table decor into a conversation piece. Stacking teacups and saucers gives height and charm without needing lots of flowers. The single blooms keep it modern and prevent the look from turning into a cluttered tea party. It’s especially photogenic when the teacups are in one consistent color (cream, pale blue, or soft gray) and the blooms are in one accent shade. Hidden gems off the beaten path shows up when you thrift the pieces from local shops near your destination.
Skip thisDon’t use tall stems; the cup stack should stay under 12 inches.
Quick tipUse non-slip pads under the saucer stack so it doesn’t slide when someone brushes the table.
13. Round Tray of Floating Herbs and White Candles
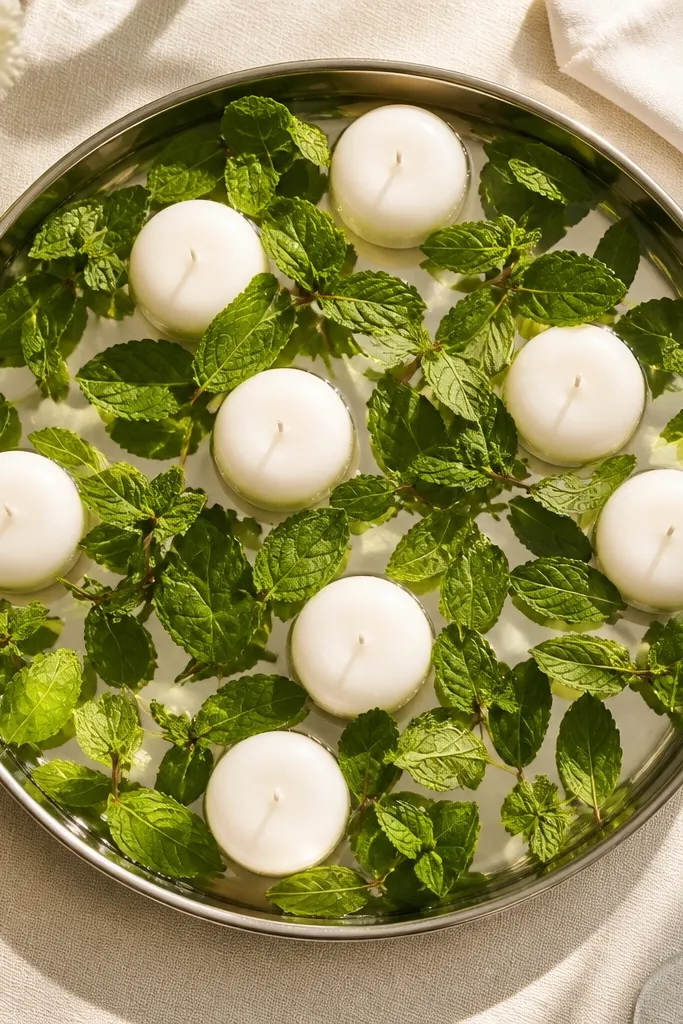
This is a clean, fresh look that still feels lush in photos. Floating herbs (like mint leaves) around white candles make the centerpiece look abundant without adding big floral volume. It’s also a smart choice for summer receptions because it feels light and doesn’t wilt visually as fast as cut flowers. If your wedding palette is white plus one green tone, this setup nails it.
Start with a shallow round tray and place 3 to 5 white LED or taper candles in a tight ring. Add a thin layer of water or clear gel in the tray, then float mint leaves or small herb sprigs between the candles. Place a few larger herb pieces at the outer edge to frame the circle. Keep the tray centered and wipe condensation so the tablecloth stays clean.
Choose herbs that hold shape when wet — mint looks best; delicate leaves can turn messy fast.
Don’t mix too many herb types; two textures are enough for a polished look.
14. Color-Blocked Table Confetti with Dried Flower Capsules
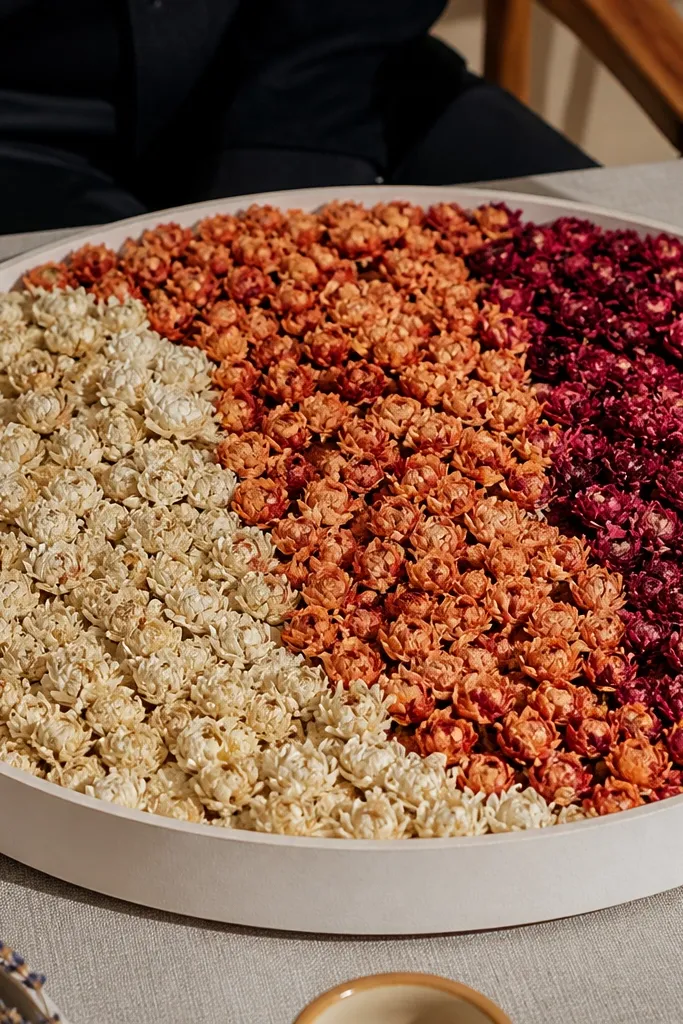
This is a modern alternative to a classic centerpiece. Instead of a single big bouquet, you create a controlled “confetti field” of small dried-flower capsules arranged on a round tray. It looks intentional because it uses color blocking — light, medium, and dark tones in separate zones. Under flash, the texture reads beautifully and the setup stays low so it doesn’t block conversations. Hidden gems off the beaten path is built in if you source capsule-like containers from local glassblowers or reuse small apothecary jars you find while traveling.
Start by placing a round tray or charger in the center and dividing it visually into 2 to 3 color zones using a neutral liner. Fill each zone with small dried flower capsules or mini jars, keeping sizes consistent within each zone. Add one low candle at the center back so light hits the textures. Arrange the capsules so the highest pieces sit in the middle zone and the edges stay lower.
Make a quick layout on the floor first. If you can’t get the color blocks right at home, it will look random at the venue.
Skip mixed-size capsules across all zones; it turns into clutter instead of design.
15. Fresh Fig Leaf + Stoneware Candle Holders
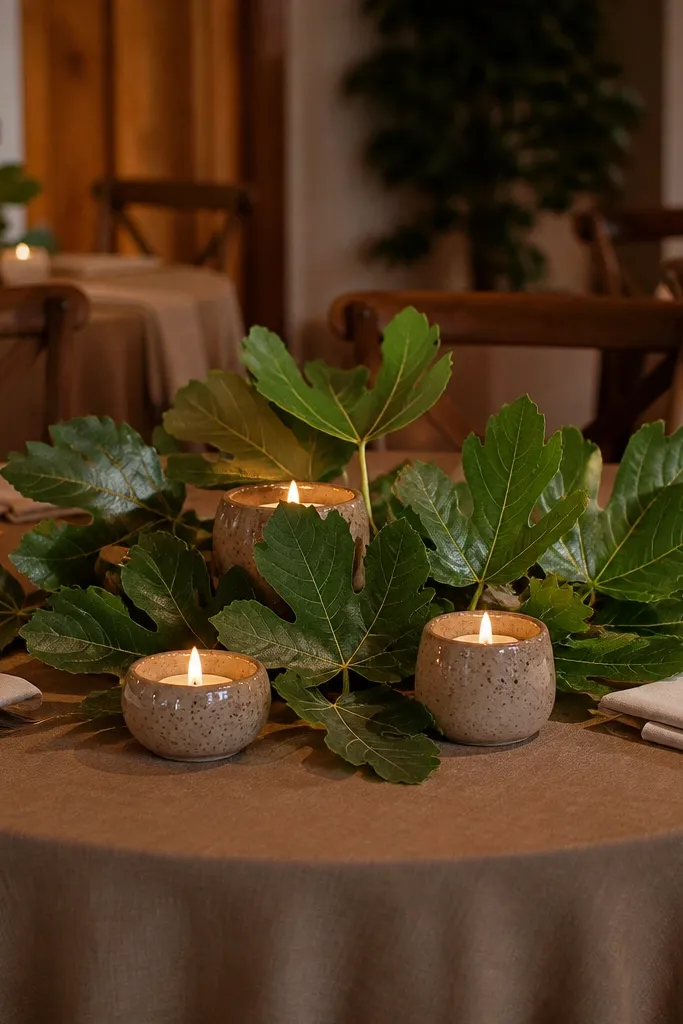
Start by selecting 4 to 6 stoneware candle holders and placing them in a circle around the table center. Lay fig leaves flat under and between holders so they create a continuous ring. Add one candle in the middle, then fold a few leaves upward so the centerpiece has height variation without going tall. Keep leaf edges clean and wipe any residue so your cloth stays spotless.
Fig leaves give you instant drama because they’re big, glossy, and sculptural. Pair them with stoneware candle holders and you get a contrast of organic shape and grounded ceramic. This looks expensive because it’s mostly negative space plus a few bold elements, not a full floral spray. It’s also a smart hidden gems off the beaten path move if you can buy fig leaves from a local market or a florist who stocks them seasonally.
Skip thisDon’t overstuff the ring. Leave breathing room so the leaf shapes read clearly.
Quick tipIf fig leaves are hard to source, use bay leaves — they still give a glossy look with less fragility.



