
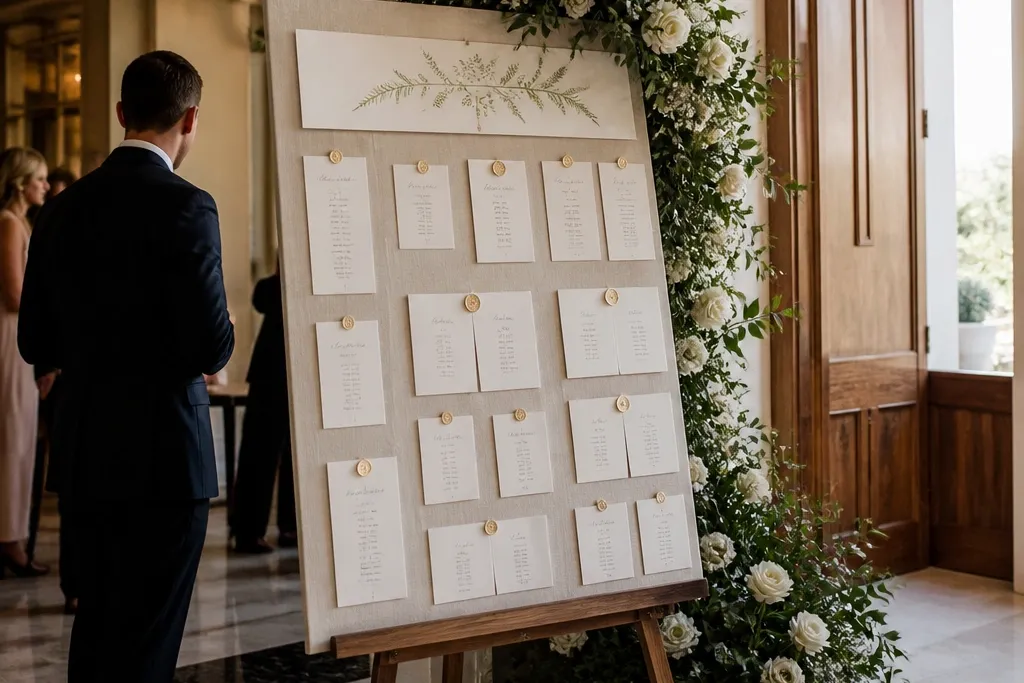
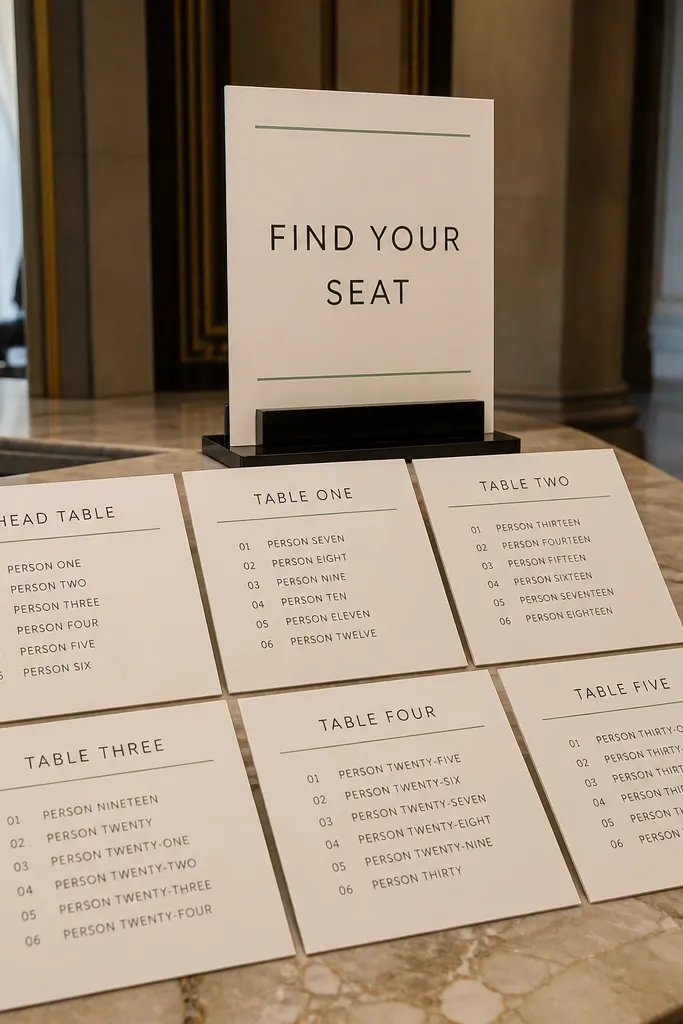
1. Chalkboard grid on reclaimed wood base
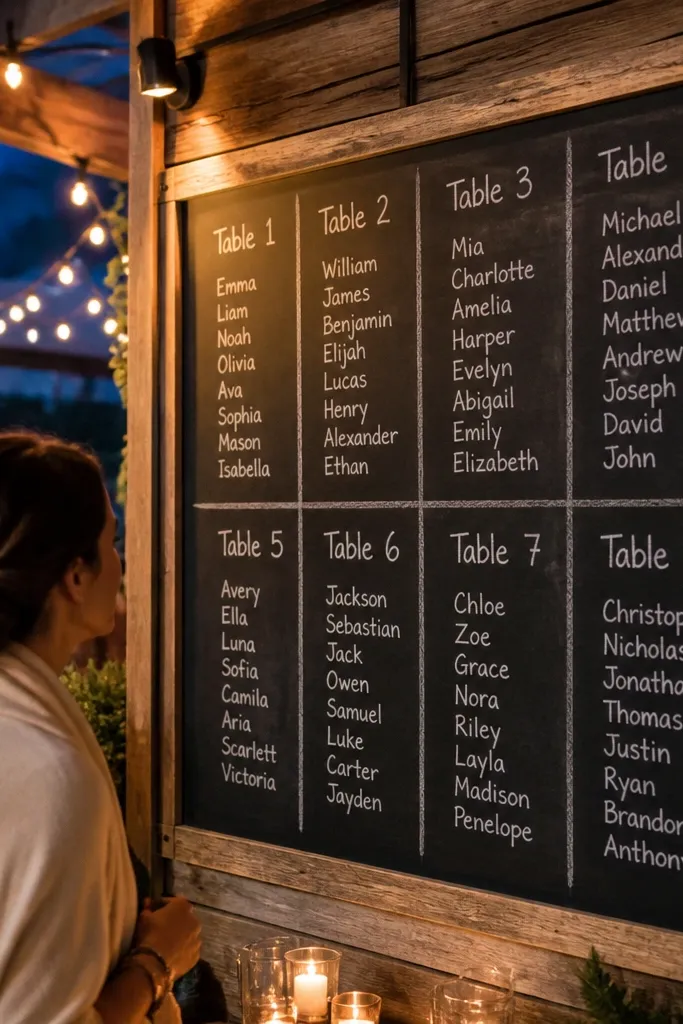
This is the seating chart wedding display that looks charming even when the venue lighting is messy. A chalkboard gives you that soft, textured background, while a strict grid keeps everything readable and photo-friendly. Use it when you want a rustic-modern mix — think farmhouse venue, barn reception, or outdoor patio with warm string lights. The best part is update-friendly text: you can adjust names without reprinting the entire chart. For an aesthetic seating chart wedding, the grid is non-negotiable; freehand chalk lists look messy on camera.
Start by choosing a chalkboard board size around 24x36 inches for 50-120 guests, then add a 1-inch margin around the edges. Draw a light grid with chalk lines before you write names, and format table numbers as large headers at the top of each column or row. Then write each table’s names in consistent line spacing, leaving a small gap between tables. Finally, seal the chalkboard with a matte chalkboard spray after it’s fully done so the surface stays readable in photos.
Quick tipBring a small cloth and a backup piece of chalk to fix smudges right before doors open.
Skip thisSkip uneven columns and mixed font sizes — they kill readability and make the chart look like a last-minute note.
2. Black frame with frosted acrylic overlay and removable name cards
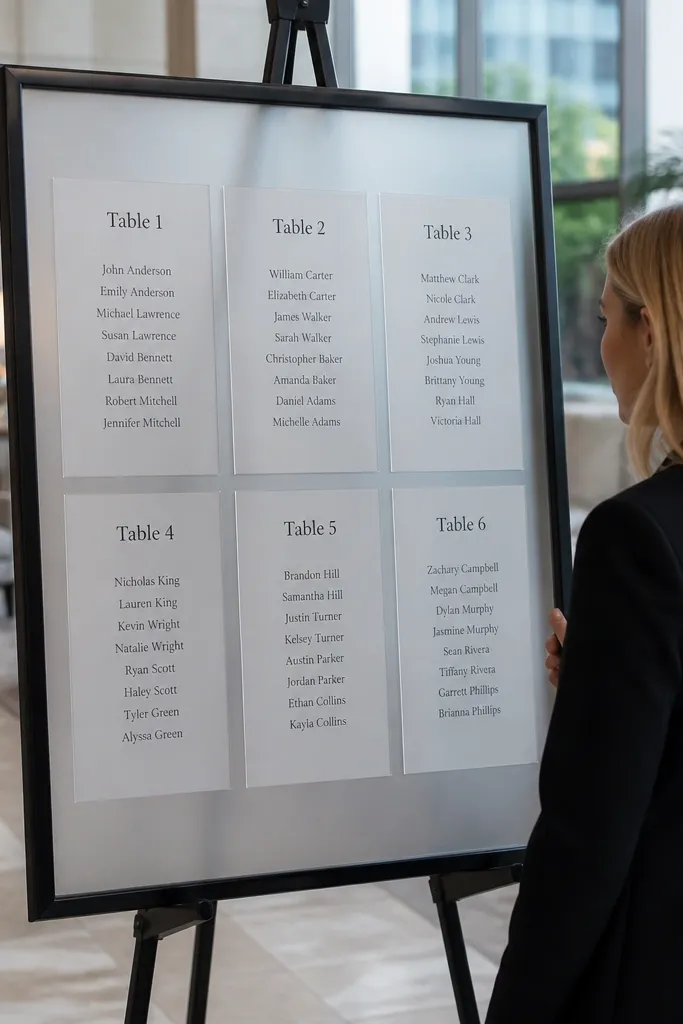
If you want a clean, luxury look without the glare of glossy prints, frosted acrylic is the move. The frosted surface hides imperfections and still looks sharp in photos, and the black frame makes the chart feel intentional. This format is ideal for modern venues, hotel ballrooms, and indoor ceremonies with bright overhead lighting. Removable name cards let you handle RSVPs and last-minute changes without tearing paper or rewriting everything. It’s a strong aesthetic seating chart wedding idea because the typography stays consistent while the layout stays tidy.
Start by buying or building a simple black frame sized for your guest list, then add frosted acrylic behind a backing sheet. Print table headers directly onto the backing paper in a bold font, leaving clear rows for cards. Cut small name cards (about 2.5x4 inches) and use double-sided mounting squares so they sit flat. Then label each card with a table number category on the back so swap changes are fast during setup.
Quick tipPack a few extra adhesive squares per table; running out mid-change is the fastest way to ruin the look.
Skip thisDon’t use regular clear acrylic — it shows fingerprints and glare, which makes the chart look messy on camera.
3. Gallery wall seating chart with 3-tier photo mat frames
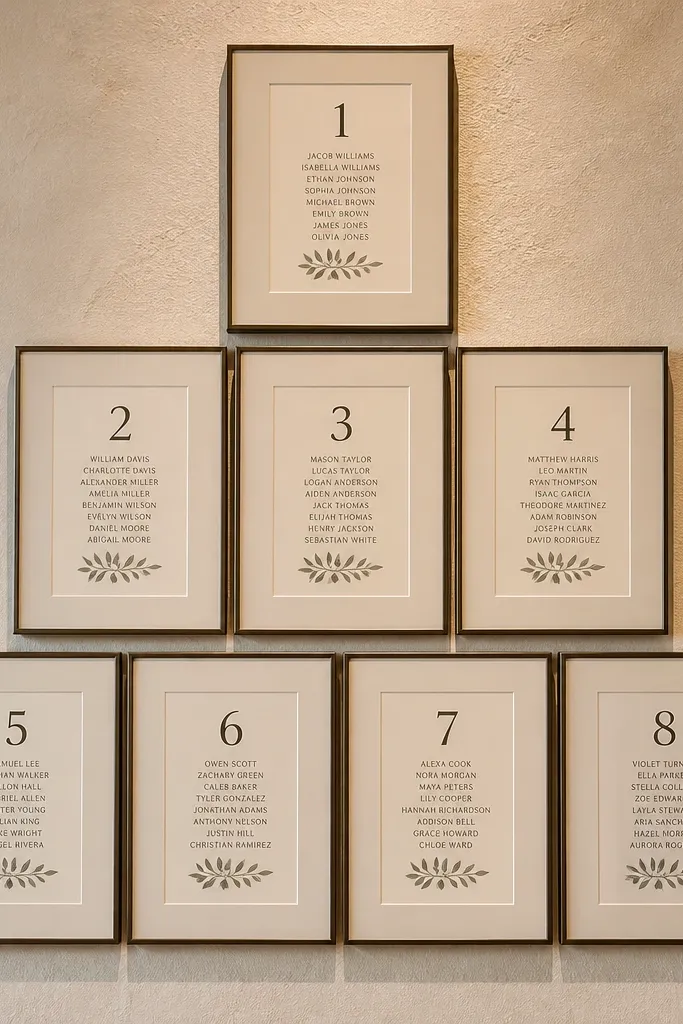
This is the seating chart wedding display that turns “information” into decor. You hang multiple frames in a tidy cluster, usually 3 tiers, so guests see table numbers as a design element. It works great for indoor receptions where you already have a photo wall or escort cards vibe. The frames add structure, and the mats give you that gallery-style spacing that photographs beautifully. For an aesthetic seating chart wedding, the key is matching mat colors and keeping each table block the same size.
Start by choosing frames with the same dimensions and a mat color like warm cream or light beige. Print each table’s names on cardstock, then place them into the mats with consistent top alignment so the names line up visually across frames. Arrange the frames in a staggered but measured grid — aim for about 2-3 inches between frames — and keep the tallest frame centered at eye level. Finally, use picture-hanging hardware that supports the weight so the wall looks straight in photos.
Quick tipLay the frame arrangement on the floor first and measure the distance between frames so it doesn’t look random on site.
Skip thisSkip mismatched frame sizes — it makes the wall look like a collage instead of a deliberate seating chart.
4. Terracotta table number plaques with vellum overlay cards
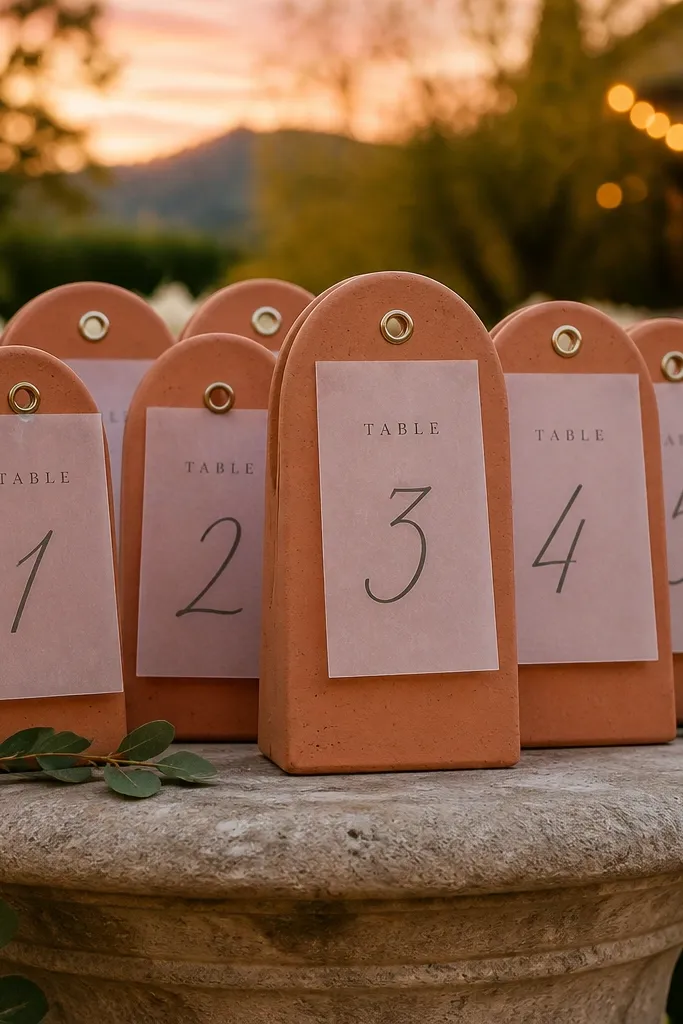
Terracotta is one of the most photogenic color choices for an aesthetic seating chart wedding because it warms skin tones and looks great under sunset light. Pair terracotta table plaques with vellum overlay cards so the text feels airy but still readable. This style suits garden weddings, desert-themed events, and venues with natural wood or stone. The vellum gives a soft translucence that looks intentional, not cluttered. It also handles updates well when you clip or tuck cards instead of printing one single sheet.
Start by choosing terracotta plaques in a consistent size, then paint or print table numbers in a high-contrast color like dark brown or black. Cut vellum name cards to a uniform shape and clip them under each plaque using small binder clips or brass paper clips. Write names with permanent ink meant for vellum so the text doesn’t smear. Then mount the plaques on a wooden board or standing display with enough spacing so each table group reads clearly.
Use dark text pens on vellum; pale ink vanishes under warm indoor lighting.
Don’t crowd the clips — if the vellum buckles, the chart looks sloppy on camera.
5. Rattan display with numbered pins and handwritten name tags
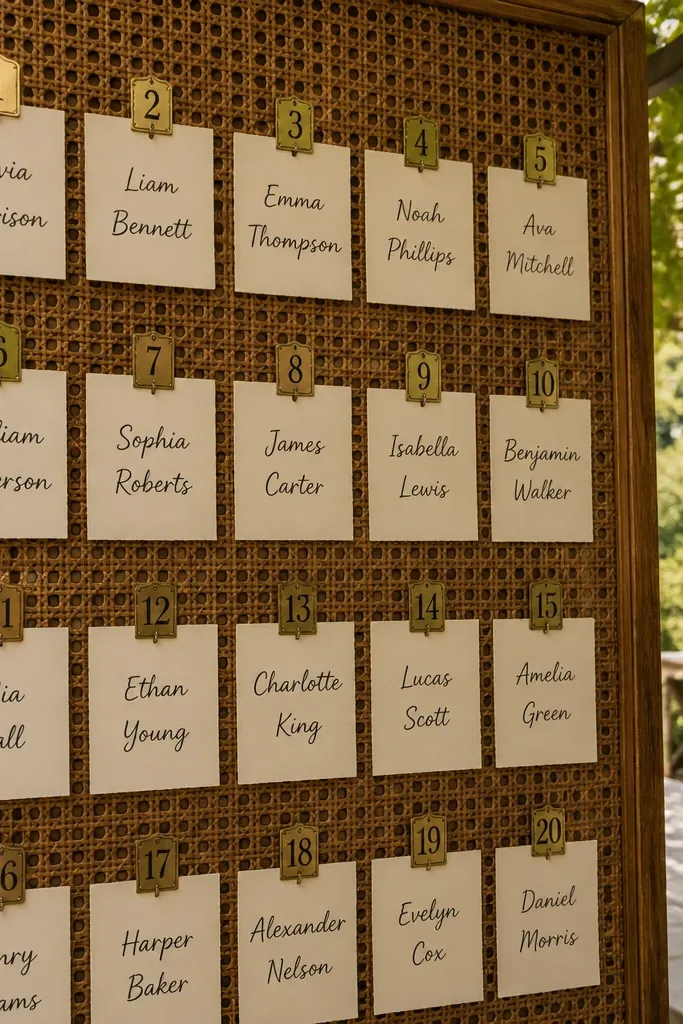
This is a seating chart wedding idea that looks casual-cute but still organized. A rattan display gives texture, and numbered pins make the structure obvious. It’s best for outdoor receptions or venues with natural materials where guests can casually browse. Handwritten name tags add warmth, and the texture of rattan makes the whole display feel like decor, not a spreadsheet. If you want aesthetic without formal printing, this is the route — just keep writing consistent and spacing tight.
Start with a rattan wall panel or standing rattan board that’s sturdy enough to hold pins. Add table number tags first, evenly spaced, and keep each number in the same font style or lettering. Then write names on matching tag cards and pin them directly under each table number. Finally, use a grid layout even though it’s “handmade” — row and column spacing keeps it photogenic and readable.
Quick tipChoose one pen color and one handwriting size; switching pen thickness mid-chart looks chaotic.
Skip thisSkip random placement — a pinned pile looks like a craft project instead of a seating chart wedding.
6. Marble-look laminate header board with acrylic table dividers
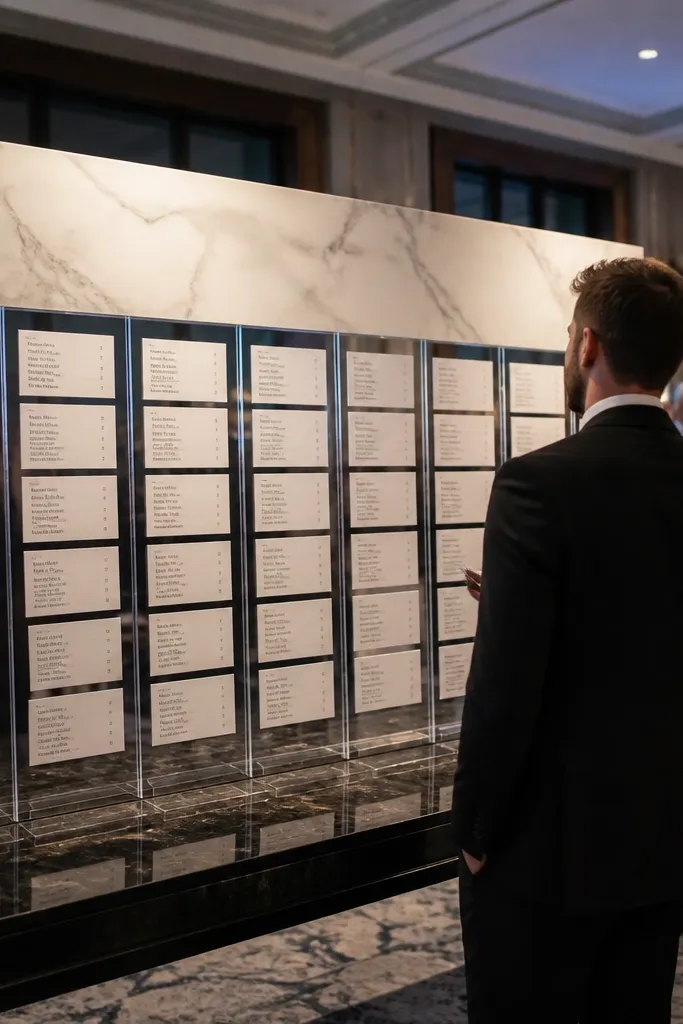
Marble-look laminate is the fastest way to get that clean, high-end vibe without dealing with real stone weight. Add acrylic dividers so each table’s names live in their own clear section, which makes scanning easy. This is ideal for modern ballrooms and evening receptions where you want the chart to look crisp under cool lighting. The aesthetic comes from straight lines, consistent spacing, and the contrast between the marble header and dark text. It also feels “designed” because the dividers create clear blocks instead of one long list.
Start by getting a board base with a marble-look print and a matte finish so it doesn’t glare. Print table headers in a bold font and mount them at the top of each divider section. Cut acrylic dividers to the same height and attach them with standoffs or clear adhesive strips, then insert name sheets behind or within each section. Finally, keep names printed in a single column per table to avoid crowding.
Test a sample under the venue’s overhead lights; laminate glare shows up fast.
Don’t use light gray text — it blends into the marble pattern and hurts readability.
7. Oversized menu-style seating chart on standing easel
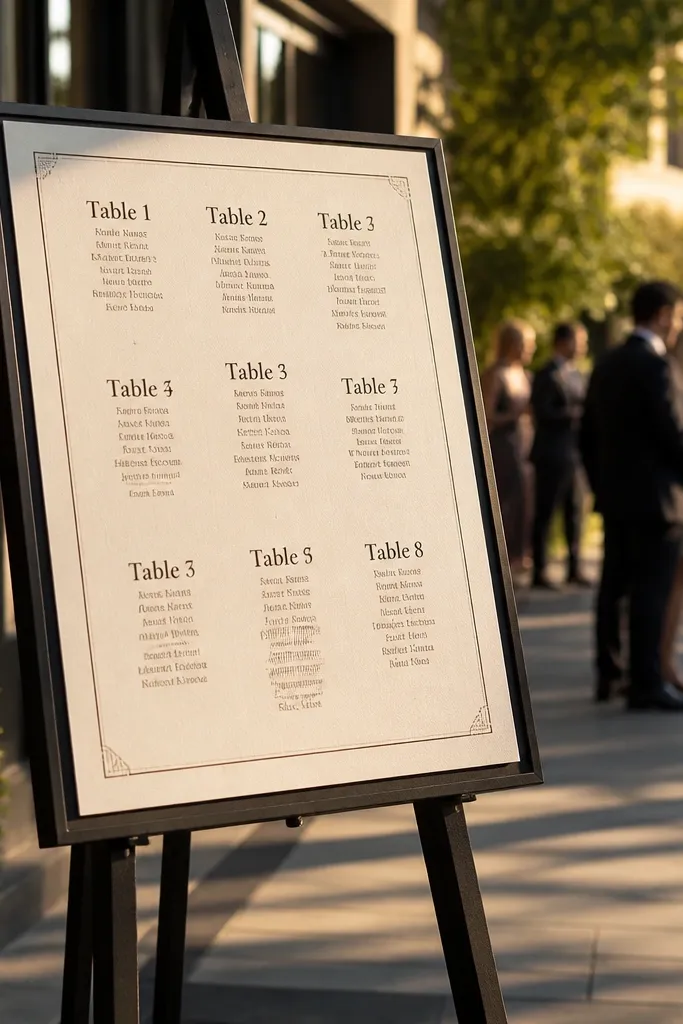
If your venue has a high-traffic entrance, an easel chart gives guests an easy, obvious place to look. The menu-style layout makes the chart feel intentional and legible, with table numbers behaving like menu categories. This works for weddings where you want a modern editorial look without going full acrylic or glass. It’s also great for smaller guest counts because you can make each table section spacious. For an aesthetic seating chart wedding, the standout feature is typography hierarchy: bold table numbers, consistent name lines, and lots of breathing room.
Start by getting a sturdy standing easel and a board or frame size that’s at least 24x36 inches. Print each table section on its own sheet so you can swap changes quickly — title at the top, names in one neat column. Choose fonts that have strong letter shapes for readability, and keep the same font size for all names. Then place the easel at guest eye level near check-in, not off to the side.
Quick tipPut a small sign next to it that says “Tables are listed by number” so guests don’t second-guess scanning.
Skip thisSkip tiny margins and condensed text — menu styling looks good only when it has space.
8. Botanical wash watercolor bands with table header cards
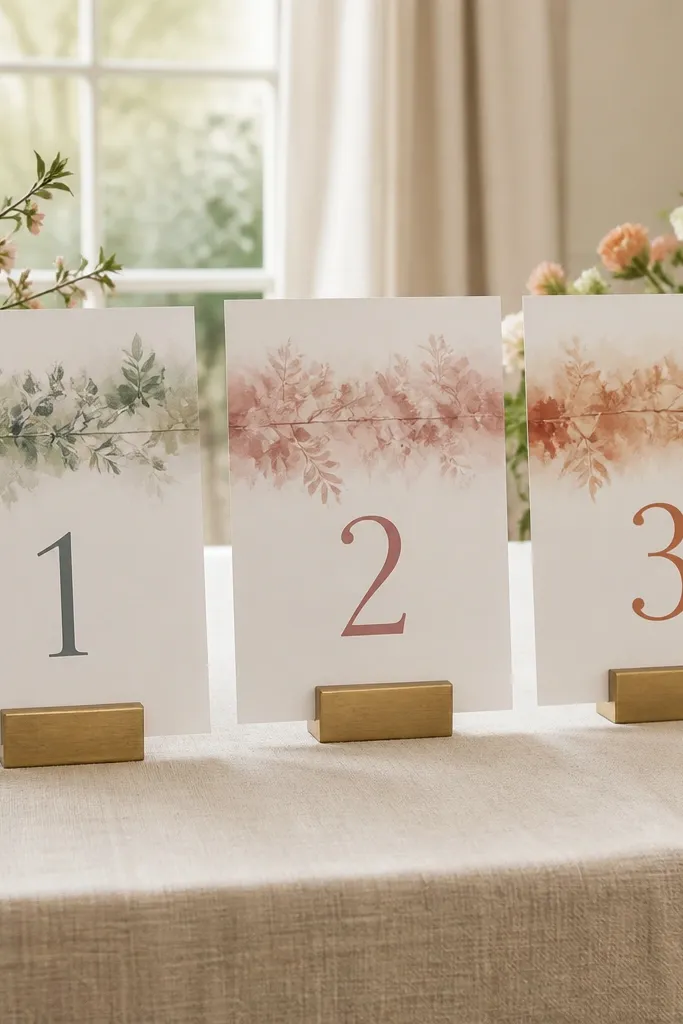
Watercolor bands are the soft, romantic option that still reads clean. The trick is to keep the artwork limited to thin header strips so it doesn’t compete with names. This style looks amazing in spring and summer weddings, especially with gardens, outdoor ceremonies, or airy reception spaces. It’s also a great choice if you want the chart to match invitations without printing full floral blocks everywhere. For an aesthetic seating chart wedding, the watercolor should frame the table number, not fill the entire card.
Start by designing or choosing watercolor bands in 1-2 colors that match your palette, then print table header cards with the bands at the top. Under each header card, list names in a simple typed font and keep line spacing consistent. Mount the headers and name blocks to a light backing board or arrange them in a row on a long sign. Finally, seal the paper with a matte spray if it’s near outdoor breeze or humid air.
Use thicker paper and matte finish; watercolor ink can look washed out under flash photography.
Don’t put full floral illustrations behind names — it becomes unreadable fast.
9. Folded place-card board with pocket sleeves by table
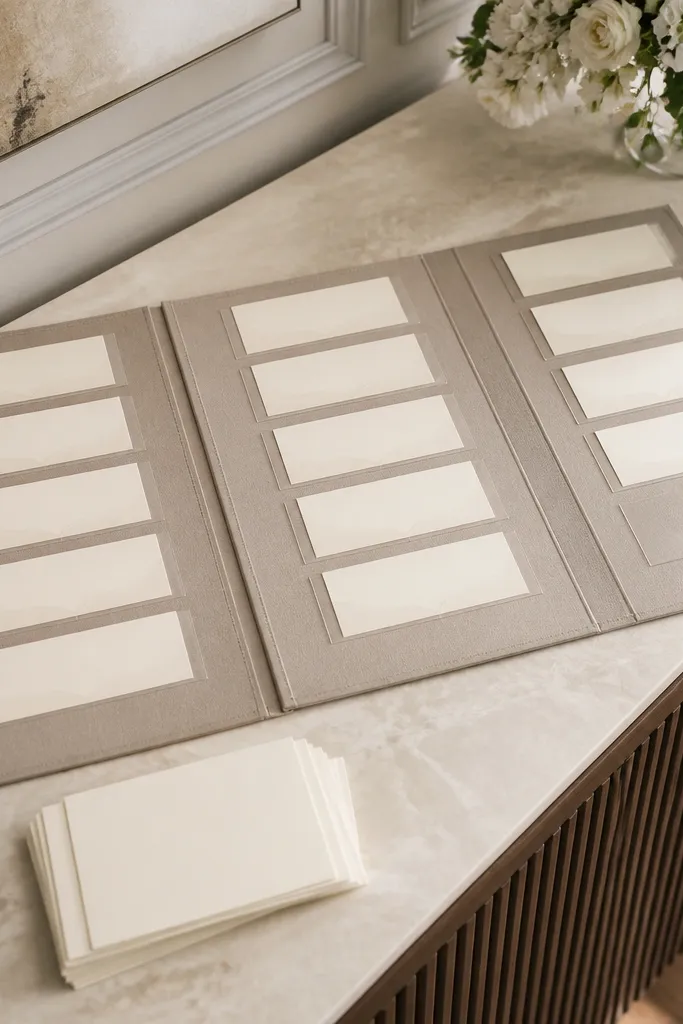
Pocket sleeves make updates painless and keep the chart looking crisp all night. A folded board feels premium because it’s compact for transport and opens like a brochure. This is ideal for weddings with frequent RSVP changes or for couples who don’t want to reprint. Guests can scan each table pocket without touching paper directly, which also keeps it looking pristine in photos. If you want aesthetic seating chart wedding results with real practicality, this is one of the best formats.
Start by choosing a board that folds open flat, then add clear pocket sleeves in a grid that matches your table count. Print each table’s name list on a separate sheet sized to fit the pockets cleanly, using large table numbers at the top. Slide each sheet into its pocket and label the pocket edges with table numbers so setup is fast. Then close the folded board during arrival and open it right before guests start moving.
Bring a label maker or small stickers for pocket edges so you can fix any numbering errors instantly.
Skip low-quality plastic sleeves — they scratch and look cloudy on camera.
10. Transparent acrylic sign with vinyl lettering and printed name blocks
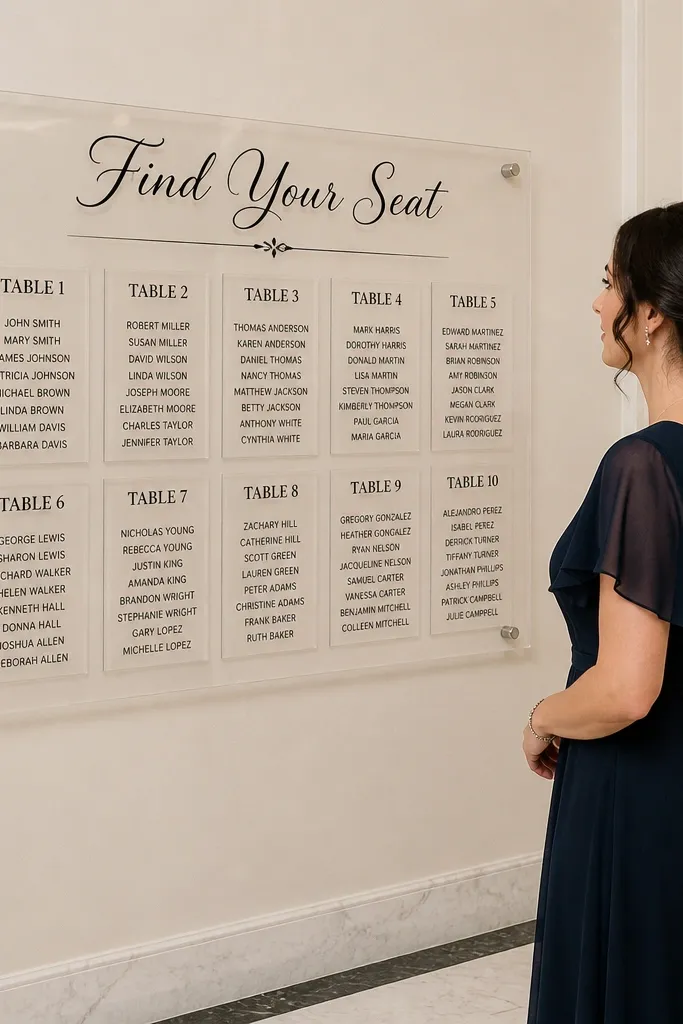
Clear acrylic with vinyl lettering looks modern and sharp, especially for weddings with clean, minimalist decor. The vinyl gives crisp, high-contrast table headers, while printed name blocks keep the names readable. This works best when the sign sits away from direct overhead spotlights that cause glare. It’s a strong aesthetic seating chart wedding idea for indoor receptions and contemporary venues. The visual impact comes from clean edges and consistent alignment — guests should be able to spot their table in seconds.
Start by choosing an acrylic sign size around 20x30 inches for 40-90 guests, then plan a grid with table blocks. Apply vinyl lettering for table numbers on a matte vinyl layer so it doesn’t reflect as much. Print each table’s names on paper sized to fit behind the acrylic, keeping one column per table. Finally, mount the sign on standoffs so it sits slightly off the surface and doesn’t trap glare against a wall.
Avoid direct sunlight and aim for even indoor lighting; glare is the main enemy with acrylic.
Don’t use thin vinyl for numbers — small strokes disappear at distance.
11. Vintage book-spine seating chart with ribbon page markers
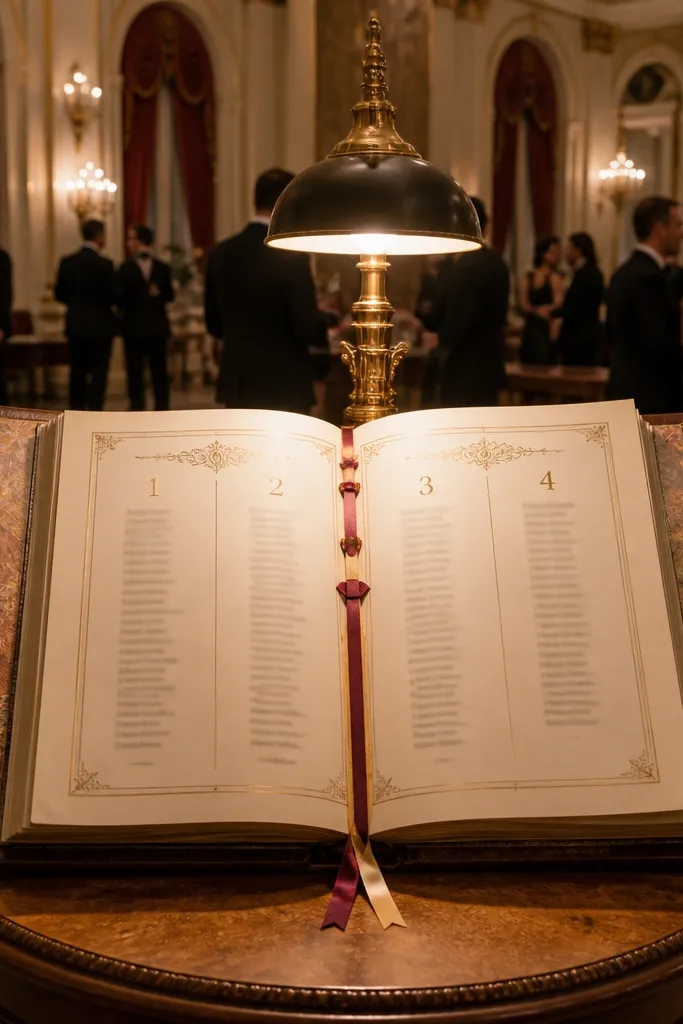
This is a storytelling seating chart wedding display that looks like decor first and information second. Instead of a single board, you use an open book or stack of books with table number pages and ribbon markers. It’s perfect for bookish themes, classic venues, and intimate receptions where guests linger. The photo appeal comes from texture, layered paper, and the way ribbons create movement in pictures. It’s also update-friendly if you keep each table’s names on separate pages you can swap.
Start with a few vintage-style books or a book-shaped display box, then decide how many tables each book will hold. Create separate name pages for each table, with a table number printed large on the page. Insert ribbon page markers so guests can quickly flip to the right section. Finally, place the open books on a stand near the guest check-in area, and keep the pages protected with a light cover if the venue is windy.
Use satin ribbon, not thin craft string — it looks smoother and photographs better.
Skip tiny text in the book pages — it turns into a guessing game from 6-10 feet away.
12. Neon-style table numbers with black cardstock and white name blocks
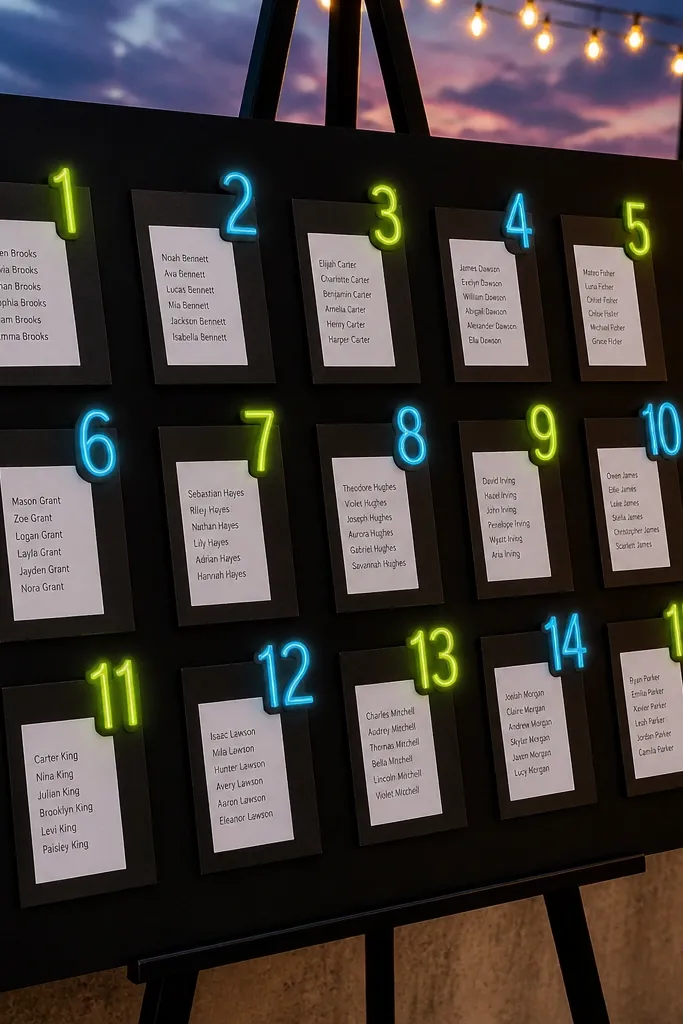
This is the bold, modern aesthetic seating chart wedding option that pops in night photos. Neon-style table numbers — done with a bright color like lime, teal, or coral — create instant visual hierarchy, while white name blocks keep text readable. It works best for evening receptions, rooftop weddings, and venues with darker interiors. The look is graphic and clean, not artsy-crazy, because the names still sit in a structured layout. If you want the chart to be a design moment, this style delivers without needing fancy materials.
Start with black cardstock as the base and choose one neon color for table headers only. Print or hand-letter table numbers large and place them at consistent grid positions. Add name lists in white on separate strips or blocks so each table reads like a panel. Then mount the chart on foam board or a framed backing and place it under soft lighting — avoid direct glare spots.
Quick tipTest your neon color with venue lighting; some shades look dull under warm bulbs.
Skip thisDon’t color the names too — neon should be headers only for readability.
13. Wood slat runner with table tags clipped in rows
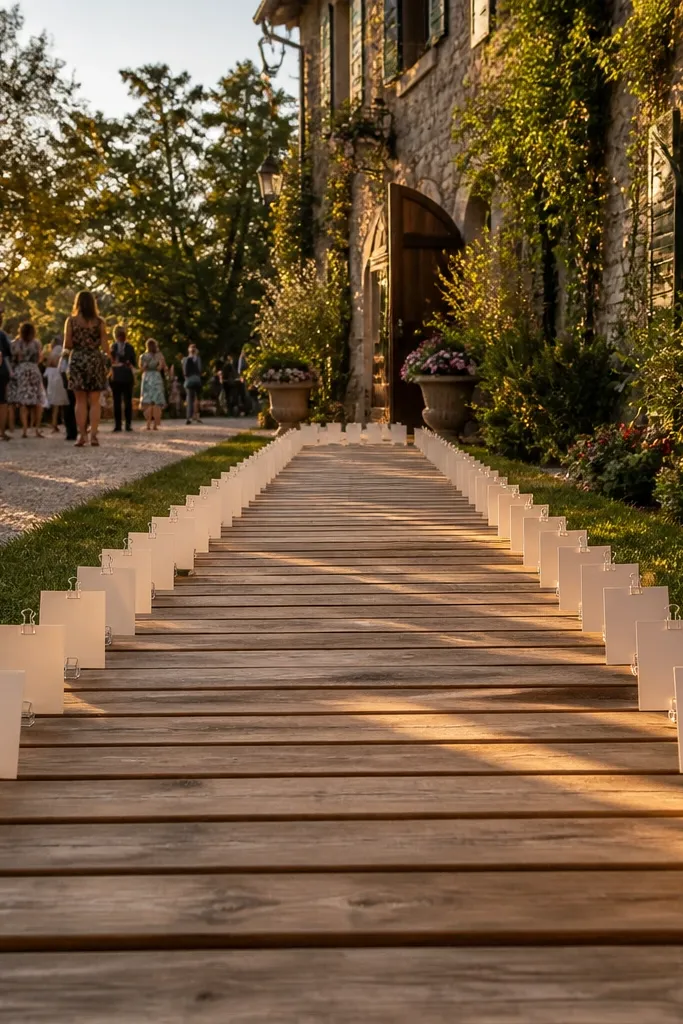
A wood slat runner is a warm, modern way to present a seating chart wedding without a big wall sign. The slats create natural separation, and clipped tags make the display look organized. It’s ideal for long reception entrances, outdoor pathways, or venues where a standing sign feels awkward. The photo appeal comes from the repeating lines of wood and the tidy rows of tags. Guests also get a clear scanning path — table numbers lead the eye down the runner.
Start by choosing a wood slat runner length that fits your space, then determine how many table rows you need. Create uniform table tags and name cards, then clip them onto the slats using mini clothespins or binder clips. Keep each table section the same height so the runner looks even. Finally, anchor the runner so it doesn’t shift, and place it where guests naturally walk through, like beside the bar or near the entrance.
Use weather-resistant clips if it’s outdoors; rust stains look bad in photos.
Skip uneven tag sizes — if the cards vary, the whole runner looks cluttered.
14. Long acrylic shelf with mini frames for each table
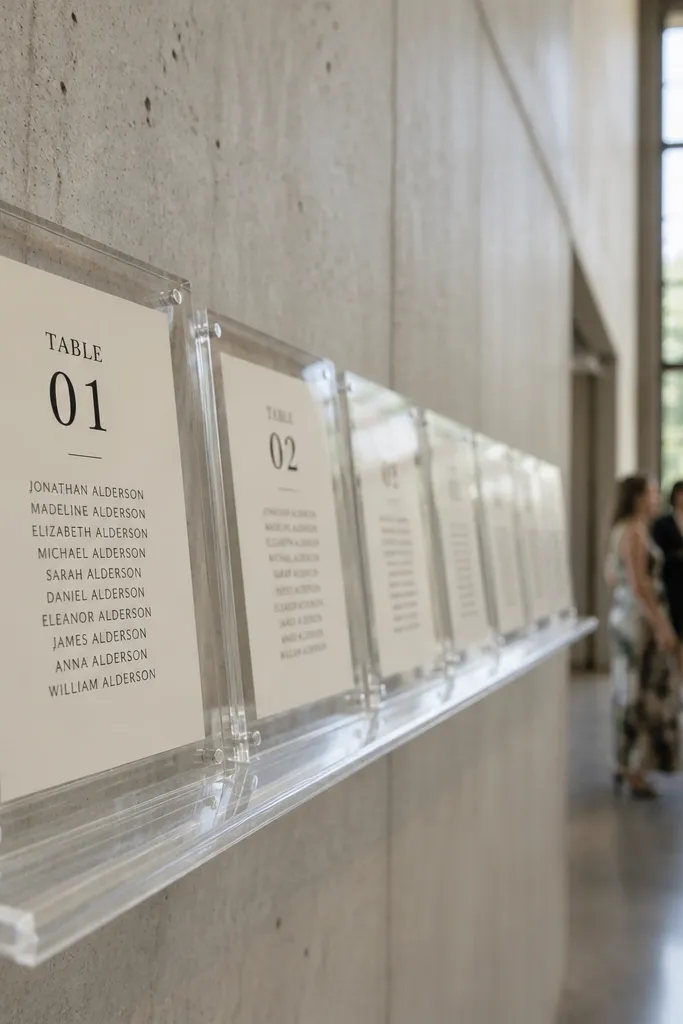
A long acrylic shelf turns your seating chart wedding into a display guests can browse like a gallery. Each table gets its own mini frame, so you avoid the “one big list” problem that makes names hard to read. This style looks especially good for modern, clean venues and weddings with a strong stationery aesthetic. The clear shelf adds a sleek feel, while the frames keep each section aligned. It’s also practical: swap only one mini frame if you have changes. Aesthetic comes from uniform frame sizes and consistent spacing along the shelf.
Start by measuring the wall or table space where the shelf will sit, then pick a shelf length that leaves about 2-3 inches between table frames. Print each table’s names on a separate sheet sized to fit a mini frame, and keep the table number as a bold header inside the frame. Mount the shelf securely and level it so the frames sit straight in photos. Finally, label the back of each mini frame with the table number so swapping during setup is quick.
Quick tipPack a microfiber cloth for the acrylic shelf; fingerprints show up instantly under venue lights.
Skip thisDon’t mix frame colors — even one different frame tone makes the display look accidental.
15. Escort-card style seating chart with oversized table cards on stakes
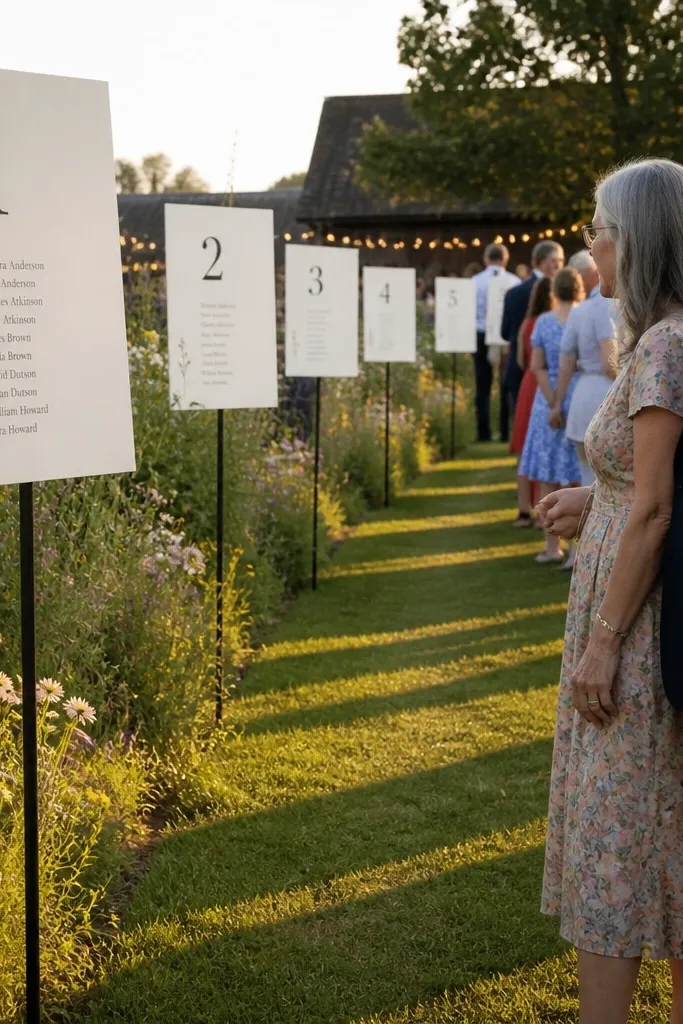
This is the seating chart wedding idea that feels interactive and looks great outdoors. Instead of a single board, you use oversized table cards on stakes, and guests find their names by table. It works well for garden weddings, farm venues, and receptions where guests walk through the space before dinner. The aesthetic is in the scale: large typography and clean name slips that don’t look tiny. If your goal is a beautiful display, stakes give you height, and height makes photos look intentional.
Start by choosing sturdy stakes and large cards that can be read from 6-10 feet away, then plan one stake per table cluster. Print table numbers big and clip or attach small name slips beneath each number in a consistent order. If you’re worried about wind, use clear acrylic clips or lamination for the name slips. Finally, place the stakes along a path with a clear flow so guests don’t crowd one spot.
Quick tipDo a quick test at the exact time of day photos will be taken; shadows can hide lower name slips.
Skip thisSkip low stakes — if the cards sit too low, the chart looks messy and names become unreadable.



