
1. Stacked linen napkin fan with a matching mini candle tray
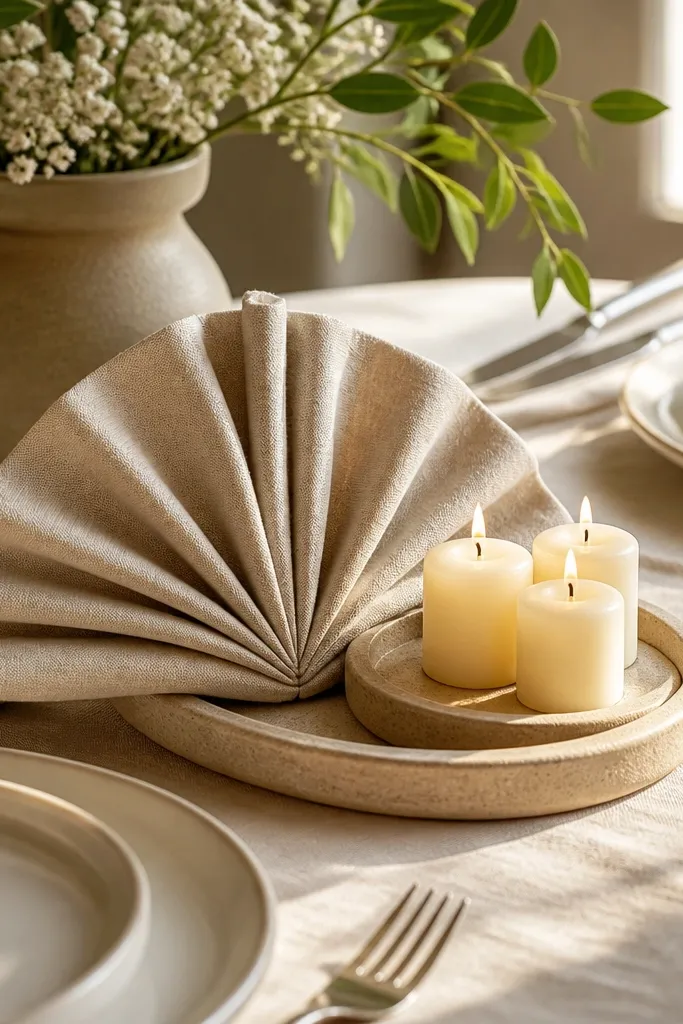
This setup looks styled because the napkin fan creates a clear shape and the tray keeps everything aligned. Use it when you want a centerpiece that feels intentional but not tall, which is great for head-to-head tables where guests need to see each other. The best part is the photo contrast: the crisp folds catch light while the candles stay soft and warm. It works with both rustic and modern venues since linen reads “handmade” without looking messy. If your tablecloth is plain, this gives you a focal point that still leaves room for plates and glassware.
Quick tipUse weighted candle bases or adhesive candle dots so nothing shifts when guests bump the table.
Start by folding napkins into a fan shape and placing them in a neat stack on a shallow tray. Then set one short pillar candle in the center and add 2-4 tea lights around it, leaving space so flames don’t crowd. Finally, tie a thin ribbon around the napkin stack or tray handle using the same accent color you’ll use on place cards or menus. If the tray is too wide for your table, switch to a narrower tray and keep the candle placement centered.
Skip thisDon’t mix three different napkin fabrics on one table; the fans lose their clean look.
2. Short bud vase clusters in a repeated grid
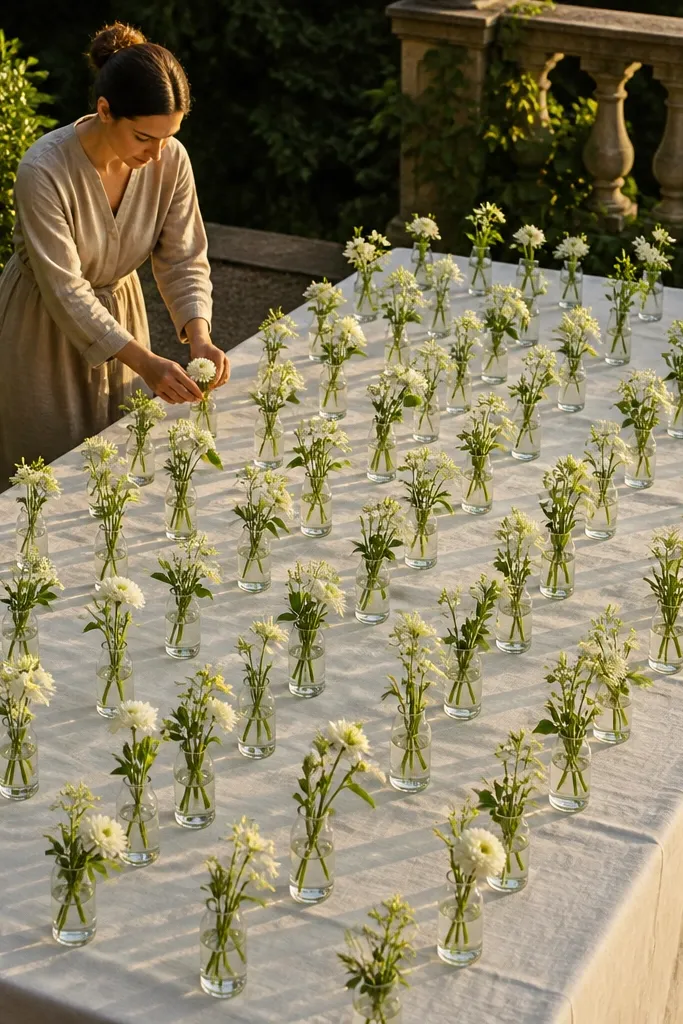
A repeated grid of short bud vases reads organized in photos and still feels DIY-friendly. This works especially well for outdoor ceremonies with bright backgrounds because the vessels frame the stems instead of disappearing into the table. The single-stem approach keeps the look airy and avoids the “messy bouquet” effect. You’ll get a consistent rhythm across the table, which makes even a simple venue look designed. Choose stems that match your palette so the grid looks intentional, not random.
Start by setting 9-12 bud vases in a straight grid across the center of the table, spacing them evenly (about 6-8 inches between centers). Then fill each vase with one stem or one small sprig bundle so every vase contributes a similar visual weight. Finally, top each vase with the same finishing element — either a thin ribbon wrap around the stem base or a tiny sprig tied with twine. If your table is long, repeat the grid pattern with a slight break at the ends instead of stretching one huge cluster.
Group vases by size: use the same height for at least 80% of them so the table looks level.
Skip mixed-tall vases in the same row; they create uneven heights that look chaotic in wide shots.
3. Candle-and-greenery "floating" garland on a runner
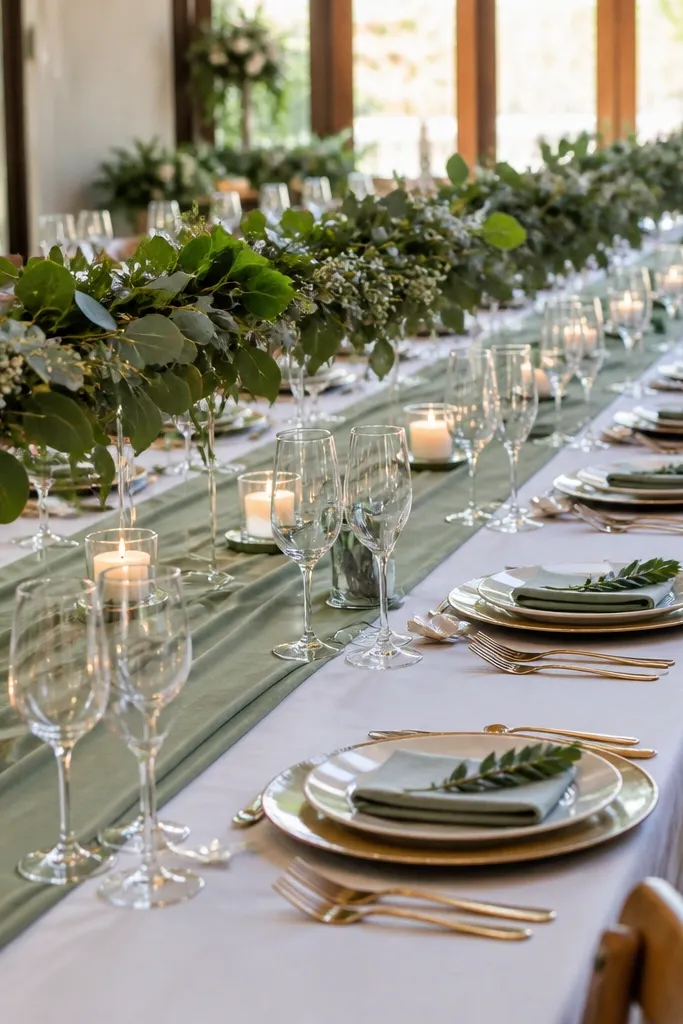
A runner with a greenery border and evenly spaced candles gives you a “floating” look without needing tall decor. It’s ideal for venues with long tables or when you want the centerpiece to stretch across the center line. The greenery adds texture, while the candle spacing creates a rhythm that reads beautifully in both daylight and evening. This style also hides small table imperfections because the runner draws the eye to the center. Keep the candles short so the greenery feels like a frame, not a wall.
Quick tipIf your runner is thin, iron it flat and add a non-slip mat underneath to stop drift during setup.
Start by placing a 12-16 inch runner centered on the table and pinning corners if it slides. Then add a strip of greenery along both sides of the runner, keeping it low and slightly uneven for a natural look. Finally, place 3-5 short candles along the middle line, spaced evenly, and tuck small filler leaves under candle bases to anchor them. For extra polish, tie a narrow ribbon bow at the midpoint of the runner and trim the ends.
Skip thisDon’t overload the runner with too much greenery; it should frame candles, not swallow the table.
4. Clear acrylic "confetti" votive holders with rose-gold accents
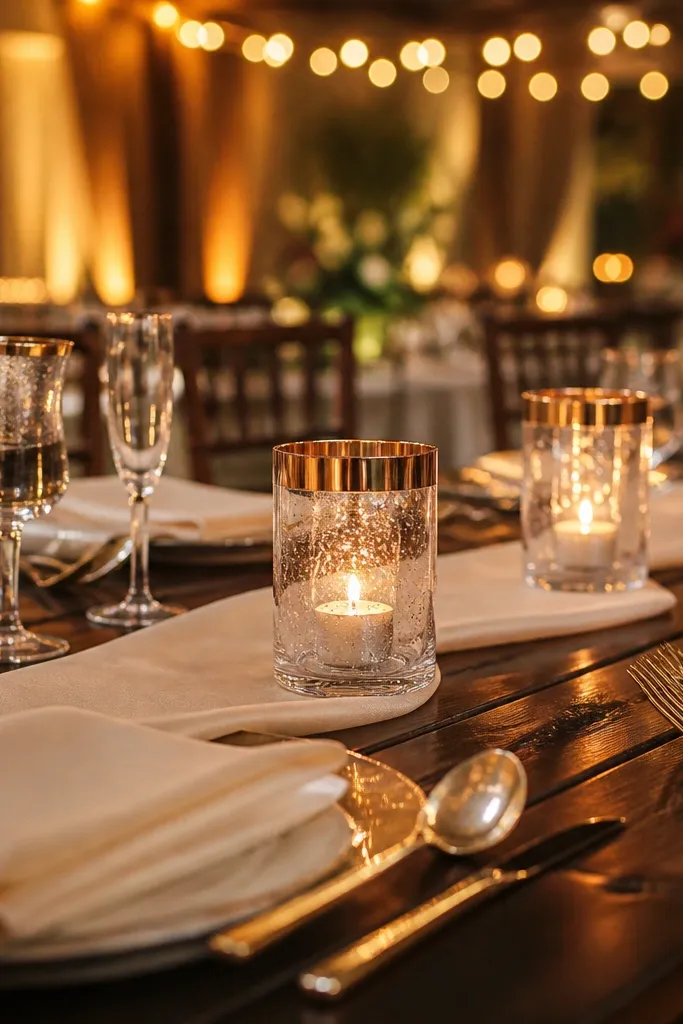
Clear acrylic votive holders give you bright highlights that photograph well, especially under string lights or warm ceiling fixtures. The trick is adding a small accent element that repeats — rose-gold, champagne gold, or copper — so the sparkle looks intentional instead of random. This setup is great for modern weddings where you want clean lines and lots of light without bulky florals. It also works for winter tables because the materials feel crisp and reflective. Keep the candles uniform so the holders look like a designed row.
Quick tipWipe acrylic with a microfiber cloth before set-up; fingerprints ruin the shine in photos.
Start by lining up 6-10 acrylic holders down the center or in two staggered rows, depending on table width. Then place the same color tea light (white, cream, or light amber) in every holder. Finally, add a tiny amount of decorative fill at the bottom of each holder — think foil confetti or small metallic flakes — and keep it consistent across all pieces. If you’re using rose-gold accents, match hardware-like details elsewhere like napkin rings or menu clips.
Skip thisDon’t use different candle sizes; uneven flames make the line look uneven.
5. Book-stack base with a single oversized dried stem
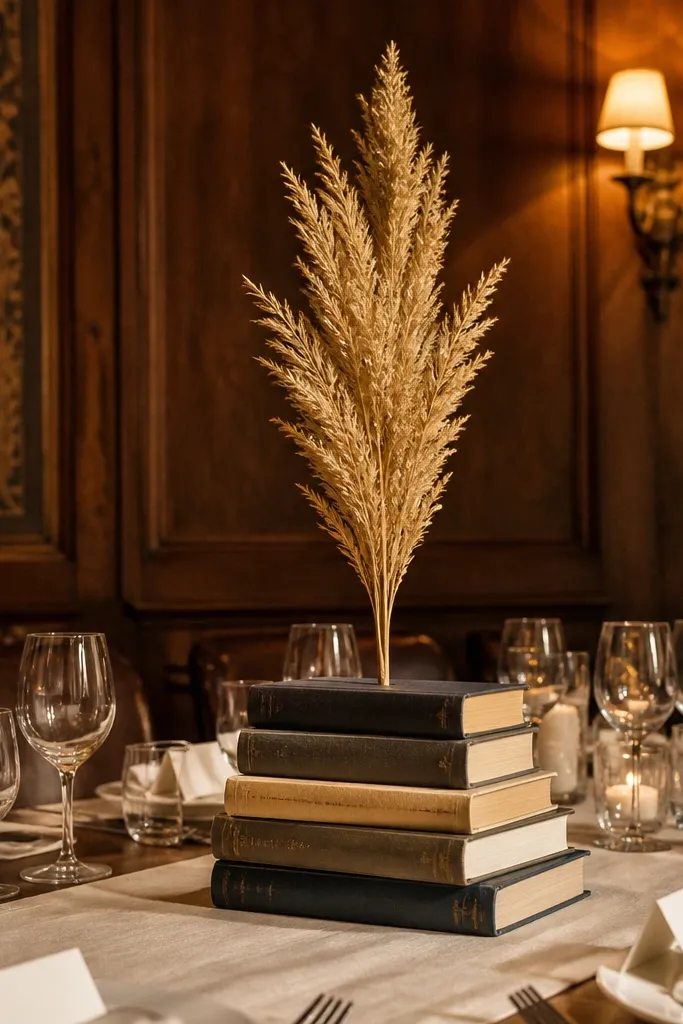
This is for tables that need height without clutter. A book stack creates a sculptural base so the dried stem looks intentional, like a gallery object. The oversized stem gives a strong silhouette in photos, which matters when your venue lighting is flat. This style suits vintage, neutral, and editorial aesthetics, and it’s easy to DIY without flower arranging. It also lets you keep fresh florals minimal since the dried stem does the heavy lifting.
Quick tipChoose one stem shape and repeat it across the table; variety makes it look like leftovers.
Start by stacking two to three books flat, then cover the stack with a thin neutral cloth or wrap paper to hide covers. Place a small vase or bud holder on top of the stack so the stem sits centered. Finally, use one oversized dried stem or pampas-style plume and secure it with floral tape or a hidden pin so it doesn’t lean. Keep the stem height around 16-20 inches above the table for impact while still keeping guest faces visible.
Skip thisSkip too many stems on one stack; it turns into a lopsided mess fast.
6. Mini terrarium centerpieces in matching glass bowls
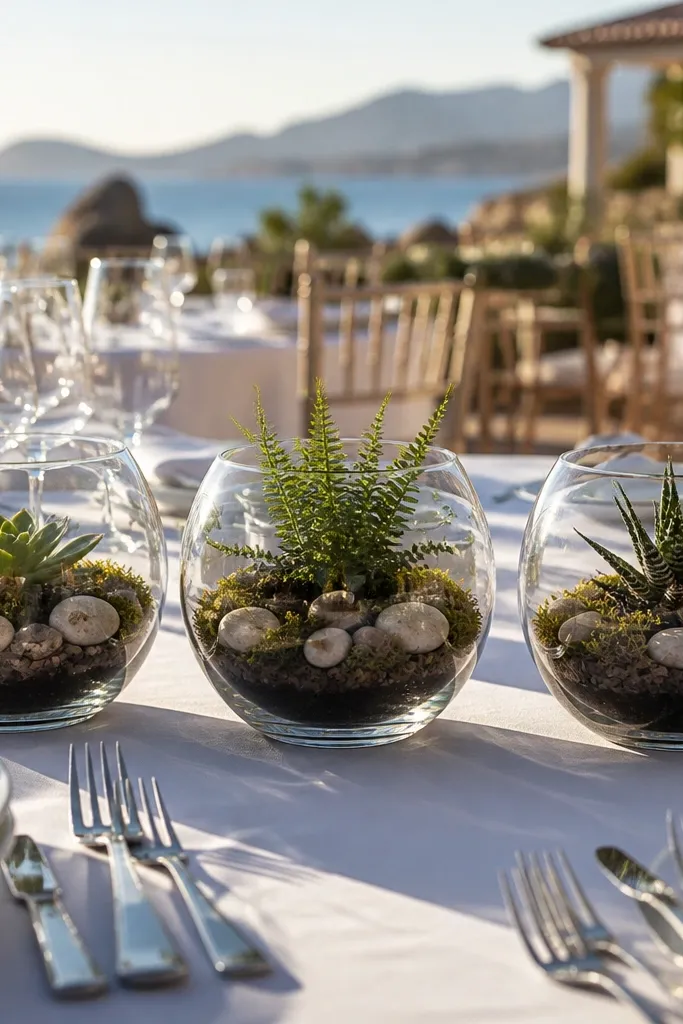
Mini terrariums look clean, modern, and calm in photos because the glass bowl is a contained frame. This works well for spring and fall weddings, especially when you want greenery that doesn’t shed or wilt in warm venues. The moss base adds texture, while the single plant element keeps the look from getting busy. It also gives you a centerpiece that feels different from candles and flowers, which helps your table stand out. You can theme the terrariums to your palette with a color-matched ribbon around the rim.
Quick tipUse shallow bowls so guests can see over them; deep terrariums read taller than you expect.
Start by placing a layer of dried moss or faux moss in each glass bowl and adding a small decorative stone base. Then insert one small plant element — a preserved eucalyptus sprig, a short fern, or a single decorative stem secured with floral wire. Finally, tie a ribbon around each bowl rim and keep the ribbon width the same across all pieces. If you’re worried about mess, line the bottom with a thin plastic liner under the moss.
Skip thisDon’t use loose potting soil that spills; it turns into dust on tablecloths.
7. Monochrome bud vase row with height graduated candles
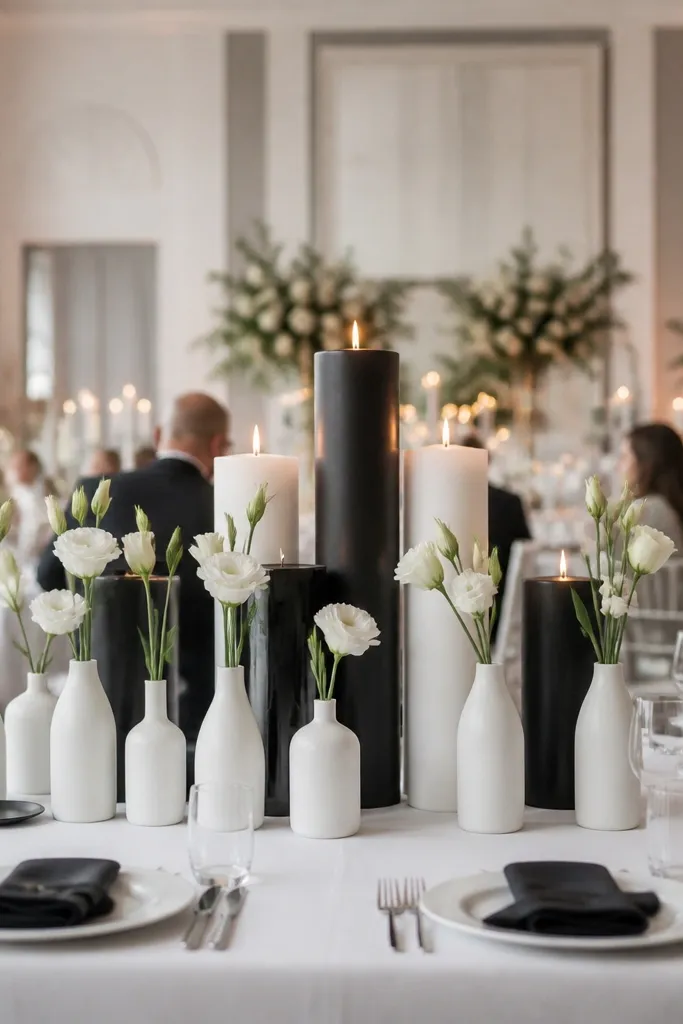
A monochrome approach makes DIY look expensive because your eye has one story to follow. The bud vase row gives structure, and the graduated candle heights add dimension without blocking faces. This style is perfect when you want a “clean editorial” look and your venue has busy décor — you’re giving the table a controlled visual zone. Choose one flower color plus one neutral — like cream flowers with white candles — and repeat it across the row. Photos love monochrome because it reduces color noise.
Quick tipMeasure stem length with a ruler once, then cut the rest in the same order for uniformity.
Start by placing 7-11 bud vases in a straight line along the center of the table. Then fill them with the same flower color and trim stems to a consistent length so the tops align. Finally, add candles at the ends and between vases using three heights (short, medium, short) rather than random sizes. Keep the tallest candle under 3 inches taller than the vase top so the line stays cohesive.
Skip thisDon’t sprinkle in a second flower color; it breaks the monochrome story instantly.
8. Twine-wrapped bottle trio with citrus slices as accents
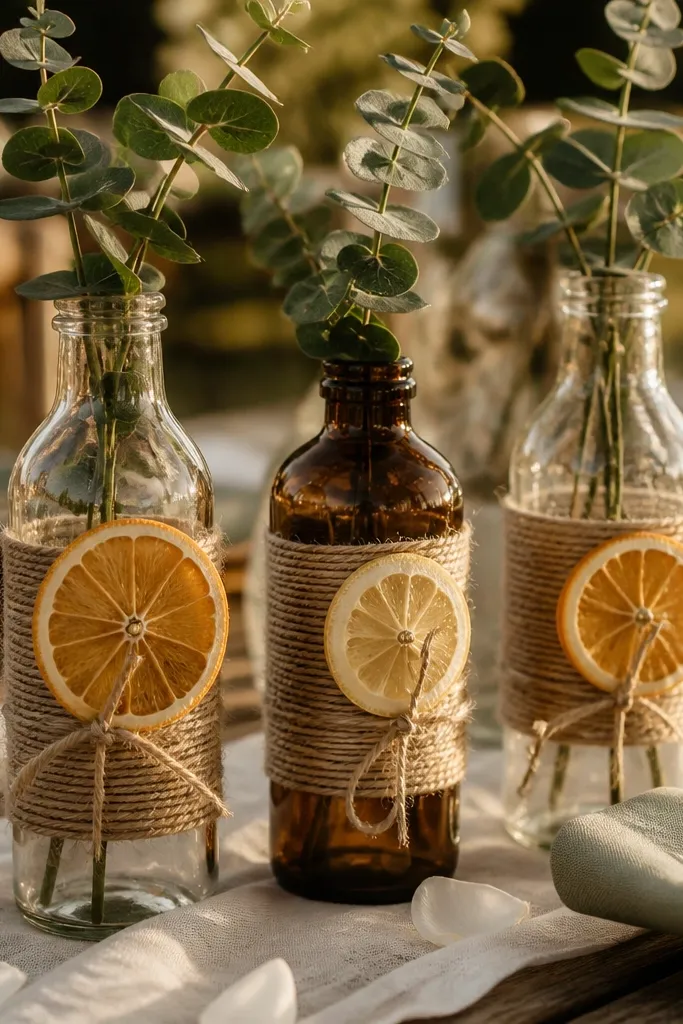
Twine-wrapped bottles add texture and a handmade feel, and citrus slices give you bright color that pops in photos. This is a great summer or early fall option when you want decor that looks fresh without complicated arrangements. The trio format keeps it tidy at each place cluster, and the citrus adds a “wow” detail without taking up table space. It also works for neutral linens because the citrus becomes the accent. Keep the slices as an accent, not the main plant — otherwise it looks like a craft table.
Start by wrapping three bottles (same height) in natural twine, then secure the twine with small knots at the neck and one mid-body wrap. Then add greenery or one stem per bottle and tuck citrus slices between the stems and bottle rim. Finally, tie a small ribbon bow around each bottle neck using a color that matches your napkins. Place the trio on a small tray so the bottles don’t wobble and the twine stays centered in photos.
Use dehydrated citrus slices if you’re doing this more than a day ahead; fresh slices weep and stain linens.
Skip wet citrus and expect it to stay clean on tablecloths.
9. Oversized ribbon bow center on a mirrored tray
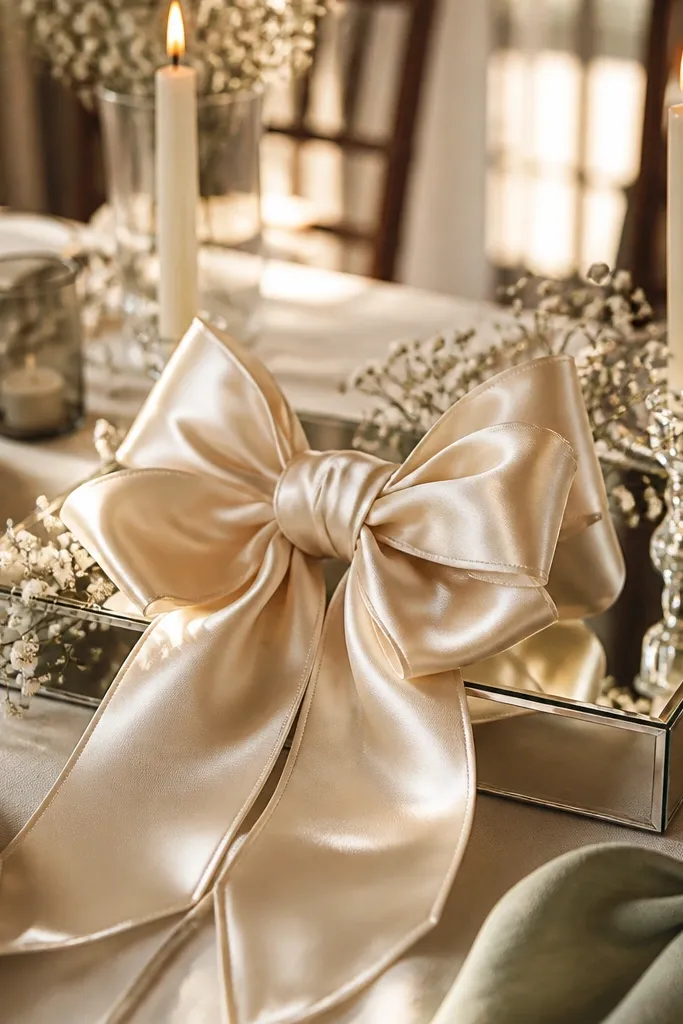
A mirrored tray turns simple materials into a high-impact centerpiece because it reflects candlelight and adds sparkle without clutter. The oversized ribbon bow is your focal point, and it photographs even when florals are minimal. This is best for modern weddings or winter tables where you want something graphic and controlled. Pair the bow with one candle or one short bud vase so the reflection doesn’t turn into visual chaos. If your venue has dark walls or low light, the mirror helps the centerpiece read clearly on camera.
Quick tipUse a ribbon length that can be trimmed and re-tied after you place it; perfect bows are easier when you adjust on the tray.
Start by placing a mirrored tray centered on the table, then add one short pillar candle in the middle. Next, create a large ribbon bow with loops about 10-12 inches wide and tie it around a ribbon-wrapped foam block or a small weighted base. Finally, position the bow so it leans slightly toward the camera and doesn’t cover the candle flame. Choose satin for shine or grosgrain for texture, but keep the ribbon material consistent across all centerpieces.
Skip thisDon’t add three different ribbon types; the bow loses its clean, intentional look.
10. Hydrangea-style paper flower clusters in clear cylinders
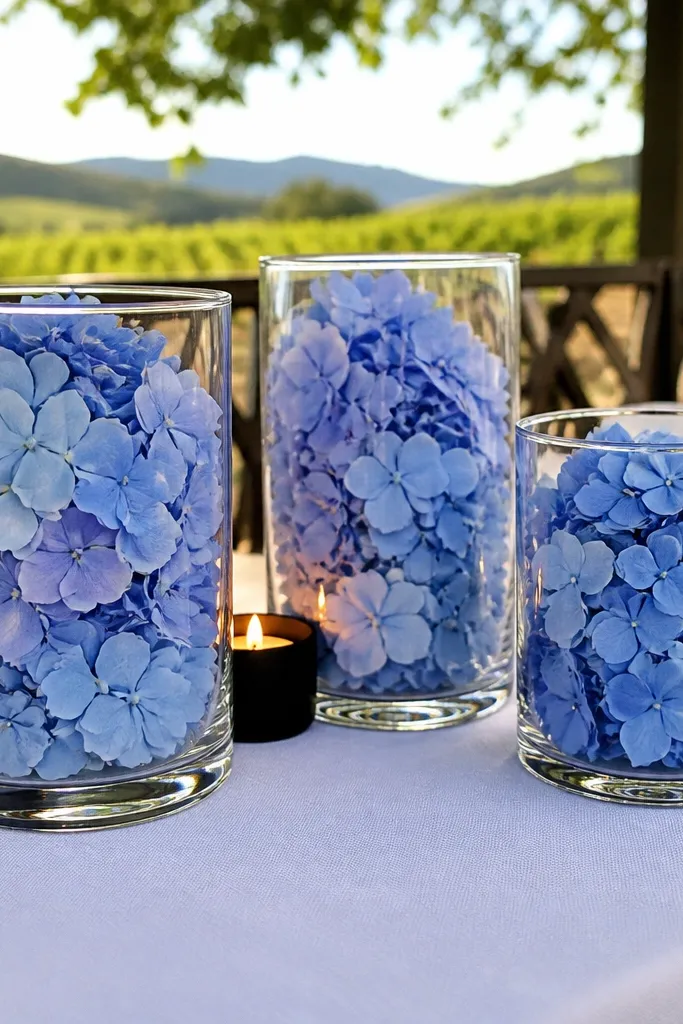
Paper flower clusters look striking because they hold their shape and stay photo-ready all day. Clear cylinders make them feel elevated — the cylinder walls frame the petals and reflect light from tea lights. This works when you want a big visual impact but don’t want fresh floral logistics. It also suits venues where flowers might wilt quickly due to heat or long ceremony-to-reception gaps. Choose one paper color family and add a warm light source below to make petals look dimensional.
Start by placing tea lights or LED candles at the base of clear cylinders so you get glow from underneath. Then build a cluster of 4-7 paper flower heads and secure them to a foam or floral pin base that fits inside the cylinder. Finally, trim stems or add greenery paper cutouts just at the edges so the cluster stays contained. Keep cylinder height around 10-14 inches so it looks like a centerpiece, not a lantern.
Use LED candles with a warm filter; cool LED light makes paper petals look flat.
Skip multi-color paper petals in one cylinder; it turns into a craft project instead of a centerpiece.
11. Terracotta tray with sage runner, candles, and olive branches
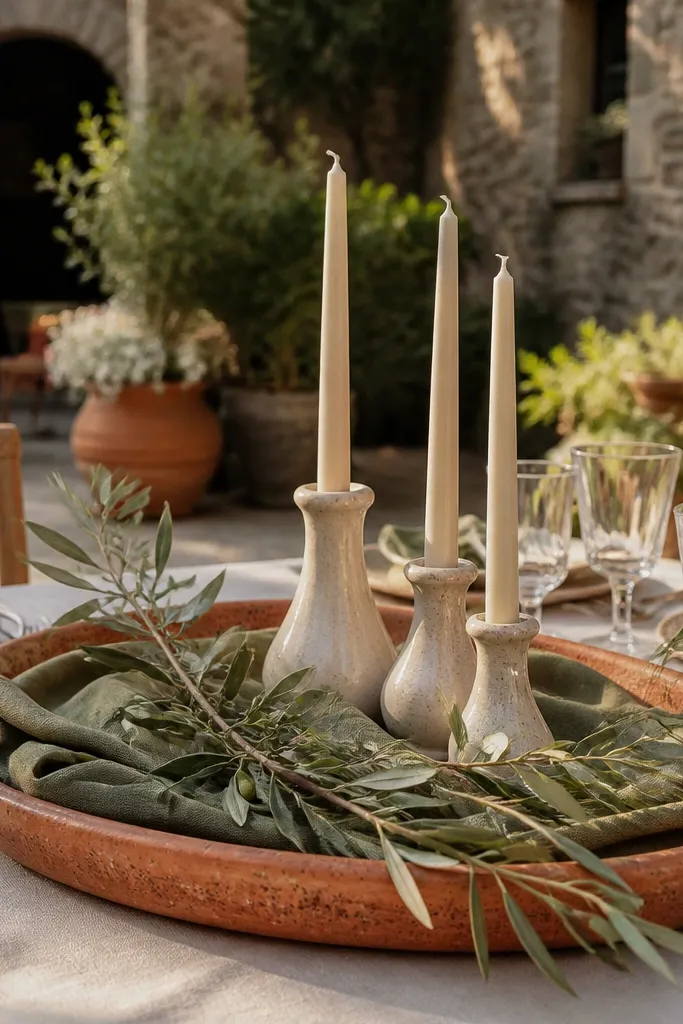
Terracotta and sage read earthy and photogenic without needing fancy florals. A terracotta tray anchors the centerpiece, while the sage runner gives you a soft backdrop for candles and olive branches. This is a strong choice for Mediterranean themes, rustic venues, or any reception where you want warm tones that don’t look orange on camera. The olive branches add movement and texture, and their muted color keeps the table from looking too loud. Keep the candle count modest so the tray stays elegant and not crowded.
Quick tipUse flameless candles if your venue has strict fire rules; the olive and terracotta still look great in daylight.
Start by centering a sage runner (12-16 inches wide) and placing a terracotta tray in the middle. Then tuck olive branches around the tray edges and add 3-5 short candles inside the tray layout, spacing them evenly. Finally, add a thin ribbon around the tray handle or a small bow tied to one branch for repeatable accent. If your tray is small, use fewer candles but keep the olive branches visible so the centerpiece has shape.
Skip thisDon’t use bright neon candles with earthy decor; the contrast looks accidental in photos.
12. Low floral ring centerpiece with floating candle halos
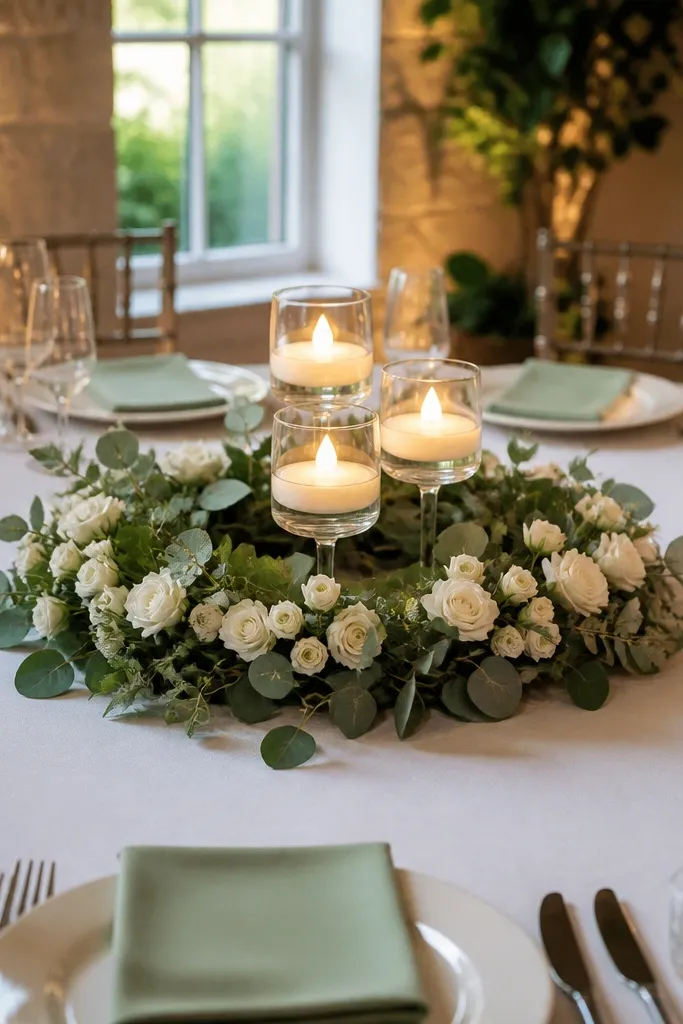
A low floral ring keeps sightlines open while giving you a clear “frame” look that reads instantly in photos. The ring shape also makes it easy to style symmetrically across multiple tables. This works best for round or rectangular tables where you want a centerpiece that doesn’t sprawl. Use fewer blooms than you think — the ring reads fuller because the shape repeats around the circle. Add small candle halos around the ring for warmth and a soft glow.
Start by building a low ring base using floral foam or a wire ring covered in greenery, keeping the finished height around 3-5 inches above the table. Then place a small cluster of flowers evenly around the ring — aim for 8-12 bloom points for a balanced look. Finally, tuck 6-10 tea lights around the outside edge of the ring on a tray or directly on the table if your table surface is safe. Keep candles short so the ring stays the tallest element.
If you’re using real candles, do a 10-minute dry run to confirm the ring doesn’t tip when you set the tea lights.
Don’t build the ring too tall; anything over 6 inches starts blocking faces.
13. Asymmetrical greenery drape with one statement candle column
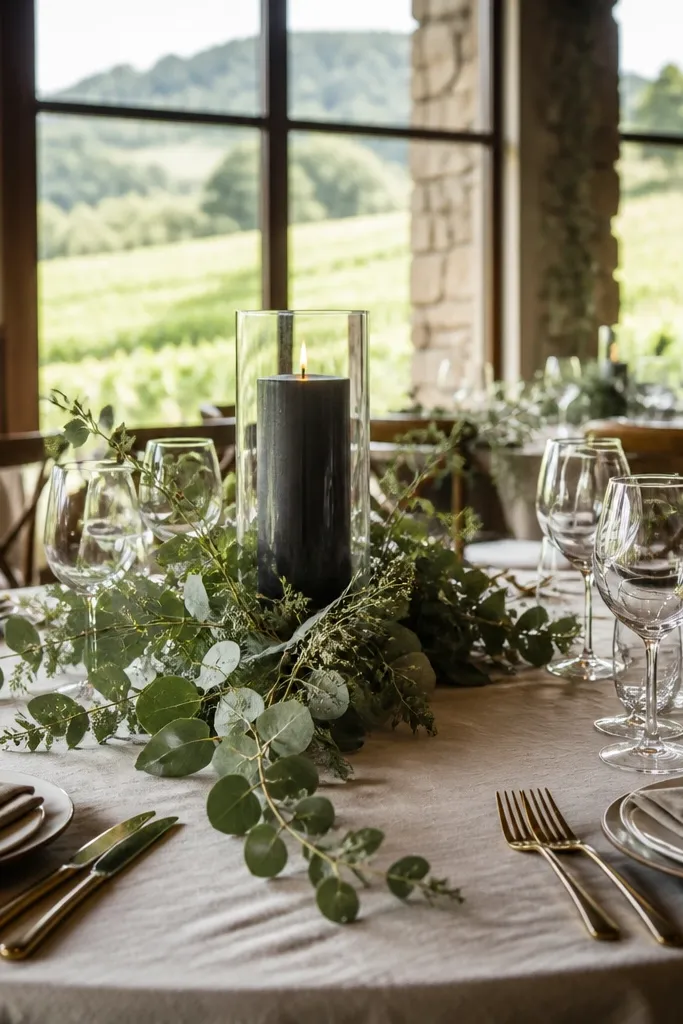
Asymmetry looks intentional when you keep one statement element — a candle column — and let greenery drape around it. This setup is great for tables that feel too plain and need direction in the photo. The candle column gives a vertical anchor, while the drape adds movement without covering plates. It’s also forgiving when your table surface isn’t perfectly even because the drape hides small gaps. Pick a deep green or muted olive so it looks rich without turning dark and heavy.
Start by placing a long tray centered on the table and setting one tall candle in the middle, keeping the candle height under 18 inches above the table. Then attach greenery to the tray with floral wire so it drapes off one side more than the other. Finally, add 2-3 short candles at the lower end of the drape for balance, and tuck small filler leaves near the candle base. Leave the top half of the tray cleaner so the drape reads airy instead of tangled.
Use floral wire, not tape, to secure the drape. Tape can peel and look messy when it warms up.
Skip multiple tall candles; two columns look busy and lose the asymmetrical effect.
14. Floating herb bundles tied with gingham ribbon
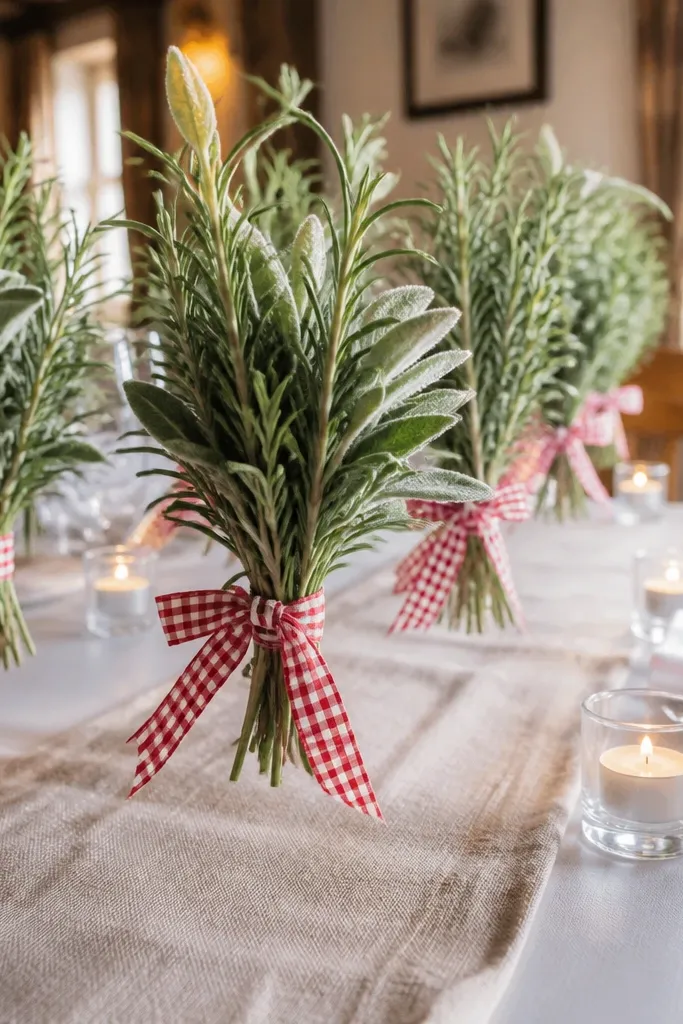
Herb bundles look charming and photogenic because they add texture and a lived-in feel. The key is “floating” placement: you don’t bury the herbs in a mound, you place small bundles in a row so each one reads as a separate design element. Gingham ribbon makes it look styled without needing expensive props. This works for brunch weddings, garden venues, and any reception where you want a cozy, casual vibe that still photographs clean. Keep bundles consistent in size so the row looks planned, not last-minute.
Quick tipChoose herbs with sturdy stems, like rosemary or thyme, so they don’t droop during the reception.
Start by tying small herb bundles (2-3 sprigs each) with twine and trimming ends so they sit neatly. Then place them along a runner or directly around the centerpiece area, spacing each bundle about 10-12 inches apart. Finally, wrap gingham ribbon around each bundle tie knot and tuck one small candle near the center so the herbs and light feel connected. If your herbs shed, mist lightly and spray adhesive on the ribbon only — not the leaves.
Skip thisDon’t add loose loose leaves to the table; they scatter and look messy fast.
15. Gold-rim bud vases with pearl string and single flower heads
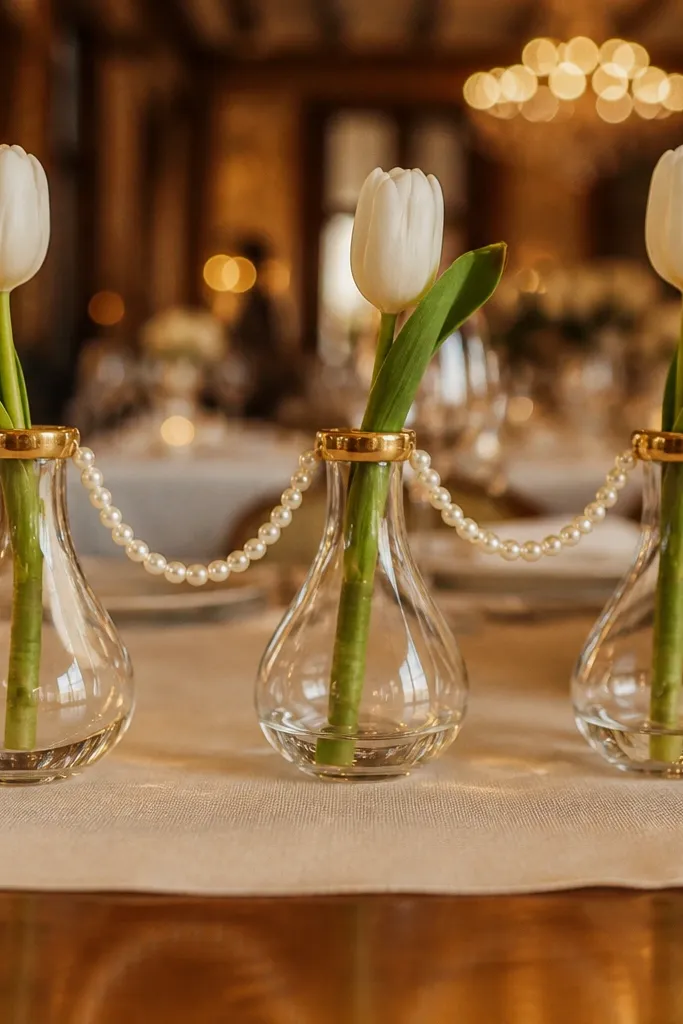
Gold-rim bud vases plus a pearl string looks luxe without being heavy. The single flower heads keep it modern and clean, while the pearl string adds a delicate line that reads well in close-up shots. This is a strong choice for indoor weddings with warm lighting where the gold catches highlights. It also keeps the table from looking over-decorated because the pearl detail is subtle. Use one accent flower color so the gold and pearls look intentional, not like mixed party supplies.
Quick tipUse a pearl string with slightly larger beads so it stays visible in photos from 6-10 feet away.
Start by setting 8-12 gold-rim bud vases in a neat line along the center of the table. Then place a single flower head in each vase, trimming stems so the flower tops align. Finally, drape a pearl string lightly across the table edge or around the vase row, keeping it loose enough to look natural rather than tangled. Secure the pearl string with double-sided tape under the runner edge so it doesn’t slide.
Skip thisDon’t use pearls and heavy lace at the same time; it looks costume-y fast.



