
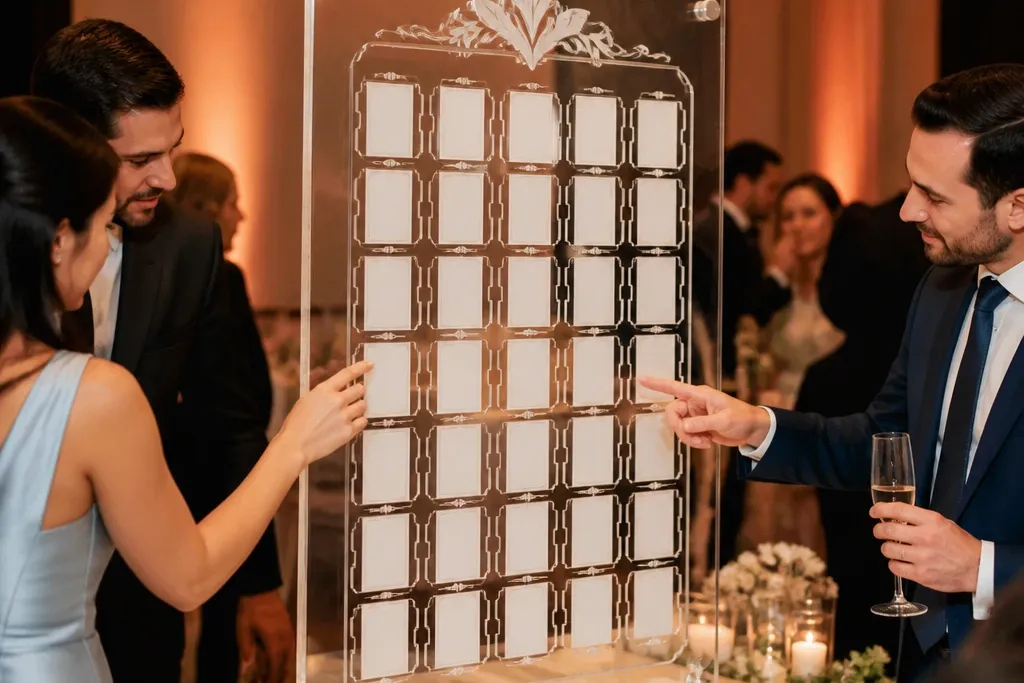
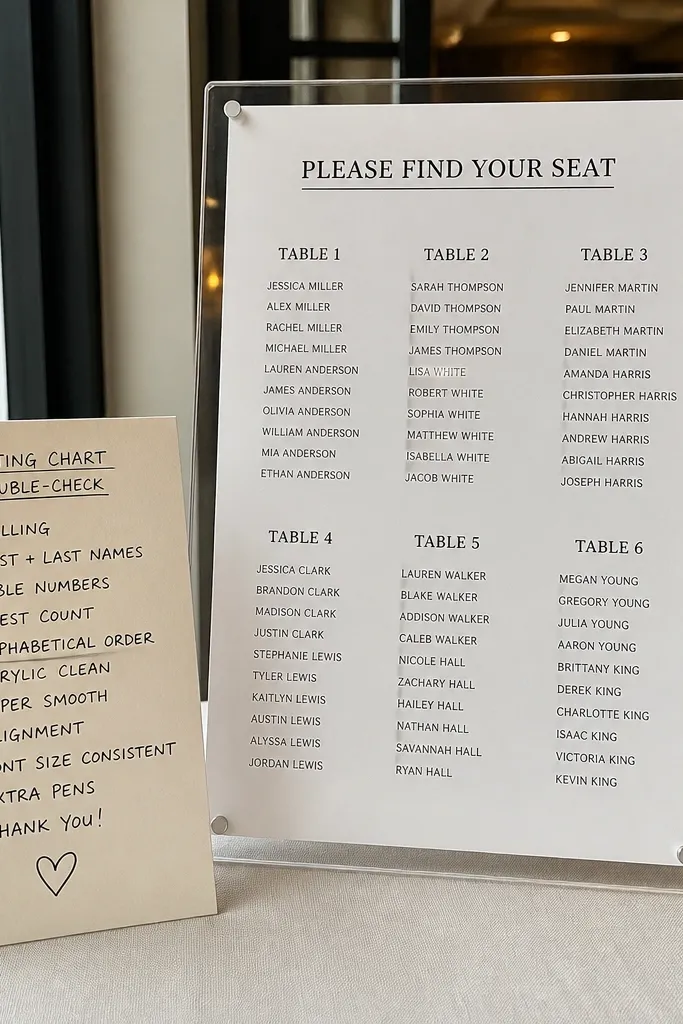
1. Satin frosted acrylic with UV-printed table numbers
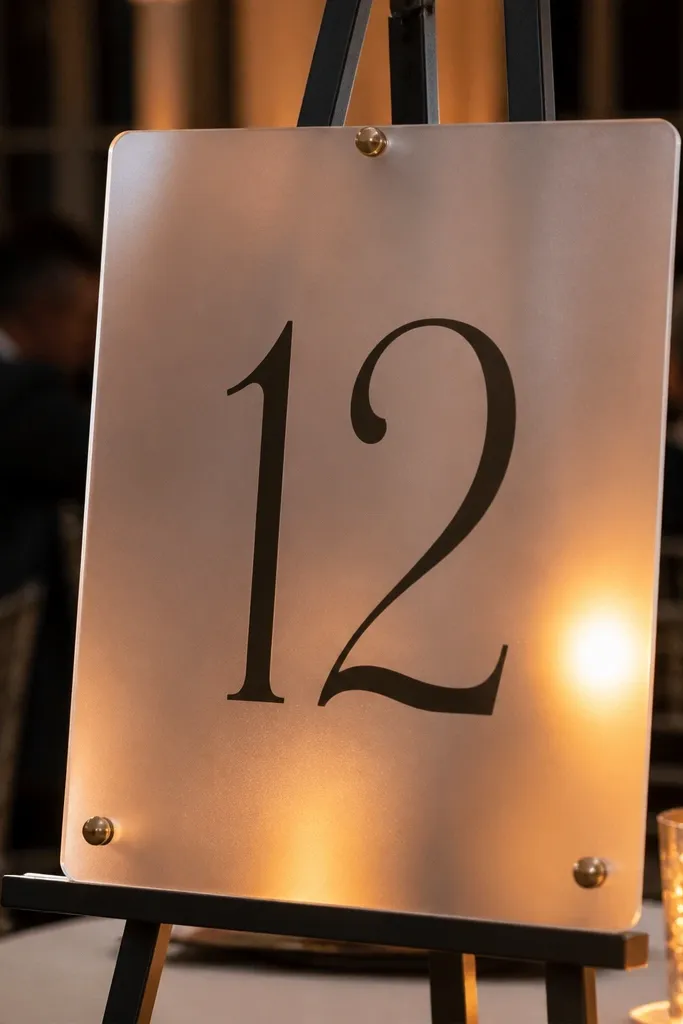
This is the most reliable “looks expensive and reads instantly” setup. Frosted acrylic removes the harsh reflections that make clear boards hard to read from across the room. UV-printed text stays sharp and doesn’t look like it’s peeling or misaligned. It also photographs well because the board doesn’t flare under direct lights.
Start by choosing a satin/frosted face and a dark text color like charcoal or near-black so names stay legible at 6-10 feet. Then request UV-printed text (not vinyl) and keep table numbers at least 2.5-3 inches tall depending on your board size. Finally, mount it at eye level and angle it slightly toward the guest flow so people don’t read it sideways.
If your venue has spotlights aimed at signage, frosted beats clear every time.
Skip clear glossy acrylic with light gray fonts — glare and low contrast make it a guessing game.
2. Clear acrylic front with white backer and bold black list
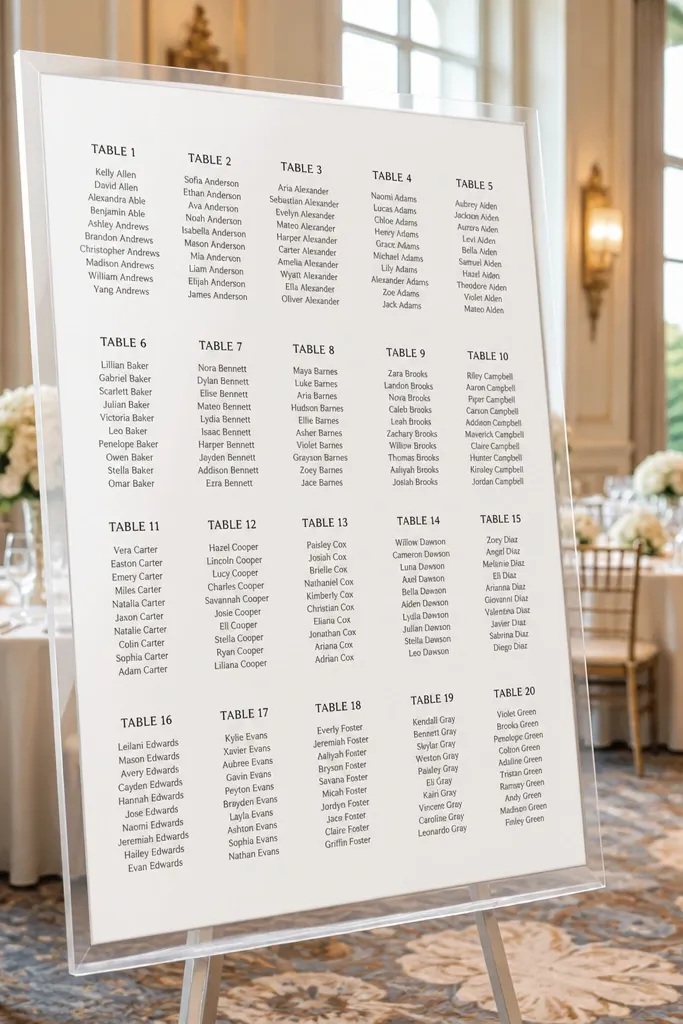
This style keeps the modern acrylic look but fixes the biggest problem with clear boards: readability. The white backer gives your text a solid contrast layer, so your names don’t fade into reflections. It also looks clean in close photos because the “card” effect is crisp. If you love the transparent look but your venue lighting is unpredictable, this is the smarter version of clear.
Start with a white acrylic or foam backer behind the clear sheet and use pure black or deep espresso for text. Then set your layout so table numbers are a separate column or line above each list, not mixed into the names. Finally, use standoffs or a rigid frame so the board sits flat — warping makes text look uneven in photos.
Ask for a backer that’s slightly larger than the clear sheet so edges don’t show misalignment.
Don’t print dark text directly on clear with no backer — guests will squint.
3. Acrylic table tiles grid (separate panels per table)
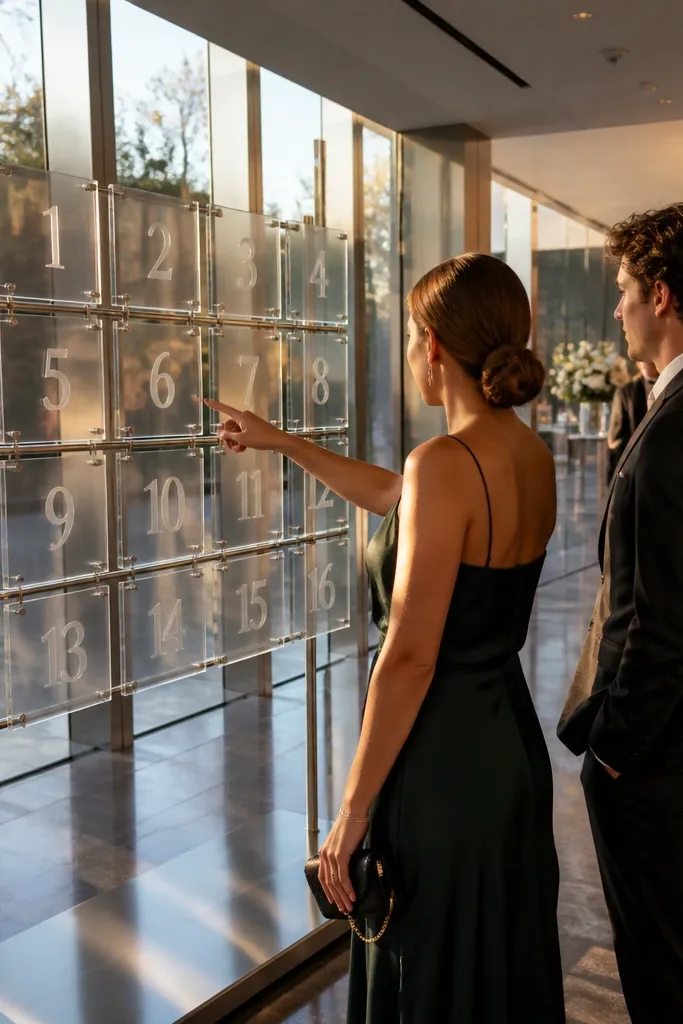
If you have lots of tables, one big chart becomes a wall of text. A grid of separate acrylic tiles fixes that because guests find their table fast and ignore everything else. It also looks intentional, not like you tried to cram too much into one rectangle. This works especially well for 14-20 tables because each tile acts like a mini sign.
Start by splitting tables into panels of equal size and keep each tile’s name list to a readable line count. Then design with consistent spacing: one table number at the top, names aligned in rows, no decorative dividers between tiles. Finally, mount the grid on a sturdy backing board or frame so gaps stay even and the whole layout reads straight.
Quick tipUse a simple numbering system on each tile (e.g., “Table 12”) so guests don’t need to interpret your design.
Skip thisAvoid a single dense chart for 14+ tables — it defeats the whole point of acrylic signage.
4. Engraved acrylic numbers with printed names
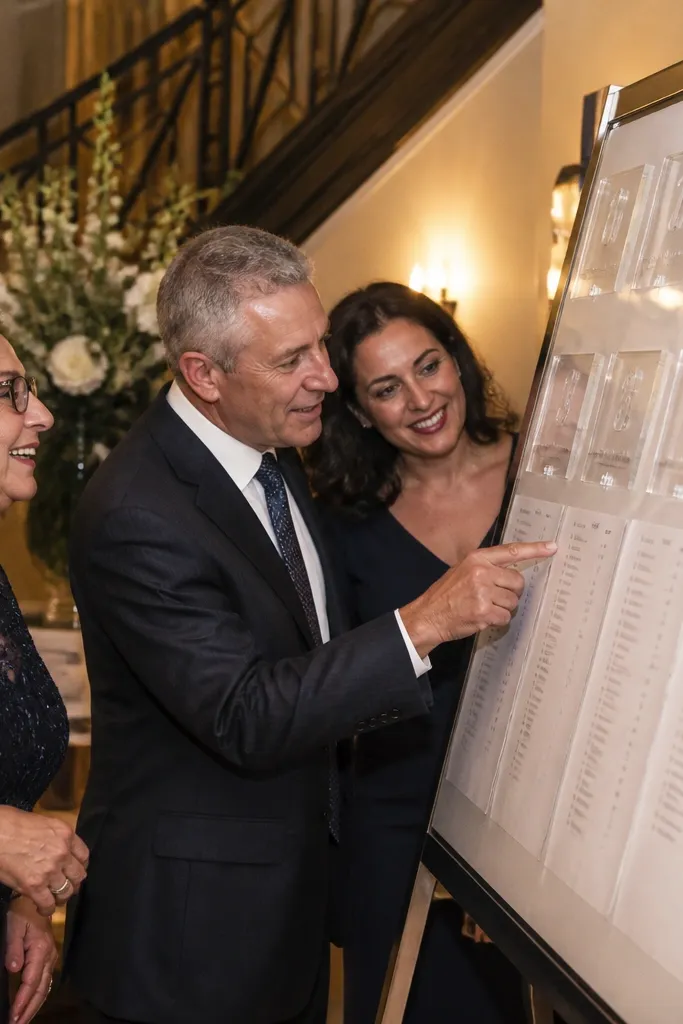
Engraving gives you a tactile hierarchy that looks classy without clutter. The engraved numbers catch light differently than flat ink, so they stay noticeable even from farther away. Pairing engraved numbers with a printed name list keeps the text crisp and fast to read. This is a strong choice when you want a minimal chart that still feels “wedding-made,” not generic.
Start by choosing a frosted or clear-with-backer base so engraved numbers have a high-contrast backdrop. Then keep names printed (UV or high-resolution print) and limit decorative fonts — let the numbers do the styling. Finally, check the depth and font size on a proof: shallow engraving looks pretty close-up but can disappear at distance.
If your venue is bright, engraving on frosted acrylic reads better than engraving on glossy clear.
Skip tiny engraved fonts — they look nice up close and fail from across the room.
5. Layered acrylic with top title in script and clean sans lists
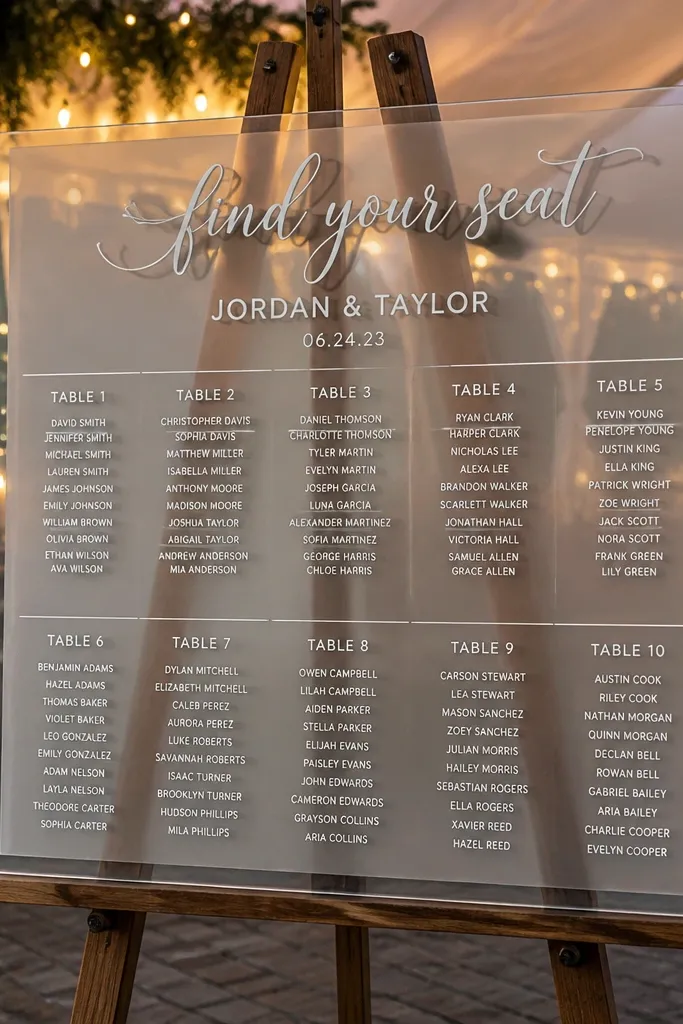
Layering gives depth without turning the chart into a scrapbook. The trick is font discipline: use a script only for the title line, then switch to a clean sans-serif for names and tables. When you do it this way, the design feels romantic but still functions. This option is great for couples who want the seating chart to look like part of the wedding stationery set.
Start by designing two layers: a front layer for the title and main text, and a second layer for contrast (often a frosted or colored backing). Then set font sizes with rules: table numbers bigger than names, names bigger than anything decorative. Finally, mount with spacers so the layers cast a subtle shadow instead of touching.
Choose script that stays readable at 2-3 feet, not a thin calligraphy style.
Don’t use script for the tables or names — it slows reading and increases mistakes.
6. Acrylic compass-style layout with numbered sections
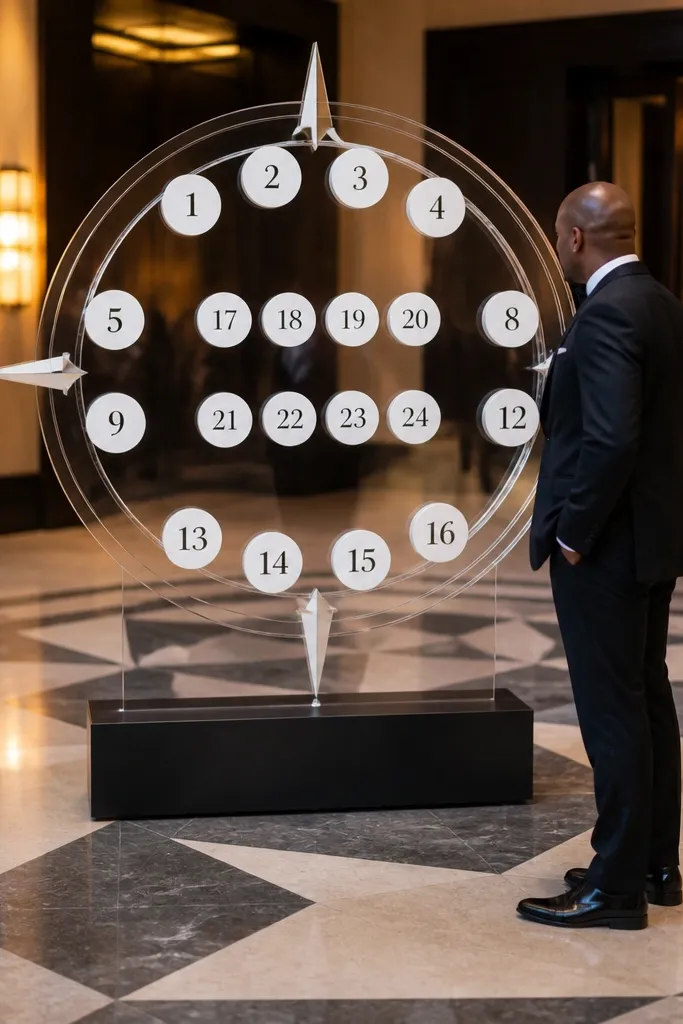
This layout looks graphic and modern, but it only works if you keep the structure simple. Numbered sections create natural scanning lanes, so guests don’t have to move their eyes across a full-width wall of text. It’s a good match for venues with geometric decor or a modern travel vibe. The best version uses straight lines and consistent blocks, not swirling flourishes.
Start by dividing the board into 4-6 large numbered regions, then place table lists inside each region with clear headers. Next, keep your table numbers consistent in size and alignment so the chart doesn’t feel random. Finally, choose a satin or backer-based finish so the lines stay crisp under event lighting.
Quick tipUse generous margins between sections; tight borders make names blur together in photos.
Skip thisAvoid decorative arrows and swirls that hide the table number — guests don’t read art.
7. Two-panel acrylic chart for first look and reception flow
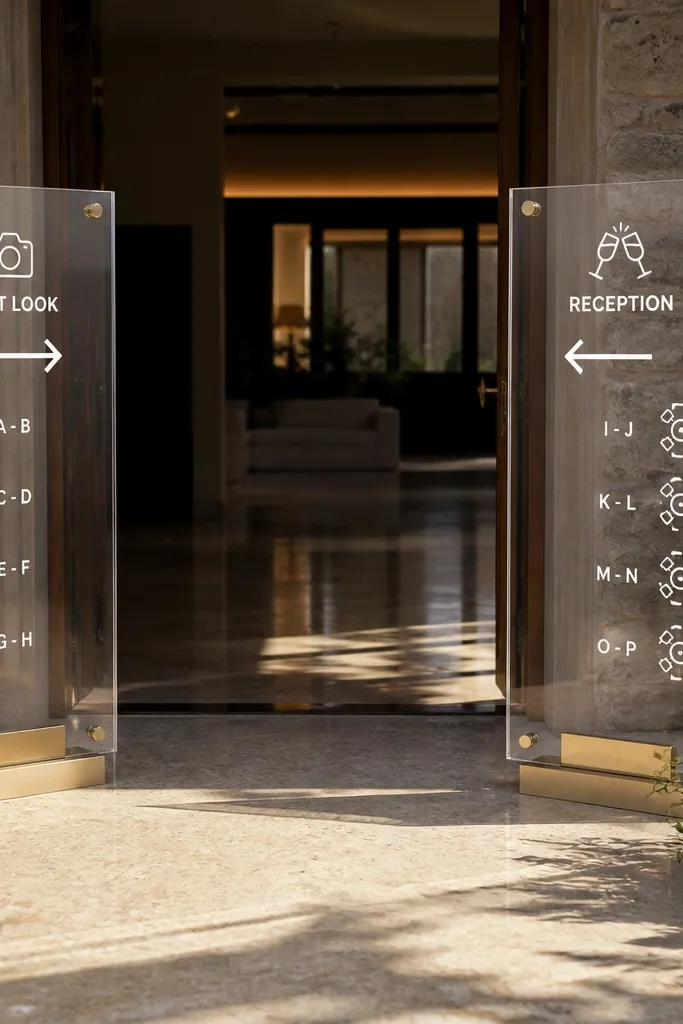
One board can get crowded fast, especially if you also want a “where to go next” cue. Two panels solve that by splitting information into two clean destinations. Guests feel guided instead of confused, and your photos look staged because signage looks intentional in multiple spots. This works when your ceremony and reception spaces are different or when you have a cocktail hour setup.
Start by deciding what each panel covers: one panel lists tables, the other lists a quick directional cue like entrance table or room location. Then size both panels so each name list stays readable without shrinking fonts. Finally, place the first panel at the arrival path and the second near the seating entrance, both at the same height.
Quick tipKeep both panels matched in finish and font so they look like one system, not two random signs.
Skip thisDon’t combine directions and full table lists on one board — it turns into clutter.
8. Colored backer acrylic with white text for a bold look
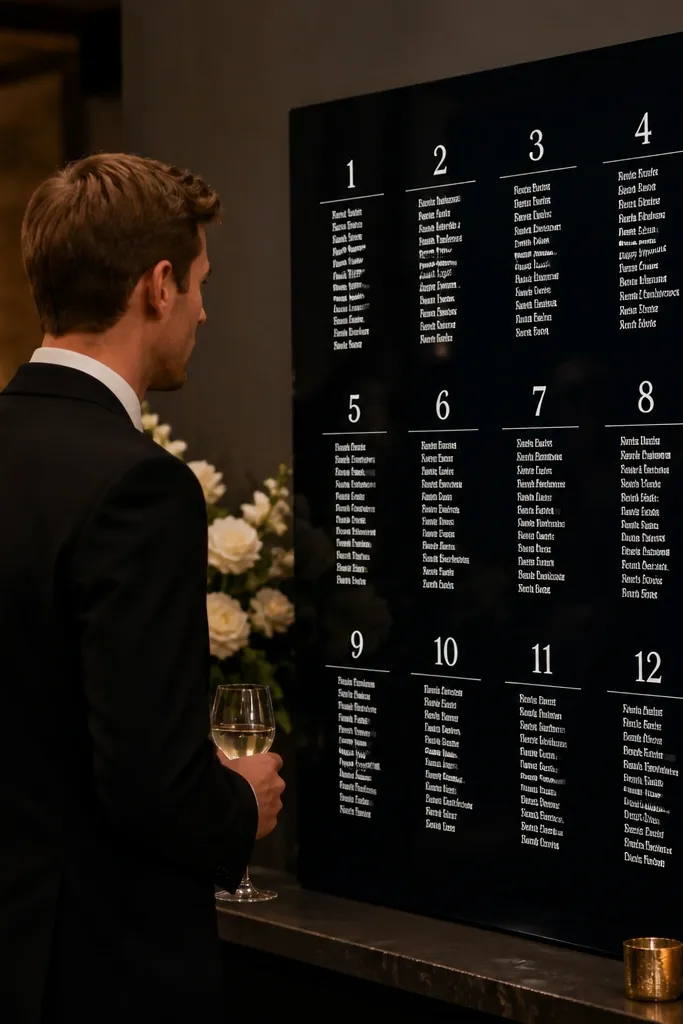
If your wedding palette includes deep colors, a colored backer makes the acrylic pop. White text on a dark backer reads cleanly and looks dramatic in night lighting. This option is best when your color is consistent across other signage, linens, or menus. The downside is that light backers can wash out text, so you want high contrast.
Start by picking a backer color that’s dark and steady, like navy or charcoal, then use white or light gray text with strong weight. Next, keep line lengths short by limiting how many names sit on one row. Finally, check the board under your venue lighting: if the backer looks too reflective, switch to satin or matte finish.
Use the same backer color on welcome signs or menus so the set looks coordinated.
Skip bright pastel backers with white text — it reduces contrast and kills readability.
9. Oversized acrylic with vertical table columns for easy scanning
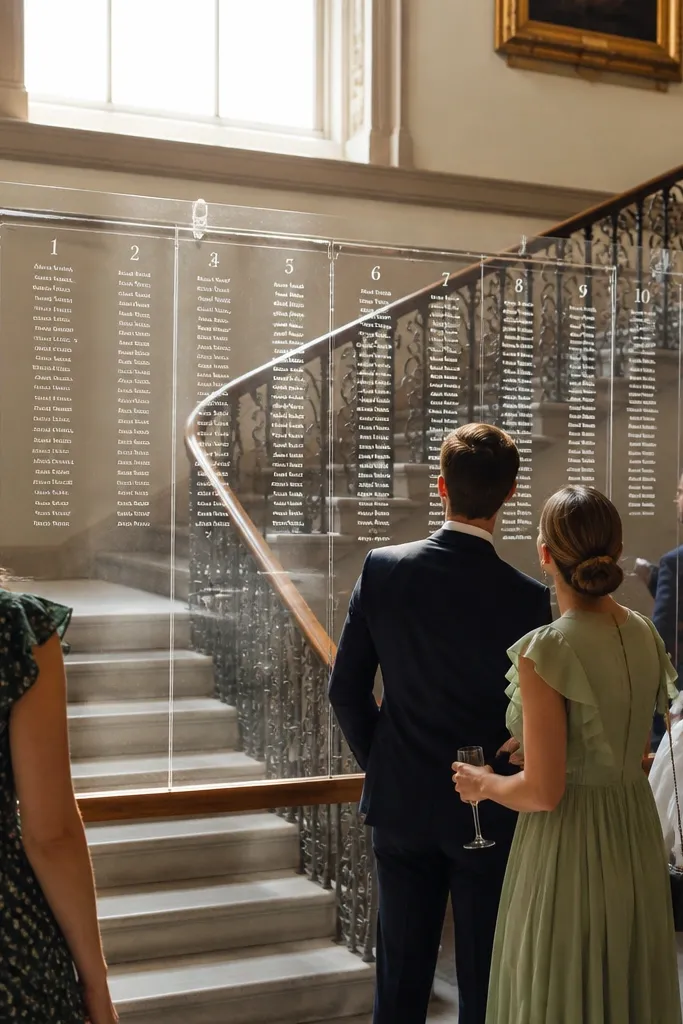
Vertical columns are the simplest way to make long lists readable. Guests find their table number in one column and then read down, which beats scanning across a wide sheet. This works well for mid-size events with 10-16 tables because it prevents the “name spaghetti” effect. It also looks clean in photos because the text forms structured stripes.
Start by choosing a board size that lets you keep names in short lines, then assign each table a dedicated vertical column. Next, keep the table number aligned at the top of the column and use one font family for the entire chart. Finally, mount on an easel or rigid stand so the face stays perfectly vertical; tilt makes columns feel off.
If your venue has high ceilings, mounting higher helps, but don’t sacrifice vertical straightness.
Avoid squeezing too many tables into horizontal rows — it becomes unreadable at distance.
10. Acrylic "index" chart with a separate table-number key
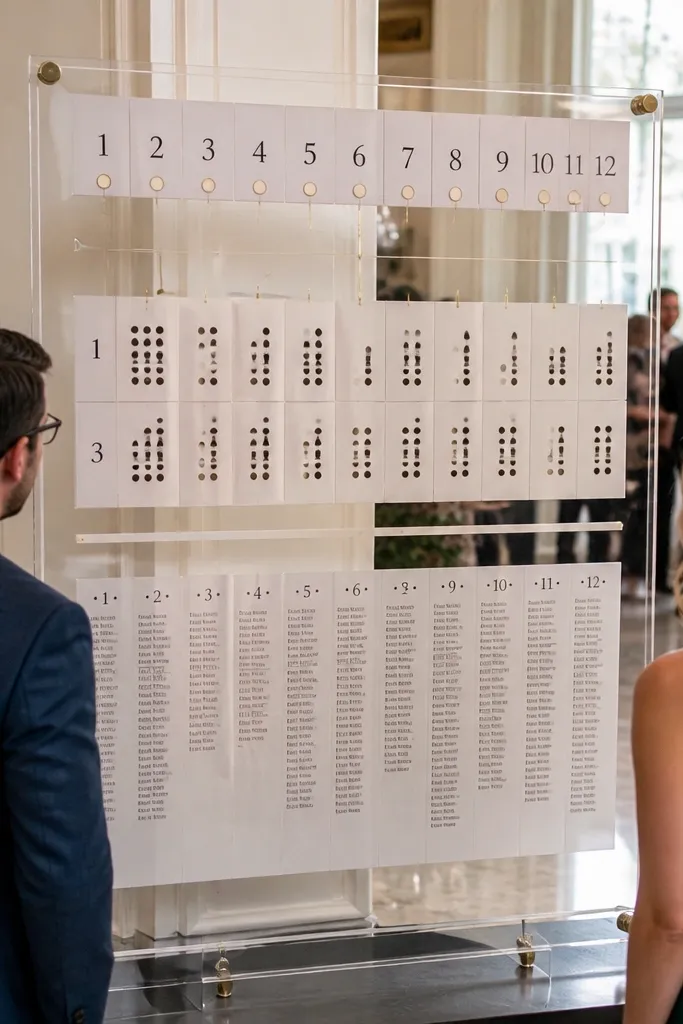
Some charts fail because guests don’t know what they’re looking at until they read everything. An index bar gives immediate orientation: a quick list of table numbers with a short pointer to where each table lives. This is great if you’re using stylized names, abbreviations, or a layout that isn’t a simple grid. The board still looks modern, but it behaves like a directory.
Start by designing an index strip at the top or side that lists all table numbers in order. Then map each table number to a clearly boxed section below or beside it, with matching labels. Finally, use consistent typography so the index and sections match visually, and choose frosted or backer-based finish for contrast.
Quick tipKeep the index strip short; it should orient, not become a second chart.
Skip thisDon’t use tiny arrows or faint lines to connect index to sections — guests miss the mapping.
11. Clear acrylic with etched outlines and high-contrast infill
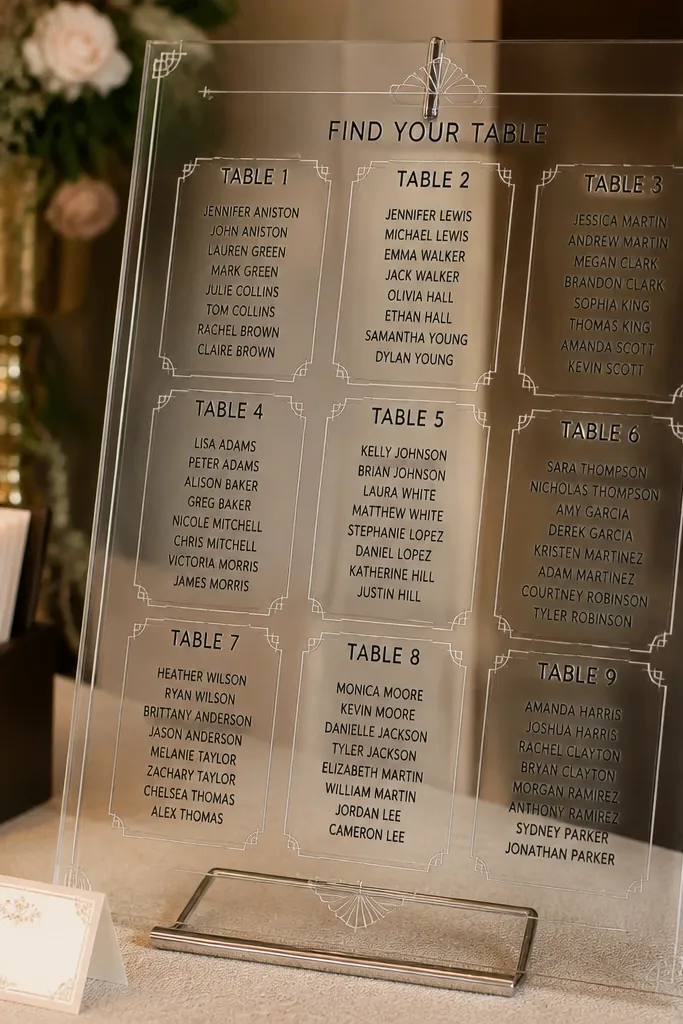
Etched outlines add structure without adding ink-heavy clutter. When you outline sections (like each table list) and then fill with dark text, the board feels organized and still reads quickly. This works best for couples who want a clean, architectural look. It’s also a good option when you want the acrylic to feel “light” visually but still structured.
Start by choosing a clear acrylic front with a backing that supports contrast, usually white or light gray. Then add etched outlines around each table list so the boundaries are visible even when glare hits the surface. Finally, keep the infill text dark and bold and use consistent spacing so the etched lines don’t crowd the names.
Quick tipAsk for outlines that are thin but visible; thick etched borders eat space and reduce legibility.
Skip thisAvoid etched outlines with low-contrast text — both disappear at the same distance.
12. Acrylic timeline-style seating chart for ceremony to reception transitions
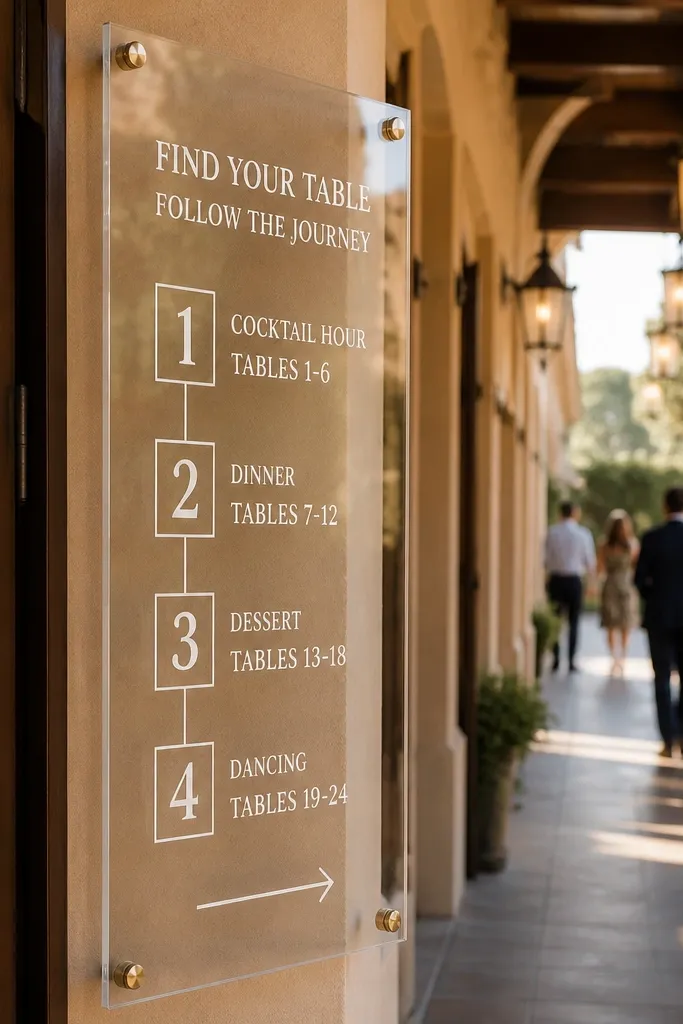
If your wedding has a planned flow — ceremony seating, then reception seating — a timeline style helps guests understand movement. The chart lists tables in the order guests will encounter them near entrances or room doors. It’s less about “pretty” and more about reducing wandering and last-minute confusion. This style works well for venues with multiple entry points and a clear walking route.
Start by mapping the guest path and ordering tables to match where the signage will be placed. Then design the acrylic in a straight sequence with big table numbers and short name blocks. Finally, place the board where guests can check it before they move into the dining area, and keep the finish frosted or backed for readability.
Align the sequence with your room entrances so guests don’t have to backtrack.
Skip timeline layouts when tables are scattered — it gives a false sense of direction.
13. Acrylic with brushed metal-style accents and minimal text
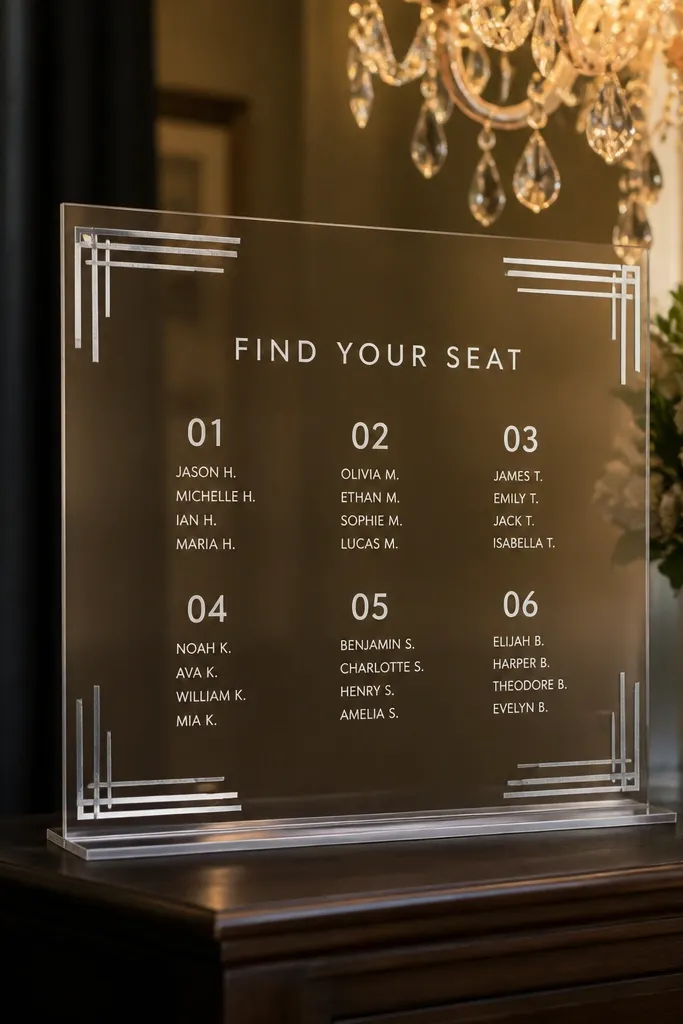
Metal-like accents make acrylic feel premium, but you have to keep the typography simple. This style uses small accent lines or corner markers, not full borders everywhere. The result is a chart that looks like it belongs next to menus and place cards. It also helps guests because the text gets more visual priority.
Start by choosing an acrylic finish that doesn’t fight the accents, usually satin frosted or clear with backer. Then place accent elements only around the title area or between major sections, never between every table. Finally, use one clear font for names and keep table numbers the largest element on the board.
Quick tipUse thin accent lines (think hairline weight) — thick borders shrink your reading space.
Skip thisAvoid full-bleed borders — they create visual noise and slow scanning.
14. Acrylic "name-first" layout with table number header per row
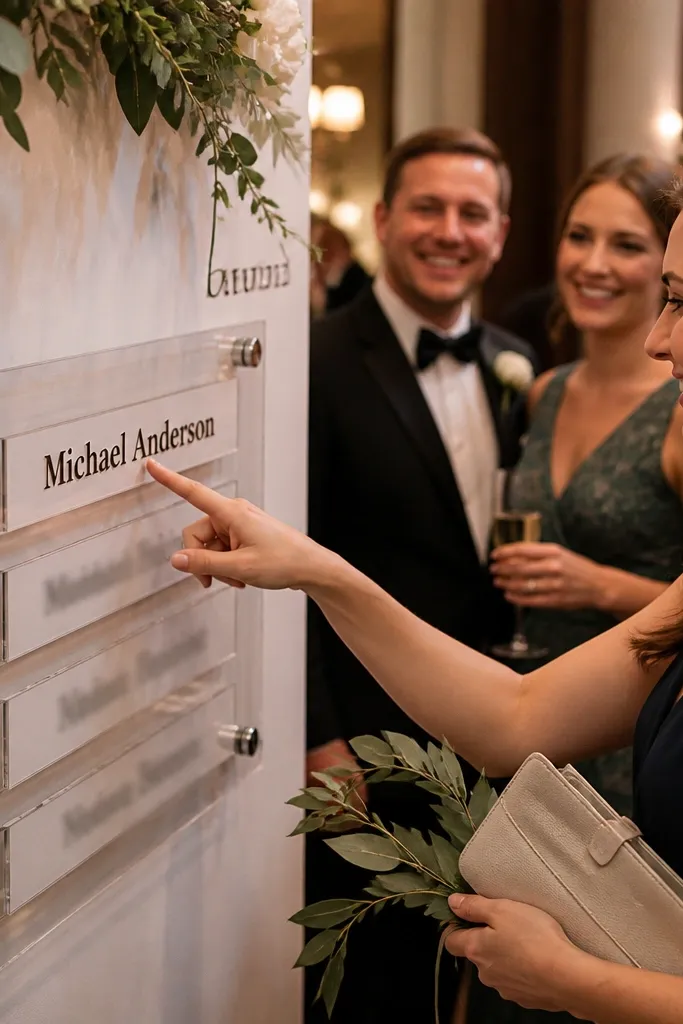
Most charts are table-first. A name-first layout is different: it’s easier for guests who don’t want to hunt table numbers. With the right design, you give each name row a clear table header, so people can find their own name quickly. This is best when you have guests who are anxious about finding their spot and you want fewer questions. It also works well when you have fewer tables but a lot of names.
Start by collecting names and sorting them alphabetically, then add a table number header for each name group or row band. Next, keep row spacing generous so names don’t stack into a blur. Finally, choose high-contrast printing and mount so guests view it head-on, not at a steep angle.
If your venue is crowded, name-first layouts reduce the “where are we sitting?” line fast.
Avoid tiny alphabetical text — name-first only works when people can read it without squinting.
15. Acrylic seating chart with separate "last-minute changes" panel
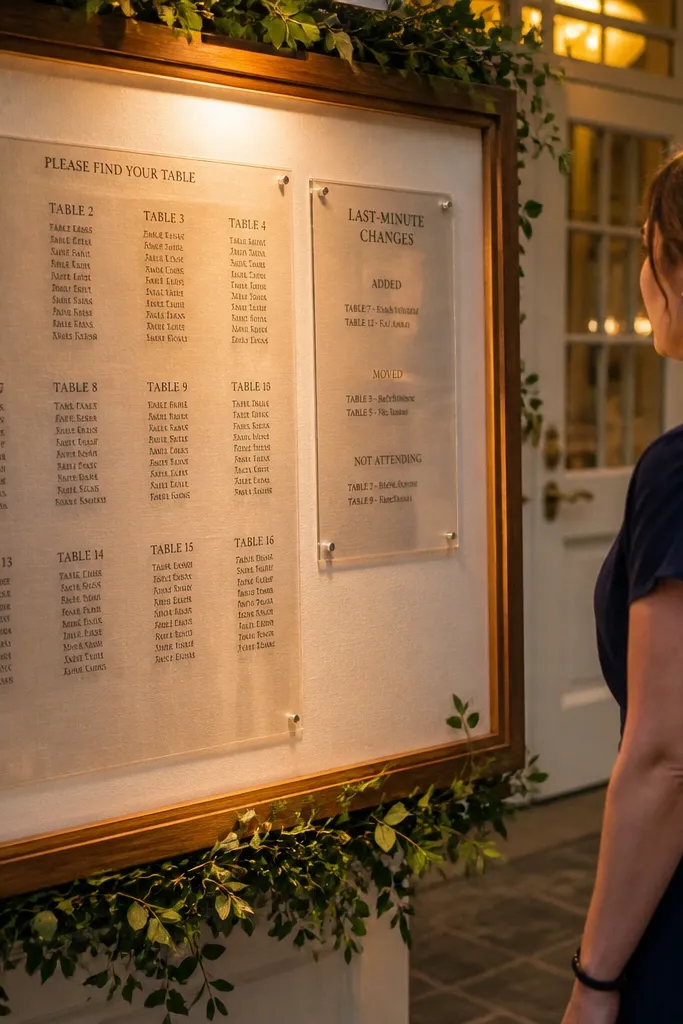
This is the practical one. A clear updates panel stops the chaos of someone scribbling on your main chart and smearing marker ink across the acrylic. You keep the main chart clean and the changes contained. Guests also trust it because the update area is obvious. It looks thoughtful, not chaotic, in photos.
Start by designing the main chart with final assignments printed and sealed (UV print or protected print). Then add a smaller acrylic panel for updates with a dedicated label like “Updates” and a dark marker-friendly surface or a dry-erase coating. Finally, place the updates panel next to the main chart and keep it visible from the same viewing angle.
Quick tipUse a dry-erase option for the update panel so you can remove changes without damaging the acrylic.
Skip thisSkip scribbling directly on the main board — smudges and glare ruin the look in under an hour.
16. Acrylic chart on a framed backing with stand-off mounting
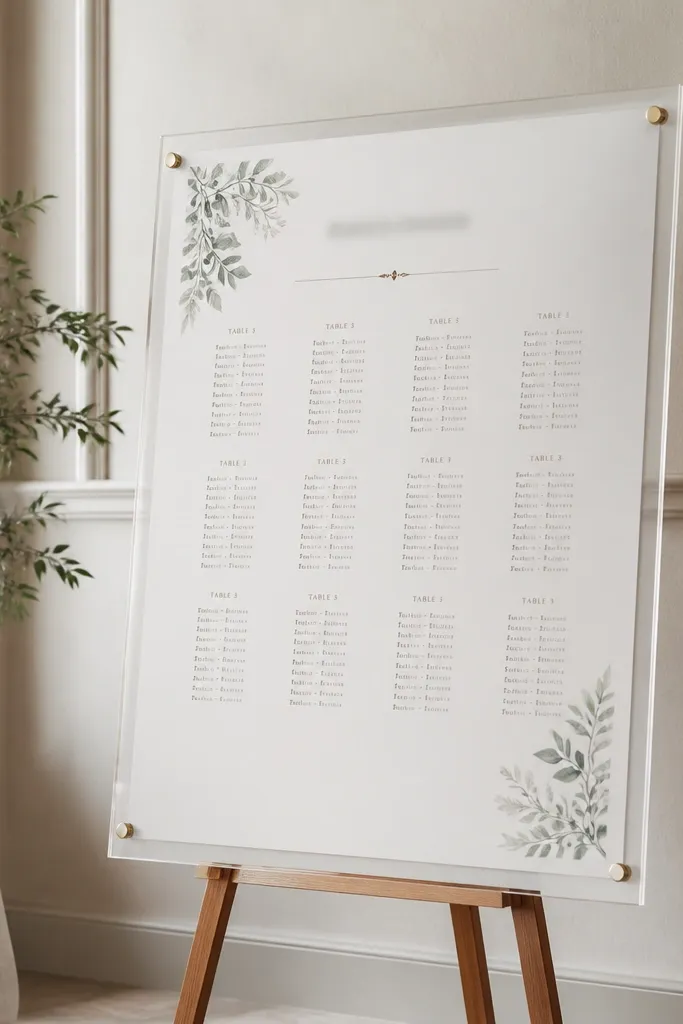
Acrylic looks better when it’s mounted like a sign, not like a floating sheet. A framed backing with stand-offs keeps the face perfectly straight and gives it a finished edge. This option is great for couples who want the seating chart to match other framed pieces like welcome signs, mirrors, or ceremony decor. It also helps the board resist wobble when guests crowd around.
Start by choosing a frame backing color that matches your palette and gives text contrast, then mount the acrylic with stand-offs so there’s a small even gap. Next, print text with high resolution and avoid thin strokes that get lost through acrylic. Finally, place the sign on a stable base or hang it securely so it doesn’t tilt; straight lines matter for readability.
Quick tipPick a backing color that hides small alignment gaps around the acrylic edges.
Skip thisAvoid flimsy clip stands — wobbling turns a clean acrylic chart into a blurry mess.



