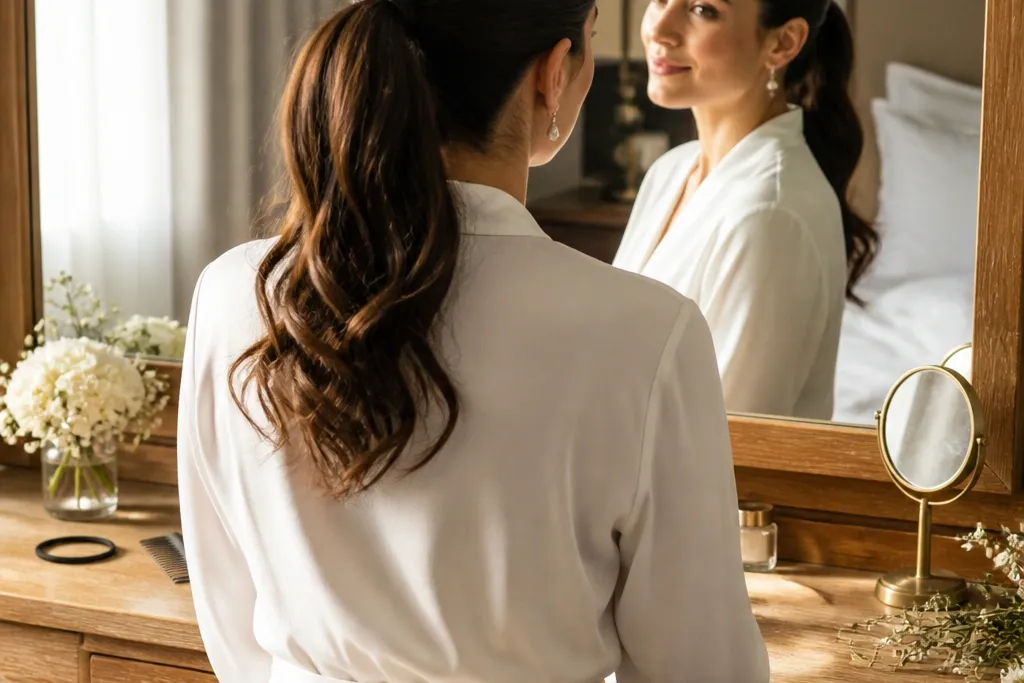
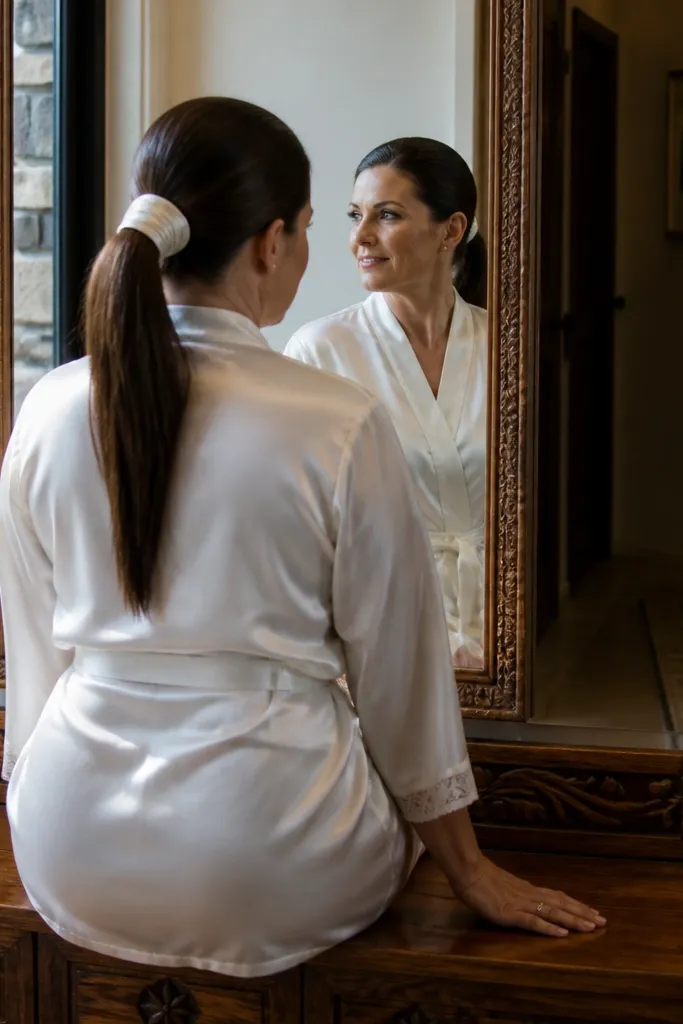
1. Sleek High Ponytail with Flat-iron Finish
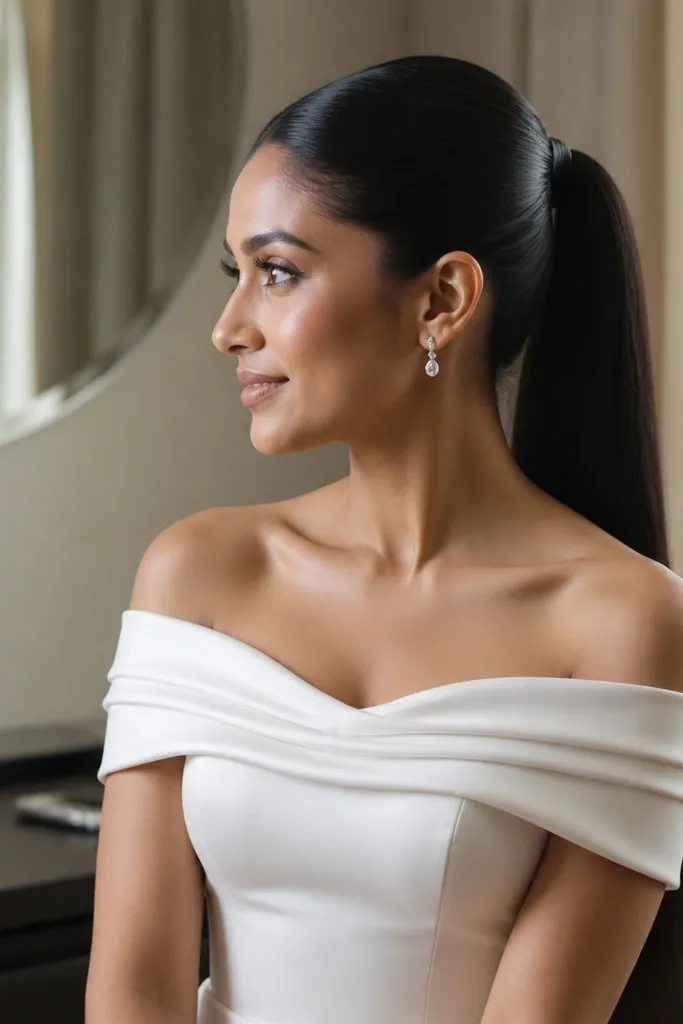
This is the “clean lines win” ponytail. A high placement elongates the neck and makes a strapless or off-shoulder dress look sharper in photos. The flat-iron finish gives you that glossy, bridal-polished surface that holds up in flash, especially when your hair naturally takes shine. It suits brides with fine-to-medium hair because it reads intentional, not bulky. For winter weddings or indoor receptions with strong lighting, this look stays crisp.
Start with a heat-protectant and blow-dry your roots straight, then flat-iron only the outer layer for that glassy finish. Tie at the very top of the head using a clear elastic or a covered elastic, then brush the hairline with a damp boar-bristle brush for smooth edges. Wrap a thin section of hair around the tie, pin it underneath, and finish with a light gloss spray on the surface only.
Pack a small mini hairspray in your emergency kit and touch up the hairline with a damp brush, not your fingers.
Don’t leave the tie area textured or you’ll see bumps every time the camera flash hits.
2. Mid-Height Ponytail with Soft Root Lift
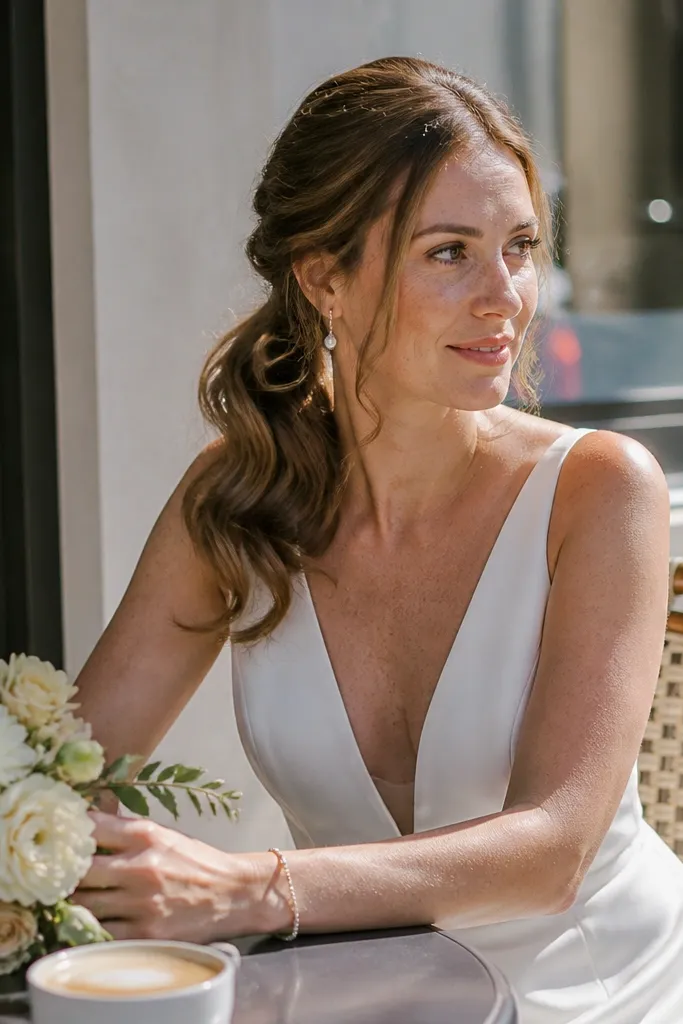
If you want bridal without the “too tight” look, this one nails it. Mid-height placement flatters most necklines and keeps the ponytail from competing with statement earrings. The root lift makes fine hair look fuller at the crown, so the ponytail doesn’t start looking thin right where photos focus. Soft waves through the length catch light in a flattering way. It works well for spring and fall weddings when you want movement but not frizz.
Quick tipIf your hair gets oily fast, do this on day-of with a clean scalp or the lifted roots collapse in photos.
Start by blow-drying roots with your head slightly forward, then use a large-barrel iron for loose bends starting mid-length. Gather into a mid-height ponytail and use a volumizing elastic cover so the tie doesn’t flatten the base. Tease just the crown area lightly with a comb, smooth over the top layer, then set with a light hold hairspray.
Skip thisSkip a perfectly flat ponytail on fine hair — it reads stringy at the crown.
3. Low Ponytail with Chignon-Style Wrap Base
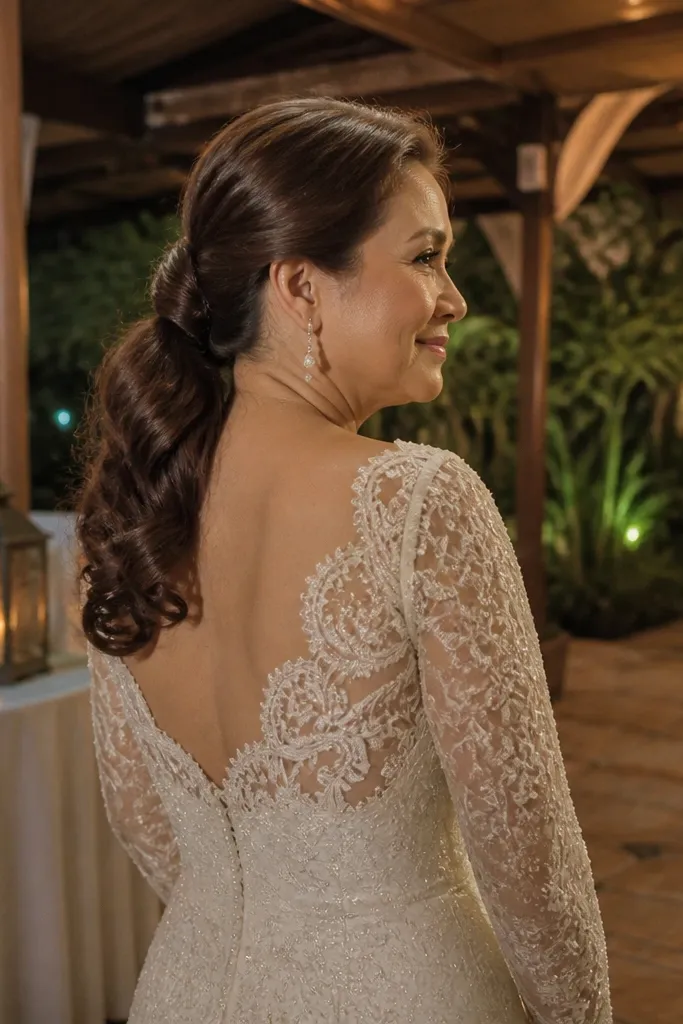
This is the ponytail for brides who want romance without height. The low placement pairs beautifully with V-neck dresses, corsets, and long sleeves because it keeps the silhouette balanced. The chignon-style wrap base hides the tie and turns the ponytail into a structured, bridal-looking shape. It also photographs well because the base looks intentional from every angle. It’s a strong choice for outdoor weddings where wind can move the length without wrecking the base.
Quick tipUse two bobby pins per side of the wrap so the base doesn’t shift when you dance.
Start by creating a center or soft side part, then curl the ponytail length with a medium barrel for S-shaped waves. Tie low at the nape, then wrap a small section of hair around the tie like a mini chignon and pin in an X pattern. Finish by spraying the wrap lightly and gently brushing the waves so they look polished, not tangled.
Skip thisDon’t tie too loose at the nape — the ponytail base will droop in photos.
4. Braided Ponytail with Crown Dutch Braid
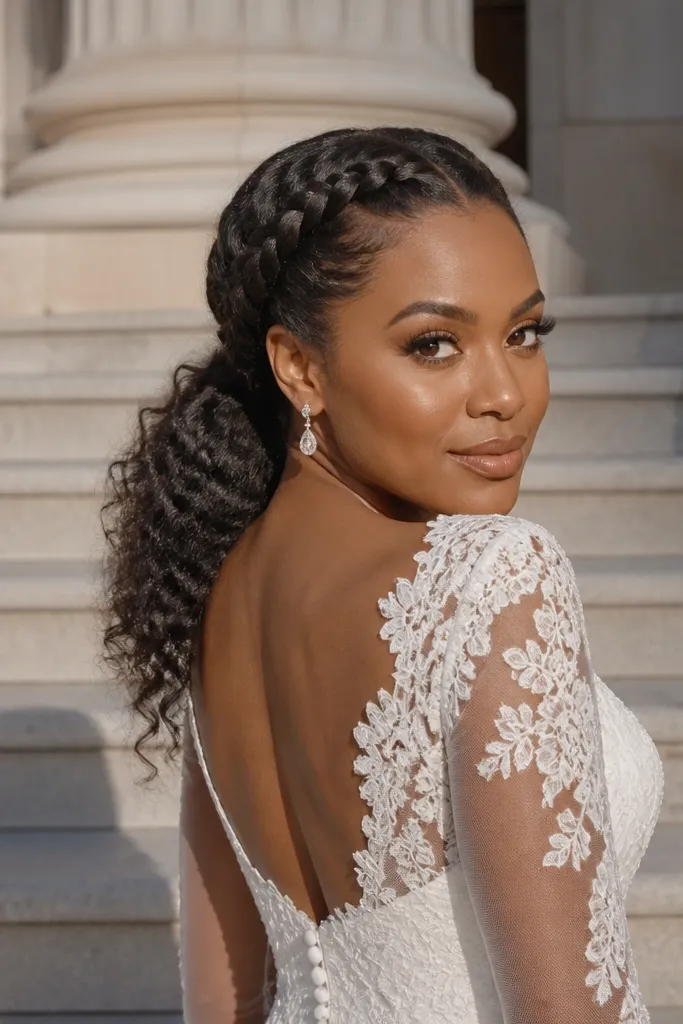
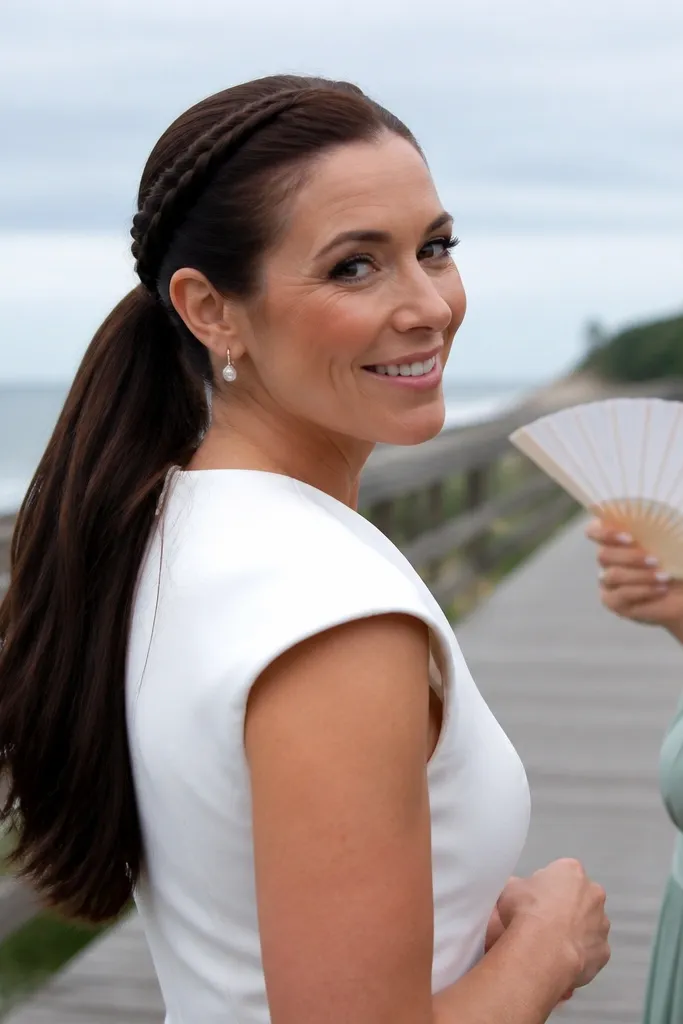
Braids make ponytails look bridal in a way sleek styles can’t. A crown Dutch braid gives you texture and structure, so even straight hair looks dimensional in photos. It’s ideal if your dress has lace or beading because the braid texture echoes that detail. This look suits brides who want a secure style that holds through windy ceremonies. It also works for medium-to-thick hair best, because the braid has enough hair to look full.
Quick tipIf your braid keeps slipping, add one small bobby pin right where the braid meets the elastic.
Start by sectioning a wide strip from temple to temple for the crown braid, then braid Dutch style (under, not over) toward the back. Tie the rest of the hair into a ponytail and blend the braid into the tie by pinning the braid tail against the elastic. Loosen the braid slightly with your fingers for a fuller look, then smooth the ponytail length and finish with a light anti-frizz serum.
Skip thisSkip a braid that’s too tight — it can pull the hairline and look harsh in close-ups.
5. Textured Ponytail with Matte Spray and Loose Ends
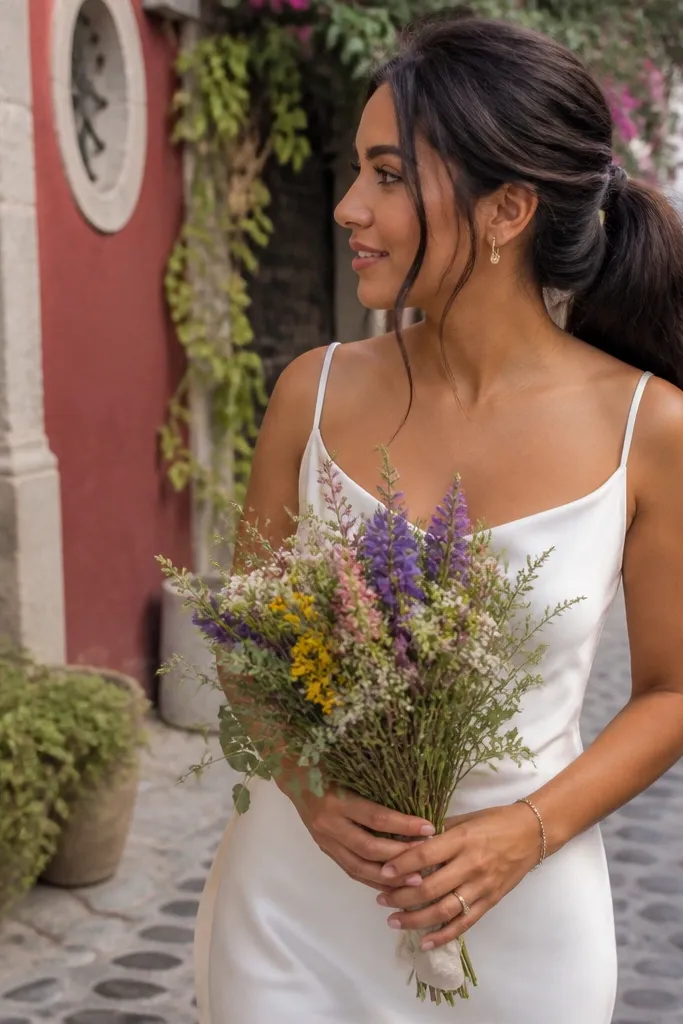
This is the ponytail for brides who hate the “helmet shine” look. A textured, matte finish hides flyaways better and makes the style look natural even in daylight. The loose ends give movement, so your ponytail doesn’t look like a single flat ribbon. It pairs well with boho, satin, and lace dresses because it adds lived-in softness. It’s also forgiving if your hair has some natural wave.
Start with a dry texture spray at the roots, then use a curling wand on only the outer layer for random bends. Tie into a mid or low ponytail, then wrap the tie with a small strip of hair and pin firmly. Spray matte texture lightly along the ponytail, then tug at the sides near the tie to create a soft frame.
Keep a travel lint roller handy if you’re outdoors — matte styles show dust faster than glossy ones.
Don’t over-spray matte product at the tie — it can look dusty under flash.
6. Ribbon-Wrapped Ponytail for Instant Bridal Detail
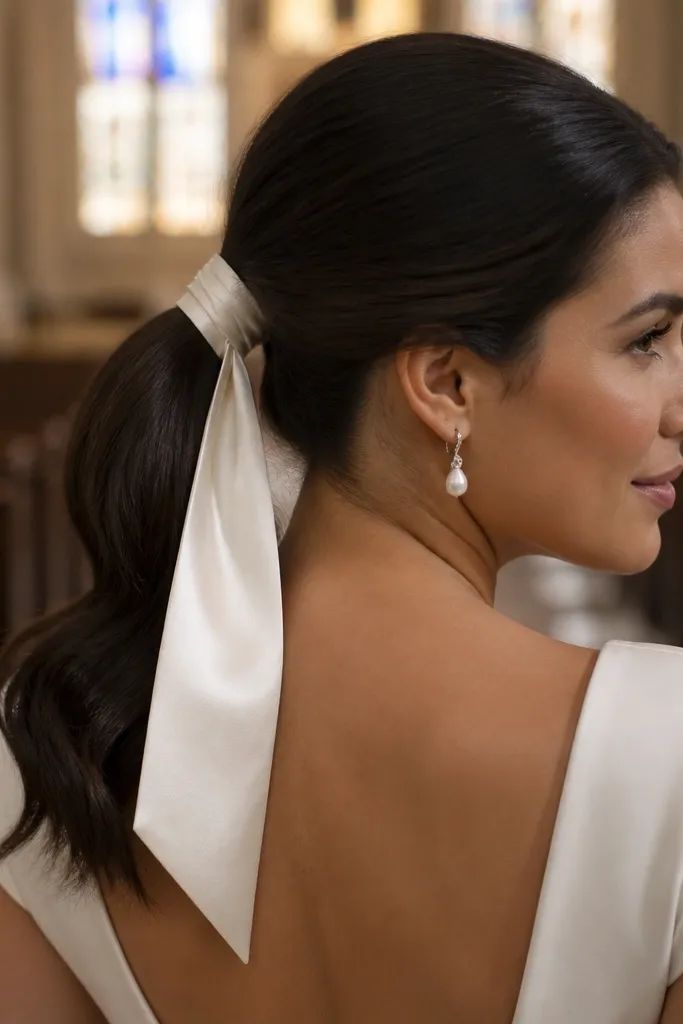
A ribbon wrap turns a basic ponytail into a ceremony-ready look. The ribbon draws attention to the tie area, which is the most noticeable part in photos. Choose satin or silk ribbon in ivory, champagne, or the same shade as your dress lining. This look is especially good if your dress has clean, minimal styling because the ribbon adds a focal point without adding bulk. It also works for warm-weather weddings when you want a light, airy finish.
Start by tying the ponytail first, then wrap a thin section of hair around the elastic to hide it. Cut a ribbon long enough to wrap 6-8 loops around the base, then secure the ribbon ends with hidden bobby pins under the wrap. Finish by smoothing the ponytail length and adding a small amount of shine spray only to the ribbon edge so it catches light.
Match ribbon width to your tie size: 1/4 inch for small ties, 1 inch for thicker hair bundles.
Skip cheap, glossy ribbon that looks plasticky in flash — it can read gray under indoor lighting.
7. Ponytail with French Twist Crown Base
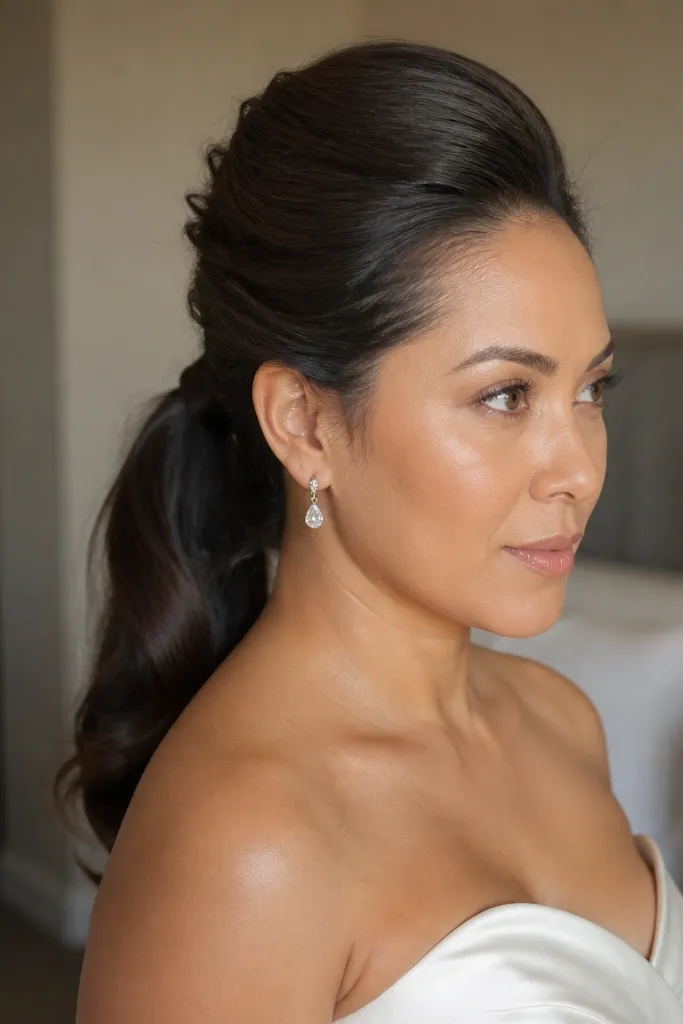
This one looks like you did more than you did. The French twist crown gives lift and a sculpted shape, while the ponytail keeps it modern and photo-friendly. It’s a great match for strapless dresses and structured bodices because the crown shape echoes the neckline. If your hair is slippery or doesn’t hold volume, the twist anchors the style. It’s also a smart pick for ceremonies with a veil because the twist gives the veil something solid to sit against.
Start by creating a loose section at the crown for the twist, then smooth the sides back and pin the twist in place before you tie the ponytail. Tie the remaining hair into a ponytail at mid-high, then blend the twist edges by pinning stray strands into the underside. Curl the ponytail lightly for a soft S shape, then spray the twist with strong hold hairspray to lock the silhouette.
Use a rat-tail comb to smooth the twist surface; it hides dents better than a regular brush.
Don’t skip pinning the twist underside — if it’s only held on top, it collapses in pictures.
8. Half-Up Ponytail with Crown Volume
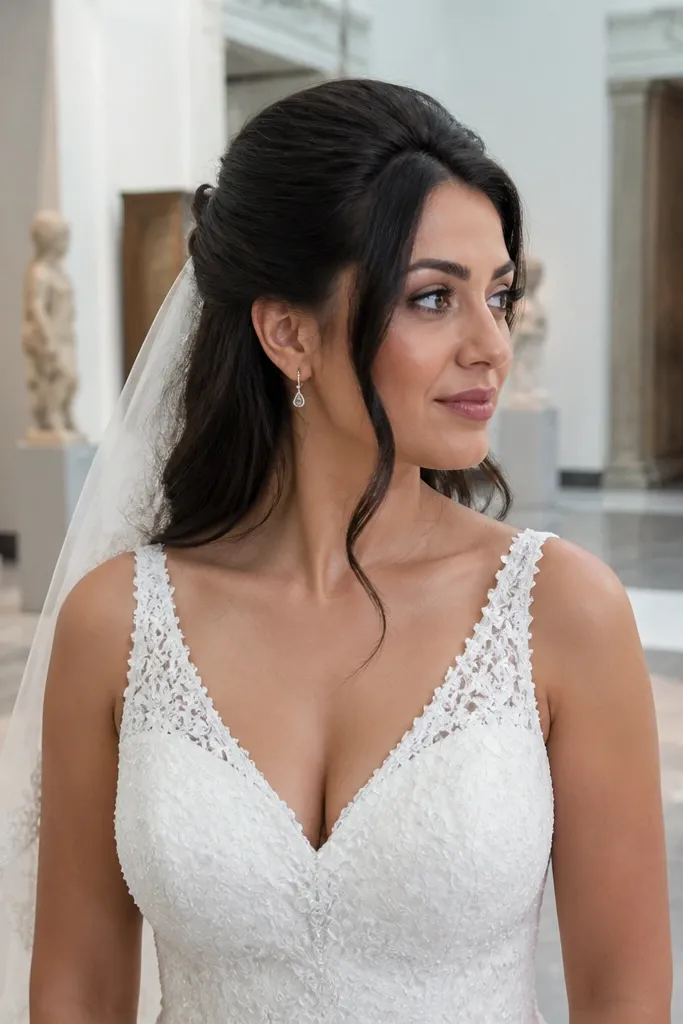
Half-up ponytails solve the “I want ponytail energy but my face needs softness” problem. This style keeps part of your hair flowing around the face while still giving you the clean look of a ponytail. Crown volume makes the top feel bridal and camera-ready, especially for portraits. It’s ideal if you want a veil with comb placement because the comb can anchor into the half-up section. Works best for medium hair and for brides who like a bit of frame around the cheeks.
Start by creating volume at the crown with a blow-dry and light backcombing under the top layer. Gather the top section into a ponytail using a covered elastic, leaving the rest down or softly wavy. Smooth the top layer over the tease, then curl the ponytail and the remaining hair to match so everything looks intentional.
If you’re adding hair accessories, place them on the half-up section so they don’t slide down onto the tie.
Skip a flat top — half-up styles look unfinished when the crown isn’t lifted.
9. Ponytail with Pearl Hair Pins along the Side
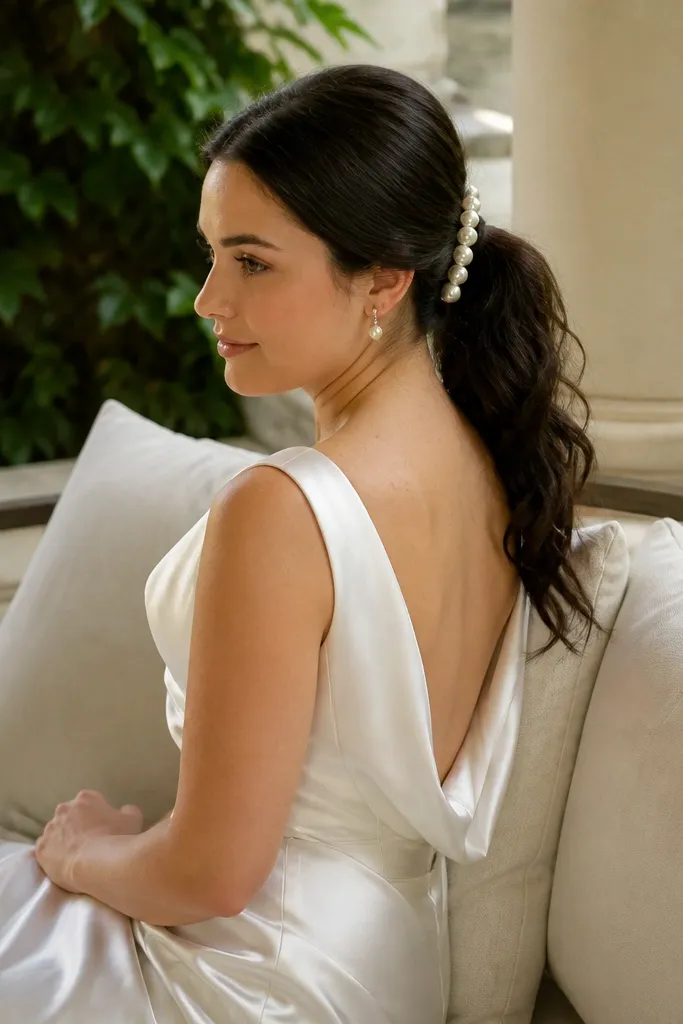
Pearl pins make a ponytail look like jewelry, not just a hairstyle. Placing them along the side of the ponytail base creates a diagonal line that looks good in both front and side portraits. This is a strong choice for classic weddings, especially with satin or lace where pearls match the dress vibe. It also helps distract from any tiny flyaways because the eye lands on the pins. Best for brides with medium hair who want a clear, elegant focal detail without a full updo.
Quick tipBring the pins you plan to wear to your hair trial so you can test spacing under your real lighting.
Start by tying the ponytail and wrapping the tie with a thin hair section, then pin the wrap down first. Place 4-6 pearl pins in a staggered line starting near the tie and moving toward the temple, keeping spacing even. Finish by brushing the sides smooth so the pins sit flat, then add a light hold spray around the base only.
Skip thisDon’t cram pins too close together — they can look like a cluster instead of a bridal detail.
10. Sleek Ponytail with Micro-Bangs and Curtain Fringe
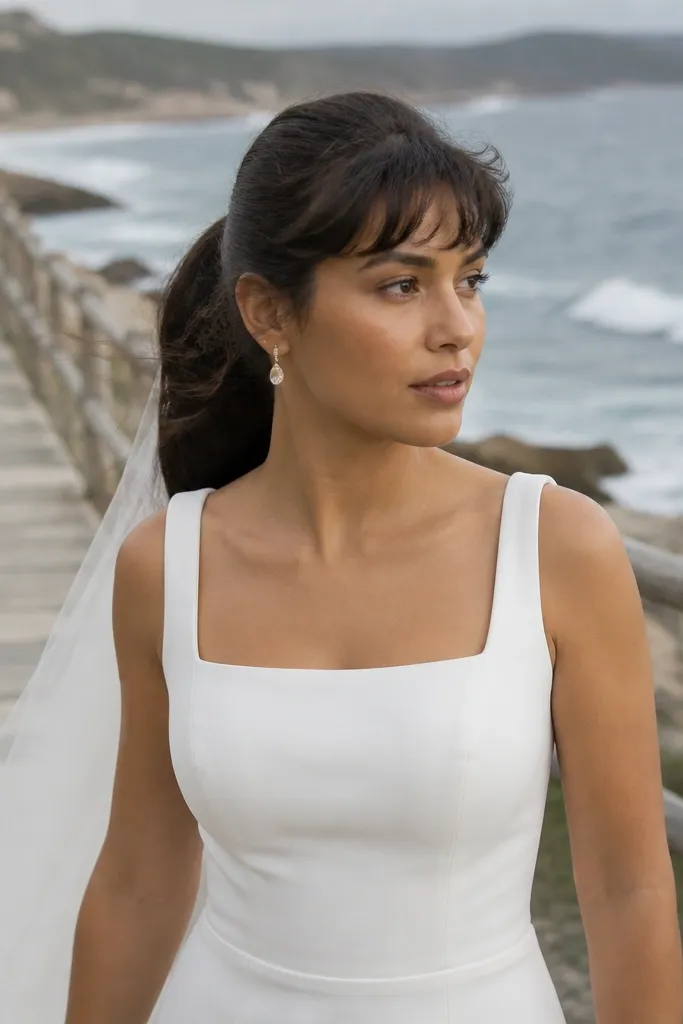
This look is sleek but not severe. Curtain fringe softens the hairline and makes the ponytail feel less “pulled back,” which is key for photos where the camera catches your forehead and cheeks. Micro-bangs or very short fringe also add interest when your dress neckline is clean and simple. It’s best for brides who already have fringe or are willing to style it daily for the wedding week. For humid weather, you need hold on the fringe so it stays separated.
Quick tipUse a small comb to separate fringe into two distinct curtains before you leave the house.
Start by blow-drying fringe with a round brush so it curves outward at the ends, then use a flat iron lightly for crisp separation. Tie the ponytail high or mid-high after you finish the fringe, so you’re not fighting hair strands while tying. Smooth the crown and set with a strong hold hairspray, then finish fringe with a tiny amount of smoothing cream just at the ends.
Skip thisSkip blending fringe into the ponytail — it can look like the hair is stuck rather than styled.
11. Curly Ponytail with Defined Ringlets
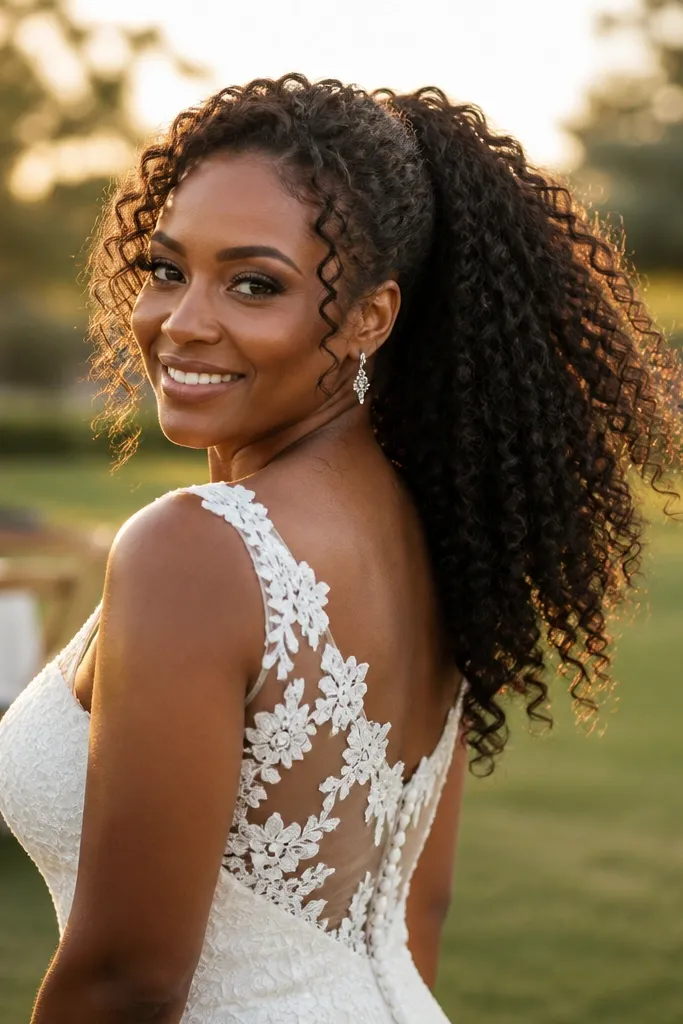
Ringlets give you that bridal texture that looks amazing in motion. A curly ponytail reads romantic and photographs with depth, especially for outdoor ceremonies where hair moves. Defined curls also make the ponytail feel fuller without needing extra extensions. This style suits brides with naturally curly hair or anyone who wants a curl pattern that holds. It’s a great choice for fall and winter because curls handle cooler, drier air well.
Quick tipPin curls at the tie for 10 minutes right after tying; it helps them keep their shape.
Start with damp hair and apply curl cream to small sections, then use a diffuser or air-dry with minimal touching. Tie into a mid ponytail after the curls set slightly, so you don’t stretch them flat. Secure with a covered elastic, then use a curling iron or wand on a few front strands only to refresh definition. Finish with a light anti-humidity spray and avoid brushing the curls.
Skip thisDon’t brush the ponytail after it’s tied — it turns ringlets into a frizzy cloud.
12. Ponytail with Bubble Sections and Soft Volume
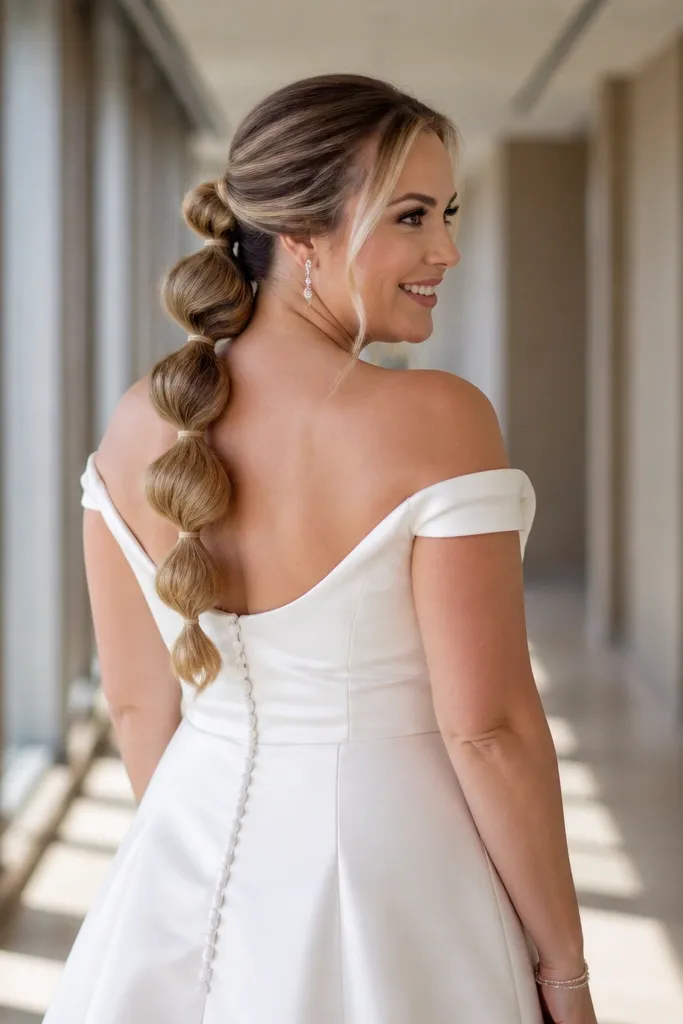
Bubble ponytails look playful and stylish, but they can still read wedding-appropriate with the right finishing. The trick is keeping bubbles smooth and spaced so the shape looks intentional instead of messy. This style is great for brides who want a modern look and want their ponytail to look full from the tie down. It also photographs well because each bubble catches light and creates a clear silhouette. Best for medium-thick hair or for adding length with extensions.
Start by creating a smooth ponytail base and tying it high, then section the length into 3-5 segments using small elastics. Pull each bubble gently to add volume, then smooth the top layer so bubbles look rounded, not frizzy. Wrap the base tie with hair and pin it down, then finish with a flexible hold spray to keep the shape through the ceremony.
Bring a handful of small elastics and a spare bobby pin — bubble styles need quick fixes when one elastic shifts.
Skip uneven spacing — lopsided bubbles read like a styling mistake in photos.
13. Twisted Rope Ponytail with Hidden Pinning
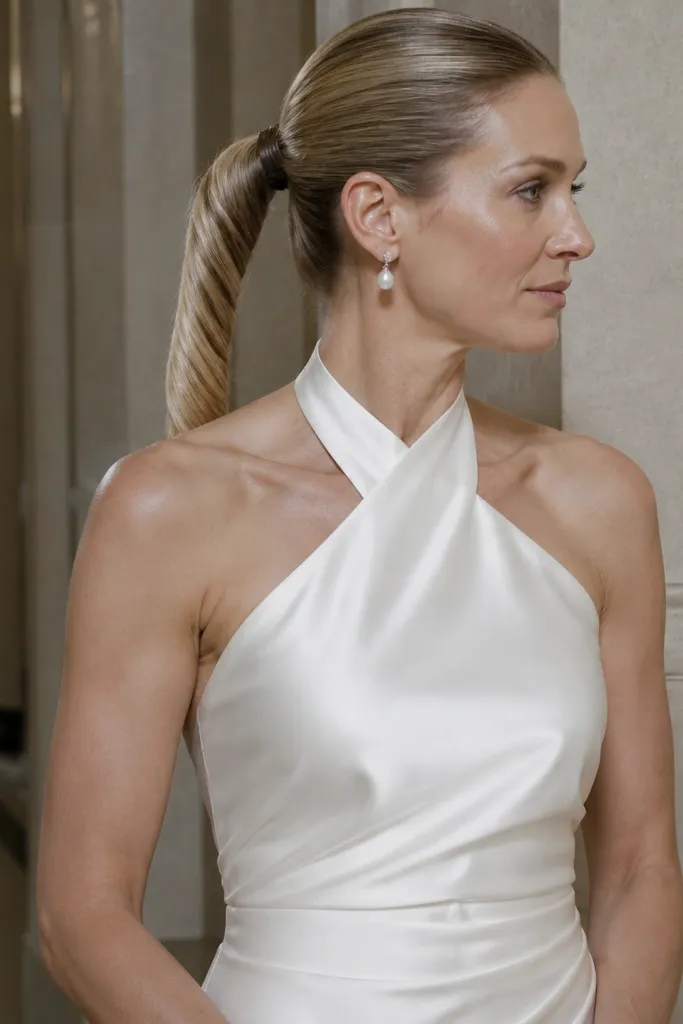
A rope twist makes the ponytail look handcrafted and adds dimension without bulky curls. It’s a smart pick if your hair is straight and you want texture that still looks sleek. The twist creates a strong line that looks great in close-ups, especially with a strapless dress or halter neckline. This style also feels secure because the twist holds the hair together. It suits medium to thick hair best, since you need enough strand volume to form a visible rope.
Start with a slightly damp, detangled ponytail base and apply a light styling cream for grip. Split the ponytail into two sections, twist each section in the same direction, then twist them together in the opposite direction to form the rope effect. Secure the ends with a small elastic and hide it with a wrap of hair, then pin the rope twist against itself near the base so it doesn’t unravel.
Use a shine spray only on the outer rope so it looks glossy, not greasy.
Don’t twist too dry — rope twists snap and look uneven when the hair has no slip.
14. Ponytail with Braided Halo Tie-Down
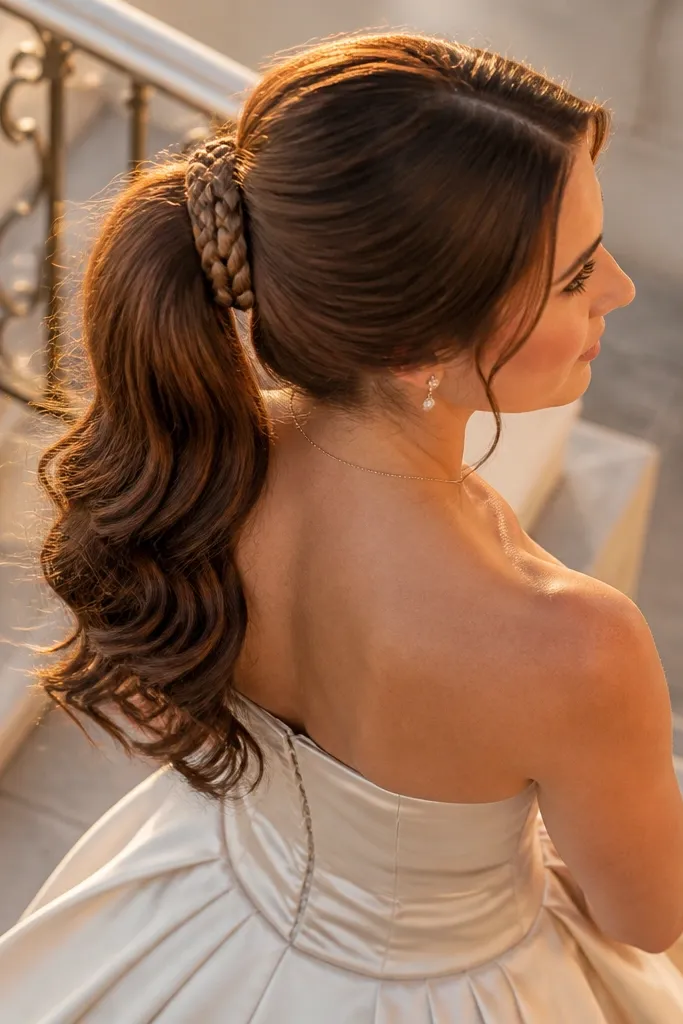
This look uses a braid to anchor the tie area like a halo. It’s one of the best options when you want a ponytail but hate seeing the elastic or tie bumps. The halo braid also frames the head, which looks great in veil photos and when you’re photographed from above. It works especially well with medium hair because the braid stays visible without needing a huge amount of volume. Choose this if your dress has a detailed neckline and you want the hairstyle to look structured.
Quick tipPin the halo braid at three points: left, center, right. That stops the wrap from lifting at the back.
Start by tying the ponytail low-to-mid, then take a thin halo section around the back of the head. Braid that section into a simple braid, then pin it around the tie so it covers the elastic completely. Smooth the ponytail and lightly curl the outer strands for a soft finish that doesn’t fight the halo braid.
Skip thisSkip a halo braid that doesn’t cover the tie — the elastic will show in every angle.
15. Satin Scrunchie Ponytail with Polished Ends
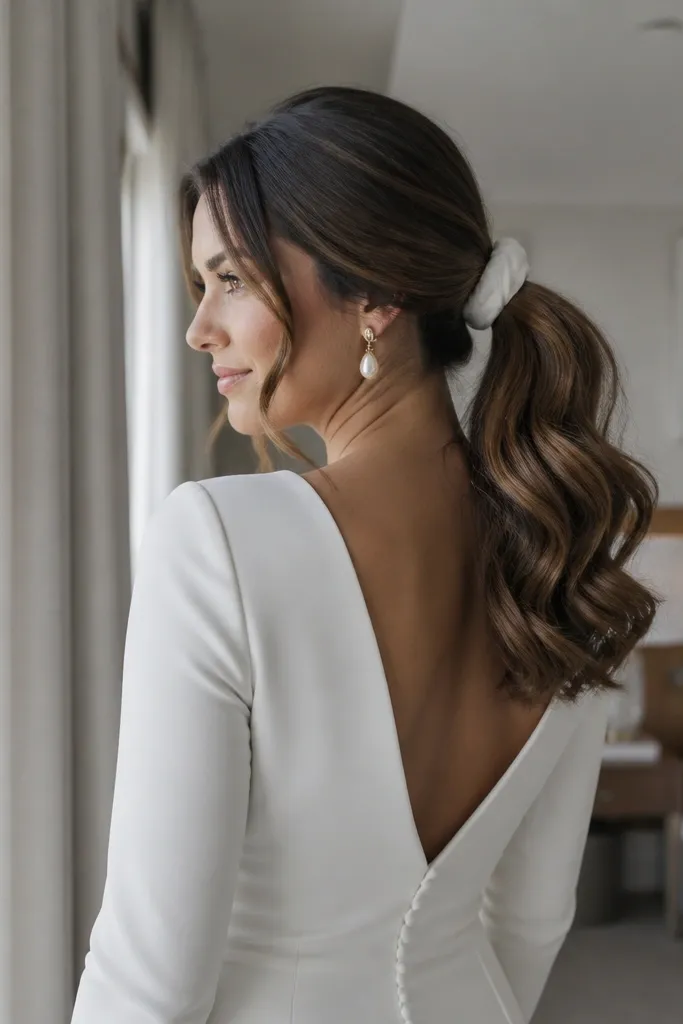
This is the ponytail for brides who want comfort and softness, but still want it to look styled. A satin scrunchie grips hair without the harsh tension that can leave a ridged tie line. The polished ends keep it bridal, so it doesn’t read like a casual everyday ponytail. It’s a flattering choice for brides with shoulder-length to long hair because you can get a smooth, continuous line. Great for summer weddings where you don’t want crunchy hold all day.
Quick tipIf you’re wearing a veil, place the scrunchie tie high enough that the veil comb doesn’t press directly on it.
Start by blow-drying hair smooth and applying a light smoothing serum to the ends. Tie with a satin scrunchie — keep it snug but not tight — then wrap a small strand around it to hide the scrunchie seam if needed. Curl or straighten the ponytail ends to match your dress vibe, then finish with a light hairspray on the length only.
Skip thisSkip leaving the scrunchie visible — it makes the style look unfinished in close-up photos.
16. Ponytail with Side-Swept Volume and Face-Framing Layers
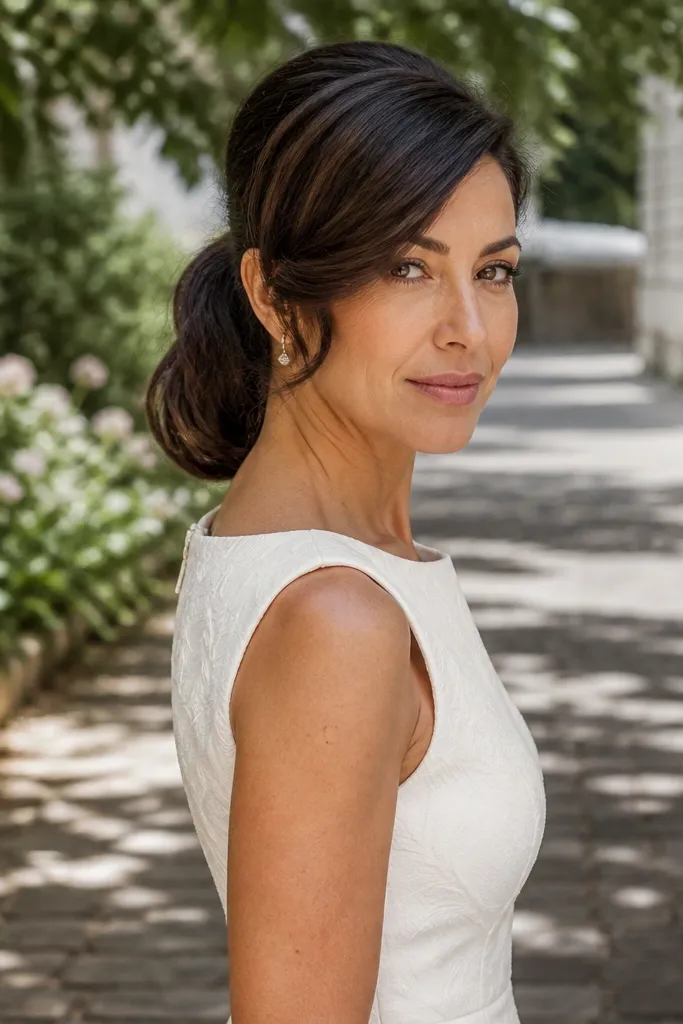
Side-swept ponytails make your face look softer and more lifted. The volume sits where cameras love it, around the cheekbone area, while the ponytail keeps the back neat. This look is especially good if you have facial layers or shorter pieces you want to style instead of tuck awkwardly. It photographs beautifully because the side sweep creates a natural diagonal. Best for brides with medium hair and for dresses with one-shoulder or asymmetric elements.
Start by styling face-framing pieces first: blow-dry them with a slight outward bend on the brush so they sit away from the face. Gather the rest into a ponytail slightly off-center, then pin any stray layers into the base with thin bobby pins. Curl the ponytail lightly for movement, then smooth the top layer with a damp brush and set around the tie.
Use two mirrors if possible — one front, one side — so you can see the sweep line from the angle guests will photograph.
Don’t pin side layers too tight — it pulls the hair and makes the cheek area look strained.
17. Ponytail with Glitter Hairline Gel (Photo-Safe Amount)
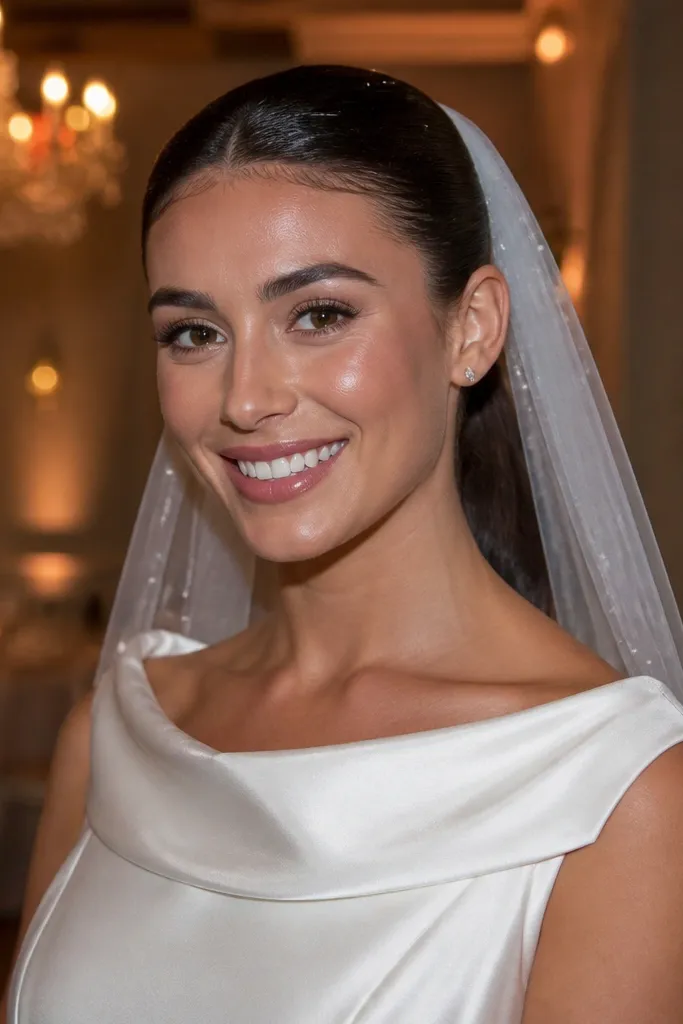
A tiny shimmer along the hairline looks stunning under indoor lighting and flash. The goal is subtle: you want sparkle that catches, not a full-on disco effect. This is a strong pick for evening receptions, especially when your dress has shine or metallic details. It also helps define the edge of the ponytail for photos, which is exactly where many brides get flyaway mess. Works best on dark-blonde to brunette hair where shimmer shows clearly.
Start with clean, dry hair and use a gel-based shimmer product in a thin line along the hairline only. Brush the crown smooth, then tie your ponytail and wrap the tie with a hair strand. Finish by spraying a light hold hairspray over the top layer so the shimmer doesn’t flake, then keep the ponytail length matte or softly shiny so the sparkle stays the focus.
Test the shimmer near your roots in natural daylight so you can judge intensity before the wedding day.
Skip heavy shimmer — it can look chunky under flash and transfer onto veil fabric.
18. Ponytail with Faux Braided Extension Wrap
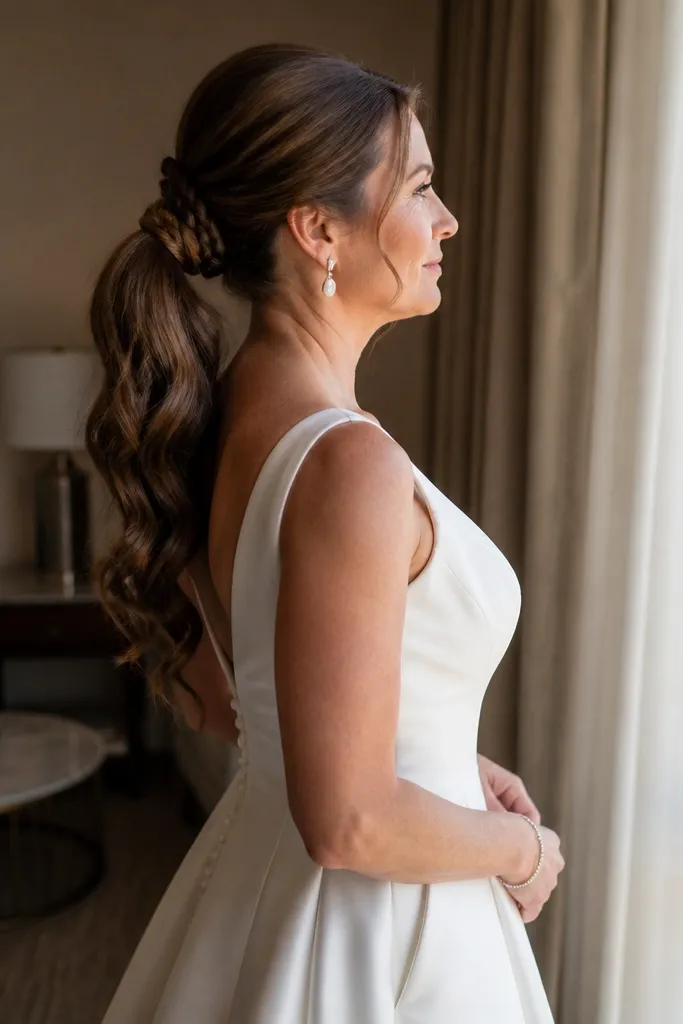
This look makes an extension look intentional and adds a braided vibe without doing full braids. The tie area looks richer because the wrap creates texture where the eye goes first. It’s great for brides who want extra length but don’t want the ponytail to look like a separate clip-in piece. This works well for thin hair, because the wrap helps the base look thicker and more blended. Choose it for classic weddings where you want a polished, styled result.
Start by tying your ponytail and adding extensions only through the length, not at the very base where you want a smooth blend. Create a faux braid wrap by taking two thin strands from the ponytail and crossing them over each other around the tie, then pin the ends underneath. Smooth the wrap so it sits flat, then lightly curl the extension length so it matches your natural hair wave or straightness.
Use extension hair that matches your natural density, not just your color — density mismatch is what gives it away.
Don’t use a thick extension base — it makes the tie area look like a separate piece.
19. Ponytail with Waterfall Twist at the Front
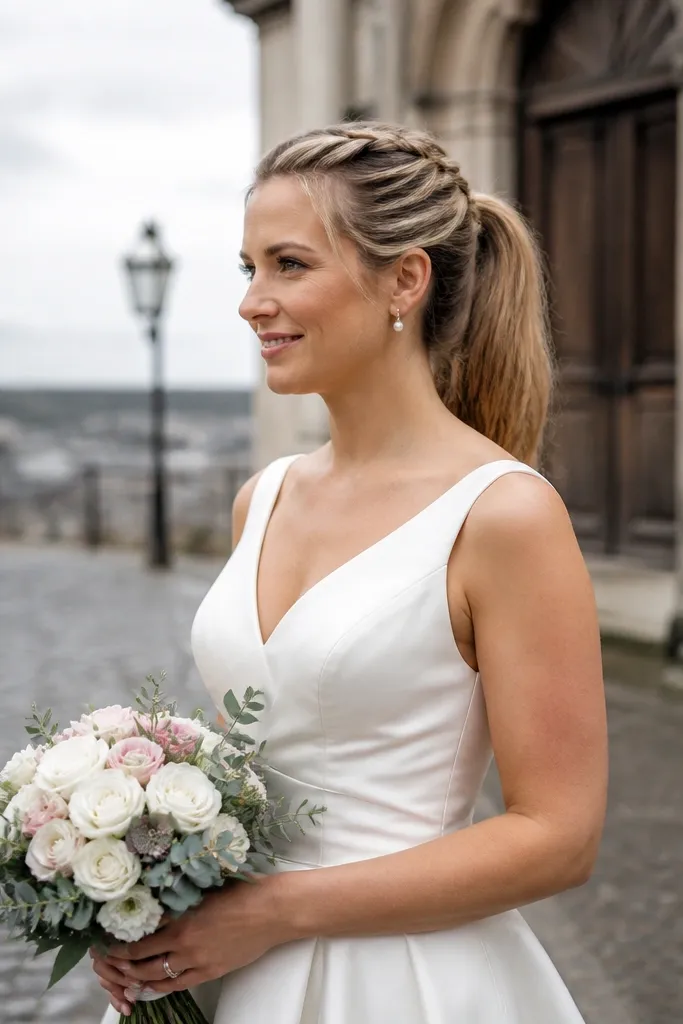
A waterfall twist at the front adds softness and movement right where portrait photos focus. It’s not a full braid, so it feels romantic without adding heaviness. This look is great for brides who want a ponytail but still want the “hair is pretty in front” effect. It also helps manage shorter layers by guiding them into the twist. Works best with medium hair and dresses with sweetheart necklines.
Quick tipPin the waterfall strand at the exact place you want it to land; moving it after styling makes it look messy.
Start by separating a front section and creating a twist that drops a small strand like a waterfall as you move back. Pin the twist into the ponytail base area before you tie the rest of the hair. Tie into a mid ponytail, then curl the length with a medium barrel for soft bounce. Finish by smoothing the front twist and setting with light hairspray so it stays defined.
Skip thisSkip vague front pieces — if the twist isn’t defined, it looks like hair got caught instead of styled.
20. Ponytail with Floral Comb Cluster at the Tie
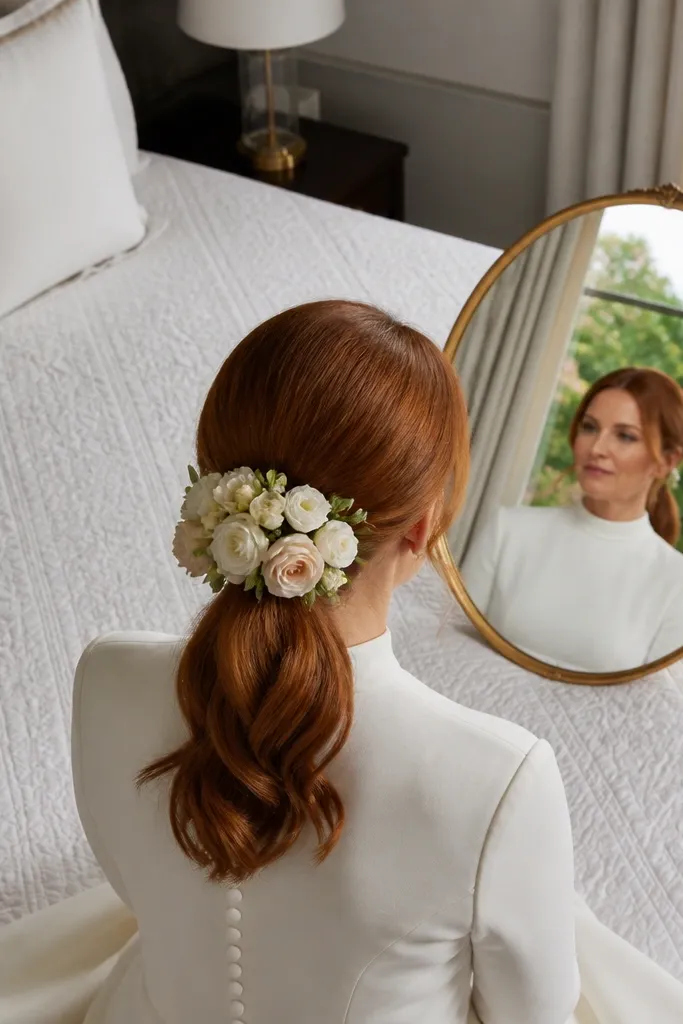
This is the ponytail for brides who want flowers without a full updo. Pinning a floral comb cluster at the tie makes the ponytail feel bridal and intentional, and it photographs well because it’s centered where the tie is. It also hides the tie area completely, which is the biggest visual weakness of ponytail hairstyles. This works for both fresh flowers and faux, but faux tends to hold shape better in heat. Great for spring and summer weddings, especially with airy dresses.
Quick tipIf you’re using fresh flowers, mist them right before styling and keep them cool — wilting flowers look worse than no flowers in photos.
Start by tying the ponytail and wrapping the tie with a thin hair strand so you have a clean base to pin into. Position the floral comb so it sits slightly above the tie and covers the wrap, then pin through the comb into the hair base. Keep the ponytail length smooth and use a light hold spray so the floral cluster stays crisp and doesn’t sink.
Skip thisDon’t pin the comb only on top — it can slide, exposing the tie mid-ceremony.